Digital Hoarding and The Electronic Music Producers

If you enjoy this blog because it doesn’t have pop-ups or ads, I want you to know I use affiliate links to cover its running costs. If this blog is helpful for you, I’d ask you to help me by using the links to buy the following tools.

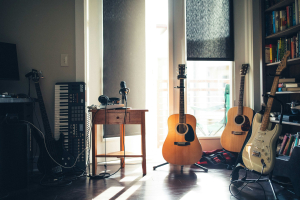
If there’s one thing I miss from making music in the ’90s, it is how my choices for making music were limited compared to now. What we saw as a limitation was an opportunity to be creative and get the most out of what you have. In the 80s, as kids, it was also the same thing: we would get some toys, but it was limited. Being forced to be creative with what you’d have was the perfect training to jump-start my electronic music exploration. I remember going to the music store, where there was a section in the back where they would sell synths, samplers, and effect units. The selection was pretty small, and if you wanted something special, such as a 909 or 808, you’d have to search because stores couldn’t get them at all.

Softwares were also limited in terms of selection and what they’d do. I remember getting some software, and we’d discuss our wishes and options. It was both frustrating and, in hindsight, liberating because the lack of options meant you’d be done quickly when you ran out of possibilities. In my latest album, I tried to get back to that state because after following numerous classes online, I realized that I was doing some digital hoarding and had to focus on the essentials to decide of a direction on how I would do things for my project.

Credit Gearspace.com

So, what would be digital hoarding?


Digital hoarding for electronic musicians tends to accumulate a vast collection of digital resources—such as plugins, samples, presets, and templates—without fully integrating or mastering them in one’s creative workflow. This behaviour often stems from the constant influx of new tools and content in the electronic music scene, leading to a cluttered digital library that can hinder efficiency and focus. Instead of exploring a few tools in depth, the musician has an overwhelming array of options, which may result in creative paralysis or a diluted artistic identity.

Some symptoms or actions that could indicate you’re tending to do hoarding would be:

  • Over-Accumulation Without Use: Continuously downloading or purchasing new plugins, sample packs, and presets, yet rarely revisiting or using many of them in actual projects.
  • Disorganized Digital Libraries: A cluttered folder system where files, presets, and samples are stored haphazardly, making it difficult to find what’s needed quickly.
  • Procrastination on Mastery: Spending more time exploring and acquiring new tools than mastering the ones already in your arsenal.
  • Analysis Paralysis: Overwhelmed by choices when working on a project, resulting in indecision about which tool to use or a tendency to switch between tools without fully committing.
  • Redundant Purchases: Repeatedly buying similar plugins or samples, often influenced by trends or free offers, without a clear plan for integration into your workflow.
  • Neglecting Cleanup: Rarely revisiting your collection to organize, delete unused items, or update your setup, leading to an ever-growing pile of digital clutter.

For hardware, the GAS (Gear Acquisition Syndrome) syndrome is often pointed out as a problem musicians have because it is apparent that hardware physically brings new material to the studio. It is less evident for software and digital tools because they are within your computer and so easy to lose/forget.

This doesn’t only refer to digital tools but also to skill hoarding. Some people spend hours watching tutorials or buying classes to learn how things are done but without putting what they just learned into practice.

Hoarding impact on one’s workflow


This leads to some pitfalls. Let’s discuss some. I will also propose ways to address the issue with practical tips.

Shallow Mastery vs. Deep Expertise


Mastery of a skill or a tool comes from hours of practice. Having too many options divides your time of practice between multiple tools. One thing in electronic music that can pose a problem is when a musician decides to do everything by themselves. This means they’ll be set to become a jack-of-all-trades. The DIY culture within electronic music has gone a long way since the early ’90s, but in today’s competitive market, aiming to do it all means you’re not maximizing your output’s quality. The positive side of having multiple tools means you’ll have the proper material to go through the various phases of song development. But you’ll still need to sit with the tools and learn them, before adding new ones to your toolkit.

Some essentials for each phase can be a game changer. If I had to start all over, I’d focus on the minimum tools per phase. This lets you organize yourself better.

The phases I teach to newcomers are:

  • Research, analysis, ideation and development: In this phase, you basically need a Splice account to fill up your moodboard with ideas to start with. Once you have some ideas, you can create a song mockup, reworking your imported samples with tools like Shaperbox alongside a few synths of your own. If you want a versatile synth that can answer pretty much all your needs, I’d go with Pigment. Honestly, that’s pretty much all you need.
  • Hook: This is where you trim the chaos and ideas from the previous phase and find your song’s hook. You don’t need anything here, but a powerful drum machine like XO can help structure an idea.
  • Structure: To see if your hook has potential, sketch a structure. This will reveal your idea’s strengths and flaws. A tool exists that will build up some basic structures for you. Song Sketch is a lovely tool to speed up the process.
  • Arrangements: This is all about how you use your DAW. The best DAW is the one that you know and have fun with. Some prefer Ableton Live, some Bitwig or FLStudio. They all have a different way of working.
  • Mixing: While there are countless tools needed for mixing, I would say that sticking to your DAW’s compression, EQ, and dynamics can do the trick. If you feel like you’re reaching the limits of one of them, perhaps expand to upgrade that specific tool with a third-party plugin.

I like to make buying decisions based on two things:

  • Can my stock plugins fix it? If not, what else can?
  • Am I using a tool that works but compromises on the quality?


If my tool is creative, I usually will ensure I finish a few projects before buying a new one.


Overwhelm and Decision Fatigue


This is a topic I have covered before, but decision fatigue is something tangible that can impact a person more than they imagined. I have been teaching newcomers lately, and one of their first comments about making music was about how tiring it was to work on music. Each time you have to make a decision regarding your song, a chunk of your mental energy dissolves. If you also need to think about how to solve a problem and have multiple options, this is another chunk that is taken away. If you have various tools for numerous issues, you’ll be draining yourself down faster, and what was supposed to serve as leverage will tank you down.

There are ways to solve this, though. One is to keep a notepad with :

  • Nature of the problem: Does this problem have a name, or can I formulate it in my own words?
  • Potential solution: Ex, for phasing issues, you might want to control the width of a sound.
  • Tools available: If it’s the width, perhaps learn the limits of how much you can widen a sound or rebalance your mono signal.
  • Link to use. Youtube or another tutorial.

Fine-tuning your workflow comes from decluttering tools and habits that slow you down. Keeping simple notes is a fast way to get your answers. The more you have tools, this can not only drain you but also make you lazy. Tools with tons of options are the combination of multiple existing tools but with an interface that makes it easier for you to use. For example, a compressor could be replaced by an Envelope follower and a utility unit, but the compression has a few more options. Having less forces you to understand the nature of the problem and the tools you have to work around it.


Clutter and Inefficiency in Workflow


As mentioned previously, a workflow works best with a minimum of tools. The more you add to it, the slower you get because you have more parameters to handle. This is an issue someone with much experience, like myself, faces when starting to work on a new song because I already see the long list of all the things to take care of. One thing about being a helpful beginner is that by knowing less, you work with what you know alone. It might be less perfect, but at least it progresses quickly. Collecting tons of samples and libraries is also something that slows you down, mainly because there are not so many tools that will help you organize everything properly. Even some DAWs will let you face chaos if you’re not organized. Ableton has recently added tags in version 12, which can help you categorize your samples and tools. However, if you do it halfway, you’ll quickly lose control over your digital environment.

Just like plugins, whenever I buy new samples, I ensure I use them on a specific project before adding new ones. Some people stick to presets, which can get messy if you collect many of them. In Ableton, I haven’t found the best way to organize all my macros properly, which sometimes forces me to redo a patch that I did previously.


Financial Drain and Resource Misallocation


Constantly chasing the latest plugins or sample packs can quickly add up financially, diverting funds from investing in quality tools or learning resources. The temptation to acquire “free” tools often leads to a glut of subpar options that may not integrate well with a streamlined setup. There was a time when the number of plugins coming in was limited, but nowadays, multiple ones have been added. A site like KVRaudio is quite handy for following up on what is coming in, and they recently added a plugin manager to keep track of your installed plugins. Plugin Boutique has also been quite helpful if you have to reinstall all your tools because it is a portal to all the plugins you bought. Both have user reviews that come as applicable when you want to know how to invest correctly.

But if you are obsessed with the latest options and buy anything fancy that gets released, knowing which plugins are helpful for your workflow will be challenging. Considering how much money one gets from their investment, it is worth buying carefully. Using trials is undoubtedly something to consider.


Stunted Creativity Through Overexposure


The barrage of new sounds and tools might lead to analysis paralysis, where too much inspiration prevents a focused creative direction. I see this with people who have difficulty finding their own sound signature or identity as a musician. Instead of nurturing a unique style, producers might mimic trends or switch approaches too frequently. This means that if you don’t know how one tool works, you’ll be using the first few presets instead without going deeper into the options your tool is providing you. With an overabundance of content, listeners might find it hard to develop a personal taste or to follow an artist’s evolution, as the constant turnover of music can blur the lines of musical identity and innovation.

Each time you add a layer of tools to your kit, you are also potentially distancing yourself from your natural self-expression. One might have a challenge of not sounding like others or professional, but there are always simple ways to get there. If you always rely on audio cosmetics, you will be limited to the outcome of the tool’s options.

When I teach newcomers, I insist they work with the minimum possible. This limitation might be frustrating at first, but if you’re curious, it pays off quickly.


Reduced Value of Curated Experiences

The art of crafting a coherent track or album can be compromised when the production process is scattered across too many tools and ideas. Well-developed sounds tend to create a more cohesive and impactful musical narrative than a collection of half-explored ideas. If you go back to the 90s when the acid house or early techno had similar aesthetics, you may understand this was not a choice but because of the limitation of tools. Not having all the necessary tools might be a good thing for you. Perhaps organizing your ideas in batches of material where you can plan your next round of song exploration based on what you just acquired can direct how you want to use them.


Digital Hoarding can happen even if you don’t realize it. You are officially hoarding if you find yourself overwhelmed and disorganized and gathering more tools than songs being produced. The more you are conscious of this, the more organization you’ll have for your next studio session.


Guide To Templates

Some links will provide a commission to maintain this blog free, so consider supporting this way. I have not been requested to make this blog and all suggestions are based on what I use for my work.


I’ve recently finished an album. The tracklist has 19 tracks, which means I had about 40 songs and discarded half of them. For some, this feels like much, but when I work on an album, there’s a point where the more I make songs, the more new potential ideas emerge. This motion feels like a force where all falls in place with ease, and the efforts become less intense.

But there’s a secret weapon that makes it all easier and fun. Well, a few tricks come together when I work on multiple tracks at once because, speeding through the ideas, I have to save macros that fix an issue; the same goes for presets and eventually, I create templates where I can pick up tools.

I thought I’d write a post about templates. People overlook this tool and don’t see the point of exploring it. It deserves some attention because it could bring you speed and efficiency.


Productivity, Speed and Organization in Creation


I’m not sure where I read this, but this person said something like:


“I don’t believe in efficiency while creating because it is normal to be messy, lost. and chaotic; it is the core of troubleshooting, which is what creativity is about.”


While I understand and relate to it, I also see the benefits of having some tricks when working on more significant projects, whether mine or a client’s. There are things in art where your intuition will guide you to make decisions, and that will get you to take steps towards zones that aren’t controllable. However, regarding electronic music, we have multiple steps towards the end of the projects, and some are purely technical. Frequently, I get clients who come to me because they’re on the verge of giving up. Once you go through the multiple layers of everything to be handled, you get to overhear your music and, perhaps, start changing things that were working in the first place. This is why if you can use some tricks, tools and organization, you’ll cut out some time from the wrapping part.

That said, you can have the best of both worlds: You want to remain intuitive and explorative, but you want to achieve results rapidly when it is time to conclude.

Being organized solves multiple issues, such as:

  • Time saving. One challenge electronic musicians face is digital hoarding, which means they constantly get free or bought plugins, tools, and macros more than they use them. This results in having more options than one can easily integrate into a solid workflow. Organizing this will give you quick decision-making.
  • Better understanding of technical needs. Having templates helps you separate your workflow into modules, where you will already know what tasks to do next.
  • More energy. A challenge that new electronic musicians face is mental exhaustion from exploring music. This is partly due to decision fatigue. The more you have to make decisions, the more you’ll feel exhausted quickly.
  • Effective validation process. When you have a process that is also a checklist of all the elements you need to decide if your song is done, you will rely less on others to know if you’re finished.


Regarding templates, if I look at what I do, I have multiple templates categorized according to the tasks and needs. There are also various ways to use them, which I will cover. Let’s go through the categories and how they can be done and review the tools I use regularly.


One Template Per Need


The point of making a template is to turn something that worked into a tool you can reuse. If you think of any tool you have, such as a stove, hammer, drill, or MIDI controller, they are all the results of people having to solve an issue they wanted to address and turn it into something that can be used repeatedly. Using someone else’s template could be a shortcut for your workflow but it’s essential to keep in mind that it was made from someone else’s trial and failures. I believe it’s essential that you develop your templates so you can learn and tweak tools to your needs. Other people’s needs will never be precisely adapted to what you do.

I want to share some template ideas and tips for turning your work into future shortcuts. My work approach involves multiple phases, so I have made my templates based on that to avoid having to redo the same repetitive tasks.


Default Template

The Default template in Ableton is where your day starts. It’s helpful to have a few things ready, so you don’t have to prepare your environment each time you open your DAW. There are a few things I want to set up my Master/Main channel, the default audio and midi channels, and organize your sidebar properly to avoid searching.


Master/Main Channel:

  • EQ: Handling garbage low frequencies means you want to have a high pass at 20Hz. You can leave it with a smooth curve, but if you do this, you’re already solving many issues beginners have with their mixes. I would suggest not doing many changes and keeping it flat but if you have tendencies to compensate for your listening environment, you could do a default EQ to fix that problem. Compensating implies that your listening environment might be badly treated with acoustic padding, making you push or cut frequencies that don’t need changes. People who don’t have a sub in their studio tend to push the lows too much or completely miss it.
  • Utility: This simple stock plugin is probably the most useful of all your plugins. Having one on the main channel lets you sum your low end to mono, which fixes most phasing issues and solidifies the mess that stereo low end can create. Some songs have a stereo low end, but this is not something I would encourage newcomers to explore. The width is also a good way to balance your mono versus stereo ratio. Then, the gain allows you to compensate for too much or too little volume coming in.
  • Limiter: When we make music, we might lose track of the main channel, and the signal might overflow. The limiter is your friend to control that. It’s that policing tool that can also scrap a mix if you leave it as is when exporting.
  • Metering: While experienced musicians tell others to use their ears to know what’s wrong, I still rely on visual representation of what I do to validate what’s happening quickly. Working on a mix for a while, you will lose sense of flatness in the frequency distribution. You can look at a visualizer to see what’s happening.


While stock plugins will do for a while, you can get some third-party plugins, some for free.

The King of Metering is free and offered by Voxengo as SPAN. It covers everything you need to understand what’s happening. Make sure to configure it properly using Dan’s tutorial. I also love T-Rack Meter. It is visually appealing and has a waterfall/spectrogram analyzer. You can also use this one for free if you want to add it.

For Utility, you can also look into other plugins, such as Track control by DMG and Melda’s own MUtility. Both are free.

For Limiters, the one in Ableton got a lovely upgrade with v12 and is now very powerful. You can achieve solid results with it. If you’re looking for something with a bit more bells and whistles, you could check Smart Limit, which is not too expensive, versatile and easy to use.


Send/Returns

I’m always baffled by how people don’t use return channels that much, but they’re efficient in many ways. One of those is global effects, which means you can route multiple channels towards them and have a more coherent result. It also saves CPU. I believe the default ones in Ableton are a reverb and a delay. Those 2 effects are common in electronic music production and other genres, so it makes sense. The stock plugins usually do the trick; you don’t need much more. But there are an extra 2 return channels I would encourage you to add:

  • Stereo/Sides: You may add a utility plugin sent to be in Sides Mode only on this channel. I’d pair that with the EQ and set it in Mid/Side mode.
  • Mono sum: This would be the opposite of the previous one. This means you put a utility plugin in mono mode.


Why do this?

Some sounds might need to be sent towards the stereo return to increase presence in that zone. You can also add “side” effects, where the effects will only affect the side part of the channels routed there. The mono channel is in the same logic, but this one is focused on the mono signal. Many clients focus on getting width for their music and forget the importance of the mono signal, which is critical to impact multiple contexts (e.g. phone, car sound system, headphones, etc.). If you use premade loops, there may be some imbalance between the stereo and mono. Using sends is a fun way to control that because once you have multiple channels routed there, you can adjust the entire track simultaneously.


Default Audio

Some plugins can be added automatically each time you open an audio channel. This saves some time, but if you add many, it will hog your CPU drastically. In theory, you don’t need much but if you think of general needs to its bare minimum, I would recommend adding the Channel EQ as well a Utility. These will let you control the tone of your signal and its input gain and stereo adjustment. If your CPU can handle a bit more, I would also suggest a few:

  • ConsoleX8056: This suite is badass. It’s an analog emulation suite with a console emulation, vintage EQ and compressor, and a coloured gain staging utility. When mixing, I’ve been ditching my pricy Universal Audio VSTs for these. Using the console on all your channels will bring some non-linearity to your mix, blurring the lines of a digital signal. The Gain unit is not transparent; you’ll get some crunch if you push it.
  • Envelope Follower: This is undoubtedly my favourite tool in Ableton. It will read the amplitude envelope of your incoming signal, allowing you to control the channel’s parameters or any other channel, which opens the door for creative sidechaining.
  • EQ8: The advanced EQ in Ableton with more filters than the channel EQ.
  • Compressor: If you want to control the density of your incoming signal.
  • Channel strip: If you want to turn your channels into an analog console with a similar look and feel, these aren’t available in Ableton. My favourite option is to turn to Brainworx with their numerous emulation of legendary consoles. I have a preference for the Neve (AMEK)‘s sound, and therefore, the 9099 is my default option.


Pheek's Default Audio chain


Default MIDI

This one comes with a few options that I would recommend.

  • Scale: You want your midi signal to have the option to follow the global key/scale of the project, so scale allows you to handle that easily.
  • Expression Control: This tool intercepts the signal’s characteristics (Velocity, aftertouch, slide, etc.) and can map them to the parameters of the synth in the channel or something else in the project.
  • Velocity: Useful for tweaking the velocity to taste, including randomization and midi compression.
  • Note Lenght: Allowing you to tweak the length of your incoming notes
  • MFA S&H Pro: Reading the incoming notes will generate random information, which helps modify your instrument in the channel. This pro version of a simple S&H is very powerful in the numerous options to control the random signal.
  • Chance Engine: This allows you to add probability to the notes with the option to modify the notes. It’s convenient when you want to deconstruct a repetitive melody.


Pheek's Default Midi chain


Sidebar

Organizing your sidebar will speed up your searches. You can use the colours to tag anything and have quick access. Mine has been a bit of a mess until I discovered a new feature on Ableton v12. You can now add custom folders on your sidebar with any content you have, but it will be essential to tag your plugins properly. To add a custom folder, you need to search and then click on the “+” to add that search as a dynamic folder. If you made a side folder for compressors, the folder will be automatically updated each time you add a new compressor to your library.


R&D Template


I have a template dedicated to research and development (ideas, theories, concepts, tutorial exploration, etc.). This template aims to have quick tools to test whatever is on my mind. The way my mind works is perhaps similar to other people’s. I often have an idea of a sound based on something I heard in a song playing (maybe I’m driving or walking and not in my studio), and then I reverse-engineer what it could be. Being on the Mac ecosystem, I either use Notes or Voice Memos to write down what I have in mind and then I will try ideas in the studio later on.

Here are some ideas for an Ableton template dedicated to research and development. You could start with the default template and then build this one since some needs overlap.

Signal Analysis & Visualization


The first channel would be for sound inspection, and the second for testing. Therefore, these analysis tools are needed for both channels.

Visual feedback is key since the goal is to deconstruct and understand sounds.

  • Spectrogram & Frequency Analyzer → To see how harmonics evolve, check the previous link to the free Spectrogram and SPAN. I also love Fabfilter ProQ4, which has a beautiful Frequency Analyzer. One thing I like about this EQ is the matching EQ option, which will be useful for understanding the frequency shape.
  • Oscilloscope → To analyze waveform shapes. I love using the one in Shaperbox because it can pair with some signal modification tools. Otherwise, Melda has a free tool that can be helpful.
  • Envelope Follower → To extract dynamics from a reference sound and apply them elsewhere. I’d use the one in Ableton.
  • Peak & RMS Meter → To monitor amplitude behaviour. SPAN can convert this.

I would drop Shaperbox on both channels to modify and analyze. That alone will be very useful.


Sound Deconstruction Track

The third track will be about making tests from a song.

  • Reference Track → Load in the sound you want to analyze.
  • Sampler & EQ Matching Track → Use an EQ Match or Sampler to isolate key frequencies.
  • Transient Isolation Track → Use gates or transient designers to extract attack portions. While you can do a fair job with Ableton’s gate plugin, my favourite gate comes from Oxford Drum Gate.
  • Sustain Analysis Track → Loop specific sections to analyze their behavior.


Reverse-Engineering Tools


This channel will explore some sounds from your reference or sound to analyze. This one is optional and not necessarily one to use de facto. Instead, you could prepare this as a series of macros you import when needed.

  • Granular Sampler Rack → A Simpler/Sampler preset pre-loaded for quick granulation. The Granulator III is pretty impressive for exploring.
  • Resonator Bank → A rack with multiple resonators (Corpus, Collision, EQ) to extract tonal characteristics. Again, you can see notes from what you hear using Pro-Q4 paired with a stereoscope.
  • Modulation Extractor → A chain with an LFO, Envelope Follower, and Sidechain Compressor to mimic movement in the reference sound.


Synthesis & Rebuilding Section


This channel is also optional but comes in handy.

  • Oscillator Matching → A synth (like Operator or Wavetable) to manually match the tonal structure.
  • Noise & Texture Layering → A track that adds noise, static, or other micro-details. Melda has a noise generator that is free and very useful.
  • Dynamic Modulation Rack → LFO + Envelope tools to reconstruct movement.
  • Harmonic Enhancer → Using Saturators, Waveshapers, or FM techniques to match reference overtones.


Possible Enhancements

  • Randomization Macros → To introduce variations while testing.
  • MIDI Note Extractor → A MIDI effect chain that converts audio to MIDI for better tonal deconstruction.
  • Spectral Freezer → A track that can “freeze” spectral snapshots for close inspection.


Song Structure Template


These templates are from a different mindset, and they’ve been explored in my blog numerous times, but it comes down to deconstructing a song you love for its arrangements. This implies dragging the song in Ableton’s arranger side, matching the tempo to the project, and then looking at the waveform.

  1. Listen to the song and pay attention to all the sounds.
  2. Add a MIDI channel per sound that you can hear. For example, one channel named Kick, one bass, clap, synth, etc. These ghost midi channels don’t have any instruments loaded and are there as references alone.
  3. Once you have listened to the song and noted all sounds with a MIDI channel, you listen again and add MIDI clips to the timeline when you hear the sound coming in.
  4. By the end, you should have the song’s structure in MIDI clips, indicating the order of all sound appearances.
  5. You can go beyond by putting midi notes in the clips to see when the sounds appear precisely.
  6. Group the reference with the midi channels, then drag and drop it in your sidebar within a folder for your structures.


This can be saved as a template for later use. Once you have a solid loop and want to turn it into a song, you could import a structure you previously made and know works. This can validate a structure and the number of sounds you need to complete a song. Some people can never pinpoint whether they have enough or too many sounds.

Mixing Template


While I offer a mixing template here for you to check, I can explain how to create one.

The logic of a mixing template is to rely on groups you can import into an ongoing project. Then, you can drag your project channels into the imported group. I would do a group per family of sounds:

  • Kick (on its own): I’ve been enjoying Cableguys’ new tool for percussion. Pair it with Shaperbox, and you will have your compression, transient shaper, and overall volume adjustment tools all in one.
  • Low End: Bass or whatever bleeds under 100hz. An EQ like Pro-Q4 or TrackSpacer will do for clean ducking, but you could also use a simple stock EQ from your DAW.
  • Percussion: Percussion potentially needs a bunch of tools, but Neutron will cover that for you. Tools that are useful here are an EQ, Gate, Transient shaper, Compression for glueing and some saturation.
  • Melodic elements: This one is tricky because it could combine synth stabs and more extended notes like pads. Some compression can help glue them together gently, and I love using a leveller for that. The LA-3A is perfect for that. EQing and stereo control are going to be essential. Please don’t overdo it with the width enhancements.
  • Background: This is low in presence. Compression and EQing, as well as the track spacer, are useful here once more for clean results.
  • Vocals: This is a tricky one, but I would say the LA-3A is going to be your best friend and a vocal rider like Melda. Pair this with your favourite reverb, delay, and chorus for cosmetics.


I hope these were useful!


Where Do I Go Next?

In case you missed it, I recently recorded a video announcing I wanted to make more YouTube videos and shared that I’m working on a series of courses. Making videos came from the need to stop repeating the same information to new people I coach. The first few hours of my coaching cover multiple aspects of music production, mainly focused on organizing your workflow, which will help set what to practice next. In the video, I invited anyone wanting to create and learn to get in touch so I can connect with others about where they’re stuck in their journey, but mainly, to understand why they are blocked.

There has never been as much help, resources, tutorials, plugins, and tools as now, yet people are still blocked. They are told and sold that this solution will fix their needs, yet it doesn’t. My meetings with these random people aimed to see how they’ve been surfing the waves of music-making, mainly electronic music. In the end, the same stories come up over multiple connections.


It seems the main issues people face aren’t technology-based. Yes, some technicalities will be a hurdle in the race to a goal, but people can find solutions with some research.


One of the main issue people face is asking the simple question “Where do I go next?”


This will manifest in multiple ways, and while each participant had different issues, the underlying problem was that, whatever they did, they felt the next phase was unclear.


Let me explain more. Based on 2 main categories, I will explain contexts and solutions.

Photo by Wes Hicks on Unsplash

The Hobbyist


This type of musician usually has a job, perhaps a family and makes music a hobby. Maybe that person had a moment where they’d party and go to concerts more, but at some point, they felt like they’d also want to make music. One common need the hobbyist will have is to balance their busy life with some activity that is fun and creative, and this leads to finishing some music. If you work 30-40 hours a week in a corporate job (or anything not so creative), you might find your life redundant and lacking one passion. The call to have a purpose self-imposes, and if music is something you live with, it becomes clear that it can be an exploration. But working full time comes with one challenge: spending more time in front of your computer after a full day of screen isn’t super exciting.


Making music has multiple uses other than spicing up your life:

  • It actualizes and crystalizes a moment in your life. When you work on a song for a little while, it creeps into your life as a score. It can follow you as an earworm while doing something not studio-related. It can also be like a story that unfolds gently, where you aren’t sure how it will end, but something emerges as you work on it. This is why it’s essential to finish projects more than perfecting them. It allows you to learn something, feel you’re progressing by learning new skills and leave a chapter behind.
  • It has health benefits. Countless studies show that making music triggers hormones that benefit mental health and sharpen cognitive abilities. It can also help prevent dementia, develop emotional intelligence, and encourage troubleshooting.
  • It regulates emotions. Making music helps you experience some emotional states. It is a way of letting go of emotional blocks, allowing you to focus on a particular feeling and not explode randomly later.
  • Music is communication beyond words. Ultimately, we share music as stories in a bottle, thrown at the world in hopes that someone will find it. While making music for ourselves, we want to connect with others through the sounds we love.


But these also can backfire in certain conditions. For instance, if you need a studio session and, within the first minutes, you run into technical issues related to technology failing you, that can impact your need to create. One of the challenges the hobbyist faces is a lack of time to dedicate to his art. If most sessions are organized in the time left, they have, not only is their mental energy isn’t sharp but their patience as well.

Successful hobbyists usually set studio sessions in the “green zones.”


Everyone has moments during the day when they have more energy. These are considered “green zones,” followed by”yellow” or “red” zones, which are different levels of energy.

  • Green. This is your peak attention time. You’ll be very effective at creating and solving issues and facing challenges that require attention and concentration. The only downside is that you have only one per day, and it has a time limit.
  • Yellow. You have less energy, but you’re still going. This zone is perfect for organizing, cleaning, and preparing tasks. Yellow zones are more extended, but if you handle them with patience, they can morph into spurts of energy.
  • Red. This state is almost lethargic. You are just unable to focus, and your motivation might be low. In this zone, you can approach the studio time to handle software updates, organize cabling, fix decorations, and, most importantly, use it to listen to music and take notes.

Setting your studio session at the best time is essential, but you can set a session’s activity based on what you can do during that moment.


Most hobbyists who struggle with music face a contextual issue: they either don’t go out to music or/and don’t have friends with the same interests. Perhaps one of the key points of my meetings relates to the lack of social validation.


Not everyone knows an electronic musician that can share knowledge but also, that can understand where one is and wants to go.

For the hobbyist, some have songs, but what are their options?


Having a few songs, you might want to push it to the world because the need they want is related to validation and a feeling of belonging. There’s some desperate need to connect with someone who will get it, and putting it out to the world seems like the best option. But since the person doesn’t go out and perhaps has a restraint network, reaching people might most likely end up being lost in a sea of noise where millions of people also want to be heard. I’m not sure where I read that, but there was a quote that said:

If you want to receive, you have to start by giving.


So, for the hobbyist, one strategy and activity to consider is listening to other people’s music and being curious. Connecting with those who share your views can provide potential artistic connections. I coach hobbyists and tell them to spend time digging for music on Soundcloud and Bandcamp. Knowing music and exposing yourself to new ideas is essential to expanding your vocabulary, but you might also come across another musician who, just like you, is waiting to connect.

With too many options, we disconnect from them and tend to focus on our little habits, tastes, and routines. It makes it hard to see potential possibilities for where we can go next. For hobbyists, having a few friends who are also making music will undoubtedly answer many of their questions—not just about what they can do with their music but also about getting updated on trends, tools, and techniques.


Where can they go then?


This is a bit of a puzzle for everyone, honestly. If I take Montreal as an example, I will speak on behalf of a city I know and share some ideas that come to my mind. Montreal is a very special city, but you might be able to find similar resources locally.


Record stores: If you’re a music lover and rely only on digital for listening, diving back into record stores might be interesting to get out of the algorithm bubble. We have multiple vinyl stores that also sell some cassettes and CDs. There’s a market for that still. You might see other people digging and listening to music in a store. This is always a good opportunity to talk with the clerk and ask for music recommendations, but perhaps venues. If you’re not going out to clubs, there might be alternative indie places that are intimate and worth checking out local talent.


Music instruments stores: Similar to record shops, those places might have some gear you could consider picking up. You might want to buy basic percussion instruments to spice up your music with interaction. Talking with the staff, they might even suggest some ideas to try. Adding just a few acoustic options to the studio already makes it more playful, and sound-wise, it becomes personal. Someone like Bruno Pronsato would always record his claps and egg shakers manually. A little touch like that gives your music colour. In both cases, those places are spots to meet up and expose yourself to other music lovers of all ages.


Exhibits, activities, cafes and random places with DJs: Montreal always have DJs playing in random places, such as a street festival or presentation in a park. Again, befriending DJs is an excellent step in building a network, and perhaps someone can play your music in the sets or podcasts.


Independent Radio events: If you can find your local community radio that plays the type of music you listen to, you’ll perhaps hear about events when shows are related. It’s always a form of promotion we overlook, but local radios have a good reach in communities.


Follow local artists on Instagram: Instagram or other social media are places where artists usually share news about their creative activities, events, and recommendations. It’s also a place where you can send direct messages; in most cases, people will interact with you. Don’t expect much news back if you reach out to artists with many followers who are often on tour. But following your artists on multiple platforms, even streaming services, is a resource to find venues for the following shows.


Production Groups on Social Media: Many groups exist on Discord or Facebook. You might have to search the web a bit, but you might be able to find a community focused on a specific genre or DAW. Of course, you can be in multiple communities.


We have places in Montreal with an open mic concept where everyone can showcase a song. The format changes frequently, so a bit of research is worth it. However, playing your music publicly requires preparation. Releasing music is, in fact, the worst approach to getting attention and a network compared to the ideas I shared above.


The Semi-Pro


I have another category of people I work with: artists who have found a way of releasing music, perhaps also DJs, and, in some cases, are making revenue out of their exploration. This kind of artist is usually pretty aligned with what they want to do; they have perhaps an alias, a music direction, maybe a few releases on specific labels, and a taste of the different aspects of production. Music making might be one of the main activities of their lives and also takes an essential amount of their free time that overlaps work. Some have a part-time job that might be in the creative realm, but sometimes, the money income is purely functional.


For these people, music has benefits similar to the hobbyist’s but also:

  • Some make music in a way that promotes certain bookings. Some festivals aren’t interested in DJs who haven’t released music.
  • Endorsing a specific aesthetic can make you join a community. Some genres have leading record labels, and making music in that direction can dictate your identity, attracting people who love that music.
  • Making music for their DJ sets.


For the semi-professional musician, making music is not necessarily only for the sake of releasing, as there are various nuances of self-accomplishment. While many want validation from a broad public, some have focused that need on a close circle of people, which makes it easier to be attuned to where they want to go. But now and then, I see people’s mood tanks when they’re not getting attention or if they’re not releasing music. It might be seen as validation; doubt will creep in if that source isn’t fulfilled.

At some point, that category of people will also encounter a moment of not knowing where to go next. This usually happens when the routine of releases/gigs/social media exposure does not provide what the person was hoping to get. It’s easy to think that a release will be the catalytic moment where you imagine one song getting traction and giving you exposure, and then things unfold themselves. While this can happen, it is more from wishful thinking than an actual domino effect leading you elsewhere.


The Role-model Problem


I see how people spot an artist they like, then look at what they released, what they did, and where they’re playing and then put this information as milestones that made them who they are. For instance, for a while, people would look up to Perlon because of its lineup of talent and think that this was the angular piece of the puzzle that was the doorway to being validated. I know a few people who did everything imaginable to get on that label, and it never worked. Some got signed, but 10 years later, they’re still waiting for the release, which will probably never happen.

The main reason one person succeeds over another artist is mainly related to the network of people they know. But this also raises a few issues. One is the buildup of cliques and closed circles of people where some intrinsic system of politics and approval is mostly unstable. Any group that is impermeable and exclusive can most likely come to a quick end when gossiping and fights erupt. With the lack of new people, it is not set to strive healthily. The second issue with exclusive groups is the lack of open opportunities but cutting networking, and ultimately, you see members leave as soon as they succeed elsewhere.

I’ve seen many scenes where people get cynical and bitter in those situations.

Seeing how others succeed will not be your path to success. While it can inspire, you might find yourself in situations that have nothing to do with your hero’s journey.


What are the options to explore?


For anyone who has hit a wall on where to go next, there are multiple things you can look into.

Change of scene, genre, alias. Expanding and exploring other genres are fun. Artists rarely limit themselves to one genre, so it might be time to step out of your comfort zone to see what awaits you.


Releasing hiatus. If you are fueling on releasing to manage your ups and downs and your music validation, I strongly encourage you to take a hiatus. A pause from releasing is like taking a break from social media or smartphones. It improves your mind, and you can focus your energy on other things. Try supporting a friend in their first release or study reference tracks.


Go to a festival abroad. Find a festival of your choice and go on a vacation to participate. Try to go far and be somewhere you’ll know no one. Experiencing the feeling of being new again can spark fun and inspiration. Not only is going to a different city and seeing other people healthy and inspiring, but sometimes we also discover micro-communities that resemble ours. That was one thing that was constantly surprising me when I toured. I would meet doppelgangers from my Montreal crew in various places, and people who would love the same music as me would connect easily with me on a personal level.


Listen to music from clubs you’re new to. This is the same as above, but locally. I name clubs, but if your music is for any other context, you need to visit those places and hear your music, leaving it up to the people there. Very often, artists are studio hermits and forget about the outside world. Hearing certain songs you love in context gives a better understanding of how you can translate your ideas out there.


Spend time in Record Stores. Just like the hobbyist, this activity explains why we’re making music. To see records and people shopping gives an outlook to a passion. I like to see this as someone who grows crops and then can go to a restaurant where they use it for their meals. It connects the dots. Sometimes, you might even be able to play your music to the shop owner and see people’s reactions.


Collaborate. As it says, opening up a project with someone else, perhaps someone who is not a musician, to see what happens can lead you to unexpected places.


Take a class. Learn anything. It can be visual design, coding, or electronic soldering. Having another hobby is very welcomed by the brain that will appreciate the new information, and this is proven even to feed your ongoing desire to learn.


Music is more than releasing. It comes and lives in various ways. I hope this article inspires you to try something new.


Electronic Music Is More Than Making Tracks

People have become increasingly interested in making electronic music in the last decade. I find it more exciting than people getting into DJing. It’s clear to me that one or the other is a hobby that everyone who enjoys electronic music should explore. As you explore the art of DJ, you learn how to dig, get familiar with the roots of artists you love, discover music you didn’t know you loved, and build some obsession over tracks. It’s a fun hobby that fuels the scene, supporting artists and labels and feeding more energy into what you believe in.

Making music is a pretty deep activity. I mean it. Some people get curious about making beats, and before they know it, they’re engaged in an inner journey where they rediscover parts of themselves and create sounds they never thought possible. Making music mirrors its creator’s psyche, reflecting subconscious emotions and triggering memories.

Photo by James Kovin on Unsplash

Maybe you’ll think I’m crazy, but most people who have been exploring the art for a while will confirm that it’s not so silly. This is why I get it when someone wants to make songs first, but I am also excited to tell the newcomer that there is more to explore than making tracks. What’s a bit tricky to explain is that to make tracks, you need to do multiple activities first. Making a song is like writing a story or a novel. You need to live some adventures first to share a story. Or perhaps you have a lot of imagination, but real stories always bring substance.

I like to see songs as stories from the studio. They are a collection of moments built into a more cohesive narrative. Sometimes, a few related stories can also be paired into a conversation.

Regarding categories of songs, in my case, I have two main buckets:

  • Reference-inspired music: This refers to songs that are built with a precise purpose, such as making music for DJs, and is built to fit sets.
  • Personal agenda: collecting moments and miniatures and finding sounds that I would love to put into a live performance where I record the outcome.


The issue I see for people who start making electronic music is that they focus on creating a song but lack the experience, tools, and general workflow to get things done. They will then compare themselves, and the gap between what they made and other people’s music will be significant. Many want to make a personal song combining the two categories I mentioned. This is even more difficult because the person will lack one of the primary essential music skills: vocabulary. That skill comes with playing, rehearsing and repeating the techniques.

I found many tutorials on making songs and known artists showing how they made music or how to make one from scratch, but this is a steep activity for a newcomer. We could relate to that kind of video, such as sharing how to build a house. It is helpful, but you’ll practice someone else’s way of working, and it won’t show all the learning they’ve been going through, which includes failing, dealing with various issues and how they resolved them. Electronic music is supposed to be a playground where you play with all those toys and software to see what comes out of it, and then, down the road, you record something you want to share.


To record something without exploration is the equivalent of sharing a made-up story that you haven’t lived: it lacks the essence. Memorable stories are partly inspired by personal experience.


Making sounds without a purpose might not be romantic or exciting, but it is an activity that develops deep listening. That skill is essential for understanding sound, reverse engineering what you imagine, and mixing. Sitting there and listening to sounds you make or have found is valuable.


Besides making music, sound activities that have to be added to your rotation of studio sessions should include:

  • Listening to music.
  • Listening to samples, videos, non-related sounds.
  • Update plugins and gear.
  • Learn a specific effect by testing all the knobs/options.
  • Backup projects.
  • Rename and organize past projects and ongoing ones.
  • Use MIDI controllers paired with plugins and play with them.
  • Design one sound at a time: ex. Bass hit or percussion.
  • Turn loops into structures
  • Create Mood boards and fill them with samples, designs, and sounds.
  • Analyze Reference tracks and create templates for them.
  • Modular patching.
  • Create grooves alone
  • Create Hooks alone
  • Create beats alone
  • Design an arpeggio.
  • Try chord progressions.
  • Deconstruct the song structure of a project of yours and see what are the different alternatives.
  • Practice playing an instrument or a keyboard.
  • etc.


I will share some activities and exercises I do daily that you can also do. These provide me with some ideas and remind me that electronic music is more than just making songs; it’s just spending time tweaking, listening, and adjusting.


Studio Activities to Try


Here are eight studio activities that mix challenge, logic, and analysis. Each is designed to be a focused exercise in sound exploration that lets you practice a new skill and gives you material to play with at the end. These exercises allow you to treat individual sound elements as mini-compositions (miniature) while keeping things structured enough to evolve into a conclusive five-minute segment.


Focus: Parameter Modulation Mapping


Challenge: Explore manual modulation with the 2-hands Technique


Activity: This requires a MIDI controller and mapping some parameters to a plugin instrument or effect. One of the most straightforward yet most potent explorations you can do is to map two knobs to 2 parameters. Then, using your hands, you’ll explore the different results when one hand does something while the other does something else. As a starter, if you need an idea, you’d control the frequency cutoff of a filter, and the other parameter would be the resonance.


What happens when you move slowly one parameter while the other squiggles quickly?

What does it sound like when the two move in opposite directions, quickly vs slowly?

You could ask yourself many questions, but being curious is the best guide.


Outcome: This transformative manipulation can drastically shape sound. You might want to add a limiter immediately to avoid hurting your ears. Recording the movement can test various sound sources through your effect. Resample everything.


Focus: Layered Texture Sculpting


Challenge: Create layers for a sound to make it more complex or richer.


Activity: You can layer textures to a simple-sounding sample using an envelope follower and a few filters. If the sound is mostly a mi-oriented synth, you can layer higher-pitched texture by putting a filter in highpass mode. Since many sounds have content in various areas of the frequency spectrum, you can explore parts of it with an EQ that isolates a section. You can also practice FM modulation to make the sound richer and then have fun with multi-band processing (eg. compression or saturation) to blend it.


Outcome: Practice adding layers to sounds, which gives you options when exploring new hooks. You can use previous experiments,, or if you build macros while exploring, you can create them on the fly.


Focus: Micro-Rhythm Manipulation


Challenge: Explore a sound when repitched, stretched or sequenced.


ActivityThere’s this interesting fact that a sound in a library can have multiple lives, just like a cat. You can use the same sample multiple times, and to avoid repeating yourself, you’ll change it so it feels anew. Changing pitch is one way of exploring a sound’s potentially new outcome. Pitch it down for darker moods and high for exciting overtones. Explore the sound in a different scale, as a chord or reversed. Changing its length and sequencing can also turn it into an unpredictable turnout.


Outcome: After resampling the new ideas, you can save them as new hooks or post them on mood boards that need fresh air.


Focus: Algorithmic Sequencing Experiment (Or any sequencing that isn’t usual to you)


Challenge: Use an algorithmic sequencer or generative tool to create evolving note sequences or parameter changes.


Activity: You can record the MIDI output to new clips using a complex sequencer or MIDI clips with probabilities on some triggers. Recording multiple new clips allows you to save practical and fun sequences to reuse. In Ableton v12, you can make a drum kit and then shuffle the sounds with similar ones. Shuffling sequences and drum selections allow you to preview sounds with a specific sequence. Sometimes, we have a melody we love, but the sound doesn’t fit, and vice versa. Exploring one or the other lets you see a broad palette for a selection. Algorithmic sequencing is a powerful tool to spit out ideas from your habits since you’re not in control of the sequence.g


Outcome: If you save them, the result is in 3 spheres with new drum kits, midi clips, and audio clips.


Focus: Resampling and Transformation


Challenge: Reshape a sound entirely


Activity: Using the option to record modulation to clip in session view, add multiple effects of your choice on the channel of the sample and then record yourself moving parameters. Tieing your modulation recording to a loop-based time creates a lot of change to the initial sample. When we play with effects, we rarely automate multiple parameters at once, so this activity is about exploring exaggeration and going to places you might not explore. Once you have some action going, resample the entire playful session.


Outcome: Recording a long exploration as this will always offer alternatives to the original idea. Those recordings can be new hooks or extra material to support the initial sound.


Focus: One-Plugin Challenge


Challenge: Choose a single instrument plugin and use it exclusively to sculpt your sound for 5 minutes.


Activity: Similar to making a miniature, this activity is about taking enough time not to achieve anything other than using your curiosity and seeing what comes out of it. Very often, we are task-driven with something in mind, which narrows the outcome of what your tools can do. Set your root key to C to resample the exploration in those moments. Being in C will let you import the recording to a sampler for easy manipulation.


Outcome: Limiting your tools forces you to explore every nook and cranny of a plugin, and not having a goal keeps you open to finding sounds you aren’t usually going far.


Focus: Dynamic Arrangement via Automation


Challenge: Turn a simple loop into multiple versions of itself using generative techniques.


Activity: Use the follow-action option in the session view to select multiple clips with a hook and create variations. The idea is to start with a simple loop, but the outcome will be different each time you play it. The record button allows you to save the order of the clips played, creating new hooks and unexpected arrangements.


Outcome: Either you resample the session or record the clip launching activity, but the outcome will provide a way of exploding the initial loop trap one can fall into. You can also revisit old projects and apply the same activity to recycle solid ideas in alternate versions of themselves.


Focus: Spatial Field Exploration


Challenge: Explore using space through panning, reverb and filters


Activity: Using a few samples from a new project or idea, spend time meticulously positioning them in space using panning. Quite often, that production phase is overlooked and left to be done at the end, either in the mixing phase or at some other point. Taking the time to explore what a sound can be like in the panning distribution can reveal potential flaws or strengths of a sound.


Outcome: The recorded performance might inspire spatial arrangements in larger tracks and help you consider sound positioning as a compositional element. Sometimes, moving around a sound will help make sense when paired with another. It’s a nice activity to listen to how sounds relate to each other, but from a spatial perspective. Also, exploring reverb use can give a new mood to the most straightforward sound.


Focus: Preset Owning


Challenge: Explore all the presets of your plugins and tweak them.


ActivityIt is an enjoyable experience to go through all the presets of a plugin or synth and modify them to taste. You can, after that, either save them over the original preset or as a new one. Electronic musicians often disdain using presets, but you can see them as a starting point. You can also make them yours by changing them to your needs. Going through multiple presets helps you understand how a specific plugin works and how to configure it to achieve a particular result.

Alternative: My friend Jason likes to try to “break” plugins by pushing them to extreme settings to see what happens. By pushing them far, you can then roll back to less intense results.


Outcome: An expansion of your presets and a better understanding of your tools.


If you have suggestions, please share!