Music Mockups
As I was recently revising a client’s workflow, I explained to them that mine had changed much in over twenty years. It has changed just a few times in the last few years, and if I were putting a number into my workflow, I think I would easily be at its 20th iteration. I recently realized the need for a phase in how I work on music. When working with clients, there is a part where we conceptualize an idea, and it becomes a bit tricky for them to imagine the end product. Perhaps my background as an engineer and label owner taught me to imagine how things should be in the end, so it’s never a problem to know where I’m heading when working on a song.
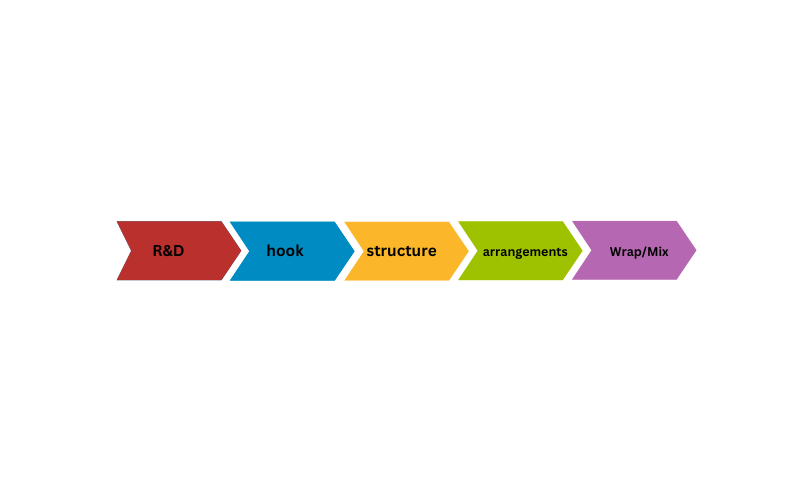
For a while, the phases of making a song would look like this:
With this new phase, I’m adding a part called Mockup. It’s similar to a mood board, but a song is closer to what it will be like. This is important in electronic music as we can access so many sounds and effects that a song could be anything. The concept itself is simple and pretty self-explanatory. The faster you know your destination, the easier it is to decide what to do to get there.
The advantages I’m experiencing when using mockups:
- Understand quickly the potential of an idea.
- See the flaws and lack of an arrangement.
- Easier to self-validate your process.
- Giving you an outlook of what the song is, you can sleep on it and test it in contexts.
By watching how people, clients, and friends work with music, I notice a lot of time invested in searching for sounds or trying to recreate something they heard in a song or their mind. This often leads to long sessions of unproductive noodling around, trying to figure out what is happening and how to make sense of it. There’s no direction or destination in mind, which I greatly encourage people to keep as a mindset. But this also has some downfalls, mainly for those new to music making. The lack of results makes it difficult to make decisions, and decision fatigue can impact energy and motivation.
I came up with a new phase because I needed to fix an issue with my production, which is about getting some results faster than just being explorative.
Research & Development of Ideas
There are two main modes for the early R&D (Research and Development) phase.
Explorative mode: Find some ideas, work and play around them to see how they develop. In this mode, the musician is invited to remain open and not try to control the outcome so much as it would limit the potential happy accident that can bring an unexpected twist. I usually encourage people to spend more time in this phase mode than in song-making. When you work on songs, you bring to term an idea that you thought made sense, and when that song is finished, it will be time to work on the next one. Since the ratio of gem ideas is very low, it is worth giving a lot of time to create new ones. Clients who consult me spend 90% of their time making songs and the rest on research, an unbalanced ratio that makes it tiring to keep going. Having exciting ideas makes it fulfilling to finish a song and work on the next one.
Goal-oriented: This state gives importance to finishing something. You’ll have a vision, and you will work in that direction. Sometimes, you might have compiled many sources or found something you love. I might want the desired outcome when working on an album or a specific project. Working with clients forces me to find precise ideas to fulfill their vision, so if I spend too much time in the explorative mode, I might not get anywhere, and if I only work towards a goal, I might lack originality. This is when the combination of both can bring some solid results. You need to control this phase to feel like your ideas are being appropriately honoured.
While the R&D phase allows musicians to gather ideas freely without the pressure to finish or release them, you can come up with a hook, but this raises specific questions that one can’t quickly answer early on.
Is this idea catchy?
What does it need to be supported?
How many variations does it need to remain riveting through the song’s duration?
In my previous workflow, I’d go from R&D to Hook and then jump to Structure. Now, I bring in the Mockup phase between the Hook phase and the Structure. Working on the mockup can also replace the structure phase if that works.
Before diving into the how-to-mockup of your next song, I think it’s necessary to cover the search for hooks in more detail because we will rely on references and samples when working on mockups. We need to reflect on how we want to build a song with a prominent sound. Some songs have no hooks, and others have something similar to songs of the same genre.
I invite you to think about this because of the decision one might take regarding using a reference. Copying it would make your song a cover. There’s nothing wrong with that, as there are countless covers of popular songs. There are even covers of covers. In techno and house, some songs have the same structure and more or less the same sounds, which is quite the same for pop music. You can take all the hits of a year and find similar critical points.
If something works, someone will try to repeat the formula to get to the same place. It rarely achieves the same results. To see the viability of an idea, I’d encourage you to first make a miniature out of it. I covered the concept of miniature songs in this article, and to refresh your memory, the idea of a miniature comes from the principle of making a tiny song (30 seconds to 2 min) with one or two sounds alone. If your idea can work on its own as is, you know you have something you can develop into an elaborate idea.
Now, let’s see how we can streamline your next session.
1. Start with the Hook: Capture the Core Idea First
Prepare your mood board and load in a reference song to narrow down your direction and outcome.
Goal: Identify and record the central theme or hook quickly—this will anchor the rest of the Mockup.
How-to:
-
- Determine the Key and Scale of your song. You can also check the details of your reference using a key detecting plugin.
- Use a synth preset or a sampled sound that’s inspiring without worrying if it’s final. I usually start with sine oscillators for their natural tone and calming mood. They are close to the human voice and a solid foundation for your final sound.
- Record a simple 4-bar loop that captures the mood or vibe you want. Analyze the hook of your reference in terms of the number of notes or the phrasing. You could start by mimicking that idea and tweaking it to taste.
- Keep it raw—don’t worry about effects or mix balance yet.
Example:
- Choose a preset in a stock synth, or try Pigments from Arturia for the number of presets available. Pick one that feels emotionally right.
- Play and record a lead melody that has a catchy or memorable phrase. You can also start by placing one note (the fundamental) at all the places you want it to play, then add a different note. I also like just to place where I want notes to be in the phrase and then change their pitch while keeping the rhythmical position.
- Loop it and move on—don’t waste time tweaking the sound yet.
2. Lay Down a Simple Rhythm: Establish the Groove
Your song’s groove relies on its accents, which determine its energy. Dilla would always say that the second note determines everything. This video here explores 5 different rhythms that you can also explore.
Goal: Create a basic drum pattern that gives the hook context and movement.
- How-to:
- Start by deciding the BPM of your song and the accents. There are usually 2 to 4 accents in a pattern, and I recommend starting with 2. You can validate the accents from your reference, if any, and do the same for the BPM if you can’t pick one. The accents are usually where kicks or snare/claps fall to.
- Use pre-made drum loops or machines like XO or Playbeat to test patterns quickly. Why them? Because they come with a wide selection of patterns, you can swap samples quickly to get various flavours.
- Focus on kick and snare for now—hats and percussion can come later.
- Keep the pattern straightforward (4×4, half-time, breakbeat, etc.) to get a feel for the energy.
Example:
- Drag a loop from Splice or sequence a basic kick-snare pattern in Ableton’s Drum Rack. I have a folder with a few snare patterns as well as kicks. I usually grab some from that folder as a placeholder.
- Keep the BPM flexible—adjust based on how the hook feels.
3. Build Harmonic Support: Bassline and Pads
You might want to adjust your melodic content to the primary key and scale if your song has a key. One thing that music has is a background or atmosphere that will be tuned to the root key. Sometimes, it will have a chord progression, but sometimes, it won’t.
Goal: Add depth and context to the hook with a bassline and simple pads.
- How-to:
- Choose a bass preset with a solid fundamental (sine or triangle wave works). If your main idea can be played with a sine oscillator, I recommend a different one for the low end, as it will feel more stable.
- Create a 2-bar bassline that complements the hook’s rhythm.
- Use a single-chord or a two-chord progression for pads—keep it minimal. Going from the Minor scale to the significant scale might do the trick.
Example:
- Use Arturia Mini V or Massive for warm analog bass. These two offer warm, fuzzy, and fat tones that usually fit any genre.
- Sequence a bassline that follows the root notes of the hook. Think already if you want the bass to respond to the hook or support it. If it responds, the notes would play in a different position than the hook, just like a conversation, but if it’s helping, it can be a mixture of playing simultaneously mixed with some silence fillers.
4. Mockup the Structure: A Rough Blueprint
Goal: Sketch a quick arrangement (Intro → Verse → Chorus → Bridge) without worrying about transitions. This might not apply to some electronic music genres, such as techno, where sections are more fluid. In that case, think of variations or scenes you move through.
- How-to:
- Duplicate your loop to fill 2-3 minutes. Place it in the middle of the structure, starting from the heart.
- Mute or solo different elements to create contrast (ex. drop out drums for a verse, bring them back for a chorus). Deconstruct to the end and the beginning from the middle.
- Keep things simple to have a macro vision.
- Avoid complex automation and focus on the bigger picture. At this point, only fades in and out are helpful.
Example:
- Create a simple A-B-A-B structure:
- A: Hook + Drums + Bass
- B: Hook + Pads + No Drums (breakdown)
- I sometimes import a structure using Instacomposer as a placeholder.
5. Placeholder Sounds: Fill the Gaps Quickly
Goal: Use temporary sounds to fill out the arrangement without getting stuck.
- How-to:
- Drag in samples or presets, even if they’re from well-known tracks, to test ideas.
- Replace them later during the deconstruction phase.
- Focus on vibe and energy, not originality at this point.
Example:
- Use Splice to grab vocal one-shots or FX sweeps to test energy transitions.
- Apply a simple sidechain or reverb if needed, but keep it light.
6. Live Play and Jamming: Test the Energy
Goal: See how the Mockup feels as a performance.
- How-to:
- Use your MIDI controller to mute, solo, and tweak real-time filters.
- Record a live jam of manipulating the Mockup—listen back to identify high-energy parts.
- Treat this as a “dress rehearsal” for the track.
Example:
- Map knobs to a filter cutoff, reverb send, and volume for different elements.
- Perform and record 5-10 minutes of tweaking live.
7. Export and Listen Away from the DAW
Goal: Get perspective by listening outside your studio setup.
- How-to:
- Bounce the Mockup as a WAV and listen on different devices (phone, car, headphones). Listen while walking. Music takes on a different persona when we listen to it actively.
- Make notes on what feels repetitive, empty, or too busy.
- Make a playlist with your reference to other similar songs and add your mockup. Listen while walking and in different contexts. Observe how your music fits in there.
Example:
- Create a note in your phone with timestamps for what works and what doesn’t.
8. The Lynch Twist: Capture the Mood, Not the Details
I’ve always been inspired by how David Lynch taps into ideas to create movies. One approach is to write scenes on paper; when he has several, he knows he has a movie. I think of the same with music.
Goal: Focus on making the Mockup feel emotionally complete, even if it’s rough technically.
- How-to:
- Ask: Does this Mockup evoke a specific mood or story?
- Does it evolve through the song, or is it stagnant?
- Is there a tension related to it, and is there a release?
- What is the opposite emotion of your hook? Can the sound be altered toward that emotion?
- See if you can divide your hook into two segments and make it in conversation with itself.
- Follow Lynch’s advice: If an idea feels wrong, cut it immediately and put it in a folder for future inspection. I usually like to close the project and return when I’m in a different state of mind to see if the wrongness remains.
Example:
- Record a voice note describing the mood or story you want the track to tell.
- Compare this vision with how the Mockup feels emotionally.
9. Deconstruct the Mockup: Rebuild from the Core
Once the mockup is ready for its next phase, you can rebuild it to taste.
Goal: Replace placeholders with original sounds and refine the arrangement.
- How-to:
- Consider whether the imported sounds can be altered to a new aesthetic. Sometimes, using a filter, distortion, or Shaperbox can completely redefine a simple sample or loop.
- Swap out samples for your own recorded/imported sounds or synth patches.
- Simplify busy sections—focus on the hook and main rhythm first.
Example:
- Replace a Splice vocal with a custom recording.
- Use a different reverb or effect to make it feel more original.
10. Final Check: Does It Still Resonate?
This is where things get delicate. You might still not feel the song, but it might still be good. Leaving it alone for a while can help make the best decisions. Asking for validation from a friend is also helpful. You can make different versions for a song too.
Goal: Make sure the track still feels fresh after listening multiple times.
- How-to:
- Take a 2-3 day break, then listen again.
- If it feels stale, identify if the problem is the sound design, the melody, or the rhythm.
Example:
- Replace one element (like drums or bass) to see if it refreshes the vibe.
- Usually, I choose the kick at this stage, when everything has been set. The kick will give the song its final intention. A dirty kick can make it old school, while a punchy one can make it more dancefloor. Testing in context can be a surprising experience. Perhaps check your reference as a guide to what you can do.