The 4 to 1 Method
Let’s discuss a production technique that has brought me much success lately.
Some techniques are discovered by accident, and this one came to me through experimentation on how to find hooks, ideas, and other elements to work with in a song. I wouldn’t say I invented this approach, as I’m sure some people work this way, but I thought I’d share this finding because it seems that when I share it with clients, something magical happens with them.
The familiar limiting approach people tend to have with music can be summed up by the phrase “1 song (project), one idea.” If you’re familiar with this blog, you probably already know that I often suggest organizing a song involves three key ideas. Without going deeper into this, since I already covered it, I’ll now share with you this approach that I have, which is to add one new element to the formula; Therefore, now I say that “one song, four ideas(!).”
Let me explain the logic.
Studying Art and Portrait
In college, while studying art, I took a class that involved drawing live models. I remember that my teacher back then would do the exercise with us and have his paper, drawing, just like we did. While watching him work, I enjoyed that he would often have multiple drawings on the same piece of paper. There would be one that seemed like a close-up of the model’s face. There would be another, which was the torso and shoulder (e.g., Roman statue style). By the end of the class, his one sheet was covered in multiple angles, some close-ups, and even some abstract shots. Everyone in the class had spent the entire hour drawing one image, which would be it. His approach allowed him to have multiple ideas on paper, and by the end, he would cut out the ones he preferred. I remember him saying, “Until I try a few things, I would never know which one would do best, and sometimes I need to try a few attempts to nail it down.”
During the same period, we also experimented with filming, following the same principle. We would repeat the same scene 3 to 5 times, sometimes with the text being slightly modified or even improvising certain elements that were off script. When creating the montage, we would typically use the first take; however, it was often combined with other parts. The process reminded me of the drawing class, and it became apparent that art rarely achieves its best form on the first try. It often takes a certain comfort to be at ease, and as an interpreter, if you have a script but with the option to customize it to taste, you gain a different angle that can be helpful in a way you didn’t intend at first.
I’m an avid fan of David Lynch and had fun reading interviews with actors who worked with him on multiple projects. They described his direction and work as often unsettling, and if you resisted it, things would not go well. But if you’d go with it, then magic would happen. Lynch was a fan of happy accidents and intuition. From what I read, actors would often come to the studio not knowing what would be shot and would simply follow instructions. After multiple takes where things frequently made no sense, Lynch would give them a meaning when editing.
I firmly believe this process also applies to music, especially within the electronic world.
The Exploration That Led To The Technique
If you have been interested in my music, you are aware that I don’t limit myself to techno and dance music-related projects. After decades of music-making, it becomes increasingly complex to continue the X version of the track concept for DJs. I have found both fun and learning by exploring ambient or experimental music. In hindsight, all the most experimental albums I’ve done (Tones of Void, Intra, White Raven, etc.) came from building a conceptual system/macro that I would use to process sounds. Since I record sounds daily, I would have numerous materials to process in those macros, where I’d record myself jamming with the tools to create a song.
The workflow I have at the moment (and for the last 10 years) has been an ever-evolving cycle that looks like this:
- Test, learn and play with a technique, synth, or tool.
- Record the outcome.
- Reverse engineer sounds I love from music I enjoy and build macros or systems (eg, modular system patched in a specific way).
- Process the previously recorded material in the macro or system.
- Record the outcome. Save processing as a macro.
- Edit the best part into a song. Perform it for organic feeling arrangements and not limit myself to mouse-only automations.
Since one project is more than a song, being a compilation of sounds, ideas, and recordings, it is clear that I can record multiple songs within the project. From a single Ableton Project, which is typically used to do one song, I had material to do four, sometimes more. It then happened that I made albums of EPs solely from a single project, because I had enough material to do so, and that had me thinking that instead of focusing on creating a song, I would work on four different ideas (in session view) and then decide later which one would please me the most. What I realized from that idea was that I had fewer expectations for a single idea, but as I worked on it, tweaking details, by the time I got to the fourth idea, I would have something different yet solid.
How It Works
The concept emerged from reflecting on how I like to incorporate a portion of the ideas I find; I developed an itch to build multiple ideas into a single project. As discussed in a past post about how I use moodboard, I bring this to another step by using a technique that I name “The Tree of Possibilities,” which involves finding multiple variations of a simple idea, either by processing, reshaping or if it’s midi, I’ll modify the melody by either changing the rhythm or the notes (not both as its too destructive of the initial idea).
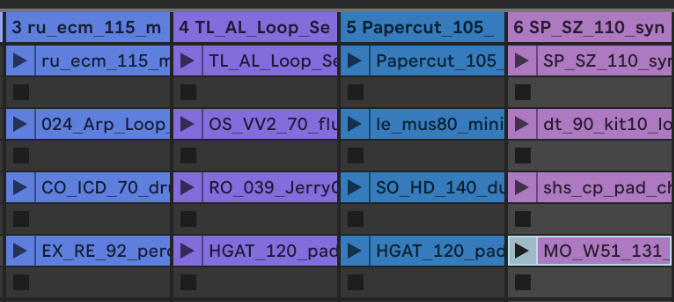
Ableton Live 4 to 1 exercise and method using Splice Samples
1- From the generated content and the tree’s branches, I will separate the material into four different ideas. Using the Session View in Ableton Live, I would try to combine ideas on a single line. Usually, 3 to 4 “voices” (ex., one synthesizer is a voice) is more than enough. By the end of this step, I should have four distinct lines with their own voices.
2- I will match, rearrange or swap percussion to give a foundation and rhythmical intention to the ideas compiled.
3- If these have a bass, then I would match notes, sound and low-end presence to the ideas, if needed.
4- Test which idea I like the most and then swap it to the arranger side and create a mockup.
From there, you not only have the most solid idea from your session, but you also potentially have multiple other ideas that you can use for different songs. Since they all come from the same project, this can be an excellent way of having coherence as an EP.
Advantages of using this method
This method is beneficial for individuals who struggle to find a strong central idea or hook. It forces you to go a bit deeper in the creative process. It’s also a valuable approach for not building a strong attachment to an idea or song, as you know, there are multiple options. Additionally, this allows you to swap ideas between sketches if you doubt your own.
Many artists often have way too many ideas they try to include within one single song. This method is excellent for them as they can split them into multiple.
Potential issue (mainly for inexperienced artists)
As mentioned above, some people who create electronic music often feel that something is missing from their song. This results in them adding multiple ideas. This method goes straight to the essential and can trigger some feeling that it is not “enough.” While this method can help to practice these issues, it doesn’t mean it will be easy at first.
More details on the Tree of Possibilities
Inspired by genetic and DNA sequences, where lab researchers attempt to study multiple potential possibilities for a virus or genome, this concept can also be applied to music. Since we work with sound-generating tools or samples, knowing the different outcomes gives multiple variations. If you think about a drummer playing an instrument, you know that because of the precision of the hands, there will be various tiny differences between all hits. This means there are multiple aspects of the sound you can create:
- Tone: Dark vs Bright, which involves an EQ handling the highs.
- Pitch: Changing the pitch of a sample will sometimes reveal some details you might not perceive at the original tonality.
- Dull vs exciting: A filter can control the amount of overtone of a sound. The more harmonics and high-end detail there are, the more exciting it can feel to the human ear. But not all the sounds of a song can be exciting as this will create harshness and incoherence.
- Thickness, texture: Using distortion, saturation, and compression, you can make a sound’s textural integrity completely different.
- Envelope change: Snappy vs. smooth or abrupt refers to how the envelope shapes a sound. Most sounds have a similar envelope, but there are situations where the envelope can change. Think of a cymbal or a Gong, the harder you hit, the longer the sound will be.
- Effects inducing modulation: This includes reverb, chorus, phaser, flanger, and possibly delay, which can alter the stereo presence of a sound as well as its overall feel.
- Modulation: Using LFOs and envelopes, you can create either cyclic or more abstract variation from one instance to another.
The key exercise involves heavy use or resampling. I usually like to create a very long recording of all the different options I can find. Isolating my favourite sounds, I want to import them into Ableton Live’s Sampler, where I use the Round Robin option to turn the multiple samples. This new feature is quite handy, as it alternates between the imported samples each time you play a note in the order of your choice. For instance, if you have six different samples of a hihat, you’ll get a very organic feeling where each time you play one, it will be different. Combining this with internal modulations, it can become very lively or completely insane.

Round Robin In Ableton Live
This video provides more information on the matter and its proper technique for implementation, as it automatically removes stale samples.
Having your tree done with its branches (generated sub-ideas) will ensure that you have multiple options for your songs, as well as creating material you might want to reuse later on. Please let me know how this benefits you and improves your workflow.
