Tag Archive for: MIDI

Artistic Integrity and Music Theory

Last week, in one of our online coaching sessions, we discussed the importance of music theory. In describing my own opinions on the importance of music theory, I’d like to outline different stages of music discovery I’ve gone through during my life. In this post, I will also elaborate on some of my reflections on the current state of music itself.

It’s hard to pinpoint the first time I heard electronic music, but it was probably in the ’70s, and obviously, I fell in love with it. There was a whole science fiction trend at the time, and anything related to sci-fi was characterized by electronic music in the score. During that time, in a sea of pop and rock, electronic music was the oddball, not sounding like anything else. It had its own rules, and while some people were making electronic covers of known songs (which I’ve always hated deeply), I had an appetite for original music.

In the early ’80s, I was really into break-dancing and early electronic hip-hop or electro, which was all the rage. The use of 808s was common, and for me it was also instant love. What I discovered later on was the strong bond between early hip-hop and jazz. Recently, I watched a Blue Note documentary which retraces the roots of hip-hop and jazz, which was very refreshing.

What’s inspiring in this documentary is how this label, in its beginning, was trying to really give artists a chance to share a very personal take on music, and they didn’t follow trends or worry about sales. What was shocking about the film was that, for most part, the artists and label owners talk about what they do largely coming from the same perspectives as electronic musicians do about their own craft.

This type of vision has always resonated with me; what makes an artist wholesome is striving to be personal before anything else. If that’s obvious to you too, I’m sure you also know it’s not the case for many others who might be reading this post. This is why I became close friends with Bryan, who I make jazz with. He’s been playing sax for more than 45 years in all kind of contexts. When it comes to learning music, knowing chord progression rules and things like the circle of fifths, he’s probably the best person to talk with.

We had a talk about those so-called “rules” once. His point of view was very clear: knowing fewer rules might actually keep you more open to making things that are ground-breaking rather than thinking that certain things shouldn’t be done. I can related to this, because when I hear about “engineering rules”, I often feel like I’m preventing myself from doing certain things by adhering to them. Bryan is not interested in guiding me with respect to melodies. “Ya gotta break patterns, man!”, he’ll say, sometimes talking about how it works in free jazz.

“Music rules got blown out of proportion in the ’80s when musicians understood they could make a lot of money if they knew the tricks. Then everyone were more interested in repeating known recipes than making something personal,” he says. We have discussed how historically music elitists came up with serious rules to keep music-making limited to wealthy people who could afford music classes and thus it became less available to the poor. The dialog around music theory has traditionally been downwards, from the higher classes to the lower class—one way communication.

Jazz made music more open and accessible. The early beginnings of the rave days (circa 1987-1992) where music and the scene was really about inclusion and a big F-you to the music industry had a similar ethos. There was a lot of tension back then between electronic music and other genres. Electronic music was often misunderstood, mocked and put down, probably because it was the exact opposite in terms of values and ways of life.

From the early ’90s until around 2010, one of the most important values in most branches of electronic music was a sense of novelty. In my early rave days, we’d attend to be musically challenged. We wanted to hear music that we never heard before, and we even wanted to be disoriented. You’d have DJs dropping a huge mish-mash of different styles, and beat-matching was not as important as it seems to be now. It got more and more organized and popular DJs became the ones that were more structured, and eventually DJs started playing sets of one genre alone. One genre would emerge, stay for a while, and then become “bad” until another one usurped it as it faded into the past. This progression had many victims: Trance, Techno, House, Drum and Bass, etc. It was pretty different from today where there’s room for everything and artists are the ones to come and go instead of genres. Maybe they never really “go”, but the media focus often shifts to others in the same genre who are slightly “different”.

But let’s get back to music theory and academic chord progressions.

Often people make melodies based on some concept or rule they have in mind, or something they’ve heard before. One thing I hear a lot from people is that when they read about music theory and then try to apply it in their own work, they sound cheesy or too pop-y. So the question is, is there a way to know rules regarding melodies and still make something that sounds right?

That’s a bit of a hard one to answer.

It’s either you understand the tones and keys associated with a genre first and then try to reinterpret them in your own creative way, or you don’t. But to me, this raises some issues regarding artistic integrity—perhaps you want to work within a genre but still create a strong sense of originality. Is that possible?

Well, if you chose a genre that really speaks to you that you want to work in heavily, that’s a certain decision you make about who you are as an artist. But in my opinion, the quality of the vocabulary you can develop in electronic music comes—first and foremost—from understanding sound design.

That said, understanding music theory is a huge help in understanding how to strike a particular note. There are numerous tools out there to help you improve your tonal and theoretical knowledge. Here are a few:

  • Instascale: Not familiar yet with this one, but I’ve heard good things.
  • Scaler: For helping you understand chord progressions by proposing what could follow your melody, based on a genre.
  • Melodyne: one of the most used plugins for pitch correction.
  • Captain Plugins: The complete suite gives you access to tools that facilitate melody-making, pitch detection, bass-making and can make a huge difference in creating musical structure.

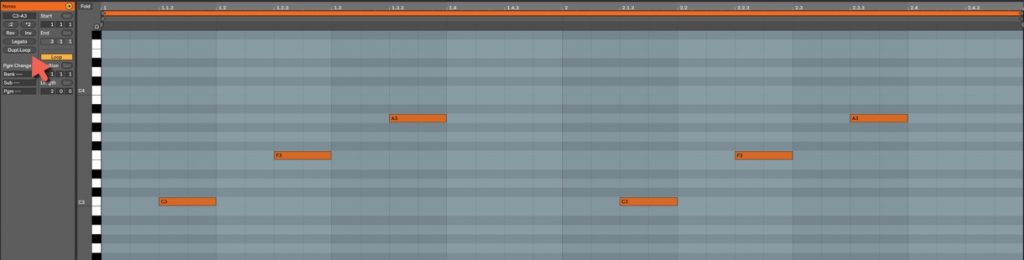
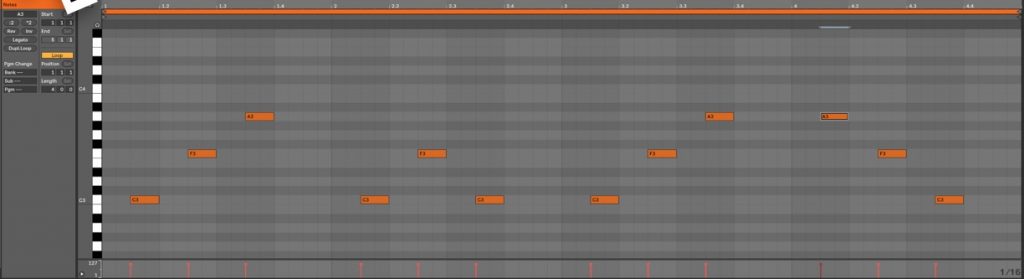
One thing I do a lot is work with my reference tracks using a pitch detection plugin (Mixed in Key, studio edition) and then will have that as a starting point. Then if you want to generate a different starting point, I’ll use Rozzer (Free Max patch) that generates a random pattern. That usually helps me find a motif for a song. Andrew here also has a few good suggestions:

I find that one thing that helps me a lot about making melodies is to work with what’s proposed instead of trying to control the output too much. If you start working with an expected melody in your head, you might spend hours trying to recreate it and it will end up sounding like crap. You sort of need to find the right melody for the right sound. That’s where it’s easy to go down the rabbit hole.

This is why if you work with what you have and try to get the most out of it, you might end up with something more original. I’ll record a lot of MIDI ideas and usually will go back to them and try a large series of presets until I find what feels like a perfect match, then tweak the sounds (this is where the sound design knowledge comes handy).

In this blog I frequently talk about remaining open-minded as much as possible and letting go of control. The notion of having control over what you do comes with practice. Same an understanding of musical theory. You need to make a lot of projects and a lot of songs to become more fluent and understanding in what you do. But to get there, first you need to really let go!

Using MIDI controllers in the studio

People often say that MIDI controllers are mostly for performing live, but they can also be your studio’s most useful tool. My advice to people who want to invest in gear—especially those who aren’t happy working only on a computer and dream of having tons of synths (modular and such)—is to start with investing in a controller first.

There are multiple ways to use MIDI controllers; let me share some of my favourite techniques with you and give you advice to easily replicate them.

Controllers for performing in studio

One trend I’ve been seeing in the last few months is producers sharing how they perform their songs in-studio as a way to demonstrate all the possibilities found within a single loop. This is not new—many people like to take moments from live recordings and edit them into a song, but it’s becoming clear that after years and years of music that has been edited to have every single damn detail fixed, artists are realizing that this clinical approach to producing makes a track cold, soulless, robotic, and not organic sounding and in the end. If you’re still touching up details at version 76 of your song, this means you’ve probably heard it about 200 times—no one will ever listen to your track that many times. My advice is to leave some mistakes in the track, and let it have a raw side to it. Moodymann’s music, for example, is praised and in-demand because his super raw approach makes electronic feel very organic and real. Performing your music in studio to create this type of feeling is pretty simple; it’s super fun and it inspires new ideas too.

For in-studio jams, I recommend the Novation LaunchXL which has a combination of knobs and sliders, plus it’s a control surface; depending on where you are on the screen, it can adapt itself. For instance, with the “devices” button pressed, you can control the effects on a specific channel and switch the knobs to control the on-screen parameters.

When I make a new song using a MIDI controller, I’ll start by using a good loop. Then I’ll use my controller to quickly play on the different mixes I can create with that loop. Sometimes, for example, I want to try the main idea at different volumes (75%/50%/25%), or at different filter levels. Some sounds feel completely different and sound better when you filter them at 75%. Generally, I put on these effects on each of my loops: a 3-band EQ, filter, delay, utility (gain), and an LFO.

Next, I’ll record myself playing with the loop for a good 20 minutes so that I have very long stems of each loop. Then when it comes to arranging, I’ll pick out the best parts.

TIP: I sometimes like to freeze stem tracks to remove all effects and have raw material I can’t totally go back and fix endlessly.

Controllers for sound design

I find that the fun part of sound design involving human gestures comes from replicating oscillations a LFO can’t really do. It’s one thing to assign a parameter to a LFO for movement, but if you do it manually, there’s nothing quite like it—but the best part is to combine the best of both automated and human-created movements.

I use a programmed LFO for super fast modulation that I can’t do physically with my fingers, and then adjust it to the song’s rhythm or melody—just mild adjustments usually. For instance, you could have super fast modulation for a resonance parameter with an LFO or with Live’s version 10.1’s curves design, then with your controller, control the frequency parameter to give it a more organic feel.

Recently, I’ve been really enjoying a complementary modular ensemble for Live called Signal by Isotonik; it allows you to build your own signal flow to go a bit beyond the usual modules that you’ll get in Max for Live. Where I find Signal to be a huge win is when it’s paired with PUSH, which is by far the best controller you can get for sound design. PUSH gives you quick access to the different parameters of your tools, and if you make macros it becomes even more organized.

Controllers for arrangements

Using MIDI controllers in arrangements is, to me, where the most fun can come from; using them can completely change the idea of a song.

For instance, if your song has a 3-note motif that has the same velocity across the board, I love to modulate the volume of the 3 notes into different levels. When we speak, all the words we use in a sentence have different levels and tones. For example, if you say to someone “don’t touch that!”, depending on the intonation of any particular word, it can change the emphasis of what you’re saying. “DON’T touch that!” would be very different from “don’t touch THAT!” This same philosophy can apply to a 3-note melody; each note is a word and you can decide on which ones to emphasize and how a certain emphasis fits in your song’s main phrase or motif.

If you assign a knob or fader on your controller to the volume of the melody, you can also control the amplitude of each note. You can do this for the entire song, or you can copy the best takes and apply their movement to the entire song. I find that there will be a slight difference in modulation depending on if you use a knob or fader; each seem to have a different curve—when I play with each, they turn out differently (but perhaps that’s just me). Explore and see for yourself!

TIP: Using motorized faders can be a a huge game changer. Check out the Behringer X-Touch Compact.

Another aspect of controllers that people don’t often consider are foot pedals. If you’re the type who taps your foot while making music, you could perhaps take advantage of your twitching by applying that to a specific parameter. Check the Yamaha FC4A. Use it with PUSH and then you have a strong arsenal of options.

SEE ALSO : Equipment Needed to Make Music – Gear vs. Experience vs. Monitoring

Basic tips for writing melodies

In our Facebook group, I was asked to share some tips about writing melodies and how to approach this process while arranging. In electronic music, many artists are self-taught and the concept of music from a melodic and harmonic perspective is often built over intuitive understandings and reading online tutorials, which is helpful, but perhaps lacking guidance for making techno or ambient music. Here are a some simple but useful tips for writing melodies that you can do using Ableton:

Find the root key

Each song has a root key. If you look on Beatport for instance, it will indicate the root key so DJs who mix in key will be able to know what they’re dealing with.

A track in G minor on Beatport.

DJ’ing in key is something I love to do once I have a bunch of really interesting sounds I want to bring into a song. Basically, if you follow my non-linear production technique, you’ll work on sound design for a while and when things get shaped into a pattern, you might want to introduce some melodic elements which will help everything come together. This is often where self-taught producers start to experience problems because their song feels like it’s all over the place and lacks an overall direction.

With writing melodies, where should you start?

First, you should decide on the root key. For instance, let’s say you choose C on your keyboard; I would leave that note playing through the entire song at first and then work around it. This means that the fundamental note of your song will be in C, as well as your bass and the other elements you’ll develop around it.

Tip: Use the Fixed grid of 8 bars to make it easier to make longer notes.

Scales, chords

I’m not going to dive into music theory so perhaps you want to do a bit of reading on the subject of scales if you’re not familiar with them, but after picking up your root key, I strongly suggest you use scales and/or chords to decide on how to develop your melodies. Using scales in Ableton will limit the notes you play to the ones that are included in the scaling – this really helps to make sure your melodies don’t sound “off” while building the overall emotion of your song.

Once you get comfortable with scales, you can have them change throughout the song to change emotion and give modal color to the melodies.

As for chords, it’s the same sort of thing. Fore example, if you pick a minor chord (three notes played simultaneously) with a root of C, you’ll immediately have a choice of a three notes to include in your melody. If you keep the song in that key/chord, you don’t have to play all three notes at once to have the chord itself.

How can I determine the notes of a chord or scale?

Insert the scale tool to Ableton or any equivalent plugin (note: there are many alternatives online if you google it). Then you can reference the notes that are from the chord by inserting phantom notes from your sequence, then you can play hit play. The beauty of using Ableton Scales is that if you place a note that is outside of the chord triad, the plugin will re-align it to where it should be, keeping you from sounding off.

The 1 octave, 1 bar motif technique

This method no secret to anyone, but still a truly personal way to write a melody. I usually create a three-note motif to start with, make sure it’s only using one octave, and not longer than one bar. Honestly, I can listen to this motif for a long time and – for myself – just while listening to it new ideas will emerge, pretty much automatically.

What I like about Ableton’s MIDI tools is how easy it makes it to build evolving ideas. The “Duplicate loop” tool makes it easy to create evolving patterns.

My initial loop will be duplicated and in the second bar, I’ll add new notes that came into my mind.

…and so on until your motif evolves to have your chorus, verse, etc. Basic melody writing isn’t really much more than that.

I usually like to copy the motif to a lower octave later on to generate a bass line.

TIP: Try flipping or reversing a pattern for fun results.

ADSR, Velocity and groove

Now that your melodic sequence is built, it will be important to give it life by adding a groove template on it. This will be valuable to make the melody less mechanical and more human-like. I usually like to add other plugins:

  • Note length: play with the lengths from shorter to longer; sometimes having variations like this is also a great way to do transitions from section-to-section.
  • Velocity: complementary to the groove template, this really allows for random velocity to kick in which can create elements of surprise. Make sure to freeze/flatten your sequence so you don’t have different versions every time!
  • ADSR: Don’t forget to modulate your melody using variation in the envelop such as the attack through the release. This is a nice variation to the note length and can give a feeling the melody plays backwards.
  • Arpeggiators: useful to generate some extra ideas to the existing motif. Try it with the diverse random options.
  • Melodic Steps: quite a power horse tool to generate ideas. Try it and see how it evolves.

Let me know of your own techniques for writing melodies and perhaps I can add more ideas here!