Why Production Matters Less Than You Think It Does
Perhaps you’ve read me write about how music production happened in the 90s, but I thought I would share some points that align with what I’m seeing in the clients I work with now. Some of the people, including myself, who were musicians back then, had a few thoughts in mind about how we were making songs.
- We wanted to create tomorrow’s music.
- The DIY culture was a way of expression and lifestyle.
- Technical challenges were a leverage to creativity.
I could go on about the numerous challenges we had, but those forged the sound of the 90’s: imperfect, sometimes stale, raw, real. Making music gear was expensive, so some people relied on the cheapest gear. Despite those limitations, we saw the emergence of music such as techno, acid house, ambient, and drum and bass, among others. From the viewpoint of high-end engineers, they’d look down on those genres as not serious, either in presentation or sound quality. Yet, some of the music that came out performed just as well as music made in multi-million-dollar studios, and is even looked at today for enduring the test of time.

Making music was a way of life, and recording songs made the whole experience memorable.
Looking back at some songs from then, in today’s standards, they have multiple flaws, even though some have been remastered. The lack of production precision across all the technological options we have makes some songs feel amateurish. But I’m also glad I was around during those times as some of that music has become favourites, and while I think of some of my favourite songs, none of them will be remembered for having solid production, but only for how the song’s ideas were emotionally impacting me back then.
In other words, the majority of people don’t remember music for their technological flexing.
See this as good news, because it means you’re probably overthinking what you think your production skills mean. Also, sometimes it’s better not to use a technique at all than to misuse it. For some of my clients, technical details took over the importance of finding original ideas, self-expression and emotional narrative. If the mixdown process is so important, perhaps the main idea is poor and needs extensive cosmetic work.
Let’s see some of the must-know production skills one can study that will make a genuine difference in their music-making, followed by some that aren’t as important as we think.
Production Essentials
If I needed to start from scratch and have access to a guru to tell me where to start, what would I start with? What would be the gear that makes a difference?
I. Signal Flow
If production isn’t as important as people think, it’s because the real magic happens well before fancy plugins or secret techniques. The foundation is knowing how audio moves through your system — the signal flow. Once you understand that, everything else suddenly becomes obvious: why something clips, why a compressor behaves strangely, why your mix feels muddy, or why your synth patch collapses when modulated.
What Signal Flow Actually Is
Signal flow is simply the path your audio takes from the moment it’s generated to the moment you hear it. That’s it. But inside that simple path are all the critical decision points that determine how your sound behaves.
In practical terms, it’s:
-
Where audio starts (oscillator, sample, mic preamp)
-
Where it travels inside your DAW or hardware
-
What processes it passes through (EQ, compression, saturation, sends, groups)
-
In what order those processes happen
-
Where it finally ends up (your master bus, monitors, or bounced file)
It’s both signal routing and signal hierarchy.
If you understand it, you can diagnose anything. If you don’t, you get stuck trying random fixes. As simple as that.
Why this matters
Because the order of operations is the difference between:
-
clean vs. muddy
-
controlled vs. chaotic
-
punchy vs. flat
-
pleasing saturation vs. ugly distortion
-
a mix that translates vs. a mix that falls apart
Most people obsess about production “tricks” without understanding the plumbing that feeds their entire system.
Examples of Signal Flow in Action
1. A simple synth going through effects
Oscillator → Filter → Amp → Distortion → Delay → Reverb → Master
Move the distortion before the filter, and suddenly the sound behaves differently.
Move the reverb before the delay, and now your space smears in a new direction.
This is signal flow in action.
2. A vocal chain
Mic → Preamp → Compressor → De-Esser → EQ → Saturation → Fader
If the vocal still distorts even though the fader is low, the problem is earlier in the chain — probably the preamp or compressor.
That’s signal flow thinking.
3. A drum bus with parallel processing
Drum Bus → (Split) → Saturation → Compression → Blend Back
If your parallel channel is clipping, it affects the blend no matter how low the fader is.
Why? Because the clipping is happening before the fader.
Understanding the path solves the confusion instantly.
4. Sends vs Inserts
Track → Insert FX → Fader → Send → Reverb Bus
People often expect a send to behave like an insert (or vice versa), but they are two totally different paths. Knowing the flow prevents surprises.
Five Things You Should Know First About Signal Flow
1. The order of plugins completely changes the sound
A compressor before saturation = controlled harmonics.
A compressor after saturation = harmonics that pump and breathe.
Swap the order, get a new tone.
This is the #1 reason beginners feel “lost.”
2. Gain staging is part of signal flow
You’re not just adjusting loudness —
you’re managing how every device reacts.
Too hot: distortion or limiting you didn’t want.
Too low: plugins don’t hit their sweet spot.
Everything downstream feels different.
3. The fader is not the final volume
Many things happen before the fader:
-
clipping in plugins
-
clipping in the track input
-
clipping in the bus
-
clipping in the converter
If something sounds bad, look upstream first.
4. Sends and buses create parallel paths
Reverb, delay, parallel compression — these are new paths created alongside the main one.
If the timing or gain is off, you get phasing, smearing, or weird balance issues.
Understanding the secondary path solves 99% of these headaches.
5. The master bus is a funnel, not a magic fix
Whatever problems start upstream will amplify once everything funnels into your master.
A limiter can’t fix a bad internal signal flow.
The mix is only as good as the structure leading into that final bottleneck.
The second thing I’d encourage anyone to look into is to understand the nature of sound itself.
II. Sound Synthesis
Most producers jump straight into using presets, layering plugins, or tweaking random knobs without ever understanding what sound actually is. But once you grasp the fundamentals — what creates a sound, what shapes it, how harmonics behave, why envelopes matter — your whole relationship with sound changes. Suddenly, you know why something works, not just that it works.
It’s like learning the instrument instead of just picking notes at random.
A bit of synthesis theory goes a long way. It’s not just about modular synths. It’s a general understanding of the tools that enables you to dive deeper to control the sound you are trying to make.
What Sound Synthesis Is
Sound synthesis is the process of creating or shaping a sound by controlling its raw ingredients: oscillation, harmonics, time, and amplitude.
It’s a combination of:
-
generating a tone (oscillator),
-
shaping its tone (filter, waveshape),
-
shaping its movement in time (envelopes, modulation),
-
and combining layers of these elements to create texture.
Whether you use Ableton, a hardware synth, VCV Rack, modular gear, Serum, or a cheap subtractive synth — the underlying principles are the same. Once you learn these principles, every instrument becomes predictable and intentional.
Five Core Principles of Sound Synthesis
These are the fundamentals every producer should know before worrying about “sound design tricks.”
1. Oscillators are the source — everything begins with the wave
Oscillators generate raw waveforms (sine, triangle, saw, square, noise).
Each waveform has a different harmonic fingerprint:
-
Sine = pure tone
-
Triangle = soft harmonics
-
Saw = bright, rich, buzzy
-
Square/Pulse = hollow, reedy, dynamic
-
Noise = texture, transient energy
Understanding this removes guesswork when choosing the right starting point.
2. Harmonics shape the tone
The reason a piano sounds different from a violin at the same note is the harmonic structure — the number and balance of overtones.
Filters, wavefolding, FM, AM, and distortion all exist to add, remove, or bend harmonics.
If you understand harmonics, you can sculpt tone intentionally:
-
darker, warmer
-
sharper, brighter
-
smooth vs. metallic
No need to “trial and error” everything.
3. Filters are tone shapers, not “EQs”
Filters define character:
-
low-pass gives warmth
-
high-pass opens a mix
-
band-pass gives focus
-
notch creates space
-
comb filters create resonances
Understanding how filter slope and resonance interact is the difference between boring sound and expressive sound.
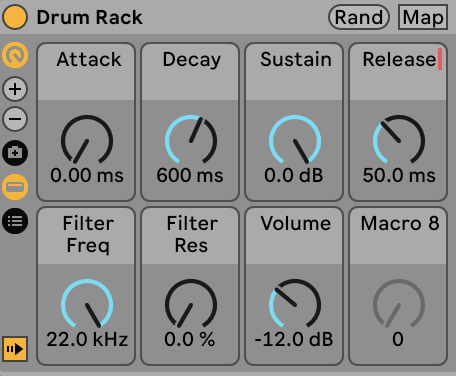
4. Envelopes define movement
A sound has a story: the way it starts, lives, and dies.
That’s all envelopes.
-
Attack: how quickly the sound starts
-
Decay: the drop after the initial attack
-
Sustain: the level while held
-
Release: how long it takes to fade
Get good with envelopes and your sounds suddenly feel alive — even with simple waveforms.
5. Modulation is where the magic happens
LFOs, envelopes, random generators, and velocity — these give sound animation, life, and personality.
Modulation can change:
-
pitch
-
filter cutoff
-
amplitude
-
timbre
-
panning
-
distortion amount
A static sound feels dead.
A modulated sound feels organic and expressive. Think of a robot talking compared to a human. We articulate our sentences, adding pauses, tense, accent and sometimes, even musical aspects.
Three Things to Know That Will Truly Make a Difference
These are the practical takeaways you want your readers to internalize through your learning in music production.
1. Choose the proper waveform first — it saves time later
Most beginners try to “fix” a wrong waveform with heavy processing.
Knowing waveforms and harmonics means:
-
better starting point
-
fewer plugins
-
cleaner results
-
faster design
Your choice of oscillator is 60% of the job.
2. Small modulation is as powerful as big movement
People often over-modulate everything. But subtlety wins:
-
tiny LFO on pitch = analog feel
-
slow filter drift = warmth
-
light amplitude modulation = grip
-
velocity → filter = expressiveness
Micro-modulation creates professional-sounding movement.
3. Every sound has a shape in time — define it
Static pads, lifeless basslines, or stiff leads often come from ignoring the envelope story.
Ask:
-
should it hit fast or slow?
-
should it decay?
-
should the sustain be steady or moving?
-
how long should the tail be?
Define the movement, and the sound instantly becomes purposeful. When it comes to Sound Synthesis, I had a class very late in my career, and as I went through the course, I realized it would have been a completely different story if I had known about it beforehand. But on the other end, it’s never too late. My experience throughout the course greatly helped, and it provided multiple clarifications on things I wasn’t sure about.
The course I refer to is by Sarah Bell Reid, which you might know. I absolutely recommend it. There’s also a mini-course she offers that fits most budgets.
III. Vocabulary (Related to music production)
This one is subtle, but absolutely essential.
Most producers don’t realize how much vocabulary affects their ability to create.
When you can’t describe what you hear — or what you want to hear — you get stuck.
You can’t communicate with collaborators, you can’t troubleshoot your mix, and you can’t even guide yourself toward the right decisions. Everything becomes trial-and-error.
Vocabulary is the bridge between your inner ear and your tools.
It’s not about using fancy jargon — it’s simply about having words for:
-
texture
-
movement
-
tone
-
emotion
-
rhythm
-
dynamics
When you can name something, you can shape it.
When you can’t, you chase random knobs hoping to get lucky.
Artists with strong vocabulary move faster, make clearer decisions, and collaborate better.
They also become better at evaluating their own work because they can articulate what’s missing or what’s working.
Three Ways to Improve Your Audio Vocabulary
These are simple, practical, and doable on your own.
1. Practice describing sounds in plain language
Pick any sound — a snare, a pad, a field recording — and write down three adjectives:
-
sharp
-
airy
-
glassy
-
warm
-
brittle
-
hollow
-
booming
-
velvety
-
dry
-
smeared
This exercise trains your brain to connect perception → words → decisions.
The more you do it, the faster and more accurate you become.
2. Compare similar sounds and name their differences
Open two presets, drop two kicks, or play two basslines and ask:
-
Which one is brighter?
-
Which one has more attack?
-
Which one feels more stable or more wobbly?
-
Which one has more weight, body, or grit?
Contrasting music production language is one of the most powerful ways to expand vocabulary.
3. Read plugin manuals, synth descriptions, and mixing books
Not to become a textbook nerd — but because manufacturers use consistent terminology.
Words like:
-
transient
-
resonance
-
compression ratio
-
saturation
-
flutter
-
timbre
-
diffusion
…start to become part of your thinking.
Over time, your brain builds a map:
words → concepts → tools → actions.
That’s when your production becomes intentional instead of accidental.
What matters less than you think
If you are into music-making, you might have learned a few things along the way, or perhaps you are new to it and have heard that you need this and that to sound “good,” but it’s not that straightforward.
1- Mixing and Mastering
What I want you to know here: Mixing and Mastering can determine the success of a song but it is not something you absolutely need to know (to make music in the first place). These are long-term goals, and working with a professional will make a valuable impact.
This might surprise many people, but let me clarify why I think those are not as important to master. First and foremost, if you know about signal flow as well as sound synthesis, you’ll be using sounds in a way that will make mixing feel like a task that doesn’t exist.
The myth about mixing is that it must be done once the arrangements are done. With this in mind, many people dread that moment, pushing it off as late as possible, which also means they’re just going to have problems down the road. To me, mixing is not a phase but a process that unfolds as you go, with issues fixed as they arise. This means the real mixing phase will come down to a few final decisions on the tone, impact, overall feel, and cohesion of your song.
Mixing will not save your song if you started with the wrong elements, programmed your patterns poorly, picked poor samples, and arranged your sounds erratically. The more you understand sound, the better the decision and the less work you have afterwards.
Mastering is misunderstood by many. When I meet someone who has just started music production and explains they want to learn mastering, I get a bit confused. Mostly because mastering means preparing the master copy for duplication and making them understand that they’re confusing mastering with gain staging, which means they want to learn how to make their music sound loud, which in itself is NOT mastering. This is not important if you know signal flow, do your gain staging as you go and resolve the various flaws that prevent your song from sounding loud.
TIP: If you have a lot of processing on your master bus to compensate for the lack of loudness coming from your busses, your gain staging is flawed.
2- Knowing Every Plugin or Effect Inside Out
Producers often believe they need:
-
the “best” compressor (hello Black Friday madness)
-
the newest synth (Magpie mentality)
-
200+ plugins
-
perfect knowledge of every feature
- Hardware, gear – let’s not even go there.
But knowing plugins deeply doesn’t automatically make you expressive.
It just makes you efficient at navigating tools.
Most iconic music was made with:
-
one compressor
-
one delay
-
one reverb
-
one synth
-
minimal processing
Because expression comes from choices, not from catalogues of gear.
Someone with strong musical intent and weak plugin knowledge will always out-create someone with encyclopedic plugin knowledge but no inner clarity.
At best, plugin expertise makes the workflow smoother.
At worst, it becomes procrastination disguised as “research.”
Reading that Aphex Twin recently shared that he often feels he doesn’t really know what he’s doing felt liberating.
Creative expression happens before technical optimization. If you understand Sound Synthesis, you’ll recognize that all plugins use the same mechanics. Knowing them gives you a free pass to understand them in a music production context.
3- Understanding Advanced Genre-Specific Techniques or Trends
Producers spend a lot of time thinking they need to master:
-
complex sidechain tricks
-
mid/side voodoo
-
multiband madness
-
exact kick lengths for Beatport subgenres
-
transient shaping “recipes.”
-
hyper-specific mastering curves
-
mix tricks from producers they idolize
But none of these skills help you:
-
find your sound,
-
build a meaningful idea,
-
express emotion,
-
or tell a story through sound.
These are music production polishing tools— valuable but secondary.
They become useful only once the musical core is already strong. See them as the core of music production.
Musicians who rely on trends usually end up with:
-
derivative design
-
sterile music
-
creative paralysis
-
constant doubt that they’re “doing it right.”
- In the long run, it sounds gimmicky.
The truth is:
Expression doesn’t come from trend literacy. It comes from understanding sound and intention.
If you know the basics — signal flow, synthesis, vocabulary, gain staging, musical structure — you can create in any style and adapt quickly.
If there’s one thing the last three decades of music-making have shown me, it’s that the artists who endure aren’t the ones who obsess over technical perfection — they’re the ones who understand what they’re doing and why. The ones who build a relationship with sound instead of chasing tools. The ones who stay curious rather than anxious about whether they’re “doing it right.”
Music production isn’t unimportant, but it’s not the core of what makes a song powerful.
What truly moves people — and what makes music memorable — is the idea, the emotion behind it, and the clarity of intention that carries it from your inner world into the speakers.
When you understand signal flow, sound synthesis, and how to name what you’re hearing, the technical side becomes lighter. Decisions become faster. Problems shrink. Mixing becomes a formality rather than a mountain. And suddenly, the whole process feels more like making music again — not fighting your DAW.
If anything, I hope this reminds you that you already have more than you think. You don’t need every plugin, every trick, or every secret YouTube hack. What you really need is a deeper understanding of sound, a more precise vocabulary, and a sense of direction.
Music has always been about expression first, technique second.
Master the fundamentals, trust your ears, and let your ideas lead. The rest will follow.

/indigomusic/media/post_attachments/wp-content/uploads/2025/02/The-Vitruvian-Man-and-the-Golden-Ratio-A-Mathematical-Masterpiece.png)