Slice Everything
After a few years of pausing teaching 1-2-1 beginner’s classes, I took a few lately to get back in touch with how it feels when you start making music. One of the reasons I wasn’t taking beginners was that it became redundant to me, and I preferred taking intermediate to advanced producers instead because of the challenge and because, at that level, different problems require some creative approach. Beginners require guidance, help with navigation, workflow, and debunking myths about music making and basic concepts. At the same time, I now realize that I take the challenge differently; I aim to teach them the most with as little as possible.
One approach I take is to see their progression with levels, like video games or Dungeons and Dragons (if you know me, I’m a big D&D fan, playing weekly). In this post, I’ll approach one technique people are constantly overlooking, and whatever level you are, it is undoubtedly something to apply: Slicing.
Sampling, Resampling and Hip Hop
At a beginner’s level, people are looking to familiarize themselves with the tools and navigation of Ableton Live (or DAW). I always insist that if you focus on hardware, you go back to a DAW, as there are a lot of concepts to learn first, and using a computer is far simpler than learning gear. Part of that navigation includes using clips, loops, and simple sounds and building songs with those to understand how arrangements work and simple theory.
At that level, you can’t yet aspire to sound like what you hope for, nor does someone who plays the piano for the first time practice scales. If you want to make songs, you need to practice making songs out of whatever you find. But sampling, resampling and remixing can go a long way. Some producers make a career out of those techniques.
Everyone wants to make songs but no one want to learn how to make them. They all want to skip the practice because they think they have it all figured out.
Hip-hop is a good example. The philosophy and basis of production include sampling old records or any music whatsoever and arranging them, often on an MPC. The logic comes down to “grab and juggle, rearrange to taste.”
Creatively, it is the ideal ground-breaking approach: You take what you love and then arrange it in your way.
I’ve been following this artist, Jon Makes Beats, who applies this efficiently. He often samples records, usually quite corny (apparently many of them were bought at a Salvation Army for a few bucks), rearranges them, adds beats (often from rearranged loops), plays some notes on top, and then booms (usually presets, which he says he’s okay with)—all that is recorded in one shot. To me, this feels like perfect, successful studio time.
Watch all his videos, and it’s impossible not to get inspired by the simplicity of his approach. But also, he has some good, down-to-earth tips that are aligned with mine.
The central concept is simple: once you have your samples, you have the material to tell your story in another way. I’ll share some points and ideas for you to try.
Numerous notable artists have made amazing things with samples, but two who come to mind are the Beastie Boys and Daft Punk. In the Apple TV documentary, The Beastie Boys share how one of their early hit songs relied on three samples as the basis; the rest was a drum machine and their rapping. On the other hand, Daft Punk layered multiple little samples from various records to achieve a song. Those 2 are good opposite examples, but both did so much with taken ideas used creatively.
Creating your own Slicing preset
I wasn’t super happy with the sampling presets in Ableton Live, so I created my own. When I slice a loop, I want, by default, access to a specific macro mapped to what I usually use.
First, if you’re unfamiliar with slicing, you can do so by taking any loop you have, and then, when you right-click, a menu will appear. From there, you pick “Slice to Midi Track.”
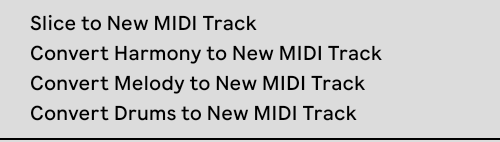
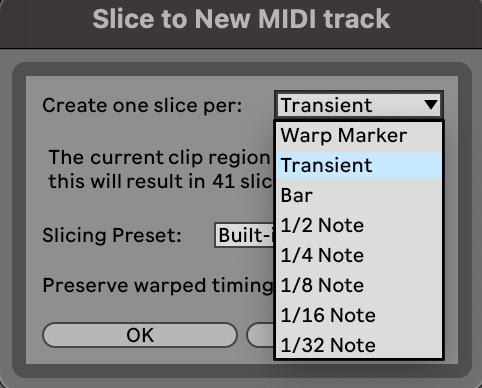
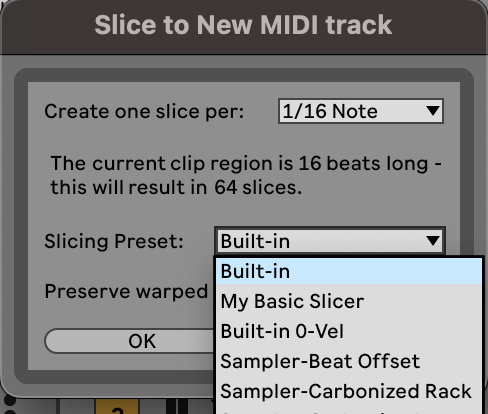
Then, you’ll be prompted on what preset to use for the slicing.
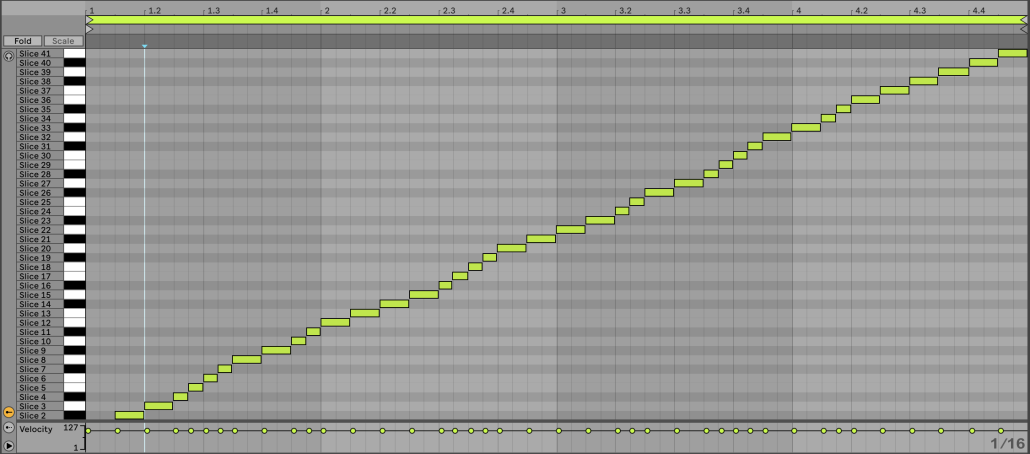
You’ll then get a drum rack with each sample (slice) assigned to the rack’s pads. A Midi clip will also be generated with a note pointing to a specific slice. If you play the clip, you’ll hear your original clip, but now you can rearrange the clip so the notes come in a different order. You can also pick one sample.

They’re all OK for vanilla slicing, but the rack’s macros feel underwhelming. Making your preset is so easy and fun that I’ll explain how I made mine so you can do your own.
Create your slicing preset
First, open an empty MIDI channel.
Second, place a Drum Rack and add a Simpler on the C1 pad.
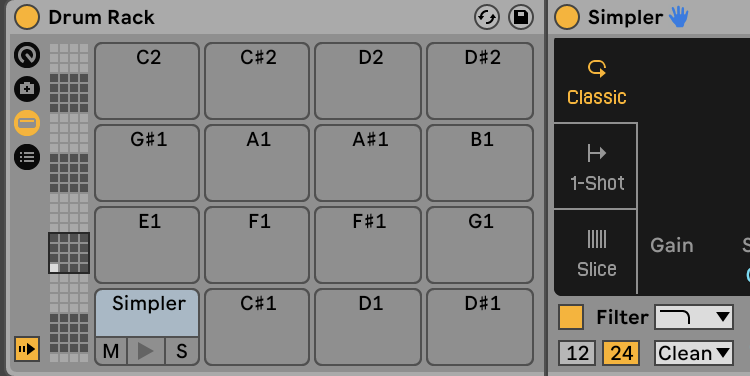
Third, you can map some parameters of the Simpler to the Macro-knobs of the Drum Rack. This means that when you slice your clip, each slice will have its own Simpler, but a simple mapped knob will control all of the same parameters. This has pros and cons. On the positive side, this means that you can, for instance, maintain the length of all the slices, making them short or long. But if some clips are intended to be short while others are long, that can be tricky.
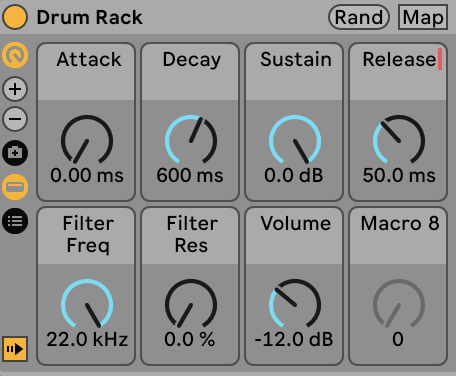
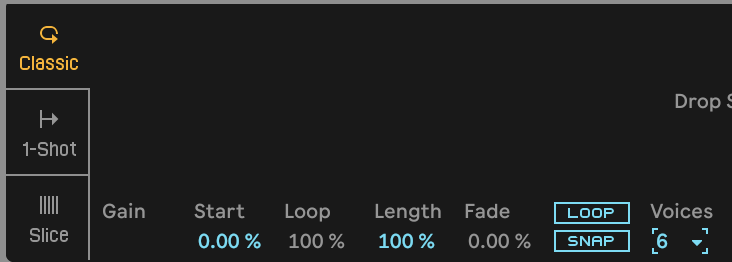
Some of my knobs are controlling these parameters: Attack, Decay, Sustain, Release, Volume on the lower right side. Then, the Filter’s Frequency and Resonance. Make sure that you uncheck the Loop and Snap options.

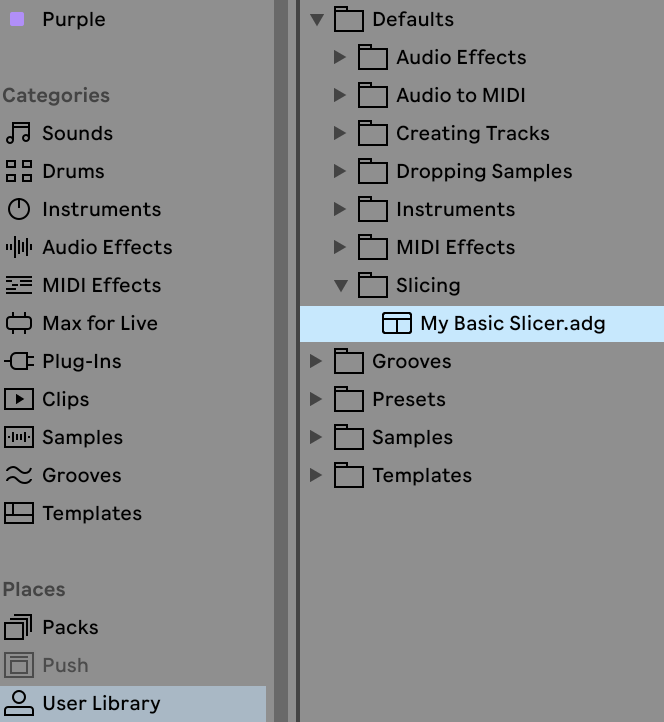
The last step is to save this new preset in the right folder so it can be used in the slicing option.
You drop the drum rack in the User Folder, under Defaults, in the folder “Slicing.” You can then rename it whatever you want, like mine below, “My Basic Slicer.”
If you slice a clip to midi, your new preset will appear in the list.
You’re now set to go!
Now, let’s do a few little experiments.
Slice the Ugly Into Beauty
Sometimes, you might have bizarre and ugly recordings of a synth or perhaps a dissonant effect. I’m particularly interested in those because you can get some unusual melodies or percussion once you slice them. I find there is something poetic in transforming something you’d automatically discard and finding a new, unexpected life.
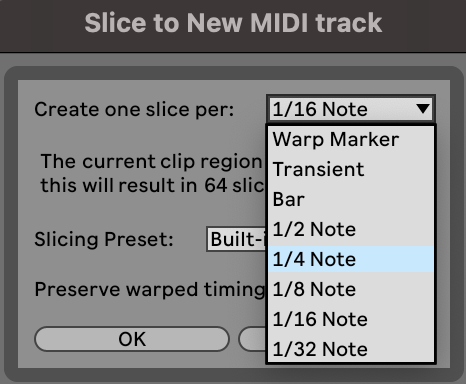
One issue might be that it might not have transients to be detected, so you might want to slice it into forced regions. I’d encourage you to try different settings, but it could be 1/4 or 1/8, depending on your desired size. Ensure the sample you’re slicing isn’t too long; otherwise, you’ll end up with too many slices, which won’t be interesting to work with.
From there, you can see what slices came out, modify the length, and discover new patterns.
TIP: You can try a sequencer before the drum rack to generate sequences without the MIDI clip. Some fun sequencers exist, such as Rozzer and Snake.
Slicing Melodies
This technique comes from Hip-Hop. They usually slice a melody into more extended regions and then, by playing a MIDI instrument, play the song with a different articulation or change the order of the notes. But you can also take a more abstract approach, have shorter notes, play them randomly, and see if it makes sense.
To do this, people would select a region size that is 1/2 or 1 bar long. But if you’re into Micro-House music, you’d go for tiny regions.
TIP 1: Get a MIDI controller to experiment with playing the regions.
TIP 2: Use the internal LFOs of the Sampler to add some life to your sequence.
Swapping Sounds
In Ableton Live 12 (if you have it), the drum rack has a new option that allows you to swap all sounds for a new selection of similar ones. This can be a rabbit hole because you’ll start with a few sounds, and then you’ll end up discovering plenty of alternatives. You can lock some sounds you like and then dice roll the other out.
To do this, you’ll first need to go into the sample list and consolidate the slices; otherwise, they won’t be detected as single slices.
TIP: Whatever slicing you do, if you use transient mode, mainly for anything percussive, you’ll have a midi DNA of where each transient falls on the grid. You can also use one slicer’s midi and pass it to another. This means that the rhythm of one slicing pattern can trigger the order of another. This leads to rearranged sequences and a fun, unsteady swing.
Third-Party Samplers
It’s also fun to explore third-party VSTs beyond Ableton. There are quite a few out there, but I’ll share my favourites. Not that you won’t be able to create a slicing preset with those. The slicing presets can only be made with the native sampler/simpler from Ableton.
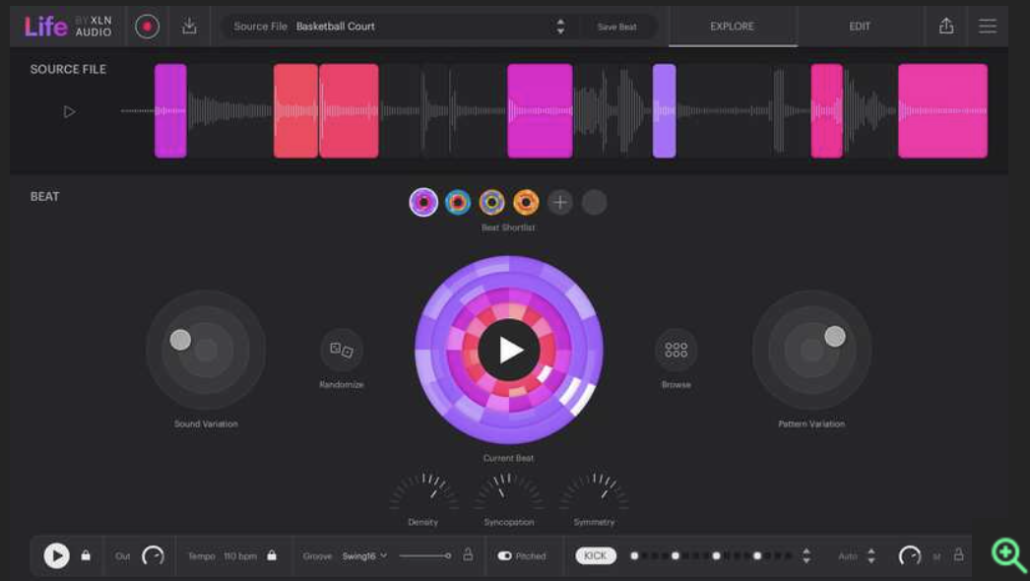
Life / XO
This plugin is XO’s little perfect companion. If you don’t know about XO, it’s probably one of the best drum machines and samplers. XO excels at creating percussive sequences, giving you variations with sounds and patterns. It also visually organizes your collection of samples by category and family, allowing you to find similar samples quickly. Life takes this to another level where you can resample your samples internally and then create new sequences out of them but with many variations options. It also has this option as an app on your smartphone to record sounds anywhere and then link them to your DAW. It is awe-inspiring.
TIP: Use both with automation to really bring your sequences to life.
TIP2: These are essentials if you have the budget.
Serato Sample
For DJs to play their sets digitally, Serato has been around for a while. It started with a Vynil encoder where they could beat-match music from their computer. This evolved in 20 years, and now digital mixing is a standard for many. DJing for hip-hop artists who do DMC scratching competitions is an art, and Serato developed a sampler version for artists who want to explore sampling parts in production. This plugin is highly rated because it offers simplicity and easy workflow.
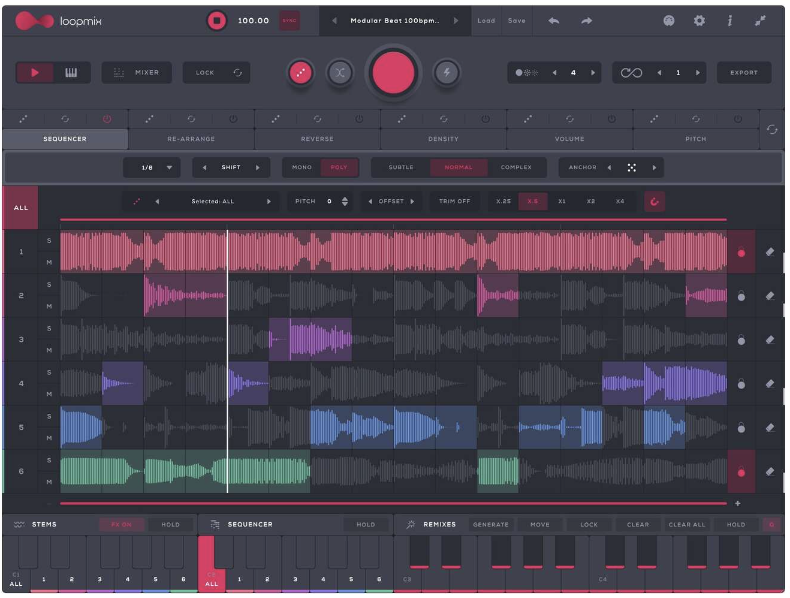
Loopmix
The guys at AudioModern have a series of excellent studio tools I use regularly. Loopmix is quite fun as it’s designed to be used with loops. The idea is to use multiple loops (ideally, it works better with percussion), and then it will slice them to recreate new sequences, blending the different sources. It’s pretty impressive what you can do with this live but also in the studio if you want to recycle the loops you have.
Dawesome Novum
I’m not too familiar with this one, as I only saw demos, but from what I understand, it decomposes the samples into layers. Instead of slicing them in time, it does it on a spectrum layer. This means you can decompose your sample into layers. It’s on my wishlist, and I’m resisting trying the demo because I know I’ll buy it in a glimpse. This is the kind of tool you’ll want if you love drones, textures, moods and anything ethereal sounding.
I look forward to hearing what you’ll do with this technique. Please share your experiments.


Leave a Reply
Want to join the discussion?Feel free to contribute!