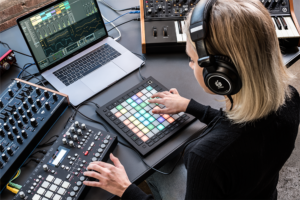
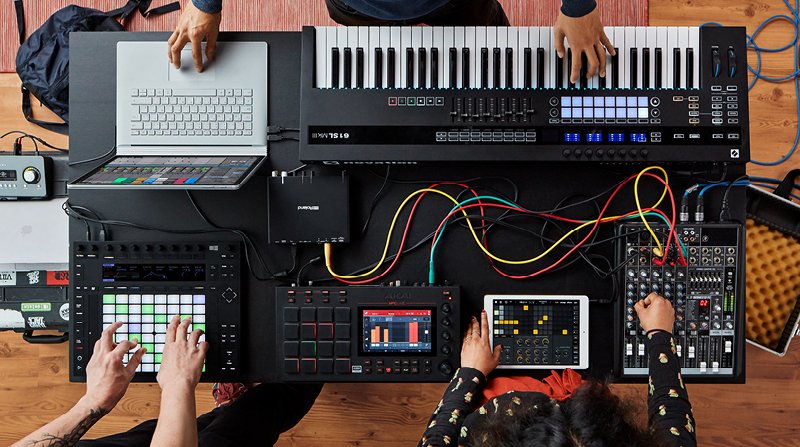
Ableton-Hardware Hybrid Setup
Producers often get comfortable in the computer and feel they are not getting enough, so they decide to invest in hardware.
Once you get good at something, it’s only natural to want to upgrade to the next level. You may get that feeling that you aren’t getting enough out of it, or that the medium is limiting in some way. With my students, often this feeling means leaping from a DAW like Abelton to a hardware-based setup.
They often think that by doing so, they’re going to unlock a richer sound, and a more intuitive, instrumental interface. They believe they will be liberated, able to just jam out compositions without having to rely on an “unnatural” mouse click or MIDI mapping inside a DAW.
The truth is that once they make this leap, and ditch Ableton for an Electron Octatrak, and a modular, they often find themselves being even more limited by the foreign user interface and the fact that modular doesn’t have an “undo” button, or patch saves.
That’s why I always recommend that they use an Ableton-hardware hybrid setup that incorporates the best of both worlds, where the tactile, plug and play nature of hardware meets the convenience of being able to easily save, and revert back to settings on the computer.
Over the years, I think I have a pretty rounded philosophy of how to tackle this integration, which I would like to share with you in this post.
However, let’s talk about hardware first, so that you can understand its strengths and weaknesses.
Myths About Hardware
It automatically Sounds Better
Just because something is hardware, doesn’t mean that it’s going to mythically sound better. In some cases, analog summing can fix some issues and enhance certain things but it can also be sounding different than digital and since our ears are used to the digital realm, it might be misleading. It’s not 2005 anymore; virtual instruments have grown leaps and bounds over the years. Even to a trained ear, it’s hard to tell the difference between an emulated TB303 and the Roland Cloud version. Analog does have charm and specific texture but it’s different than digital. Some people get confused once in front of certain pieces of gear.
However, there are things that happen with the sound in hardware that is difficult to emulate in software. For instance, the “ghost in the sound’ – that almost invisible hand that creates random, happy accidents due to the fact that you are working with pure electrical current, rather than a binary representation of it.
This “hand” often results in sounds that are impossible to replicate, existing for only as long as they project from the speakers. To me, this is the magic of hardware – that unpredictability that exists for a fleeting moment, until it’s gone, never to be heard again, unless you capture it.
In other words, analog has a sound that digital doesn’t have and that’s an aesthetic that pleases many people. Believe it or not, some people really do prefer the digital sound, mostly because our ears have got used to it.
However, what is this capability worth, if you can’t capture it properly? That’s why it’s imperative when buying hardware that you also buy a solid audio interface to be able to record the sound at the highest fidelity. Because at the end of the day, your hardware will only sound as good as the weakest part of the chain.
It’s More Intuitive
This is another fallacy. If anything, analog hardware can create a new set of problems, with the main problem being that you can’t just pull up a setting or patch. You also can’t revert back to a previous setting if something gets all messed up.
Instead, you have to work backward in order to figure out where it went wrong. And if it’s analog, chances are that due to the “ghost in the machine” you won’t be able to get back to where you were. This results in endless hours of fruitless tinkering.
This also poses problems for live performance as well. I remember when I was performing at MUTEK with a modular setup. I was in the middle of soundcheck, jamming on my modular, getting lost in the frequencies. Then at the end of the check, I realized that I had to repatch everything back to where I wanted it for the beginning of the set. It was frustrating, to say the least. On a computer, I could have just reloaded the project.
If you’re allergic to the mouse and sceen, perhaps hardware might be closer to your needs but it doesn’t mean it will be easier.
It’s DAWless
What is an MPC, Octotrak, Deluge if not a Digital Audio Workstation? They are digital, process audio, and they are a workshop. If anything, you are just substituting an intuitive interface that looks like a laptop, for a complicated interface that looks like a box with buttons on it (wait, isn’t that what a laptop is; just a box with buttons?).
If you can’t stand the aesthetic of a laptop and want something sleeker, then that is your right as a creative. Just know, it’s way harder to drop a drum sample into an MPC than Ableton assisted by a Push or Maschine. If you hate the look of a laptop on stage, disguise it in a case.
How To Get The Most Out Of Your Hardware
Learn One Piece At A Time
People will often buy a lot of gear all at once without understanding their needs. Unless you are copying someone’s setup exactly from a YouTube video, and want their exact same sound, chances are people want their own thing to fit their artistic vision.
So people will often be like ok, I need a synth, a drum machine, a set of effects, and a “brain” that I can route this all into. Then they set this all up, and realize that they are totally overwhelmed and have no idea how to use it, because there is no blueprint for it.
That’s why I recommend starting out with one piece of gear and getting really good at it. Once you know how it plays, then you can start thinking about the next part of the chain.
So, let’s say you start with an analog synth. First, you must understand where all the filters are, and what they do. Understand how the oscillators sound, and how you can route them. Then you can consider your next addition.
So if you got a synth, the next thing you’re probably going to want is a way to sequence it. That is often a drum machine with a VC gate that can signal the synth to play (or not play) certain parameters. I recommend Beatstep Pro (Arturia) or Pioneer DJ Toraiz Squid. Of course, there are many you could add but those 2 are very versatile and fast to learn.
Once you figure that out, maybe you want an effect in order to get some more character out of the synth. Make sure that the effects that you buy are exactly what you want by testing it on the sequenced synthesizer. If they don’t create exactly what you want, then get new ones. No need to move on until you figure this out.
By moving on too soon, you may just get tangled in your new setup, and not realize how to use it. Now you’re $5,000 deep into a headache, and not any more or less creative.
However, if you understand your pieces inside and out before expanding the chain, then you will run into fewer obstacles.
Record Everything
Remember, often with analog hardware, what you made will only exist at that moment. You may never be able to record that again. Therefore, make sure that you have plenty of space on whatever device you are recording onto because you should be recording nearly everything.
This works especially well if your creative process is to create a bunch of loops, and then assemble your loops into a song.
Truth be told, hardware doesn’t require endless MIDI mappings, and clicking, and is more instrumental, in a lot of ways. The knobs are properly dialed in with the circuits, and the keys are weighted to interact with the synth in ways that a standard MIDI controller may not be. Therefore, the loops that you create may very well be more interesting than anything you could have made with a soft-synth.
Make Sure Your Recording Is Clean
Like I mentioned before, you need a good audio interface. I recommend Focusrite Scarlett or SSL2. These record at a high sample rate, and will capture the purest representation of what’s outputting from your setup.
Also, you have to record it properly. Therefore, the signal has to come as close as possible to 0dB because the noise floor will always be the same on hardware. So if you’re recording at -6dB as you would with digital instruments, when your hardware recording is loaded into your “brain”, it will not seem loud enough in many cases.
That’s because -6dB in the physical world is quiet. So, naturally, you will turn it up. However, when you turn it up you add 6dB of noise to the recording. Maybe you want this noise, but it won’t be accurate to the fidelity of your original recording. Therefore, always make sure that when recording, that it is as close to 0DB as possible.
Realize You Will Be A Noob, Again
Just because you were a proficient Ableton user, doesn’t mean you will be a proficient hardware user. You will have to pick up the user manual again and start watching copious YouTube videos in order to get back up to speed.
Your first stuff will probably sound terrible. This may be discouraging, but this is the reality you will have to accept. Just because you made electronic music “in the box”, doesn’t mean you will be able to “out of the box”
How To Get The Most Out Of An ABleton-Hardware Hybrid Setup
For the sake of this article, we’re going to assume you’re proficient with your DAW. In this article, we’ll use Ableton as our primary example.
Play To Each Other’s Strengths
The goal with a hybrid setup is to buy what the computer can’t give you, and/or compliment what you’re doing on the computer with hardware.
As you know, the process in Ableton is pretty intuitive, and not destructive in nature. If you screw something up, you can always undo, or revert to a previous version of the project.
It’s also way easier to visualize a song’s arrangement on Ableton than it is on an MPC.
However, perhaps you like the playability of the MPC. Well, there is a solution to that – it’s called Ableton Push. I use it for basically everything; it’s amazing. It adds that tactile instrumentation that’s missing when dealing with a mouse. Additionally, all its MIDI mappings are designed to be standardized and intuitive with Ableton.
Use Ableton As A Band Member
A good way to use Ableton in conjunction with your hardware is to use it as a session musician/band member. Write out a basic structure of a song on Ableton, MIDI clock it with your hardware, and then route your hardware into channels, and start jamming. Inside Ableton you can also create some complex effects chains that can modulate the hardware in unexpected ways, giving you something entirely fresh.
Use Ableton To Preserve Sounds
Another way you can use Ableton to compliment your hardware in an Ableton-hardware hybrid setup is to be able to have multiple versions of the same project that contains all the hardware loops that you recorded. Since Ableton’s environment isn’t destructive to waveforms like something like the MPC would be due to its limited hard drive space, you can modify the waveforms, without having to have multiple large files. Instead, you just have individual projects for different versions of the recording.
Split Your Time Into Technical And Creative Sessions
This kind of works whether you are pure hardware, or using an Ableton-hardware hybrid setup. The fact remains, whenever you are integrating analog gear, there will be a setup process. You can’t just load settings. So you have to get all your patches set up, your effects set up and properly bypassed, your sequencer running, and your patterns in order. You then have to make sure that everything is playing back close to 0dB to avoid the dreaded noise.
This will consume a good amount of brainpower.
Therefore, once this is all ready, make sure to take a break. Go drink a beer, meditate, exercise, or do whatever you do to reset your mind.
Then come back and start jamming and being creative with your Ableton-hardware hybrid setup.
MIDI Controllers Are Your Friend
MIDI mapping is really easy on Ableton. Sure, it takes a little bit of time to set up, but it’s often nothing compared to the amount of time you will be tweaking hardware to get a similar result. Therefore, get some MIDI faders and knobs to control some internal processes in Ableton.
MIDI will create that tactile sensation that hardware provides. The Push is, once again, a great way of accomplishing this, since it’s intuitive with Ableton. However, some people don’t want to spend that much money on a MIDI controller. In that case, there are dozens of great controllers out there that allow you to essentially create your own instruments on the fly.
Some suggestions: AKAI midimix, Novation Launch Control
These mappings will also affect your hardware as well, since you can map them to different internal faders that change the sound of the hardware, such as channel volume, or surgical EQ parameters.
Ultimately, do what works best for your creative process. These are just my recommendations from my experiences using both exclusively, and then integrating the two. Just remember, there is a learning curve with everything, and things that were true for one, will not be for the other. There is no magic bullet when it comes to making music. Hardware won’t make you amazing, software won’t make you amazing. Only talent and dedication will.
Some links contain affiliate offers.