What Izotope’s Ozone Series Doesn’t Consider
It was a great surprise to see the release of Izotope’s new Ozone and Neutron update last week. Since I use both products, often I immediately got started looking for whats new.
There will undoubtedly be a ton of new tutorial and youtube review videos posted of these tools, but I want to approach this post around how I use these plugins, and also mention a larger problem I find all too common within the production of software, and an issue I feel Izotope’s Ozone series doesn’t consider.
But firstly, let’s talk about where Izotope really succeeded.
The sound. I can’t put my finger exactly on it, but to my ears, there is a noticeable improvement of the sound quality in Ozone 8. Perhaps it’s an oversampling issue or something with the filters, but the sound is tighter, bright, and more precise over earlier versions.
The workflow – Ozone 8 comes with several new features that provide a faster way for me to achieve the sound I want. The maximizer now includes a loudness target and the reference addition to comparing the versions via the tonal balance control.
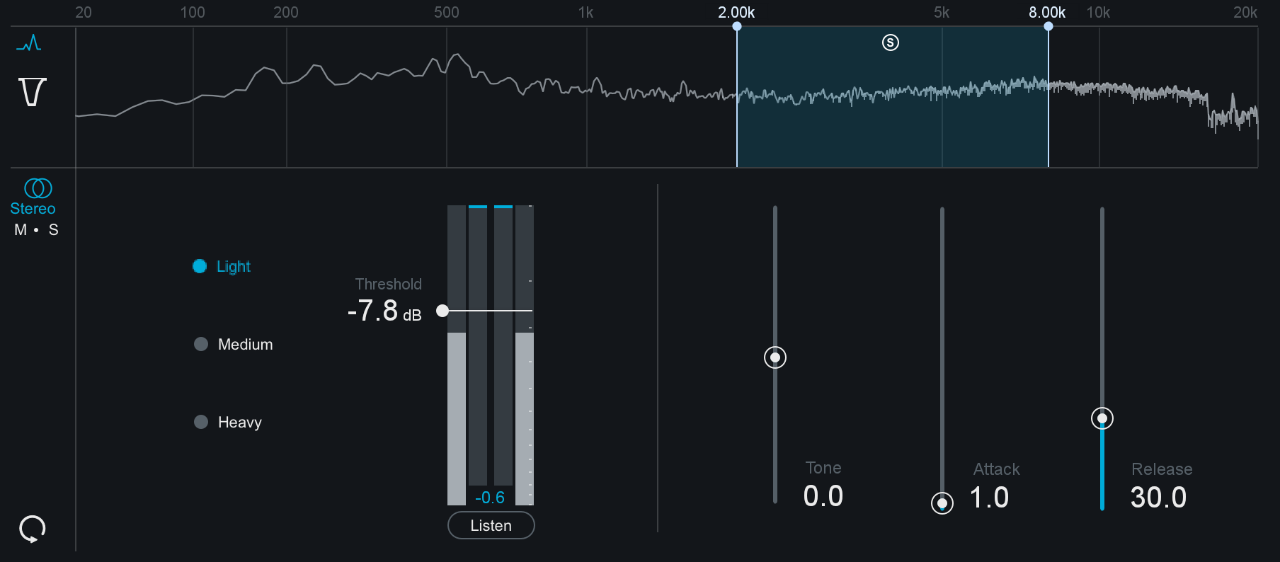
Tonal Balance. A fascinating tool that allows you to visualize the frequency levels of your track, and will enable you to match to eq targets from a specific genre of music. Having visual feedback of where your tonal balance per frequency is, and easy access to eq those levels is a great and fast way to achieve a professional sound. I did some testing earlier today and found the target system pretty accurate, but in the end, I found the target ranges slightly off for the lows and highs (see below in my low points).
 Visual Mixer. This is the bomb within Neutron 2, and for that feature alone I’d buy the entire package. The visual mixer allows you to place and position your tracks visually across the spectrum, (volume, pan, and width). It’s a beautiful process, and the edit window looks super sci fi and modern. If you work with multiple channels and often have mono tracks this is simply a killer addition. One of the things that blew my mind was that you can actually automate the panning, which opens the doors to many exciting and beautiful options in sound design.
Improved Mix assistant. I really like the mix assistant by the way. I’ve heard many people mock the process, or are jaded to the idea that it’s impossible for AI to do a man’s job but honestly if the assistant can pull up all the tools I need and set the table for me to tweak fast, you won’t hear me complain.
Communication between plugins. This feature is really cool. You may adjust EQ from one window on another incoming channel, which is reflected in other instances of the plugin. This is super useful when you want to tame the relation between kick and bass as you want to be EQing side by side, both channels. It works and looks seamlessly.
In the end, I’m really loving the update from Izotope and will be using many of the new and improved features. I also want to take a minute to point out a criticism I have with Izotope.
Generalization of customers – It’s unfortunate that I find many large, corporate companies narrow down potential customers into three simple types – pop, edm, and hiphop. I see how that makes marketing more manageable, but what about producers like me who are creating and working on underground and experimental music? I say this because many of the new tools shipped with Ozone and Neutron are built with presets as starting points to mix and master only three types of music. I my opinion, this is quite limiting, and the fact that you can only refer to 3 types of tonal shapes is, to me, a complete fail. It reminds me of LANDR giving only 3 types of loudness range. It’s disappointing because I feel like this software expects you to be either this or that, which is clear from the design of the genre-specific presets – as if there are no other types of musician in the world??
What Izotope’s Ozone series doesn’t consider is people like me, and many friends and colleagues of mine, who make our living from creating music, and don’t fit into the standard pop, edm, or hiphop category.
 CPU hungry. I have a newish MacBook, fully geared up for performance, and while running several instances of Ozone my entire screen began flickering and making strange glitches. Izotope support claimed it was likely my CPU over-loading, however, I was only using 5 Neutron and 1 Ozone 8 instance, plus visual mixer. If my custom built computer is hit hard with CPU usage imagine how will the average Joe deal with such demands on the processor.
This goes along with the new mastering plugin by Eventide, Elevate that is so power hungry that it’s barely usable. Funny enough, a few days after Ozone 8 came on the market, Eventide droped the price of its plugin by 50%…
Still, in my opinion, the updated Ozone suite is a serious tool to consider having. It really delivers impressive quality sound. As always, I want to hear about what you think about these tools and feel free to leave a comment below and share your opinion.
Cheers,
JP