What Makes A Difference Before Mastering

I often explain to clients, almost daily, that a good master starts with a solid mix. Therefore, I thought I’d list what actually makes a difference for me when I get files to process. This article will also talk about certain things that producers do to their tracks that they think will make the job easier for me, but really, they just end up making me work hard.


I would like to start with what is obvious to me but seems to not be for many clients, which is about how people listen to their music. Many times, people send me a song that will have issues related to how their studio is set or because of a lack of understanding about how their studio translates to the outside world. If the way you listen to music in the first place influences how you perceive it, it is clear that you’ll misunderstand the song you will get, once mastered. When I get feedback from a client that their song has a tone-related issue (too bassy, too bright), I will always reply with “compared to what?” Because in the end, that’s what it is – a comparison. You will always have some people comparing you to other things and the definition of perfection is extremely arbitrary. That’s why it’s always a good idea to provide me a reference. 


Every mastering engineer has their own touch, therefore the idea of working with a mastering engineer is directly related to how you like their work. The engineer will work with a definition of what they think works best for what you have, related to a genre, within a range of technical points that will make the best out of it. Therefore, the first thing that can make a huge difference is trust. When you have your song done and need the last touches, there can be some wild differences, but in the end, it’s about communicating your vision and hoping the engineer can manage to do it. I often get people sending me files and asking me if they’re ready for mastering to which I always tell them that the best way to know is to do tests, where you send me a version to master, and I see how your mix translates after the process. This is, to me, a huge step to build trust.


Obvious Technical Details


These have been discussed inside out. They’re also covered on pretty much any mastering sites or forums. However, I still get files prepared wrong. Some people forget, but there are also some people think they know better too, so let’s see once more, here:


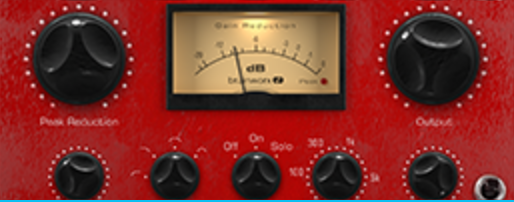
  • No compression or limiting on the master bus: If you have your gain staging done properly, there will be no need to really have compression on the master as your loudness and density will be already solid. If you want to glue things all together, leave it to the engineer. If you want a certain vision, bounce a home master as a reference. A limiter is useful during production in case you get hot and push things a bit. Still, for mastering, you need to remove that tool because otherwise, it creates some intense processing on your transients and density that will be problematic for mastering. Note that many use limiters within the mix itself, either on the low-end buss or percussion, which is ok but sometimes can cause distortions too. Also, be careful with saturation on the master. Many people actually mess up their mixes that way – a 3-5% of wet factor of saturation may feel huge once mastered, so treat it with care.


  • Headroom: The usual requirement engineers will ask for is -6dBfs but nowadays, I’m cool with -3dBfs too, as long as there’s no limiting on the master 0and the transients are healthy looking.


  • Resolution and sample rate: This keeps changing but I find that the bare minimum is 24bit, 48khz. Some people send files with better resolution than that but on my side, I run most of my sessions in 96khz to get the best headroom so I can deal with pretty much anything. Of course, files have to be in stereo, wav or aiff.


These points are easily handled by most clients. If you aren’t sure of one of these points, you’ll easily get answers on forums or straight from a Youtube tutorial. I would say I often get files that don’t meet those requirements, but often we can easily fix them.


Average Level Technical Details


This is where things get messy. It’s what I would call, mostly average level. Meaning that new producers will have some difficulty with these but if you’ve been making music for a few months, and finished a bunch of tracks, you’ll probably run into some of these issues and the lack of experience might lead you into trying different things. It takes time to really pinpoint how a mix will translate after a mastering. It comes down also to your pick of engineer, their aesthetic and communication with you. Of course, the more you work with someone, the more they’ll know what you expect. Most of my recurring clients never ask for a revision because it comes as they want.


Advanced Technical Details:


  • Loudness. This is where many people are confused. There’s a difference between the peak loudness and the density of a song. I’d encourage you to get a loudness measuring tool and look into the LUFS indicator. 


If your track is at t -6dB, it means that I will need to add 6 dB gain as I’m trying to get it as close to 0dB as possible. In order to do this, I will need to boost the density to match other songs on the market. If your song is close to 0dB without density measures, it probably means that it’s not loud enough. 


There are multiple ways to boost the density such as saturation and compression. Sometimes, people wonder why their song is compressed and the reason is always about matching loudness. We can’t simply boost the gain, that won’t be enough. That said, people need to do their gain staging properly. I can’t explain in this post how to do it but there are multiple tutorials online for that


So, in the end, I always prefer a mix to be roughly around -15LUFS ideally. I can do with less but you’ll have to accept there will  be a pretty steep difference.


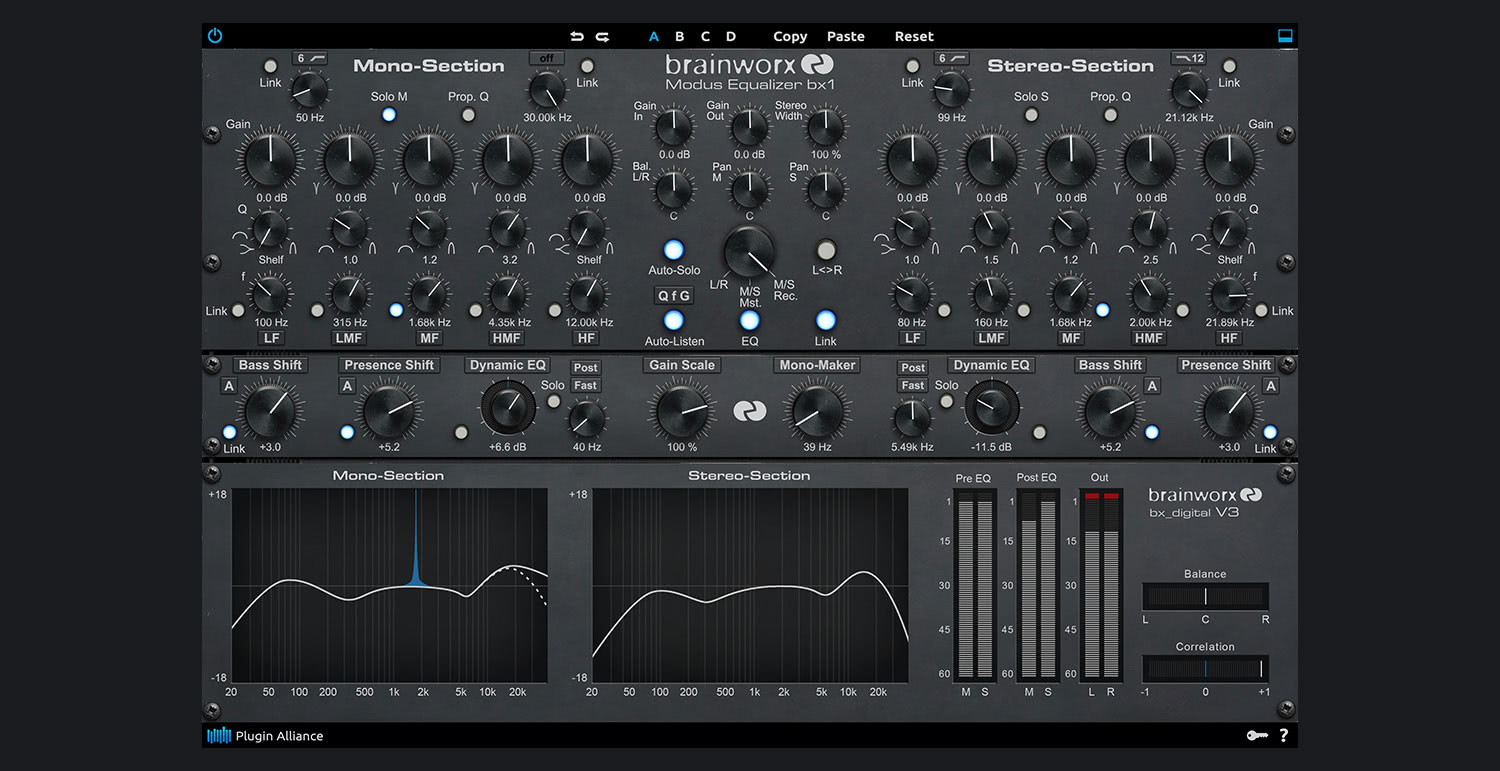
  • Stereo width. Most people I know love their song to be returned with a nice width, as they love to be wowed. If it’s too wide, there will be a loss in punch and assertiveness. Usually, people are pretty ok with this but there are a lot of people who get addicted to plugin that use width and clients might boost the sides a bit too much. I often have to rebalance the signal between mid and side. It’s not much of a big deal but if, in some frequencies, I notice the sides are too loud, I’ll have to control that because it might be a sign of phasing. That is one type of issue that clients have a hard time spotting because it requires experience or good monitoring tools. 


  • Saturation. Every now and then, I’ll have clients who will push saturation a bit much without knowing that loudness matching will multiply that crunch by much. This results in weird clipping, distortions, noise, nastiness. Some people are ok with that but some need to redo their mixes to find the sweet spot. My general suggestion is to add saturation until you hear it and then dial back a bit. If you hear a lot of the saturation and your gain staging isn’t right, I will boost your track much and the saturation will be boosted a lot.


  • Noise floor. If you record from synths and analog gear, there might be some noise in the background. You need to record as loud as you can so the noise doesn’t get boosted by your gain staging. It often happens that people record with lots of noise in the back and when I boost, then it gets amplified. So, be careful.


  • Effects. In general two red flags occur here: overuse of phasing, MS or reverb that is way too loud. Often clients have to fix the reverb and send me a new file. Long reverb are super tricky and sometimes I suggest to use ducking on it so it doesn’t mess up the transients or make the entire mix messy.


  • Compression. This one is tricky. Sometimes people will put compression on the master to glue everything together but I don’t recommend doing that so much. This is something I like to control myself since I do the final gain staging and overall adjustment of that matter. People who use compression as gain on the master or all over the place will end up having a track with exaggerated tails on the sounds that are supposed to be a bit shorter, which can have dramatic effects on the bass or the kick for instance. If they bleed into one another, the low end will be mushy and messy. Snappy kicks need space to be cutting through and if the mids are also bleeding all over the place, there will be a lack of precision. Overall, compression is useful yes but with some moderation, unless you want a puffy, really inflated-sounding track.


  • Samples. The higher the quality of your samples, the better the mix you might get. In essence, using mp3s or youtube ripped sounds will sound lofi and that might be exaggerated, once more, in mastering. This is where aliasing and weird digital artifacts can make a pristine-sounding song into a harsh one. When I refer to quality samples, I not only relate to the bit rate, but also for a good balance of density, clarity and precision. Samples with sibilant resonances and sharp transients also can be hard to control in the mastering process.


What usually really helps and will make a huge difference:


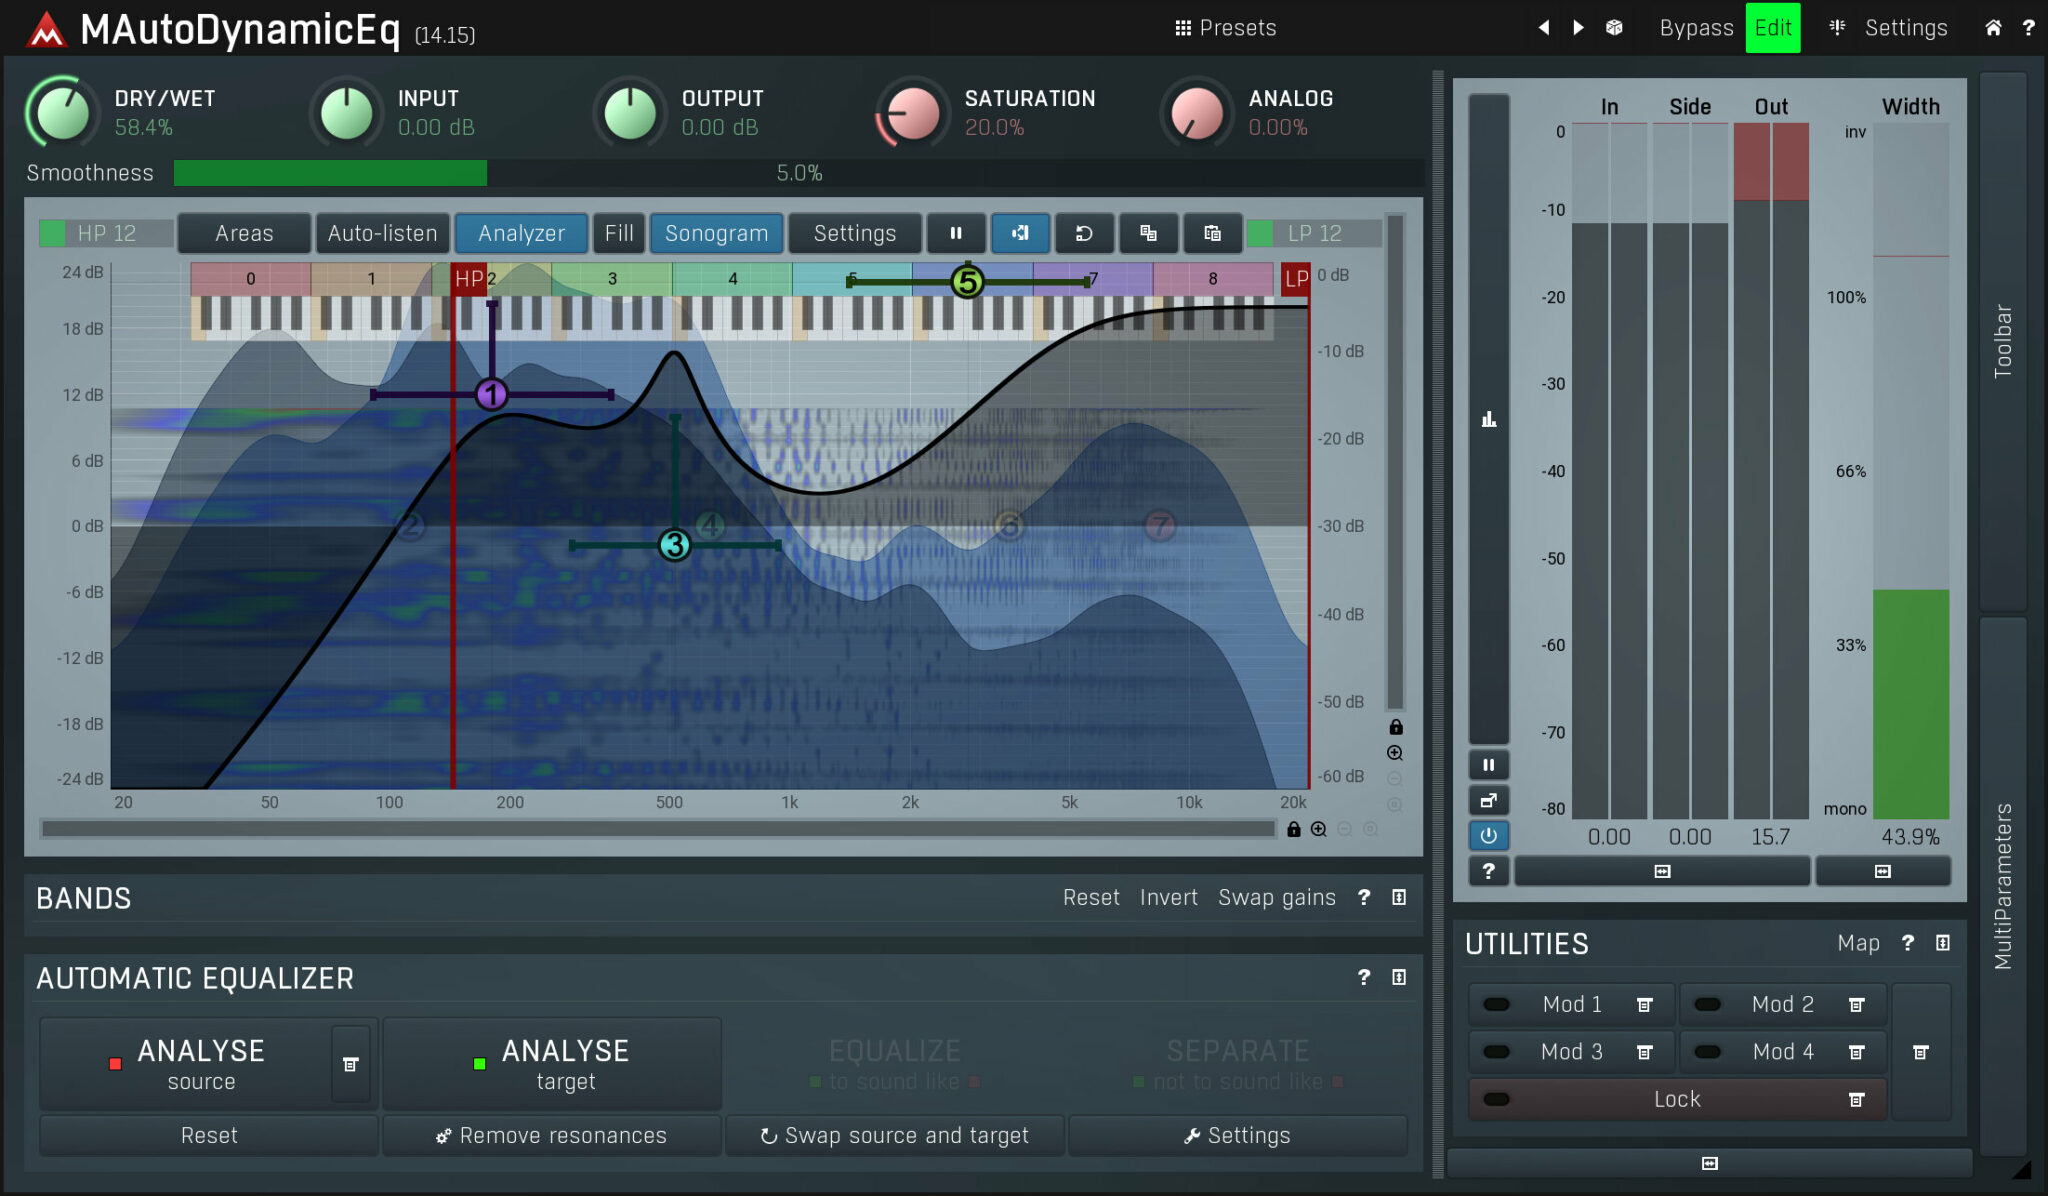
  • Resonances removal: If you think that I might do gain staging, you’ll quickly see how they’ll escalate into a harsh ringing if you have any resonances in there. Removing resonances isn’t something you easily learn but once you start being aware of the impact they have on your mixes, you’ll want to handle them right in the sound design part. While I can control them with my mastering EQs, there’s nothing like having a clean mix to start with. I had a try at this Reso EQ and it turned out to be quite solid. There also the MAutoEQ by Melda that detects resonances and lets you cut to taste.


  • Transients taming: There’s nothing more annoying than harsh transients on big sound system or at high volumes. There’s a difference between snappy and harsh, sometimes people don’t really realize until they hear the master. While I can control things, if you do the most cleaning on your side, your mix will sound stellar. One of my favorite transient shapers is Impact by Surreal Machines. But if you want something that is game changer, you can go high level and get the Oxford Transmod.


  • Proper leveling: This is the mixing 101 of all tips. Not much you can do else than practice, take breaks, listen to references but if you get your levels right. This always is a win in mastering.


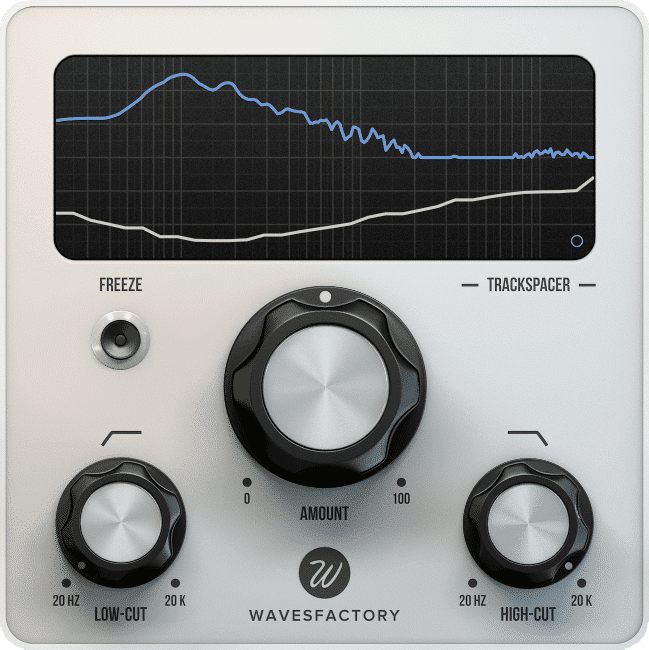
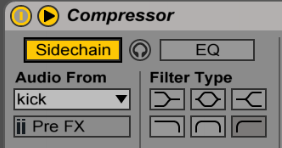
  • Sidechaining, unmasking: If you have multiple sounds that are in the same frequencies, it will soon head into a masking issue territory. You can spend some time cleaning the frequency of one to let the other be heard but the fastest fixing method is side-chaining. Using TrackSpacer is always clean and fast, but lately, the new Neutron 4 has proven to be quite amazing. It also has a lot of other practical tools and it has been in every songs I mixed lately.


  • Proper gating: Gating is often misunderstood but it is a technique that will bring punch, clarity, dynamics to drums or anything with tons of details. It also resolves masking sometimes, clean noise floor and avoid muchiness all around. If you don’t know much about it, go check tutorials!


The last stretch of points is what I’d consider advanced but those are actually the ones that I will have the most trouble with because they should always be handled in the mix. The cleaner your mix, the better the master.


Favorite Equalizer For Electronic Music

People often ask me what my favorite equalizer for electronic music is, and my answer is that it depends on what their goal is, as well as their skill level. However, the EQs that I like for electronic music generally fit a certain set of criteria. Not every equalizer in this article fits all of the criteria, but here is a not-so-exhaustive list of things that I like to see when I’m purchasing a new EQ.

Keep in mind that all EQ’s are at their core, just filters, but some go above and beyond this. Equalizer settings for electronic music vary based on the timbres and styles, but each one of these will work universally for electronic music.


Criteria

  1. They have previews of the band that you can solo (you can press the button and hear the band on its own). This allows you to hear things more specifically.
  2. The plugin needs to be able to do oversampling.
  3. The plugin needs to be able solo the filter (EQ band).
  4. The EQ needs to have a mid and side mode, aka M/S mode.
  5. The EQ can switch from digital approach to analog. A digital EQ is very clean, and an analog is a little bit more organic and less precise.
  6. The EQ can be dynamic
  7. While all don’t have this feature, it’s nice if an EQ has a piano roll, so you can see how frequencies quantize to notes (this is a good way of seeing if a note will fit inside the track).


Fabfilter Pro-Q 3

A picture of one of the best equalizers for electronic music, in my opinion, the Fabfilter Pro Q 3

First on the list is the Fabfilter ProQ 3 – an affordable, easy-to-use EQ that hits most of the points I look for in an equalizer. It’s versatile, as in it can be used in both mastering and mixing. On top of state-of-the-art linear phase operation and the ability to get zero latency readouts on your EQ, you get natural phase modes, mid/side processing, and a bunch of other intuitive options.


A Neat Pro-Q 3 Trick


One of my favorite features is that if you have the ProQ 3 on multiple channels or busses, it can communicate with the ProQ 3’s on the other ones and let you know if there are conflicts in frequences.

Then, with the side processing (sidechain), you can easily duck precise frequencies, and you can even solo these frequencies to hear exactly how the sidechain is affecting the relationship between all the individual sounds. Or sometimes you don’t even need a sidechain, and you can just grab the curve and bring the conflicting frequency down.

Another neat trick with the Fabfilter ProQ 3 is that you can use it to split the stereo, and modify the same frequency at different amplitude levels on the stereo. So for instance, sometimes in a recording, you have a sound that mixes well on the right pan, and doesn’t quite mix perfectly on the left, but should be somewhat present on the left panning in order to fill out the stereo field.

With the ProQ 3, you can leave the level on the right channel as is, and on the left, alter the amplitude in order to fit the frequencies it’s conflicting with.

All of these reasons are why it’s a favorite equalizer for electronic music. It produces some of the best equalizer settings for bass, mids, and highs in all genres.


Wavefactory Trackspacer

A photo of Wavefactory's trackspacer, which allows you to have some of the best equalizer settings for electronic music without the hassle.

This one is not necessarily an EQ, but if you’re familiar with Wavefactory’s Trackspacer you can see why it would fit well within this list. Basically, it uses a mathematical formula in order to automatically figure out where conflicting frequencies are between two tracks and then it will apply precise side compression to the parts that are necessary to compress to get them to meld better.

You can even apply a low pass or a high pass filter to each end of the frequency spectrum to isolate what part of the sounds you want to compress. It’s ridiculously easy to use.


HornetVST Total EQ

a photo of HornetVST's Total EQ. It's one of my favorite equalizers for electronic music.

Not everyone has the money to invest in VSTs. However, HornetVST makes VSTs that are ridiculously cheap, and they often do sales, so you can get decent plugins for 5 bucks. 

The HornetVST Total EQ is similar to ProQ 3, sounds really good, and is easy to work with. Personally, I believe it’s better than Ableton stock EQ’s because you have a team working specifically on developing the best equalizer for electronic music (or all music at that matter).

While it doesn’t have all the gizmos and detail goodies that the ProQ 3 has, it’s still really good. For instance, it has 12 bands, a real-time spectrum analyzer, a whopping 17 different kinds of filters for each band, individual analog response and emulation for each band, band soloing (like in the ProQ 3), mono/stereo for each band, and a bunch more features.


Melda Productions – MAutoEQ

Image of one of my favorite equalizers for electronic music - the Melda Productions - MAuto EQ

The thing that makes this EQ special is the MeldaProduction Filter Adaption (MFA) technology which uses a formula to analyze your recording and make suggestions based on your recording, another recording, or even a spectrum that you can “draw” inside the interface. It’s kind of the Photoshop of EQs, in a way. It can also be used extensively for mixing and mastering.

MAutoEqualizer can place a track into a mix using the spectral separation feature, where you can, like in Photoshop, pencil your preferred frequency response. MAutoEqualizer’s technology will search for the best settings and alter the parametric equalizer bands to fit the best form.

With a normal equalizer, you are listening to the spectrum and then increasing or decreasing the amplitude of the band to fit what you believe is the correct level, which can be a chore. With MAutoEqualizer it gives your ears a little bit of a break by setting things to levels based on its algorithmic predeterminations. 

Also, if you are allergic to resonance in your sound then this EQ is for you. One of the things it does best is listen to the incoming signal, where it then finds resonances that it can apply filtering suggestions to. Then with the wet/dry knob, you can determine how much resonance you want in the areas it pointed out. It’s really simple, and a favorite equalizer for electronic music.


Brainworks’ BX3

A photo of the Brainworks’ BX3, which produces some of the best equalizer settings for electronic music.

A mastering and mixing EQ I recommend is BX3 by Brainworks. It’s an extremely powerful, surgical EQ that I use extensively. It can make space, clean, and can really polish things up. This EQ is not meant for adding color or character to mixes, but rather making sure that everything sounds as clear and crisp as possible. It’s a bit difficult to use if you’re not super familiar with mixing and mastering, but it’s extremely powerful, making it a favorite equalizer for electronic music.

This EQ’s Auto Listen feature automatically solos each band’s Gain and Q (resonance) controls based on their respective settings while doing the same with the channel’s Frequency controller. By setting Gain, Q, and Frequency on an individual channel (L or R), Auto Solo switches the monitoring to that channel.

Your tweaks are illustrated with separate frequency-response graphs for each channel. With this feature, you may notice that your adjustments will become more visible and audible than ever before since it allows for some of the best equalizer settings for electronic music.


Brainworks’ AMEK200

photo of one of my favorite analog emulated EQ's for music, the Brainworks’ AMEK200.

My favorite analog emulation EQ is AMEK200 by Brainworks. This is modeled after classic 70’s and 80’s mastering EQ’s, such as the GML 8200 and vintage SONTEC vintage EQs, but with some plugin specific upgrades, such as Auto-Listen features, variable high-pass and low-pass filters, and M/S processing.

All of these features result in a very transparent mix that does a really beautiful finishing. Note that the AMEK200 has no spectral readout, just knobs you twist, which is good for learning how to trust your ears.


So, which one is my favorite equalizer for electronic music?

There is no specific one. All of these plugins will allow for the best equalizer settings for music, whether that’s minimal house, techno, jazz, rock, hip-hop or k-pop. They all allow for the best equalizer settings for rolling bass, or entrancing mids, it just depends on your experience level, and your desire to learn and experiment.

This article contains affiliate links which I may make a commission off of.

Can you trust yourself to judge your own music?

This has been a popular topic recently—I think that because of the pandemic and the isolation that comes with it, people rely a lot on online contacts to get feedback on their music. The lack of in-person music testing as well as and lack of being able to go to clubs has changed the way we are able to analyze our own music.

I was a part of an organized live stream recently to support a friend named Denis Kaznacheev, who has been held in prison for something we all think is impossible (but that’s another topic). Being in a room with 4 people, playing live, and getting feedback after months of isolation was a weird experience. The first thing that came to my mind was, that my music sucked. Yeah, I also go through it once in a while, and I had forgotten how playing music for and in front of people changes the dynamic of a song. In studio, it sounds a specific way but add one listener and it’s all of a sudden, different.

Some song, different context, completely different mood. Was there something I could do to predict this?

Technically, there was absolutely nothing wrong with what I did. People who tuned in loved it. The thing that clashed was the mood, the feel of the track, compared to what I had in mind. In past articles I’ve discussed the importance of a reference track, and this could have helped me in this particular situation, and could have helped better classify my music as well. But as you know, there’s no do-it-all plugin that can prevent this. This is why many people struggle with judging their own music.

Technical Validation

When it comes to technical items, you can self-validate using some handy tools.

See if your track is, compared to a reference, feeling like the same tone and balanced, I’d recommend using Reference. This tool is my go-to plugin whenever a client insists that the track I’m working on doesn’t sound like a particular song. I’ll load up the reference song and then, after volume matching, I can see if the lows, mids, highs are adjusted in a similar way than my mix. It also shows you if you have, per band, the same level of compression or wideness. It doesn’t lie and you can match it to have something similar. But how do you raise one band to match the reference?

I use a multi-band compressor to compress and, or EQ. A shelving EQ, with 3 bands can be helpful to adjust, but a multi-band compressor really can set the tone. You’ll set the crossovers of each band to match Reference and by adjusting, you’ll see it react to your gain or reduction. While you could use any multi-band compressors, I’d highly recommend the Fabfilter MB.

The same company that makes Reference also made a plugin named Mixroom which, with the same idea as reference, focuses on everything in the mids and highs. It’s a bit tricky to use at first, but once I found reference songs that were analyzed properly, it gave me some interesting pointers on what to push or remove. I thought it was pretty interesting to reverse-engineer some complicated mixes.

Many times people will tell me they don’t like to compare to anyone or that they’re going for their own style but that’s like trying to draw your grandmother from your memory. Some people might do better than others, but audio is abstract and you need to compare yourself to someone else to know what’s lacking or overflowing. I mean, even within a mix, I compare my channels to see their peaks, densities, and panning to make sure one doesn’t cross another, unless to create something as a whole.

People struggle with loudness, but it’s is a bit easier to manage. You’ll need a metering tool such as the IKmultimedia TR5 Metering or the lovely Hawkeye from Plugin Alliance. They are costly but necessary. For a mix, you have to keep in mind a few details: the loudest peak should be -6dB, the RMS (more or less the density) around -13 to -20dB, in LUFS, I’d suggest to be around -15dB and dynamic range to be above 10. A plugin such as Reference will also indicate loudness, and that can be really useful to see if you’re in the same ballpark.

Please consider these are numbers I deal with, and that for certain genres, it can be completely different.

If you come to struggle with the low end, the guys from Mastering The Mix also have a low-end validation/enhancement with the excellent Bassroom plugin. Again, you’ll need a quality reference to do the trick, but once loaded and with some practice, a muddy, weak low end will be a thing of the the past.

These are the best technical validation tools I’ve used in the last few years. They’re efficient, affordable and very useful in whatever I do.

Self-Mastering and Mixing

Pretty much anyone who’s been making music for a while or has studied audio engineering will agree that mixing or mastering yourself isn’t the real deal. It’s doable, understand me right, but you’re not winning. With the previous listing of all the technical tools I shared, you can make some really efficient mixes, but perhaps sometimes that’s not enough.

As an engineer, the main thing I’ll say is that someone else might spot things that are in your blind spots, plus that person is also emotionally detached from the music itself, so making decisions feels like less of a risk in itself. If you’ve been reading this blog regularly, you know I often refer to our duality as humans to have a analytical side and a creative side. When I work with musicians, I invite them to see this duality as a muscle. Your creative side needs to be exercised; it needs to constantly be fed because it’s a sponge. You want to find the perfect routine and be efficient at it, then break it to pieces to reinvent your new way of making music by re-combining them for a new version of yourself.

The way I see music-making isn’t about trying to be in full possession of your potential, but more about always putting yourself into a state of instability and risk, so new creative ideas emerge. You’ll connect the dots of the past to create a path in the now.

This state of mind is one that is not always technical, and it’s raw. I would invite you not to tame it, but to create spontaneous ideas and raw projects.

This approach is basically the exact opposite of sitting in front of your computer to design and fix a snare. There’s nothing wrong with that if you like, it but like I say to people, artists should become experts at flow, not perfection. They want to be artists, not craftsmen. But I won’t stop you from being both—I just often feel that technical production doesn’t age as well as solid creative ideas. The only thing that stands the test of time is simplicity, and that comes with a mastery of both flow and technical expertise.

If you want to be a master at everything, you’ll be very average at everything as well for quite some time, or potentially forever.

So, imagine you have an amazing idea that you made but you are very average at mixing and new to mastering—you’ll probably be butchering your idea when you try to do either. Yes, you save money and learn by doing it yourself, but I think if you’re aspiring to release something on a good label, to get attention, it might be a good thing to have someone look into your mix, even a friend. But if you really want to do it all yourself, get yourself solid tools to make sure you get the most out of them.

If you want to practice mixing, I suggest trying to find what I call, a swap buddy who can send you their mixes and vice-versa. You both learn by tweaking each other’s work, and going back to your own music after will feel easier, and clearer as well.

Psychological Validation

Now, psychology is an area where don’t get any tools to help that we all have to deal with. It’s that limbo where you maybe made a few different mixes and feel unsure which one is best. You know technically everything is there and in order, but in the last bit you’ll try to label your song into one of these buckets: Good, Not Good, Still needs work, Ready for mastering…etc.

Are advanced, experienced, and veteran producers exempt from this state of mind? Not at all. After decades of making music, I still have no idea if my music is “good” or not, even if got in the top 10 on Beatport or if my friends all love it. Deep inside, sometimes, I’ll doubt myself. However, I came up with some personal rules to help me judge if I think my own work is decent or not.

Deal with technical points first: This is why I started this post with technical stuff. I see in our Facebook group, people giving feedback, and my observation is that it is often biased by their mood or listening situation. What has become clear to me is that when giving feedback, you need a common reference. I can tell you that your kick is too loud, but compared to what? I have clients sometimes who complain about the low end being overpowering but in the same mastering session on that day I had another client who loved really, really loud kicks. The difference was laughable and both had the exact opposite feedback: one had weak low end but he felt it was too much while the opposite was a bass orgy but he wanted more. Could it just be what they hear? Yes, probably, and this is why you need to be able to use a FFT to check, but also, listen to you music in the middle of a playlist that has other songs of the same genre to know if it sounds right.

A client was telling me “It sounds right in the studio, wrong in the car and at home, its a different song… which one is right?”

The one that is right should be your studio version, but it should be cross-validated technically with other songs. If it doesn’t sound right at home, then find a song that sounds good there and then study it at the studio to see what that song has that yours don’t.

Know that you’ll never really have a permanent opinion about your music. Each day your mood might change and affect how you appreciate your music. Down the road, you’ll learn new techniques and then hear mistakes in your song, you’ll hear a better song than yours… all these points will make you doubt yourself. You’ll always want to go fix something. Since you know you’ll never be really satisfied with it, then you can accept to move on faster. Just start another song, apply what you learned, use your new influences and try something new.

Nothing exterior will validate your music. No matter what you think or do with your song, you might doubt it. This means, you don’t need the latest synth or to be on that specific label. “...and then I’ll be happy.” is a fallacy. Knowing that, it re-centres you to count on a handful of friends for feedback.

4. Let things age. Nothing better than taking a few weeks off before listening to know how you feel about it.

What’s interesting is that, whenever I receive criticism, I start see a perspective I didn’t look into enough—super important. Music production and audio engineering is often discouraging and that’s the reality of the art. That said, I don’t think there’s a day where I make music that I don’t learn something new. Accept that everything is work in progress. This is why songs that take too long to finish are often because my perfectionist side took over, and that’s not where I can make magic happen—it’s often the other way around.

Are Music Schools Worth The Investment?

Whether or not music schools are worth the money might spur a heated debate—schools worldwide might not like what I’m about to say, but I think that this topic needs to be addressed. What’s outlined in this post is based on my personal experience(s); I invite anyone who want to discuss this topic further, to contact me if necessary.

Music schools: an overview

Many people over the last few years have been asking me about my opinion regarding enrolling in music production schools. There are many production and engineering schools in the world, and a lot of them ask for a lot of money to attend. In Montreal, we have Musitechnic (where I have previously taught mastering and production) and Recording Arts. Most major cities around the world have at least one engineering school and if not, people can still study electro-acoustics at Universities. University takes at least 3 years to get a degree; most private schools will condense the material over 1 year. During that time, the physics of sound will be studied, mixing, music production in DAWs, recording, and sometimes mastering. While each of these subject usually take years to really master, the introduction to each can be very useful as you’ll learn the terms and logic of how these tasks work and what they are for.

If the teachers are good at explaining their topic(s) and have a solid background, there’s nothing quite like being in the presence of someone with a great deal of experience, not only for the valuable information they provide, but also, the interpersonal context. Having a good teacher will pay off if you ask questions and are curious. While I don’t teach at Musitechnic anymore, some of my past students are still in contact with me and ask me questions—I even hired some for internships. I’ve often been told by many students that they remembered more from hearing about their teacher’s experience(s) than the class content or material.

One issue with audio teachers I hear about a lot is that many times, teachers might be stuck in a specific era or on a precise genre, which might be difficult for a student to relate to; there might be a culture clash or a generation gap between themselves and the teacher.

For instance, if a school has teachers who are from the rock scene, many people who are interested in electronic music or hip hop will have a really hard time connecting with them. Similarly, sometimes the teachers who make electronic music can even be from a totally different sphere as well, and mentalities and approaches can clash.

The advantages of attending a school or program

There are, however, many beneficial outcomes from attending a music school:

  • you’ll get a solid foundation of the understanding of audio engineering, and get validation from experts.
  • you’ll end up getting a certificate that is recognized in the industry.
  • you’ll have access to resources, equipment and experienced teachers that you might not otherwise find.

The main issue I have with some music schools is how they sell “the dream”, in most cases. The reality of the music industry is really harsh. For instance, a school might tell students that when they graduate, they can open a studio or work for one. While after graduating you might have some skills and experience that you didn’t have before, nothing guarantees that people will come to you to have their music mixed. That said, getting your first client(s) will eventually bring in other clients and opportunities.

“What’s the best way to get a full time job in the music industry or to become an engineer?” I’m often asked, and I’m very careful about how I answer this question. I described my thoughts on finding full-time work in the music industry in a previous post, but I’ll share some points about this topic again here and how it relates to music schools:

  • Whatever anyone tells you or teaches you, even if you applied what they say to the finest level of detail, it’s likely that things still won’t work out the way you envision them. I know this sounds pessimistic, but the reality is that no path will provide the same results for anyone else in the music/audio world.
  • The industry is constantly changing and schools aren’t always following fast enough. If you want to make things work, you need to make sure that you can teach yourself new skills, and fast—being self-sufficient is critical to “make it” out there.
  • Doing things and learning alone is as difficult as going to school, but will be less expensive. The thing a school will provide is a foundation of knowledge that is—without question—valuable. For instance, the physics of sound won’t change in the future (unless one day we have some revolutionary finding that contradict the current model; this is not going to come in anytime soon).
  • Clients don’t always care where you’re from or what your background is, as long as they get results they like. Your reputation and portfolio might speak more for itself than saying you went to “School of X”. Where schools or your background can be a deal-breaker though, is if you apply to specific industries, such as video game companies, and maybe you already have some experience with the software they use—companies will see that as a bonus. But I know sound designers for some of those companies who’ve told me that your portfolio of work matters more. For instance, one friend told me that they really like when a candidate takes a video and then completely re-makes the audio and sound design for it; this is more important than even understanding specific software which can always be learned at a later time.
  • The most important thing is to make music, daily, and to record ideas, on a regular basis. Finishing songs that are quality (see my previous post about getting signed to labels) and having them exposed through releases with labels, by posting them on Youtube channels, self-releasing on Bandcamp, or filling up your profile on Soundcloud can all be critical to reaching potential clients. One of the main reasons I am able to work as an audio engineer and have my own clients is mostly due to the reputation as a musician I built a while ago. I often get emails of people who say they love my music and that was one of the main reasons they want their music to be worked by me specifically. Not many schools really teach the process of developing aesthetics (i.e. “your sound”) or the releasing process. While some do, both of those topics also change quickly, and you need to adapt. I’ve been feeling like every 6 months something changes significantly, but knowing some basics of how to release music certainly helps.

Would I tell someone not to attend a music school?

Certainly not. Some people do well in a school environment, and similarly, some people don’t do well at all on their own. So knowing where you fit most is certainly valuable in your own decision-making about schools. Perhaps a bit of both worlds would be beneficial.

Will a school get you a job in the audio world?

Absolutely not—this is a myth that I feel we need to address. It’s not okay to tell this to students or to market schools this way; it would be as absurd as saying that everyone who graduates from acting schools will find roles in movies and make a living from acting.

What are the alternatives to music schools?

If you don’t think music school is for you—because you don’t have the budget for it, or you’re concerned about the job market after, or even because you’re not someone who can handle class—there are still other options for you:

  • Take online classes. This is a no-brainer because there are a huge number of online classes, courses, and schools online, and you can even look for an international school. You can also work on classes during a time that fits into your schedule. This means you can invest some of your time off from work into it. Slate Digital has some nice online classes, as well as ADSR.
  • Become a YouTube fiend. YouTube has a lot of great content if you’re good at finding what you need. You can create a personal playlist of videos that address either a technique or a topic that is useful. There are also videos where you see people actually working, and they’re usually insightful.
  • Get a mentor. People like myself or others in the industry are usually happy to take students under their wing. While you can find most information online, one advantage of having a mentor is to speed up the search for precise information. How can you learn a precise technique for a problem if you don’t even know what it is? Well, someone with experience can teach you the vocabulary, teach you how to spot a specific sound, and teach you how to find information about it. “How do they make that sound?“, I sometimes hear, as some stuff feels magical to students until I explain that it’s a specific plugin. In my coaching group, we even have a pinned topic where we talk about certain sounds and how they’re made.

I hope this helps you make your own judgments about music schools!

SEE ALSO : On Going DAWless

The EQ and compression combo (Pt. 3)

After going into details with regards to EQ and compression, in this post I’ll cover some practical tips on how they work well together. I’ll try to also clarify why many engineers will tell you that all you need is these two tools to accomplish most of the work in mixing and mastering.

Here are a couple terms and ideas that have to do with this topic:

  1. There are no rules for how to use EQs or compressors. You’ll read many different views online, and some people will affirm loud and clear that their point of view is right, but after 20 years of trial and error, I still feel that I’ve accomplished a lot of great things when I knew less than now. Relying on your ears is really important. Some of the most innovative trends involve people who have no idea what they’re doing else than following their gut feeling.
  2. Substractive correction. It involves only cutting the junk out.
  3. Coloring correctives. This usually means that you’ll boost frequencies. Sometimes, cutting might necessary.

To start with, I’d point out that in mastering or mixing, one of the most common chain would look like this:

[Corrective EQ]  –  [Compression]  –  [Color EQ]

There’s precise logic behind this. Basically, you want to take the rogue frequencies out first, compress and readjust the good ones with the compression, and finally adjust the tone or highlight details with a coloring EQ. My personal preference for better results would be that whenever I cut, I do it with a pretty narrow Q (resonance) on the EQ. A great starting point is to start with 2 or 3 and then adjust. Don’t hesitate to use visual reference of the FFT that is often included in the EQ’s display, especially if this technique is new to you. Then, I’d cut about 3dB at first, up to 5. You see how this changes your sound by bypassing the EQ and comparing.

When it then comes to compression, there are a few different things you could do here. For instance, if you go with an aggressive setup, then you’ll beef up what you have “open” by cutting away the bad frequencies. I’d suggest starting with a more exaggerated approach to see what will pop as annoying. It might not be possible to hear what’s wrong if you don’t push the sound to its limit.

Once you see and hear issues more clearly, you can cut again, then you roll the compression into parallel mode to have some of the incoming dry signal mixed with the compression.

If you haven’t explored the side-chain frequencies, this is an option where you can decide that your compressor won’t apply anything starting at the target (ex, anything under 100hz). With this, you might want to filter only a part of your song with the EQ and then compress to accentuate the part you want to put to front.

The last process in the chain is the color EQ. You can take any EQ you like but ideally, I’d go for either an analog emulation or a shelving EQ. Those will provide a nice enhancement to complement what the compressor has been doing. For coloring, you can explore. One way to approach it is to completely exaggerate one band to see how it sounds, and then roll down. This is not only very interesting for sound design, but also for mixing more subtly annoying details. It can help build body for a sound that feels week too.

Examples of where to start – EQ and Compression

A pad that that lacks body and roundness. In this case, it’s most likely that a resonance is poking through too loudly and that good frequencies are hidden behind it. You could start by checking if there is one peak on the spectrum and with your corrective EQ, with a not so wide Q (ex. 1.5 to 3), try to bring that peak down pretty severely with a cut of 5-6dB. Get the threshold of your compressor to meet the highest peak and then adjust the output to be the same as the input. With the shelving EQ, bring the mids up but 2-3dB.

A kick that lacks bottom. This might be related to the mids of the kick that are too loud. You could lower them by 4-5dB, then compress with a ratio of 8:1. The shelving EQ should then bring the lows under 100hz up by 4db. If that doesn’t do, cheat by using the corrective EQ to notch up a bell curve at 50hz.

Percussion that are harsh. This is usually because one frequency is resonating around 4 to 8khz. It’s hard to say but try to cut by 8dB and scan around to see if there’s at any point, something more comfortable. Bypass to double check and then adjust your cut so that you can make the resonance almost there. Compress with a fast attack to control the transient and glue them. The shelving EQ could be used to lift the highs.

EQ suggestion: The TDR SlickEQ GE will do a great job for correcting.

Compression: The new SphereComp is super lovely and affordable. I tested it in sound design and it does really nice gluing.

Shelving EQ: I tried the demo of EVE-AT1 and I think you’d like it just like I did. The price is incredibly good for what it offers!

SEE ALSO : Saturation Tips and Hacks

Tips for compression: The Multi-band compressor (Pt. 2)

Continuing with more compression tips, I’d like to discuss of my all time favorite tool for anything and everything: the multi-band compressor. For many, this beast is a bit of a difficult tool to tame, but I’d like to break it down for you so you can include it in any of your routine and needs. In order to continue, I hope you’ve first read the first post about compression, and also the two posts about how to use EQs.

Compression guidelines

Common Use-Cases for Compression

Controlling harshness. Using a compressor, you can set the attack to be fast and the release to also be pretty fast. This makes the whole action of the compressor fast, controlling any aggressive sounds and taming them. If the attack is too fast however, it can distort, so you need to juggle with the settings to find your sweet spot.

To add punch. This is the opposite of harshness. You’ll want the attack to be slow and the release to be fast. The compressor won’t jump on the transient immediately but will instead create some snappiness. The ratio should be around 5:1 or even higher to achieve this effect in most situations.

To add thickness. Using your compressor in parallel mode, you can set it to about 50% wet/dry, then compress with a medium attack and a medium-fast release. I’d make sure the ratio is as high as possible too. If your compressor doesn’t have a parallel option, then you can use the compressor in a AUX/Send bus.

To glue together a mix. Very similar to thickness and punch, you’ll want to add this to multiple channels and busses at once. Again, parallel compression, slow attack, high ratio. That should do it. Experiment with exaggerated effects and then tone it down.

To sum it up, a fast attack makes the compressor react quickly, which means it is there to control something. A slow attack is to enhance the beginning of the sound. The ratio is how much of that effect you want in action, and the release is for how long.

Multiband action

The multi-band compressor works exactly as the use-cases explained above, but with a multi-band compressor, we can set a range of frequencies to be affected. Therefore, you can set thickness in the mids, control the high-mids for harshness, and enhance the high’s transients with a single compressor, but with different settings for each section.

The multi-band compressor has an additional feature: the use of crossovers that set points for where each section starts and ends. A crossover is simply a frequency you set. For instance, Ableton’s 3-band multi band will have 2 of crossover frequencies. You set the lower crossover which will set where the low end ends in the mids (ex. 200hz) and the other crossover will be where the mids end and the highs start (ex. 6khz).

My perspective on multi-band compressors is that I use them like a shelving EQ where I control each section’s aesthetics in a different way. You can then shape the tone of a sound or mix, or extract minute details. Ideal for finishing touches, multi-band compression can also be used to bring forward parts of your sounds in the most effective way.

Now, here are some situations where the effects of multi-band compression can be useful:

  • Wimpy percussion: If your percussion needs presence, thickness and power, set your crossovers so you can control what’s happening between 200hz and 800, then up to 3khz. Beef up the first section with slow attack and high ratio and aim to add punch up there (refer to the notes above regarding how to do this).
  • Pale pad: Again, say a weak pad needs presence, beefiness between 250 and 600 hz. I’d also compress between 4 and 8khz to add some shimmering, which is like adding thickness. You could even lower your section to hit all the way down to 90hz to get some analog feel.
  • Crazy swirl: Sometimes transitional effects are great but can be not appropriate for your song. I like to control the highs over 7khz in a way were they don’t hit aggressively but will have the mids over 1khz enter smoothly. This is a way to control the harshness and presence; often very useful to create wobble, rubbery movement.
  • Dull mix: A dull mix usually needs brightness which can be created by stimulating the highs and mid highs. This can be a combination of adding thickness or stimulating the transients. I’d say try sharp sections around 4khz to 8, then another one until 11khz and even compress above that with a 3rd section to create what we call pixie dust.
  • Stellar reverb: A multi band with a reverb is pack of fun for me! I like to beef up the mids above 300hz and also create thickness between 2khz to 6. You can then control the levels to decide on the tone of the space you’re creating for your song.
  • Deep kick design: Compress a section under 50hz and then another until 120, plus a last one that goes all the way to 500hz. I can guarantee you that if you have the lower sub purring, then you can also add a bit of punch around the mids to have a super deep, but punchy kick.

When it comes to my favorite multi-band compressors, here are some of them:

Neutron 2 (Izotope)

General tool for mixing that makes pretty much the best all around assistant to deal with numerous problems. Transient shaper, exciters, gate, compressors and all of them are in multi-band mode. You can’t get better than that.

Drawmer 1973 (Softubes)

The Drawmer compressor is amazing for creating ambient so imagine if you can set it in multi band mode, then you get awe dropping moments.

Fabfilter Pro-MB (Fabfilter)

Elegant, precise and transparent would be the best way to describe this one. Really useful for the finishing touch of your mixdown.


SEE ALSO : The EQ and compression combo (Pt. 3)

What Izotope’s Ozone Series Doesn’t Consider

It was a great surprise to see the release of Izotope’s new Ozone and Neutron update last week. Since I use both products, often I immediately got started looking for whats new.

There will undoubtedly be a ton of new tutorial and youtube review videos posted of these tools, but I want to approach this post around how I use these plugins, and also mention a larger problem I find all too common within the production of software, and an issue I feel Izotope’s Ozone series doesn’t consider.

But firstly, let’s talk about where Izotope really succeeded.

The sound. I can’t put my finger exactly on it, but to my ears, there is a noticeable improvement of the sound quality in Ozone 8. Perhaps it’s an oversampling issue or something with the filters, but the sound is tighter, bright, and more precise over earlier versions.
The workflow – Ozone 8 comes with several new features that provide a faster way for me to achieve the sound I want. The maximizer now includes a loudness target and the reference addition to comparing the versions via the tonal balance control.

Tonal Balance. A fascinating tool that allows you to visualize the frequency levels of your track, and will enable you to match to eq targets from a specific genre of music. Having visual feedback of where your tonal balance per frequency is, and easy access to eq those levels is a great and fast way to achieve a professional sound. I did some testing earlier today and found the target system pretty accurate, but in the end, I found the target ranges slightly off for the lows and highs (see below in my low points).

Visual Mixer. This is the bomb within Neutron 2, and for that feature alone I’d buy the entire package. The visual mixer allows you to place and position your tracks visually across the spectrum, (volume, pan, and width). It’s a beautiful process, and the edit window looks super sci fi and modern. If you work with multiple channels and often have mono tracks this is simply a killer addition. One of the things that blew my mind was that you can actually automate the panning, which opens the doors to many exciting and beautiful options in sound design.

Improved Mix assistant. I really like the mix assistant by the way. I’ve heard many people mock the process, or are jaded to the idea  that it’s impossible for AI to do a man’s job but honestly if the assistant can pull up all the tools I need and set the table for me to tweak fast, you won’t hear me complain.

Communication between plugins. This feature is really cool. You may adjust EQ from one window on another incoming channel, which is reflected in other instances of the plugin. This is super useful when you want to tame the relation between kick and bass as you want to be EQing side by side, both channels. It works and looks seamlessly.

In the end, I’m really loving the update from Izotope and will be using many of the new and improved features. I also want to take a minute to point out a criticism I have with Izotope.

Generalization of customers – It’s unfortunate that I find many large, corporate companies narrow down potential customers into three simple types – pop, edm, and hiphop. I see how that makes marketing more manageable, but what about producers like me who are creating and working on underground and experimental music? I say this because many of the new tools shipped with Ozone and Neutron are built with presets as starting points to mix and master only three types of music. I my opinion, this is quite limiting, and the fact that you can only refer to 3 types of tonal shapes is, to me, a complete fail. It reminds me of LANDR giving only 3 types of loudness range. It’s disappointing because I feel like this software expects you to be either this or that, which is clear from the design of the genre-specific presets – as if there are no other types of musician in the world??

What Izotope’s Ozone series doesn’t consider is people like me, and many friends and colleagues of mine, who make our living from creating music, and don’t fit into the standard pop, edm, or hiphop category.

CPU hungry. I have a newish MacBook, fully geared up for performance, and while running several instances of Ozone my entire screen began flickering and making strange glitches. Izotope support claimed it was likely my CPU over-loading, however, I was only using 5 Neutron and 1 Ozone 8 instance, plus visual mixer. If my custom built computer is hit hard with CPU usage imagine how will the average Joe deal with such demands on the processor.

This goes along with the new mastering plugin by Eventide, Elevate that is so power hungry that it’s barely usable. Funny enough, a few days after Ozone 8 came on the market, Eventide droped the price of its plugin by 50%…

Still, in my opinion, the updated Ozone suite is a serious tool to consider having. It really delivers impressive quality sound. As always, I want to hear about what you think about these tools and feel free to leave a comment below and share your opinion.

Cheers,

JP


Mix & Mastering Preparation Tips

As a mastering engineer one question I get asked all the time is – “how can I get the best pre-master mix out of my tracks?”. It’s an important question for sure, and this post will outline some of the actions producers can make right now to make your tracks sound way better than before. I can promise by following the mix & mastering preparation tips in this article you’ll hear a huge difference towards the final version of your projects.

My clients want big and full sounding tracks, and I love when my customers flip out after hearing the project they’ve worked hard on come back to them sounding every bit as big as the productions they are inspired by. If you ask the best engineers around the world they’ll tell you that working on music with a great quality mix is the key to turning a solid tune into a monster sounding track. But how do we get there first?

My clients come to me to correct and fix the flaws of their mixes, which isn’t always simple and straightforward. Working on properly mixed tracks with plenty of headroom (at least -6db) will make my job much easier and allow me to bring out the very best in your track.

It’s common for producers not to have the right tools or experience when tackling many of the problems that take away from a good mix, and this is where I step in to help. Let’s make clear a few things you can do in prepping your tracks to sound their best from the get go.

  • Avoid extreme EQ’ing. The greater adjustments you apply to a sound, the higher the likelihood of inducing unwanted resonances, and phasing issues. While in sound design, heavy processing can sometimes bring interesting results, it is often much more productive to pair an EQ with a compressor to get the same result. First, use your EQ to cut shelves from your audio source, then use compression to make what you want to hear, louder. TIP: Try using a maximum of 4 points on your EQ.
  • Remove unwanted frequencies. This is mainly about removing unnecessary frequencies from your sound, rather than cranking up the parts you want louder. If your sound isn’t a kick drum or something else in the lower range, apply a high pass filter or EQ and cut everything below 100hz. If your sound is a kick or bass, try cutting everything under 20-30Hz. As for pads, melodies, vocals, I’d suggest doing cuts in the 100-250Hz region as there will always resonances there. If you use reverb, make sure to remove or cut anything under 300Hz as it can easily get congested there, which will take out some of the precision and power of your song.
    In the end using your eq is a process of clearing away space to allow other sounds to be heard more clearly. Less is more.
  • Be careful with cheap plugins. While you can do a lot with free or cheap plugins, sometimes, this might compromise the quality of your work. Most DAW’s will have native plugins such as reverbs, compressors, eq’s etc.. however I recommend investing $30-$50 on a handful of plugins that more than often sound much better than the native plugins your DAW provides. This applies to compression, EQ, reverbs, chorus, delays, etc. I’ll often get effects on Plugin Boutique or Plugin Alliance.
  • Side chain your kick and bass channel. These frequencies will likely overlap to some degree, which will leave your track sounding muddy, and reduce the impact, clarity, and volume of both sounds. Use sidechain compression with your bass and kick to allow both sounds to breathe and peacefully cohabit in your mix.
  • Less is more. Busy mixes, once compressed can sound horribly busy if not EQed properly. Play safe, use less. You might be surprised that on huge sound system, simple elements can sound much more powerful than a giant wall of noise.

These next 3 important points will always make a tremendous difference in the quality of your mix.

• Do not apply compression or limiting on the master (bus). Please leave the compression to me. This might sound like a good idea but your track will likely suffer for it. Mastering is my job, and I need your track to come to me as transparent as possible. If you add compression on the master channel, you’ll likely create distortions and the end result won’t be nearly as tight.
• Give me -6dBfs of headroom. This is super important. Ideally, you should aim to have each channel at -6dB, not just turn the master channel down to -6. This reduction in volume per channel creates the right amount of space for me work with and is essential in getting your track to sound full, and deep.
• 24 or 32bits / 44khZ. This is the requirement for the best results.
• Careful with hiss. Hissing is a background noise that can happen with analog gear or some fun plugins. Once compressed, it might be loud and difficult to mix in, so be careful of the level you use.

In general, the best mixes I get are the once where everything is balanced in terms of frequencies. Here’s a easy way to get that happen:

  • Lower down the volume of your monitoring. You can’t achieve good mixing at high volume. You’ll see right away what’s too loud if you use it that way.
  •  Lower the volume of each channels if they’re too close to 0dB. One bad habit I often see is people pushing all their channels to 0dB. Not only this take off the dynamic range, but it also gets hard to see what’s at the right level. The loudest channel in your mix should be at -6dB, the others below. Why? Because it gives you room (6dB exactly!) to push louder to what requires attention.
  • Find the busiest moment in your track and listen to it looping. Now, use one channel at a time to lower your channels completely and mix each sound up until you hear it properly. The mix out/mix in technique is a good way to pinpoint if something was too loud in the mix. Sometimes, a sound doesn’t need to be that loud and because we overheard the track, we feel everything should be loud.
  • Group channels or use busses. Group your four main frequencies: low, mids, hi-mids, highs. You can then play with volumes of each zones and adjust them so they’re balanced. You may use again the mix in/mix out technique and EQ for subtle details.


I want to hear your feedback on anything talked about in this post. As always let me know if you have any suggestions or tips you’ve come across in prepping your tracks for great mixes. Share this post or leave a comment below and tell me what projects you’re working on right now.


 SEE ALSO : Dynamic Sound Layering and Design 

2016: Studio Trends and My Clients

It’s been a crazy first year for the audio services I founded in November 2015. Things really got started with the website in January, and it fired up right away. I thought this would be a good time to look back at 2016, and to share some of the year’s highlights: of the plugins I used the most, the projects I worked on, and the producers I had the great pleasure to work with.

Where to start?

Let’s begin with some numbers. With online sales alone, I completed over 300 projects by early December, though the number for all sales combined is closer to 350 projects for the entire year. This includes sound design, mixing, mastering, and training services, both online and in person. This was indeed my biggest year since 2004.

Add to that my online coaching service that reached 450 people in 6 months. It’s been a bit overwhelming to be sure, but being able to help so many people fuels me as well.

Overall, the breakdown of services offered by my studio in 2016 looks like this:

Mastering: 43%

Mixdown: 24%

Arrangements: 15%

Coaching: 15%

Other: 3%

And in terms of musical styles, it broke down like this:

Tech house/house: 24%

Techno: 33%

Deep/dub techno: 14%

Hard techno: 4%

Experimental/Ambient/Chill out/IDM: 15%

Pop: 3%

Hip hop: 7%

The most frequent requests were:

  • Rounded lows.
  • Warm bass.
  • Punchy.

I’m really happy that people have generally stopped asking for the music to be “LOUD,” as this was a common request years back. In 10 years, I’ve seen that people’s tastes have slowly evolved, and that they’re more and more into the warmer sound that analog provides.

Plugins

In terms of plugins, these are some of the ones I used the most this year. In general, I try to create a different chain of compressors and EQ depending on the label or client, to create a unique aesthetic. One thing a lot of people don’t realize is that the combination of various effects adds grain to the sound. It’s like combining ingredients when you cook: you can try 2 different brands of a same spice, and the results will differ subtly.

Universal Audio Ampex ATR-102 Mastering Tape Recorder Plug-In

This is certainly a very creative tool, as well as a nice mixing plugin. It adds saturation and will beef up flimsy parts. Anything that goes through it seems to come out in perfect shape.


Sonalksys CQ1

This is certainly the best multiband tool out there — and trust me, I’ve tried them all. You will need multiband for mixing, but you can get very interesting results if you use drastic measures for sound design. This one never fails.


Harrison 32C

This is definitely an underestimated player in the EQ world, as I rarely hear people talk about it. This year was when I started using it almost every day though. It has this little thing that makes lows so warm.


Bx_Opto

A simple compressor, but it works like a charm. Brainworx never fails to create quality products that use simple and intuitive controls. A huge help on percussions.


Space Strip

A fun little tool for sound design, it creates really cool spaces, as the name suggests. Throw it on the master and watch it craft lovely atmospheres out of so little.


Reason 9

The DAW of the year without a doubt. If you’re one of those people that has been overlooking Reason, run now to get yourself the trial and be ready to have your jaw drop in awe. Rewired with Ableton, it is the most powerful tool to get over any creative block. It also does crazy (I mean it) sound design.


Adaptiverb

This reverb didn’t get the attention it deserved. If you’re not familiar with Zynaptiq, they really make state-of-the-art products. These guys are machines. Adaptiverb is hard to explain, so I’ll leave the descriptions to them, but suffice to say that it is not your typical reverb. It’s certainly a nice add-on to your plugin collection, as it can form creamy textures out of simple pads.

People


One of the things that really got me motivated this year was having clients who were interested in pursuing a long-term association with me. They’d come to me for all of their mixing needs so that they could focus their energies on recording new ideas. Some wanted their studio sessions arranged around songs. It’s great to have multiple contracts with someone, because you start by working with a reference artist, until eventually that shifts and the producer starts referencing themself.

It would be impossible to list all the clients I had in 2016 whose work I loved, but here are a few of the highlights that come to mind:

Pachyderme

From Argentina, Franco worked with my buddies at 31337 Records, producing a superb palette of ambient sounds, intricately organized into a beautiful microcosm.


Kike Mayor

Kike has been one of my most loyal clients this year, as we worked together to define his sound as something “fun and sexy,” as we both liked to call it. Kike’s style is hypnotic and catchy, and he always comes to me with projects I love.


Debbie Doe

Debbie had a breakthrough this year, as she managed to pull her very first project together and nail down a growing number of important gigs. This Lebanese-Montreal artist is not afraid of reaching into her Arabic influences to craft some exotic moods.


Ghini-B

Another very serious producer from Italy/France who booked me regularly to handle mixes and mastering for his music. He’s a nerd collector with a massive modular set-up, and he prefers focusing on designing quirky house instead of spending time on his computer.


Andrey Djackonda

From Moldova, Djackonda was a nice discovery for me this year. The guy makes really organic techno with dub influences. It’s been a headnodder for my mastering sessions. You know you have some groovy music when you start spending time shaping the track into these groove monsters.


Stereo_IMG

From Montreal, Stereo_IMG is a serious sound designer who builds weird devices to extract found sounds that are both beautiful and intriguing. Working with him in the studio turned some of his tunes into Audion-sounding gems.


Wiklow

A programmer and kind soul, Wiklow came to me for mentoring, and we spent the next 2 months discussing music philosophy and the mysteries of human behaviour. This fantastic trip of anything-but-music-related talks led him to create a beautiful EP that would make Jan Jelinek blush.


Ruslan

Ruslan runs a label in New York named Minim, and he has been one of the most supportive people for me this year. We worked together closely, talking almost daily, and it was wonderful to see him at MUTEK to dance to Barac’s set.


Dom Varela

A young producer from Laval who I’ve seen grow slowly, finally releasing his first track this year. It’s been a pleasure to coach him and work closely with him on his development.


Bmind

This was my most demanding mixdown this year, but man did it turn out well. Bmind is an artist I adore. His free-jazz perspective makes his music feel like a spiritual journey through an LSD trip. Nothing easy, but never flaky.


Mod303

Not to forget also 2 other clients who were super busy with me, Isaac and Luis.

These guys make albums in a matter of months, and each time, it’s spot on. Not only are they dedicated, but there’s a real depth to every song they make.

There are so many others I could mention, and I have to apologize if you’re disappointed that your name isn’t featured here. But the truth is that working with ALL of my clients has been amazing! 2016 has been an incredible year, and 2017 will be too, without a doubt.


Conversations with Clients: Luis Rivera

In Conversations with Clients, we bring you an honest and unfiltered look at Pheek’s services, straight from the mouths of those who know — and want you to know too! For this second piece in our series, I spoke with Luis Rivera (artist name LRb), a minimal techno producer based in Puebla, Mexico. 

♦   ♦   ♦

Hi Luis, thanks for taking the time to chat with us! To start off, why don’t you tell us how long you’ve been producing music for?

Well electronic music I’ve been producing in Ableton for 5 years now, but I started making songs with my sister when I was very young. I played the guitar and my sister sang and we used to record it on an old tape recorder my dad has. So I’ve been making songs and music all my life, but producing electronic music for 5 years.

Now tell me a bit about your projects. Do you have any releases yet or are you working on that?

No, actually I’m working with Pheek because we want to release an EP. That’s the idea behind me using his services, the song finalization and analog mastering services. There’s an app, a KORG app, and I started making songs with it, and I won a contest they had 4 years ago, which led to a release on a compilation of tracks. But I’m working right now on my first EP.

When did you realize that you wanted help with your EP?

Well the thing is, if you start making one kind of music, in my case it’s techno minimal, you tend to repeat the same things. Like in your workflow, you always start, in my case, with drum groove, and even with the drum groove, you always start with a perfect kick, then some hi-hats, then some claps, and you start doing things methodically. You can hear your tracks, and you think they’re all different, but if you leave them for 2 or 3 days and you hear them again, you’re like, “This sounds exactly the same as the track I made a month ago.” So to try to do things differently, you need help, somebody from the outside, an educated ear. I realized that I had 10 tracks that were pretty good for me, I had stuff that I really liked, but – I didn’t know if it needed polishing or what – but I didn’t want to leave the songs as they were. I thought I could improve them. So that was the point where I knew I needed help, but you need help that is very specialized in this type of music.

How long have you been working on the tracks that you’ll be releasing?

There are tracks that I’ve made in the past 2 to 3 years. When I started talking with Pheek, he suggested one thing. He told me, “You know, you should get those tracks out of the closet and listen to them again, with all the knowledge you have right now, with everything you’ve learned through the years, you’re gonna listen to them differently. Maybe you can combine your current drums or groove with a bass you really like from a song you did 3 years ago.” So I did exactly that, I spent 2 to 3 weeks listening to tracks I remember I liked – you don’t remember anything though, you don’t even remember making the track!

We’re looking right now at 8 tracks – the idea is to release 4 – but 80% of these are tracks that I did 3 years ago, and we’re reinventing and smashing things up, et cetera.

Luis Rivera (LRb) is using Pheek's song finalization and analog mastering services to prepare his first EP

How did you find out about Pheek’s services?

I am really a fan of his music. I had an album that was released by Minus and I really liked the tracks. Actually, they were very inspiring for me at the beginning of my work in electronic music, because I was more oriented towards dubstep and drum ‘n’ bass, and then eventually I started listening to house and techno music – I mean, I loved techno from when I was very little – but there was a track from Pheek on the record, and I started following him on Soundcloud and Facebook. I saw that he posted about his services, so I checked them out on his website, and I just sent him an email. It was super fast and easy. So it was very easy for me to establish contact with him.

Had you ever heard of song finalization services before or was this something new to you?

No, it was something completely new for me. And it was very attractive, but also very scary for me at the beginning. It was very attractive, because I thought I have an opportunity to have an artist, a real artist, whose music I really like, in the same genre I produce – and he has so many years of experience, et cetera, et cetera – so I thought it would be very, very productive for me to have someone like him hear my songs. But at the same time I was very scared, because I still want the songs to be my songs. I don’t want them to be completely changed or anything like that.

And what led you to decide in the end to book him?

Well you know, I simply said “okay, let’s try it.” I talked to Pheek two times before I sent him tracks. We were very clear on the idea I had for the EP, we talked about the general idea, the theme behind the EP. And then I just sent him the track, and he works very fast. Two or three days after he sent me his version, his arrangements, and I immediately loved them.

So it has been a very productive and very easy working relationship. I like to say to him – he laughs, but I like to tell him, “I’m not your client, I’m your friend, and let’s do this like we’re friends.” And it has been flow, flow, flow from there.

What was the thing that struck you the most about working with Pheek, was there anything that surprised you?

Well first of all, he’s always available. You would imagine that a person with his record label, with his mastering work – he does a lot of mastering for a lot of producers – you’re gonna think, “well he has a very busy agenda.” But he’s always available. That was the first thing that really connected with me, that I know I can ask him for advice on many other subjects, not just, “Okay, what arrangement did you do on this or that track?” I can ask him, “What are you listening to right now?” and stuff like that.

And second, definitely the arrangements, the things he sends back to me, they’re things you can only do with experience, with all those years you have working in the studio, mastering, hearing music. All those little things, in the end, they make a huge difference on your tracks. Like for example, I had a song that was driven with very dark synths, it has a very heavy bass, but I didn’t know where to put the percussions. I sent it to him, and 3 days later he sent me a song with just a ride on the percussion, just a cymbal, and it was amazing. He did 2 or 3 things there that were amazing, that completely changed the vibe of the song, and I really liked it. You know, those kinds of things, only a person with experience can really give you.

So in the longer term, what do you think you’ve gained from this experience of working with Pheek? What has it brought to your music production in a lasting way?

Oh a lot of stuff, it’s definitely a lot. Well actually, first, I hope I can continue working with him. He’s very active in other things too. Like right now we’re preparing the EP – we have some labels in mind – but the idea is to make this kind of big. He offers you help in that aspect too. So first of all I don’t wan’t this to be a one-time experience, I am definitely going to continue working with him. The mastering he does – his studio is filled with analog stuff, I produce mainly with analog instruments, and the sound is amazing when he sends back the songs.

But you know, those little pieces of advice, the way he sees things musically speaking, you learn a lot, you learn very very much, in very short conversations, and you can soak up all the knowledge he gives you. It’s like a graduate course!

Check out Luis Rivera (LRb) on Soundcloud here.

This interview has been edited.

Conversations with Clients: Isaac Prieto

Isaac Prieto is a Detroit-based DJ and producer and the co-founder of vinyl label Detroit Vinyl Room. He was also a client of Pheek’s, who helped Isaac with song finalizationmixdown and mastering. I spoke with Isaac to gain some insights into his journey as a DJ and producer and his experience working with Pheek.

Note: this interview has been edited for length and readability.

Shawn: To start off, why don’t you tell me a little bit about your relationship with electronic music, how and when you got into it.

Isaac: Well it was basically when I moved to Detroit, with the first time I went to the Movement Festival, in 2012. I remember the experience, and not understanding why I had never heard this kind of music before, because I immediately fell in love with it. After the festival I sought out events in the city that played this type of music.

So you didn’t have any education or formal training in music, right? You just got into it as a fan?

Yeah, I was just a fan of the sound. I would always be using Shazam to find the tracks I liked, and I started listening to so many sets on Soundcloud and just building a music library like that. As my library grew, I got the urge to edit a lot of the tracks (slow them down/filter) to fit my style more, and that was my initial motivation. To make a set with my library, that I would enjoy.

So did you pretty much teach yourself how to DJ then?

Yeah, I started out with just one turntable and a Pioneer Traktor mixer. My friend told me to just watch a bunch of tutorials on YouTube, so that’s what I did. Something that helped me develop too was to try and find a set I really enjoyed [and] which I could find the tracks for, and try to replicate it.

Okay, so let’s talk a bit about your production work. In your Resident Advisor bio, it says you’ll be releasing music this summer on the Detroit Vinyl Room label that you co-founded. Can you tell me more about this project?

Yeah, so a few months ago a new venue opened up [in downtown Detroit], 1315 Broadway. I was asked by a friend of mine, Ali Unifier, to help put together the lineup for some events. To me the sets that always influenced me the most were vinyl-only sets, so we called it Detroit Vinyl Room. The parties went well, but after starting the podcast series I eventually decided to take a break from hosting events to focus on building up the label. I had some tracks I had been working on for some time, and that’s when I reached out to Pheek to help with the mixdown and mastering.

Isaac Prieto talks about co-founding Detroit Vinyl Room

So it was a series of parties and podcasts that then became a label, is that right?

Yeah, correct.

And was it easy to start up a label?

Oh god no, it’s a lot more work than I had anticipated to be honest, but I’m glad I’m doing it. For a while, I had been contemplating whether I wanted to build a package of tracks to send out to labels, but decided against that. I made my main goal in releasing music to make something I would personally enjoy to have, and in turn it made the production process a lot more enjoyable. I showed the tracks to a few of my friends, and they liked it and wanted to be involved in the release. So on this first release, I’ll be providing 2 original tracks with remixes from MGUN as well as Moreon & Baffa.

And you say you needed help with the mixdown and mastering. Tell me more about this. Had you tried to learn how to do it yourself?

Yeah, I had looked into how that process works, but it was beyond the scope of what I could dedicate time to at this point. It really is a job for a sound engineer.

And aside from questions of sound engineering, how did you find the transition from DJing to production? Did you face challenges at first, either technical or in terms of the creative process?

It was a little more frustrating because production took more time to get the hang of. I started off with just getting to know Ableton with a MIDI controller and making loops that I liked, and then moved gradually to aquiring more analog gear. But that took time and money. Before asking Pheek for help, it had been over a year of working on stuff on my own until finally I had 3 or 4 tracks that I was pretty happy with. With one in particular I felt like, “Okay, this track for sure I want on vinyl,” and with the others I felt I had really good ideas, but they just didn’t flow the way I wanted them to, you know? And so I went and asked him for help, and he made them sound a lot better and gave me ideas about how to change them up.

Yeah, he helped with song finalization too, no?

Yeah, so in his tutorials, he talks about these ideas and sub-ideas. And for one of these tracks, I had it down, but it was just the transition points between these ideas that I was having difficulties with. And so I sent him the project, and he changed it up a lot. He sent me a few versions and I would tell him, “Okay, more of this, less of that.” He sent me a few versions, and then afterwards he sent me the different parts of the finalized version that I liked the most. And from there I could easily tell, “Okay, these are the changes that I liked or didn’t like,” which allowed me to make the the final arrangements for the track into something different that fit my own style better. But I wouldn’t have been able to reach that last version had he not changed some other aspects first himself.

Detroit-based DJ and producer Isaac Prieto came to Pheek for help with song finalization, mixing and mastering

Right, so he sort of unblocked you, you could say?

Yeah, he took this block out. Like he would say, “Okay, that transition is really nice right there, but I want it to be more this way.” And now that the song is finished, it’s something that I felt was definitely, was organically, all my idea. He’s just been working with music for so long that these things come so easy to him. So the more we work together, the easier the process gets I guess.

So what brought you to Pheek originally though?

I had been a fan of his music, and so I just followed him on Facebook, and I saw that he posted stuff about production. I found that pretty helpful. I have an agent here in Detroit, my friend Maggie, from Auxetic, and I was telling her about the idea of the label and what I wanted to do, and how I saw what Pheek had been posting on Facebook. And she’s like, “Oh actually, he’s a good friend of mine, he’s a great person, you should totally get in contact with him.” So she made that connection. I mean I already had a bunch of his records, and I like the sound that he makes, so I thought he would be good as someone who can understand what I wanted to do with my sounds.

So it sounds like it’s been a very fruitful creative collaboration for you.

Yeah, yeah. I had chances where I could have put stuff out earlier, and some digital releases and stuff, but nothing really got me that excited about doing that. And it wasn’t until I thought, “Okay, now this is something I’d want to have as mine.” And even if it sells out or it doesn’t sell out or whatever, I’m just gonna print out a few copies on vinyl, and I think it’ll fall into the right hands.

And do you think that the collaboration has brought something to your own production more durably?

Yeah, definitely. I saw how he was able to change what I had, and it gives me new ideas as to how I can do that for future productions. He also posts a lot of good ideas [on his Facebook page and blog] that I wouldn’t have thought of, like “Do a loop a day.” Or, even just how he’s honest. Like when I first sent him the songs, one of them, it just wasn’t ready. And he said, “You can make it sound better.” So before I sent them back, it was a few more weeks of changing it up, before I thought, “Okay, I’ve reached a point where I think this is the most I can do with this track, and I think, with your help, it can be better.”

Follow Isaac Prieto and Detroit Vinyl Room on Soundcloud.

Use Mastered Tracks To Submit A Great Demo

This post will cover some essentials on how to submit a music demo to a label you want to join.

How to send a demo to your favourite record label

If you’re a music producer and have been making a few tracks, perhaps you thought it would be a great idea now to submit a music demo to a label. I mean, that’s pretty much what we all dream of as musicians, which is to be part of a community of artists we appreciate and to be appreciated in return. That sense of accomplishment is something you’ve been pursuing for a while and will most probably be chasing for years to come. Trust me.

I’d say that if you want to reach your goals or be part of a label, especially one that has a certain notoriety, you’ll need to be prepared and to do things right.

I thought I’d make a list of rules for you, starting with these:

  • One demo, one label. Think of who you want to send your music to, check out the latest tracks released by the label, and then pick your tracks accordingly. If the label has been there for a while, chances are they might have a restricted number of artists and that their sound has changed over time. So make sure you’re up to date.
  • Before contacting the label, make sure you’re following the label on social media. This might sound silly, but if you’re sending to a label you’re not following and tell them you’re a fan, it just looks bizarre. It’s something label owners do check.
  • Find the contact to submit to. I could write an entire post about this alone, but I’ll summarize.
    • Check if the label has a website and find the specific contact information for demo submissions.
    • If they have a submissions policy, read it. It’s that simple, but important! If it’s written down, it’s because they want you to stick to it.
    • Send a first email to see if the label is accepting demos at the moment.

You now have the 2 main starters: the label and the how-to-submit. Now, let’s get to work.

Preparing your music demo for submission

Unless the label has a precise modus operandi, here are some general guidelines that work for most labels.

  • Check list with green and red pen over white paperAim for an EP. The magic number of tracks to start with would roughly be 4, so start by picking the best fitting ones. It’s not a good idea to send too many tracks at once since label owners already have a lot of demos to listen to (Note: the Soundcloud age has really brought smoke-screening to whole new level), and it makes you look a bit confused in your intentions.
  • Send your best stuff mastered, if possible. But ask the label for its preference. As much as this sounds obvious, you’d be surprised to know that as a label owner, I do receive music that sounds half-finished, pale, or improperly mixed. It doesn’t show you in your best light, and a first impression can only be made once. Ask someone to do the mixdown for you if you’re not sure.
  • Don’t submit remixes. It’s not up to you to pick the remixers at this point. That’s just awkward.
  • If you send Soundcloud links, make sure your tracks are private. Send full tracks. Use playlists too.
  • Always name your music demo files or record labels might find it later and not know whose it isIf you send tracks, use a service like WeTransfer, and I’d recommend sending mp3 files, in maximum 256 kbps. Sadly, there are people with bad intentions out there, and giving the real masters is risking trouble if the label releases your song. You still have rights over it, but I’ve seen labels do this.
  • Name and tag your files with your name, and title your song correctly. I sometimes find a demo months later with no information at all, and it’s quite frustrating to find out who made it.

Okay, you have your tracks ready, now let’s move on to the first contact.

  • Screen Shot 2015-12-21 at 13.19.12Send your email to only one person!
  • Introduce yourself. Like any emails, business or casual, you gain attention by keeping things short, concise, clear and simple. Don’t share your bio (it has no value in decision-making), your releases to come (if you’re too busy, it can be turned against you, and if you have nothing, it can be… well, not good either), that you like the label (why would you contact the label otherwise?), or your 17 different profiles on all those music-related sites.
  • Say what you’d want from the label. Are you up for an EP? Or a vinyl only? Would you like remixes? Be precise but not demanding (you’re not signed yet!).
  • Don’t ask for a money advance or be cocky in any way. It’s pretty much a turn-off for everyone.
  • Start a conversation and invite the person to get back to you. Ask questions and try to open a space for discussion.

Great! Email sent, tracks submitted. Now, it’s far from over — next there’s follow-up!

  • Wait at least 1 week to follow up. When you do, make it very short and simple.
  • Bigger labels request time. Be patient.
  • Do not send your demo to other labels. But if you do, definitely not to more than one. I’ve heard so many stories of people submitting to a bunch, and then 2 wanted to signs the tracks… Sadly, after trying to please both, the artist ended up being discarded for his lack of commitment. So, be careful.
  • Again, be patient. Make more music, but don’t send more music unless the label owner asks for more.

At this point, it’s a bit of a follow-up game. You can give up on the label if there’s no answer at all after 1 month. If there are no plays on your Soundcloud links, that’s of course a bad sign. You can also track who listened. Some label owners hate to receive tracks that have multiple listens, so if you’re recycling a demo, I encourage you to delete the tracks or start from scratch.

If you give up on the label, be polite and just send a last email to thank them for their time and attention and to say you’d be interested in submitting more in the future.

Good luck!

SEE ALSOHow Will A Music Label Find Me?

How To Define Your Label’s Identity With Your Sound Engineer

In this article, I discuss the impact that music mastering can have for a label, and how a good sound engineer can help.

What is label mastering and how you can benefit from it

The term “label mastering” might sound new to you, but it’s something that can make one crew stand out from the others. When I refer to a label’s sound identity, I’m referring to the impression you want your label to leave with fans. For them, a label is:

  • A sign of quality.
  • A sure bet that the sound will sound as great as fans expect.
  • Whenever you look back, that sound still remains.

Label mastering means “making sure the sound is adjusted so each release sounds close to the others, and having a signature that makes your label unique.”

As examples, I could name Chain Reaction and its dirty techno sound, Ostgut with its driven techno, or Perlon’s quirky music.

Think of your own favourite label – one that has been running for years. Now think of the label’s early releases and compare them to the label’s more recent work. There’s a correlation, right? The sound is great, regardless of the release date.

Shaping the sound

A sensitive sound engineer will pay special attention to the label owner’s aesthetics and take a moment to listen to the artists to understand their musical direction. The partnership between an audio engineer and the label is as critical as the graphic designer is to forging the label’s visual identity. I see a label as the product of a strong collaboration between the three.

  • The label owner/manager decides the content of the catalogue.
  • The sound engineer analyzes the releases and directs what will suit them, sound-wise.
  • The graphic designer will aim to visually represent the way the sound feels.

Label mastering means that you will work hand-in-hand with your sound engineer to develop the direction of your label in the long run. If people can use your label as a reference, you’ll know you did well.

my demo is not being listened

Now, a tip for musicians that are sending demos abroad. So often, I see musicians sending me music for my label that sounds like nothing comparable to what we do. It always amazes me to think artists have no idea that a label aims to maintain a certain sound aesthetic. Of course, some labels are more open to different genres and ideas, but in general, the sound quality is what really will make the huge difference in deciding whether your tracks will be accepted or not.


You might also want to consider having a trusted engineer do a proper mixdown for your song, which I can help with.

SEE ALSO : The Changing Dos and Don’ts of Contacting Record Labels