How To Mix A Track As You Arrange


One question I get a lot when I teach production is, “Should I start mixing as I work on the track?” There isn’t a precise answer to that as each song is different. I will say though, I do start working on the mix in the beginning, but it isn’t necessarily in the way that people would think. 


There are 3 things I look into when it comes to making sure my mix is right, from the start.


  1. Gain staging. This is something I cover in mixing tutorials and workshops but it’s mostly about normalizing. You want your input (sample, synths) to be close to 0dB. Then you’ll adjust the fader to the level you want (ex. -10dB).
  2. Amplitude hierarchy. Which sound is the leader? That one would be the loudest of your mix for most of the song’s duration. The others will be adjusted in relation to the leader.
  3. Sequencing and negative spacing. This is where the important part is played. Many people struggle with the mixing done at the end of a song’s production because of all the overlapping in the song’s amplitude (volume) and timing. For example, if you need to use side-chaining between the kick and bass, that’s because you didn’t prepare any negative space for the kick to lead. Then you’ll have to carve both frequencies sharing and amplitude.


Proper Sequencing Means A Proper Mix


My motto is that if your sequencing is done properly, you won’t have much to juggle with once in the mixing stage. You basically don’t want the sounds to overlap so much so you won’t have to carve into masking issues.


When I get a song for mastering, one of the main tasks I have to do is adjust the loudness. If the gain staging is poor, then I need to boost it much to reach the standard loudness. If I need to boost the loudness, this means any sound that is overlapping will be squashed and merged with others, killing all the precision an airy mix would have, creating a muddy and lifeless master.


Now some sounds can share the same position in sequencing, such as how, in techno or house music, kicks, claps and hats will shuffle around. But as you know, they are not in the same frequency areas. Kicks will be in the lows, claps in the middle, and hats in the highs. Therefore there is space in the spectrum for all sounds to cohabit. The claps’ transients can also accentuate the kicks, giving them more punch. 


(H2 Tag – Make sure to adjust this on WordPress) Pay Attention To Dynamic Range

That said, those sounds will have more punch if you have control of their length. Dynamic range accentuates punch and precision. What we refer to as dynamic range is the difference between the loudest peak and the lowest part. If you insert negative space (silence), your sounds will hit harder in theory.


This means reverb, delays, and background noises can kill the dynamic range as they will take some space out of the noise floor. Adding too much will make a song sloppy and muddy.


When you have this in mind, you’ll start by picking sounds and adjusting their length, then normalize them (eg. bring them near 0dB). 


Be Strategic With Your Voicing


When it comes to creating the main idea of a song, we will refer to the sounds as voices. You’ll make your life easier by sticking to 4 maximum.


One voice can be a synth or an instrument. If you add layers to it, then it’s still one voice. But if you add a second instrument that plays different notes at different times, it will be a second voice. So four of them make it quite busy.


Space In The Mix


Amplitude wise, we know the levels must differ, but panning and stereo positioning can also make a difference. You want to keep in mind that you will try to avoid stereo overlapping as well but in terms of amplitude, if two sounds are fighting, you can pan them differently so then you have space, and clarity.


Again, when it comes to amplitude, you can cut some frequency based so that some low-end or mid-range don’t interfere. This is why EQs that are passive, such as Pultecs or 3-4 band EQs come in handy. They’ll let you adjust a range of frequencies without changing the whole spectrum.


In the end, I invite you to consider how you sequence your music with care and I believe your mix will be way easier.

What Makes A Difference Before Mastering

I often explain to clients, almost daily, that a good master starts with a solid mix. Therefore, I thought I’d list what actually makes a difference for me when I get files to process. This article will also talk about certain things that producers do to their tracks that they think will make the job easier for me, but really, they just end up making me work hard.


I would like to start with what is obvious to me but seems to not be for many clients, which is about how people listen to their music. Many times, people send me a song that will have issues related to how their studio is set or because of a lack of understanding about how their studio translates to the outside world. If the way you listen to music in the first place influences how you perceive it, it is clear that you’ll misunderstand the song you will get, once mastered. When I get feedback from a client that their song has a tone-related issue (too bassy, too bright), I will always reply with “compared to what?” Because in the end, that’s what it is – a comparison. You will always have some people comparing you to other things and the definition of perfection is extremely arbitrary. That’s why it’s always a good idea to provide me a reference. 


Every mastering engineer has their own touch, therefore the idea of working with a mastering engineer is directly related to how you like their work. The engineer will work with a definition of what they think works best for what you have, related to a genre, within a range of technical points that will make the best out of it. Therefore, the first thing that can make a huge difference is trust. When you have your song done and need the last touches, there can be some wild differences, but in the end, it’s about communicating your vision and hoping the engineer can manage to do it. I often get people sending me files and asking me if they’re ready for mastering to which I always tell them that the best way to know is to do tests, where you send me a version to master, and I see how your mix translates after the process. This is, to me, a huge step to build trust.


Obvious Technical Details


These have been discussed inside out. They’re also covered on pretty much any mastering sites or forums. However, I still get files prepared wrong. Some people forget, but there are also some people think they know better too, so let’s see once more, here:


  • No compression or limiting on the master bus: If you have your gain staging done properly, there will be no need to really have compression on the master as your loudness and density will be already solid. If you want to glue things all together, leave it to the engineer. If you want a certain vision, bounce a home master as a reference. A limiter is useful during production in case you get hot and push things a bit. Still, for mastering, you need to remove that tool because otherwise, it creates some intense processing on your transients and density that will be problematic for mastering. Note that many use limiters within the mix itself, either on the low-end buss or percussion, which is ok but sometimes can cause distortions too. Also, be careful with saturation on the master. Many people actually mess up their mixes that way – a 3-5% of wet factor of saturation may feel huge once mastered, so treat it with care.


  • Headroom: The usual requirement engineers will ask for is -6dBfs but nowadays, I’m cool with -3dBfs too, as long as there’s no limiting on the master 0and the transients are healthy looking.


  • Resolution and sample rate: This keeps changing but I find that the bare minimum is 24bit, 48khz. Some people send files with better resolution than that but on my side, I run most of my sessions in 96khz to get the best headroom so I can deal with pretty much anything. Of course, files have to be in stereo, wav or aiff.


These points are easily handled by most clients. If you aren’t sure of one of these points, you’ll easily get answers on forums or straight from a Youtube tutorial. I would say I often get files that don’t meet those requirements, but often we can easily fix them.


Average Level Technical Details


This is where things get messy. It’s what I would call, mostly average level. Meaning that new producers will have some difficulty with these but if you’ve been making music for a few months, and finished a bunch of tracks, you’ll probably run into some of these issues and the lack of experience might lead you into trying different things. It takes time to really pinpoint how a mix will translate after a mastering. It comes down also to your pick of engineer, their aesthetic and communication with you. Of course, the more you work with someone, the more they’ll know what you expect. Most of my recurring clients never ask for a revision because it comes as they want.


Advanced Technical Details:


  • Loudness. This is where many people are confused. There’s a difference between the peak loudness and the density of a song. I’d encourage you to get a loudness measuring tool and look into the LUFS indicator. 


If your track is at t -6dB, it means that I will need to add 6 dB gain as I’m trying to get it as close to 0dB as possible. In order to do this, I will need to boost the density to match other songs on the market. If your song is close to 0dB without density measures, it probably means that it’s not loud enough. 


There are multiple ways to boost the density such as saturation and compression. Sometimes, people wonder why their song is compressed and the reason is always about matching loudness. We can’t simply boost the gain, that won’t be enough. That said, people need to do their gain staging properly. I can’t explain in this post how to do it but there are multiple tutorials online for that


So, in the end, I always prefer a mix to be roughly around -15LUFS ideally. I can do with less but you’ll have to accept there will  be a pretty steep difference.


  • Stereo width. Most people I know love their song to be returned with a nice width, as they love to be wowed. If it’s too wide, there will be a loss in punch and assertiveness. Usually, people are pretty ok with this but there are a lot of people who get addicted to plugin that use width and clients might boost the sides a bit too much. I often have to rebalance the signal between mid and side. It’s not much of a big deal but if, in some frequencies, I notice the sides are too loud, I’ll have to control that because it might be a sign of phasing. That is one type of issue that clients have a hard time spotting because it requires experience or good monitoring tools. 


  • Saturation. Every now and then, I’ll have clients who will push saturation a bit much without knowing that loudness matching will multiply that crunch by much. This results in weird clipping, distortions, noise, nastiness. Some people are ok with that but some need to redo their mixes to find the sweet spot. My general suggestion is to add saturation until you hear it and then dial back a bit. If you hear a lot of the saturation and your gain staging isn’t right, I will boost your track much and the saturation will be boosted a lot.


  • Noise floor. If you record from synths and analog gear, there might be some noise in the background. You need to record as loud as you can so the noise doesn’t get boosted by your gain staging. It often happens that people record with lots of noise in the back and when I boost, then it gets amplified. So, be careful.


  • Effects. In general two red flags occur here: overuse of phasing, MS or reverb that is way too loud. Often clients have to fix the reverb and send me a new file. Long reverb are super tricky and sometimes I suggest to use ducking on it so it doesn’t mess up the transients or make the entire mix messy.


  • Compression. This one is tricky. Sometimes people will put compression on the master to glue everything together but I don’t recommend doing that so much. This is something I like to control myself since I do the final gain staging and overall adjustment of that matter. People who use compression as gain on the master or all over the place will end up having a track with exaggerated tails on the sounds that are supposed to be a bit shorter, which can have dramatic effects on the bass or the kick for instance. If they bleed into one another, the low end will be mushy and messy. Snappy kicks need space to be cutting through and if the mids are also bleeding all over the place, there will be a lack of precision. Overall, compression is useful yes but with some moderation, unless you want a puffy, really inflated-sounding track.


  • Samples. The higher the quality of your samples, the better the mix you might get. In essence, using mp3s or youtube ripped sounds will sound lofi and that might be exaggerated, once more, in mastering. This is where aliasing and weird digital artifacts can make a pristine-sounding song into a harsh one. When I refer to quality samples, I not only relate to the bit rate, but also for a good balance of density, clarity and precision. Samples with sibilant resonances and sharp transients also can be hard to control in the mastering process.


What usually really helps and will make a huge difference:


  • Resonances removal: If you think that I might do gain staging, you’ll quickly see how they’ll escalate into a harsh ringing if you have any resonances in there. Removing resonances isn’t something you easily learn but once you start being aware of the impact they have on your mixes, you’ll want to handle them right in the sound design part. While I can control them with my mastering EQs, there’s nothing like having a clean mix to start with. I had a try at this Reso EQ and it turned out to be quite solid. There also the MAutoEQ by Melda that detects resonances and lets you cut to taste.


  • Transients taming: There’s nothing more annoying than harsh transients on big sound system or at high volumes. There’s a difference between snappy and harsh, sometimes people don’t really realize until they hear the master. While I can control things, if you do the most cleaning on your side, your mix will sound stellar. One of my favorite transient shapers is Impact by Surreal Machines. But if you want something that is game changer, you can go high level and get the Oxford Transmod.


  • Proper leveling: This is the mixing 101 of all tips. Not much you can do else than practice, take breaks, listen to references but if you get your levels right. This always is a win in mastering.


  • Sidechaining, unmasking: If you have multiple sounds that are in the same frequencies, it will soon head into a masking issue territory. You can spend some time cleaning the frequency of one to let the other be heard but the fastest fixing method is side-chaining. Using TrackSpacer is always clean and fast, but lately, the new Neutron 4 has proven to be quite amazing. It also has a lot of other practical tools and it has been in every songs I mixed lately.


  • Proper gating: Gating is often misunderstood but it is a technique that will bring punch, clarity, dynamics to drums or anything with tons of details. It also resolves masking sometimes, clean noise floor and avoid muchiness all around. If you don’t know much about it, go check tutorials!


The last stretch of points is what I’d consider advanced but those are actually the ones that I will have the most trouble with because they should always be handled in the mix. The cleaner your mix, the better the master.


Favorite Equalizer For Electronic Music

People often ask me what my favorite equalizer for electronic music is, and my answer is that it depends on what their goal is, as well as their skill level. However, the EQs that I like for electronic music generally fit a certain set of criteria. Not every equalizer in this article fits all of the criteria, but here is a not-so-exhaustive list of things that I like to see when I’m purchasing a new EQ.

Keep in mind that all EQ’s are at their core, just filters, but some go above and beyond this. Equalizer settings for electronic music vary based on the timbres and styles, but each one of these will work universally for electronic music.


Criteria

  1. They have previews of the band that you can solo (you can press the button and hear the band on its own). This allows you to hear things more specifically.
  2. The plugin needs to be able to do oversampling.
  3. The plugin needs to be able solo the filter (EQ band).
  4. The EQ needs to have a mid and side mode, aka M/S mode.
  5. The EQ can switch from digital approach to analog. A digital EQ is very clean, and an analog is a little bit more organic and less precise.
  6. The EQ can be dynamic
  7. While all don’t have this feature, it’s nice if an EQ has a piano roll, so you can see how frequencies quantize to notes (this is a good way of seeing if a note will fit inside the track).


Fabfilter Pro-Q 3

A picture of one of the best equalizers for electronic music, in my opinion, the Fabfilter Pro Q 3

First on the list is the Fabfilter ProQ 3 – an affordable, easy-to-use EQ that hits most of the points I look for in an equalizer. It’s versatile, as in it can be used in both mastering and mixing. On top of state-of-the-art linear phase operation and the ability to get zero latency readouts on your EQ, you get natural phase modes, mid/side processing, and a bunch of other intuitive options.


A Neat Pro-Q 3 Trick


One of my favorite features is that if you have the ProQ 3 on multiple channels or busses, it can communicate with the ProQ 3’s on the other ones and let you know if there are conflicts in frequences.

Then, with the side processing (sidechain), you can easily duck precise frequencies, and you can even solo these frequencies to hear exactly how the sidechain is affecting the relationship between all the individual sounds. Or sometimes you don’t even need a sidechain, and you can just grab the curve and bring the conflicting frequency down.

Another neat trick with the Fabfilter ProQ 3 is that you can use it to split the stereo, and modify the same frequency at different amplitude levels on the stereo. So for instance, sometimes in a recording, you have a sound that mixes well on the right pan, and doesn’t quite mix perfectly on the left, but should be somewhat present on the left panning in order to fill out the stereo field.

With the ProQ 3, you can leave the level on the right channel as is, and on the left, alter the amplitude in order to fit the frequencies it’s conflicting with.

All of these reasons are why it’s a favorite equalizer for electronic music. It produces some of the best equalizer settings for bass, mids, and highs in all genres.


Wavefactory Trackspacer

A photo of Wavefactory's trackspacer, which allows you to have some of the best equalizer settings for electronic music without the hassle.

This one is not necessarily an EQ, but if you’re familiar with Wavefactory’s Trackspacer you can see why it would fit well within this list. Basically, it uses a mathematical formula in order to automatically figure out where conflicting frequencies are between two tracks and then it will apply precise side compression to the parts that are necessary to compress to get them to meld better.

You can even apply a low pass or a high pass filter to each end of the frequency spectrum to isolate what part of the sounds you want to compress. It’s ridiculously easy to use.


HornetVST Total EQ

a photo of HornetVST's Total EQ. It's one of my favorite equalizers for electronic music.

Not everyone has the money to invest in VSTs. However, HornetVST makes VSTs that are ridiculously cheap, and they often do sales, so you can get decent plugins for 5 bucks. 

The HornetVST Total EQ is similar to ProQ 3, sounds really good, and is easy to work with. Personally, I believe it’s better than Ableton stock EQ’s because you have a team working specifically on developing the best equalizer for electronic music (or all music at that matter).

While it doesn’t have all the gizmos and detail goodies that the ProQ 3 has, it’s still really good. For instance, it has 12 bands, a real-time spectrum analyzer, a whopping 17 different kinds of filters for each band, individual analog response and emulation for each band, band soloing (like in the ProQ 3), mono/stereo for each band, and a bunch more features.


Melda Productions – MAutoEQ

Image of one of my favorite equalizers for electronic music - the Melda Productions - MAuto EQ

The thing that makes this EQ special is the MeldaProduction Filter Adaption (MFA) technology which uses a formula to analyze your recording and make suggestions based on your recording, another recording, or even a spectrum that you can “draw” inside the interface. It’s kind of the Photoshop of EQs, in a way. It can also be used extensively for mixing and mastering.

MAutoEqualizer can place a track into a mix using the spectral separation feature, where you can, like in Photoshop, pencil your preferred frequency response. MAutoEqualizer’s technology will search for the best settings and alter the parametric equalizer bands to fit the best form.

With a normal equalizer, you are listening to the spectrum and then increasing or decreasing the amplitude of the band to fit what you believe is the correct level, which can be a chore. With MAutoEqualizer it gives your ears a little bit of a break by setting things to levels based on its algorithmic predeterminations. 

Also, if you are allergic to resonance in your sound then this EQ is for you. One of the things it does best is listen to the incoming signal, where it then finds resonances that it can apply filtering suggestions to. Then with the wet/dry knob, you can determine how much resonance you want in the areas it pointed out. It’s really simple, and a favorite equalizer for electronic music.


Brainworks’ BX3

A photo of the Brainworks’ BX3, which produces some of the best equalizer settings for electronic music.

A mastering and mixing EQ I recommend is BX3 by Brainworks. It’s an extremely powerful, surgical EQ that I use extensively. It can make space, clean, and can really polish things up. This EQ is not meant for adding color or character to mixes, but rather making sure that everything sounds as clear and crisp as possible. It’s a bit difficult to use if you’re not super familiar with mixing and mastering, but it’s extremely powerful, making it a favorite equalizer for electronic music.

This EQ’s Auto Listen feature automatically solos each band’s Gain and Q (resonance) controls based on their respective settings while doing the same with the channel’s Frequency controller. By setting Gain, Q, and Frequency on an individual channel (L or R), Auto Solo switches the monitoring to that channel.

Your tweaks are illustrated with separate frequency-response graphs for each channel. With this feature, you may notice that your adjustments will become more visible and audible than ever before since it allows for some of the best equalizer settings for electronic music.


Brainworks’ AMEK200

photo of one of my favorite analog emulated EQ's for music, the Brainworks’ AMEK200.

My favorite analog emulation EQ is AMEK200 by Brainworks. This is modeled after classic 70’s and 80’s mastering EQ’s, such as the GML 8200 and vintage SONTEC vintage EQs, but with some plugin specific upgrades, such as Auto-Listen features, variable high-pass and low-pass filters, and M/S processing.

All of these features result in a very transparent mix that does a really beautiful finishing. Note that the AMEK200 has no spectral readout, just knobs you twist, which is good for learning how to trust your ears.


So, which one is my favorite equalizer for electronic music?

There is no specific one. All of these plugins will allow for the best equalizer settings for music, whether that’s minimal house, techno, jazz, rock, hip-hop or k-pop. They all allow for the best equalizer settings for rolling bass, or entrancing mids, it just depends on your experience level, and your desire to learn and experiment.

This article contains affiliate links which I may make a commission off of.

Sound Design and Arrangements Series Pt. 4: Emphasis and Proportion

This post is part of a series: Part 1 | Part 2 | Part 3 | Part 4

In this post I thought I’d dive into two principles that I find go hand-in-hand: emphasis and proportion. Let’s start by defining what they mean, then how we can use them in what we love doing—music production.

In past articles I’ve talked about how to start a song. While there’s no right or wrong answer here, we can agree on certain points for the core of a song. Let me ask you a straight-up question to start with, which is, when you think of your all-time favourite song, what automatically comes to your mind as its most memorable part?

All kind of answers can come up, and perhaps you’re hearing the song in your mind while reading this. Maybe you remember the chorus, the main riff (motif), or have a part of the song where a specific emotion is evoked in you; you might even be thinking about a purely technical part.

Whatever you remember from that song was your point of focus. The focal point of the listener is what grabs attention and keeps it engaged.

Emphasis is a strategy that aims to draw the listener’s attention to a specific design element or an element in question. You could have emphasis on multiple focal points, but the more you have, the less emphasis impact you’ll have.

When producing a song, I like to ask, what is the star of this song? What is the motif, the main idea? What’s going to catch your attention first and keep you engaged? When listening to a song, you might have different layers and ideas succeeding one another, but of course, they can’t all grab a listener’s attention, as you can only really focus on 1-2 elements at a time. As explained in past articles, the listener will follow the arrangements exactly like one would follow the story line of a movie.

I see emphasis is from two perspectives: from the tonic side and/or from the storytelling part.

The tonic part is where you have your phrase (melody) and there is a part that is “louder” than the others. So, let’s say we take one sentence and change the tonic accent, it will change it’s meaning (caps represents the tonic):

  • I like carrots.
  • I LIKE carrots.
  • I like CARROTS.
  • but also, I LIke carROTS!

We have here 3 different tonic emphases, and in each, the focal point of the listener is shifted to a specific word. When we talk, we change the tonic naturally—emphasis on a specific word is to put importance on it for the listener. It can be used as weight, on insisting your position about a topic, or to clarify one word.

The same is also true for timing:

  • I like… carrots.
  • I… like carrots.

Or spacing perhaps the syllables to create another type of tonic:

  • I li..ke carrots.
  • I like car…rots.

Pausing creates tension as you wait. If you can focus on one idea and articulate it in various ways, you can imagine that your motif will keep the interest of the listener.

Now imagine these ideas transposed to your melodic phrase; you can play with the velocity, but also create emphasis by pausing, delaying, and accentuating it.

Potential solutions to add emphasis: velocity, swing, randomness.

In our coaching group on Facebook, I often see people try to focus on everything a song should have, but without a main idea and therefore without emphasis, listeners have a hard time getting hooked on any part of it. You can do anything you want in music, yes, but perhaps if you listen to your favourite songs, you might notice that they usually have a strong hook or something to suck you in.

Tip: Strip down your track to the bare minimum but so that it’s still recognizable as the same song. Are you left with the melody or is it something else? What’s unique about your song?

While this post is not going to discuss motifs and hooks in detail, since it was previously covered multiple times on this blog, I’d like discuss how emphasis can be used to bring a hook/motif to life.

To emphasize a specific sound, hook, or motif, you can use any of these techniques:

  1. Amplitude: One sound is 25-75% lower or higher in gain than another. Think of different drum sounds in a kit.
  2. Brightness: Brightness mostly starts at around 8khz. A filter or EQ boost around that area and higher will feel like magic. Same for multi-band saturation. This is why cutting or taming sounds compared to the one you want brighter will help contribute to emphasis.
  3. Thickness: If you take multiple samples, percussive for example, and compress some in parallel (eg. 50% wet) very aggressively with a ratio of 8:1, you will definitely see a difference.
  4. Dynamics: Using an envelope, map it to some parameters of your plugins to have them interact with the incoming signal.

However, all of these techniques depend on one thing: whatever you put emphasis on must have an “edge” in comparison to the other sounds. In ambient or techno with multiple sounds, you’ll want to make sure to setup routing in your production even before mixing your song. I like to group all elements that are decorative so they are treated as if they’d be a bit more distant. For example, for that group you could start by cutting most of the highs at around 10k with a gentle filter curve, then control the transients with a transient shaper by making them less aggressive and then have a reverb that focuses on a late response, which will create a distance. You can then lower the gain of the entire group to taste to get more of a background feel from all those sounds. Something like Trackspacer could also very useful here to create space between the main idea and your other sounds.

To support emphasis, you need proportion. In sound design, I like to think of proportion as an element of design more than a pragmatic thing. If you think of a drum set, all hits are really at different volume levels—you never see a drummer hit everything at the same volume level; they probably wouldn’t even if they could because it just doesn’t sound right. This is a version of proportion that can be applied to any of your sequences, percussion, and other ideas—it’s often related to velocity.

I also see proportion in the wet/dry knob of your effects. How much do you want to add or remove?

For the listener to understand the importance and emphasis of an effect, you’ll need to counter-balance it with something proportionally lower. If you want the listener to hear how powerful a sound is, try using another one that is very weak; the contrast will amplify it.

Proportion comes from different aspects. Arrangements take over from the mix in a dynamic way. So, if you think of your song as having an introduction, middle, and ending, proportion can also be address from a time-based perspective in arrangements. While there’s nothing wrong with linear arrangements, which are some of the friendliest DJ tools possible, they are perhaps not strongest example of proportion in music.

Here are just a few examples of how you can address proportion in your productions with some simple little tweaks:

  • When mixing your elements, look at the volume metering on the Master channel. You want your main element to be coming the loudest and then you’ll mix in the other ones. You can group all your other elements besides the main element and have them slightly ducking with a compressor. I’ve been really enjoying the Smart Compressor by Sonimus. It does a great job at ducking frequencies, a bit like Track Spacer but, cleaner since it provides a internal assistant.
  • If you’ve missed past articles, one technique I’ve outlined is the 75-50-25 technique, as I’ve named it. Once you have your main element coming in, you’ll want other channels to be either a bit lower (75%), half of the main (50%), or in the back (25%). This will really shape a spatial mix to really provide space and proportion for the main element.
  • I find that if you want emphasis, there’s nothing better to bring in some life in it and I’d recommend you use a tool like Shaperbox 2. I would automate the volume over 4 bars. I find that 4 bars is the main target for electronic music, mostly for the organization and variation it needs to keep the listener engaged. If it changes every 2 bars, the listener will notice, but every 4 bars, with a progression, it will create the idea that there’s always a variation. Also, I like to create fades in different plateaus of automation. You can have a slant between bar 1 and 2, then jump to a different level on 3 and a slow move for 4. This is very exciting for the ear. Pair that with filtering automation, and you’ll have real action. Emphasis will work well if this type of automation is happening on your main element, but it’s hard to do on all channels because it becomes distracting.
  • Supporting elements can share similar reverb or effects with the main idea for unity.
  • Dynamics are helpful for articulation and emphasis. The new Saturn 2 is pretty incredible for this—it can tweak the saturation based on an incoming signal.

Can you trust yourself to judge your own music?

This has been a popular topic recently—I think that because of the pandemic and the isolation that comes with it, people rely a lot on online contacts to get feedback on their music. The lack of in-person music testing as well as and lack of being able to go to clubs has changed the way we are able to analyze our own music.

I was a part of an organized live stream recently to support a friend named Denis Kaznacheev, who has been held in prison for something we all think is impossible (but that’s another topic). Being in a room with 4 people, playing live, and getting feedback after months of isolation was a weird experience. The first thing that came to my mind was, that my music sucked. Yeah, I also go through it once in a while, and I had forgotten how playing music for and in front of people changes the dynamic of a song. In studio, it sounds a specific way but add one listener and it’s all of a sudden, different.

Some song, different context, completely different mood. Was there something I could do to predict this?

Technically, there was absolutely nothing wrong with what I did. People who tuned in loved it. The thing that clashed was the mood, the feel of the track, compared to what I had in mind. In past articles I’ve discussed the importance of a reference track, and this could have helped me in this particular situation, and could have helped better classify my music as well. But as you know, there’s no do-it-all plugin that can prevent this. This is why many people struggle with judging their own music.

Technical Validation

When it comes to technical items, you can self-validate using some handy tools.

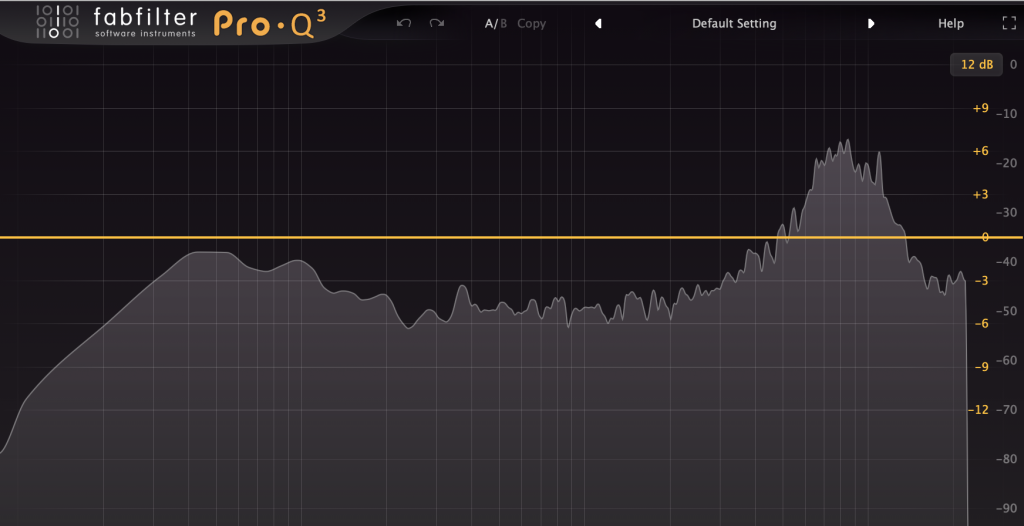
See if your track is, compared to a reference, feeling like the same tone and balanced, I’d recommend using Reference. This tool is my go-to plugin whenever a client insists that the track I’m working on doesn’t sound like a particular song. I’ll load up the reference song and then, after volume matching, I can see if the lows, mids, highs are adjusted in a similar way than my mix. It also shows you if you have, per band, the same level of compression or wideness. It doesn’t lie and you can match it to have something similar. But how do you raise one band to match the reference?

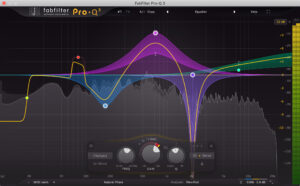
I use a multi-band compressor to compress and, or EQ. A shelving EQ, with 3 bands can be helpful to adjust, but a multi-band compressor really can set the tone. You’ll set the crossovers of each band to match Reference and by adjusting, you’ll see it react to your gain or reduction. While you could use any multi-band compressors, I’d highly recommend the Fabfilter MB.

The same company that makes Reference also made a plugin named Mixroom which, with the same idea as reference, focuses on everything in the mids and highs. It’s a bit tricky to use at first, but once I found reference songs that were analyzed properly, it gave me some interesting pointers on what to push or remove. I thought it was pretty interesting to reverse-engineer some complicated mixes.

Many times people will tell me they don’t like to compare to anyone or that they’re going for their own style but that’s like trying to draw your grandmother from your memory. Some people might do better than others, but audio is abstract and you need to compare yourself to someone else to know what’s lacking or overflowing. I mean, even within a mix, I compare my channels to see their peaks, densities, and panning to make sure one doesn’t cross another, unless to create something as a whole.

People struggle with loudness, but it’s is a bit easier to manage. You’ll need a metering tool such as the IKmultimedia TR5 Metering or the lovely Hawkeye from Plugin Alliance. They are costly but necessary. For a mix, you have to keep in mind a few details: the loudest peak should be -6dB, the RMS (more or less the density) around -13 to -20dB, in LUFS, I’d suggest to be around -15dB and dynamic range to be above 10. A plugin such as Reference will also indicate loudness, and that can be really useful to see if you’re in the same ballpark.

Please consider these are numbers I deal with, and that for certain genres, it can be completely different.

If you come to struggle with the low end, the guys from Mastering The Mix also have a low-end validation/enhancement with the excellent Bassroom plugin. Again, you’ll need a quality reference to do the trick, but once loaded and with some practice, a muddy, weak low end will be a thing of the the past.

These are the best technical validation tools I’ve used in the last few years. They’re efficient, affordable and very useful in whatever I do.

Self-Mastering and Mixing

Pretty much anyone who’s been making music for a while or has studied audio engineering will agree that mixing or mastering yourself isn’t the real deal. It’s doable, understand me right, but you’re not winning. With the previous listing of all the technical tools I shared, you can make some really efficient mixes, but perhaps sometimes that’s not enough.

As an engineer, the main thing I’ll say is that someone else might spot things that are in your blind spots, plus that person is also emotionally detached from the music itself, so making decisions feels like less of a risk in itself. If you’ve been reading this blog regularly, you know I often refer to our duality as humans to have a analytical side and a creative side. When I work with musicians, I invite them to see this duality as a muscle. Your creative side needs to be exercised; it needs to constantly be fed because it’s a sponge. You want to find the perfect routine and be efficient at it, then break it to pieces to reinvent your new way of making music by re-combining them for a new version of yourself.

The way I see music-making isn’t about trying to be in full possession of your potential, but more about always putting yourself into a state of instability and risk, so new creative ideas emerge. You’ll connect the dots of the past to create a path in the now.

This state of mind is one that is not always technical, and it’s raw. I would invite you not to tame it, but to create spontaneous ideas and raw projects.

This approach is basically the exact opposite of sitting in front of your computer to design and fix a snare. There’s nothing wrong with that if you like, it but like I say to people, artists should become experts at flow, not perfection. They want to be artists, not craftsmen. But I won’t stop you from being both—I just often feel that technical production doesn’t age as well as solid creative ideas. The only thing that stands the test of time is simplicity, and that comes with a mastery of both flow and technical expertise.

If you want to be a master at everything, you’ll be very average at everything as well for quite some time, or potentially forever.

So, imagine you have an amazing idea that you made but you are very average at mixing and new to mastering—you’ll probably be butchering your idea when you try to do either. Yes, you save money and learn by doing it yourself, but I think if you’re aspiring to release something on a good label, to get attention, it might be a good thing to have someone look into your mix, even a friend. But if you really want to do it all yourself, get yourself solid tools to make sure you get the most out of them.

If you want to practice mixing, I suggest trying to find what I call, a swap buddy who can send you their mixes and vice-versa. You both learn by tweaking each other’s work, and going back to your own music after will feel easier, and clearer as well.

Psychological Validation

Now, psychology is an area where don’t get any tools to help that we all have to deal with. It’s that limbo where you maybe made a few different mixes and feel unsure which one is best. You know technically everything is there and in order, but in the last bit you’ll try to label your song into one of these buckets: Good, Not Good, Still needs work, Ready for mastering…etc.

Are advanced, experienced, and veteran producers exempt from this state of mind? Not at all. After decades of making music, I still have no idea if my music is “good” or not, even if got in the top 10 on Beatport or if my friends all love it. Deep inside, sometimes, I’ll doubt myself. However, I came up with some personal rules to help me judge if I think my own work is decent or not.

Deal with technical points first: This is why I started this post with technical stuff. I see in our Facebook group, people giving feedback, and my observation is that it is often biased by their mood or listening situation. What has become clear to me is that when giving feedback, you need a common reference. I can tell you that your kick is too loud, but compared to what? I have clients sometimes who complain about the low end being overpowering but in the same mastering session on that day I had another client who loved really, really loud kicks. The difference was laughable and both had the exact opposite feedback: one had weak low end but he felt it was too much while the opposite was a bass orgy but he wanted more. Could it just be what they hear? Yes, probably, and this is why you need to be able to use a FFT to check, but also, listen to you music in the middle of a playlist that has other songs of the same genre to know if it sounds right.

A client was telling me “It sounds right in the studio, wrong in the car and at home, its a different song… which one is right?”

The one that is right should be your studio version, but it should be cross-validated technically with other songs. If it doesn’t sound right at home, then find a song that sounds good there and then study it at the studio to see what that song has that yours don’t.

Know that you’ll never really have a permanent opinion about your music. Each day your mood might change and affect how you appreciate your music. Down the road, you’ll learn new techniques and then hear mistakes in your song, you’ll hear a better song than yours… all these points will make you doubt yourself. You’ll always want to go fix something. Since you know you’ll never be really satisfied with it, then you can accept to move on faster. Just start another song, apply what you learned, use your new influences and try something new.

Nothing exterior will validate your music. No matter what you think or do with your song, you might doubt it. This means, you don’t need the latest synth or to be on that specific label. “...and then I’ll be happy.” is a fallacy. Knowing that, it re-centres you to count on a handful of friends for feedback.

4. Let things age. Nothing better than taking a few weeks off before listening to know how you feel about it.

What’s interesting is that, whenever I receive criticism, I start see a perspective I didn’t look into enough—super important. Music production and audio engineering is often discouraging and that’s the reality of the art. That said, I don’t think there’s a day where I make music that I don’t learn something new. Accept that everything is work in progress. This is why songs that take too long to finish are often because my perfectionist side took over, and that’s not where I can make magic happen—it’s often the other way around.

Sound Design and Arrangements Series Pt. 2: Balance

This post is a part of a series: Part 1 | Part 2

Balance in mixing—and in music in general—is one of the main aspects of healthy sounding music, mostly because it is a reflection of space, and perhaps, our life as well. While this post is mostly about my philosophy of work, I’ll still discuss some technical tips that can be applied to your mixing strategy and arrangement work.

Let’s define what balance means in design and see how this translate to music:

Balance is the distribution of the visual weight of objects, colors, texture, and space. If the design was a scale, these elements should be balanced to make a design feel stable. In symmetrical balance, the elements used on one side of the design are similar to those on the other side; in asymmetrical balance, the sides are different but still look balanced.

Source: Getty Edu

While this comes from visual design, you should already able to see how this is applicable to the world of sounds. When I first read this definition, I could understand how I was already applying it to mixing music, as I get very conscious of space and the distribution of the frequencies. One of my favorite tools at the moment is Neutron, which I use on all my groups and sometimes, all channels, so I can monitor all of them visually. I can also apply EQ flipping, where if you boost on one channel, you’ll do the exact opposite cut on another channel that is battling the first one to be heard. Using the Visual Mixer tool, you can then place each sound in space. For people who struggle with panning, this is a precious tool that will also help you see if you have distributed your sounds properly.

One of the most misunderstood aspects of mixing I see is the volume difference between elements. Thinking that everything should be loud is a not only a misconception, but it creates imbalance. The volume difference represents the space use and you need some that are further away otherwise the louder one won’t be important, they’ll be lost.

Same goes for textures. Not all your sounds can be textured simultaenously, otherwise you won’t be able to notice their differences. However they can all be textured at different times. I like to split the arrangements timeline in 3 parts and will let sounds have their moment in each; it keeps the story evolving.

Regarding the stereo spectrum, we often relate this to left and right panning, but one important part a lot of new people to mixing don’t see is the importance of the mono section. If you want your song to have a backbone, you need that part to be dead solid. One trick I like is to have a compressor in a return channel and add a mono utility there. I’ll send a lot of my groups to that mono’er channel that will beef up the mono signal of the track.

As for the frequency spreading, I find that your whole spectrum can be divided in 5 sections: low, mid-low, mids, highs-mid, highs. You can technically have them all loud, but that’s not really good balance, and your mix will probably sound harsh if you don’t control resonances and transients properly. I think having 2 out of those 5 frequency ranges slightly lower than the others will give some room for your mix to breathe. When people book me for mastering, they can select a coloured or transparent master, and if they ask for coloured, this is basically what I’ll do. Re-adjusting 2 of the bands will give a new tone to the track and most of the time, mixes I get are already unbalanced as there’s often a band that is way too loud (most of the time, the lows). If the lows are too loud, then I will lower them.

Now, when it comes to arrangements, this is where it gets fun.

I find that there’s a lot to say about the significance of arrangements. Arrangements come in many forms: short stories, edited experiences, live jams, etc.—but I find those three types are a good starting point. A pop song can be a short story, and a piece of minimalist techno music can also be one, but with a different purpose. The reason we apply a certain methodology to arrangements is to maximize the potential of the sounds, as well as the patterns. In the previous post in this series, we talked about contrast and how it can be used in a specific sound—balance, on the other hand, can be exists on multiple levels.

How Do I Know if an Arrangement is Well-Balanced?

The idea of using balance to leverage creativity is not a rule, but an idea and approach. There are countless pieces out there that have no balance and it work perfectly. I find that balance in arrangements is a method of regulation, but it’s not something I’d focus on alone as the main approach.

See balance as tomato sauce. It can be a really great base for a lot of dishes and yes, it can be used as-is, but it does a better job when it’s combined with other ingredients. This is why it works well on a pizza and pastas, etc.

So It depends what you listen to and of course, some great songs are totally unbalanced and that’s what makes them special. I like to say that rules are made to be broken, but you need to know the rules first. A balanced song has a better chance of creating a quality that we all strive for in music: timelessness. In visual arts, minimalism aged well. The logo of Mercedes has basically remained the same, compared to Google’s original disaster brand. Same for music, in general. What I see is that music which is balanced, has a number of sounds playing at a time and has an organization and internal self rules that are set to keep a clarity and easy understanding.

I find that balanced arrangements usually feel easier to understand and are not too destabilizing. But if you go in the opposite direction voluntary, it can be a good way too create contrast.

A song with a balanced mix has a full presence and usually doesn’t have one element stand out. So for percussion, I like to have a balance of numerous sounds but you can then have one that pop out, in contrast (refer to part 1).

As for having balanced arrangements, I’d recommend the following:

Set the rules of your song in the 1st minute (or first part). This can be the tempo, time signature, density, motif preview, etc. The rest of the song is a balance of contrast operating in the rules you’ve set. By balance, we can agree that it’s about not placing all your tricks into the same thing.

Distribute your ideas evenly across your song. I’m talking about the motif for instance, that could reveal one variant more per section. Balance predictability as well unpredictability by having your sounds come in and out at times the listen gets used to.

Use repetition to create patterns that support one another. The famous call and response technique is a good example.

The best way to leave annotations in your arrangements is by adding a empty MIDI channel and creating blocks that you can stretch over sections of your song and leave notes accordingly. This can be very helpful if you have a hard time seeing how sounds are distributed once a channel is flattened.

I like to have colours for each genre of sounds. This usually tells me if there’s too many percussion blocks compared to another group, for example.

Background sounds are often a good way of helping everything work together. Songs that feel full have a background, a noise floor. It can be a reverb, noise, or it can be field recordings. People often ask me where you can find sounds like that. Archive.org, Freesounds.org, Loopcloud, and Soundly are all super useful for finding these as well as odd and out of ordinary ideas.

This post is a part of a series: Part 1 | Part 2

Tips to Keep a Loop Interesting for an Entire Song

To keep a song built mostly on a single loop interesting, we need to discuss how you work and your perceptions. I can’t just recommend technical bells and whistles that will solve everything. You need to think about how you see your music, and from there, there are certain things that I think can make a difference in helping to keep a listener engaged, even if your song is built around a single loop.

There are two main things you need to consider with regards to listener engagement when making a song:

  1. How someone listens to a song.
  2. How your song can engage the listener in his/her experience.

Meeting Your Listener’s Expectations

If you read this blog, you’ll know that this topic has been covered in other posts, so I won’t deeply go into this again but I’d like to remind you of a few key elements. The first and foremost important point here is to understand what you want to do in the first place. From the numerous talks I’ve had with clients, this is where many people get lost. To know what you want to do with a song has to be clear from the start.

Is a plan for a song something set that can’t be changed afterwards?

Of course you can change your mind, but this can open a can of worms, as the direction and vision of what you want to do becomes less clear. Music is about communicating some sort of intention.

When, in the music-making process, should you set your intention?

You don’t have to about your intention explicitly, of course, but doing so helps if you’re struggling with a lack of direction or when you feel you can’t reach goals. I find there are two important moments where setting an intention can provide significant benefits. The first is when you start a project—when you start a song, you can think of something somewhat general, such as “an ambient song” or “making a dance-floor track”; but the more precise you are, the more you are establishing some boundaries for your wandering mind. Many people don’t feel this approach helps and may skip this aspect of writing music, but for others, it can be a leveraged to maximize your efforts in what you do.

For instance, I often make songs without a precise goal because I just like to let things flow and to see how it’s been made affects the end-product. But when I’m asked to make an EP, I need to focus the results.

For me, for example, to meet my client’s expectations, I need to know what they want. It helps if they work in a specific genre or can reference an artist they like so I can help them deliver music that will appeal to people with similar tastes. When working with a clear intention, one needs to study how the music is made, more or less, in terms of variations, transitions, number of sounds, duration, tones, etc.

The objection I always get to this recommendation is “yes, but I want to have my own style.” I feel this a bit of a erroneous statement. We always are influenced by other artists and if you’re not, then you might have a problem in your hands: who are you making music for?

I know some people who make music for themselves, which is great. But when they tried to sell it or promote it, there was no way to know who it was for because we had no model to reference. Can you be original and still be heard? Yes, but I think a certain percentage of your songs need to have some sort of influence from a genre that people can relate to. For example, a very personable version of drum and bass, or house—then your music will fall under certain umbrella.

Meeting Your expectations and Your Listeners’ Expectations at the Same Time

The number one problem I hear is of the producer being bored of his/her own music, rather worrying that the listener might be bored, and that’s quite normal, considering the amount of time one can spend making music. Personally, I make my songs with a meticulous approach:

  • 1 idea, 2 supporting elements.
  • Percussion, limited to 5 elements maximum.
  • Bass.
  • Effects, textures, and background.

That’s it.

The main idea rarely evolves more than 2-3 times in a song. If it changes more frequently than that, you might want it to evolve on a regular, precise interval, i.e. changes every 2 bars.

When Writing Music, How Can You Keep a Single Idea Interesting?

I use design principles that are used in visual content and apply them to my music. If you learn about these principles for music-making, you’ll develop a totally new way of listening to music. In searching for these principles, you’ll see some variety, but generally these are the ones that usually come up:

Balance: This principle is what brings harmony to art. Translating this to music, I would say that, mixing wise, this could mean how you manage the tonal aspect of your song. If we think of sound design, it could be the number of percussion sounds compared to soft sounds, or bright vs dark. I find that balanced arrangements exist when there’s a good ratio of surprises versus expected ideas.

Contrast: Use different sources, or have one element that is from a totally different source than the others. This could be analog vs digital, acoustic versus electronic, or having all your sounds from modular synths except one from an organic source. If everything comes from the same source, there’s no contrast.

Emphasis: Make one element pop out of the song—there are so many ways you can do this! You can add something louder, or you could have one element run through an effect such as distortion, and so on. Emphasis in music is often related to amplitude, dynamic range, and variations in volume. In a highly compressed mix, it will be difficult to make anything “pop”.

Pattern: This is about the core idea you want to repeat in your song. It can also be related to the time signature, or an arpeggio. It could be the part you repeat in a precise or chaotic order.

Rhythm: This is the base of a lot of music in many ways, and this, to me, can directly refer to time signature, but it can also mean the sequence of percussion. You can have multiple forms of rhythm as well, from staccato, chaotic, robotic, slow-fast…it’s really one of my favourite things to explore.

Variety: This relates to the number of similar sounds versus different. This is a bit more subtle to apply in music compared to visual design, but a way I see this is how you repeat yourself or not in your arrangement. If you make a song evolve with no variety, you might lose the listener’s attention…same thing for if you have too much variety.

Unity: This is what glues a song together. To me, the glue is made from mixing, but there are things you can do that makes it easier, such as using a global reverb, some compression, a clean mixdown, same pre-amps (coloured ones) or a overall distortion/saturation.

To wrap this up, I can’t recommend to you enough to space out your music sessions, set an intention and pay attention to your arrangements. If you know what you want to achieve with your song, you can refer to a specific reference, and then build up your ideas using some of the design principles I have discussed in this post. Good luck!

Bass Line and Low-End Mixing Tips

Tips on mixing low-end is an often-requested topic in our community and Facebook group. Handling low-end in electronic music is important to give it the glory it deserves, since it’s one of the most important parts of the genre. In this post, I’ll cover tips on how to handle low-end from multiple points of view, not only from the software side, but also from a monitoring perspective. As I’m writing this during the COVID-19 pandemic quarantine, I’ll also propose some tips on how to manage low-end at home.

The Theory

I won’t go into boring engineering theory here because it’s not my blog’s style. I like to keep things simple and straightforward. So for making low-end easy to understand, let’s cover a few important points:

  • For the purposes of this post, “low-end” means 20hz to 300hz.
  • The low-end is basically the fundamental part of your song. If it’s muddy, your track will not flow.
  • Low-end is the most powerful part of your song in terms of loudness. If your song has a lot of lows and not much mid, it will feel less loud while in theory while actually being very loud from a technical point of view.
  • Over-powering lows makes a song feel muddy and empty in a loud, club context.
  • Lacking lows will make your song feel wimpy.

When it comes to mixing, I usually start by cutting everything with a filter or high-pass EQ at 20hz with a 24db/octave slant. This cuts unnecessary rumble that most sound system can’t reproduce. If you feed monitors garbage frequencies, it takes away precision in the “good ones.” So I cut everything on the master/mix bus, but I will also high-pass every channel by removing any frequencies aren’t needed. When mixing claps, for example, I will remove everything under 300hz.

Low-End Frequency Bands

  • 20-30hz: The section is the sub area. Not always present in every sound system, but when it is, it really creates a warmth that is quite addictive.
  • 30-50hz: I find this section is where a song gains in power. Most clubs cut at 30, and on vinyl records they also cut there—this zone is critical.
  • 50-80hz: The range that creates a lot of punch.
  • 80-100hz: Punch, presence and precision.
  • 100-320hz: This is the body of the song. It gives a lot of weight.

I usually put everything under 150hz in mono. This really solidifies the low-end and avoids phasing issues that are often present, which can help in clarity. Vinyl cutting requires mono low end or the cut will make the record skip. I’ve seen producers who enjoy the weird effect of a stereo low-end but that’s for home listening mostly, and they know there can be issues.

Frequencies are shared by many sounds, and the more you free space for your low end content to breathe, the better it will perform. I know it’s time-consuming but there’s nothing like doing it this way compared to using a side-chaining tool. This phase of mixing is critical for clarity. The more care you put into each channel, the better the results will be in the end.

Since the low-end has fundamental notes, in electronic and dance-oriented music, it’s generally important to pick a key note for your song and not change it much. You can change it as much as you want, of course, but if you do, you’re going to deal with a few headaches.

The Challenges of Mixing Low-End

Handling low-end has multiple challenges, but with time, but hopefully some of my suggestions here help you to deal with those challenges more effectively.

Monitoring

In general, people who can’t hear or deal with low-end properly is because they’re not equipped to work with it. Using a sub is a good, but it will never have the precision of a tool like the Subpac. The Subpac is a wearable device that reproduces the low-end more physically, making it easier to understand what’s happening down there—you feel low-end on your back directly. Headphones, on the other hand, can mislead you, as you cannot hear lower frequencies.

After figuring out the bet monitoring options for your setup, you need to A/B your mix with something to see how your low-end compares to it. There are two main plugins I highly recommend for A/B tasks: Bassroom and REFERENCE. Both allow you to pick a song you like, and then it measures your work in reference to that song to show you how to manage your song to get the desired result. Doing this without these plugins is very hard unless you’re a veteran engineer.

A/Bing requires something very important that a lot of people find difficult to understand when I explain it: you need to find quality song that has well-mixed low-end to compare your work to.

You can’t make quality music if you have never been exposed to it beforehand.

Low-end mixing approaches also vary widely in genres and producers. I would recommend that you pick a song to A/B that you like the feeling and sound of, and then try to emulate it with those plugins. For instance, some techno producers prefer the bass too be present all the way to 20hz and the kick to hit at around 80hz, while some other genres, it will be the opposite. One isn’t better than the other—they’re just styles—but both will create a certain feel on a dance floor.

Shared Frequency Ranges

Speaking of the kick, I should also mention pads, toms, and synths, as they all share space in the low end with the bass elements. It can quickly get messy down there, and the more shared space, the muddier it gets. If you look at the different bands I mentioned, I try to make sure one one sound per section occupies each band. This is why side-chain compression can come in handy—when the kick hits, you can apply ducking to all the rest of the signals that could be present in that range as well. You can also side-chain the bass with percussion or synth so they all have a moment but not at the same time. For quality side-chain compression, I highly recommend looking into the Shaperbox 2 plugin. It’s a “knife” for extremely precise ducking, filtering, and applying mono to your low end—it’s crazy-good.

Space is not only shared in frequencies but also in time. We all love low-end and I see people getting a little bit too excited and have way too much decay on all their sounds down there, which means a lot needs to be removed. The shorter the sounds, the clearer your low-end will feel. You can do that with Shaperbox 2 but also with the very useful mTransientMB that can help you make super punchy sounds.

This means that picking your envelope can be a very delicate task. If your low-end has too much attack, it will compete with the kick and make things muddy. If it lacks attack, it will feel slow and lifeless. To shape your sounds, I would say Shaperbox is the best tool, but if you can look into understanding the attack/decay/sustain/release of your tools and perhaps looking into a good envelope follower, too. Some max patches can really come handy for this as well.

Density

It’s not because your low-end is loud that it’s dense. If you have your low-end coming in loud, it might need some compression to have more density. I find that the best way to get that is by having side-to-side compression (eg. insert 2 compressors), both in parallel mode (wet/dry at 50%) which will condense the signal and make it thick, warm, and fat—pretty much what we love in low-end. You can also add harmonics by using some saturation. I personally find that the most interesting saturation for the low-end is tape; it just works very well. My favorite is the Voxengo CRTIV Tape Bus plugin, it’s a marvel.

Practice Mixing Low-End

Practicing the mixing and design of the low-end of your song takes time, good monitoring, and understanding of each of the challenges that come with it. Once you start working on it and start feeling something isn’t right, check which challenge you’re facing. Try to be methodological about this.

Here’s how I approach it, step by step.

  1. Pick the root key of your song; G, for example.
  2. Find the hook, motif and main idea of your song, then tune it to the key. Usually the main idea, which could be an arpeggio, will situate itself in around G5.
  3. Use the same idea, pitched down to G1-2 to define your low end. It could be one or two octaves difference. It will support your main idea in the same key, making sure your song feels unified.
  4. Put in mono—all your elements under 150hz should be mono.
  5. Add your percussion. You can tune each element to the root key. Tuning the kick can really give a whole different feel.
  6. High-Pass all channels to remove garbage frequencies.
  7. Clear the decay. Fine tune the decay of all sounds so there’s no bleed and they have more dynamics.
  8. Side-chain elements that are masking one another.
  9. Add or control the attack of each sound for precision.

If you do the items in this checklist, you’ll have much better results already. The rest will come with time.

Writing Bass Lines

This tip builds on my previous post about chord progressions and music theory. I come from the dub techno world where we had one-note, one-bar bass lines that felt satisfying enough, so when people ask me if a bass line can be monotone, I sometimes reply that the simplier the low end, sometimes the more effective it can be. Sometimes making it complicated doesn’t mean good. That said, having a bass line over two bars instead of one is often pretty lovely for variation.

I also find that powerful basses are the ones that are reply to the main idea. Support is efficient, but it will make your bass line lack interaction and making it less engaging.

A good way to find a dialog for a bass is to put a square LFO modulating the volume and then using it to mute parts of your bass. If you change the speed of the LFO, you’ll gate parts out, and might find a good combo or variation. In Hip Hop, they often use a pure sine tone and they’ll duck with an LFO or kick. This makes the low end very full and thick.

Oscillators

If you’re going to pick a synth to design with, it might be wise to consider the use of certain wave shapes. For instance, a sine is warm and pure but it can have resonances which are difficult to remove with a bell EQ because they can phase. You want to control your low end only using filters (high-pass) or a shelving EQ. A filter’s slant will help control a rumble. You can put it at 30hz and then switch the slant from 6dB/oct to 12,18, 24 and see how the low-end changes. They all make it very different, from taming to numbing it out. I like to use a square oscillator, but I’m not a fan of the harmonics it creates, so I will filter some out. I’m very careful with resonances in the low-end, but they can also bring a certain warmth to it. For instance, you can use resonance as an extra sine oscillator, which brings fullness to the low-end.

I hope this covers low-end sufficiently for you. Feel free to share your own findings, techniques, or extra questions!

Tips for better clarity in your mixes

Clarity in mixes is not something people understand or perceive well when they first start mixing, but it’s a magical part of a song that often distinguishes professional mixes from amateur mixes. Clear-sounding mixes instantly grab your attention because they feel precise, open, airy and easy to understand. While clarity in a mix might seem easy to create, it’s actually very difficult to achieve.

I can say that I’m starting to better understand clarity myself. If you’re familiar with my music, you know I like busy music and my songs are generally quite full, with multiple layers of sounds. It’s a challenge for me to get a clear mix because of the number of sounds I use, but for me this is also the best way to practice mixing clearly, as it’s more difficult than if I were only using a minimal amount of sounds.

Here are some of the things I’ve learned when creating clarity in my own mixes.

Less is more, and less is clearer

The less you have going on, the clearer your song will be. Nothing clashes and there’s less to try to find an appropriate spot for. When mixing, you need to find a fitting place for every sound you use. If you have 5 hihats, 3 claps, and 5 melodies, this can become quite a challenge.

How can you clean up a mix and make it clearer?

I see a lot of clients struggle with cleaning up their mixes. Most artists suffer from a strange thought process that goes something like “I’m afraid the listener is going to get bored, therefore I will fill my mix with as much as possible so the listener never feels let down.” To this I would reply that there’s a remedy in your DAW…the mute button! Let me explain:

1 – Loop a section of your song, the part where it’s the busiest.

2 – Mute everything, then start by un-muting your essential sounds. What are the fewest number of sounds that can communicate your song’s idea clearly? Toggling mute on parts of a song sometimes create interesting perspectives and can reveal things you didn’t realize about your arrangements—it often takes fewer sounds to create a clear mix. This can mean no fills, no decorations, no backgrounds, just the essentials.

3 – Are your essential sounds sharing space in the frequency spectrum?

Technically, if you have less, sounds are most likely to occupy less space and clash with one another less frequently. Generally, there are a few areas where your sounds can clash:

  • Frequency: If you divide the spectrum into 4 or 5 bands, you want each band to have the same number of sounds. Low-end would be under 100hz, then 100 to 1k for mids, 1k to 3k for high mids and then 3k to 10k for highs, then 10k+ for the air/transients. If you have a hard time muting your sounds, you can also isolate a few different sounds in different bands.
  • Amplitude: Also known as volume, amplitude is often not understood properly. People want everything LOUD and are afraid that secondary sounds won’t be heard. Everything gets heard in a mix and sometimes, things that are less loud are way better. Some sounds should be the loudest, then the others should be mixed in relation to those. The greater the amplitude distance you have between your sounds, the more they’ll feel like they’re breathing instead of fighting. This is your dynamic range, a concept that’s often misunderstood. I would recommend playing with levels here and there as well. Having modulation on the amplitude of a sound is a good way to create a breath of fresh air in a mix. You can use a tool like MTremolo to give you a hand with that.
  • Sample length: This is something many overlook but is very important when it comes to samples. In many cases, samples people use are too long (too much decay) and that can cause a lot of noise, especially once compressed. Take kicks, for instance; people love big, badass kicks but don’t realize how problematic a long kick is in the low-end, especially in mastering. It bleeds in the bass and everything becomes mushy. I often use Transient Shaper (by Softubes) to shorten kicks or other percussive elements. You’d push the attack if you want and reduce the decay. You can also reduce the decay of a sample in Ableton if you go in the “Preserve” to be switched to “Trans” and then make sure it’s one-way, and play with the percentage to remove the decay.
  • Stereo space: I’ve explained this before and will refrain from repeating myself, but stereo clarity is crucial. If your sounds are spread wildly, you might get into phasing issues which means, you’ll end up with holes and sounds ghosting when they should be heard. I know that discovering phasing issues might be a bit of a mystery to many new producers, but with a good metering, you can see them. You can also listen to part of your song in mono to see if everything is coming out properly.

Chaos-inducing mixing errors

There are a number of tools and habits that can create chaos in a mix—I run into them often, and here are a few I see regularly that I can provide some advice for:

1- Using loop samples: There’s nothing wrong with using a pre-made loop or sampling something from source, but you won’t be able to access the loop’s sounds individually, and can get trapped dealing with issues that already exist within the loop or sample. If you’re using a loop, make it the centre of your song and make sure that you work the other samples around it. Tip: Using busy loops can be a bit of a problem, but you can use a multi-band compressor to control them, or put them in mono and use a multi-band stereo tool like the Shaperbox 2 to decide on the position of each sound.

2- Auto-panning nightmares: Making things move can feel exciting, but it doesn’t help mix clarity if you overdo it. Using multiple auto-pan effects on sounds can be cool, but the human ear can only handle a certain number of complex things going on. If on the first listen, one can’t understand the movement clearly, there are chances the modulation isn’t helping. TIP: Use just one auto-panning effect per song, max.

3- Delays and reverb: Reverb and delay multiply or make sounds longer, songs busier, and therefore, potentially more confusing. Reverb can be useful, but a type like Hall can make things sound a bit messy. I would recommend to have your reverb set to a short decay and low wet/dry. Darker reverb can also help preserve the highs in your song. Tip: Using reverb with a Chamber/Room at the beginning can help to know how much you should use. Also, if you can use a delay instead of reverb for creating wider sounds, use an EQ to tame the clashing frequencies.

4- Intense compression: Compression glues and adds body to sounds, but a compressor with a slow release and high ratio can also mess up the precision of a sound. Keeping some transients intact can really help a sound to pop out of a mix. If you compress, perhaps using the magic 1:1.5 ratio with slow attack to help the transient snap. TIP: Parallel compression is always useful for clarity.

My last general tip is to always check your mix in mono…it really helps!

I hope this was useful.

Does Your Mix Sound Too Clean? Unpolish It.

If you think about it, it’s pretty astonishing to consider the number of tools that exists to make our music sound more professional. Since the 90s—when the DAW became more affordable and easily attainable for the bedroom producer—technology has been working to provide us with problem-solving tools to get rid of unwanted noises, issues, and other difficult tasks. We now face a point where there are so many tools out there, that when confronting a problem, it’s not about how you’ll solve it, but about which tool you’ll pick. Some plugins will not only solve a particular problem, but will also go the extra mile and offer you solutions for things you didn’t even know you needed.

The quantity and quality of modern tools out there have led myself, and others I’ve discussed this topic with, to a few observations regarding the current state of music. A lot of music now sounds “perfect” and polished to a point where it might be too clean. Just like effects in movies, deep learning, and photoshopped models—it feels like we’re lacking a bit of human touch. On top of the tools, engineers (like me) are more and more common and affordable, which makes it easier for people to get the last details of their work wrapped up. For many, music sounding “too clean” is not an issue whatsoever, but for others—mainly those who are into lofi, experimental, and old-school sounding music—the digital cleanliness can feel like a bit much.

If you think about it, we even have AI-assisted mastering options out there, but mastering plugins are also available for your DAW (Elements by Izotope does an OK job), as well as interactive EQs or channels strips to help you with your mixing (Neutron, FabFilter Pro-Q3), and noise removers and audio restoration plugins (RX Suite by Izotope). We’ve been striving to sound as clean as possible, as perfect as a machine can sound, and with increased accessibility, technology gives us the possibility to really have things sound as perfect as we can dream of.

So where should you stop?

Monitoring

You can only sound as perfect as what you can hear. If your monitoring isn’t perfect, you might not be able to achieve a perfect sounding mix. I know some people who intentionally will work with less-precise monitoring—it could be on earbuds/Airpods (not the Pro version), laptop speakers, cheap headphones, or simple computer speakers. Engineers usually test their final mix on lower-grade systems to make sure it will translate well in non-ideal settings. Starting out mixing this way also works; if you make music on low or consumer-level monitoring, you’ll be missing some feedback, which can actually turn out to be a good thing for your sound.

When producing on lower-grade speakers however, it also means you might not polish parts that actually need fixing. One of the frequency zones that always needs attention is the low-end—not paying proper attention to mixing it can be problematic in certain contexts, such as clubs. In other words, making bass-heavy music without validating the low-end is risky, because compared to other songs of the same genre that do sound “perfect”, your mix might have huge differences, which could sound off. In my opinion, if you want an “unpolished” sound, you should still give the low-end proper attention if it’s an important part of your song.

However, having self-imposed limitations, such as in your monitoring, is a good way to add a healthy dose of sloppiness to your mix.

Technical Understanding

The more you learn, the more you realize you really don’t know much. It’s perfectly fine not to know everything. Each song is a representation of where you are at the moment with your music production. I never try to accomplish a “masterpiece”. The more time and energy I put into a song to make it sound “perfect”, the more I realize I’ve sort of screwed up the main idea I had in the first place. Quickly-produced music is never perfect, but its spontaneity usually connects with people. I see people on Facebook amazed with music I’d consider technically boring from a production perspective, but the emotion these works capture strikes people more than the perfection of a mix.

Every time I search for something music-related, I learn something new. There are also some things I’m okay with not doing “the proper way”. I don’t think my music should be a showcase of my skills, but more of a reflection of the emotions I have in that moment.

I often see people over-using high-pass filters in their mixes, which makes their music feel thin or cold, or using EQs side-by-side that could introduce phasing issues…but does fixing these things actually matter? I’ve made some really raw music without any EQs at all (Tones of Void was recorded live without any polishing), which sounded really raw and was my most complimented work in the last 10 years of my productions.

Similarly, a lot of producers know very little music theory—how important is it? I’ve never gone to school for music and it’s only recently that I started wanting to learn more about it. Clients often ask me questions like “is it okay if I do this?” To which I reply that there is no right or wrong. Following rules might actually lead you to sounding too generic, if you’re technically-influenced.

The resurgence of tape in production and the rise of lofi love is great thing for music. People on Reverb are buying more and more old tape decks, four-tracks, and recording entire albums on them. One thing I love is the warmth it brings and the hiss as well (note: I get sad when clients ask me to remove any hiss). Some even have a shelving-EQ that can create a nice tone. Using an external mixer for your mixes can also create a very nice color, even on cheaper ones. Perhaps you shouldn’t be looking for the best sounding piece of equipment to improve your sound!

References

If your usual references are music that is really clean-sounding, you’ll be influenced to sound the same. I like that at the moment I see younger producers who are interested in uncompressed music, and like to have as much of a dynamic range as possible in their work; this is the opposite of the early 2000s when people thought loudness was the way to go—a trend that made a lot of beautiful music sound ugly as hell. Now some of the top producers have been passing their love for open dynamics on to the people who follow them, and that opens up a really large spectrum for exploring the subtle art of mixing.

When music is too clean and safe, it also becomes too sterile for many peoples’ tastes. If your references are only the cleanest sounds possible, perhaps you should explore the world of dub techno, lofi, and strange experimental music on Bandcamp—you’ll start to understand how music can exist in other ways.

SEE ALSO : How to balance a mix

Making Digital Synths Sound Analog

In exploring online electronic music production groups and forums, you’ll see a lot of hate around the use of presets. Some people think it’s a lazy way to get things done, and others that it’s just less creative and adds to the pool of music that all sounds the same. I have no shame saying that I myself use presets. I use presets to help myself understand concepts, how my tools work, and to give myself ideas that are outside of my normal routine. However, I don’t use presets “as-is”; generally—at the very least—I’ll run the sounds through a hurricane of colouring tools. I’m mostly drawn to very, very bizarre sounds that presets are usually not made for, except for some made by Richard Devine (but he usually goes too far).

Personally, my biggest pet-peeve with presets comes from cold-feeling digital synths or pads—they sound like Kraft Dinner served cold with canned peas; plain and horrible. Not only do I dislike these sounds themselves, but I can’t get over the fact that very simple things could have been done to enhance them, which is why I am writing this post.

Why Digital Presets Sound Cold and Bland

Analog equipment involves slight, microscopic, ever-changing modulations. Digital plugins and presets do not have these variations—they operate in a linear way. Think of an analog watch—the hands slide from one number to another without pause. A digital watch jumps sharply from one number to another without anything in the middle. This is the simplest analogy I can think of to help you understand why digital synths often sound surgical and cold, and inversely, why analog synths sound round and warm.

There are things you can do with tools to remove a digital or cold feeling, which mostly involves embracing the world of subtleties and tiny modulations. Don’t be afraid to push things to the point of feeling slightly “ugly”. Let me explain:

One of the things that’s become more obvious for me lately is how a tiny bit of distortion and clipping can bring a lot more of precision to a sound in a mix. I’ve always been a fan of saturation (sometimes my clients tell me to reduce it a bit); in case you didn’t know, saturation is a mild form of distortion—wave-shaping that you can really push in a very subtle way. Subtle distortion sort of breaks a signal’s linearity, or coldness. Recently, I was in a studio with my friend Jason—a brilliant sound designer—and asked him how he turns something cold into something more analog sounding. While he could have applied a bunch of effects and processing to a sound, he said he was more interested in creating multiple layers around the pad or digital sound.

A good way to combat the cold side of digital sounding synths is to add a good dose of acoustic samples, field recordings or other organic sounding findings around it. The combination of digital and organic really guides the perception [of the listener] away from the digital aesthetic.

What makes some acoustic recording samples feel warm is a combination of a bunch of things. The quality of the microphone, for example, can translate a lot of the details and capture more depth. The sample rate of the recorder will also make a huge difference. Microphones are often overlooked, but they basically determine the level of precision in your recording; if it’s extremely precise, with a lot of high-end information, it will contribute in the definition of the sound quality. Another thing to consider is the preamp of the recorder. There’s a world of difference between preamps, and having high quality one will certainly add a lot to sounds. If your sounds are thin and lacking substance, you can also use preamp plugins. Some of the best out there are from Universal Audio, but you can also rely on Arturia’s preamp emulation for something quite impressive as well.

I had a talk with someone who was saying that one of the things that made Romanian techno so good was the combination of the acoustic kicks with the analog ones, to which I added that without good preamps, the acoustic kicks would sound like garbage.

If you have raw synthetic sounds, you can also pass them through some convolution—this helps create a space around it. The mConvolution Reverb by Melda is quite spectacular. It also has some microphone impulse response which mimics as if the sound had been recorded in a space. You can make it multi-band so you can assign specific bands to have a specific reverb type(s). This allows you to be very creative, and if you leave it at a very low wet rate, it will infuse the sound with a nice, warm presence.

Regarding warm presence, again, with distortion, I’d encourage you to look into trying various distortion plugins and use them with a wet factor of about 3-5% max. Depending on the plugin, you’ll see how they add a little bit of color to a sound. My way of using distortion is usually bringing it up to about 20% and then rolling down until I barely hear it. You want to hear it a bit, but not much.

Some nice distortion plugins I like include Decapitator by SoundToys, mDistortionMB by Melda, Wave Box by AudioThing, Saturn by Fabfilter.

Get Out of “The Box”

There’s no doubt that moving outside your computer will infuse your sound with some texture, presence, and some analog feel.

Use a little mixer for summing. If your sound card (audio interface) has multiple outputs, then you can send them to a little mixing board where you can group your channels into different buses. For instance, you can split them into a channel for kick (mono), stereo channels for bass and melodic elements, and another one for percussion. If your board has more channels, you can experiment with different things, but just these sound groups are a great start; the mixing board will give you a rawer feel than your DAW alone. For simple, affordable boards, look into Mackie’s latest series—pretty impressive and absolutely affordable.

Use external saturation. People love Elektron’s Analog Heat. It’s a good external distortion and does a pretty solid job of adding colour to sounds, out of the box. You can also look into using distortion pedals, reverb, or invest in a 500 series lunchbox and get some saturation modules—there are many to look into.

Use VHS, cassette, or tape. Some of my friends have been searching local pawn shops for cassette decks or old VCRs; they offer a static saturation that you can explore. There’s a whole world of possibilities too when you compress the recorded result—you’ll create something weird sometimes, but it will give you a lofi feel.

If you have other suggestions, please share!

SEE ALSO : “How do I get started with modular?”

Improving intensity in music

Intensity in music can be a tricky balancing act. In our Facebook group, one member recently asked about how he could improve the intensity and excitement of his tracks. He makes electronic music, and feels that compared to some producers he likes, his music doesn’t match in terms of excitement. After asking him a few questions, I realized that the tracks he shared as examples he wanted to emulate were mostly songs with high levels of density, and perhaps not the levels of intensity I thought he was referring to. The term “intensity” is very different from one genre to another; in this post, I’ll try to cover some of the different ways we relate to intensity, and also some tricks and tips as to how to make your tracks more intense-feeling.

Loudness

One of the main aspects of intensity is the loudness or volume of a song. Humans are often tricked into thinking that loudness directly correlates to the intensity of a song. Concerts at high volumes give music a physical sonic experience that people like. Artists often try to replicate the live experience through volume levels or even compression.

However, when making music, there are a lot of other things one needs to pay attention to in the process—loudness should be the very last thing to worry about. Volume/loudness levels can only be adjusted once your mix is proper and flawless. Some people play with mastering tools such as Izotope Ozone 9 as a mastering assistant to help push songs up to a higher level, but if you think loudness is the key to intensity, you might run into issues. Heavily boosting the loudness of a song ruins all the finer details that were worked on so much, via too much compression.

If you want to play with the perceived loudness experience, one thing you can do is make sure that your mid-range frequencies are mixed at sufficient levels, or even perhaps a bit louder than what you’d usually do. Humans will always hear something with a good mid presence as “louder”, even if the overall loudness is lower. A plugin like Intensity by Zynaptiq can really help bring intensity to a song, but can also do subtle wonders at lower levels.

Another thing you can do is play with saturation. This gives a gritty feel to your track’s sounds, adding textures, depth, and relative power as well. Harmonics by Softubes is often my go-to plugin when it comes to applying saturation to mids. It really brings out an organic brightness in sounds that almost always sounds good. Saturation also creates the impression that something is louder, but not in a compressed way.

Density

Similar to loudness, is density: how many sounds you have in your mix at a given time that have very little difference in volume. You could have multiple percussive sounds, for example, and all of them equally loud. Doing this occupies a lot of room in your mix and makes sounds feel more like they’re at the forefront. The denser a mix, the less room there is for depth, but a dense mix can have a lot of immediate power.

For certain techno songs, density is often in the form of a wall of machine-gun type hi-hats which are always going. This creates excitement in the highs. In tribal music, density comes from percussive sounds, but in the mids, and in dubstep, it’s pretty much all about the low end (although dubstep tends to overcharge the full frequency spectrum).

An interesting genre that people often simply refer to as ambient, is drone music. Drone, in a loud venue, becomes a pure noise show so intense, it can give you very powerful body sensation. At MUTEK, I almost puked after a drone show.

If you want an alternative way to create density, other than simply using a lot of tracks, you can also play with the decay of your sounds. Longer hats, kicks, claps, and other percussive sounds will add intensity via density. If you have certain sonic limitations, decay can also be “created” with a gated reverb which will add a tail, but I’d encourage you to use a darker tone.

Background and noise floor

If you go to the most quiet place you can think of and record with a field recorder, you’ll still hear noise in your recordings at a very low level. In general, there’s always some sort of noise surrounding us. It can be the fan of your computer, a car passing by your apartment, people talking in the background in a quiet coffee shop. When you put your headphones on and make music, you might have the impression that your music feels empty and that usually comes from a lack of noise floor. In Dub Techno, songs are often washed in a sea of reverb, which creates a space that feels comforting. Using a long reverb can create a low level of noise that is naturally pleasant to the ear, but there are also other ways to create a noise floor:

  • In many minimal tracks, people will mix in field recordings. You can find a lot of field recordings for free online. They can be from anywhere, but you can event record noise from where you live and use that (some producers love to have a microphone in their studio to pick up noises of themselves as they work). You can also spend time creating your own invented field recordings using day to day sounds that you mix with a white noise and reverb, then lower the volume to -24db or lower.
  • Use hardware equipment and use a compressor to bring up the noise.
  • Take a synth and use a noise oscillator to create a floor. You can then add volume automation to it to give it life, like side-chain compression.

In the tracks the member of our group shared which I mentioned at the beginning of this post, the noise floor was just as loud as the main sounds, which then created an impression that the song was really, really dense, loud, and busy.

Powerful low end

One thing people often do for intensity is create really powerful kicks or basses. They’ll have them mixed way louder than the rest of the track, but this often results in a muddy mix, as the details will then feel covered or too low. But in many genres, the importance of a solid kick is often directly related to the intensity of the song. A tip—the clap or snare, should also be equally intense, with a presence in the mids; this relationship will make the track feel very assertive and punchy.

Creating a powerful kick is not an easy task, but you can achieve better results with a combination of Neutron‘s transient shaper and multiband compressor. This will allow you to shape your kick so it’s fat and round. But even if you end up with the most powerful kick you can create, a mix can still feel like it’s lacking intensity unless the kick is properly mixed. Proper mixing of a kick’s low end can often be done by high-pass filtering or EQ’ing some parts of the bass so it doesn’t mask the kick. You can also use a tool like the Volume Shaper or Track Spacer to give clarity to the kick.

Exciting effects

Transitional effects, fills, and rises/falls are always a popular way to create excitement in your track. These are often effects you can use straight from presets and simply apply them on random sounds that are already in your project. I usually like to have two channels per percussive sound I use. Not only for layering, but sometimes the second channel of a percussion will have an effect that I’ll use once or twice. You can have dedicated channels that are effects only, and then drop sounds from your song into that channel. This can be done with a send/aux channel too, but I like to have a FX-channel on its own, as it’s more visually clear.

Popular effects that can help create intensity and excitement include delays, panning, reversing sounds, and reverb, but if you’re looking into something out of the ordinary, I suggest you look into unusual multi-effect plugins such as SphereQuad, Tantra, Fracture XT, Movement, and mRhythmizerMB.

Dynamics

A lot of people don’t seem to understand dynamics, and what they mean in music. Dynamics are often simply interpreted as compression, but if you really use dynamics in an exciting way, you need to think about it as the contrast or range between two levels. Imagine someone whispers something in your ear, and then, all of a sudden, starts talking really loudly; it will create a shock or surprise. Differences in sound are a good way to create surprise and intensity—the greater the difference between the two sounds, the louder or more intense the second sound will feel, or vice-versa. You could have section or certain sounds in your song that are quieter for a moment and then get louder. Dynamics don’t necessarily always refer to volume, however. For example, you can create a moment in a song in mono, and then go to full stereo mode—this difference is also surprising for the listener.

Finally, one thing to keep in mind about intensity in music: if you immediately give away everything your song is about in the first few seconds of a track, you’re mostly likely going to screw up the ability to create intensity, tension, and excitement in the entire work—it will be really hard to keep a listener interested for the entire duration of a song if he or she has already heard your “climax”.

SEE ALSO : Textures Sample Pack

How Long Does it Take to Make Professional Sounding Music?

For people who are just getting started with production and recording their own music, many wonder how much practice is involved before they can create professional sounding music that they are happy with. I often get asked questions like this:

I’ve been making music non-stop for 6 months. Why am I not happy with how it sounds yet?

In terms of life experience making music, 6 months is nothing. You’re basically a toddler in the world of music, but being a toddler is also a once-in-a-lifetime experience and has some advantages as well. In comparing yourself with people who have many more years of experience, it’s normal that it might feel like you’re still far behind. You’re not really being fair to yourself; you can’t expect to squeeze in so much knowledge in such a short time. Most people who make music for a long time usually have also worked in the company of other experienced artists, learned some valuable tips from their experiences, and many have also spent a lot of time at events or working with live sound. All these details are often overlooked by newcomers who often have the misconception that making professional sounding music is something that’s relatively easy to do. Making quality music takes a lot of time—it usually takes many years. However, the difficulty in being satisfied about what you do doesn’t decrease as you gain experience.

Each time I learn something new or that I understand that a type of detail is actually a mistake, I start hearing it everywhere in my past music and it drives me crazy. If you think that with over 20 years of production I might be more easily satisfied with what I make, then I have bad news for you—I still get frustrated, get writer’s block, and most of the time, I’m not entirely happy with how my songs sound. The difference between myself and someone new to making music is that in 20 years, I’ve learned something you’ll learn too: imperfection is a part of the process.

I met a DJ once who told me:

All quality producers I love are full of self-doubt, but the ones that sound like crap are so full of themselves.”

Not being satisfied with your own work also means you’re willing to learn. So, what are the options available for someone just starting out? Is it just a matter of time?

There are a lot of paths one can take, and unfortunately, sometimes friends or other music producers send new artists down the wrong one. Generally, people will advise others to take a direction that worked for them, but this might not necessarily work for anyone but themselves. I say this before I get into more detail about how long I think it takes for a new artist to make art he or she is satisfied with; the advice below is what has worked for me and what I have seen work for others.

Understanding a sound

If you’re not happy with your sound, you should first ask yourself what sound you’re after. There are a few things to really grasp to understant what’s “wrong” in how you perceive this sound.

Sound monitoring: What monitors are you using? Are you using KRKs? Genelecs? Yamahas? Some people have poor equipment and it’s a handicap in how you’ll “understand” your sound. The clearer and more reliable your tools, the easier it will be. Before buying anything else for your studio, monitoring should be where you invest the most of your budget. You can buy very expensive gear, but if you can’t hear it properly, you’ll always be on step behind.

People will recommend certain speakers or headphones, but monitoring is extremely personal—I encourage you to go to a store and spend a good amount of time comparing different brands and models. I swear, when you hear your favorite track on a specific system and it triggers goosebumps, you’ll know that system is for you. Prepare to invest in good speakers—there’s nothing professional about buying cheap monitors just to save a bit of cash.

A/B referencing: Cross-validating is one of the most important things to do when you make music, and though a lot of people seem to have reservations about it, this is how professionals and people who want meaningful results will work. This goes for not only audio, but in pretty much any craft; you need a model, a reference, and something to guide your vision, or to keep track of your progress. As you work, you need to constantly check what’s going on. You might hate it at first, but that’s how it’s done. In terms of audio, having good headphones and other output systems to cross-reference with is very beneficial.

There are many tools out there that can help make doing A/B checks easier and more pleasant. For instance, Reference is a great tool to see if your levels are right. Magic A/B is also great, but doesn’t have the precision of Reference. Levels is also another great tool to analyze the technical requirements of your song. But more importantly, I recommend a good FFT such as SPAN by Voxengo (free) or Izotope’s recently released Ozone 9, which is a good overall bundle of tools to have that can really help make a difference in what you do. Ozone comes with an “assistant” that listens to your music and can propose fixes, enhancements, and overall adjustments, while comparing your work to a preloaded reference track—it can be a big investment, but it will be a tool you’ll use every time you work on music.

Listening volume. The worst way to listen to music when you want to understand it is at high volume (eg. 85dB+). I try to keep my listening levels low so I can easily hear what’s wrong. You’ll be able to tell that the highs are too sharp or that the low end is too low at lower volumes (something that’s barely possible to do at high volume due to the Fletcher Munson Curve which says that after a certain volume level is reached, the human hear stops perceiving things in a neutral way). Make sure you keep the volume low and don’t touch the knob as you work. Take pauses every 20 minutes too—you’ll notice problems more easily.

Sound preparation and “mental jogging”. When you actually sit down to make music, you shouldn’t just start right away; you need to do some “mental jogging” first. Forget shortcuts like smoking spliffs or drinking beer. Just sit there and listen to music at around 65dB (I use my apple watch to monitor decibel levels). Listen to music for a good 30 minutes to an hour, then make music. Never touch the volume knob. Your ears need to adjust to the right levels of highs, mids, and lows. If you touch that master volume knob, you’ll screw up the exercise.

Learning

To get better at anything, you need to educate yourself. Perhaps you love to learn by yourself (like me), but I swear, it only takes one video or a bit of reading to feel like you’re improving, and you’ll feel silly you didn’t look for that information before. I’m personally always on the hunt for tutorials, even on matters that I know a lot about already, because I want to make sure I know as much as I can about each subject. You’ll often realize that a problem has many ways it can be solved, and it’s important to learn multiple different approaches to achieve a certain result. Why? Sometimes, a certain approach will reach its limits and another one might be a better fit. This also applies to plugins and gear. You might have 3 different compressors, but they all have their own persona and might work better than one another in different contexts.

However, I wouldn’t worry much about tools to start. It’s more important to create conditions where you can properly understand sound, develop healthy habits towards your work, and constantly allow for time and resources to dedicate towards self-improvement.

Tools come and go—what really makes a difference in going from an amateur to a professional is how you understand and use them. Understanding how audio engineering works and how you perceive sound is hugely important.

Good Quality Schools and Learning Hubs

Point Blank Online Music School. I only hear good things about Point Blank, and their tutorials on YouTube always are quality.

Noisegate. I’m currently testing it and got a few tips from there but it’s mostly for new comers.

Puremix. For advanced users and mostly oriented towards Protools. Even so, I’ve learned a lot from them.

Loopmasters. They sell classes and they’re very good; a favourable ratio of get-what-you-pay-for.

SEE ALSO : Make Music Faster: Some Organizational Tips

EQing Resonant Frequencies and Harsh Sounds

EQing resonant frequencies can be a very difficult task. Once in a while, I see ads in my Facebook feed that claim to reveal some “secret” EQ tips. Recently, I clicked on one just to see what they had to say, and was very disappointed to read stuff like “if your track sounds honky, you need to cut at 500hz…blah blah blah…”, as if a simple cut at a specific range would easily solve everyone’s EQ problems. The thing about EQ’ing music is that one simple solution cannot apply to every case—it’s more complex than that. Yes, there are things that you can do consistently that will make a difference, and yes, in some cases, cutting at a specific frequency can help, but there are other ways to EQ, too.

In this post, I will provide a very high-level outline of how to identify resonances and to fix them with surgical EQ’ing. If you’re an advanced audio nerd, I recommend you carry on with your online searches for EQ tips.

In past articles, I’ve referred to the benefits of shelving EQs in certain cases to fix tonal issues in a song. Using shelving EQs to correct tonal issues is one of the most misunderstood concepts in mixing and it is also, in some ways, probably the easiest to fix. Surgical EQ cuts are the exact opposite, as they are difficult to really explain—especially through a simple blog post—and can be a bit of an esoteric subject.

Training your ears to detect resonances

Ear training is the most important part of EQ’ing and it is also the most difficult to develop; it demands practice and guidance. I’d say roughly 90% of my clients’ projects have bizarre EQ correction(s). I often see multiple cuts, very sharp and very low. When I remove them, I hear no difference in my studio. Why? Probably because of how they hear things at home with their speakers/headphones. Bad referencing is counter-productive, as you might expect. It’s like wearing glasses with a stain on them; you’ll see it everywhere. Problems can also arise from the acoustics of the room which might overload certain frequencies, creating resonances that aren’t in the mix itself, but from the room, which results in people cutting valuable frequencies from their mixes and sounds.

I find it useful to mute a problematic sound and listen to an oscillator on its own, to train your ear to recognize that kind of frequency.

One trick I found useful in developing my understanding of resonances is the use of a keyboard and a simple oscillator (note: Ableton’s Operator will do). When I hear a resonances—which sound a bit like a delay with too much feedback—I would try to play the note on a keyboard with a sine oscillator to mimic what I hear. With the help of a FFT or a great EQ plugin like Fabfilter Pro-Q3, I can then “see” the frequency of my note and compare it to my sound. You want to play them roughly at the same level to see exactly where the resonance is in the spectrum.

Another way to identify a resonant frequency is to take your EQ, starting with a wide Q of about 1, and boost it by 5dB then scroll through the frequency spectrum. This will amplify what you hear in certain ranges and you might notice a resonance. Once you spot a sensitive area, leave your boost on that spot and slowly increase the Q to 2.5, then adjust the covered area to pinpoint where the resonance might be. Once you get to about 5 on your Q, then you can cut down on the problematic frequency, starting by cutting 3dB off. Toggle the bypass on the EQ to see how much of the frequency you removed.

Sometimes resonances are the sum of multiple incoming sounds that have similar frequencies that overload on top of one another. These are nasty because you might want to EQ one sound, but you can’t really pinpoint where the problem is coming from. It’s best to group similar channels and EQ them all together.

I usually tell people to group channels by “sound families” such as all metallic sounds, organic percussion, synths, etc. Grouping can be great for fixing issues, and also to place sounds into a specific spot in the bubble you’re creating in the mix (ex. fore front vs background).

Visually speaking, resonances are often difficult to see on the FFT. Sometimes people believe it’s a simple peak rising, but that might not actually be the case. This is why on the Pro-Q3 or Ableton’s EQ8, you can monitor what you’re altering. But before searching for a resonance, it’s important you hear it first. Otherwise, you’ll go hunting for problems that might not exist, which will create “holes” in your mix (a frequent problem I hear in mastering but luckily it’s easy to fix). If you’re checking for little peaks poking out only visually, sometimes those can actually be pleasant frequencies, but because of a poor listening environment, you might interpret them as bad ones.

My general tip on cutting frequencies is: never too sharp and always start with -4dB. Often you’ll hear resonances from 200hz to 800hz, mostly because a lot of melodic content and ideas have a fundamental note within that range, so some sounds might clash. Also, if you feel you need more than one EQ to fix a problem, just trash the thing you’re trying to fix. It might be garbage and if you need to really alter it that much, there’s something fundamentally wrong with it. Using too many EQ points might also result in phasing issues. Same thing goes for using more than one EQ plugin…it can be risky!

Optimizing your listening conditions and environment is a hugely important thing to do.

Detecting Harshness

Harshness or other difficult frequencies that aren’t resonances can be found at any level of the frequency spectrum. Most of the time, harshness-related issues are around 1-5khz. The human ear finds this range sensitive, and when there are too many sounds in it, it brings confusion, muddiness, and unpleasant feelings.

Harshness can also be a result of the sum of multiple sounds. It’s important to hear everything on its own—specifically similar groups of sounds—then mute them one by one to find out which ones are causing an issue. Once you find the problematic sound, I suggest you try the following corrective techniques:

  • Start by lowering the volume to see if that can help.
  • Try the EQ’ing cut method explained above to see if you can isolate a resonance or something annoying. Try cutting it by 3dB. Cutting along with the volume drop can sometimes be enough to fix a problem.
  • Try panning it to the opposite position. I often see that sounds that are crammed in a same location will clash.
  • Add subtle reverb. This trick can help smooth things out. I’d suggest a reverb at a 10% wet/dry.
  • A chorus effect can sometimes do wonders on certain sounds.
  • Controlling a transient can fix wonders. Instead of cutting with an EQ, just spot the problematic frequency and then use a multiband EQ like Melda’s mTransient to remove some of the attack of that band. Isolate the frequency. If you don’t have a transient shaper, you can create your own with a compressor that has a fast attack.
  • On higher-pitched sounds, a de-esser can really help. If you don’t have one, make sure to grab ERA4 De-esser as it’s affordable and super useful.

Harshness is easier to fix than resonant frequencies—it’s often simply the result of noisy sounds at wrong levels that need adjustments. With practice, your mixes will be clearer and smoother. Train your ears!

SEE ALSO : Creating Depth in Music

The benefits and risks of using a reference track when mixing

In the group I run on Facebook when we discuss using a reference track when mixing, I often ask people what sort of tracks they have been using as a reference—I ask so regularly that people find my predictability funny. There are so many reasons why I encourage people to use a reference track when mixing, but for me personally to give someone feedback, I find it critical that I provide commentary based on the artist’s views. In the early days of the Facebook group, someone posted a song and everyone was criticizing its kick, but after a bunch of people commented on it, we all realized that the song creator was trying to mimic the low end of a very lofi song where the kick was intentionally “ugly”. From the perspective of people who love highly-produced techno, this particular kick was “wrong”, but only from this point of view. There’s no one-size-fits-all kick.

I encourage people to be super careful with feedback they give to artists in the event one may not totally understand what that artist is trying to do. I’ve developed this habit as a mastering engineer—if you’re too technical and detached from what the person is actually trying to do, it will be hard to really achieve mastering results that will please them, while respecting the artistic direction he or she is trying to achieve.

Think about using a reference track in the same way as how a painter might draw someone—it would be easier for the painter if he/she had an image of the person to use as a reference. Of course, the painter could try to “freehand” the drawing from memory, but it would probably end up less accurate.

The main concerns people seem to have with respect to using a reference track is that it might be too much of an “influence” on what they’re working on, and that they’re trying to find their own original sound. Many people think using a reference track would sort of corrupt their vision.

The problem is, if you’re trying to “sound like no one”, you’ll get a lot of confusing feedback about your work because most people won’t understand it. People always have something already in mind when they listen to something new. They’ll compare and try to make sense of it, but if it’s totally unsettling, they might feel a bit lost. If you refer to something they know, then there’s link that can be made by the listener.

A reference track can only be used for certain portions of a song and not all of it, which to me is the reason why it can’t totally corrupt your vision. Plus, if you use the same reference a few times, you’ll introduce new habits into your workflow, and this will ensure that your tracks are on the right path.

How can a reference track benefit your mix?

  • Tone: This is mostly what I use references for, myself. The longer I work on a track, the more fatigued my ears get, and I lose sense of the lows and highs. If I can quickly A/B another track, I’ll know if I’m on the right path.
  • Arrangements: If you know a track is really successful at, let’s say, creating a tension, or really nailing it with the timing of the drums in a timeline, you might want to study its structure to understand it.
  • Mix levels: Very useful if you want to know if one element of your sounds is loud enough in a mix, then you can see what kind of relation the reference has. People are often confused with the mids which is the part I always fix in clients’ works; I can fix it because I can check my references that have very clear, present mids. Mids are critical to have right on a big sound system.
  • Loudness: You can also check if you’re matching the power of your reference—but keep in mind that your reference has probably already been mastered by someone with experience!

How can a reference track harm your mix?

Despite having many benefits, using a reference can have pitfalls as well. The most common error in using a reference track is using a song that’s actually poorly mixed or mastering and trying to emulate it. If your reference isn’t great from a production point of view, you risk messing up your whole perspective on music production and mixing up what’s “good” with what’s “bad”.

How should you find a good quality reference track?

If you’re in doubt, to me there are two main ways to find a reliable reference track:

  1. Ask a reliable source to validate something you’ve chosen, or to provide you with one that’s similar to your selection. The source can be someone in the industry, a record store owner, a DJ, a fellow producer, etc. Make sure your source is someone you trust.
  2. If you go out in a club and hear something that sounds really great, ask what it is. There are a lot of people who want to know what’s playing so if the DJ is unable to tell you, perhaps someone else can.

Once you have your reference track chosen, you can compare anything to it to see if it’s in the same “ballpark”. Try to get a 24-bit WAV or AIF version of the reference track. Once you have a high-quality version of the reference track, I recommend “audio jogging” everyday—listen to the reference on your sound system, not too loud but at a comfortable level, and then don’t change the volume for the whole duration of the session. Now your reference track has been set up as a guide for you to work from; cross-check your own project with the reference as you work!

SEE ALSO : How to balance a mix

How to balance a mix

In general, I find that there are certain common elements found in mixes I’m sent, and I’d like to share my thoughts on how to balance a mix. If you google “mixdown tips”, you’ll see that mixdowns have been covered in a lot of detail online, but most articles on the topic are geared towards rock music. Since I am dealing with electronic music and DAWs like Ableton, I thought adding my own perspective to help correct and polish different types of mixdowns might be beneficial.

Let’s run through a basic mixing exercise together. To do this, you’ll need an FFT—like SPAN by Voxengo—to analyze the overall frequencies in your mix. The more time you spend checking a frequency analyzer as you work on your mix, the more likely your mix will come out balanced and have fewer mistakes.

Why does a balanced mix matter?

Balanced mixes are important because you don’t really know how clubs’ PAs are EQed until you play on them. If a club has too much low end in its system, then a bass-heavy mix will sound incredibly messy. Yes, a DJ can tweak the mix , but it will never sound the same as if he/she started with a track with a nicely balanced mix.

When people send me music to be mastered, they often forget to double check the frequency analysis of their mix, and sometimes it’s just not balanced.

A balanced mix (or flat, if you prefer) usually has a full range of frequencies more or less hitting 0dB on an FFT reader. You can go -/+3dB around it, but keeping it around 0 is the best. For electronic music, it’s pretty normal to have the low end sticking out by about +3dB though.

Now, the classic mixdown curves I see most are fairly common—they have something appealing about them, but also create downsides with risks.

But I check masters, and they’re often not flat,” you say.

Well yes, that can happen, but the mastering engineer’s job is also to remove unwanted resonances before boosting. It’s always better to have something balanced that won’t need a lot of cutting before the engineer can make the critical decision(s) of boosting a range of frequencies.

That said, let’s examine some common mixdown curves I see that aren’t really balanced, according to how they look in a frequency analyzer.

How to balance a mix according to different types of mix curves

The Smiley Curve

Look at that smiley, similar to a shark I believe.

This shape is well-known, and sometimes you’ll see EQ presets with this name—it means the lows and highs are boosted, hence the curve looking a bit like a smile.

The good: First impressions with this curve is that it’s instantly gratifying. Exciting feel, bright and shiny highs, and low end power—pretty much what humans love in music; foundation and excitement.

The bad: A lack of mid-range frequencies can mean that on a large system it feels hollow, confusing, lacks body, presence, and emphasizes hi hats and kicks over everything else, making the main theme of the song hard to discern. Harsh, boosted highs are also quite tiring on the ear and produce listening fatigue.

The fix: If you look at the FFT and your mix is smiley, there are a few ways to fix it. The first, is to manually readjust the elements who have the hot frequencies and turn them down. Highs are mostly likely high-frequency percussion, such as hats, but could be transients or the very upper part of synths and atmospheric elements. If you can spot which sound(s) have that range exaggerated, filter it with a low pass curve of 6dB/octave. Another way to fix this curve is to put a 3 band EQ on the master and lower the lows and highs, then boost the master for the loudness lost. The mids will magically appear and might feel overwhelming at first, but that’s simply because the human ear is sensitive to mids—more mids mean more presence and power, plus clarity on most systems.

The bright mix

A bright mix is dominated by an accentuation of the highs. Many of my clients frequently mix this way because it’s exciting and electric, but bright mixes also very harsh on certain systems and as previously mentioned, they’re very tiring on the ears.

The good: Excitement, air and powerful transients.

The bad: Bright mixes will sound rough at high volume level and I swear that in 50% of the time it will be played in a club, the DJ will have to turn down the high-EQ. If the system isn’t great quality, bright mixes can also create distortion.

The fix: Use a shelving EQ and turn down those highs. Look at your curve and see where the steep part starts (sometimes at 5khz, sometimes at 8khz), then just lower it down by 3-5dB until the FFT becomes a bit more flat.

Note: If you feel like you really need it bright, try to keep it under +3dB.

The bass-heavy mix

Bassy mixes are ski slopes.

Bass-heavy mixes are very common in electronic music because of the lows needed to make people dance. It sometimes becomes a huge issue for me where clients really want their kicks to punch through, but a kick will sound powerful if it exists on a full-range frequency scale (also in the mids, and high mids).

The good: Bass-heavy mixes will be powerful and can blow away the crowd.

The bad: After a few minutes of pounding lows, if you can hear anything else, it feels very dull. Bassy mixes will sound muddy, messy, blurry, and insignificant. For instance, on a Sonos (like the one I own), all you’d hear would be a thump, thump, thump…annoying, not nice sounding.

The fix: Just like the bright mix, add a shelving EQ but work with the lows. I’d encourage you to revise your kick-design process if they sound too bass-heavy, and also get to familiarize yourself with how your favourite home sound system is calibrated.

The peaky mix

Look at this peaky curves! So sexy… not…

A “peaky” mix is my own term—it’s when I look at a mix and the curve has these big frequencies sticking out, while everything else is low (hence “peaks”).

The good: If done well, emphasizing certain peaks can be a good way to create dynamics in a song in terms of volume differences between your sounds. In some cases, it can create a sense of depth, but in doing so you demand a very active listening experience from the listener to be able to achieve this effect. This technique common in jazz, for instance.

The bad: Done wrong, a peaky mix just feels like there’s no power to it and the song will feel thin and some sounds will feel resonant.

The fix: Revise your mix entirely. Pull down the gain on the peaking sounds, then turn up the gain on the master to create something more even. Fixing peaks demands patience and practice.

The Gruyere mix

A rare specimen that is a mix between Gruyere and peaky, wearing red glasses.

A Gruyere mix is one with hole(s)—on a big sound system, they can feel partly empty, or just wrong. Basically, the feeling of holes in a mix is a sign that it could tweaked to cover the missing areas.

The good: Truth be told, you can always live with a mix with holes. You won’t really face any serious issues, but your sound might feel flat.

The bad: Let’s say you could cover more mids with your percussion to cover a hole—then perhaps your percussion would feel more powerful. If your pads are lacking body at around 200hz, they will lack power. These holes are simply pointing out that some sounds could use a bit of tweaking.

The fix: Revise your mix. Try to see if you can boost weak parts of certain sounds. On the master, use a high quality EQ and gently boost the holes up, as that can make a difference.

The thin mix

A thin mix is one that, on the spectrum, looks good, but somehow doesn’t seem to drive at all.

The good: It’s gentle. Maybe you like it that way on purpose?

The bad: No power, no loudness, dull.

The fix: Add a compressor in parallel mode (50% wet) on the Master bus to give the mix a bit of thickness.

The punch-less mix

Punch-less means a mix just doesn’t punch, slap, or kick as it should.

The good: Non-punching mixes could be good if your music on the ambient side of things.

The bad: For dance music, you need at least some elements with punch, like the kick and/or clap.

The fix: Use transient shapers and/or compression with a slow attack and high ratio to turn your lifeless elements into something with attitude.

All these fixes need practice before you come out with a nicely balanced mix—I hope this has been useful advice on how to balance a mix!

SEE ALSO : The benefits and risks of using a reference track when mixing

Mixing projects with many tracks or sounds

If you are familiar with my music, you know I love things complex and busy. Many people in our online community share songs they are currently working on that have a lot of content in them, so I thought it would be practical for me to share what I’ve learned about mixing too many tracks at once.

The pros and cons of using a large number of different sounds in a song

Pros

  • The song becomes exciting to listen to.
  • For listeners, there’s always something new to discover on each listen—this is good for replay value.
  • A song can develop complex call-and-response story-lines. After multiple listens, a listener might notice that certain sounds are “talking” to one another.
  • A song becomes very colorful—covering many frequencies of the spectrum in a single track can feel like a rainbow to the ears.
  • Movement—using multiple sounds can be a cool way to create the impression that many things are moving at once.
  • Stereo effects—if you like action and panning, playing with the panning of many sounds can be fun.

Cons

  • The song can feel overwhelming. Work by someone who is not familiar with producing with many sounds can feel irritating and hard to connect with if the brain of the listener doesn’t know what to focus on.
  • Complex tracks are harder to DJ. If there’s a lot going on in a track, it can be hard for a DJ to find other appropriate songs to mix it with.
  • Complex songs can feel confusing. If a sound isn’t well mixed, it can be confusing on certain sound systems.
  • Phasing issues—if you’re not careful, some sounds can technically disappear in mono, and on some sound systems, this effect can be weird.
  • The timelessness of the piece suffers—if you’re overdoing it, it might be difficult for people to get emotionally attached to the track and it will not age well.
  • Losing the hook in the mix—it’s super important to have your hook be very clearly discernible in a jungle of sounds.

Despite these cons, it can be quite fun to use a lot of sounds in your work; most of the risks come from technical challenges in mixing too many tracks or sounds at once.

Sometimes people crowd a track with tons of different sounds because they’ve spent too much time on it and they’re afraid people will get bored.

Mixing multiple sounds requires the producer to approach the mixing process in a few different phases. Let’s say you’re happy with the arrangements in the track—you can then move on to the next step(s).

Should you mix while working on your arrangements simultaneously?

Yes and no. When I’m arranging, I make sure the levels are OK but I won’t deploy an armada of plugins to polish the mix yet because it drains CPU and also because some unfinished arrangement details might completely change the mix itself; I would have to re-polish afterwards.

One of the first things I do when I get to mixing is to question if all of the sounds I’ve included in the project are essential to the narrative of the song or not. You can start by listening to the song and perhaps cross-checking with a reference.

How does one know if a sound is essential? Try removing it. Sometimes, having fewer sounds in a mix can be beneficial to other sounds so they can be heard properly. If you are in love with certain sounds, you can save them for the next track you’re working on if you don’t think they work in your current mix.

Establishing a hook

What’s your hook? Is it the bass? Or is it a 2-bar melodic sequence? Are the rest of your sounds either decorative, percussive, or supporting your hook? What’s the purpose of those additional sounds? People will remember the hook when listening to your song—the other sounds can be described as “decorative”. While some producers are really against using too many decorative sounds in a song, there are no rules to making the music you like and I encourage you to say to anyone telling you “you’re doing it wrong” to just mind their own business. If you like lots of sounds like I do, that’s all that matters, really.

In the late 90s, there was a huge interest in minimalist techno. One of the approaches that artists like Hawtin were obsessed with back then was trying to use as few sounds as possible in a track and still getting their message across. [Hawtin] would come up with an idea and surround it with only the bare-minimum; his idea was that a track was a part of a bigger picture that included assembling it with other tracks.

Mixing with groups

Mixing with groups can be done in many different ways, but to use groups effectively it’s essential that you have a good understanding of the nature of each sound in your project. For instance, I usually have a big group named “Percussion” which will have its own sub-groups. The sub-groups can be different themes on that main group:

  • Same “family”. All “metal” samples could be grouped together, wooded ones, synth, tonal, atonal, etc. Having a group for each family of sounds is excellent for EQing similar resonances these sounds might all have.
  • Same length. All short samples could be grouped together, all long ones, etc. This is useful if you want to use compression and control the groove.
  • By stereo position. All sounds in mono could be grouped together, sides on another. All high, forefront, or far-back sounds could be assigned to different groups. Grouping by position is useful for controlling a portion of the stereo field’s positioning and volume all at once.
  • Other sub-group types. You can come up with your own sub-groups based on what seems the best for your particular track. The idea of a group and sub-group is to control something common to all its members.

Leveling many sounds

Attaining proper volumes for each sound is critical for a mix with a lot going on. If you’re using Ableton, I suggest you switch to the session view to be able to see the meter of each channel. Just by eye, try to start by making sure that they’re all roughly even. After they’re even, lower some 20% lower, others 50%, and some very, very low. Which sounds you lower will depend on what sounds you want to be “decorative” and what sounds you think are a part of your main hook. One of the most common mistakes I hear in complex mixes with many tracks is that the producer is concerned that all of the sounds won’t be heard, so they’re all turned up too loud. The thing is, if you use a lot of sounds, it’s better to have some that are way lower in the mix, and just like in percussion—we call them ghost notes.

Creating unity in a busy mix

How can you make sure all your sounds feel like they’re a part of the same song? Sometimes when you use a lot of tracks and sounds, some might sound lost or it might feel as if two different songs are playing at once.

Grouping

Unity is something that groups can really help with. If your mix doesn’t feel like one song, the first fix you can try is to apply reverb to each of your groups. You can either use a AUX/Send bus, or apply different reverb per-group. I usually keep it at a low 10% wet only, but you can exaggerate too. Similarly, if you EQ a group, you modify the signal of each sound, and this usually helps blend all the sounds from the group together. I put an EQ on a group by default and then will do at least one cut where there’s a general resonance. Compression works magic on groups too—especially a vari-mu type of compression with a pretty aggressive setting; this will feel like adding butter to the whole thing.

Gating

There are multiple ways to use gating, but I like the simple gate from Ableton that has an envelope and an incoming side-chain. If you gate an entire group to one of the main percussion elements of your song—such as the regular clap for instance—it can provide a lot of room to other sounds and have them not be in conflict.

Side-chaining

Like I said, compression is great to bring all the sounds together and a bit of subtle side-chain is also really practical. I like to side-chain some decorative percussion to the main hats, so I make sure they peak through. The best option here is to use Trackspacer as side-chain because it will only use frequency of the incoming signal instead of the amplitude. So for instance, if you use it to side-chain hi-hats from a clap, only the conflicting frequencies of the clap will be removed from the hats.

Modulation

One of the riskiest things a producer can do when mixing many tracks or sounds is the use of stereo modulation such as auto-pan, chorus, phasing, or flanger. These effects make sounds move, and if multiple sounds are moving at once, then you’re going to face phasing issues. I always use these modulation effects on specific sounds in each song, but the sounds that are modulated are treated as “main” sounds. This means you have to give them a lot of room in the mix otherwise they’ll get lost.

Finalizing the mix

Finishing a busy mix is where most people get confused and many fail. The main percussion and other main elements of your song should be mixed first as-is. Then, all elements that are decorative should be mixed in, as a second layer like a “cloud” that completes it all—you’re bringing the main sounds and decorative sounds together. Usually, in the end—thanks to Live 10’s multiple groups feature—I end up having only two faders to mix with. You’ll need to compress them both with a gain reduction of about -3dB to create the impression they merge well together.

But before you get to your final mix, it’s important to get all your sounds right, group them, and control them all first. The final blending of these two major layers at the e nd will be pretty easy if you can get your levels together.

SEE ALSO : Creating organic sounding music with mixing