Creating organic sounding music with mixing
I’m always a bit reluctant to discuss mixing on this blog. The biggest mistake people make in mixing is to apply all the advice they can find online to their own work. This approach might not work, mostly because there are so many factors that can change how you approach your mix that it can be counter-productive. The best way to write about mixing would be to explain something and then include the many cascades of “but if…”, with regards to how you’d like to sound. So, to wrap things properly, I’ll cover one topic I love in music, which is how to get a very organic sounding music.
There are many ways to approach electronic music. There’s the very mechanical way of layering loops, which is popular in techno or using modular synths/eurorack. These styles, like many others, have a couple main things in mind: making people dance or showcasing craftsmanship in presenting sounds. One of the first things you want to do before you start mixing is to know exactly what style you want to create before you start.
Wherever you’re at and whatever the genre you’re working in, you can always infuse your mix with a more organic feel. Everyone has their own way, but sometimes it’s about finding your style.
In my case, I’ve always been interested in two things, which are reasons why people work with me for mixing:
- While I use electronic sounds, I want to keep them feeling as if they’re as organic and real as possible. You’ll have the impression of being immersed in a space of living unreal things and the clash between the synthetic and the real, which is for me, one of the most interesting things to listen to.
- I like to design spaces that could exist. The idea of putting sounds in place brings the listener into a bubble-like experience, which is the exact opposite of commercial music where a wall of sound is the desired aesthetic.
There’s nothing wrong with commercial music, it just has a different goal than I do in mixing.
What are some descriptions we can apply to an organic, warm, rounded sound?
- A “real” sounding feel.
- Distance between sounds to create the impression of space.
- Clear low end, very rounded.
- Controlled transients that aren’t aggressive.
- Resonances that aren’t piercing.
- Wideness without losing your center.
- Usually a “darker” mix with some presence of air in the highs.
- Keeping a more flat tone but with thick mids.
Now with this list in mind, there are approaches of how to deal with your mix and production.
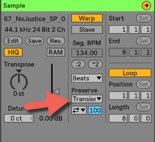
Select quality samples to start with. It’s very common for me to come back to a client and say “I have to change your kick, clap and snare”, mostly because the source material has issues. Thi is because many people download crap sounds via torrents or free sites which usually haven’t been handled properly. See sounds and samples as the ingredients you cook food with: you want to compose with the best sounding material. I’m not a fan of mastered samples, as I noticed they sometimes distort if we compress them so I usually want something with a headroom. TIP: Get sounds at 24b minimum, invest some bucks to get something that is thick and clear sounding.
Remove resonances as you go. Don’t wait for a mixdown to fix everything. I usually make my loops and will correct a resonance right away if I hear one. I’ll freeze and flatten right away, sometimes even save the sample for future use. To fix a resonance, use a high quality EQ with a Q of about 5 maximum and then set your EQ to hear what you are cutting. Then you lower down of about 4-5db to start with. TIP: Use Fabfilter Pro-Q3, buy it here.
Control transients with a transient designer instead of an EQ. I find that many people aren’t sensitive of how annoying in a mix percussion can be if the transients are too aggressive. That can sometimes be only noticed once you compress. I like to use a Transient designer to lower the impact; just a little on the ones that are annoying. TIP: Try the TS-1 Transient Shaper, buy it here.
Remove all frequencies under the fundamental of the bass. This means removing the rogue resonances and to monitor what you’re cutting. If your bass or kick hits at 31hz, then remove anything under that frequency. EQ the kick and all other low end sound independently.
Support the low end with a sub since to add roundness. Anemic or confused low end can be swapped or supported by a sine wav synth that can be there to enhance the fundamental frequency and make it rounder. It make a big difference affecting the warmth of the sound. Ableton’s Operator will do, or basically any synth with oscillators you can design.
High-pass your busses with a filter at 12db/octave. Make sure you use a good EQ that lets you pick the slope and high-pass not so aggressively to have a more analog feel to your mix.
Thicken the mids with a multiband compressor. I like to compress the mids between 200 and 800. Often clients get it wrong around there and this range is where the real body of your song lies. The presence it provides on a sound system is dramatic if you control it properly.
Use clear reverb with short decay. Quality reverbs are always a game changer. I like to use different busses at 10% wet and with a very fast decay. Can’t hear it? You’re doing it right. TIP: Use TSAR-1 reverb for the win.
Add air with a high quality EQ. Please note this is a difficult thing to do properly and can be achieved with high-end EQ for better results. Just notch up your melodic buss with a notch up around 15khz. It add very subtle mix and is ear pleasing in little quantity. TIP: Turbo EQ by Melda is a hot air balloon.
Double Compress all your melodic sounds. This can be done with 2 compressors in parallel. The first one will be set to 50% wet and the second at 75%. The settings have to be played with but this will thicken and warm up everything.
Now for space, I make 3 groups: sounds that are subtle (background), sounds that are in the middle part of the space, and space that are upfront. A mistake many people make is to have too many sounds upfront and no subtle background sounds. A good guideline is 20% upfront as the stars of your song, then 65% are in the middle, and the remaining 15% are the subtle background details. If your balance is right, your song will automatically breathe and feel right.
All the upfront sounds are the ones where the volume is at 100% (not at 0db!), the ones in the middle are generally at 75%, and the others are varied between 50% to 30% volume. When you mix, always play with the volume of your sound to see where it sits best in the mix. Bring it too low, too loud, in the middle. You’ll find a spot where it feels like it is alive.
Lastly, one important thing is to understand that sounds have relationships to one another. This is sometimes “call and response”, or some are cousins… they are interacting and talking to each other. The more you support a dialog between your sounds, the more fun it is to listen to. Plus it makes things feel more organic!