Transient Shaping
In this blog, I’ve already discussed many ways of playing with your track to create new textures and variations and how to keep your sounds interesting. I’d like to discuss another way of colouring your music: transient shaping; something that can completely change the way a track sounds and feels, depending how you shape your sounds.
To experiment with transients, we will need to play with certain features of Ableton Live which can be very powerful. Alternatively, you could also invest in a type of plugin that is in the category of “Transient Shapers”; there are many out there but some of my favorites are the MTransient by Melda Production and Transient Shaper by Softubes. Both offer quality results at a decent price.
Firstly, if you’re not familiar with transients, they usually consist of the beginning of a sound/sample. If you’re familiar with the Attack-Decay-Sustain-Release (ADSR) envelope of the synthesizers, the attack would be generally manipulating the transient. Sometimes its fast and strong, or other times, it’s slow and smooth. For a kick that punches, you want it to be pronounced and snappy. If you’re after that specific feel, then the transient shaper will really be interesting for you. A plugin will allow you to make the transient more apparent or make it quieter; generally you will also be able to control the sustain of the transient. Sometimes you might want your transient to snap but the rest of the kick to feel quieter; a transient shaper plugin will be able to do that with 2 knobs. I have multiple versions of these types of tools and use them daily – it’s quite captivating what you can do if you exaggerate the attack of sounds which don’t have any transient at all.
In Ableton Live, you can also have fun with a feature integrated in the sample’s detail view. Let’s have a look at how you can manipulate it and how you can have fun with it…
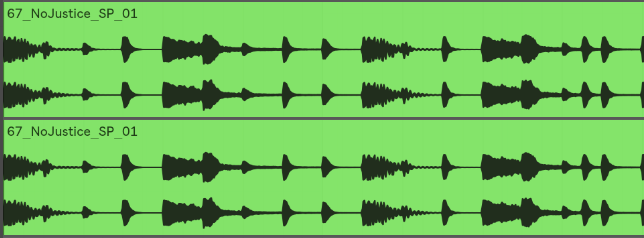
First take a loop sample, and duplicate it in another channel.
The on the duplicated loop, make sure you set up your details like this. Now turn down the percentage of the transient.
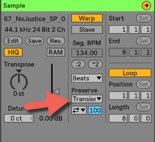

You’ll notice that as you lower down this box, only the transient will remain and the rest of each sounds will disappear. You’re basically trimming each sound to keep just the beginning of it, which is the transient. The new channel can be leveled up and layered with the other: you’ll now notice the transient is louder and you now have certain punch added if there was not enough originally.
If you flatten or consolidate, you’ll get a new view:
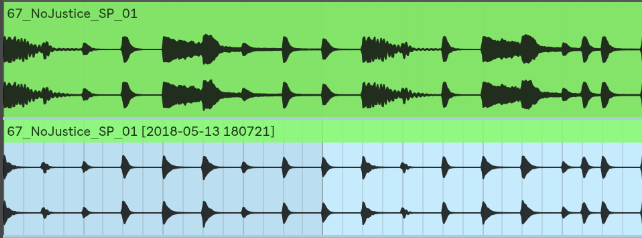
See the difference and what we removed? By layering the beginning, you’re giving more punch.
Tip: try it with a kick loop or a hihat loop.
Now your fun really has just begun!
Here are a few suggestions to try for pushing your sound design even further:
- Control/lower the transients of the original loop with a compressor. If you set a compressor with a fast attack, it will control the transient. Play with the release to really tame it down.
- Add a reverb or any effect on the transient channel alone. This is really cool because the effect can either affect the beginning or the end of the sounds. I like to put reverb only on the sustain while leaving the transient dry, which gives more precision to your percussion instead of having them lost in a pool of reverb.
- EQ the transients to keep only the high end for sharp precision or just the mids for more oomph.
- Side-chain the transient with the original sound. Experiment with this one and you’ll achieve some fun results!
- Compress both channels by grouping them.
Feel free to share your thoughts about transient shaping!


Leave a Reply
Want to join the discussion?Feel free to contribute!