Mid Side Processing Explained
Often when I listen to tracks in my coaching group, I notice that the mid/side processing is often really off. Not having a solid M/S mix makes mixes sound thin, and muddy, rather than expansive and crisp. It’s often the M/S that is the make or break between an ok mix and a radiant one. Therefore, it felt prudent to write an article on what mid/side processing is, and how producers can have it done properly in the mix. Therefore, without further ado, here is Mid / Side processing, explained.
What Is Mid/Side Processing?
So what is Mid/Side processing? Basically, if you want a wide-sounding mix, you’re going to have to concentrate on mid/side processing. Often these sort of mixes sound “better” to the listener, and allow the producer to throw more sounds in their mix, without it sounding cluttered. While a wide-sounding mix can be accomplished through a bunch of different panning and stereo processes, mid/side is a strategy that can really dial that in, and create a spatial mix.
Mid in Mid/Side Processing, Explained
The “mid” part of the mid/side process is basically mono. It’s the sound(s) that sits in the center of the mix. Kick drums, snares, melodies between 200 – 500hz (like a pad), and any other “static” sounds can, and often should be placed in mid. Sure, there are artistic exceptions, but this is a good rule of thumb.
Also, bass below 100hz. This is best practice. Why? If you print a vinyl, and if the bass is in stereo, the needle will jump. Also, in clubs, they do serial summing, where anything under 100 will be summed into 1 mono signal, but if your bass is in stereo, and it’s summed, it can quiet phased parts of the mix.
Side in Mid/Side Processing, Explained
The side-channel is the edges of the mix. Note: This is not to be confused with panning, where you can move sounds specifically into the left or right stereo field. Side processing is strictly hard to the right, or hard to the left, and is technically a mono signal.
When the side’s amplitude is increased, the listener hears a wider, fuller sound. A good way of using it is to increase the width of leads, or strategically move a percussion bus to the sides of a mix to create a fuller listening experience.
You can even get creative with this, and widen parts of the mix at different intervals in the song. For instance, whenever the chorus comes in, you can widen the leads on it, to give it a more present feeling, allowing it to become more expressive to the listener.
Pads are great for the sides as well, since it’s audio that “hugs” you, in a way. Other things that work well on the side are background noises, like field recordings, or weird ambiance -, that stuff works well on the side, it’s not present. Only present stuff should be in the middle. All decorative percussion can technically be on the side – swingy hi-hats, bells and whistles.
Side Processing May Cause Phasing
Once mid/side processing is explained to many newbies, often they just go out and start messing around with it. However, side processing can reveal one of electronic music’s most dastardly foes: phasing. Basically what happens with phasing is when you have two of the same sound, on opposite sides of the stereo field, they cancel each other out. That means, we have to be judicious with the sounds we put on the sides. Generally, “less is more” is a good approach when dealing with phasing since there are fewer chances of frequencies canceling each other out.
How To Correct Phasing
If you want to correct phasing while keeping them in stereo, the trick is to have one of the sounds reveal itself immediately after the other, so they don’t phase. This can be done with a very short delay. When dialed in, the sound will perceptually happen at the same time, but be delayed ever so slightly, allowing the other sound to peek behind the other one and be heard.
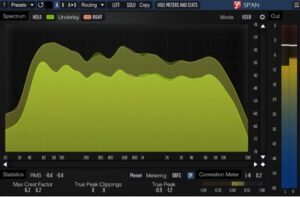
A more immediate, definitive way to correct phasing is to make the sound more mono. There is a tool you can use, called SPAN. This plugin allows you to see in yellow, mono, and in red, side signal. When the red goes beyond the yellow, you have to reduce. The tool you use to fix this is the utility plugin, native to Ableton. You can control the width in this. If you want it more mono, you just adjust the width down, and then turn the volume up.
However, let’s say you have a purely mono signal that you want to add some subtle stereo width to. There are certain effects that can impact this. You can use reverb with little decay (otherwise it will be too loud).
You can also use a chorus. Eventide made a harmonizer that is beautiful for that. It’s two delays – left and right – and when you play with the delay of each other, it creates a weird signal/shape, and then you can play with the wet/dry to add degrees of stereo. However, if you don’t have the money, you can use the echo delay, and control the left-right, and create a very short delay to create a little more phasing and the width you can play with opening and closing it.
EQing in Mid/Side Mode Is A Must
In my opinion, all EQing should be done in MS mode. Sometimes people hear things that they don’t like in the mix, and if you just cut, you are cutting both the left and the right at the same time. However, sometimes you want a sound to be EQ’d differently, depending on the channel that it’s in.
For instance, let’s say you have a synth in your left channel, and it doesn’t exist as much in your right channel. When placing decorative percussion, there will most likely be a crossover in the panning.
But since the synth is primarily in the left channel, the percussion in the left channel is going to have to be EQ’d different to not conflict with that synth. However, since there is all this open space in the right channel, there is no need to EQ out some of the frequencies, allowing that sound to better express itself.
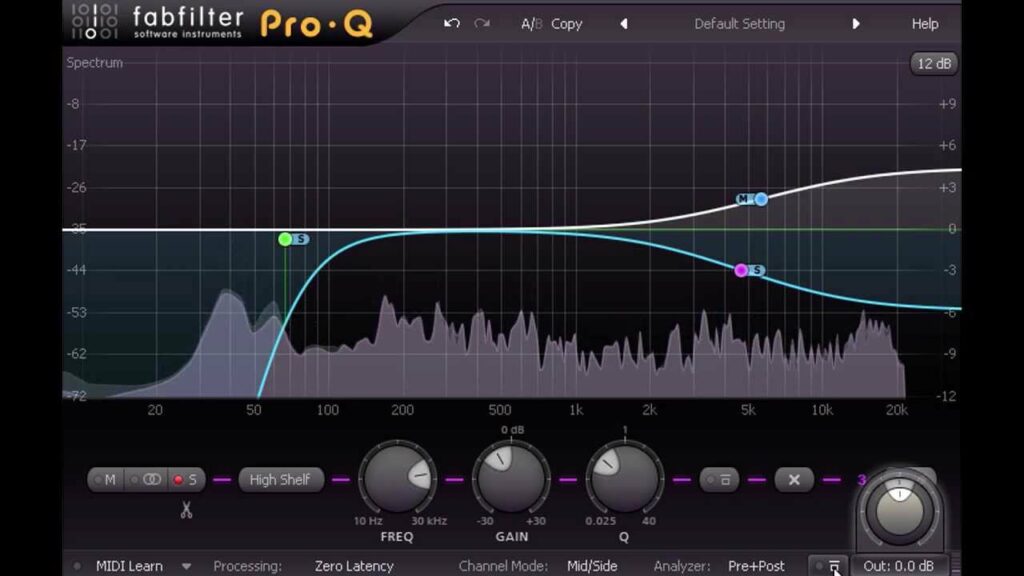
Fabfilter ProQ3 allows you to easily enter MS mode for EQing, and make precise cuts to the sound. If you don’t have ProQ3, you can unlink the left/right in Ableton as well. On EQ 8, there is a mode called stereo, but you can unlink left/right by clicking edit and then selecting left or right. You can also switch it to MS (Mid/Side), where you can edit either the mid or the side or you can treat left/right independently. When you do this, your sound feels more organic, because you’re not cutting in one place.
More Plugins That Impact Width and Phasing:
Panman
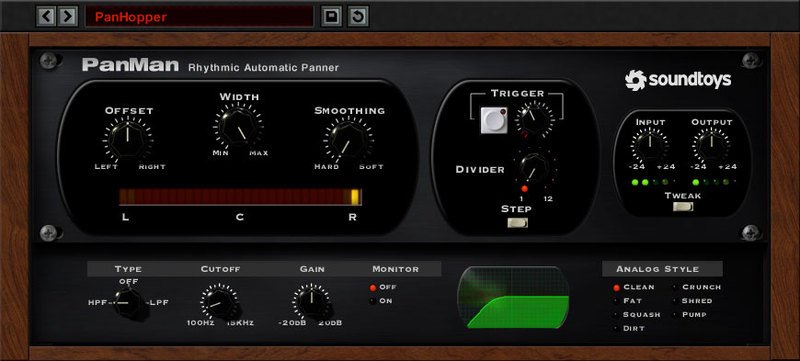
PanMan really splits open the possibilities of panning. First and foremost, it’s a hardware emulation, which allows producers to mimic the syle of vintage hardware panning gear. You can also trigger panning if the track hits a certain parameter. The automation allows you to generate complex rhythms and stunning sweets.
Microshift
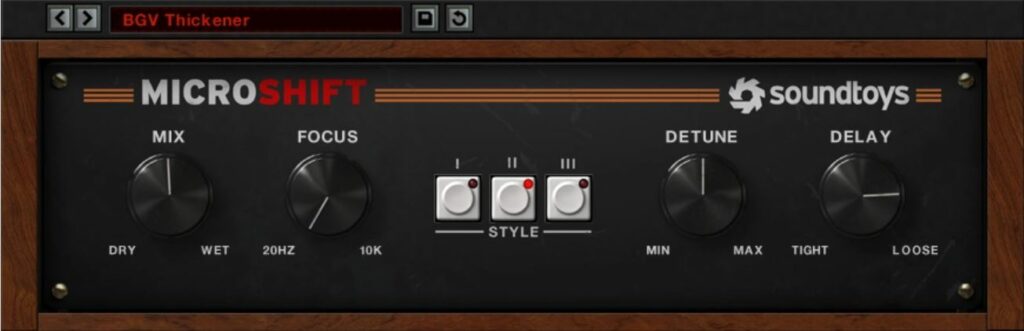
Need some width? Well Microshift’s got width. It provides you 3 separate kinds of stereo widening in just a single button push. It uses a specific algorithm to pitch shift and add delay to your sound, that morphs over time to generate brilliant stereo width. It’s very easy to play around with and can be used to give more flavor to instruments, or create nice blends.
MStereoGenerator
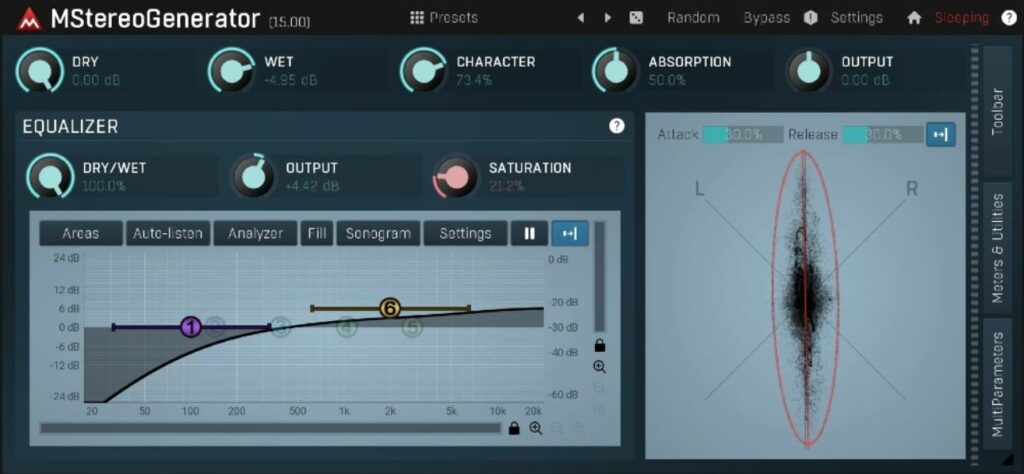
With MStereoGenerator, you can convert mono recordings into stereo (or even surround). MStereoGenerator is a unique natural-sounding mono to stereo (or even surround) expander, which makes your tracks sound wider, stronger and punchier. It’s especially good for acoustic instruments.
Panshaper 3 by Cableguys
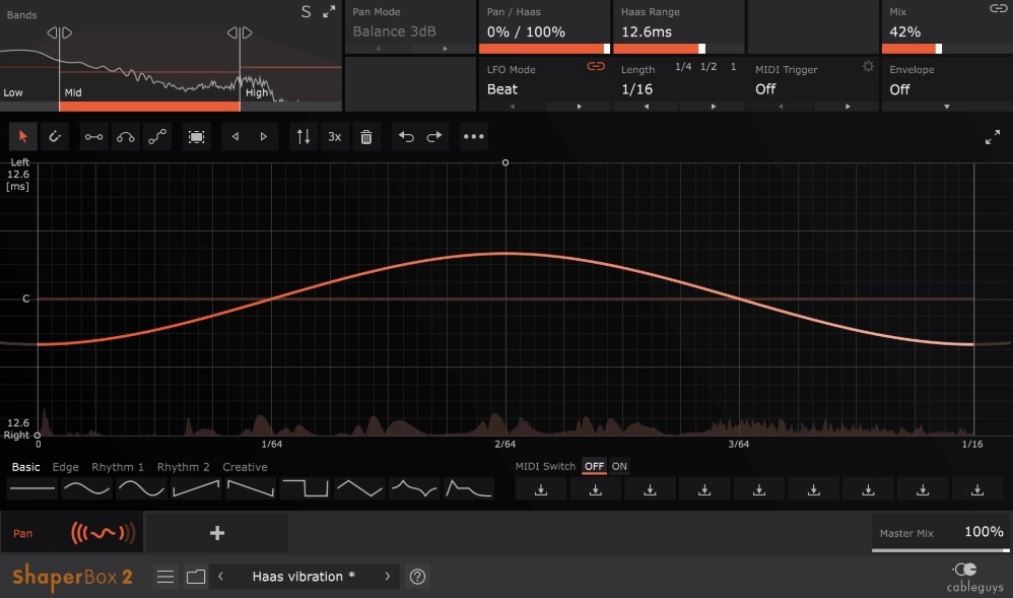
PanShaper 3 takes control over your stereo field to another dimension. The real-time LFO that can be drawn on every band and the envelope follower allow you to design evolving, dynamic pan patterns and make dialed-in stereo edits in seconds.
Energy Panner
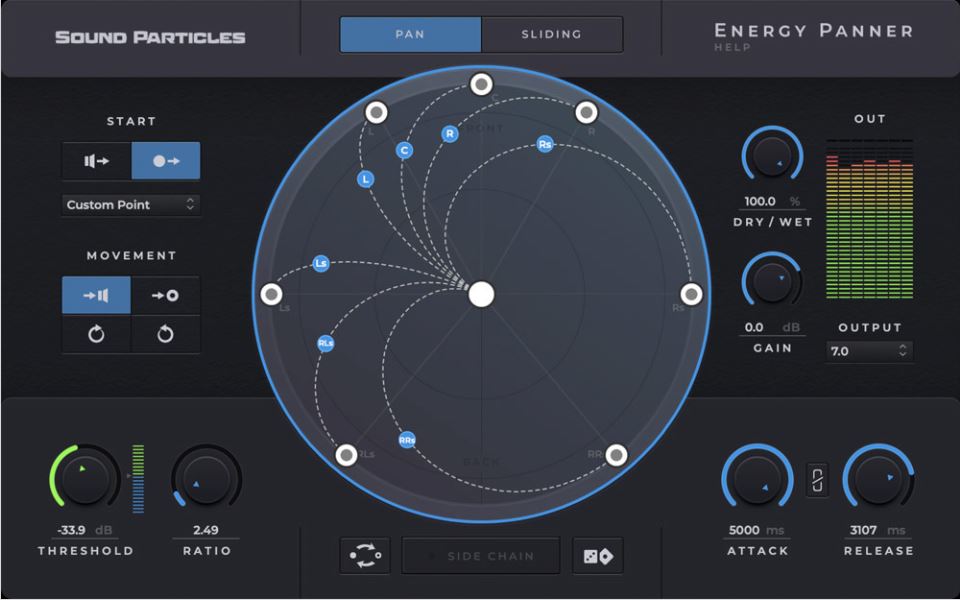
Energy Panner reacts to the sound intensity by moving in response to it. A drum kit that moves to the beat, synth notes that move on attack, and many other behaviors are possible. Whether it’s stereo or Dolby Atmos, Energy Panner is a plugin you shouldn’t be without.
Width Shaper 2 by Cableguys
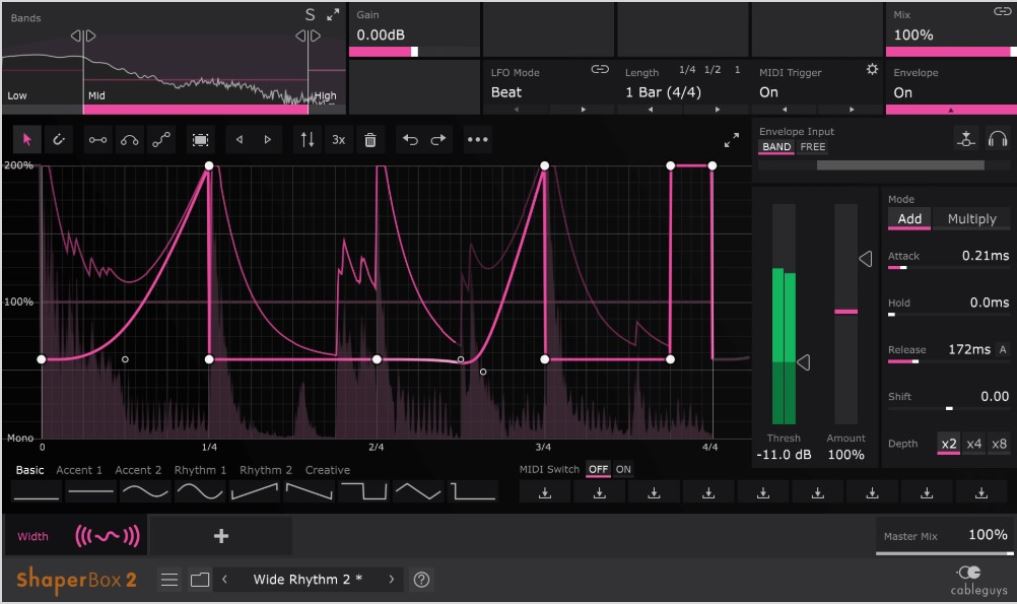
With WidthShaper 2, you can fine-tune your stereo image to the finest detail. With three mid/side stereo adjustment bands, each with its own drawable LFO and envelope follower, you can gain precise control over the sound. It is perfect for sound design, mixing, and mastering, and can be used on single tracks and buses.
Once you have mid/side processing explained to you, you can see there is way more to stereo than just left and right. With M/S EQing you can surgically cut into sounds, and make them fit precisely in a mix. You can expand and retract sounds at different points in your mix, creating those illusionary, almost psychedelic effects in music that are almost inexplicable, since they are best described as space, rather than music.
However, with this power, comes the responsibility of not phasing your sounds out, and destroying the punch of your songs. Keeping in mind space, and how sounds relate to each other is a paramount skill in music production, and often an overlooked aspect.
I understand this can be complicated. If you need coaching or you just want to delegate this process to me, I’m available to help. Check out all of my services here.
 The first time I familiarized myself with this concept was when I used the iPhone grid to take pictures. I had read that a tip to take better pictures was to use that grid to “place” your content.