Tag Archive for: synth

VCV Rack Ideas And Meditations

If you’re not familiar with VCV Rack you should be. While modular synthesis is an expensive hobby, usually reserved for people with cash flow, the open source, mostly free VCV rack is democratizing people’s access to this amazing creative tool. VCV Rack acts as a Eurorack DAW, allowing you to build complex patches using a variety of free, or premium modules, often based on existing hardware. In this post, I won’t talk so much about how to use VCV Rack, as there are tons of tutorials already on it. Instead I will talk more about how it has inspired me, VCV Rack ideas, and how you can use it to inspire yourself.


VCV Rack Ideas Are Meditative

The first benefit I noticed from VCV Rack was how meditative it is. I have been an avid practitioner of traditional meditation for many years now, and the similarities are striking. It forces me into a state of flow, one that often results in the dissolution of all outside distractions. A state where time and space become irrelevant, and I am concentrated on a singular purpose. 

A lot of people conflate meditation with a silencing of thoughts, when that’s far from the truth. We’re human; we’ll never be able to silence our mind. Instead, we have to funnel those thoughts into a singularity. A singularity where you accept you have no control over what happens, both of which VCV Rack ideas do for me.


The Random Beauty Of VCV

That’s the beautiful thing about modular. These electrical circuits are so finicky that often what you aim to create and what comes out are often vastly different. It’s that sense of unpredictability that makes it so wonderful, and thus, meditative.

Surprisingly this sense of randomness and unpredictability isn’t lost in a digitalized version of modular. Somehow the community of open source developers have kept this aspect true to form, demonstrating the increasing dissolution between analog and digital as technology advances.

Many of you probably don’t know this, but I was an actor, before I was a musician, and even went to school for it. While you have a script, the fine art of acting was always in the slight improvisations. Lines often wouldn’t come out as intended, and you would have to react in the moment. This would often lead to beautiful accidents, far superior to the original script. 

In a sense, the life that exists in modular is very much like a fellow actor on stage. It may have its lines, but ultimately, it will improvise, and it’s up to you to harness this improvisation and redirect it to something evolutionary.


photo of vcv rack ideas


VCV Rack Tutorials Are Fun

The second thing I noticed about VCV Rack was that it made me appreciate tutorials again. If you’ve been a power user of Ableton for as long as I have, you may find that Ableton tutorials an get super cookie cutter, and formulaic. This often results in stale music that sounds like everyone else who watched the same tutorial.

This may be one of the reasons why the sound we hear is becoming more and more homogenized, and less innovation is seeping through the cracks. This is despite an exponential increase in the number of musicians. However, with VCVRack, the tutorials seem more personalized. Even if you try to recreate something precisely, you’ll almost never get the same result, due to the nature of modular. The sheer amount of VCV Rack ideas you can get from these tutorials is incredibly exciting, and constantly motivating.


VCV Rack Tutorials Help You Build Existing Hardware

Another fun aspect of tutorials is that there are some people out there, like Omri Cohen, who build faithful reconstructions of existing pieces of hardware. The one that I linked to is for the Moog DFAM, a semi-modular percussive sequencer that allows you to build really wild, synthesized patterns. 

Normally a DFAM runs for about $700 USD, which isn’t a small investment. While following these tutorials, you not only learn the ins and outs of the DFAM by building it piece by piece, but you also get to try it before you buy it, in a sense. 

This allows you to figure out your setups and configurations for your hardware studio, without having to buy things, and send them back if they don’t fit. Also, since it’s fully modular, you can in theory connect multiple recreated devices together. This allows you to see how they will perform as a hardware version. So let’s say you wanted to see how a DFAM would interact with a Moog Subharmonicon. This is now possible through VCV Rack, for the low low cost of zero dollars. These are just some of the hardware VCV Rack ideas found in tutorials.

photo of the dfam vcv rack ideas

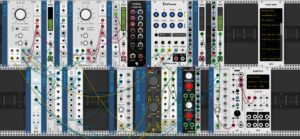
VCV Rack emulates the Moog DFAM

VCV Rack Changes How You Listen To Music

The third thing I learned while formulating VCV Rack ideas is that it changed how I listened to music. Normally I have a nerdy way of listening to music from a sound engineer point of view, where I analyzed EQ, compression, stereo spread, etc, but now when I listen I notice the changes in the patterns, and how things modulate. 

While toying around with VCV Rack ideas, I start thinking about the patches that make the sounds. For instance, what waveform is controlling the FM, or how the envelope routes to the VCA. Or what hooks up to the clock, or how many VCOs are in play. Still, super nerdy, but it adds another dimension to the whole thing, which in turn, stimulate more VCV Rack ideas.  


VCV Rack Ideas Help You Build Your Real Modular Setup

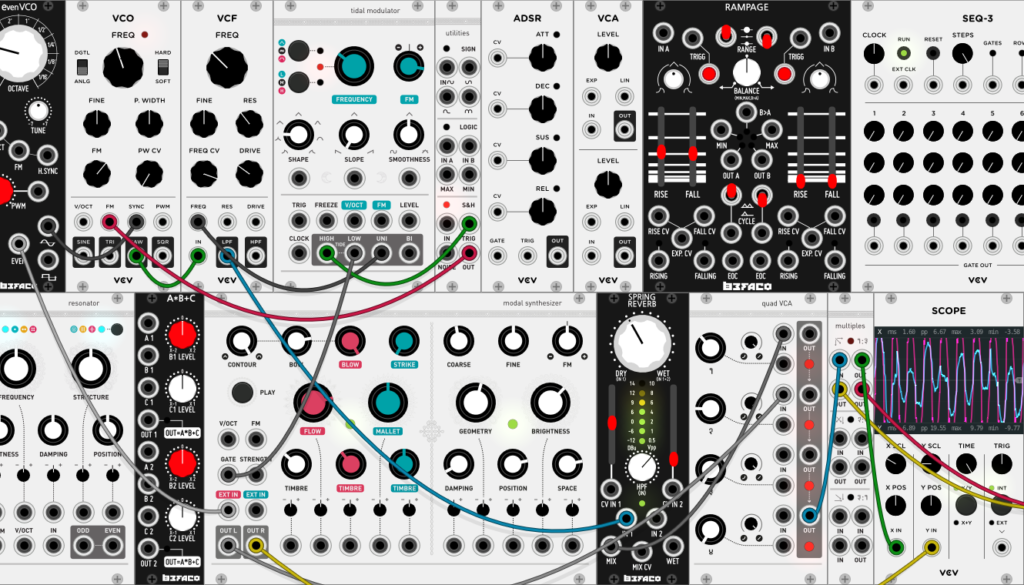
The fourth benefit I got from playing with VCV Rack ideas is that just like it allows you to build existing pieces of hardware to test in your setup, it also acts as a way to test modules for your real modular setup. There are a bunch of faithful emulations of existing modules. For instance, the Audible Instruments line is a software emulation of Mutable Instruments. There, you can get clones of things like their Clouds or Tides modules and test them in your setup.

Other examples include:


  • Lateralus: Hybrid diode/transistor ladder. This models itself after the Roland filter circuit where they added a few alterations to get close to the Moog circuit.
  • Vorg: Single segment of the filter circuit of Korg MS-20.
  • Ferox: CMOS filter based on the circuit of the CGS749.
  • Nurage: The Nurage bases itself on the circuit of Thomas White LPG which bases itself on the Buchla LPG.
  • Vortex: this bases itself on the circuit of the Polivoks (Erica Synths version).
  • Tangents: This bases itself on the Steiner-Parker version of Yusynth. The three models are variations of the same circuit.
  • Stabile: based on the textbook Stave-Variable filter circuit (linear version).
  • Unstabile: Nonlinear State-Variable filter with low voltage simulation


vcv rack ideas real clouds

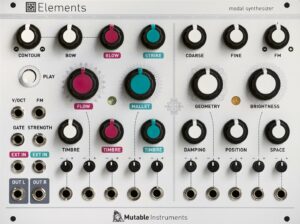
The real Mutable Instruments Elements

vcv rack ideas photo

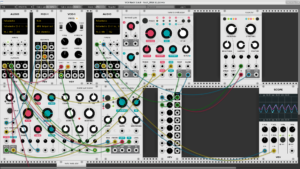
VCV Rack that includes Mutable Instruments emulations, aka Audible Instruments


VCV Rack Is Constantly Improving

Since it’s community supported, it’s constantly evolving, with new modules being added frequently. Most are free, too! 

Some people will complain that it doesn’t integrate into other DAWs in a smooth fashion, but VCV has heard the complaints and in 2.0 the rumor is that they will have this integration. 

These are just some of my observations about VCV Rack and its amazing ability to spark creativity. In truth, the sheer amount of VCV Rack ideas and inspirations you can get from those VCV Rack ideas are quite staggering. If you have any questions about it, or want to share your experiences with it, feel free to contact me, or make a post in Pheek’s Coaching Corner and let the community know what you think!

Bass Line and Low-End Mixing Tips

Tips on mixing low-end is an often-requested topic in our community and Facebook group. Handling low-end in electronic music is important to give it the glory it deserves, since it’s one of the most important parts of the genre. In this post, I’ll cover tips on how to handle low-end from multiple points of view, not only from the software side, but also from a monitoring perspective. As I’m writing this during the COVID-19 pandemic quarantine, I’ll also propose some tips on how to manage low-end at home.

The Theory

I won’t go into boring engineering theory here because it’s not my blog’s style. I like to keep things simple and straightforward. So for making low-end easy to understand, let’s cover a few important points:

  • For the purposes of this post, “low-end” means 20hz to 300hz.
  • The low-end is basically the fundamental part of your song. If it’s muddy, your track will not flow.
  • Low-end is the most powerful part of your song in terms of loudness. If your song has a lot of lows and not much mid, it will feel less loud while in theory while actually being very loud from a technical point of view.
  • Over-powering lows makes a song feel muddy and empty in a loud, club context.
  • Lacking lows will make your song feel wimpy.

When it comes to mixing, I usually start by cutting everything with a filter or high-pass EQ at 20hz with a 24db/octave slant. This cuts unnecessary rumble that most sound system can’t reproduce. If you feed monitors garbage frequencies, it takes away precision in the “good ones.” So I cut everything on the master/mix bus, but I will also high-pass every channel by removing any frequencies aren’t needed. When mixing claps, for example, I will remove everything under 300hz.

Low-End Frequency Bands

  • 20-30hz: The section is the sub area. Not always present in every sound system, but when it is, it really creates a warmth that is quite addictive.
  • 30-50hz: I find this section is where a song gains in power. Most clubs cut at 30, and on vinyl records they also cut there—this zone is critical.
  • 50-80hz: The range that creates a lot of punch.
  • 80-100hz: Punch, presence and precision.
  • 100-320hz: This is the body of the song. It gives a lot of weight.

I usually put everything under 150hz in mono. This really solidifies the low-end and avoids phasing issues that are often present, which can help in clarity. Vinyl cutting requires mono low end or the cut will make the record skip. I’ve seen producers who enjoy the weird effect of a stereo low-end but that’s for home listening mostly, and they know there can be issues.

Frequencies are shared by many sounds, and the more you free space for your low end content to breathe, the better it will perform. I know it’s time-consuming but there’s nothing like doing it this way compared to using a side-chaining tool. This phase of mixing is critical for clarity. The more care you put into each channel, the better the results will be in the end.

Since the low-end has fundamental notes, in electronic and dance-oriented music, it’s generally important to pick a key note for your song and not change it much. You can change it as much as you want, of course, but if you do, you’re going to deal with a few headaches.

The Challenges of Mixing Low-End

Handling low-end has multiple challenges, but with time, but hopefully some of my suggestions here help you to deal with those challenges more effectively.

Monitoring

In general, people who can’t hear or deal with low-end properly is because they’re not equipped to work with it. Using a sub is a good, but it will never have the precision of a tool like the Subpac. The Subpac is a wearable device that reproduces the low-end more physically, making it easier to understand what’s happening down there—you feel low-end on your back directly. Headphones, on the other hand, can mislead you, as you cannot hear lower frequencies.

After figuring out the bet monitoring options for your setup, you need to A/B your mix with something to see how your low-end compares to it. There are two main plugins I highly recommend for A/B tasks: Bassroom and REFERENCE. Both allow you to pick a song you like, and then it measures your work in reference to that song to show you how to manage your song to get the desired result. Doing this without these plugins is very hard unless you’re a veteran engineer.

A/Bing requires something very important that a lot of people find difficult to understand when I explain it: you need to find quality song that has well-mixed low-end to compare your work to.

You can’t make quality music if you have never been exposed to it beforehand.

Low-end mixing approaches also vary widely in genres and producers. I would recommend that you pick a song to A/B that you like the feeling and sound of, and then try to emulate it with those plugins. For instance, some techno producers prefer the bass too be present all the way to 20hz and the kick to hit at around 80hz, while some other genres, it will be the opposite. One isn’t better than the other—they’re just styles—but both will create a certain feel on a dance floor.

Shared Frequency Ranges

Speaking of the kick, I should also mention pads, toms, and synths, as they all share space in the low end with the bass elements. It can quickly get messy down there, and the more shared space, the muddier it gets. If you look at the different bands I mentioned, I try to make sure one one sound per section occupies each band. This is why side-chain compression can come in handy—when the kick hits, you can apply ducking to all the rest of the signals that could be present in that range as well. You can also side-chain the bass with percussion or synth so they all have a moment but not at the same time. For quality side-chain compression, I highly recommend looking into the Shaperbox 2 plugin. It’s a “knife” for extremely precise ducking, filtering, and applying mono to your low end—it’s crazy-good.

Space is not only shared in frequencies but also in time. We all love low-end and I see people getting a little bit too excited and have way too much decay on all their sounds down there, which means a lot needs to be removed. The shorter the sounds, the clearer your low-end will feel. You can do that with Shaperbox 2 but also with the very useful mTransientMB that can help you make super punchy sounds.

This means that picking your envelope can be a very delicate task. If your low-end has too much attack, it will compete with the kick and make things muddy. If it lacks attack, it will feel slow and lifeless. To shape your sounds, I would say Shaperbox is the best tool, but if you can look into understanding the attack/decay/sustain/release of your tools and perhaps looking into a good envelope follower, too. Some max patches can really come handy for this as well.

Density

It’s not because your low-end is loud that it’s dense. If you have your low-end coming in loud, it might need some compression to have more density. I find that the best way to get that is by having side-to-side compression (eg. insert 2 compressors), both in parallel mode (wet/dry at 50%) which will condense the signal and make it thick, warm, and fat—pretty much what we love in low-end. You can also add harmonics by using some saturation. I personally find that the most interesting saturation for the low-end is tape; it just works very well. My favorite is the Voxengo CRTIV Tape Bus plugin, it’s a marvel.

Practice Mixing Low-End

Practicing the mixing and design of the low-end of your song takes time, good monitoring, and understanding of each of the challenges that come with it. Once you start working on it and start feeling something isn’t right, check which challenge you’re facing. Try to be methodological about this.

Here’s how I approach it, step by step.

  1. Pick the root key of your song; G, for example.
  2. Find the hook, motif and main idea of your song, then tune it to the key. Usually the main idea, which could be an arpeggio, will situate itself in around G5.
  3. Use the same idea, pitched down to G1-2 to define your low end. It could be one or two octaves difference. It will support your main idea in the same key, making sure your song feels unified.
  4. Put in mono—all your elements under 150hz should be mono.
  5. Add your percussion. You can tune each element to the root key. Tuning the kick can really give a whole different feel.
  6. High-Pass all channels to remove garbage frequencies.
  7. Clear the decay. Fine tune the decay of all sounds so there’s no bleed and they have more dynamics.
  8. Side-chain elements that are masking one another.
  9. Add or control the attack of each sound for precision.

If you do the items in this checklist, you’ll have much better results already. The rest will come with time.

Writing Bass Lines

This tip builds on my previous post about chord progressions and music theory. I come from the dub techno world where we had one-note, one-bar bass lines that felt satisfying enough, so when people ask me if a bass line can be monotone, I sometimes reply that the simplier the low end, sometimes the more effective it can be. Sometimes making it complicated doesn’t mean good. That said, having a bass line over two bars instead of one is often pretty lovely for variation.

I also find that powerful basses are the ones that are reply to the main idea. Support is efficient, but it will make your bass line lack interaction and making it less engaging.

A good way to find a dialog for a bass is to put a square LFO modulating the volume and then using it to mute parts of your bass. If you change the speed of the LFO, you’ll gate parts out, and might find a good combo or variation. In Hip Hop, they often use a pure sine tone and they’ll duck with an LFO or kick. This makes the low end very full and thick.

Oscillators

If you’re going to pick a synth to design with, it might be wise to consider the use of certain wave shapes. For instance, a sine is warm and pure but it can have resonances which are difficult to remove with a bell EQ because they can phase. You want to control your low end only using filters (high-pass) or a shelving EQ. A filter’s slant will help control a rumble. You can put it at 30hz and then switch the slant from 6dB/oct to 12,18, 24 and see how the low-end changes. They all make it very different, from taming to numbing it out. I like to use a square oscillator, but I’m not a fan of the harmonics it creates, so I will filter some out. I’m very careful with resonances in the low-end, but they can also bring a certain warmth to it. For instance, you can use resonance as an extra sine oscillator, which brings fullness to the low-end.

I hope this covers low-end sufficiently for you. Feel free to share your own findings, techniques, or extra questions!