How to get the right tonal balance for a mix

One of the biggest challenge of finishing a song is to properly adjust the tonal balance. There’s no doubt this part of track-making is puzzling; many people – even experienced producers – are still going to have some issues with tonal balance some days. There are tools and methods to correct tonal balance, but it’s always a challenge; I feel that it’s important to share some tips on how you can make adjusting tonal balance easier.

What is tonal balance?

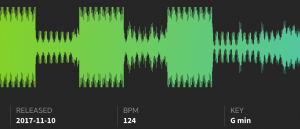
I’ll keep this as simple as possible: tonal balance, from my perspective, is dividing your song into three frequency sections and figuring out how to adjust them. For instance, in certain genres, you want the tone to be totally balanced, while for dance oriented, electronic music, you’d want the lower end louder in the mix. While this sounds extremely simple to achieve, in reality, it can be a nightmare.

The biggest issue with tonal balance is that if your tone is wrong, your work when played in a specific context (ex. in a club) will sound completely off compared to similar songs of the same genre.

Common problems with tonal balance include:

Lower end anemic: The song will feel weak, energy less and hollow.

Lower end too loud: The song will feel muddy and lacking in body.

Mids lacking: The song will feel empty, no punch or body, far off.

Mids too loud: The song becomes unnecessarily aggressive and obnoxious.

Highs lacking: The song lacks definition and precision in the sounds.

Highs too loud: The song is fatiguing and harsh.

Using the right tools for tonal balance adjustments

Monitoring is of course, crucial to adjusting the tonal balance of a song. I’d say 75% of the time I get a file for mastering and the tonal balance is completely off, mostly because of the artist’s listening environment. While we don’t all have the budget or space to have a fully treated studio, there are some things you can still do:

  1. Cross-validating. With my speakers, I’ll always check a mix periodically with headphones as I work. I like to have a different perspective and I find that the sound I have between the two often reveals a perspective I missed.
  2. Mixing at a low volume. You’d be surprised at how you’ll automatically hear what’s wrong. Reduce by half the volume level you’re working with and listen to how the kick comes through, then the melody compared to it, then the high end, etc. Cross-validate with a reference track.
  3. Using a subwoofer. Many people will tell you that you don’t need a sub to do a good mix but it certainly helps to have an idea of what’s happening down there. Many of us will have issues with the neighbors so I suggest to only use sparingly just to check your mix. A good alternative is getting a Subpac.

There are also tools you can use in your productions to help you. I use many but here are some of my favorites:

Reference

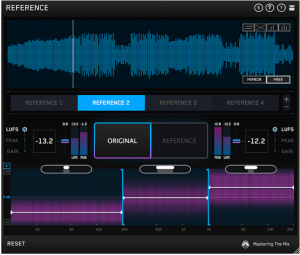
This plugin is a life-saver, no doubt. You load in your reference track, adjust the volume to match and then you can swap between your mix and the reference. There are even some dynamic graphics to show you what part of your mix is too loud or lacking in comparison to the reference track.

If the track is already mastered, you won’t be able to rely on the compression meter but the levels will be used the same way. For 60$, this is certainly an essential to have in anyone’s collection.

Shelving/Band EQ

When I first started to make music, I really didn’t like shelving EQs as I felt they weren’t useful, but once I started looking into them, I have to say that it almost became one of those obsessions one can have for a plugin. There are many of them, so I’ll name a few and then explain how to get the best out of them.

  • Tonelux (Softubes): One of the most recognized and acclaimed tools out there. It gets things done, quickly. Often on sale too.
  • Solid EQ (Native Instruments): I love this one because you have some precision on what you do and it is a good mix between being a musical EQ and a transparent one.
  • Maag Audio EQ4: This one is great for highs. It’s one of the most used in the industry in mastering to get the proper “air” sound, right.
  • Hammer DSP (Kush Audio): Crazy musical, warm and outstanding all the time. Often something to just play with on the master bus to see all the different moods one song can have.
  • Sie-Q (Sound Toys): A bit like Hammer. Musical, and slightly magical in how it handles the mids.
  • ValvEQ (Kazrog): A good alternative to the expensive Bax EQ by Dangerous. It’s handling your tone in MS mode as well.

Using the right techniques in tonal balance

If the EQ, cross validation and other tools don’t seem to work for you, I’d recommend a very simple technique to help you nail down the tone.

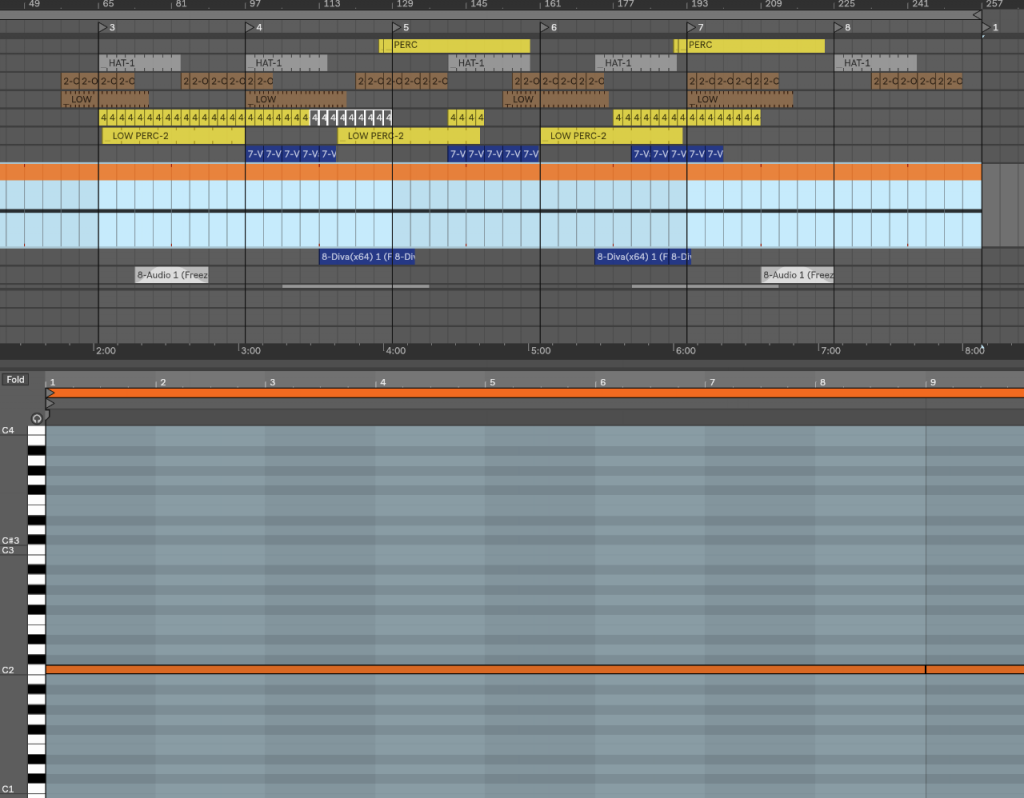
Basically, we’ll limit it our tone balance to three sections but you can pull it to four or five if you want, but the lower the number, the easier it gets later on. Knowing this, I’d encourage you using Ableton Live 10 for the use of the groups in groups feature. You can make alternative groups where you push all the channels using lower end in one group, then mids, finishing with highs.

If you have only three groups or busses, you really limit your options to these 3 faders to control. The less you have in front of you, the more focused you’ll be.

The way I usually do it, I’ll start with the main, loudest channel and put it as the loudest one, then mix the 2 others accordingly. Pretty often I feel like knowing the level of the low end first will greatly help settle the rest.

Basic tips for writing melodies

In our Facebook group, I was asked to share some tips about writing melodies and how to approach this process while arranging. In electronic music, many artists are self-taught and the concept of music from a melodic and harmonic perspective is often built over intuitive understandings and reading online tutorials, which is helpful, but perhaps lacking guidance for making techno or ambient music. Here are a some simple but useful tips for writing melodies that you can do using Ableton:

Find the root key

Each song has a root key. If you look on Beatport for instance, it will indicate the root key so DJs who mix in key will be able to know what they’re dealing with.

A track in G minor on Beatport.

DJ’ing in key is something I love to do once I have a bunch of really interesting sounds I want to bring into a song. Basically, if you follow my non-linear production technique, you’ll work on sound design for a while and when things get shaped into a pattern, you might want to introduce some melodic elements which will help everything come together. This is often where self-taught producers start to experience problems because their song feels like it’s all over the place and lacks an overall direction.

With writing melodies, where should you start?

First, you should decide on the root key. For instance, let’s say you choose C on your keyboard; I would leave that note playing through the entire song at first and then work around it. This means that the fundamental note of your song will be in C, as well as your bass and the other elements you’ll develop around it.

Tip: Use the Fixed grid of 8 bars to make it easier to make longer notes.

Scales, chords

I’m not going to dive into music theory so perhaps you want to do a bit of reading on the subject of scales if you’re not familiar with them, but after picking up your root key, I strongly suggest you use scales and/or chords to decide on how to develop your melodies. Using scales in Ableton will limit the notes you play to the ones that are included in the scaling – this really helps to make sure your melodies don’t sound “off” while building the overall emotion of your song.

Once you get comfortable with scales, you can have them change throughout the song to change emotion and give modal color to the melodies.

As for chords, it’s the same sort of thing. Fore example, if you pick a minor chord (three notes played simultaneously) with a root of C, you’ll immediately have a choice of a three notes to include in your melody. If you keep the song in that key/chord, you don’t have to play all three notes at once to have the chord itself.

How can I determine the notes of a chord or scale?

Insert the scale tool to Ableton or any equivalent plugin (note: there are many alternatives online if you google it). Then you can reference the notes that are from the chord by inserting phantom notes from your sequence, then you can play hit play. The beauty of using Ableton Scales is that if you place a note that is outside of the chord triad, the plugin will re-align it to where it should be, keeping you from sounding off.

The 1 octave, 1 bar motif technique

This method no secret to anyone, but still a truly personal way to write a melody. I usually create a three-note motif to start with, make sure it’s only using one octave, and not longer than one bar. Honestly, I can listen to this motif for a long time and – for myself – just while listening to it new ideas will emerge, pretty much automatically.

What I like about Ableton’s MIDI tools is how easy it makes it to build evolving ideas. The “Duplicate loop” tool makes it easy to create evolving patterns.

My initial loop will be duplicated and in the second bar, I’ll add new notes that came into my mind.

…and so on until your motif evolves to have your chorus, verse, etc. Basic melody writing isn’t really much more than that.

I usually like to copy the motif to a lower octave later on to generate a bass line.

TIP: Try flipping or reversing a pattern for fun results.

ADSR, Velocity and groove

Now that your melodic sequence is built, it will be important to give it life by adding a groove template on it. This will be valuable to make the melody less mechanical and more human-like. I usually like to add other plugins:

  • Note length: play with the lengths from shorter to longer; sometimes having variations like this is also a great way to do transitions from section-to-section.
  • Velocity: complementary to the groove template, this really allows for random velocity to kick in which can create elements of surprise. Make sure to freeze/flatten your sequence so you don’t have different versions every time!
  • ADSR: Don’t forget to modulate your melody using variation in the envelop such as the attack through the release. This is a nice variation to the note length and can give a feeling the melody plays backwards.
  • Arpeggiators: useful to generate some extra ideas to the existing motif. Try it with the diverse random options.
  • Melodic Steps: quite a power horse tool to generate ideas. Try it and see how it evolves.

Let me know of your own techniques for writing melodies and perhaps I can add more ideas here!

Alternative music arranging techniques

Music arranging techniques are a topic I’ve been asked about most in the last few weeks. For many people, this is the part of music-making that causes issues. And rightfully so; arranging is all about storytelling. In past posts, I’ve said that even though your sound and production might be awesome, if you have nothing to say or if you can’t express your ideas properly, the song will feel shallow and will be quickly forgotten.

In this post, I will explain a few things you can do to create exciting, original arrangements – mainly tips on how to work on transitions, which is one of the most important parts of electronic music.

The “perspective” method

One of the most important aspects of arranging are something I’ve explained in past posts, which I call “perspectives”. A quick summary of what I mean by perspectives: split your song in sections using the Markers in Ableton (or your DAW). I usually put a marker at the end of the song, then one in the middle, then others so the song has four similar sections of the same length. Basically, you need an intro, an outro, and the middle part of your song, which is now split in two.

These marker points are critical moments where you could lose the listener’s attention. They are critical pivots for where you want something to happen to keep the flow going and to roll into the next section of the song. Each section should have a surprise and some development or an element to relieve the tension. These points are also moments where the tension can rise or be released; with a proper transitional approach, this can be done easily.

TIP: Find your main idea and try to see if you can create two different developments of it as well as add supporting sounds/melodies. Try to distribute your melodic content across all the sections so the song feels like it evolves.

The jamming method

Recently, I was trying to explain to my son movies are made. He thought a movie was shot as-is, continuously, and didn’t understand the editing aspect of the process. A lot of people think the same way about songs; they’ll grab material and spread it across the song linearly.

I like the idea that making a song is like a movie, or a bit like how songs were recorded in the 70s/80s. You need many, many, takes and jams to find all the possible ideas for your motif. Here are some methods to jam withing your project to help it evolve further:

Jam the clips of your project in the session view of Ableton Live and record the results after the original song structure so you have alternative ideas on how your song could evolve next to your original idea. Many artists jam the clips, then add effects and such while recording for a good 30 minutes to see what comes out. You might be heading down a totally new arrangement path after this way jamming once or twice.

Stop making the song in a linear fashion from start-to-finish and try to chop up your sections and move them around within the timeline. Writing a song is not like writing a story; in the era of DAWs you always have the option to chop out a section and move it to other points in your arrangement. Personally, I like to jam for about an hour so I can really capture the best moments, but this also means I have to chop out a lot of crap out afterwards.

Use re-sampling on a loop. This is my favorite technique in sound design and arranging which is about taking every single loop I have in my project and passing it through a lot of effects, while recording in a channel that re-samples the master. You’ll end up with long files filled with many alterations of your sounds.

  • Add 100% wet reverb to create intense, transitional, swoosh moments.
  • Use LFOs from Max for live to add movement and life to certain parameters.
  • Map your effects to a controller and record yourself physically turning knobs – you can fine tune the automation later.

Use new material in the transitional, focal points of the song. This is a powerful way of re-inserting your recordings into your arrangements and will ignite creativity; your song will get a huge dose of vitality and movement from doing this. This technique can provide you with a lot of ideas for making original transitions, but also spice up your arrangements in sections that fall flat.

Other types of transitions you can try which rely on this technique include:

  • Programing alternative patterns using a controller like PUSH.
  • Slicing certain MIDI sequences and then rearranging them.
  • Punching in and out of certain channels in real time and recording yourself. All your gestures, and work can be recorded by engaging the recording button in the upper part of the window.

Most importantly though, use references! Try to analyze your favorite songs and see how they are arranged in terms of transitions, and then try to replicate them. Music arranging is not rocket science; you’ll learn by copying and eventually by practicing, you will develop your own tricks.