How To Make An EP
In my coaching group, someone asked:
So, how do you make an EP ( I ask this thing regarding the atmosphere, like all the tracks should be in the same way let’s say, or create a story)? I find it really hard, if I count my last 10 projects, all of them are really different. How can I approach this kind of vibe for more tracks? Can you tell me how to make an EP?
I replied a quick answer but I thought it would make sense to expand on this because the real answer of how to make an EP is a bit longer and covers multiple things. Why? Because as a producer, a music lover and label owner, there’s nothing that frustrates me more than having an EP that has no soul, no concept and no direction. It feels bland and empty. There are different kind of EPs you can find out there and all of them will find an ear but I get picky. Let’s see some successful EP types:
The utility:
This type of EP is more for DJs and has a collection of tracks with the function to be played in sets.
The compilation:
Either various or 1, this one is simply a collection of random tracks picked from unsigned material.
The conceptual:
Sometimes an artist has a patch, a system or a way of working that will make a series of songs sound the same, which a few songs will united because of the direction.
The last one is the preferred type of EP I want. If I listen to it on Spotify, I sometimes like the non-linearity experience of shuffling it. To me, it is successful if I can listen to this EP that way in repeat and not get bored or even better, wanting to dig for more music from the artist. As there are multiple people who enjoy an EP just as much as an album, there is value to make one. People were saying that streaming services killed these types of releases but I really think otherwise. As a label owner, if I see someone who put enough energy to do an album, it certainly shows a lot of maturity that makes it special to my eyes. These, whether instinctual, or planned, are perfect examples of how to make an EP.
Chicken Or The Egg: How to Make An EP from What I Have Vs Starting From Scratch
Many people make music on a regular basis with the idea to eventually publish it. If you think about it, if you go from one project to another, you certainly will explore different moods, techniques, softwares and ideas. If you work on hardware gear, your music will mostly have some sort of common aesthetic though but with the computer, it gets pretty much all over the place since you have access to so many tools and samples.
It’s a bit more difficult to keep something coherent and you can easily start making music that is completely different from previous song you did. If you remember some past posts I did about my approach of working in a non-linear way, you’ll be working here and there and you may borrow some ideas from a song that is not working to another one that needs something specific.
The idea of how to make an EP is, to my understanding, is to try and propose 3-4 songs that have the same direction and aesthetic. This is one of the idea behind my approach to always try to work on multiple songs, bring them to about 90% and export them to a folder as a reference.
Later on, when working on an EP or album, I’ll go in that folder, listen to the tracks. Then I’ll know which ones have relatives and similar ideas, so I can work on the last 10% that is lacking to call it done. Whenever clients come to me that they can’t finish songs, there’s need to clarify that it is not necessary a bad thing. You can practice wrapping them but it is not essential. Same thing for all the fuss about what if I do this or that. I believe those questions can be answered once you have let the song ripe for a few weeks.
How To Make An EP – Purpose And Direction

Credit: Blocks
One of the things we talked about a lot on this blog is how there’s not many secrets to music making if you can analyze a reference song. When it comes down to it, how to make an EP is sometimes as simple as referring to previous artist’s formulas. Many people I work with are concerned that a reference track will taint their art direction in a way that will make them not sound like themselves.
The thing that is making smile is how those people are more likely to come to me and share they’re lost. You can use reference EP/LP as a way to pick your songs that are going to be part of the same project. For instance, perhaps a very important EP for you had 5 tracks, where 2 songs were ambient and the others had a different take. Perhaps that is something that you can consider.
The way I see the use of a reference project in this condition is that you get your framework around it and then discard it. How many tracks on an EP is a matter of preference, based on whatever your goal is for the EP.
A thing that boggles people a lot are when they start thinking about what the listener expects. There’s equally a balance between people who want the same type of music from an artist from release to release, and another who wants the artist to keep a core but evolve, change, and not repeat formulas. This can also be the same kind of balance of how people want an album or an EP – All tracks slightly the same or all the tracks very different from to another.
Where do you situate yourself in this?
Wherever you feel like. You don’t have to worry too much because no matter what, some people will like and some will dislike anyway. One approach I have is to imagine the project for a friend in particular. How would they like it? Or a DJ… what is it that they like?
Sometimes I find that a good exercise to compile some tracks all together for an EP is to think of my current purpose. How do these tracks answer my own need, today, when recording an EP?
Mindset
How to make an EP starts and ends with mindset. There are different moments where you will have time to make music. I like to approach my session with an intention otherwise I quickly lose my session either troubleshooting issues or getting lost in details that aren’t useful at the end of the day. The different intentions could be listed as:
- Sound design, doodling, testing new toys.
- Assembling loops, creating motifs, programming sequences.
- Going through ideas to see what works or not.
- Arrangements.
- Optimizing ideas.
- Technique learning.
- Fixing issues.
- Finalizing songs.
What I Do
The mistake a rookie producer will do is to approach the use of his time without an intention and deal with whatever comes up. It works most of the time but you’re not using your time wisely. If you start a session with one thing in mind, you won’t get distracted by chasing something else that is taking you away from what you’re trying to achieve. Your mind can do something really well if you put all your energy to it. In that sense, I have developed a natural self-confidence that whatever happens, a future-me is going to fix it or recover it at some point.

Credit: Nguyen Dang Hoang Nhu
Having this approach is an open call to work on multiple projects and songs all at once, and makes the process of how to make an EP easier. You’ll create a huge pool of sounds and ideas that is ready for the moments where you want to feel creative and make loops, core to a song.
It’s important to capture the song mood and try to finalize it quickly so you don’t overwork it but you can also create a bunch of skeleton ideas that you’ll wrap later. Keep in mind that if you make music on a regular basis, you’re improving yourself and the future-you will be more skilled that your current-you.
That mindset has been my best approach in the last year when thinking about how to make an EP, allowing me to create a lot of music. To grind my skills to a point where I can, in full inspiration, make a song from scratch, gets easy. The other mindset I find useful is to record little live moments as often as possible.
The reason behind this is to know how it feels to jam, to play, to live the song instead of mouse-cliking it away. This is particularly important so you can perhaps imagine your music fitting an artist’s podcasts and sets. You want to have that fun factor as well as being essential for an artist to have your music in his arsenal.
Another benefit from having a focused mindset is that when it comes to working on an EP or LP, the 2 mindsets that will really benefit that will be the optimizing part as well as the finalization. I’d rather have 10 unfinished songs and then pick 4, wrap them based on a single aesthetic to unify them than have 10 finished songs that are not really coherent all together. If you shop for music often and look for EP, what grabs your attention and what kind of EP makes you go wow on it?
Aesthetics
Now that you know that you can have a bunch of songs almost done and that the last 10% of polishing can bring your entire project in a direction, I hear you asking how that last detail can be achieved. There are different things you can do but usually what unifies a project, if we refer to techniques, we can classify that into different clusters:
Sound design related
A good example is how the use of a same set of sounds can create unity. For instance, a 808 drum kit for all the songs gives a sense that all songs are the same for its core but you can add different ideas around it. Same for a synth in particular, where Mathew Jonson is a good example. In that sense, building a percussion kit is really useful.
There are multiple ways to build one but my favourite way is to use XO by XLN because it creates a map of all the sounds I have and also put them in a way that similar ones are closer on that map. So you can not only create a kit based on another but you always have the flexibility to search a huge selection and not go to far off. It’s the kind of tool that I’d be dreaming about but not only they made it happen but they made it better than what I would I have done it.
Effect driven
The main effects that can bring a project together, from subtle to drastic, are the ones that are coloured. Think of reverb for Dub and distortion for breakbeats or lofi effects for some old school house. They are the key the the key signature of the genre, and help define how to make an EP that’s similar. Sometimes it’s interesting to grab all tracks part of the EP and use the same effect rack that you can create. It’s easy to import into each of them and you can save a few presets that are easily set.
There are multiple aesthetic related plugins you can use and try. I would also not hesitate to simply drop it ON the master bus (yes, I’m serious) which will give you a very coloured version that you can dial back after. But like I often say, you need to push things exaggerated to see how far you can otherwise, if you go with 2-3% of wet signal at a time, you’ll never really see the full picture. I find that a multi-effect like RC-20 by XLN can give you a really good idea of your song in a new space. It adds saturation and noisefloor. It makes your song sound as if it was taken from a dubplate. Pretty impressive.
Tone
One thing I see when I master an EP from an artist is a coherence with the tone. When there’s not, I usually emphasis it so it feels better. It’s weird to have a super bright song amidst a few dark ones. If it’s artistic, ok it can work but it makes the listening experience a bit bumpy. If you use Fabfilter Pro-Q3, You can apply one EQ curve from a song to another. Sometimes you can have a curve for an EP that you apply on all songs. That can provide some interesting results.
Complementary stories
In a past post I was saying how you can layer all your tracks and see how they would be mixed from a DJ’s point of view. Have you tried layering them to see if some nice combinations are possible?
Templates
As explained before, I like to save the arrangements of a song to keep them as templates for future ones. Really handy to speed up the process from a loop to a song.
 One thing that I love doing is to work with unestablished artists. It’s why I have
 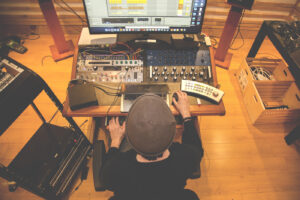 Not all genres are the same, and they require different equipment. If you were to record a cowboy outlaw record, it’s probably not the best idea to go to a micro house producer. However, I have had rock bands come to me because they wanted their album to sound electronic in nature, despite it being a rock album.
 Perception is reality, and some people have different perceptions on what things are supposed to be. Especially when dealing with their art. With audio, producers often get married to their sounds, thinking that they should be specifically in this spot in the mix, when, in reality, it probably won’t translate the way you want it to. This may come from hearing said sound over and over again in whatever room, or on whatever medium they were listening to while they were making it. However, in a well treated room, with calibrated equipment, or conversely, in a club with a good, or poor sound system, it may not translate exactly how you anticipate. Some people are more judicious about this, and accept the reality. However, some you just can’t please. So is the way of the artist.
 Engineers get that artists have a lot of things to say about their work, and may use poetic language in order to communicate it. And this prose sometimes leads to elaboration. However, there is a saying in sales, called K.I.S.S, which stands for Keep It Simple, Stupid. This is because people understand things if they are simplified. No need to get technical, or elaborate. Just say what you mean. A good way of easily communicating is to provide examples of things that already exist. Let’s be real, nothing is new under the sun, so if we can pinpoint where that idea is coming from, then maybe it can be recreated, with a flourish that makes it your own.
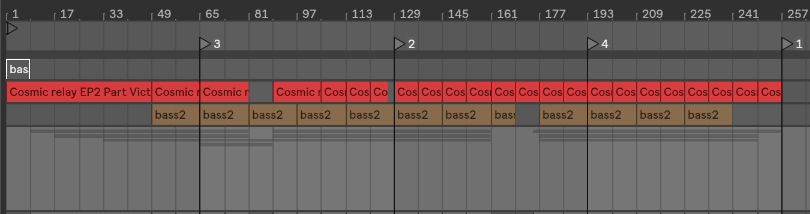


 Before consolidation
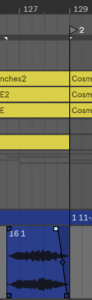
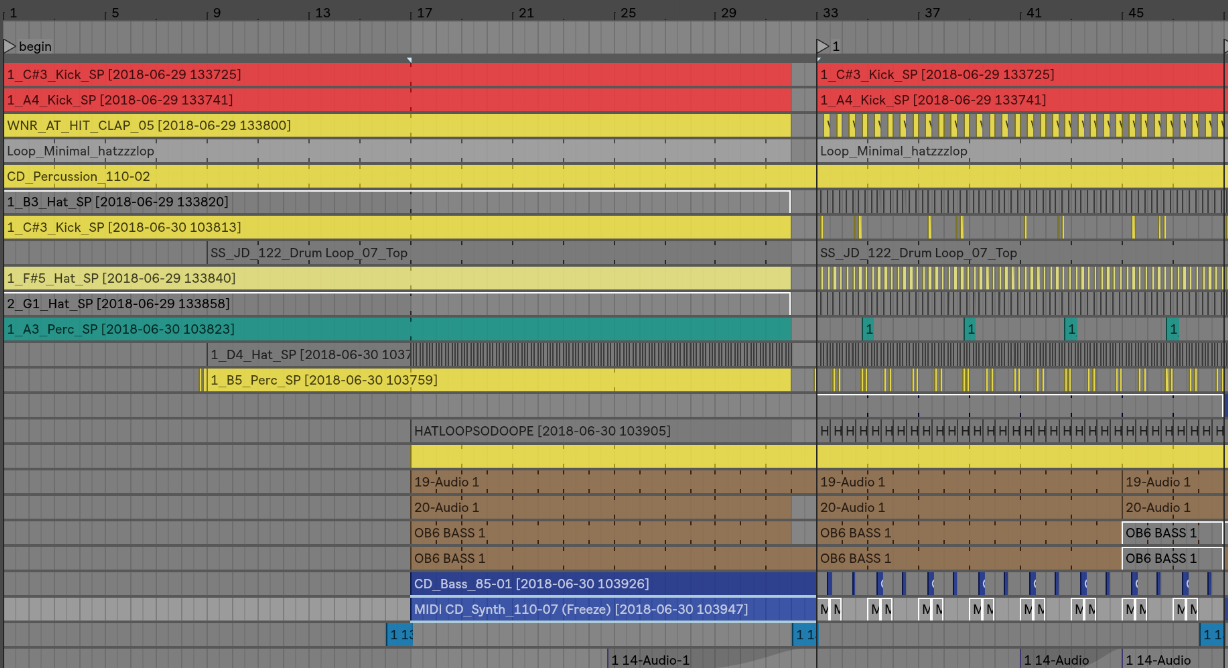 Clips consolidated
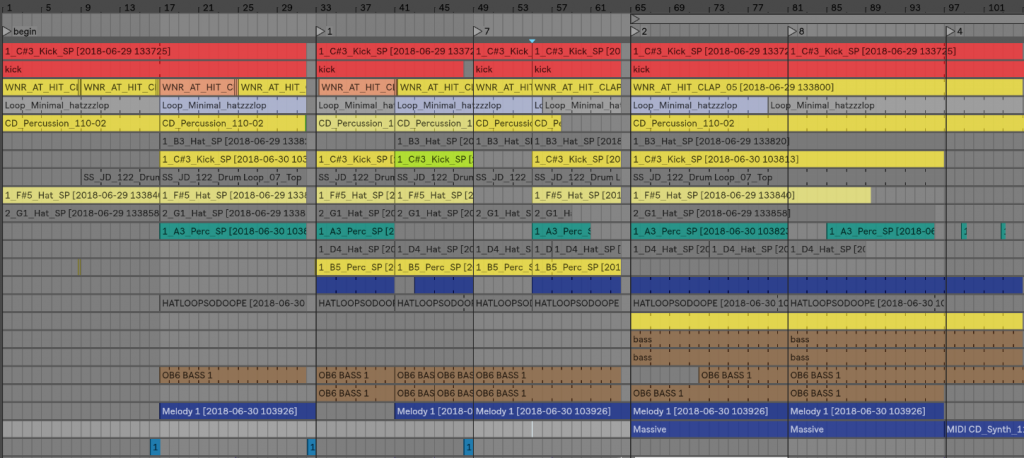
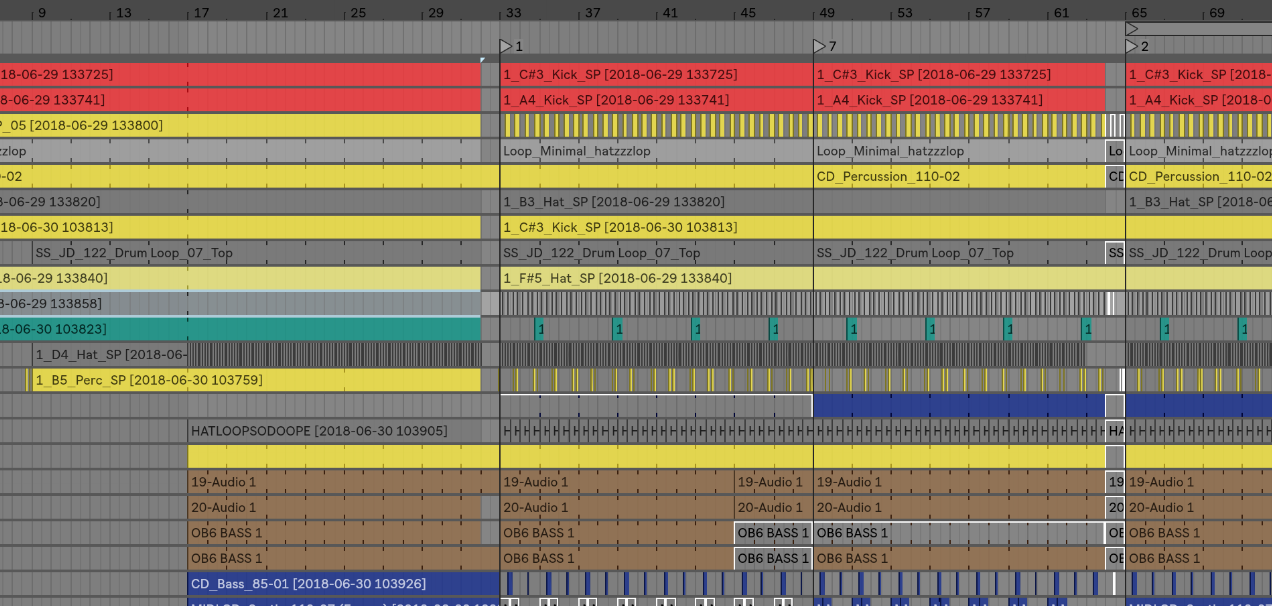 And duplicated
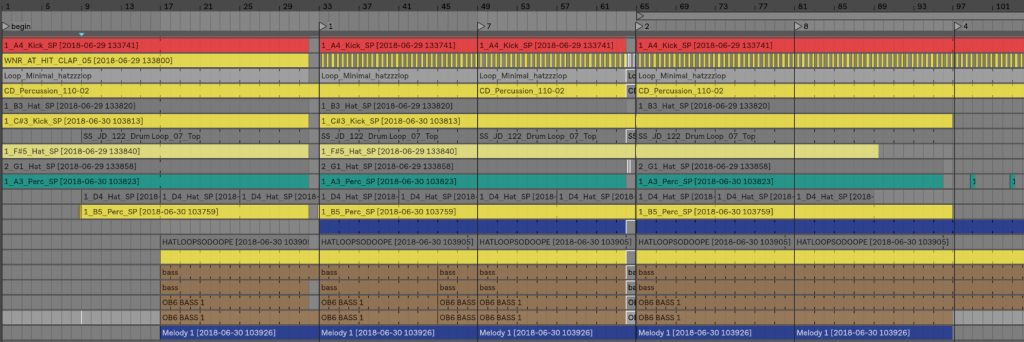
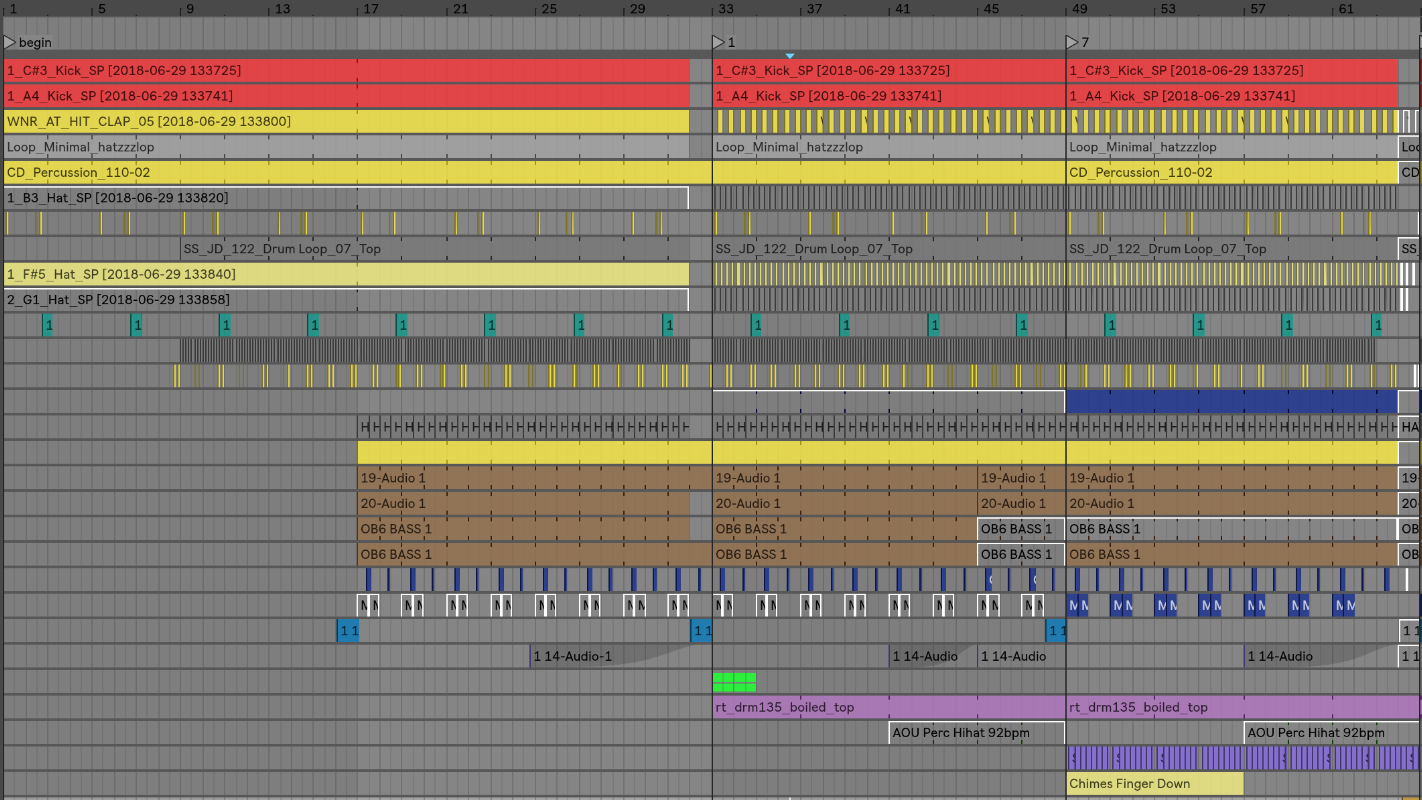
 the organization.
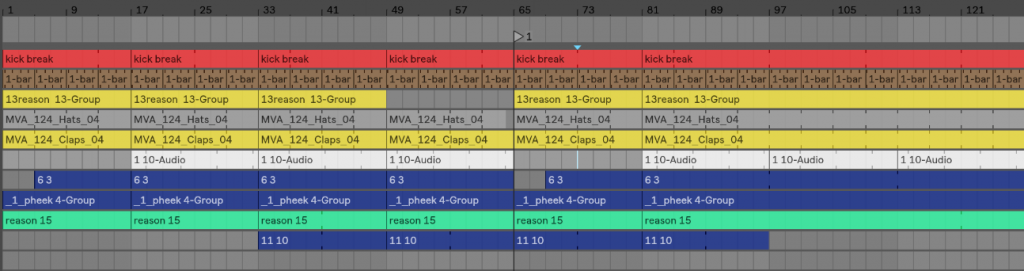
 basslines. If that’s not enough you can also use the midi effect velocity which can not only alter the velocity of each note, but in Ableton Live it also has a randomizer which can be used to create a humanizing factor. Another way to add dynamics is to use a tremolo effect on a sound and keep it either synchronized, or not. The tremolo effect also affects the volume, and is another way of creating custom made grooves. I also personally like to create very subtle arrangement changes on the volume envelope or gain which keeps the sound always moving.
 modulate anything, and they will automatically create movement. For each LFO, I often use another LFO to modulate its speed so that you can get a true feeling of non-redundancy.
 A sound’s position in a pattern can change slightly throughout a song to create feelings of movement; a point people often overlook. This effect is easier to create if you convert all of your audio clips to midi. In midi mode you can use humanizer plugins to constantly modify the timing of each note. You can also do that manually if you are a little bit more into detail editing but in the end a humanizer can do the same while also creating some unexpected ideas that could be good. Another trick is to use a stutter effect in parallel mode to throw a few curve balls into the timing of a sound every now and then.