How AI is Helping Musicians Break Free From Unoriginality


When it comes to creating music, there is a never-ending tension between the desire to innovate and the pressure to make money. Many musicians find themselves trapped in a cycle of producing unoriginal music that fits neatly into pre-existing categories, all in the name of pleasing their audiences and making a profit. But what if there was a way to break free from this cycle? 

We recently talked about slowing down to learn new skills, but let’s have a view on the the most techno-technology out there.

Enter artificial intelligence (AI), a tool that is increasingly being used by musicians to push the boundaries of what is possible in music production. As AI been bringing a lot of controversy in the artist community because it is a game changer in democratizing its access, I wanted to focus on the positive aspects.


Using AI to Generate Ideas We Wouldn’t Think Of


One of the reasons why musicians tend to produce unoriginal music is because they are constantly aware of the latest trends and what is popular among their audiences. In order to make money, they feel pressured to produce music that fits neatly into these trends, rather than exploring new territory. This results in a homogenization of music, where everything starts to sound the same. If you read this blog often you’ll know that we often refer to the “success trap” where one tries to repeat a success story and that leads to nothing.


AI, on the other hand, is not aware of these trends. It doesn’t have a preconceived notion of what is popular or what will sell. Instead, it is able to analyze vast amounts of data to identify patterns and connections that humans might not be able to see. This makes it a powerful tool for innovation in music production.


For example, AI can analyze existing music and identify common elements that could be used to create something new. It can also generate entirely new ideas that humans might not have thought of. By using AI, musicians can break free from the constraints of their own creativity and explore new territory that they might not have discovered otherwise.


AI Can Recycle Old Ideas In Innovative Ways


But AI is not just a tool for creating entirely new music. It can also be used to recycle existing ideas in innovative ways. For example, AI can take an existing melody and transpose it to a different key, or it can apply different rhythmic patterns to a familiar chord progression. By using AI in this way, musicians can create something that feels fresh and new, while still drawing on familiar elements that their audiences will recognize.


Of course, using AI in music production is not without its challenges. Some musicians worry that it will make their work feel less authentic, or that it will take away the human element that makes music so special. But the truth is that AI is just a tool, and like any tool, it can be used in a variety of ways. Musicians who embrace AI as a tool for innovation and exploration can use it to enhance their own creativity, rather than replacing it.


AI Tools For Making Electronic Music

  1. Amper Music: A platform that uses AI to generate original music tracks based on user inputs for genre, mood, and tempo.
  2. AIVA (Artificial Intelligence Virtual Artist): A composer and music generator that uses deep learning algorithms to create original pieces of music in different genres.
  3. Melodrive: A tool that uses AI to create personalized music for video games and other interactive media, adapting the music to the user’s behavior and emotions.
  4. Google Magenta: An open-source project that aims to advance the state of the art in machine learning for music and art generation, providing tools for creating and exploring new musical experiences.
  5. Amadeus Code: A tool that uses AI to help songwriters generate new musical ideas, providing suggestions for chord progressions and melodies based on user inputs.
  6. Humtap: A platform that uses AI to help users create original music by providing suggestions for chords, melodies, and lyrics based on their inputs.
  7. Emergent Drums: generate drum kits with a few clicks. Powerful!
  8. AI Kitchen: Still not public but this one looks promising. It is basically the Midjourney of audio. You enter prompts and the AI provides ideas.

How To Spot If A Tool Is Actually AI and Not Something Else:

It can be difficult to determine whether a music production tool that is described as AI-driven is really using AI, as the term “AI” is often used loosely and can mean different things in different contexts. I’ve noticed a number of plugins that say they use AI but aren’t really. However, here are some things to look for that may indicate that a tool is using AI:

  1. Machine learning algorithms: Many AI-driven music production tools use machine learning algorithms to analyze and generate music. If a tool claims to use AI, it is worth looking into what specific machine learning algorithms it is using, and how they are being applied.
  2. Training data: AI systems require large amounts of training data to learn from. If a music production tool claims to use AI, it is worth checking what training data it has been trained on, and whether it has been trained on a sufficiently diverse and representative set of data.
  3. Output variability: One hallmark of AI systems is that they can generate a wide range of outputs based on a given input. If a music production tool is able to generate a large number of unique tracks or variations based on user inputs, this may be a sign that it is using AI.
  4. Expert endorsements: If a music production tool is endorsed by experts in the field of AI or music production, this may be a sign that it is using legitimate AI techniques.
  5. Transparency: Finally, it’s important to look for transparency in how the tool is described and marketed. If a tool is vague about how it uses AI or makes unrealistic claims about what it can do, this may be a red flag.

Ultimately, the best way to determine whether a music production tool is really using AI is to do some research and ask questions. Look for reviews from reputable sources, ask the developers about their AI techniques, and talk to other users to get a sense of how the tool performs in practice.


Generative vs AI

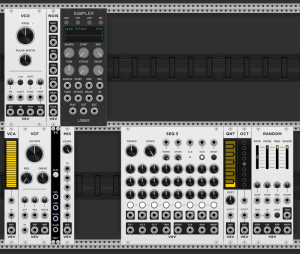
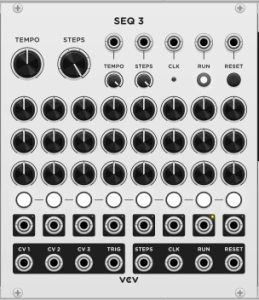
Generative music is the ancestor of AI music. What we do in the modular realm is basically prehistoric cavemen stuff compared to the high tech approach of modelling systems. Modular is sort of relying on boolean logic and basic operations. I think it’s important to explore generative music to understand how machines are there to create material for you to use in your music. Generative music will provide you multiple outputs of ideas based on parameters of your choice. Generative music is something that is important to understand if you’re looking to break writer’s block.

One flaw I like from AI is its lack of understanding good or bad ideas.

It just does things it knows how to do.

You can then take clumsy takes to turn them into ideas of yours. A bit like one joke from a toddler can be used to make some funny stories in adult ways.

So, to all the musicians out there who feel trapped in a cycle of unoriginality: it’s time to reconsider your approach. By embracing AI as a tool for innovation, you can break free from the constraints of what is popular and explore new territory that you might not have discovered otherwise. Whether you are creating entirely new music or recycling existing ideas in innovative ways, AI can help you push the boundaries of what is possible in music production.


Slowing Production to Better Learn

In recent years, mental health has become less of a taboo topic among musicians, and for good reason. The music industry, as well as streaming services, have put immense pressure on musicians to create music that may not be true to who they are, leading to destructive conditions that are negative for creativity. It’s sort of sad that some artists are now sharing their mental health updates but at the same time, it also the first step to getting suppor. Therefore, I thought I’d write about mental health and music. 


We’ll explore why it’s essential for musicians to live rich, fulfilling lives outside of music in order to create music that has more depth and meaning. I’d like to propose some ways to make meaningful music that does sacrifice your mental health. 


Chasing success


The pressure to constantly produce new music is undeniable in the music industry. We’ve been told that if we don’t release music, we haven’t received validation and if we are quiet for a while, people will forget about us. The need to keep up with the latest trends and remain relevant has led to an overwhelming emphasis on quantity over quality. Musicians are often pushed to create music that is less relevant to who they are, sacrificing their authenticity for the sake of commercial success. This can be incredibly damaging to a musician’s mental health, leading to depression, anxiety, and burnout. Let’s not forget that it leaves traces of past albums that you might feel completely disconnected from.


Additionally, touring can be an incredibly stressful experience for musicians. The constant travel, lack of sleep, and pressure to perform can take a toll on their mental and physical well-being. The industry has normalized the idea that musicians should work themselves to the bone, with little regard for their health and well-being. This toxic culture can create a hostile environment that is not conducive to creativity and self-expression. We’re also been told that touring is the dream but once in it, things aren’t as easy as a dream can be.

TRY: Focus on the time you spend on making music instead of the end result. That can be achieved by doing experiences that requires no goals intended, such as making a macro.

 Taking Breaks


It’s essential for musicians to take breaks between music releases to live rich, fulfilling lives outside of music. Experiences outside of music can help inspire and inform a musician’s creative process. When a musician has a diverse range of experiences to draw from, their music has more depth and meaning. Taking the time to live fully can help a musician reconnect with their true self, enabling them to create music that is authentic and true to who they are.

Strangely enough to me, I often hear about artists who think that taking break is taking a pause in music making. The distance you take activates your brain and you’ll be flooded with ideas and you’ll be making music, in your mind, as it is still ongoing.

TRY: Go for a 15 minutes walk and observe what train of thoughts you’ll have.


Coming Down The Mountain


For this, I heard this talk by Lauren Hill who was explaining why she produces slowly and it made a lot of sense to me. The way she explains it, there are mountains and there are valleys. Life is bipolar and even a day has a ups and downs. What’s not viable is to think we always have to remain at the top of the mountain to be successful and recognized. Being at the top of the mountain enforces the need to embrace perfectionism as a way to make music. 


Being at the top of the mountain is when you’re in full control of your flow and techniques. Some people learn what’s necessary and are feeling comfortable with it, releasing music, touring. But that gets tiring and if you never learn to go down the mountain, it might be a shock you when you eventually crash, tumbling all the way down to the bottom.

TRY: Spend a studio session mastering one effect or tool in your DAW. Watch a few tutorials and the practice.

Coping With Imperfection


I’ve always been comfortable with imperfection. I think accepting it has helped me move forward with projects, albums. I’d be ok understanding that I can wrap the idea and moving on, I would work on the next using what I learned. In hindsight, I think I spent way too much time in the valleys than on top of mountains, which explains why I don’t tour much but I’m totally at peace with it.


What’s hard is to cope with harsh feedback and people who feel entitled that you should serve them perfect music, each time. I accept criticism and see it as a way to improve, sometimes, if it makes sense but it can be frustrating if I think that the listener isn’t understanding that I am maybe in learning of new techniques which means that my output isn’t as quality as the last one.


So that means, it comes down to dive in creativity as much as possible and not do too much damage control of my music.

TRY: When you’re about to wrap a project, ask yourself which part you’re ok to accept as imperfection. Keep in mind that wherever you are will be an imperfect moment compared to your future-you.

Learning New Techniques To Stay Mentally Fresh


One way to inspire creativity is by learning new music and techniques. However, it’s important not to get bogged down in the technicalities of music. When a musician is at ease with their techniques, they can reach a state of flow where they can tap into their intuition and creativity. This state of flow allows a musician to be fully present and in the moment, allowing their creativity to flourish. That’s when you’re on the top of the mountain.


 How to find new techniques?


Mostly by listening to songs you love and then paying attention to one element you love to try to reproduce it. When I listen to music, I listen as a whole but then I take a second listen where I listen with a modular approach asking myself certain questions: How is the percussion? how is the melody evolving? what are the sounds I hear (synths, acoustic, long, short, muffled, detailed)? is there a background? What is in front?

I learn to love songs but I learned to love songs for specific attributes, which was a very important skill for my job. As a sound engineer, I see value in learning to love any music, especially if I have to work with it. When a client ask me to work on a song, I need to find at least one thing I love about it and then build around there.

Then if there are things I don’t like, I want to see how I can improve it. This becomes a learning experience, but through specific themes. Those become an exercise to learn.

For example, chord progressions, kick design, synths, vocal effects, etc. Then you go on youtube and you basically write in your own words what you need to know.

For example:

How to do effective chord progressions in electronic music


How to make a snappy kick


How to design complex synth in Pigments


How to make a vocal effect chain to sound like Tame Impala

What’s exciting is, there are so many videos about one topic and since there are multiple ways to get to a specific result, you can really expand your skill set. Personally, when people come to me for learning mixing or production, I notice that frequently they lack understanding concepts of the previous phase. For instance, the one before mixing is arrangement. You might want to learn mixing, but you need by understanding arrangements first. Sometimes people want to learn about arrangements, but I notice they lack understanding of sound design. When you learn one skill, you’re basically opening roads and easiness for the following ones.

Sometimes, people ask, “I don’t know if there are things I don’t know so it’s hard for me to know where to start!?” or, how to get that started exactly. This starts with curiosity.

Be interested in parts of songs you like. For instance, the bass of that song and the percussion of that other one. Or the chords of a specific song. Then go to Youtube and see if someone can explain you how to do it. Start with simple searches and that will bring more ideas.

Basic concepts that you should really understand early on, should you lack ideas:

  • Gain staging
  • How envelopes work.
  • Signal flow (a bit advanced).

Try referencing artists, use software you use and try to articulate your best ideas. But the more you search, you’ll be exposed to may different ways to do things and will have material to practice with.

Two softwares that I regularly  recommend for referencing are Bassroom (for the low end) and Reference for the overall understanding the difference between your references and your music.

I find more important to record a lot of ideas as a way to document your journey. That is a good lesson to let go of controlling imperfections. A way to let go is to understand that there will always be imperfection but you’ll be limited with what you know, at a specific moment. Leaving it as is, shows you’re ok with it.


In conclusion, the music industry and streaming services have put immense pressure on musicians to create music that may not be true to who they are. I think we need to reverse this by slowing down and spending more time learning. There are too much time trying to produce without being in control of your techniques and this leads to much time being lost.


Getting Started in VCV

Modular synthesis has been around for decades, but with the rise of digital technology, it’s become more accessible than ever. Then came VCV, Cardinal, Mirack to name a few. VCV Rack is a free and open-source software that allows you to explore the world of modular synthesis in a virtual environment. In this post, we’ll discuss the three types of modules in modular synthesis, the differences between VCV Rack and VCV Rack Pro, how to use VCV Rack in Ableton Live, essential free modules, and the benefits of using master sequences and modulations.


Creating sounds, then modulate them


Modular synthesis involves building a sound-generating system out of individual modules. 


There are three types of modules: sound generators, sound modifiers, and signal movers

Sound generators create the initial sound, sound modifiers shape the sound, and signal movers control the flow of the sound through the system. By combining these modules in different ways, you can create complex and unique sounds that would be difficult to achieve with traditional synthesizers.


VCV Rack is a popular modular synthesizer software that emulates a modular synthesizer system. It offers a vast library of modules, including sound generators, sound modifiers, and signal movers. While VCV Rack is a free and open-source software, VCV Rack Pro offers additional modules and features for a fee. These additional modules and features can enhance your sound design capabilities and workflow, but the free version of VCV Rack is still a powerful tool that can be used to create amazing sounds.


If you’re an Ableton Live user, you can use VCV Rack as a plugin in Ableton Live. This allows you to control and record VCV Rack within the Ableton Live environment. You can use Ableton Live’s MIDI clips to trigger VCV Rack modules and automate parameters in real-time. This integration makes it easy to incorporate VCV Rack into your production workflow.


Essential modules


When it comes to essential free modules, there are a few that every modular synthesizer enthusiast should have. For sequencers, the SEQ-3 module is a great starting point. It offers three independent sequencers with up to 16 steps each. The reason why you want to have a sequencer with 3 built in sequences is because you can use them for not only melody making but also for other types of modulations like velocity.

The VCO-1 (VCV) module is a simple yet powerful oscillator that can produce a wide range of 4 different wave shapes: sine, triangular, saw and square.The idea is usually to pair this with the 4 input mixer from VCV where you can decide how much of each sources you want to use to create your own signal. I would encourage you to add a noise source (VCV again) and have a bigger mixer such as the 8 inputs by Bog Audio and then add some noise to it. Noise seems to gel all of it together and also add harmonic content.


For filters, the VCF-1 (VCV) module is a great choice. It offers low-pass, high-pass, and band-pass filter modes, as well as a resonance control for shaping the filter’s frequency response. But I would also high recommend the simple VCF from Bog audio because it has more options (filter curve slope and v/oct) which is super useful for shaping your sound.


The heart and the brain


One of the biggest benefits of using VCV Rack is the ability to use master sequences and modulations. Master sequences are sequences that control multiple modules at once. This allows you to create complex patterns that evolve over time. Modulations are similar to master sequences, but they can be used to control any parameter in any module. This allows you to create dynamic and evolving compositions that change over time.


I put them into 2 categories:


The heart: Anything related to the tempo of the song. Is it constant or broken? Everything will be in sync or not, some might be following the tempo but perhaps double speed or half.


The Brain: This is for modulations that will be affecting multiple parameters across the patch such as scaling, transition, melodies/hooks, velocity, accent and even mixing.


Starting kit for a patch:


I’d recommend building a template patch to start with that has the essentials to get started. Then you can start adding to it. I think it’s important to start fairly simple too because it can easily get complicated.


Main tempo (Brain)

  • Simply use a LFO. I love the 4FO from Bog Audio because it features 4 of them at different phases. 
  • Then I’d add a divider to have a different multiple and speed from the heart. You could use Clocked by Impromptu both for tempo and divider but I prefer an LFO for tempo because the modulation is easier.
  • I love to have multiple dividers so my full sequence is offering 1/4th, 1/8th, 1/16th steps covered so I can decide what to populate and where.


Hook (heart)

  • This is where you could SEQ-3. It has 3 lanes so you could also have 3 variations.
  • Quantizer for global scale: use the VCV one.
  • I’d use a sequential switch to go through the lanes. Count Modula has a few but I also like the switch by ML Module because of the various options it has.


Voices:

  • Use samples or oscillators of your choice but you’ll need an ADSR, a VCA and 2 filters so you can properly control the signal. I’d add an octave shifter so you can have one voice per octave.
  • I find Bog audio has everything you need here or you can use the default modules by VCV.
  • You’ll need a mixer for all those voices. I’d recommend the one by MindMeld. It is perfect.


Percussions:

  • Using the SEQ 3’s sequencing, you can use that as triggers for your percussion.
  • I’d use a Bernoulli Gate to add probabilities to your percussion or switch between sounds. The one by Audible Instruments will do the trick.


Modulation

  • One master LFO. Again, a 4FO would do.
  • One master random. Use the random module from VCV.


Conclusion and Using VCV Rack In Ableton


In conclusion, VCV Rack is a powerful tool for exploring the world of modular synthesis. It offers a vast library of modules, including sound generators, sound modifiers, and signal movers. The free version of VCV Rack is a great starting point, but the pro version offers additional modules and features that can enhance your sound design capabilities and workflow. If you’re an Ableton Live user, you can easily integrate VCV Rack into your production workflow. Essential free modules like the SEQ-3, VCO-1, and VCF-1 can help you get started with creating complex and unique sounds. Master sequences and modulations allow you to create dynamic and evolving compositions that change over time. With VCV Rack, the possibilities are endless, and the only limit is your imagination.


Minimalism in Music Production: Drawing Inspiration from Arthur Russell, Brian Eno, and Terry Riley


Minimalism is an approach that emphasizes simplicity and a reduction in the number of musical elements. This approach can be applied to many genres of music, but it has been particularly influential in electronic music, where technology and sound design can lead to overwhelming complexity. In the end of the 90’s, minimal techno had a huge bloom in popularity. It was in reaction of maximal music such as trance and hard techno. This is when I started making music because I felt a strong connection with minimalist music.


In this article, we will explore how minimalism has been used in music production, drawing inspiration from three influential artists: Arthur Russell, Brian Eno, and Terry Riley.


The Power of Minimalism


The essence of minimalism in music production lies in the ability to create a focused and spacious sonic environment. By using fewer sounds, producers can create a clear and uncluttered atmosphere that allows the listener to focus on the details of each individual sound. This approach works well in electronic music, where sound design and texture are often the main focus. 


Modular and eurorack synthesizers, in particular, are great tools for exploring minimalism in music production. With their limited number of modules and limited space (but also their costs!), these instruments force the producer to be creative with fewer resources. This constraint can be a great source of inspiration, leading to innovative and original compositions.


One of the most important differences between now and the late 90’s is the accessibility to music production tools. Back then, you’d be caught to use only a few things you’d have, such as a drum machine and a sampler. Now we have so many things that it is hard to focus on what to pick. Minimalism starts with fully embracing limitations one has to impose to themselves.


 Simple, Constantly Evolving Phrases


One of the key challenges in minimalist music production is to create variation and development with limited musical material. A useful exercise for developing this skill is to focus on creating simple but constantly evolving phrases. These phrases can be created using a limited number of notes, rhythmic patterns, or sound textures. 


I also like to think about picking up to 4 different sounds i love and will try to make phrasing out of them.


Arthur Russell was a master of creating evolving phrases in his music. His use of repetition and subtle variation created a hypnotic and mesmerizing effect. In his track “Lucky Cloud,” for example, he uses a simple four-note bassline that repeats throughout the track, but he gradually adds layers of percussion, synths, and vocals, creating a rich and complex texture. He would rely on reverb, delays and use of panning to create all the tension and variations necessary to create engagement.

Brian Eno is another artist who has explored the possibilities of minimalist music. His approach is often characterized by the use of ambient textures and drones, creating a meditative and introspective atmosphere. In his album “Music for Airports,” he uses a limited number of simple chords and melodic fragments, layering them to create a constantly evolving soundscape. He is known for developing generative tools to create his music. He will let the machines come up with ideas and then will cherry pick the moments he loves.

Terry Riley is a pioneer of minimalist music, known for his innovative use of repetition and improvisation. His piece “In C” is a landmark work of minimalist music, consisting of 53 short phrases that can be repeated and combined in different ways, creating a virtually infinite number of variations.


 Exercises for Minimalist Music Production


Here are three exercises inspired by Arthur Russell, Brian Eno, and Terry Riley to help you explore minimalism in your music production:

  1. Arthur Russell Exercise: Create a simple four-note bassline and add layers of percussion, synths, and vocals to create a rich and complex texture. Focus on reverb and delays, panning. Challenge: use your voice (yes, do it).
  2. Brian Eno Exercise: Create an ambient soundscape using a limited number of chords and melodic fragments, layering them to create a constantly evolving texture. You may try to generative melodies scaled to a key and then keep what you love. Challenge: record 30 minutes of music, unedited.
  3. Terry Riley Exercise: Create a short phrase consisting of a few notes or a simple rhythm. Repeat and vary this phrase, gradually adding layers of texture and improvisation to create a complex and evolving composition. Challenge: Face ultimate repetition and stick to it.


Tools you can use:


Synths I love: I seem to always come back to Pigments as one of my favorites. It features multiple possible options when it comes to modulation and it makes it a very versatile tool. What I love is to start from a preset (it has a shop in the plugin!) and then tweak it to taste. The ones that are included are lovely starting canvas that are in tune with current genres. Quanta 2 and Diva would also be great here, for the quality of their sound.

When it comes to reverbs and delays: I’m a big fan of anything that comes from Valhalla’s effects. They are perfectly priced and the quality is trusted by top producers for a reason, because they sound amazing. Otherwise, if you want something solid, you could consider Fabfilter Reverb and Neoverb for a cheap option. Both are often used on my side.

Generative tools are numerous in the Ableton live environment. You could use simple max patches like Snake or Rozzer and have some LFOs mapping that make them evolve through time. Otherwise, the good old Riffer comes handy. I would recommend Alexkid VST Seqund that really wonderful as well. Otherwise, dive in VCV.


Conclusion


Minimalism in music production is a powerful tool for creating focused and spacious sonic environments. By using a limited number of sounds and musical elements, producers can create innovative and original compositions. Drawing inspiration from Arthur Russell, Brian Eno, and Terry Riley, we can explore the possibilities of minimalist music and develop our skills in creating simple but constantly evolving musical phrases.


How To Mix A Track As You Arrange


One question I get a lot when I teach production is, “Should I start mixing as I work on the track?” There isn’t a precise answer to that as each song is different. I will say though, I do start working on the mix in the beginning, but it isn’t necessarily in the way that people would think. 


There are 3 things I look into when it comes to making sure my mix is right, from the start.


  1. Gain staging. This is something I cover in mixing tutorials and workshops but it’s mostly about normalizing. You want your input (sample, synths) to be close to 0dB. Then you’ll adjust the fader to the level you want (ex. -10dB).
  2. Amplitude hierarchy. Which sound is the leader? That one would be the loudest of your mix for most of the song’s duration. The others will be adjusted in relation to the leader.
  3. Sequencing and negative spacing. This is where the important part is played. Many people struggle with the mixing done at the end of a song’s production because of all the overlapping in the song’s amplitude (volume) and timing. For example, if you need to use side-chaining between the kick and bass, that’s because you didn’t prepare any negative space for the kick to lead. Then you’ll have to carve both frequencies sharing and amplitude.


Proper Sequencing Means A Proper Mix


My motto is that if your sequencing is done properly, you won’t have much to juggle with once in the mixing stage. You basically don’t want the sounds to overlap so much so you won’t have to carve into masking issues.


When I get a song for mastering, one of the main tasks I have to do is adjust the loudness. If the gain staging is poor, then I need to boost it much to reach the standard loudness. If I need to boost the loudness, this means any sound that is overlapping will be squashed and merged with others, killing all the precision an airy mix would have, creating a muddy and lifeless master.


Now some sounds can share the same position in sequencing, such as how, in techno or house music, kicks, claps and hats will shuffle around. But as you know, they are not in the same frequency areas. Kicks will be in the lows, claps in the middle, and hats in the highs. Therefore there is space in the spectrum for all sounds to cohabit. The claps’ transients can also accentuate the kicks, giving them more punch. 


(H2 Tag – Make sure to adjust this on WordPress) Pay Attention To Dynamic Range

That said, those sounds will have more punch if you have control of their length. Dynamic range accentuates punch and precision. What we refer to as dynamic range is the difference between the loudest peak and the lowest part. If you insert negative space (silence), your sounds will hit harder in theory.


This means reverb, delays, and background noises can kill the dynamic range as they will take some space out of the noise floor. Adding too much will make a song sloppy and muddy.


When you have this in mind, you’ll start by picking sounds and adjusting their length, then normalize them (eg. bring them near 0dB). 


Be Strategic With Your Voicing


When it comes to creating the main idea of a song, we will refer to the sounds as voices. You’ll make your life easier by sticking to 4 maximum.


One voice can be a synth or an instrument. If you add layers to it, then it’s still one voice. But if you add a second instrument that plays different notes at different times, it will be a second voice. So four of them make it quite busy.


Space In The Mix


Amplitude wise, we know the levels must differ, but panning and stereo positioning can also make a difference. You want to keep in mind that you will try to avoid stereo overlapping as well but in terms of amplitude, if two sounds are fighting, you can pan them differently so then you have space, and clarity.


Again, when it comes to amplitude, you can cut some frequency based so that some low-end or mid-range don’t interfere. This is why EQs that are passive, such as Pultecs or 3-4 band EQs come in handy. They’ll let you adjust a range of frequencies without changing the whole spectrum.


In the end, I invite you to consider how you sequence your music with care and I believe your mix will be way easier.