Playing Electronic Music Live – How to Prepare Your Live Set (Part 3)
After the first two parts on this series of posts about playing electronic music live, we arrive at our final topic: clip arrangements, song organization and sound preparation.
Clip Preparation
I hope you did your homework from part two where I asked you to take your arrangements and turn them into an Ableton Live session. If you’ve done this, you’ll see that this task is pretty demanding and can be confusing, because you might feel your song(s) aren’t the same anymore, or perhaps they don’t make any sense. But trust me, even if you feel like you have failed in arranging your sessions, it will start to make more sense as we continue. What really matters is that you now have material loaded into the session view.
“What if my track is so simple that I have only a few clips in the session view?“
That’s not a problem, the idea is to have something. Part of the beauty of a live set is that once you have all your tracks in the session, you’ll shape them into a longer set. A live set isn’t like a DJ set, where you focus on transitions and track selections; it’s way more flexible and involves constant shaping to create a bigger picture.
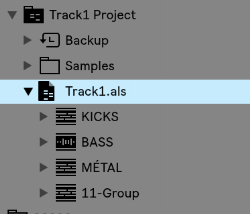
1st To Do: Import all Your tracks into one big project
For the sake of this exercise, please start by creating a blank new live set that you’ll name “My Live Set” where you’ll have 12 channels to start with.
 Next we will import all songs into that project. There are two ways to do this and it’s up to you to decide what is the best for you. I personally like to open a track, grab all clips in the session, copy (cmd+c), then open your “My Live Set” project and paste. You can also copy through the browser and should you be more comfortable using that method, do it that way.
One of the great new features of Ableton 10 is that groups now appear in the browser; which could be a good way to organize your work to re-import later on.
You should also consider copying audio leftovers over from each track. These unused pieces are more precious than you think, in a live context. A leftover is anything in your track that was created but didn’t make the final cut. It could be a variation, some weird FX, vocals, whatever – basically, anything will do. The idea behind leftovers is to create material for your live version to make it differ from the original song; it will add an edge.
Once you have all your tracks imported, you have a better idea of your whole session.
“How many tracks do I need for a 1h set?”
The answer here is hard to figure out until you’ve rehearse and determine your natural flow. After years of playing and recording my sets, I’ve figure that each of my tracks average a rough 6 to 8 minutes in a live context. This also includes the transitions (i.e two songs overlapping for 1-2 minutes, to make things smooth enough like a DJ would).
The total time of the tracks is not necessarily important to figure out. If you’re creative, you might even play the tracks in a random order.
2nd To Do: Name and color all clips appropriately
People often overlook this part but trust me, the better the organization, the less stress you’ll have in a live context. Never believe yourself when your mind says “oh I’ll remember what this clip is.” This is why names are important, but also, the clip color. All kicks should be the same color, basses and so on. My personal coding colors have been:
Kicks: red (grabs my attention)
Low end, bass: brown
Percussions: yellow
Claps/snare: Orange
Hihats: grey
Melodic elements: Blue, in various tons as some are different.
One thing about colors that helps is if you’re playing a track while in transition to another one, you can see the color of the other clip that you can’t see on screen.

Please note that I don’t necessarily recommend putting all of the same sounds in the same channels. You might want to mix, for instance, hihats of track A with the ones of track B. If both track’s hihats are in the same channel, you won’t be able to mix them and one will play after the other (only one clip can be played in a channel at a time).
Scene organization
Organizing your scenes is time-consuming, and it will also be what you’ll be reworking the most. It will also get your songs to have more of a live feel. For this section, I’ll use an example of one of my latest live sets to explain what I did, and why.

This song starts at the second row (scene).
Channel headers: As you can see, header colors aren’t important to me so much but there is a section all in white. This is because I use two MIDI controllers for controlling the volumes and the second section is for the second controller. This is also why they’re numbered so I know which slider they refer to on the actual controller.
3rd To Do: Map your channels to the appropriate elements of your controllers
Think of how you want to control your set on a base level, which is the channels in most cases. This is the most important part to pin down, because as you prepare your set, you’ll need to control volume sliders. Map your channels to the appropriate elements of your controllers. If your controller has buttons, I’d also map them to the mute buttons. Mutes are very important.
Buffer rows: As you can see, alternating rows before and after each busy row have scene of empty clips. You can also see that they have the “stop” square in them. I create “buffer rows” for two reasons: the buffers help know where the song starts and begins, but they also serve as a quick way to toggle a clip to stop playing if necessary.
4th To Do: Add 1-3 buffer rows between each song
The first scene/row of each track: The first row, to me, is the most important one. Over years of playing, I’ve settled on a super minimalist version of my live set where I play mostly loopy music with variations which really enforced the importance of the first row of the set.
The first row has various various roles:
- It is the introduction of your song: It will be used in the transition from the previous track.
- It is the core idea of your song: All sounds that are playing from beginning to end of your song should be placed here and remove everything below. In my case, the kick will be the same from beginning to end. The length of the kick will be 4 bars long and include variations. Some people like to add multiple clips underneath as variations to trigger, so that is always another option, but think that whatever remains the same throughout should be there.
- Tension relief: If you noodle around, create an improvised breakdown or start removing sounds. You can use the right side play to then trigger all sounds at once to come back to the song’s full intensity and main idea. This point is very important if you think you’ll be exploring and improvising as you’ll need an anchor.
5th To Do: Make a solid core
Supplementary/following scenes: There are multiple ways to use the scenes that follow your initial introduction. To “play it safe” you could simply have each scene play as the track evolves. The good thing about this approach is that by having all scenes on hand, you can deconstruct the timeline of your song by playing them in different orders. My favourite way of doing this is to have variations of a scene, such as one line with hihats, one with none, one with two playing and a clap, etc, same for melodies. This way I can play variations but I can also trigger one entire line and have a “ready-to-go” new take. If you look at my live set screenshot above, you’ll also see that under one sample “Tommydrum”, I have the same clip three times using variations in timing or tweaks in the versions. I can toggle between them as I need them.
Last To Do: Plan your follow-up lines/scenes and decide what you use.
In the next post, we’ll discuss rehearsing, sound calibration and advanced clip settings!