Tag Archive for: percussion

Slice Everything

After a few years of pausing teaching 1-2-1 beginner’s classes, I took a few lately to get back in touch with how it feels when you start making music. One of the reasons I wasn’t taking beginners was that it became redundant to me, and I preferred taking intermediate to advanced producers instead because of the challenge and because, at that level, different problems require some creative approach. Beginners require guidance, help with navigation, workflow, and debunking myths about music making and basic concepts. At the same time, I now realize that I take the challenge differently; I aim to teach them the most with as little as possible.


One approach I take is to see their progression with levels, like video games or Dungeons and Dragons (if you know me, I’m a big D&D fan, playing weekly). In this post, I’ll approach one technique people are constantly overlooking, and whatever level you are, it is undoubtedly something to apply: Slicing.


Sampling, Resampling and Hip Hop


At a beginner’s level, people are looking to familiarize themselves with the tools and navigation of Ableton Live (or DAW). I always insist that if you focus on hardware, you go back to a DAW, as there are a lot of concepts to learn first, and using a computer is far simpler than learning gear. Part of that navigation includes using clips, loops, and simple sounds and building songs with those to understand how arrangements work and simple theory.


At that level, you can’t yet aspire to sound like what you hope for, nor does someone who plays the piano for the first time practice scales. If you want to make songs, you need to practice making songs out of whatever you find. But sampling, resampling and remixing can go a long way. Some producers make a career out of those techniques.


Everyone wants to make songs but no one want to learn how to make them. They all want to skip the practice because they think they have it all figured out.


Hip-hop is a good example. The philosophy and basis of production include sampling old records or any music whatsoever and arranging them, often on an MPC. The logic comes down to “grab and juggle, rearrange to taste.”

Creatively, it is the ideal ground-breaking approach: You take what you love and then arrange it in your way.


I’ve been following this artist, Jon Makes Beats, who applies this efficiently. He often samples records, usually quite corny (apparently many of them were bought at a Salvation Army for a few bucks), rearranges them, adds beats (often from rearranged loops), plays some notes on top, and then booms (usually presets, which he says he’s okay with)—all that is recorded in one shot. To me, this feels like perfect, successful studio time.


Watch all his videos, and it’s impossible not to get inspired by the simplicity of his approach. But also, he has some good, down-to-earth tips that are aligned with mine.


The central concept is simple: once you have your samples, you have the material to tell your story in another way. I’ll share some points and ideas for you to try.


Numerous notable artists have made amazing things with samples, but two who come to mind are the Beastie Boys and Daft Punk. In the Apple TV documentary, The Beastie Boys share how one of their early hit songs relied on three samples as the basis; the rest was a drum machine and their rapping. On the other hand, Daft Punk layered multiple little samples from various records to achieve a song. Those 2 are good opposite examples, but both did so much with taken ideas used creatively.


Creating your own Slicing preset

I wasn’t super happy with the sampling presets in Ableton Live, so I created my own. When I slice a loop, I want, by default, access to a specific macro mapped to what I usually use.


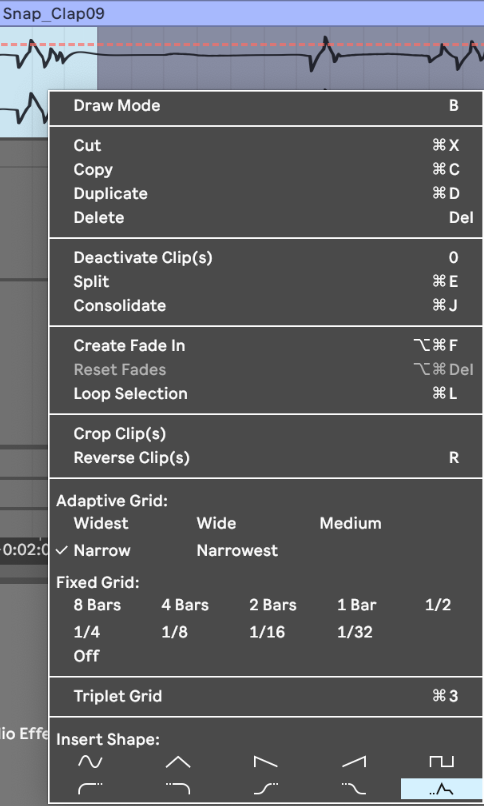
First, if you’re unfamiliar with slicing, you can do so by taking any loop you have, and then, when you right-click, a menu will appear. From there, you pick “Slice to Midi Track.”


Then, you’ll be prompted on what preset to use for the slicing.
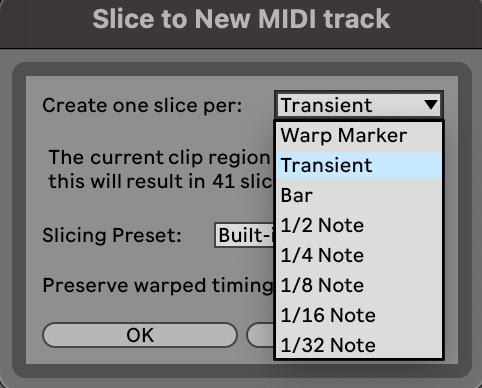
 

You’ll then get a drum rack with each sample (slice) assigned to the rack’s pads. A Midi clip will also be generated with a note pointing to a specific slice. If you play the clip, you’ll hear your original clip, but now you can rearrange the clip so the notes come in a different order. You can also pick one sample.
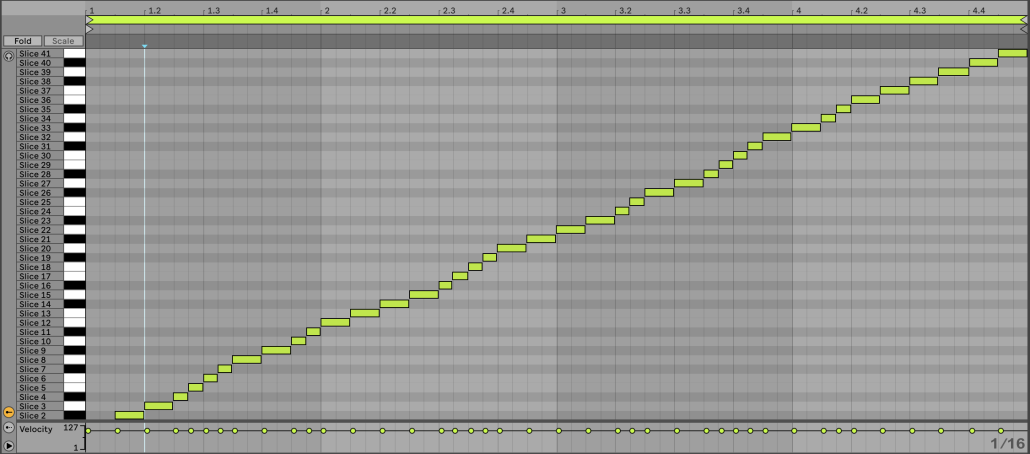
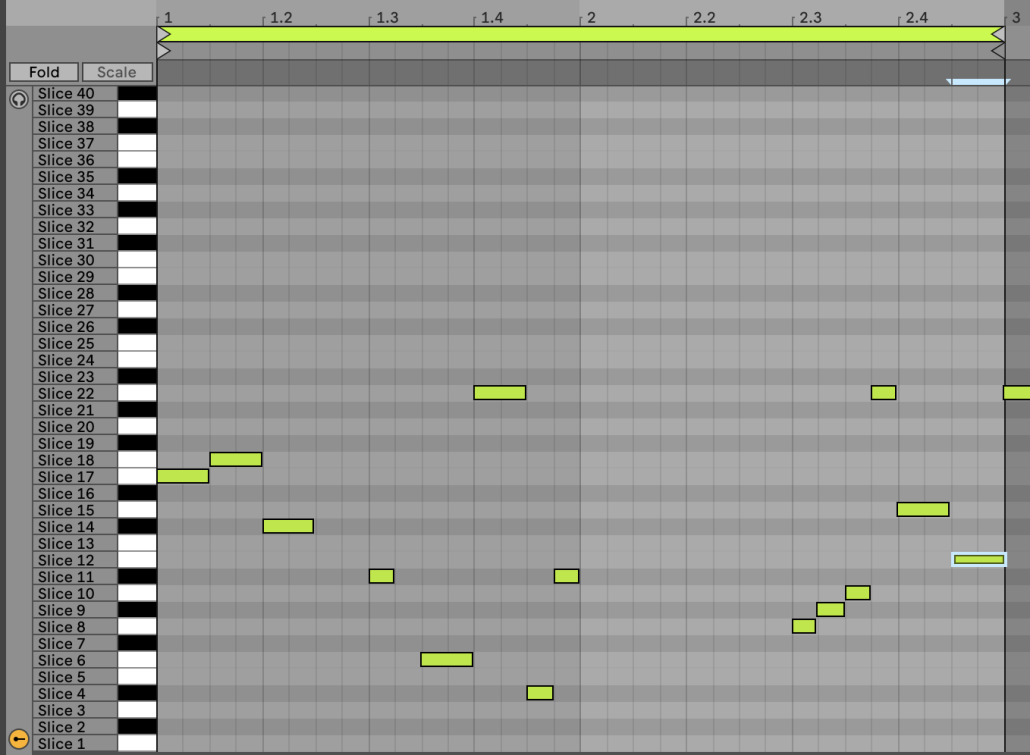


They’re all OK for vanilla slicing, but the rack’s macros feel underwhelming. Making your preset is so easy and fun that I’ll explain how I made mine so you can do your own.

Create your slicing preset

First, open an empty MIDI channel.

Second, place a Drum Rack and add a Simpler on the C1 pad.
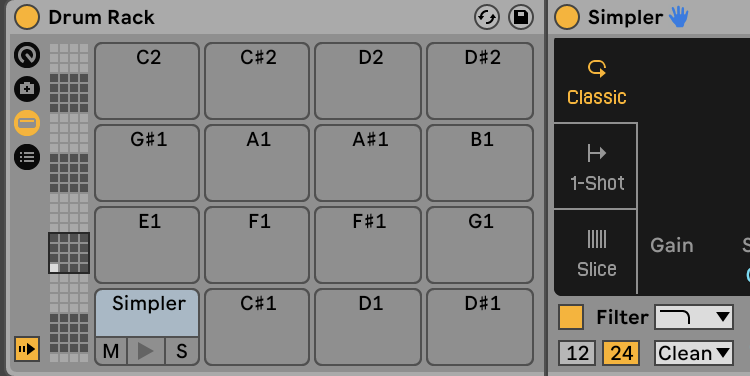


Third, you can map some parameters of the Simpler to the Macro-knobs of the Drum Rack. This means that when you slice your clip, each slice will have its own Simpler, but a simple mapped knob will control all of the same parameters. This has pros and cons. On the positive side, this means that you can, for instance, maintain the length of all the slices, making them short or long. But if some clips are intended to be short while others are long, that can be tricky.

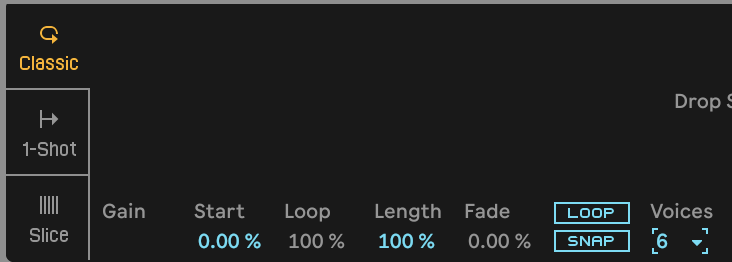
Some of my knobs are controlling these parameters: Attack, Decay, Sustain, Release, Volume on the lower right side. Then, the Filter’s Frequency and Resonance. Make sure that you uncheck the Loop and Snap options.
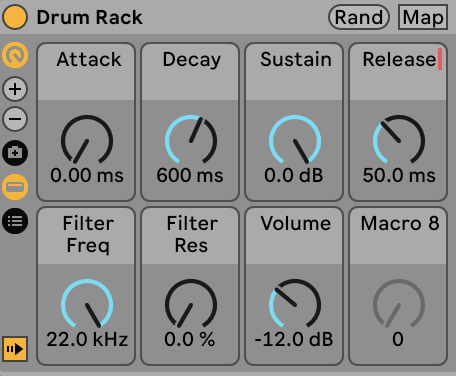


The last step is to save this new preset in the right folder so it can be used in the slicing option.

You drop the drum rack in the User Folder, under Defaults, in the folder “Slicing.” You can then rename it whatever you want, like mine below, “My Basic Slicer.”
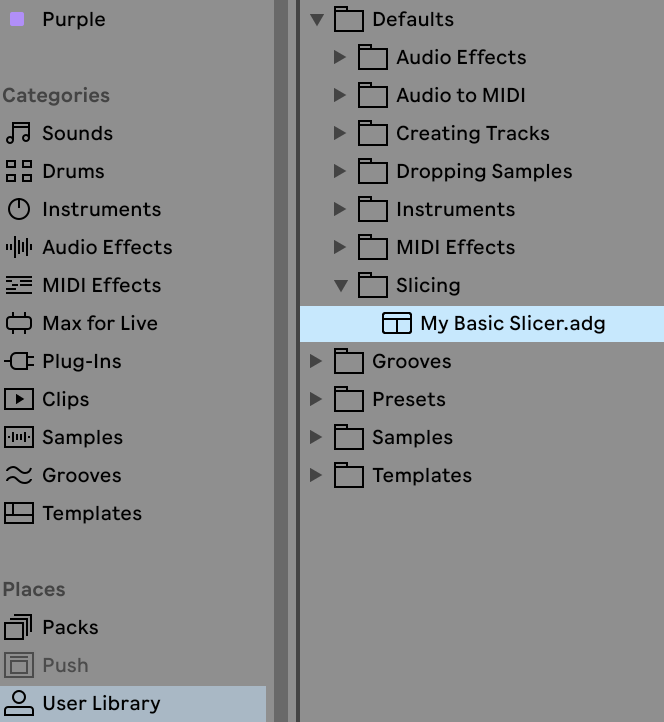


If you slice a clip to midi, your new preset will appear in the list.
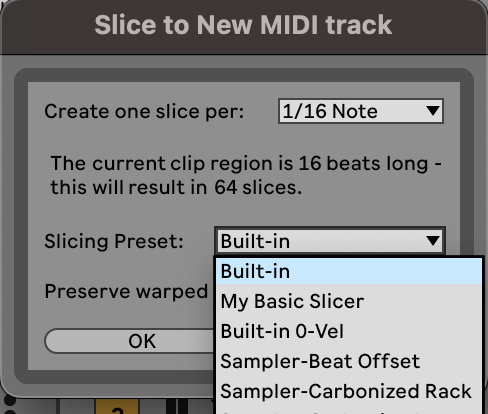
 

You’re now set to go!

Now, let’s do a few little experiments.


Slice the Ugly Into Beauty


Sometimes, you might have bizarre and ugly recordings of a synth or perhaps a dissonant effect. I’m particularly interested in those because you can get some unusual melodies or percussion once you slice them. I find there is something poetic in transforming something you’d automatically discard and finding a new, unexpected life.

One issue might be that it might not have transients to be detected, so you might want to slice it into forced regions. I’d encourage you to try different settings, but it could be 1/4 or 1/8, depending on your desired size. Ensure the sample you’re slicing isn’t too long; otherwise, you’ll end up with too many slices, which won’t be interesting to work with.
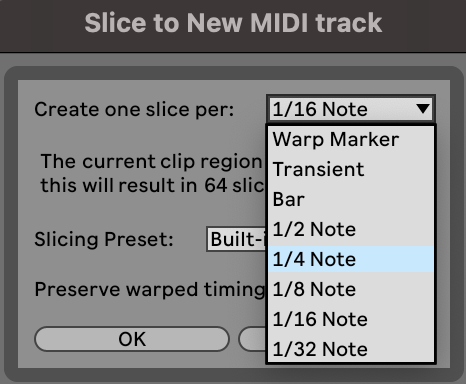


From there, you can see what slices came out, modify the length, and discover new patterns.

TIP: You can try a sequencer before the drum rack to generate sequences without the MIDI clip. Some fun sequencers exist, such as Rozzer and Snake.


Slicing Melodies

This technique comes from Hip-Hop. They usually slice a melody into more extended regions and then, by playing a MIDI instrument, play the song with a different articulation or change the order of the notes. But you can also take a more abstract approach, have shorter notes, play them randomly, and see if it makes sense.

To do this, people would select a region size that is 1/2 or 1 bar long. But if you’re into Micro-House music, you’d go for tiny regions.

TIP 1: Get a MIDI controller to experiment with playing the regions.

TIP 2: Use the internal LFOs of the Sampler to add some life to your sequence.


Swapping Sounds

In Ableton Live 12 (if you have it), the drum rack has a new option that allows you to swap all sounds for a new selection of similar ones. This can be a rabbit hole because you’ll start with a few sounds, and then you’ll end up discovering plenty of alternatives. You can lock some sounds you like and then dice roll the other out.

To do this, you’ll first need to go into the sample list and consolidate the slices; otherwise, they won’t be detected as single slices.


TIP: Whatever slicing you do, if you use transient mode, mainly for anything percussive, you’ll have a midi DNA of where each transient falls on the grid. You can also use one slicer’s midi and pass it to another. This means that the rhythm of one slicing pattern can trigger the order of another. This leads to rearranged sequences and a fun, unsteady swing.


Third-Party Samplers


It’s also fun to explore third-party VSTs beyond Ableton. There are quite a few out there, but I’ll share my favourites. Not that you won’t be able to create a slicing preset with those. The slicing presets can only be made with the native sampler/simpler from Ableton.
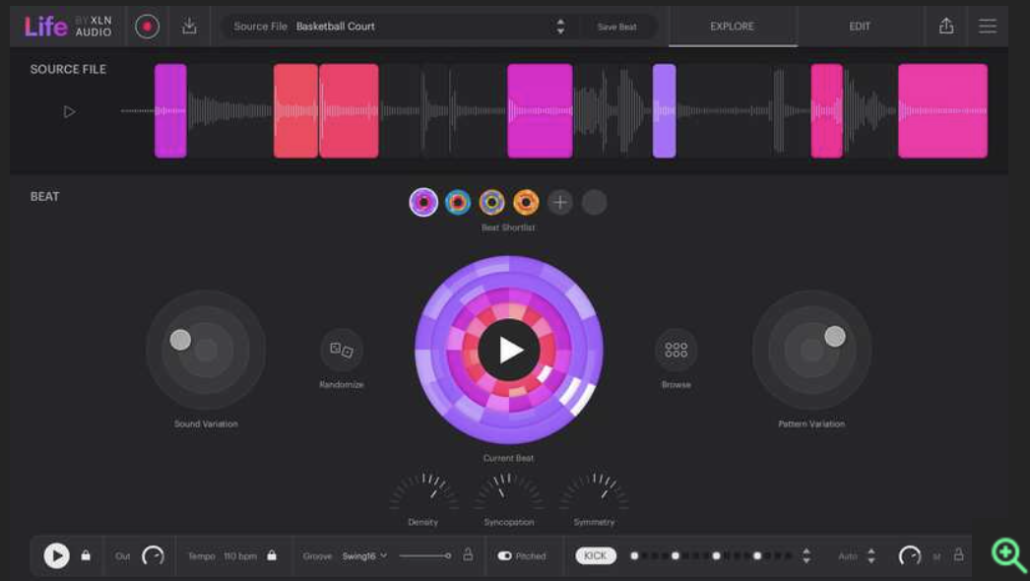
 

Life / XO

This plugin is XO’s little perfect companion. If you don’t know about XO, it’s probably one of the best drum machines and samplers. XO excels at creating percussive sequences, giving you variations with sounds and patterns. It also visually organizes your collection of samples by category and family, allowing you to find similar samples quickly. Life takes this to another level where you can resample your samples internally and then create new sequences out of them but with many variations options. It also has this option as an app on your smartphone to record sounds anywhere and then link them to your DAW. It is awe-inspiring.

TIP: Use both with automation to really bring your sequences to life.

TIP2: These are essentials if you have the budget.


Serato Sample

For DJs to play their sets digitally, Serato has been around for a while. It started with a Vynil encoder where they could beat-match music from their computer. This evolved in 20 years, and now digital mixing is a standard for many. DJing for hip-hop artists who do DMC scratching competitions is an art, and Serato developed a sampler version for artists who want to explore sampling parts in production. This plugin is highly rated because it offers simplicity and easy workflow.
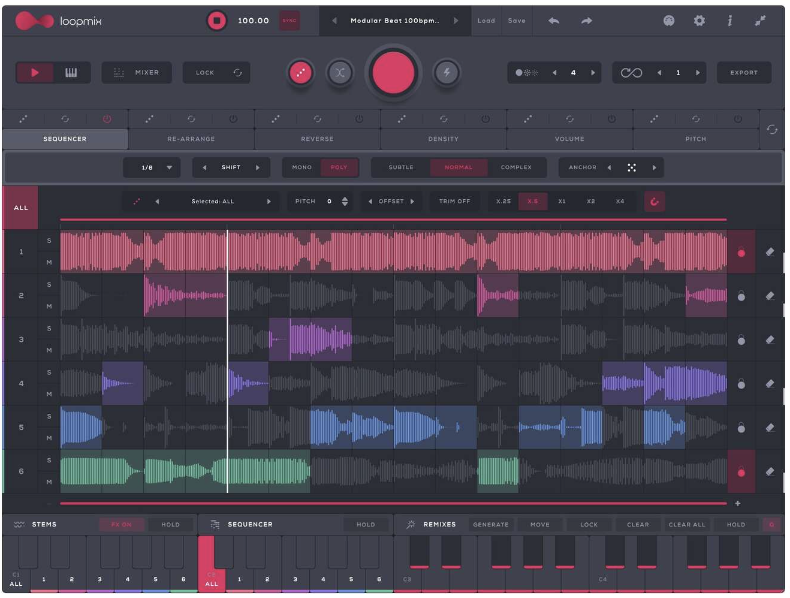


Loopmix

The guys at AudioModern have a series of excellent studio tools I use regularly. Loopmix is quite fun as it’s designed to be used with loops. The idea is to use multiple loops (ideally, it works better with percussion), and then it will slice them to recreate new sequences, blending the different sources. It’s pretty impressive what you can do with this live but also in the studio if you want to recycle the loops you have.


Dawesome Novum

I’m not too familiar with this one, as I only saw demos, but from what I understand, it decomposes the samples into layers. Instead of slicing them in time, it does it on a spectrum layer. This means you can decompose your sample into layers. It’s on my wishlist, and I’m resisting trying the demo because I know I’ll buy it in a glimpse. This is the kind of tool you’ll want if you love drones, textures, moods and anything ethereal sounding.


I look forward to hearing what you’ll do with this technique. Please share your experiments.


Photo by MW on Unsplash


Creating Depth in Music

I don’t know many people who took theatre in school, or aspired to become an actor or comedian. For me, having a background in theatre has shaped my vision of music, performance, and storytelling. In Québec, we have a “theatre sport” called Improvisation, where teams meet in a rink to create stories and characters, out of the blue. After practicing this for 20 years or so, it’s shaped how I perceive songs and sets. There are so many parallels to music in theatre: how a story develops, the use of a main character, supporting roles, etc., all of which can be applied to the use of sounds in a track.

A story is never great without quality supporting roles. Support adds depth to any story, and richness to the main character. Think of all the evil nemeses James Bond has faced—the more colorful they were, the more memorable the story, and the same goes for songs.

You might have a strong idea for your song, but if it has a good supporting idea or two, then you’ll end up with a song that keeps you engaged until the end.

I’ve been really into minimalist music lately; I like music that has a solid core idea that evolves. I was reading a really nice post on Reddit about Dub Techno where one of the main criterion discussed was the importance of simplicity. Simplicity doesn’t make something dull or dumb—in music it can be a reduction of all unnecessary elements, in dub techno resulting in a conversation between the deep bass and the pads and other layers.

If you’re immersed in electronic music, you’re generally used hearing multiple layers and often multiple conversations between sounds. Percussion layers will be often related to themselves, but the main idea is usually supported by a second layer. I often hear this in some indie rock songs too, especially ones that have some electronic elements in them. The way the human ear works, is that we will always hear the main component of a song as the centre of attention, but attention will shift back-and-forth between different layers. The advantage of having depth in music is that it encourages repeat listening. For a listener to replay a song and hear something new is exciting; some songs will grow on them even though they may have felt overwhelming during the first listen.

How can you create secondary ideas and “supporting roles”?

There are multiple ways to do to add depth to your songs.

Negative Space

The most important part when you program or write a melody, is to leave some empty space in it, which I call “negative spacing.” This space is where your secondary ideas can appear, supporting or replying to the main idea. I usually start by writing a complex melody, and then will remove some notes that I will use elsewhere, either in a second synth, bass, or percussive elements. Here are some suggestions as to what you can do with the MIDI notes you remove from the first draft of your melody:

  • Use the same MIDI notes from your melody, but apply them to multiple synths or other sounds to create variations and multiple layers that all work together.
  • Use the MIDI tool chords and arpeggios to build evolving ideas that come from the same root.
  • Look into some MIDI-generating Max for Live patches that can give you alternative ideas. I’ve had some fun with patches like Magenta, but also with the VST Riffer or Random Riff Generator which are really interesting.

The “Fruit of the Tree” Exercise

This is an exercise that is a bit time-consuming that I have a love/hate relationship with. You spend time playing the main idea through intense sound altering plugins. So, if your main idea is a melody, imagine you send it through granular synthesis, pitch-shifting, a harmonizer, random amplitude modulation, etc.—you’ll end up with a bunch of messed up material that can be shaped into a secondary idea while still being related to your original idea. The idea is to transform what you have into something slightly different. There are multiple plugins you can look into for achieving this:

  • Vocoders, mTransform, mHarmonizer, mMorph: These all work by merging an incoming signal and with a second signal. So, let’s say you have your main idea or melody—you can feed it into something completely different, such as a voice, some forest sounds, textures, or percussion, and you’ll obtain pretty original results.
  • Shaperbox 2 is the ultimate toolbox to completely transform your sound by slicing, gating, and filtering it, with the help of LFOs. This is pretty much my go-to to create alternative tools quickly. One thing I like to do a lot, is to run two side-by-side on different channels, and then use them to create movement that answers one another. For instance, one will duck while the other plays. You can also use side-chaining in the newest version, which can create lovely reactivity, if you use it along with the filter to shape the tone by an incoming sound. This allows you to do low-pass gating, for instance, which isn’t really in Ableton’s basic tools.

Background Sounds

The lack of background sounds, or noise-floor, always leaves people with the impression that there’s something missing in a track. This can be resolved with a reverb at low volume that leaves a nice overall roundness if you keep it pretty dark in its tone. Low reverb creates an impression that a song is also doubled, or wide. Another good way to make background sounds is to load up a bunch of sounds that can be played multiple times in different sections of your song, at very low volume. I was checking out this producer who does EDM/festival music, and he would use sounds of people cheering at a very low volume in moments where the chorus of the song would hit, to create more density and excitement. However, at a high volume, this approach can conversely create a “wall of noise”, so it should be crafted carefully.

If you simply drop a background sound into a project, such as forest sounds, you’re missing out on one of the most enjoyable activities in making music, which is to create your own live sounds. A forest has a bunch of—what seems like—random sounds. You can alter this, and say have a basic 5-second background of noise-floor and then decide when the bird chirping comes in via automation and perhaps have them sync to the tempo. This creates a bit of a groove too. A good exercise is to try to create sounds that emulate nature as you’ll have a bit more control over the sounds (and you’ll learn more about sound design in the process).

Ghost Notes

Ghost notes are mostly discussed as they relate to percussion, but they can be used, as a technique, with anything. A common example of ghost notes is their use in hi-hats, as a bunch of in-between hats at a very low volume to fill up space, which stretches the groove and but avoids too much negative space. Aside from using this technique on the low end—where sounds need a lot of space and room to breathe—make sure everything doesn’t sound mushy. The use of a delay in 16th or 32th notes can be a good way to create ghost notes.

A tap delay, where you can program where the delays fall, is also super fun in terms of creating ghost notes, as you can use one to make complex poly-rhythms. However, I suggest cutting some part of the high-end from the delays to avoid clashing with the main transients, and make sure the volume is very low. Using a AUX/Send bus for delays can be quite useful.

SEE ALSO : Improving intensity in music

Creating a kick drum from scratch with an analog feel

There’s no doubt that a kick is an important part of electronic music, and in the last few years, it seems like more and more people are creating kick drums from scratch—analog or digital—with lots of depth. The difference between 90s production and modern production is the increased quality of sound systems around the world. I’ve heard that Funktion One sound systems are appearing more and more at festivals and in clubs. I myself have had to adjust my mastering approach to maximize the sound precision on these higher quality systems. In the end, the results are great for everyone. However, one thing I’ve noticed is how 90s music sounds a bit less warm and less open on these newer systems, which isn’t a big deal, but we’re missing out a bit on quality here, as this music is from a different era.

That said, really well designed kicks are so addictive on a nice setup that a kick alone can keep a crowd happy for a while…I’m exaggerating a bit but this isn’t totally false either.

Do you need to buy a drum machine, synthesizer, or something fancy to make beautiful kicks?

Yes and no. There’s something exciting about having gear, but gear can also be a trap. You’ll use it for a while, but eventually you’ll find that a lot of hardware always produces the same type of sound(s). Do you want want the same kick in 99% of your productions? Personally, I don’t—I want variation. This is one of the reasons why I see people buying and selling gear over and over, looking for something they’ll never really find. I like to have a hybrid setup where I get the best of both hardware and software; but trust me, I get a lot from software alone.

I’m a firm believer that one can do a lot with a little. There are a wide variety of cheap options; you can invest a tiny bit without going out to buy expensive machines.

My main kick sounds come from a few machines—I’d advise you to try to find out which machines make kicks you love. I’ve always loved the TR-808 by Roland, which is a classic, but I also love what Jomox does, as well as the Tanzbar (MFB). Once you learn about a few machines you like, the easiest approach is to find some high-quality samples of them; there are many options and sample packs online.

Creating a kick drum from scratch

If you Google “TR-808 free samples” for example, you’ll find websites like this one and this one sharing samples for free. Search yourself and you’ll find some pretty solid 808 kicks. I know this sounds silly, but samples are the fastest way to get things rolling. In a previous post I explained that great kicks are often layered. The best way to build great kicks using a simple setup is to start with a base of high quality samples. They need to be in 24b minimum, not compressed, but at -3dB.

When it comes to making an analog sounding kick “in-the-box” (no hardware), I’d say you should try following these steps:

  1. Start with the low end made by an oscillator. In this case, you can use Ableton’s Operator; you can use the sine wave or use the user section it to color things a little bit with harmonics
  2. Layer a quality sample over it. I’d high pass samples to let the purity of the oscillator take over the low end. It’s also important to align the phasing to get a punchier sound.
  3. Use a transient from a modular sound recording. Snip out a transient or small slice of an audio recording to layer on your kick (I’ll discuss this again later and provide some free downloads!).
  4. Compress the whole thing with an analog modeled compressor to glue everything together. In this case, we can use the Glue Compressor from Ableton.
  5. Add saturation on the sound to provide some finishing warmth. You can use Ableton’s drive, but I’ve never really been a big fan of it. It’ll do the job though if you’re on a budget.

The best way to work with samples like this is to use the Ableton (or whatever DAW you use) drum rack so you can take advantage of the sampler’s modulation system and envelopes.

In Ableton Live 10.1, one feature I really like is the suggested/preset envelopes you can use on any sample. These settings come handy when modeling percussive sounds out of any samples you want. I love to create textures and then slice them quickly using this feature. Returning to the transient recording approach I mentioned previously—this type of slicing is particularly practical when I grab long recordings from my modular synth; there are tiny sounds I can turn into a snare or hat. Like I said, combining the best of all of these sounds will result in a full range kick.

Download sample transients recorded Pheek:

[download id=”39268″]

If you want to invest, below are some interesting kick plugins I’d recommend:

Raw Kick by Rob Papen. Anything by Papen always is quality and you can’t go wrong. Raw Kick is a no-brainer, it will create something ranging from very clean kicks to dirty, badass ones.

Big Kick. As the name states, this plugin creates “big kicks” and doesn’t disappoint. Even the presets—once tweaked a bit—are pretty impressive and ready to use.

Sasquatch. Another solid kick maker that can make a room shake pretty heavily.

Give A Direction To Your Loops

I have never studied sound or music theory. My blog is a pure description of how my mind and artistic view has grown through time and practice. In this post, I will share some observations on percussion and how it can give your loops a new meaning.


Make Tracks From Your Loops

If you’re into making techno or more beat-driven tracks, you pretty much have your own routine. It’s always a bit different from one person to another because we all hear in different ways or simply work in a different flow. But all in all, here’s some of what we can say to sum it up:

When it comes to techno loops or other dance-related music, it sometimes happens that the percussion is the heart and soul of the track. There can be different reasons for this: it can be the DJ tools or loops, or it can also be that it’s just plain good as it is (e.g. a “foreverloop” that you never get bored of).


Percussion is often the heart and soul of a track, and as a producer, it can give your loops a whole new meaning.If you’re into straight-up percussive loops and perhaps play with simple ideas for fun or for an eventual track, there are some tips you can keep in mind, just like I do. But let’s not get crazy about it either: On the one hand, some people study percussion all their lives without seeing all of its subtleties, while others can go to university and learn that every culture has its own intricate, complex way of doing it.


Let’s keep it simple. But if you want to learn more, there are tons of great reads online.


So, in my case, I’ve been inspired by early workshops I did with Gabrielle Roth and have been interested in the “5 Rhythms” approach. Ever since, it’s been in the back of my head whenever I try to design my tracks. The 5 Rhythms categorize dance types into families based on their style of percussion. Roth believes that within an hour, once a practitioner experiences her use of the different rhythms, they can reach a level of personal enlightenment.

Loops can be the most useful tool a DJ might want. Some loops can be listened to forever.

This can make you question, in a way, your own personal quest and reasons for making music. Are you making tracks or are you working on a bigger set of instruments with the purpose of transporting the listener elsewhere? Not to fall into pseudo-new-age stuff, but it certainly becomes more exciting when you give your music a significance.

Now, when it comes to the rhythms, they are:

  • Flowing.
  • Staccato.
  • Chaos.
  • Lyrical.
  • Stillness.


One track can focus on one or multiple, but you can also integrate them all to create something balanced.


SEE ALSO:  The Rule Of 10: Production in Rotation for Big Results 


One of Gabrielle Roth's 5 Rhythms, a good flow is the basis for all other rhythms.

Flowing

To me, this is the most important one.

A good flow is the basis of all other rhythms.

It implies that your track, even with drastic changes, has a way of making all the rhythms work together so that it creates a cohesive whole. Great flow also makes a song catchy and re-playable.


When it lacks: There will be a feeling of awkwardness in the transitions. DJs will observe a drop of energy from the crowd.

Try: Working with transitions and arrangements. Try to separate your song into sections, and then find a way to move from one to another. That can be achieved with percussion changes or effects.


Staccato

Powerful and dynamic would be the best terms to describe this one. Think of huge samba drums or repetitive, hypnotic, minimal techno loops. The staccato is often dense and can go from very simple to very complex. It isn’t only necessary in percussion; it can also be in the form of simple arpeggios applied to a melody, for instance.

When it lacks: At some level, it can make a groove feel weak and static, which is the opposite of what a great staccato can bring to your work.

Try: Using arpeggios and applying them to any of your sounds. Tweak the settings to get something unexpected.


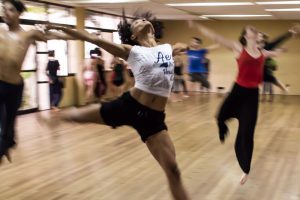
When DJs apply it strategically, surprising a crowd with an off-the-grid beat or rhythm ("chaos") can make people go crazy in a good way.

Chaos

Often hated by DJs who love linear and predictable loops for easier mixing, chaos here doesn’t necessarily refer to Ornette Coleman’s free jazz. I’d say it’s when things get a bit off the grid, and go slightly unquantified in the spirit of infusing your track with quirky grooves or unpredictable moments. When applied strategically, surprising a crowd can drive them crazy in a good way. Chaos can also refer to breaking free of standard genres and ideas to forge something new.

When it lacks: Your loop might sound generic, clinical, predictable — and yes, boring.

Try: Tapping percussions using PUSH. Apply weird grooves from Ableton. Adjust transients so they fall off the grid just a little bit. You may also slice your loop and randomize the order of the sounds.


Great melodies can make a song timeless.

Lyrical

To me this is the hardest, but that’s mainly because I’m more of an artist than a musician. What “lyrical” implies here is the use of melodies to conjure an emotion. There’s no restriction here: we’re talking pure emotional material, from sad to happy, deep to cheesy. Great melodies can become ear worms and can stay in people’s minds for a long time, making some material timeless. When someone can whistle your main idea, you know you have lyrical content.


When it lacks: Your song might be cold or simply ephemeral. There’s no main idea that we can refer to when describing it to someone else.

Try: Experimenting with melodies or asking a musician for help. You can turn to solutions like Liquid Rhythm to assist you as well.


Stillness

The most difficult to explain, because this one is a pure game of subtle micro-changes. Stillness in music is often translated to boring because nothing seems to happen. When nothing happens, a lot is happening… in the listener’s mind. They will start craving something, will start wondering, getting a bit anxious. Stillness is the art of creating an intelligent tension that makes the eventual release both soothing and powerful. You can also see it as linear music, which is a genre in itself. That is another game.

When it lacks: If you don’t allow for your listener to have any tension building, your song might feel self-supporting or shallow.

Try: Finding songs that build tension in you. When listening to them, pay attention to the very moment where you start getting a bit anxious, and notice how the song is built at that very moment so you can replicate the formula in your own music.