My Music Production Methodology Pt. III: Depth and spatial shaping tips

This post about music production methods is an important one. In the group I work with on Facebook, I give feedback to people and I’d say that while for many, the part they strugg le with the most is to nail down a proper mixdown, and for the majority there are issues with the stereo field. I have a bunch of tricks that can help turn a 2D pattern into a 3D realm to get lost in. Let’s start by discussing a few things regarding making music 2D, and then how you can slowly shape it.

One thing that is essential for music to sound clear, loud, and powerful in a club is to have the majority of your sounds “in mono”, or in engineering terms, to have your mids solid. This is why many people will tell that doing a mono test on your mix to see if everything is heard is a good way to know. Why? Because if the sounds are moved randomly around, they might phase with others, which will end up cancelling out once in mono.

While this might sound like voodoo magic if you make music as a hobby, you can drop a tool into your DAW to make the signal mono so you can check. (hint: in Ableton Live, it is the Utility effect that will let you do that)
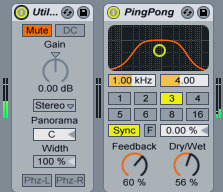
Ableton’s Utility tool

This is why you want your low end (under 100hz) to be in mono; to make sure there are no conflicts and that it will be sounding fat and strong. Again, in Ableton Live 10, you can activate the “Mono bass” option on the Utility tool.

Why I’m saying this is clear and simple: depth is a fun thing to have on your music but if you go too crazy with it, it might end up being a problem. So, first and foremost, when you program your patterns and music, try starting in mono. Make sure everything is heard and clear.

Once you have created the arrangements and are pretty much done but before you get to mixing, start spreading your sounds around to occupy the space in front of you. You don’t want to have everything in the middle, it will feel narrow and lifeless. There are multiple ways to get this done and it goes a bit beyond than simple panning which might be a bit boring. (Note: many mixes I get have everything in mono!)

Tips to give your mix more space
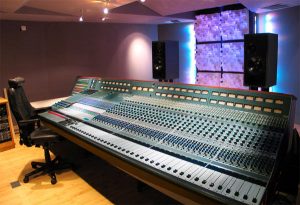
Mid/Side is a great way to use space in a mix, but is often misunderstood.

Here are a few tips to give you mix space and life, and if you google this topic, you’ll find multiple others too:

  • If the sound/sample is in mono: Try doubling it by duplicating the channel a few times, then pan and experiment. In pop, soul, R&B, the producers often do that and have up to 4 duplicates, spread around and or pitched to different tones to give sounds textures. You can use a VST Doubler to do the same but there’s something exciting about doing it manually. Keep in mind, a clap is actually 4 layers and so on for your percussion. Try to create something wild.
  • Panning around your sounds can do but it will feel bland if you don’t couple it with a quality reverb. Even at very low levels, a reverb will create space around the panned sound. This is why I group percussion into families (ex. all organic, all metals, all wood, etc) then have a reverb per family, not per sound.
  • Use stereo effects: These will be super useful to help things around and for instance an auto-pan will help give life and movement. These include: chorus, delay, phase, flanger and wideners (of course). These should be applied to a sound, not a family. Only one of these effects per song to avoid issues.
  • Quality reverbs: as described above, a quality reverb is a game changer. Stock plugins are never as good as a whole team that work on making something special. For instance, all the plugins from Valhalla are now recognized as some of the best in the industry and for a reason, they sound just as good as some hardware units. Tip Top who make modular synths has licensed their reverb for their z-Dsp 2. If you can, always go for convolution reverb for your music and use only one, in a AUX/Send. So if you really a 3D sounding song, keep in mind that a reverb will do 80% of the job. The rest is about lowering the volume of certain sounds to give the impression they’re further away. Also, filtering out the low can give that impression. Mixed with a quality reverb, you will have a lovely space.
  • MID/Side: This is one of the most misunderstood aspects of mixing because it’s hard to really understand it. Keep it simple, this term refers to how your space is shaped as what you have in front of you is the mid and the sides are located where are the speakers/monitors are. If you misuse the sides too much, it will make your music phase (you’ll hear it in the mono-check). But it’s really interesting to play with the Mid/Side (Aka MS) of your groups to open them, a bit.

Last tip: Low end should always be in mono and I usually make sure that some part of the melody is also, while it can partly be spread around. The main hihat and percussion should also be strong in the mid but then you can have support sound of the same family be spread around to give room.

 SEE ALSO :   The “sous-chef” experience 

My Electronic Music Production Methodology: The Mothership (Part II)

I don’t know if you’re a fan of sci-fi movies, but I am. One thing I really like from those types of movies are alien invasions, where the aliens are dropping from the sky after jumping from a huge space ship; where all the bad guys are assembled and then dispatched. In music making, I apply a similar concept to my own music production methods and overall methodology.  Ever since I’ve passed this idea down to people I coach, I see them do really cool things using the concept of the “mothership“. They adapt this method to their own way of making music, and when they show it to me, I learn a thing or two on how to upgrade my music production methods.

This post about the mothership concepts, and I will share an empty Ableton LIve set you can reuse for your own work. I’ll also cover a few features in Ableton that can help fasten up your idea making.

The Mothership: Where Do I start?

First, know your music. Whatever genres you listen to, get to know what it has and needs. If you read this blog regularly, you know that I always insist on knowing and using references. Well, the mothership method also starts with using references. There are a few essential questions you need to ask yourself when you listen to your references:
  • What are the predominant sounds? For instance, in techno, the kick, hats, and snare are pretty much always there and for most of the song’s duration. There are percussion and effects often but they’re not the main players.
  • What is the melody composed of? Is the melody only one sound (ex. synth) or 2-3 different sounds talking to each other?
  • Is there more to it? Sometimes we can get a bit lost in a reference track as there seem to have a lot going on, perhaps little sounds in the background or swirling swooshes. Those are what I call distractions. If you want to truly analyze a song, make a 2 bar loop right in the middle part or when the song is at it’s busiest, then start counting each sounds and make sense of what you hear.

Once your song has been analyzed, you’re ready to build a template.

Building an empty mothership

If you feel like seeing what an “empty mothership” Ableton Live template could look like, you can download one here:

[download id=”34555″]

It might not meet your needs out-of-the-box, but it’s a great starter nonetheless.

This empty template was created by ROOM323 who I’ve been coaching for almost 2 years. His starting template is really great – perhaps even better than mine – so I’ll explain why I think it can be really useful.

  • Each sound has its own channel.
  • There are just enough channels to cover everything and limiting yourself to them makes you stay focused.
  • The background and effects channels are a good reminder. Sometimes we forget that one aspect of the song has been overused, especially for details like a background. It’s also a reminder not to overdo it.
  • Storing your loops gives you an outside view of all the potential you have.
  • There’s nothing better to help make decisions with regards to your different songs.
  • It can be turned into a live performance set!

How to use THE TEMPLATE

The very first part of using this template is to start by collecting “main ingredients” (see part one of this series). This can be done by scavenging Youtube, jamming a new demo VST synth or hanging out with friends while recording them play randomly with instruments. Anything can be potentially good, it’s how you use it that will make the difference.

“It’s not the note you play that’s the wrong note – it’s the note you play afterwards that makes it right or wrong” – Miles Davis

  1. Put each different idea in the appropriate channel of the Mothership.
  2. You’ll have perhaps 5 strong ideas. Now you can fill the channels that are missing content. If you have a nice guitar melody, then you need percussion, kick, etc.
  3. For each idea, try to have different variations. Perhaps your first loop was good but if you rework some elements, maybe you’ll find another option that is pretty cool too. Those variations can also be different scenes of the first loop.
  4. Jam away!

That’s about it!

When I work with ROOM323, I will have 20 different ideas from him, then I can select the best 5. From there, I’ll pick a row and drop it in the arrangement section to start building a song. In terms of productivity, this method is way more effective than canning one idea in a project that is then turned into a song. One important thing to have in the back of your mind is, if during your song, you run out of ideas, then you can just jump back into your original 20 loops to pick something complementary.

One amazing thing about Ableton 10 is that you can drop a song/sample from it’s browser and drop it in your song. It will import your idea as you left it. This means that you can build your Mothership today by dropping in all your unfinished loops!


SEE ALSO :

My Music Production Methodology Pt. III: Depth and spatial shaping tips

My Electronic Music Production Methodology (Pt. I)

I’ had been thinking about recently how I should consolidate the many values, observations and principles I share regularly on this blog into a summary of music production methods and methodology. I regularly give feedback in our Facebook group and I find that I’m often repeating myself with regards to certain details and points that seem like basics. Not long ago, I wrote a post with a checklist to see if everything had been covered in order to know if your song is done, but what about a todo list to start? And what are the big points you should consider beforehand in order to avoid getting lost?

Let me describe my own mindset before I get to work on music in the early stages; it helps me greatly and I think I could also give you a boost in productivity.

The intention

Have you ever had sessions that were magical or others where you felt you did the same things, went horrible where you started to doubting what you’re doing? Making music seems like it should be as straight forward as playing a sport but it can’t be predicted or controlled, which can be frustrating. I’ve started noting down a common denominator in all my good sessions: they all had been started with a precise intention. What I mean by an intention is that beforehand – even before opening the session to work with – I’d spend some time developing a precise idea of what I wanted to do in that session. It could be simple sound design, mixing, arranging, or working on a client’s session.

I’d sum it by saying to myself “today, by the end of the day, I should have done X.” The X is a sort of a goal I can quantify easily, such as finishing the polishing of a track.

I also start sessions with something I do well and love doing; this important habit puts me in a good mood, helps my brain focus, and preparesme for bigger challenges.

The mood board

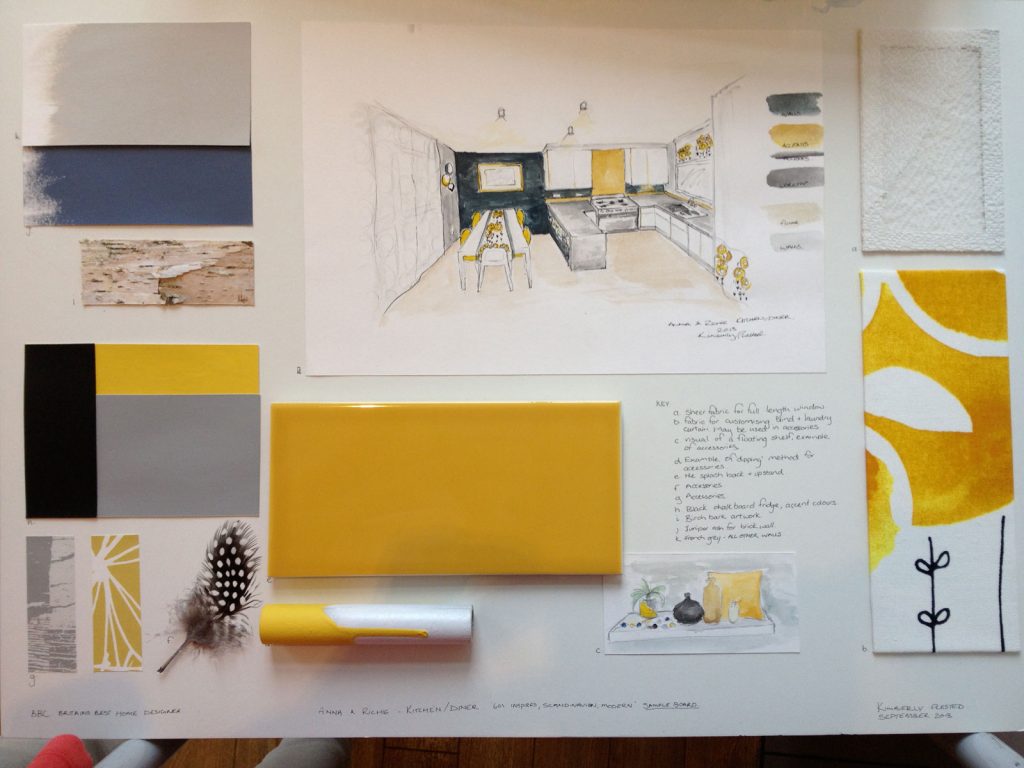
The term “mood board” is often used in visual design. It’s basically a pin board with all kind of images: the mood, aesthetics, concepts. Sometimes it can be a texture or drawing, but it can be also a few pictures; it becomes a reference for all the members of the team.

A example of a graphic mood board (image courtesy of https://www.sophierobinson.co.uk)

It’s basically the same in audio. I have a huge folder with music I like for use as references. I have also playlists on Youtube of each reference per client. I have yet another one on Soundcloud for ideas, inspiration, and arrangements. The audio quality of Soundcloud being not so great makes me use it more for ideas than anything mix/mastering related. Sometimes it’s songs, sometimes it’s just simple atmospheres or a weird tune just for its reverb (which I can use for convolution). There are new, amazing songs I see in my feed everyday and I really want to tag the ones I see. I honestly even have a mood board on Instagram/Pinterest. Some images help me generate sound ideas too. Yeah, I’m weird like that.

The main ingredient

In risotto for example, rice is the main ingredient but this dish can be altered in many different ways; audio works in the same way.

This main ingredient is the core of your next project. I often compare making music to making food; I find that relying on a first important ingredient helps to develop a theme for a song. The more you work on something, the more you’ll want to add. Remember that songs are split in sections and my rule is to have either one major change or one sound added per section. Songs have, in general, 3-4 sections. Some only have 2!

So, this means that your main ingredient could – in theory – have major changes 2-3 times maximum in a song  to remain understandable. Of course, this is my personal rule. You might have totally other views and that’s alright. The main ingredient will also have brothers and sisters. I usually form a family of 3 sounds per song. The main ingredients will have 1 brother and 1 sister. The brother will be a similar to the main ingredient as a way to complete it. For example, a higher pitched note. The sister sound will be in opposition to the main ingredient. For example, if the main ingredient has a fast attack, the sister would have a slow attack.

Setting up these ideas really helps me see what I need quickly. But knowing this method doesn’t help find the actual sounds though. Sounds come to me in many ways: sampling something you love, using jams you did on some machine that you recorded, recycling older ideas, browsing Youtube’s infinite possibilities, going to a local store and buy the weirdest record you can find, learning a new way to design sound from a tutorial you watched, etc. The idea is to make material to manipulate.

FACT: When I hit a wall, I usually do a remix for someone I know, for fun. Remixing is easy and fun. You try to juggle the elements and keep some of them true to the original to make the remix recognizable in a way. In remixes, you’re given the main ingredient already, and then it’s up to creativity to do the rest.

The foundation of the house

I invite you to view your song as a dish, but now let’s also picture it as a house. To build one, you need a solid foundation. Solid is not about making it loud or big. It’s about being clear. In musical terms, we refer to the foundation as its fundamental note, it’s lowest part. Therefore, I find that setting a few notes in the bass/sub will give ideas, support for the melody to come in the mids. But if it’s muddy in the lows, the whole song will suffer.

TIP: Try to keep it to only 1-2 elements under 80hz.

A hook

Your song will be memorable for others if they can actually sing it back to someone who has never heard it. Ask a friend to see if that’s possible. If not, your song would be categorized as “intentional music” (in the same vein as percussive African music) where you can’t sing it. In techno, the whole movement of Romanian music is partly built around a combination of hook-songs vs no-hook-song. What makes it addictive is that you feel you can sing it back but not, and then when mixed, the interaction of 2 songs makes it reveal something you didn’t expect.

Do you need a hook? No. But if you never use hooks in your music, try to make one. Or if you only do music with hooks, try to make one that feels… empty. it’s a pretty difficult challenge to go out of your comfort zone but it can also make you discover things you didn’t know you could do.

David Lynch said:”Ideas are like fish. If you want to catch little fish, you can stay in the shallow water. But if you want to catch the big fish, you’ve got to go deeper.”

That’s all it for the first part on music production methods and methodology – I will provide more insights next week.


SEE ALSO :

My Electronic Music Production Methodology: The Mothership (Part II)

Resisting the lust to be famous

While music fame and the desire to “get famous” might seem comical to some, I’m sure that if it doesn’t apply to you, perhaps there are some people in your network who have expectations to build a career in music production. It’s one thing to leave your mark, but it’s another when you have a very strong expectation to be famous. Why do I address this? Mainly because working with people I’ve noticed that many have this cyclical pattern of ups and downs, all based on how productive or successful they’ve been. The thing is, when you’re up, things are great of course, but the issue is how to deal with the lows.

In my career, I’ve learned a few things regarding how to deal with the lows. It comes down to perception mostly, but also to how you approach things. The thing is, no matter if you’re riding a high or a low, you are exactly the same. External factors can trigger frustrations but they’re not responsible of your emotions. While it is known that physically, making music can release some internal hormones that give pleasure just as a drug, on the flip side not being able to do music can also be hurtful.

Let’s debunk a few things that can help you surf more positive waves.

If you’re in music production to chase success, you’re in for a nightmare.

What is a successful release?

This is a good question; the definition of success can be based on multiple factors:

  • Sales. As you know, what might seem like a catastrophic release for one market could be a crazy success for another, with the same numbers. I can tell you that I had a time where 200 vinyl sales was a moment to open up a champagne bottle.
  • Reach. It’s so strange how some releases will have all the same amount of effort in marketing but one will pop on social medias and charts. It’s basically impossible to predict what will work and how much it will spread out. But sometimes, something that reaches out more than usual, might have next to no sales.
  • Media feedback. So you know, if you pay for PR, it will be between 150 to 1000 euros or more for a company to pass the music to medias, DJs, blogs and journalists. It doesn’t guarantee anything at all. But one thing you want is the music to gain momentum and if you start seeing comebacks here and there, that can be seen as a form of success.
  • Other artists’ appreciation. Charts, thumbs up, DJs dropping music in an event are all a form of success.

The thing is, these factors are all linked as you can see, in one way or the other. As a label owner, sometimes it becomes pretty frustrating to deal with artists who complain that you didn’t push hard enough because the previous release did better. Explaining it like a lottery might be the best way to put it out. The strangest thing is, sometimes some of the most talented artists I know make music that is exceptionally beautiful but it just doesn’t sell, reach or get any feedback; it’s as if people completely missed it. I’ve seen some releases on Archipel pop 7 years later because a known DJ played a track in an event, randomly. Thank you Shazam!

In the end, you are the one that can define your own success. Using numbers will help you greatly. “Being famous or known” can’t be measured, but selling 200 vinyls can. And since sometimes things move really slowly; sometimes patience can make a difference.

Over 20+ years of releasing music, I’ve come up with my own set of success measurements. One of them is based on a very tight circle of friends I share my music with once I’m done with a new song. If they all like it, then I know I have something I’ll be happy with down the road. Because one of the main issues with music making is to know if you’ll love your music later on. While you’re in it, you often lose perspective of its true potential

So what does success come down to?

1 – Create personal projects that matter: This is something really important here. Make music, finish your songs, make albums and share them with your friends. Hire someone to make a kickass artwork, make sure it sounds top notch and have something that makes you proud, even years later. Why? Because that is success, honestly. To have your own collection of homemade music is something that creates a portfolio and later on, if anyone looks back at your past work, they can see the dedication and work you put into it.

2- The 1/20 ratio: Keep in mind that one song out of 20 might get attention. Perhaps less. Keeping that ratio in mind, it really brings you down to earth and keeps you humble. Is it worth making music? Hell yes. Make tons of it. Don’t spend forever on that one song you believe will make you famous. Make tons of them, record daily at least one thing, one sound design, one loop… keep yourself engaged in what you love, because you love it, not because it will lead you anywhere.

3- Create your circle of validation: This will take time and patience but if you can find a circle of 5 people you love and that you know have similar tastes to you, then you can broadly share with them. Expect to be frustrated at times but be there to validate their work as well, and remain honest, diplomatic and constructive in any feedback. Make sure that some people of that circle are DJs that often play out so they can test your music in context, if that’s you’re goal. Bonus points if one of those DJs is a social media magician; he might refer you around. I also like to have someone that is very knowledgeable so I can bounce ideas of him/her regarding labels to send my music to.

And have fun!

The rule of thirds in arrangements and mixing

One of my favorite aspects of music making is to use proportional ratios regularly. While this seems perhaps counter-productive when compared with the artistic side of producing music, I use it to eliminate a bunch of technical roadblocks that emerge in the process of decision making. Because making decisions can sometimes end up in roadblocks, you can use this technique as a general rule that you always refer to whenever you have to.

Let me explain how this rule of thirds can give you wings.

The first time I familiarized myself with this concept was when I used the iPhone grid to take pictures. I had read that a tip to take better pictures was to use that grid to “place” your content. To compose your photos according to the rule of thirds, you must imagine your photo divided into nine equal parts using two vertical lines and two horizontal lines. For example, the square in the middle should have the subject of your picture, so it’s perfectly centered, it is also recommended to have something like a detail where the lines cross.

When I practiced this, I immediately saw a parallel with musical arrangements. For instance, any song will have three distinct sections when it comes to the story line (intro, main section, outro). Where each section meets, there must be a pivot, an element of transition. When I work, I always start by dividing the song into equal thirds, then, I’ll divide again so I have nine sections total. Starting with arrangements, they have equal parts, but this will then change as I dive in details of arrangements; some of the “lines” of the grid will be moved around.

TIP: Use markers in Ableton and give names to each section.

What you want in arrangements, is a good balance between expected and unexpected elements.

Using the rule of thirds helps achieve this balance: while you center the main idea of your song right in the middle of your timeline, you can have an overview of where the listener will sort of expect something to happen. Then you can play with that. Either you give the listener something where they expect it, or move it slightly to create a surprise.

The rule of thirds can also help in a few other aspect of your work:

  • Tonal balance: We covered this topic recently and this means splitting your song’s frequency range in three areas (low, mid, high). You can use a shelving EQ to help you with this or you could re-route your sounds into three busses that are per-band. This will allow you to control the tone using the mixer of your DAW. In this case, by simply splitting in 3 bands, you minimize the work of deciding which tone to take.
  • Sound design: We’ve discussed sound design before but I’d like to pinpoint how you can apply the rule here. For instance, think of how a kick is made. There will be the mid punch of the kick, supported by a bit (or a lot) of sub, then a transient on top. Most of my percussion are layered with three sounds. One will occupy most of the space, another will add add body, and the last one will be adding transients or texture. I also find that shuffling with three sounds often makes it difficult to get bored of a sound. The rule of thirds – where you have sound variations – pretty much always works for me. The question to ask is, is there a balance or is there a dominant?
  • Mixing: When I do a mixdown, I always have multiple categories for my sounds. Part of this is that – since I really don’t want all my sounds to be front forward – I’ll have some that are intentionally low, others in the middle, and the loudest one are the ones that are meant to be right in front of me. It’s very soothing for the ear to have these three areas of sound levels because it help creates dynamic range and creates an acoustic feeling of tangible spacing; putting some sounds in the back will give support to the ones who need to be heard. Just like sound design, if you always keep in mind that you’re layering in thirds, this can give your mixes a lot of depth.
  • 1, 2, PUNCH!  This is a technique that I’ve learned in my theater classes, consisting of creating expectations to then mess with the expectations. Basically, you want to introduce a fun sound, and in the pattern introduce it again later, but at the exact same place, then the listener will expect it to come a third time. This is where you can surprise them by either not playing the sound or by bringing something different. Simple, but very effective.
  • AUX/Sends. This might sound a bit much, but I limit myself to not use more than 3 aux/sends. I find that an overflow of effects will make your song messy and unnecessary busy. One of my starting templates has only three sends by default: reverb, delay, compression (or another sound modulation effect such as chorus).
  • Stereo spectrum. I like to see the placement of my sounds in a grid of 3 x 3 zones. It will go as: right, middle, left then, low middle and high. Some of the main sounds will have to be right in the middle (ex. clap, melody), some in the low-middle (ex, bass) and then some elements that are decorative, around. A healthy mix is sort of shaped like a tree: middle low should be strong with bass/kick, then middle left-right and middle-middle are strong too, then some content in the middle-high, with a little presence in the high left-right. You want to be very careful with the zones of low left or right as this could create phasing issues. You want your low end to be in mono, therefore, centered.

There are other examples, but these are the main ones that come to me!