Workflow Suggestions for Music Collaborations

One of the most underestimated approaches to electronic music is collaboration. It seems to me that because of electronic music’s DIY approach people believe they need to do absolutely everything themselves. However, almost every time I’ve collaborated with others I hear them say “wow, I can’t believe I haven’t done that before!” Many of us want to collaborate, but actually organizing a in-person session can be a challenge. In thinking about collaboration and after some powerful collaboration sessions of my own, I noted what aspects of our workflow helped to create a better outcome. I find that there are some do’s and don’ts in collaborating, so I’ve decided to share them with you in this post.

Have a plan

I know this sounds obvious, but the majority of people who collaborate don’t really have a plan and will just sit and make music. While this works to some degree, you’re really missing out on upping the level of fun that comes out of planning ahead. I’m not talking about big, rigid plans, but more so just to have an idea of what you want to accomplish in a session. Deciding you’ll jam can be plan in-itself, deciding to work on an existing track could be another, or working on an idea you’ve already discussed could be a more precise plan.

Personally, I like to have roles decided for each person before the session. For example, I might work on sound design while my partner might be thinking about arrangements. When I work with a musician, I usually already have in mind that this person does something I don’t do, or does it better that I can. The most logical way to work is to have each participant take a role in which they do what they do best.

If you expect yourself to get the most of sound design, mixing, beat sequencing, editing, etc., all at once, you’re probably going to end up a “Jack of all trades, master of nothing”. Working with someone else is a way to learn new things and to improve.

A good collaborative session creates a total sense of flow; things unfold naturally and almost effortlessly. With that in mind, having a plan gives the brain a framework that determines the task(s) you need to complete. One of the rules of working in a state of flow is to do something you know you do well, but to create a tiny bit of challenge within it.

Say “yes” to any suggestions

This is a rule that I really insist on, though it might sound odd at first. Even though sometimes an idea seems silly, you should say yes to it because you’ll never know where it will lead you unless you try it. I’ve been in a session where I’ve constantly had the impression that I was doing something wrong because we weren’t following the “direction” of the track I had in my head. But what if veering off my mental path leads us to something new and refreshing? What if my partner – based on a suggestion that made have seemed wrong at first – accidentally discovered a sound we had no idea would fit in there?

This is why I find that the “yes” approach is an absolute win.

Saying yes to everything often just flows more naturally than saying no. However, if the “yes” approach doesn’t work easily, don’t force it; it’s much better to put an idea aside and return to it another day if it’s not working.

Trust your intuition; listen to your inner dialogue

When you work with someone else, you have another person who’s also hearing what you’re hearing, and will interact with the same sounds and try new things. This new perspective disconnects you from your work slightly and gives you a bit of distance. If you pay attention, you’ll notice that your inner dialogue may go something like “oh I want a horn over that! Oh, lets bring in claps!” That inner voice is your intuition, your culture, and your mood, throwing out ideas; sharing these ideas with one another can help create new experiments and layers in your work.

Combining this collaborative intuition with a “yes” attitude will greatly speed up the process of completing a track. Two people coming up with ideas for the same project often work faster and better than one.

Take a lot of breaks

It’s easy to get excited when you’re working on music with another person, and when you do, some ideas might feel like they’re the “best new thing”, but these same ideas could actually be pretty bad. You need time away from them to give yourself perspective; take breaks. I recommend pausing every 10 minutes. Even pausing for a minute or two to talk or to stand up and stretch will make a difference in your perceptions of your new ideas.

Centralize your resources

In collaborating, when you reach the point of putting together your arrangements, I would say that it’s important to have only one computer as the main control station for your work. Ideally you’d want an external hard-drive that you can share between computers easily; this way you can use everyone’s plugins to work on your sounds. One of the most useful things about teaming up with someone else is that you get access to their resources, skills, materials, and experience. Make sure to get the most out of collaborating by knowing what resources you can all drawn upon, and then select a few things you want to focus your attention on. It’s easy to get distracted or to think you need something more, but I can tell you that you can do a lot with whatever tools you have at that moment. Working with someone else can also open your eyes to tools you perhaps didn’t fully understand, were not using properly, or not using to their full potential.

Online collaboration is different

Working with someone through the internet is a completely different business that working together in-person. It means that you won’t work at the same time and some people also work more slowly or more quickly than yourself. I’ve tried collaborating with many people online and it doesn’t always work. It takes more than just the will of both participants to make it work, it demands some cohesion and flexibility. All my previous points about collaborating in-person also apply to collaborating online. Assigning roles and having a plan really helps. I also find that sharing projects that aren’t working for me with another person will sometimes give them a new life.

If you’re a follower of this blog, you’ll often read that one of the most important things about production that I stress is to let go of your tracks; this is something very essential in collaborating. I usually try to shut-off the inner voice that tells me that my song is the “next hit” because thinking this way usually never works. No one controls “hits”, and being aware of that is a good start. That said, when you work with someone online, since this person is not in the room with you and he/she might work on the track while you’re busy with something else, I find works best to be relaxed about the outcome. This means that if I have a bad first impression with what I’m hearing from the person I’m working with, I usually wait a good 24h before providing any feedback.

What if you really don’t like what your partner is making?

Not liking your partner’s work is probably the biggest risk in collaborating. If things are turning out this way in your collaboration, perhaps you didn’t use a reference track inside the project, or didn’t set up a proper mood board. A good way to avoid problems in collaboration is to make sure that you and your partner are on the same page mentally and musically before doing anything. If you both use the same reference track, for example, it will greatly help to avoid disasters. If you don’t like a reference track someone has suggested, I recommend proposing one you love until everyone agrees. If you and your partner(s) never agree, don’t push it; maybe work with someone else.

The key to successful collaborations is to keep it simple, work with good vibes only, and to have fun.

SEE ALSO : Synth Basics

Using Quad Chaos

I’m proud to announce the release of our first patch – Quad Chaos. I met Armando, the programmer, on the Max/MSP group on Facebook and his background was exactly what I was looking for and we got along very well. Quad Chaos is basically a patch version of what this blog is about: finding ways to have innovative sound design through modulation and chaos.

Speaking of chaos, the only “rule” for using Quad Chaos is to resample everything you do, because we intentionally wanted it to be something that works ephemerally; something you can’t really control and just have to go with. There are many tools out there you can use to do anything you want, but we wanted to create something experimental that can be fun and creative at the same time.

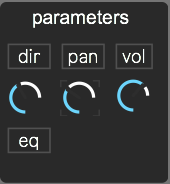
Make sure these knobs are up!

The first thing that appears when you load up Quad Chaos is a screen in which you can add up to four samples. If you hear nothing when you load in a sound, you probably need to raise the volume, direction, or panning. In the demo video, Armando has used short samples, but I find that the magic truly comes together when you load up longer files such as field recordings, things that are four bars long, or even melodic content. I don’t really find that Quad Chaos works well if you load a sample that has multiple instruments in it, but I still need to explore it more and I could be wrong about that. My advice is to start with one sample that you load into Quad Chaos, and then with your mouse, highlight a portion of it. Personally, I like to start with a small selection based on the waveform content I see. I’ll try to grab one note/sound, along with some silence. Once you make a selection, you’ll hear a loop playing that might sound like something in a techno track…but this is just the beginning.

While it’s very tempting to load in all four samples at once, if you do things this way, Quad Chaos will get out of control quickly; I like to start with one layer and then build from there.

Once you isolate a section that loops to your taste, it’s time to engage the modulation. One trick that I like to do with any synths or gear is to move one knob to its maximum and then minimum, quickly then slowly, to simulate what an LFO could do. When I find something I like, then I’ll assign an LFO or envelope to it and start my tests.

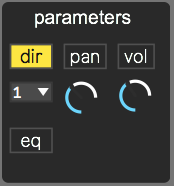
For example, in Quad Chaos you can assign the first modulator to a direction; you click on “dir” and you’ll see numbers underneath, which represent the modulation source. To access to the modulation section, use the drop down menu and pick “mod” and you’ll see the first modulation.


Depending on how you set it up, you’ll start hearing results as your sound now has modulation on and in full effect. I know the lack of sync in the plugin might seem odd, but to repeat myself, a lack of sync is needed to create “chaos” and this approach gives more of an analog feel to what you make; you can get some pretty polyrhythmic sequences because of this as well.

As I mentioned earlier, how I start my sound is usually just with an LFO set to sine curve and the I explore slow/fast oscillation to see what kind of results I get. I’ll find a sweet spot somewhere in the middle or something, then I’ll try all the different oscillations to hear other results. I’m very much into the random signal just because it will create the impression of constantly “moving” sonic results. Afterwards, I have a lot of fun scrolling through the recorded results of these experiments and then from them I pick one-bar loops/sections. I find that the random signal is always the one that gives me pretty interesting hooks and textures.

Once you’re happy with the first layer you’ve created with the first loop, you can use the other loops to create complex ideas or simply to add a bit of life to the first one. I’ve seen a few artists using Quad Chaos already and everyone seems to comes up with really different use-cases and results. One thing I often see is people dropping some important samples of a production they’re currently working on into the plugin to get some new ideas out of them. My friend Dinu Ivancu – a sound designer that makes movie trailers – tried out Quad Chaos and had some very lovely feedback of his own:

I love it JP!

[Quad Chaos] is a fantastic tool. I would love it even more if it had a few quality live options. Still though, as is, it’s an amazing tool to generate live and organic sounds out of ordinary samples. I’ll send you something I made with it and just two soft-synths. It’s fantastic. That reverb is AMAZING! Congrats – you guys did a great job. I’ll try to help [Quad Chaos] get to a wider audience as it’s very, very good for film work!

Dinu Ivancu

I think what Dinu is excited about here is the creation of small-but-detailed organic, improbable textures that are difficult or laborious to make in a very stern, organized DAW. Breaking down the strict boundaries of your DAW opens doors to creating sounds you’d hear in the real world that are completely off-sync and un-robotic. Quad Chaos also includes a built-in reverb to help create space for your sounds (and there are other effects included as well!).

Jason Corder, “Offthesky”, sent us a neat video of himself working with Quad Chaos. Jason shows us how you can record a song live, only using the plugin. It’s very spontaneous; he’s using the macros to create external automation to keep a minimum structure. This approach is something I didn’t initially think of, but seeing Jason do it makes me think that I’ll explore that avenue next time I use it!

You can get a copy of Quad Chaos here and if you make songs or videos, I’d be more than happy to see how you use it!

SEE ALSO : Creating tension in music

Choosing a genre for your music

Every now and then I encounter people I work with who have trouble choosing a genre to produce in because they like a wide variety of different genres and have too many ideas. I’ve also experienced this myself in my early years of DJing, and it was a bit of an issue for my sets. Given my early experiences, I’m well situated to understand how it can feel to have too many ideas and to have trouble settling on a specific genre or style. I’d like to discuss how you can deal with this problem in your own music-making.

As a DJ in the late ’80s and early ’90s, I was very much interested in emotional music and techno. There was some commercial dance music that I would dig and mix with techno in my sets, but the reactions I’d get when I’d do this were often not very good. There are legendary DJs like Laurent Garnier who are masters of surfing different genres in a single set, going from one to another seamlessly and having people love it, but this is an art in itself. To understand how to do this, you have to understand how the music you’re playing is made and how it works, in terms of rhythms and harmonies. But once you do, anything is possible. Now, software like Traktor or Mixed In Key can help with this type of mixing; the flexibility we have now with modern technology provides us with many options to constantly reinvent ourselves.

But what about music-making and producing as opposed to DJing? How can you choose a genre to make if you are interested in many?

I like to have a very open mind about producing in terms of taking influences from multiple genres and styles; I’d say that it can actually be something positive once you understand how your brain works. Many people feel that cross-breeding genres will end up a mess, but just like DJing, it can work. Let me discuss how:

One genre, one alias

A very simple way to approach producing in multiple genres is to use the Uwe Schmidt (Atom) approach where you make and explore making music in one genre, under one alias. Schmidt has a ridiculous amount of aliases he’s been using to make all the music he’s inspired to. He doesn’t hold back, he just makes music and will do whatever he feels like doing in-studio. He might make techno some days, but also has a funny salsa-flavoured house project under the alias Senor Coconut. I’ve always felt that making music should be comparable to an ultimate feeling of freedom. If you don’t feel free, your brain is stuck on something. I think that easiest way to approach solve feeling stuck is to make music using my parallel production technique. When you save your projects, make sure to have folders or categories so you know what project sounds like what.

The advantages of working in parallel this way include:

  • You’ll never run into limitations or lack inspiration.
  • Learning techniques from multiple genres can be a very enriching experience.
  • You get to play with different sounds and tools in each session which will never be boring.
  • Exploring different genres can ultimately lead you to new breeds of styles, spawned from mixing two worlds together which creates your own original identity.
  • Perhaps you’re not aware that you are very good at making a specific genre until you’ve explored it.

However, there are also disadvantages to working on multiple styles in parallel such as:

  • It might take longer to get recognition in one genre if you’re all over the place. “Jack of all trades, master of nothing” holds true.
  • You might never get really solid at working in any genre. Each genre has different approaches and techniques which can take time to master.
  • Getting gigs might become confusing for promoters.
  • Managing multiple accounts/identites on Soundcloud or elsewhere can be a bit of an issue.

So, where should you start with deciding on your genre(s)?

I’ll speak for myself and say that for me, things started to make sense once I saw Plastikman do a live set in 1998 (I’ve said this in countless posts, sorry). I realized that what happened that day was a barrage of multiple personal insights:

  • His set was so inspiring, sounded so new, innovative, and different than everything else, that I fell in love with the sound. It was some sort of deep minimal, with a dub approach. My mind had a reaction of “OMG when this set is over, where am I going to hear this again?!” Back then, when a show was done, it was over. Insight 1: After this show, my brain felt I needed to make music to feed itself.
  • One of the other things that inspired me was how he was using panning and the stereo image to have sounds move in the space in real time. It was truly an exciting experience to hear movement. I felt that I had not heard this enough before and not in a live context. Insight 2: My inspiration came from seeing and hearing this creativity and exploration of new sounds.
  • A last point that’s important here was that this event was well attended and people really understood what was going on and dancing and enjoying the set. I was in awe to see that. Some events I play, people are on the dance floor talking the entire time which drives me bonkers. Insight 3: I wanted to be part of this community of people who liked exploratory music.

When you decide on a genre, there are different things to keep in mind: what are you making? Who are you making it for? Why are you making it? If you’re making music in multiple different genres, your purpose might not be clear, but once it is, it will make more sense for you to trim your genres of interest down to only a few (ideally, just two). I like to encourage people to be interested in two styles because you might get bored of one, or it will become difficult to introduce new elements to your routine.

There’s another important thing to keep in mind when choosing a genre to work in: before you get really good at it, that genre might go “out of style.”

Is working in an outdated style a bad thing, though? Well, when you love something deeply, you usually don’t care if it’s less popular because that genre is you in the end. However, if your goals are releases, bookings, etc., it might get tricky. When minimal techno’s popularity started waning around 2009, many DJs and producers all jumped on the house bandwagon – sometimes not even liking it – they felt they needed to make house if they still wanted to get booked.

To summarize, I think that if you’re not yet set on one or two genres, there’s a part of you that’s still searching for your style. It might take time to figure it out, but I believe that going out and really enjoying music, then listening to it at home, will help you narrow down your search.

SEE ALSO : Experimentation in music: how far can you go?

Synthesizer Basics

I’ve realized that using synths is a bit of an esoteric process for many (for me it definitely was for a while), so I’d like to share with you some synth basics. I used to read things online in-depth about synths, but didn’t feel like it was really helping me do what I wanted to exactly. Synths can create certain sounds, but the ability to shape these sounds into something you like is another task. When I dove in the modular rabbit hole, I felt like I needed to really grasp how to use them. After years of working with synths, presets have a actually provided me with many answers as to how things are made, and I’ve ended up learning more with presets than with tutorials. It’s probably useful for some to understand some basic concepts with regards to how to use synths in order to create lush or complex sounds, and in order to develop your own set of synth sounds. I’m not going to explain every synthesis concept, but I’ll cover some synth basics.

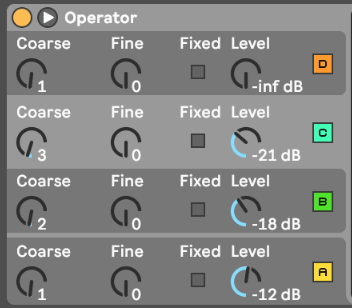
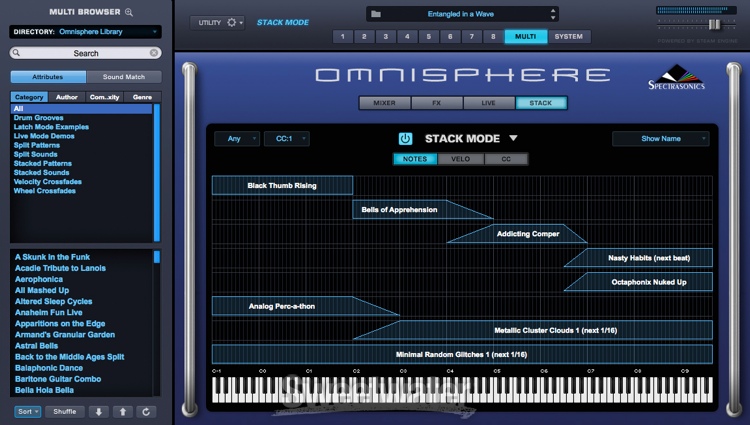
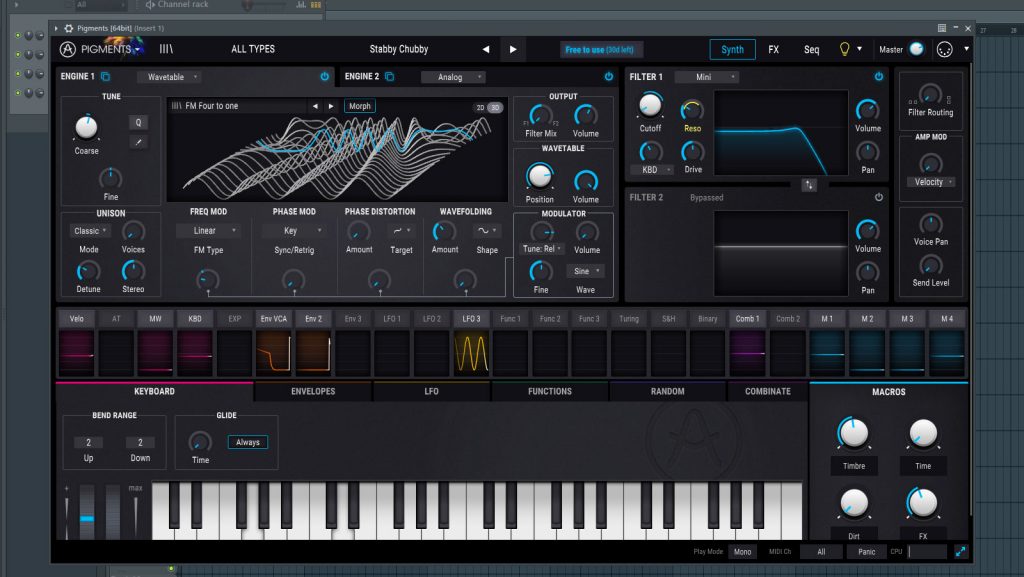
My personal go-to tools when I get to work with synths are Omnisphere, Pigments, and Ableton’s Operator. They all have different strengths and ways to work that I feel fulfill my needs. When people talk synths, they often discuss which ones are “best”, but I find that these three are pretty powerful, not only for the sounds they create, but for how they work. Speaking of workflow, if a synth doesn’t create something I like quickly, I usually get annoyed as I want to spend time making music and not just spend an hour designing a sound. In the case of these three, they all have several oscillators that can quickly be tweaked in a way you want.

Oscillators

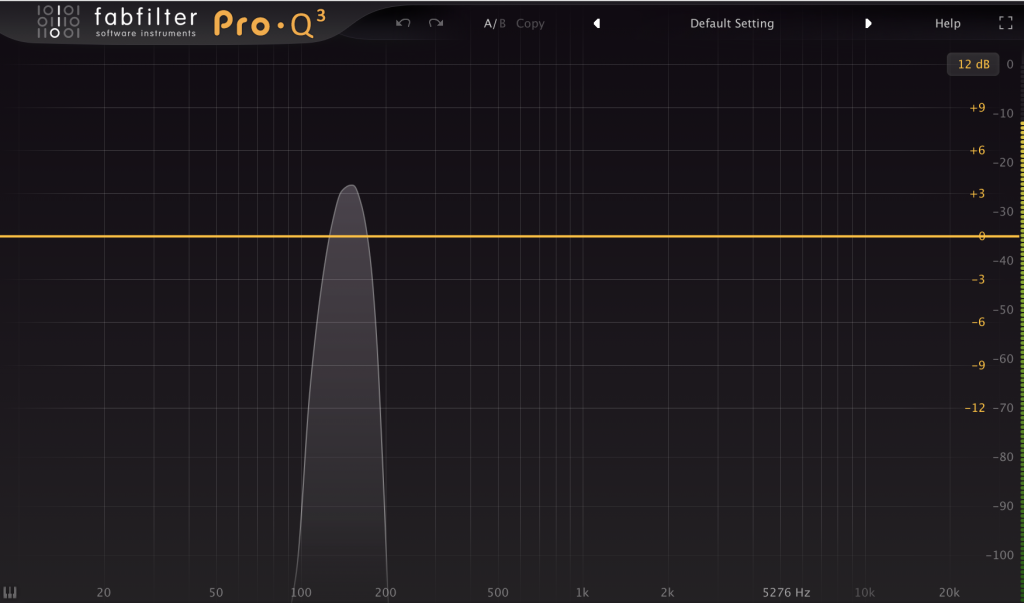
Imagine the oscillator as a voice (I’ll explain polyphony another time which is a slightly different topic). The oscillator can shape sounds in various ways by creating a waveform: sine, square, triangle, saw, etc. The waveform has certain characteristics and difference waveforms have more or fewer harmonics. If you play a note, you’ll first see that it will create a fundamental frequency (as in, the note played has its own frequency), followed by the harmonics. Sine waves, because of their simplicity, will have basically no harmonics, but a saw wave will have a lot.

The sine wave is a fundamental frequency and has no harmonics.
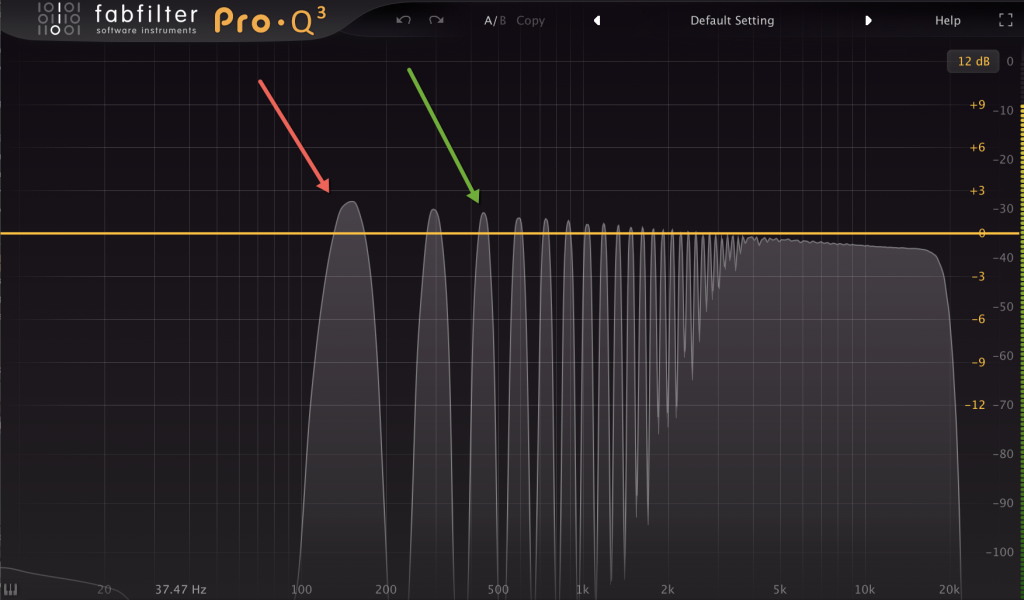
A saw wave is different. The red arrow shows the fundamental frequency, and the green, the harmonics.

As you can see, sine and saw waves create different results, and you can combine them to create richer sounds. When there are more harmonics, the human ear tends to hear them as a sound that is richer, as it covers more frequencies (yes, this simple explanation for a more complex topic but I’ll leave for another time).

So what should you take away from this? Well, when you see a synth with multiple oscillators, realize that you can combine them in sound designing. One basic synth exercise I give to students is to start with one oscillator, like a sine wave, and then add a second one, pitched a bit higher (one octave) using a triangle wave, and use a 3rd oscillator that is a saw, pitched up again. If you play the same note, you’ll see the content is altered because the harmonics now interact to create new “sonic DNA”.

This simple starting point should pique your interest in exploring the combinations of different ways to set the oscillators in order to shape different sounds. Like I explained in past article, sounds are combinations of layers that create different outcomes; same goes for synths and oscillators. Synths are a rougher approach and it takes time at first to feel like you’re getting somewhere, but the more you practice, the better you get, and then you can event use a synth to bring richness to samples you layer. For example, I frequently use a low sub sine to give bottom to wimpy kick.

Envelopes

After deciding on the oscillator content of your synth, next comes shaping it. This is done with an envelope ADSR (Attack, Decay, Sustain, Release). The envelope tells your synth how to interact with the input MIDI notes you’re sending it. It waits for a note, and then depending on how the envelop is set, it will play the sound in a way that will shape both the amplitude (volume) and timing. For example, a fast attack means the sound will start playing as soon as the key is pressed, and a long release will let the sound continue playing for a little while after you release it. Each oscillator can have its own envelope, but you could have one general envelope as well. The use of envelopes is one of the best ways to give the impression of movement to a sound. I’m addicted to using the Max envelope patch and will assign it to a bunch of things on all my sounds, but I had to first learn how it worked by playing with it on a synth. While the envelope is modulating the amplitude, it can also be used to shape other characteristics too, such as the pitch.

Filters

You might already be familiar with filters as they’re built into DJ mixers; filters allow you to “remove” frequencies. In the case of a synth, what’s useful about filters is that most synths have filters that can be assigned by oscillator, or as a general way to “mold” all oscillators together. If you take a low pass filter, for example, and lower the frequency, you’ll see that you’ll smooth out the upper harmonics. In case of pads, it’s pretty common that multiple oscillators will be used to make a very rich sound but the filter is the key as you’ll want to dull out the result, making your pad less bright and defined.

LFOs

LFOs are modulators, and as you know, are one of my favorite tools. I use them on many things to add life and to give the impression of endless, non-repetitive changes. I’ll even sync them to a project and use them to accentuate or fix something. In most synths you can use LFOs to modulate one or multiple parameters, just like envelopes. What’s fun is to use a modulator to modulate another modulator; for example, I sometimes use LFOs to change the envelope, which helps give sounds different lengths for instance. Using LFOs on filters is also a good way to make variations in the presence of your harmonics, creating different textures.

Noise

One of the most misunderstood points in synthesis the use of noise. Noise is a good way to emulate an analog signal and to add warmth. One of the waveform types an oscillator can have is noise; white noise or other. You can add it in the high end or have it modulated by an envelope to track your keys. I like to keep noise waves very low in volume, and sometimes filter them a bit. But that said, I use a noise oscillator in every patch I design. Even a little bit of noise as a background layer can create a sense of fullness. If you record yourself with a microphone in an empty, quiet place, you’ll notice there’s always a bit of background noise. The human ear is used to noise and will be on the lookout for it. Hearing noise in a song or sound creates a certain sense of warmth.

Why do I love Omnisphere and Pigments?

Both Omnisphere and Pigments are very powerful for different reasons. Omnisphere is one of the most used software tools in the sound design industry, as well by composers who write film scores. Hans Zimmer is known to use it, among others. It has more oscillators that Operator, not just in quantity, but also in emulations of existing synths. Fore example, you could have your lower oscillator to be emulating a Juno, then add a Moog for the middle one and end up with an SH-101. I mean, even in real life, you can’t possibly do that unless you own all three of those synths, but even then it would be a bit of a mess to organize those all together. Plus, Omnisphere’s emulators sound true to the originals. If this isn’t convincing enough, Omnisphere also comes with a library of samples that you can use to layer on top of the oscillators, or import your own. Add one of the best granular synthesis modelers and you are set for endless possibilities.

Pigments by Arturia
Pigments by Arturia

Pigments is made by Arturia, and it was made with a very lovely graphical approach, where you have your modulators in the lower part of the UI and the sound frequencies in the upper part. You can then easily and quickly decide to add modulation to one parameter, then visually see it move. It’s one of those rare synths that has modulation at its core. This is why I love it; it provides me with numerous quick sounds resulting from deep or shallow exploration.

SEE ALSO : Using MIDI controllers in the studio

Balancing a Mix

Balancing a mix is simple “mixing 101” theory; it’s usually fast and simple to do. I could go into a lot of detail about mix balancing, but the point here is to provide you with some quick information that you easily can put to practice to get quick results yourself. Hopefully this will also make you more curious about balancing and you will research it more on your own.

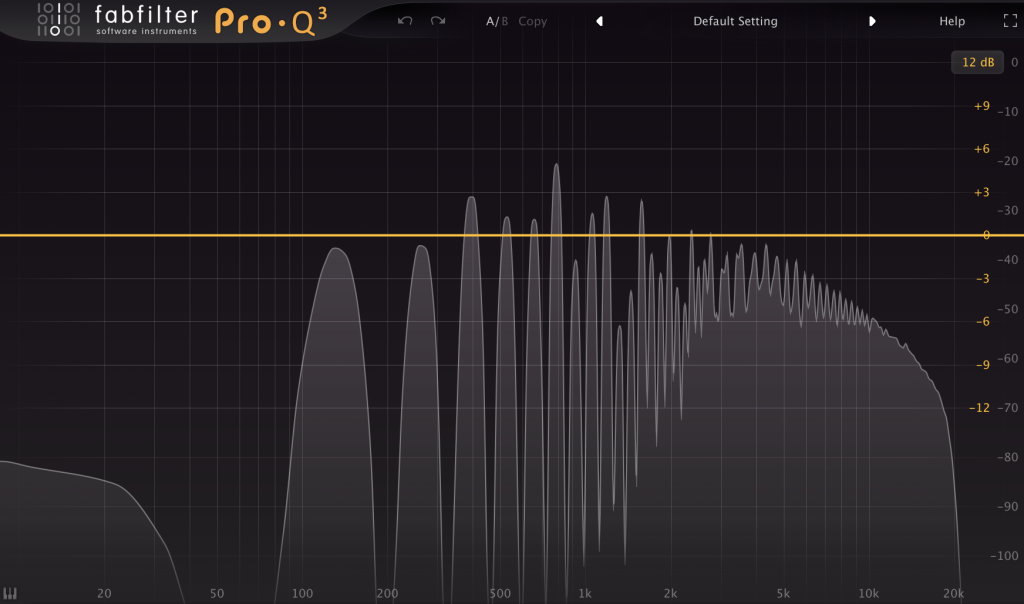
One of the very first things I do when I create a new project or mix for a client, is to drop Fabfilter Pro-Q3 on the master. Not only do I love how the FFT looks (the frequency graphic analysis), but I also love that I can make cuts, or even dynamic cuts, that react to the incoming signal. The problem with the Spectrum Analyzer from Ableton is that it’s ugly and can be a bit confusing; other than displaying information, it doesn’t do anything. The Pro-Q3 needs no adjustments; you drop it on a track and it’s ready to be used. With Pro-Q3, if you hover your mouse pointer over the graphic, you’ll be also shown the peaks with the precise frequency target. It’s hard to go wrong here.

That said, let’s say your track is about 85% done, and you’re about to switch to mixing mode to see how the track will turn out. At this stage, you know you need to have one thing in mind: balance. People who use a reference track find that there might be a tone that seems to be right to emulate, such as a very bassy or bright track. However, I find that when it comes to a rough mix, balancing the mix before referencing will give you a more objective outlook of your work so far. When I work with clients who are in this stage of their project, this is what I advise: if you’ve been working on something that’s too bright (eg. high frequencies being pushed over 0db), you’ll lose perspective of how piercing that might feel in a club. Darker mixes (eg. high frequencies below 0bd) will sound more organic, mysterious. Human ears tend to get excited by bright mixes at first, but in a loud environment, they get tired. Engineers often get “tired ear syndrome” at the end of a day because of over-exposure to bright sounds.

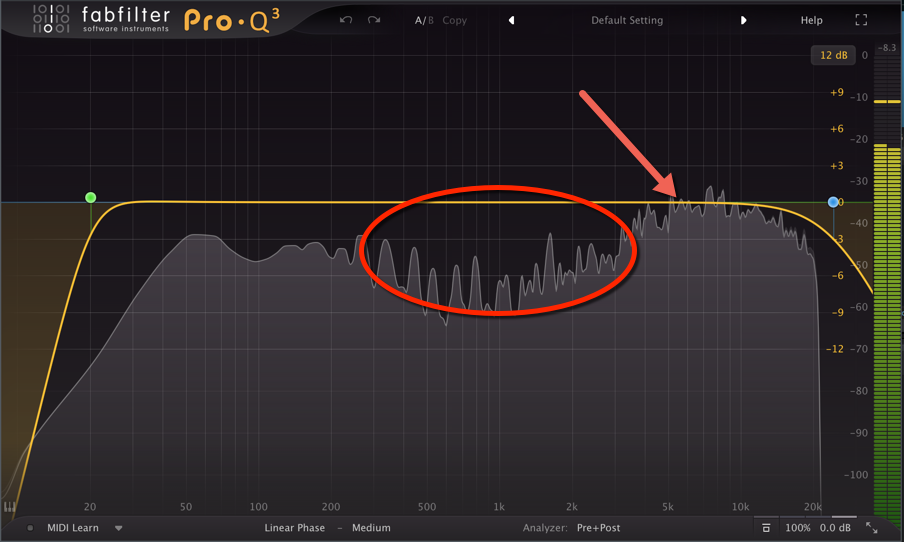
If you play your track and then a reference track (which should be inside your Project, in a channel that is muted unless you want to AB your mix), you might see some very different EQ curves on the graphic analyzer comparatively. In the middle of the graphic, there’s a line that points to zero dB. Ideally, you want your signal to remain under that throughout the entire frequency spectrum; by doing this you’re creating a mix that’s considered balanced. You will most likely see some “holes” in your mix or some sounds that jump over the zero line (spikes).

The circle points a hole and the arrow points to a potential overload.

One of the things that people sometimes do is boost everything to reach the zero line, but engineers go about this a different way. We will lower the louder zones with a shelving EQ and – using the gain on that plugin – we’ll raise the volume, which will automatically adjust the lower frequencies to reach the 0dB line. This simple trick alone can save you tons of time and headaches. In the case above, I’d lower everything above 3k, raise everything by 3dB and probably give a nudge at around 1k with a wide resonance.

But will this alone solve all your balance problems? The answer is no, it won’t.

The idea of using this technique is not to get into the habit of relying on EQs or tools on your master track to fix things, but more to help you understand how to balance the sounds in your mix as you go. One of the most valuable things you can do is solo each channel and look at the analysis graphic to see what’s truly going on with that sound alone. I usually take some time to fix a channel’s content with its own EQ so that it falls under 0dB on the master. If you do that with each channel, you’ll have a good base to start working from.

What about frequency spikes that go over 0dB? Well, it depends, really. I’ve heard some really good sounding songs where there’s a spike or two somewhere. Usually, spikes can work if they’re not too resonant and if they don’t go beyond 3-6dB at the most. Keep in mind that spikes will really stick out of a mix, and at loud volume they could be imposing if the quality of the system isn’t best.

One of my favorite plugins to put on a track is a channel strip, and there are many out there for you to choose from. Neutron 2 sticks out to me as one of the best out there, based on all the options provides. It also allows each instance of the plugin to “talk” to one another, so you can do useful side-chaining between numerous channels. I’d suggest trying out a few different channel strips, but make they have at least a 3-band EQ as you want to be able to do shelving to balance out your channel(s). Balancing a mix is one of the simplest things you can in the early stages of mixing, and it makes a world of difference!

Let me know what you think and happy mixing to you.

SEE ALSO : Common mindsets of musicians who have writer’s block and how to solve them