Tag Archive for: compressor

Creating organic sounding music with mixing

I’m always a bit reluctant to discuss mixing on this blog. The biggest mistake people make in mixing is to apply all the advice they can find online to their own work. This approach might not work, mostly because there are so many factors that can change how you approach your mix that it can be counter-productive. The best way to write about mixing would be to explain something and then include the many cascades of “but if…”, with regards to how you’d like to sound. So, to wrap things properly, I’ll cover one topic I love in music, which is how to get a very organic sounding music.

There are many ways to approach electronic music. There’s the very mechanical way of layering loops, which is popular in techno or using modular synths/eurorack. These styles, like many others, have a couple main things in mind: making people dance or showcasing craftsmanship in presenting sounds. One of the first things you want to do before you start mixing is to know exactly what style you want to create before you start.

Wherever you’re at and whatever the genre you’re working in, you can always infuse your mix with a more organic feel. Everyone has their own way, but sometimes it’s about finding your style.

In my case, I’ve always been interested in two things, which are reasons why people work with me for mixing:

  1. While I use electronic sounds, I want to keep them feeling as if they’re as organic and real as possible. You’ll have the impression of being immersed in a space of living unreal things and the clash between the synthetic and the real, which is for me, one of the most interesting things to listen to.
  2. I like to design spaces that could exist. The idea of putting sounds in place brings the listener into a bubble-like experience, which is the exact opposite of commercial music where a wall of sound is the desired aesthetic.

There’s nothing wrong with commercial music, it just has a different goal than I do in mixing.

What are some descriptions we can apply to an organic, warm, rounded sound?

  • A “real” sounding feel.
  • Distance between sounds to create the impression of space.
  • Clear low end, very rounded.
  • Controlled transients that aren’t aggressive.
  • Resonances that aren’t piercing.
  • Wideness without losing your center.
  • Usually a “darker” mix with some presence of air in the highs.
  • Keeping a more flat tone but with thick mids.

Now with this list in mind, there are approaches of how to deal with your mix and production.

Select quality samples to start with. It’s very common for me to come back to a client and say “I have to change your kick, clap and snare”, mostly because the source material has issues. Thi is because many people download crap sounds via torrents or free sites which usually haven’t been handled properly. See sounds and samples as the ingredients you cook food with: you want to compose with the best sounding material. I’m not a fan of mastered samples, as I noticed they sometimes distort if we compress them so I usually want something with a headroom. TIP: Get sounds at 24b minimum, invest some bucks to get something that is thick and clear sounding.

Remove resonances as you go. Don’t wait for a mixdown to fix everything. I usually make my loops and will correct a resonance right away if I hear one. I’ll freeze and flatten right away, sometimes even save the sample for future use. To fix a resonance, use a high quality EQ with a Q of about 5 maximum and then set your EQ to hear what you are cutting. Then you lower down of about 4-5db to start with. TIP: Use Fabfilter Pro-Q3, buy it here.

Control transients with a transient designer instead of an EQ. I find that many people aren’t sensitive of how annoying in a mix percussion can be if the transients are too aggressive. That can sometimes be only noticed once you compress. I like to use a Transient designer to lower the impact; just a little on the ones that are annoying. TIP: Try the TS-1 Transient Shaper, buy it here.

Remove all frequencies under the fundamental of the bass. This means removing the rogue resonances and to monitor what you’re cutting. If your bass or kick hits at 31hz, then remove anything under that frequency. EQ the kick and all other low end sound independently.

Support the low end with a sub since to add roundness. Anemic or confused low end can be swapped or supported by a sine wav synth that can be there to enhance the fundamental frequency and make it rounder. It make a big difference affecting the warmth of the sound. Ableton’s Operator will do, or basically any synth with oscillators you can design.

High-pass your busses with a filter at 12db/octave. Make sure you use a good EQ that lets you pick the slope and high-pass not so aggressively to have a more analog feel to your mix.

Thicken the mids with a multiband compressor. I like to compress the mids between 200 and 800. Often clients get it wrong around there and this range is where the real body of your song lies. The presence it provides on a sound system is dramatic if you control it properly.

Use clear reverb with short decay. Quality reverbs are always a game changer. I like to use different busses at 10% wet and with a very fast decay. Can’t hear it? You’re doing it right. TIP: Use TSAR-1 reverb for the win.

Add air with a high quality EQ. Please note this is a difficult thing to do properly and can be achieved with high-end EQ for better results. Just notch up your melodic buss with a notch up around 15khz. It add very subtle mix and is ear pleasing in little quantity. TIP: Turbo EQ by Melda is a hot air balloon.

Double Compress all your melodic sounds. This can be done with 2 compressors in parallel. The first one will be set to 50% wet and the second at 75%. The settings have to be played with but this will thicken and warm up everything.

Now for space, I make 3 groups: sounds that are subtle (background), sounds that are in the middle part of the space, and space that are upfront. A mistake many people make is to have too many sounds upfront and no subtle background sounds. A good guideline is 20% upfront as the stars of your song, then 65% are in the middle, and the remaining 15% are the subtle background details. If your balance is right, your song will automatically breathe and feel right.

All the upfront sounds are the ones where the volume is at 100% (not at 0db!), the ones in the middle are generally at 75%, and the others are varied between 50% to 30% volume. When you mix, always play with the volume of your sound to see where it sits best in the mix. Bring it too low, too loud, in the middle. You’ll find a spot where it feels like it is alive.

Lastly, one important thing is to understand that sounds have relationships to one another. This is sometimes “call and response”, or some are cousins… they are interacting and talking to each other. The more you support a dialog between your sounds, the more fun it is to listen to. Plus it makes things feel more organic!

SEE ALSO : More tips about working with samples in Ableton

The EQ and compression combo (Pt. 3)

After going into details with regards to EQ and compression, in this post I’ll cover some practical tips on how they work well together. I’ll try to also clarify why many engineers will tell you that all you need is these two tools to accomplish most of the work in mixing and mastering.

Here are a couple terms and ideas that have to do with this topic:

  1. There are no rules for how to use EQs or compressors. You’ll read many different views online, and some people will affirm loud and clear that their point of view is right, but after 20 years of trial and error, I still feel that I’ve accomplished a lot of great things when I knew less than now. Relying on your ears is really important. Some of the most innovative trends involve people who have no idea what they’re doing else than following their gut feeling.
  2. Substractive correction. It involves only cutting the junk out.
  3. Coloring correctives. This usually means that you’ll boost frequencies. Sometimes, cutting might necessary.

To start with, I’d point out that in mastering or mixing, one of the most common chain would look like this:

[Corrective EQ]  –  [Compression]  –  [Color EQ]

There’s precise logic behind this. Basically, you want to take the rogue frequencies out first, compress and readjust the good ones with the compression, and finally adjust the tone or highlight details with a coloring EQ. My personal preference for better results would be that whenever I cut, I do it with a pretty narrow Q (resonance) on the EQ. A great starting point is to start with 2 or 3 and then adjust. Don’t hesitate to use visual reference of the FFT that is often included in the EQ’s display, especially if this technique is new to you. Then, I’d cut about 3dB at first, up to 5. You see how this changes your sound by bypassing the EQ and comparing.

When it then comes to compression, there are a few different things you could do here. For instance, if you go with an aggressive setup, then you’ll beef up what you have “open” by cutting away the bad frequencies. I’d suggest starting with a more exaggerated approach to see what will pop as annoying. It might not be possible to hear what’s wrong if you don’t push the sound to its limit.

Once you see and hear issues more clearly, you can cut again, then you roll the compression into parallel mode to have some of the incoming dry signal mixed with the compression.

If you haven’t explored the side-chain frequencies, this is an option where you can decide that your compressor won’t apply anything starting at the target (ex, anything under 100hz). With this, you might want to filter only a part of your song with the EQ and then compress to accentuate the part you want to put to front.

The last process in the chain is the color EQ. You can take any EQ you like but ideally, I’d go for either an analog emulation or a shelving EQ. Those will provide a nice enhancement to complement what the compressor has been doing. For coloring, you can explore. One way to approach it is to completely exaggerate one band to see how it sounds, and then roll down. This is not only very interesting for sound design, but also for mixing more subtly annoying details. It can help build body for a sound that feels week too.

Examples of where to start – EQ and Compression

A pad that that lacks body and roundness. In this case, it’s most likely that a resonance is poking through too loudly and that good frequencies are hidden behind it. You could start by checking if there is one peak on the spectrum and with your corrective EQ, with a not so wide Q (ex. 1.5 to 3), try to bring that peak down pretty severely with a cut of 5-6dB. Get the threshold of your compressor to meet the highest peak and then adjust the output to be the same as the input. With the shelving EQ, bring the mids up but 2-3dB.

A kick that lacks bottom. This might be related to the mids of the kick that are too loud. You could lower them by 4-5dB, then compress with a ratio of 8:1. The shelving EQ should then bring the lows under 100hz up by 4db. If that doesn’t do, cheat by using the corrective EQ to notch up a bell curve at 50hz.

Percussion that are harsh. This is usually because one frequency is resonating around 4 to 8khz. It’s hard to say but try to cut by 8dB and scan around to see if there’s at any point, something more comfortable. Bypass to double check and then adjust your cut so that you can make the resonance almost there. Compress with a fast attack to control the transient and glue them. The shelving EQ could be used to lift the highs.

EQ suggestion: The TDR SlickEQ GE will do a great job for correcting.

Compression: The new SphereComp is super lovely and affordable. I tested it in sound design and it does really nice gluing.

Shelving EQ: I tried the demo of EVE-AT1 and I think you’d like it just like I did. The price is incredibly good for what it offers!

SEE ALSO : Saturation Tips and Hacks

Tips for compression: The Multi-band compressor (Pt. 2)

Continuing with more compression tips, I’d like to discuss of my all time favorite tool for anything and everything: the multi-band compressor. For many, this beast is a bit of a difficult tool to tame, but I’d like to break it down for you so you can include it in any of your routine and needs. In order to continue, I hope you’ve first read the first post about compression, and also the two posts about how to use EQs.

Compression guidelines

Common Use-Cases for Compression

Controlling harshness. Using a compressor, you can set the attack to be fast and the release to also be pretty fast. This makes the whole action of the compressor fast, controlling any aggressive sounds and taming them. If the attack is too fast however, it can distort, so you need to juggle with the settings to find your sweet spot.

To add punch. This is the opposite of harshness. You’ll want the attack to be slow and the release to be fast. The compressor won’t jump on the transient immediately but will instead create some snappiness. The ratio should be around 5:1 or even higher to achieve this effect in most situations.

To add thickness. Using your compressor in parallel mode, you can set it to about 50% wet/dry, then compress with a medium attack and a medium-fast release. I’d make sure the ratio is as high as possible too. If your compressor doesn’t have a parallel option, then you can use the compressor in a AUX/Send bus.

To glue together a mix. Very similar to thickness and punch, you’ll want to add this to multiple channels and busses at once. Again, parallel compression, slow attack, high ratio. That should do it. Experiment with exaggerated effects and then tone it down.

To sum it up, a fast attack makes the compressor react quickly, which means it is there to control something. A slow attack is to enhance the beginning of the sound. The ratio is how much of that effect you want in action, and the release is for how long.

Multiband action

The multi-band compressor works exactly as the use-cases explained above, but with a multi-band compressor, we can set a range of frequencies to be affected. Therefore, you can set thickness in the mids, control the high-mids for harshness, and enhance the high’s transients with a single compressor, but with different settings for each section.

The multi-band compressor has an additional feature: the use of crossovers that set points for where each section starts and ends. A crossover is simply a frequency you set. For instance, Ableton’s 3-band multi band will have 2 of crossover frequencies. You set the lower crossover which will set where the low end ends in the mids (ex. 200hz) and the other crossover will be where the mids end and the highs start (ex. 6khz).

My perspective on multi-band compressors is that I use them like a shelving EQ where I control each section’s aesthetics in a different way. You can then shape the tone of a sound or mix, or extract minute details. Ideal for finishing touches, multi-band compression can also be used to bring forward parts of your sounds in the most effective way.

Now, here are some situations where the effects of multi-band compression can be useful:

  • Wimpy percussion: If your percussion needs presence, thickness and power, set your crossovers so you can control what’s happening between 200hz and 800, then up to 3khz. Beef up the first section with slow attack and high ratio and aim to add punch up there (refer to the notes above regarding how to do this).
  • Pale pad: Again, say a weak pad needs presence, beefiness between 250 and 600 hz. I’d also compress between 4 and 8khz to add some shimmering, which is like adding thickness. You could even lower your section to hit all the way down to 90hz to get some analog feel.
  • Crazy swirl: Sometimes transitional effects are great but can be not appropriate for your song. I like to control the highs over 7khz in a way were they don’t hit aggressively but will have the mids over 1khz enter smoothly. This is a way to control the harshness and presence; often very useful to create wobble, rubbery movement.
  • Dull mix: A dull mix usually needs brightness which can be created by stimulating the highs and mid highs. This can be a combination of adding thickness or stimulating the transients. I’d say try sharp sections around 4khz to 8, then another one until 11khz and even compress above that with a 3rd section to create what we call pixie dust.
  • Stellar reverb: A multi band with a reverb is pack of fun for me! I like to beef up the mids above 300hz and also create thickness between 2khz to 6. You can then control the levels to decide on the tone of the space you’re creating for your song.
  • Deep kick design: Compress a section under 50hz and then another until 120, plus a last one that goes all the way to 500hz. I can guarantee you that if you have the lower sub purring, then you can also add a bit of punch around the mids to have a super deep, but punchy kick.

When it comes to my favorite multi-band compressors, here are some of them:

Neutron 2 (Izotope)

General tool for mixing that makes pretty much the best all around assistant to deal with numerous problems. Transient shaper, exciters, gate, compressors and all of them are in multi-band mode. You can’t get better than that.

Drawmer 1973 (Softubes)

The Drawmer compressor is amazing for creating ambient so imagine if you can set it in multi band mode, then you get awe dropping moments.

Fabfilter Pro-MB (Fabfilter)

Elegant, precise and transparent would be the best way to describe this one. Really useful for the finishing touch of your mixdown.


SEE ALSO : The EQ and compression combo (Pt. 3)

Tips on how to pick your EQs and use them (Pt. I)

People often ask me about my opinions on what the best audio plugins are, and there are no doubts that investing in quality EQs and compressors is one of the most important things you can do for both sound design or mixing. You can do pretty amazing things just with EQ and compression, but of course you need to understand your tools to make the best of them. In this post I propose some exercises and tips, as well as covering the main tools I have gathered through the last years and my thoughts on the best EQ plugins.

Types of Equalizers

There are many types of EQs and I believe some are more important than others. It took me a while to understand how to fully use them all and how to select the right one for specific situations. This subject is actually so vast and complex, I could make a series of multiple posts and I wouldn’t get through it. I’ll try to avoid being too technical and will explain them in simple terms so anyone can understand.

The way I approach EQs are based on different actions:

  • Corrective. Sometimes a sound will have part of it that will feel aggressive and annoying. I will do corrective by spotting where where it looks like it’s an issue and then cut. Corrective cuts are usually not too narrow (Ex. Q of 3)
  • Surgical. A resonance in a sound makes your ears hurt and that will need a very narrow cut. (Q of 6-8+).
  • Tonal adjustments. An EQ can be used to make tonal changes such as deciding if you want your track more beefy or more light by either boosting lows or highs.
  • Coloring. Some EQs aren’t transparent and will have a musical touch to the changes it makes. This will add some personality.
  • Valley cuts. The opposite of surgical, where the Q will be make the curve really wide. It makes very subtle changes, somewhat tonal, a bit colored and sometimes a bit corrective. Try it at different points on a sound and see it change without being able to really know what’s happening.

TIP: The human ear will hear a noticeable difference if you cut 3-4dB minimum. If you cut 6dB, it will be quite obvious.

The main types of EQ plugin categories are:

  • Graphic/Fixed Frequencies. Influenced by older models and the first EQ, the frequencies you’d have access to are fixed and won’t be changed. In many of those models, the frequencies are based per octaves but certain companies will have their own way of deciding which ones are used.
  • Parametric. One EQ that is very popular is the Q2 by Fabfilter which allows you to drop a point anywhere and then be able to shape how narrow you want to cut or boost.
  • Shelving/Band. This is a part of the spectrum that will be affected. For example, on DJ mixers, the 3-4 EQ buttons are basically shelves of frequencies that are altered.
  • Dynamic. This one is advanced. You can “order” a point of your EQ to react depending of certain conditions. For example, if you have a recording of a drum, you can order the highs to lower down by 3-4dB if the cymbals hit too loud. Very practical!

TIP: If you love the sound of analog, you might want to dig in Universal Audio’s suite that does emulation of classic pieces of gear. The fidelity of replication is absolutely mind boggling!

Now let’s make some associations regarding which EQ does what:

  • Surgical and valley cuts are mostly done with parametric EQs. This type of EQ will allow you to precisely identify the rogue frequencies and then cut or boost, in the way you want.
  • Corrective EQ can also be done with parametric but with graphical ones too. Sometimes a correction needs precision but sometimes, it can just be a way to realign the curve of the sound which a graphical EQ can do easily.
  • Tonal adjustments. This is done with shelving and band EQ.
  • Coloring. This is basically fixed frequencies, but if you look for analog emulation or EQs that provide a type of saturation, then you’ll also get some coloring and personality.

My favorite EQ plugins

Here are my thoughts on the best EQ plugins  that are precious tools to have in your arsenal. I’ve also included low budget EQs alternatives that are similar.

1. Fabfilter ProQ2 (Surgical, Valley cuts, Corrective, Tonal)

This plugin seems to have found it’s way in many producer’s tool kit mostly because it can pretty much do it all. From complex curves, mastering touch-ups to shelving tones and copying the frequency of a sound to apply it to another… the ways you can use this beast are so numerous that you’ll have to watch a bunch of tutorials to get all the hidden things it can do.

Budget Alternative: TDR Nova GE by Tokyo Dawn

2. Electra by Kush Audio (Shelving EQ, analog replica)

Not so known by the masses but this EQ is an absolute wonder to have on hand. I use it in every single mixes I do and the results are always amazing. A bit of a learning curve to understand as the GUI is a bit weird but even if you’re not sure of what you’re doing, it shapes the sound in a way that makes it pop out and warms it too.

Budget Alternative: RetroQ by PSP

3. BX_Hybrid V2 by Brainworx (Corrective, shelving)

I don’t think there’s any plugin that can do what this can do in terms of results. Not as versatile as the ProQ2 but where this one stands out is for how buttery it cuts in the sound, smoothing things out. When I have people studying mixing with me, I would always require them to buy this one as the very first EQ to have and use.

Budget Alternative: Voxengo Prime EQ

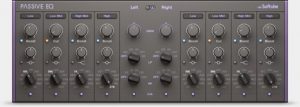
4. Passive EQ by Native Instruments (Shelving, correction, color)

This emulation of the famous Manley Massive-Passive EQ is a bomb EQ. I love to place it on a bus of all my melodic content and then smoothly shape it into something that magically turns organic and warm. It requires a bit of exploration but when you get your hands around it, you’ll always want to use it. I find it quite powerful for sound design as a way to warm up the lows.

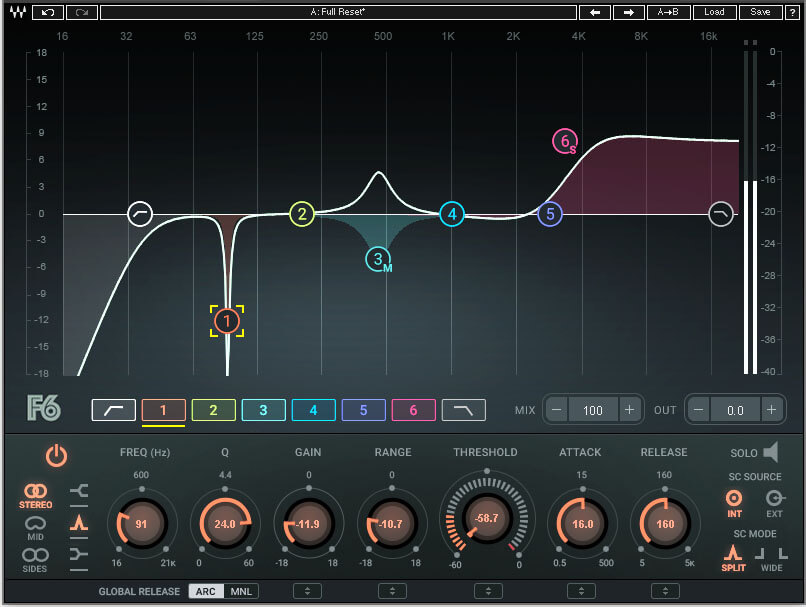
5. F6 Floating band dynamic EQ by Waves.

I’m not a big fan of Waves as well as their aggressive tactics for selling but this plugin is a really useful one to have. As described above, with a dynamic EQ, you can tame some frequencies that are randomly happening. The problem with a static EQ is, you’ll be cutting permanently a frequency so if what you’re trying to cut isn’t always there, you might cut something that doesn’t need adjustment. This is why you can have more control with a dynamic EQ. This one is also really easy to use if you’re familiar with the concept and the fact that you can use it in MS makes it really versatile. Not as easy and fancy looking as Fabfilter’s but it does more, in other ways. Wait for the price to fall but you might get it fro either 29$ to 49$ if you’re patient enough.

In the next post, I will go more in detail with my favorite plugins and will also explain certain ways, in details, for how to get the most of them.


SEE ALSO :

The best EQ plugins and various EQ’ing tips (Pt. II)