Saturation Tips and Hacks
After presenting some of my favorite EQs and compressors, it would be silly not to also talk about audio saturation which is complementary tool. There’s not a single project I’ve done in the last 10 years where I haven’t used saturation in one way or another; same with mastering. I often compare it to putting some words in bold in a text, where that effect will do the same thing in a mix: making parts stand out in a way the brain can’t totally understand at first.
What is saturation exactly?
Saturation is essentially a form of soft distortion that gives certain texture to sounds. The simplest way to explain it is to think of how analog processing changes sound; it brings a certain noise it, sometimes very subtly or not. You may use it give warmth or character to the signal being processed, which gives a more aggressive crunch if you exaggerate it. Types of saturation that are most common:
- Tape emulation: Similar to what was popular in the disco days when they’re send their mixes to a reel to reel, to provide a certain thickness.
- Tubes: Common in compressors and certain EQs using lamps, they are the absolute reference to warm up synths.
- Transistor and retro: To emulate an old school feel.
- Preamp: Often related to guitars and the world of microphones, preamps can be used on anything. They’ve been a tool of excellence for decades to give personality to sound by engineers.
- Distortion: Pure distortion isn’t always pleasing and appropriate but if you control it properly, it will give beautiful textures and beefiness.
There are multiple situations where you could benefit from saturation in your mixing or sound design in order to alter the character of your sounds.
Pads & synths.
There’s nothing more exciting than rich tones, melodies, and very warm pads. More than often, I see people recording soft synths with no processing whatsoever; they’re really missing out on giving depth to the backbone of their songs. You can for instance simply pass them through a preamp, but my tool of choice for these is absolutely tape emulation (a personal favorite of mine in case you didn’t already know).
How: Start by pushing the saturation to a very high point and make sure it’s more than noticeable. Then adjust the wet/dry to a very low level where you can hear the incoming signal feeling almost clean but have the saturation be mixed in there. I usually find the sweet spot by going “oh, here I can totally notice the saturation” and then lower it by a few notches.
Tool: I’d suggest the Tape from Softubes or RC-20 Retro Color. Both are fantastic to shape your sound with shimmering textures.
One thing I really love is to use multiband saturation to get the most out of your melodies. This way, you can address the lower mids in a way while you bring out harmonics in the higher part of the sound. This can be done with tools such as Ozone 8, Neutron 2, and Melda’s PolySaturator.
Bass
Who doesn’t like a dirty, funky bassline? Low end with grit will always bring some excitement to a mix – especially in a club – this is something we’ve heard so many times in hip hop for instance. A very clean sine bass typically from an 808 has a certain warmth, but if you pass it through tape or tubes, it will give a lot of oomph. If you want to try it, I suggest you even try two instances of saturation to see where that goes. It depends of how much you want it distorted. The wet/dry will have to be applied to taste here. The producers of dubstep brought the game here to a new level.
How: Just experiment. Try to go overboard. Really.
Tool: SoundToys’ Little Radiator does marvel on basses as well as its cousin the Decapitator. For something more subtle but still robust, try the Steven Slate Virtual Preamp Collection.
Percussion
Saturation on percussion will automatically bring an old school feel from breaks that were really popular in the 90’s. The take on that, with Hip Hop (again), was to export the audio to VHS tapes or even tape cassette. The result is pretty badass. Experimenting outside of software is really fun, and I would encourage you to give it a try. One thing I like from doing this is to saturate only the tail and not the transients so that you beef up the overall signal.
How: Duplicate the channel you want to saturate and put saturation on the second one. Using MAX’s envelope follower, map it to the wet/dry of the saturator/exciter. Set the envelope to be flipped so that when a transient is detected, it will duck the knob making sure transient isn’t affected. Melda’s Polysaturator provides that option internally.
Tip: Add reverb and put the saturation after to get really fluffy crispiness.
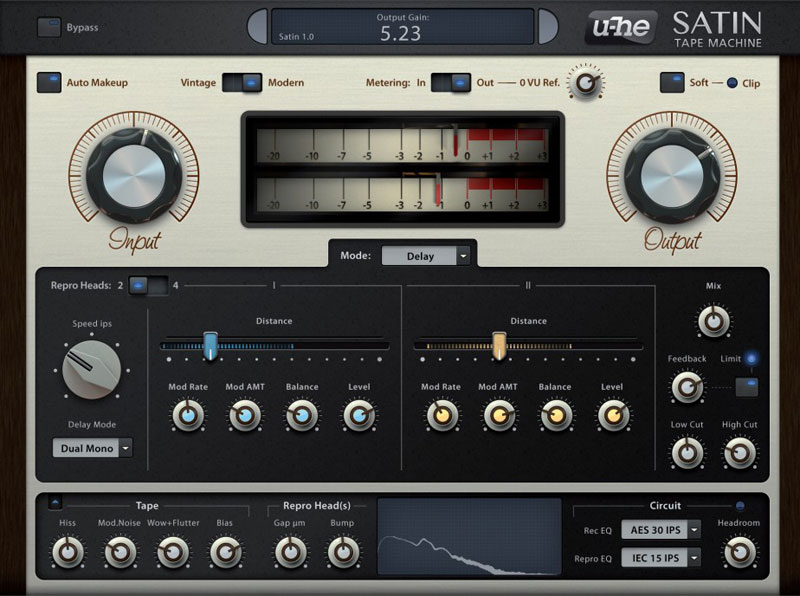
Tools: Reels by AudioThing, Satin by U-He and Polysaturator once more.
Vocals
There’s nothing more beautiful than vocals that are lush and full. Treating vocals alone is an art in which I could get lost. I don’t want to get into that too much, but I’d like to invite you a bit of everything to see which one suits you best. Some prefer the tubes but other swear by the tapes. This is where Ozone can be a game changer, especially that you can do multi band processing as well as M/S.
Tip: Apply anything and everything from what’s explained above but start by doubling your vocals which will already do great things.
SEE ALSO : Tips to add movement and life to your songs


Leave a Reply
Want to join the discussion?Feel free to contribute!