Tag Archive for: gear

Ableton-Hardware Hybrid Setup

Producers often get comfortable in the computer and feel they are not getting enough, so they decide to invest in hardware.

Once you get good at something, it’s only natural to want to upgrade to the next level. You may get that feeling that you aren’t getting enough out of it, or that the medium is limiting in some way. With my students, often this feeling means leaping from a DAW like Abelton to a hardware-based setup. 

They often think that by doing so, they’re going to unlock a richer sound, and a more intuitive, instrumental interface. They believe they will be liberated, able to just jam out compositions without having to rely on an “unnatural” mouse click or MIDI mapping inside a DAW. 

The truth is that once they make this leap, and ditch Ableton for an Electron Octatrak, and a modular, they often find themselves being even more limited by the foreign user interface and the fact that modular doesn’t have an “undo” button, or patch saves.

That’s why I always recommend that they use an Ableton-hardware hybrid setup that incorporates the best of both worlds, where the tactile, plug and play nature of hardware meets the convenience of being able to easily save, and revert back to settings on the computer. 

Over the years, I think I have a pretty rounded philosophy of how to tackle this integration, which I would like to share with you in this post.

However, let’s talk about hardware first, so that you can understand its strengths and weaknesses. 
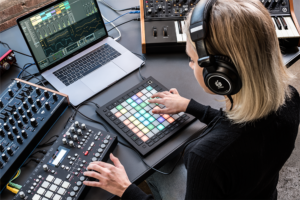
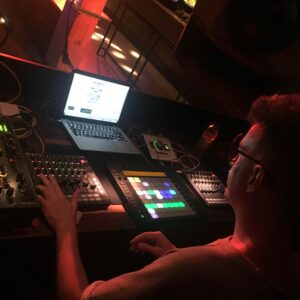
A photo of a simple example of an Ableton-hardware hybrid setup.


Myths About Hardware

It automatically Sounds Better

Just because something is hardware, doesn’t mean that it’s going to mythically sound better. In some cases, analog summing can fix some issues and enhance certain things but it can also be sounding different than digital and since our ears are used to the digital realm, it might be misleading. It’s not 2005 anymore; virtual instruments have grown leaps and bounds over the years. Even to a trained ear, it’s hard to tell the difference between an emulated TB303 and the Roland Cloud version. Analog does have charm and specific texture but it’s different than digital. Some people get confused once in front of certain pieces of gear.

However, there are things that happen with the sound in hardware that is difficult to emulate in software. For instance, the “ghost in the sound’ – that almost invisible hand that creates random, happy accidents due to the fact that you are working with pure electrical current, rather than a binary representation of it. 

This “hand” often results in sounds that are impossible to replicate, existing for only as long as they project from the speakers. To me, this is the magic of hardware – that unpredictability that exists for a fleeting moment, until it’s gone, never to be heard again, unless you capture it. 

In other words, analog has a sound that digital doesn’t have and that’s an aesthetic that pleases many people. Believe it or not, some people really do prefer the digital sound, mostly because our ears have got used to it.

However, what is this capability worth, if you can’t capture it properly? That’s why it’s imperative when buying hardware that you also buy a solid audio interface to be able to record the sound at the highest fidelity. Because at the end of the day, your hardware will only sound as good as the weakest part of the chain.

It’s More Intuitive

This is another fallacy. If anything, analog hardware can create a new set of problems, with the main problem being that you can’t just pull up a setting or patch. You also can’t revert back to a previous setting if something gets all messed up. 

Instead, you have to work backward in order to figure out where it went wrong. And if it’s analog, chances are that due to the “ghost in the machine” you won’t be able to get back to where you were. This results in endless hours of fruitless tinkering.

This also poses problems for live performance as well. I remember when I was performing at MUTEK with a modular setup. I was in the middle of soundcheck, jamming on my modular, getting lost in the frequencies. Then at the end of the check, I realized that I had to repatch everything back to where I wanted it for the beginning of the set. It was frustrating, to say the least. On a computer, I could have just reloaded the project. 

If you’re allergic to the mouse and sceen, perhaps hardware might be closer to your needs but it doesn’t mean it will be easier.

It’s DAWless

What is an MPC, Octotrak, Deluge if not a Digital Audio Workstation? They are digital, process audio, and they are a workshop. If anything, you are just substituting an intuitive interface that looks like a laptop, for a complicated interface that looks like a box with buttons on it (wait, isn’t that what a laptop is; just a box with buttons?). 

If you can’t stand the aesthetic of a laptop and want something sleeker, then that is your right as a creative. Just know, it’s way harder to drop a drum sample into an MPC than Ableton assisted by a Push or Maschine. If you hate the look of a laptop on stage, disguise it in a case.


How To Get The Most Out Of Your Hardware

Learn One Piece At A Time

People will often buy a lot of gear all at once without understanding their needs. Unless you are copying someone’s setup exactly from a YouTube video, and want their exact same sound, chances are people want their own thing to fit their artistic vision. 

So people will often be like ok, I need a synth, a drum machine, a set of effects, and a “brain” that I can route this all into. Then they set this all up, and realize that they are totally overwhelmed and have no idea how to use it, because there is no blueprint for it.

That’s why I recommend starting out with one piece of gear and getting really good at it. Once you know how it plays, then you can start thinking about the next part of the chain. 

So, let’s say you start with an analog synth. First, you must understand where all the filters are, and what they do. Understand how the oscillators sound, and how you can route them. Then you can consider your next addition.

So if you got a synth, the next thing you’re probably going to want is a way to sequence it. That is often a drum machine with a VC gate that can signal the synth to play (or not play) certain parameters. I recommend Beatstep Pro (Arturia) or Pioneer DJ Toraiz Squid. Of course, there are many you could add but those 2 are very versatile and fast to learn.

Once you figure that out, maybe you want an effect in order to get some more character out of the synth. Make sure that the effects that you buy are exactly what you want by testing it on the sequenced synthesizer. If they don’t create exactly what you want, then get new ones. No need to move on until you figure this out. 

By moving on too soon, you may just get tangled in your new setup, and not realize how to use it. Now you’re $5,000 deep into a headache, and not any more or less creative.

However, if you understand your pieces inside and out before expanding the chain, then you will run into fewer obstacles.

Record Everything

Remember, often with analog hardware, what you made will only exist at that moment. You may never be able to record that again. Therefore, make sure that you have plenty of space on whatever device you are recording onto because you should be recording nearly everything.

This works especially well if your creative process is to create a bunch of loops, and then assemble your loops into a song.

Truth be told, hardware doesn’t require endless MIDI mappings, and clicking, and is more instrumental, in a lot of ways. The knobs are properly dialed in with the circuits, and the keys are weighted to interact with the synth in ways that a standard MIDI controller may not be. Therefore, the loops that you create may very well be more interesting than anything you could have made with a soft-synth. 

Make Sure Your Recording Is Clean

Like I mentioned before, you need a good audio interface. I recommend Focusrite Scarlett or SSL2. These record at a high sample rate, and will capture the purest representation of what’s outputting from your setup. 

Also, you have to record it properly. Therefore, the signal has to come as close as possible to 0dB because the noise floor will always be the same on hardware. So if you’re recording at -6dB as you would with digital instruments, when your hardware recording is loaded into your “brain”, it will not seem loud enough in many cases. 

That’s because -6dB in the physical world is quiet. So, naturally, you will turn it up. However, when you turn it up you add 6dB of noise to the recording. Maybe you want this noise, but it won’t be accurate to the fidelity of your original recording. Therefore, always make sure that when recording, that it is as close to 0DB as possible.  

Realize You Will Be A Noob, Again

Just because you were a proficient Ableton user, doesn’t mean you will be a proficient hardware user. You will have to pick up the user manual again and start watching copious YouTube videos in order to get back up to speed. 

Your first stuff will probably sound terrible. This may be discouraging, but this is the reality you will have to accept. Just because you made electronic music “in the box”, doesn’t mean you will be able to “out of the box”
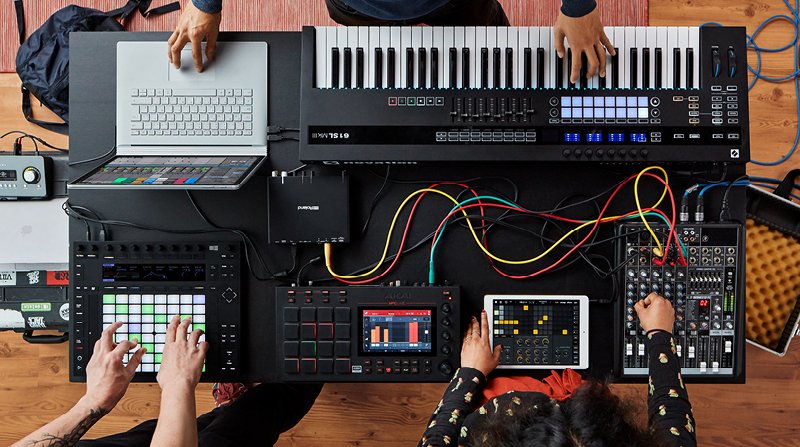
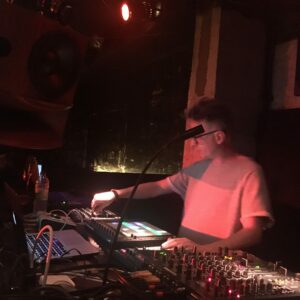
another photo of an Ableton-hardware hybrid setup

How To Get The Most Out Of An ABleton-Hardware Hybrid Setup


For the sake of this article, we’re going to assume you’re proficient with your DAW. In this article, we’ll use Ableton as our primary example. 

Play To Each Other’s Strengths

The goal with a hybrid setup is to buy what the computer can’t give you, and/or compliment what you’re doing on the computer with hardware. 

As you know, the process in Ableton is pretty intuitive, and not destructive in nature. If you screw something up, you can always undo, or revert to a previous version of the project.

It’s also way easier to visualize a song’s arrangement on Ableton than it is on an MPC. 

However, perhaps you like the playability of the MPC. Well, there is a solution to that – it’s called Ableton Push. I use it for basically everything; it’s amazing. It adds that tactile instrumentation that’s missing when dealing with a mouse. Additionally, all its MIDI mappings are designed to be standardized and intuitive with Ableton. 

Use Ableton As A Band Member

A good way to use Ableton in conjunction with your hardware is to use it as a session musician/band member. Write out a basic structure of a song on Ableton, MIDI clock it with your hardware, and then route your hardware into channels, and start jamming. Inside Ableton you can also create some complex effects chains that can modulate the hardware in unexpected ways, giving you something entirely fresh.

Use Ableton To Preserve Sounds

Another way you can use Ableton to compliment your hardware in an Ableton-hardware hybrid setup is to be able to have multiple versions of the same project that contains all the hardware loops that you recorded. Since Ableton’s environment isn’t destructive to waveforms like something like the MPC would be due to its limited hard drive space, you can modify the waveforms, without having to have multiple large files. Instead, you just have individual projects for different versions of the recording. 

Split Your Time Into Technical And Creative Sessions

This kind of works whether you are pure hardware, or using an Ableton-hardware hybrid setup. The fact remains, whenever you are integrating analog gear, there will be a setup process. You can’t just load settings. So you have to get all your patches set up, your effects set up and properly bypassed, your sequencer running, and your patterns in order. You then have to make sure that everything is playing back close to 0dB to avoid the dreaded noise. 

This will consume a good amount of brainpower. 

Therefore, once this is all ready, make sure to take a break. Go drink a beer, meditate, exercise, or do whatever you do to reset your mind.

Then come back and start jamming and being creative with your Ableton-hardware hybrid setup.

MIDI Controllers Are Your Friend

MIDI mapping is really easy on Ableton. Sure, it takes a little bit of time to set up, but it’s often nothing compared to the amount of time you will be tweaking hardware to get a similar result. Therefore, get some MIDI faders and knobs to control some internal processes in Ableton. 

MIDI will create that tactile sensation that hardware provides. The Push is, once again, a great way of accomplishing this, since it’s intuitive with Ableton. However, some people don’t want to spend that much money on a MIDI controller. In that case, there are dozens of great controllers out there that allow you to essentially create your own instruments on the fly.

Some suggestions: AKAI midimix, Novation Launch Control

These mappings will also affect your hardware as well, since you can map them to different internal faders that change the sound of the hardware, such as channel volume, or surgical EQ parameters. 


Ultimately, do what works best for your creative process. These are just my recommendations from my experiences using both exclusively, and then integrating the two. Just remember, there is a learning curve with everything, and things that were true for one, will not be for the other. There is no magic bullet when it comes to making music. Hardware won’t make you amazing, software won’t make you amazing. Only talent and dedication will.

Some links contain affiliate offers.

Playing Electronic Music Live (Part 6, final)

I recently played a live set at StereoBar in Montreal for the launch of my album Returning Home and it was very interesting to create a live set from scratch, following the advice of this series I’ve written over the past few months about playing electronic music live. I’d like to share with you a bit about how it went, as well as some personal notes I took for future performances.

Notes about preparation of my set

Returning Home has many tracks; I wasn’t sure how I’d approach them in a live context considering they are all pretty intricate, full of details, and pretty much impossible to execute as the recorded version(s). I decided to go through all the songs and export the stems for each group of sounds – plus making sure the kick and bass would be isolated – so I could control how they would come and go in the set.

Exporting stems took me a while. I had also exported stems from certain songs that weren’t included in the album but that I wanted to play. I had a good 17 tracks ready, with about 8 channels exported per track. I imported everything into my new live set, and added everything in the right columns and with the colors I needed. I also started chopping the stems into sections so I could trigger some parts spontaneously.

After a few days of geeking out, I started playing the tracks to see how the flow felt and to see if the transitions were going well. I played with effects; trying to spice up the main ideas to surprise people. As I kept rehearsing and trying to see how to play the songs, I found myself becoming very bored out of what I was hearing. The thing is, when you spent months making an album, you get to a point where you can’t listen to your own music anymore – and playing it as is felt too safe, too simple.

Live at MUTEK Chile 2006

Live in Zurich 2005

I scrapped everything. I remember thinking that this whole series advising people on how to play live was crap but I realized that after going through it myself again, it still had a lot of value, but even I had done the preparations wrong. I remembered then how I used to LOVE playing live, 15 years ago and had a flashback excited me: pure improvisation. I realized that using stems wasn’t improvising enough and that my music is in itself, pure chaos.

I went back to my pool of sounds which didn’t make the cut originally and started chopping sounds, deconstructing stems, and re-exporting new parts. Then I started creating a space where I could remix the whole album on the spot, plus adding unexpected, unused sounds. Basically, it was combining the bass of track 2 with the melody of track 7, then percussion of track 4…pure remixing. I found a core idea for each moment of my set, and left a lot of space for reinterpretation. It worked and I was having a lot of fun.

My setup for this Set

I was using Ableton Push and 2 Novation Launch XLs, as mixers for all the channels (I ended up using 10). For some reason, each time I’ve tried using PUSH live, it has never really helped, but I felt this time I wanted to use it. I love the Novations so using 2 felt really amazing.

Limitations: My Macbook pro only has 2 USB ports so I needed a port to accommodate multiple items.

Soundcheck at Stereo

Soundcheck

Arriving at the venue, I felt really confident; perhaps too confident. The soundcheck went so smoothly that – in my experience – when that happens it gives you the feeling that something will go wrong later.

I had spent time in the studio carefully tweaking each channel with EQs to make sure the sound wasn’t to harsh or piercing. I also decided to use a Manley compression from UAD on the master which made everything really smooth. It was important to use a reference track as an EQ curve. It really paid off in Soundcheck so I didn’t have to do much; everything went so smooth.

TIP: Listen to your reference track before soundchecking, then play it to adjust an EQ on the master.

The show/performance

After a great start, shit started to hit the fan. As a track was playing, I noticed my mixer wasn’t responding and realized it had rebooted. By rebooting, it made the second mixer crash and the PUSH too. I wasn’t even 5 minutes in and the wheel of death was spinning on my Mac. I waited patiently and luckily it went back to normal. But after this glitch, I disconnected one of the Novations to plug it directly in my computer instead of the USB-Hub I had bought the same day (cheap connectors are always a big mistake!). PUSH was frozen and not doing anything, I had to activate clips with my mouse. Luckily from my experience playing live for so many years, I was able to do this in a way so that people didn’t notice. The Novations kept crashing one after the other. Each time I had to unplug them patiently to restart them, and then the wheel would go off on my computer; for some reason they would work for a good 20 minutes but then crash again.

Luckily, no one noticed anything! I could have really played a great show that night if everything had worked properly because Stereobar has the perfect setup for me…it was a bit disappointing, but I still received a lot of good feedback.

MUTEK Montreal 2006

Live in London 2005

After the show

Despite the technical issues, it was great show and fun nonetheless.

To summarize, a few tips here based on this live experience:

  • Don’t buy gear the same day without testing. Soundcheck are never 100% of what a show will be and can never be a real test.
  • Deactivate Ableton Live’s auto-update feature. It actually upgraded to a version the day before with a bug in it – a pretty big one. I had to reinstall the software and that was stressful. Thanks for the swift reply from Ableton tech support on that one.
  • Never panic when problems arise. Most of the time, people don’t notice.
  • Try to avoid shitty USB hubs! I’m still trying to find a better alternative.

I hope this series was helpful!

Home studio essentials: Starter kits for electronic music production

Due to popular demand and because I receive questions about what to buy to start making electronic music almost daily, I decided to cover the topic based on various levels of investment. If you follow the plan I outline below, you won’t fail or be mislead into bad purchasing decisions. This list is based on years of discussions with people, consultation with clients, and testing a variety of this gear myself. As previously covered in a past article, we’ll start with the level where you are completely new to making electronic music and then build up from there. If you need guidance beyond first levels, scroll down to see tips for larger budgets and more advanced levels of producing. Just remember, the type of studio electronic gear that you choose to use will have a profound effect on your sound.

Level 1 kit: The beginner Studio Electronic Musician

Your level of knowledge:little-to-none; you’re contemplating making music.

Includes: Laptop, DAW and Headphones.

Music really doesn’t take much to get started with anymore. There’s a myth that many people believe, that the more equipment you have, the better the music you’ll make and thus it’s waste of time if you don’t have much money to invest in the early stages. This is false, I know some pretty amazing music that was done on the cheapest setups you can imagine. Remember, studio electronic music started as a DIY endeavour, in cultures that were not traditionally wealthy.

The only thing I’d strongly encourange you to do is get a demo version of Ableton, Reason, or Bitwig to see which one seems the best for you but my personal pick will always be Ableton, which I’ve been using since 2002.

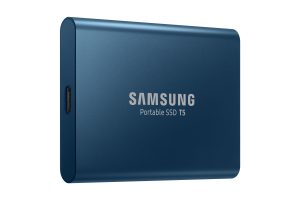
For your laptop, if you can invest in one, I’d say try to get a PC or MAC with at least a i5 or i7 processor and an SSD hard drive; this will make a tremendous difference in how you’ll be able to manage the needed resources. Plugins and software are mostly dependent on a powerful CPU to process information, while the fast hard drive is to access how the samples are read. If your hard drive is slow, it can create bottlenecks if you’re reading large files. An external SSD is critical should you rely on something not internal. Also with regards to RAM, the higher the better. At the moment, I find that a minimum of 6gb will make a difference but if you can get more, that’s even better. High RAM is also a critical part of how smoothly your DAW will run.

Harddrives & Laptops For For Studio Electronic Music

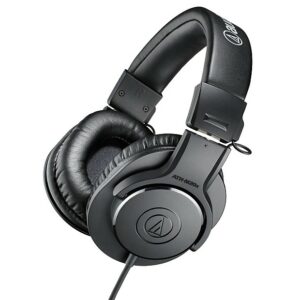
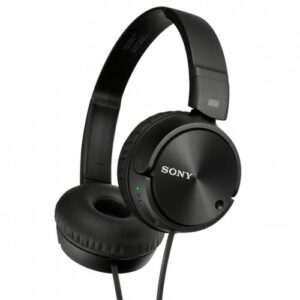
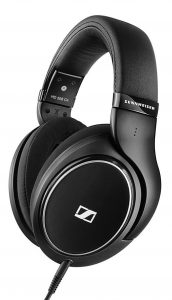
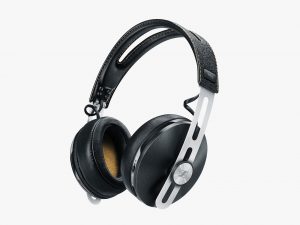
You’ll need a good pair of headphones. If you don’t like making music, you’ll still have a good pair. I find that it can be misleading to not invest much in it so if you can, get the best you can get. I propose here pairs for different budgets.

Headphones

Level 2 kit: Getting confident In Studio Electronic Music

Your level of knowledge: You’ve made some songs and you start to feel limited by the level 1 kit (headphones and a laptop).

Includes: extra software/plugins, Speakers, MIDI controller.

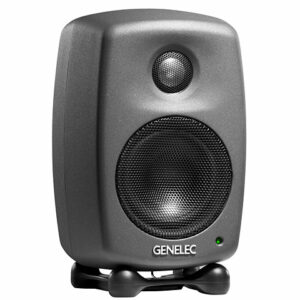
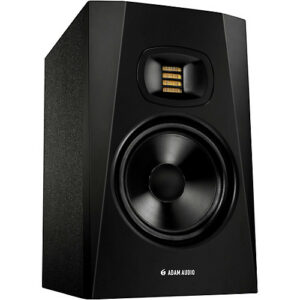
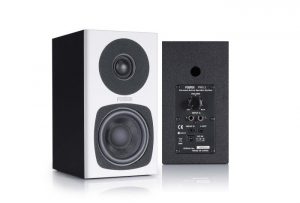
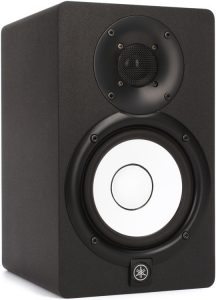
Ok, so now you know you want to do this as a hobby or more. I think it’s important to have better monitoring than just your headphones so getting speakers should be among your next priorities. There’s nothing more important than to go to your local shop and spend time testing a few pairs of monitors with music you know. So get your phone ready and go listen, then you can make a decision and buy. My personal favourites might not work for your style, but here are some of them, including some for different budgets.

Just make sure that the music you listen to is similar to the type you will be making, since your studio electronic music will be influenced by whatever you get. 

Speakers & Monitors FOr Studio Electronic mUsic

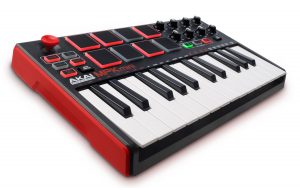
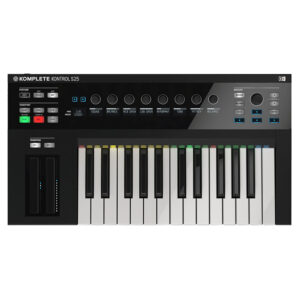
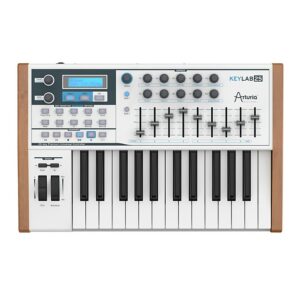
MIDI Controllers

A good investment is adding some controllers for your DAW so you feel a bit more physical about how you interact with your music. This can go from a pad based midi controller, to a keyboard or a midi mixer. It really depends of what you do with your music but any of these will be useful somehow.

If you’re serious about your music, you will want some original material and investing in good synths is important; you can then combine controllers with sounds. KOMPLETE by Native Instruments is a powerful investment that will pay off for years to come. Otherwise, Arturia is also quite amazing.

Level 3 kit: The Studio ELectronic hobbyist

Your level of knowledge: You’re able to make music and finish songs, you spend considerable time making music.

Includes: extra software/plugins, Gear upgrades.

At this point you can make music, finish songs, and perhaps getting some of your tracks signed to a label. This is the stage where most of my clients are at. In general, their needs are pretty much the same. Many haven’t invested in good monitoring, either a proper sound card or monitors. A quality sound card/interface will make a big difference in the quality of your sound; this sounds pretty obvious but many people I work with still need to be convinced…until they get one and come to me to say I was right! Sound cards aren’t like monitors, it’s not a question of personal tastes but a matter of understanding what you need. The very first question you should ask yourself is “how much gear do I need to record?”, because that will determine how many inputs you need in your interface. You could always get a little mixing board to get all the audio in then route it to two stereo inputs, but some people prefer multiple audio in. In other words, studio electronics matter.

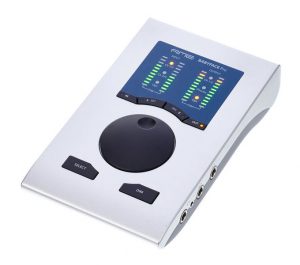
Audio interfaces & Sound cards

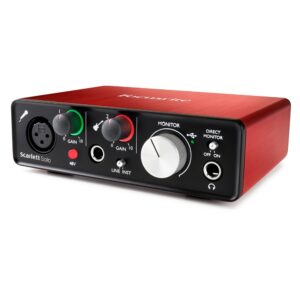
Most basic audio interface: Focusrite

Focusrite Scarlett-Solo Gen2 USB Audio Interface

Picture of Focusrite Scarlett-Solo Gen2 USB Audio Interface

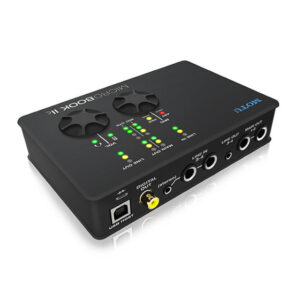
Medium budget: MOTU – who also make killer converters for recording.

MOTU MicroBook IIc USB Audio Interface

Picture of the MOTU MicroBook IIc USB Audio Interface. It's an excellent piece of studio electronic gear.

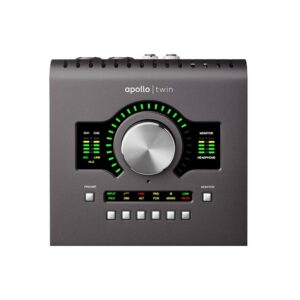
My personal suggestion is to go with UAD Apollo Twin, which also gives you access to all their plugins and outboard CPU power. This is a solid piece of studio electronic gear.

I find that at this point, investing in software to define your sound and to get out of your DAW’s internal sound is a great move. Some companies I love are U-He with their amazing synths such as Diva, Bazille or the Presswerk compressor. I am also on the Plugin Boutique mailing list to get daily discounts on software. Not only do I learn about what exists, but it then also becomes possible to get discounts for plugins I’ve had my eye on. Following KVRAudio is also an essential habit. They are masters of studio electronic gear.

Level 4 kit: The serious bundle FOr STudio Electronic Music

Your level of knowledge: You’re getting very serious at it and want to be semi-pro.

Includes: extra software/plugins, Gear & studio upgrades.

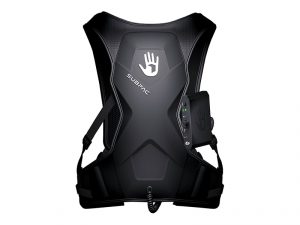
At this point, you have an organized your studio and all essentials are covered. Usually this is where you’ll feel ready to invest into more gear such as modular synths, synthesizers, external effects, and fine tuning what you already have. Before anything else, I’d suggest you make sure you have something to cover your low end. If you have neighbors and still want good relationships with them, I’d go for a Subpac:

Bass & Subwoofers

This thing has really been helpful at home and helped me get more precise mixes; there’s this more expensive wearable version, or a cheaper version for your back while sitting in a chair. It’s a piece of gear that gives you a physical impression of having a sub. If you can get a sub though, that’s even better. I can recommend many, but usually something like the Yamaha HS8s Studio Subwoofer will do for a home or small studio.

Nailing the low end is really an important part in solid sounding music, and you can only get there by being able to hear what’s going on down there. To adjust it, you won’t really need to hear it as much as feel it, which is what the Subpac also does.

Synthesizers

In terms of synths, there are many great ones out there. If you can get to a shop to test some in person, I recommend you do so. I can explain in my own words the technicalities of sounds each synth can make, but test driving a synth is the best thing to do, to really know if it will fit what you do. I think my view on this is that when you get a synth, it will become an important part of your artistic identity. I’ll list some of my favorites, based on different branches and aesthetics: Roland, Korg, Moog, Elektron.

TIP: Always search for demos of the synths on Youtube to see how they sound!

Roland: aesthetic – classic sound

A staple player of the electronic music world, Roland basically shaped the beginnings with drum machines and the tb-303, source of the original acid tones or the Juno that shaped Trance/deep techno. After being silent for years, Roland has returned with force, deploying super solid products such as Roland Aira TR-8 Rhythm Performer for the 808, hugely recommended if you want classic kicks. The sound is very classic, clean, and efficient. I would recommend the Roland GAIA SH-01 Synthesizer which has made a big comeback in many genres in the last few years and is far from being out of date.

Korg: aesthetic – edgy, modern, clean, warm

Let’s cover the basics of Korg as I know some of them. The all favorite at the moment is definitely the Korg MS-20 Mini Semi-modular Analog Synthesizer which is a good cross of analog synths because of its patching options. It can sound very modern and experimental but it can also sound old school 50’s spooky sci-fi. There’s a bit of a learning curve but the investment is very rewarding once you dive in it. Very unpredictable at times, it can provide many outstanding ideas. These happy accidents define so much excellent studio electronic music, as well as live electronic music.

Another one is the Korg Minilogue 4-Voice Polyphonic Analog Synth which is a super slick synth that sounds very clean and modern. It is able to make tight basses and warm fuzzy pads. Excellent for techno.

There’s also the cheaper version as well too. Finally, super useful and fun is the Volca series. There’s a nice little FM synth in this series – a very powerful buddy that can provide really warm tones.

Moog: aesthetic – Fat, rounded, electroish sound, vintage and gritty)

Moog is a staple for its name and the legacy it’s left over the years in so many songs we have all heard. Fat and dirty basses are often from Moogs and bold melodies are pretty much a trademark. If you want to dip your toe in the modular world, the Mother is a great machine to get. Its sounds really, really warm and thick plus its patching board is well designed that you can get started intuitively. The Moog Sub Phatty is another favorite of many for the name it carries, and what you get in return. The Moog Mother is another beast that can make extremely powerful sounds, from basses to kick and leads. it’s also a good step in the semi-modular world if you’re looking to make some hard hitting studio electronic stuff.

Elektron: aesthetic – Berlin techno, modern/underground dance music

This company is the current leader for studio favourites. It’s defining a lot of the current techno tracks that are being released. The main bad boy here is the Elektron Digitakt. There are two things that define the success of this monster: it sounds right and the integration with Ableton/DAWs makes it an ideal desktop companion. If you have the budget, you could also get the Elektron Analog Four which is another beast. Crazy possibilities on this one and a resource to do pretty much anything you want.

SEE ALSO :   Equipment Needed to Make Music – Gear vs. Experience vs. Monitoring  

Equipment Needed to Make Music – Gear vs. Experience vs. Monitoring

This post follows a previous one I made regarding the minimum equipment needed to make music; due to the popularity of that post and the number of questions I had afterwards, I wanted to dive deeper into my thoughts on this.

I’m often asked what matters the most between equipment, experience, and monitoring, and I  give someone the following advice on those three topics:

The Role of Experience

There is absolutely no doubt at all that someone’s experience, more importantly than anything, will have the biggest impact on the quality of the music he or she makes. A producer with years of experience knows what works and what doesn’t. Even without the proper equipment, he or she will find ways to maximize the tools they are limited to in order to get the make the most of their gear, and sometimes can even turn something very insignificant into a piece of art. What’s also something to understand is that experience can also guide you to make strategic decisions based on past experiences. For example, someone who has made high quality products knows that reaching out to others who can help is a valuable, essential part of the process. Also, if you’re faced with limitations, the internet is filled with information about how to make the best of your situation. Lacking sounds you love? Find a sample pack and buy it. Lacking ideas or technique? Look stuff up on YouTube. There’s an abundance of information that is either free or cheap. Investing in little things like personal connections is not only a great way to build support among people who can help you later, but it’s also a way to stay on top of new and better tools that come out from people who and work with develop them.

Studio Monitors Matter

The biggest mistake I see in people who are just starting out, is to invest in cheap studio monitors because of their budget limitations. I know this one is tricky because many people have small budgets. Monitors are something you want to have for the next 10 years minimum, and you want them to be the best pair you can afford. Though experience is the most important thing to consider, but you can’t start with it if you have none, monitoring is to me, what’s you need to focus on as a close second. Studio monitors are your “eyes” in music making: if you can’t “see” what you do, your music will not be precise and the end result might be difficult to appreciate after it leaves your studio. Having proper speakers is like having access to glasses when you can’t see: all of a sudden, everything is clear and you’ll know exactly what’s not working.

  • Tight budget? I find that if you can’t invest in good monitors, it’s worth waiting. There are many ways to raise money, from getting a loan or asking relatives, or whatever. But investing in cheap speakers will only benefit you in the short run and will be a major problem in the long term. In the meantime, try getting good headphones that feel good for you when listening to your favorite songs. Go in a store and spend some time comparing models. Comfort is also important.
  • What if music production isn’t for you? If you want to produce, it’s probably because you’re a music lover. If you give up on production after buying monitors (note: contact me before doing that!), you’ll still have great speakers to DJ on or to just to listen to.
  • Having a subwoofer is a game changer. To me this is an indisputable fact; you’ll see what I mean if you get one or if you get to hear a setup that makes use of one. Thin walls? Angry neighbors will love you if you get a Subpac instead.

The takeaway here: music equipment is a useful but luxurious tool.

One of my friends came to my home one day and showed me a stunning album he made which totally blew me away. We quickly started talking production and he explained me that he was using Cool Edit (a very simple sound editor which in the early 2000s wasn’t even considered a DAW!) and no equipment whatsoever. None. Everything was made from scratch and with a lot of patience. Honestly, he changed my perspective on gear forever. Every time someone tells me they “need this” or “need that” to start working on their music, I have to yell “bullshit!” because I know and have heard otherwise.

The Role of Additional Gear

“Yeah but I love the feeling of touching knobs to produce!”

So, where should you start if you want to explore the tactile dimension of producing? If you still feel the need to buy equipment beyond a good pair of monitors, I would recommend the following:

  • Explore to know what you love doing and invest based on what you decide you like. Don’t fall for the classic “If I just have the [insert trendy piece of gear name here], then I will be okay.” Try to understand music on your computer first: play with synths, make beats, see what you like, and after a few songs, maybe you’ll notice you love synths that sound like a Moog. Learn to understand what kind of sounds you like, just like how you find out what labels an artist releases with. The more you know, the more you’ll be able to invest properly.
  • Buy used, rent if possible. Or go hang out with someone who has gear you can try. Make a song with their gear to see if it feels good for you.
  • MIDI controllers are always a good investment no matter what but aren’t essential.

Truthfully, there is no such thing as minimum equipment needed to make music, but the things I’ve outline here are things that will help you get started. I hope this helps!

SEE ALSO :  What is the Electronic Music Equipment Needed to Start Producing?   

Deleting all yours tracks and selling your gear.

Since the very beginning, I can remember many times I’ve questioned my abilities as a music producer. Feeling stuck on a project or coping with negative feedback from a track I was proud of left me wondering if I was starring down the path of a musical dead end. Sometimes it doesn’t take much to consider unplugging, and putting it all away for good. Several colleagues of mine have similar stories, and more than once I’ve seen someone debate deleting all their tracks and selling all their gear.

High highs and low lows. There is a wealth of research which supports the fact that making music can produce a massive dose of satisfaction, a high similar to the effect of drugs or the rush of an intense workout. The thrill after completing a track is huge, yet on the flip side when things aren’t working out the low can often be depressing. At times it can feel like you’re living in a constant state of low-grade misery. Our perspective often governs our moods, and with just a twist our outlook can turn from sour to super very quickly.

I’ve spent a lot of time reading comments within Facebook groups from people flirting with the idea of selling their gear and calling it quits. On the digital side, I hear people talk about deleting entire hard drives filled with a rough version of tracks, and I think about the hard work and time they’ve invested in projects that will never be completed. They feel the work is simply not worth the effort. So often the feeling of excitement and energy from listening back to our next best track can be replaced by frustration and self-doubt when seeing it stored away in the unfinished bin. Another great idea that stays just that, and idea – incomplete, unheard. Back to the drawing board. Again.

A personal rule of mine is never to delete any project or sample. I just won’t do it. 0% chance.

I believe the main enemies that alter our judgment are overexposure and adverse reaction. If I am working on a project that just isn’t happening, I remind myself to simply store it away and come back to it after a time has passed. Once re-opened and listened to with a new perspective, you’ll likely find something that inspires you, or at the very least – something you can work off of right away. As artists, we are always changing. The artist you’ll be a year from now might like or dislike what you’re producing right now. By keeping your unfinished projects somewhere safe, you are investing in your time and talent for tomorrow rather than throw away what you’re frustrated with today.

Tip: This might feel silly but if you don’t feel good about music, try simply saying:”For the moment, I don’t feel like making music.” Insist on “for the moment“, because it takes away the idea that your mindset is permanent.

In past posts I’ve talked at length about the benefit of planting seeds, creating a master project where all your ideas can be grabbed from and used as a springboard to something great with minimal effort. The benefits of having a library of sounds and tools custom-made, ready at a moments notice, is huge because momentum is critical to completing your tracks.

One thing that’s common is the search for old gear to achieve a particular sound. At some point, it’s natural to feel like you’ve outgrown your equipment and you’re sure that buying new (old) gear will solve the problem. We are constantly being tempted with new products and tools that promise to solve our problems and make everything that much easier. Even after buying new gear we sometimes don’t take time to truly audition them. How often do we ask ourselves what it is we truly need to fix? Can gear solve this? The hype and marketing work for sure, yet without fail the next time we turn around there is yet another must-have tool we’re after, because this one…. man this one, is going to make the difference.

Tip: Some gear can be rented. If you can test drive what you want, that can be really useful.

Take a minute to reflect what your goals are before making another investment.

To truly move on as a producer the best personal investment I can think of is to simply finish something, anything. I believe deleting your tracks reinforces your inability to finish what you started, and doesn’t bring anything good. You certainly aren’t farther ahead as a producer, and you’ll never have anything to show without completing your projects.

Take a moment to look at your progress or lack thereof. Where do you get stuck? Where does it come to and end? Is your sound design weak, do you break apart while arranging it? Find your weakness and draw a circle around it with a big, red, pen. That is your problem area. This is the tough part for you. This is where you give up and call it quits. Nothing you can buy is going to fix this for you. The good part is that now you know where you break down you can learn ways to improve on it.

Youtube. Thank the Lord. Whatever you are looking for I promise there will be a video to help you overcome your sticking point. Just don’t get stuck endlessly watching videos that hours later morph into a totally different topic (it’s easy to do). Also, to wrap things up, here’s a production tip I love doing: At the end of a session, bounce whatever you have, then store this in the folder of the production. Always do “collect all and save” It can be a 30-second loop ,the arrangements you have ongoing, or even export all your session stems.  Doing this is extremely useful when going through older projects but also, you can open a blank project and then import several bounces and play with them straight away. This tip has been so useful for my past albums!


SEE ALSO :  Finishing Your Projects