Equipment Needed to Make Music – Gear vs. Experience vs. Monitoring

This post follows a previous one I made regarding the minimum equipment needed to make music; due to the popularity of that post and the number of questions I had afterwards, I wanted to dive deeper into my thoughts on this.

I’m often asked what matters the most between equipment, experience, and monitoring, and I  give someone the following advice on those three topics:

The Role of Experience

There is absolutely no doubt at all that someone’s experience, more importantly than anything, will have the biggest impact on the quality of the music he or she makes. A producer with years of experience knows what works and what doesn’t. Even without the proper equipment, he or she will find ways to maximize the tools they are limited to in order to get the make the most of their gear, and sometimes can even turn something very insignificant into a piece of art. What’s also something to understand is that experience can also guide you to make strategic decisions based on past experiences. For example, someone who has made high quality products knows that reaching out to others who can help is a valuable, essential part of the process. Also, if you’re faced with limitations, the internet is filled with information about how to make the best of your situation. Lacking sounds you love? Find a sample pack and buy it. Lacking ideas or technique? Look stuff up on YouTube. There’s an abundance of information that is either free or cheap. Investing in little things like personal connections is not only a great way to build support among people who can help you later, but it’s also a way to stay on top of new and better tools that come out from people who and work with develop them.
Studio Monitors Matter

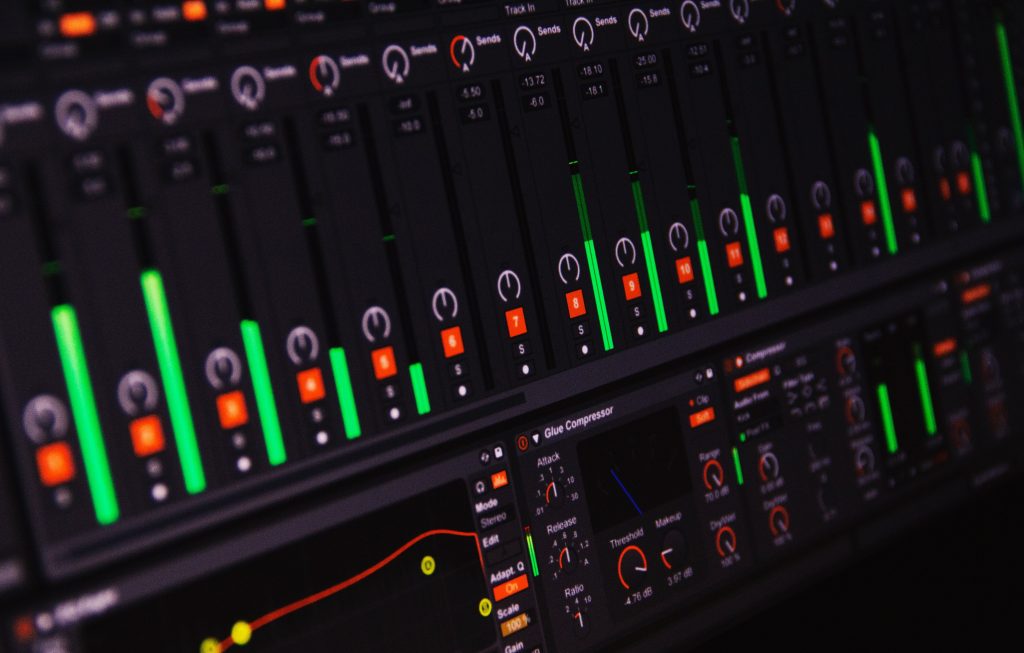
The biggest mistake I see in people who are just starting out, is to invest in cheap studio monitors because of their budget limitations. I know this one is tricky because many people have small budgets. Monitors are something you want to have for the next 10 years minimum, and you want them to be the best pair you can afford. Though experience is the most important thing to consider, but you can’t start with it if you have none, monitoring is to me, what’s you need to focus on as a close second. Studio monitors are your “eyes” in music making: if you can’t “see” what you do, your music will not be precise and the end result might be difficult to appreciate after it leaves your studio. Having proper speakers is like having access to glasses when you can’t see: all of a sudden, everything is clear and you’ll know exactly what’s not working.

  • Tight budget? I find that if you can’t invest in good monitors, it’s worth waiting. There are many ways to raise money, from getting a loan or asking relatives, or whatever. But investing in cheap speakers will only benefit you in the short run and will be a major problem in the long term. In the meantime, try getting good headphones that feel good for you when listening to your favorite songs. Go in a store and spend some time comparing models. Comfort is also important.
  • What if music production isn’t for you? If you want to produce, it’s probably because you’re a music lover. If you give up on production after buying monitors (note: contact me before doing that!), you’ll still have great speakers to DJ on or to just to listen to.
  • Having a subwoofer is a game changer. To me this is an indisputable fact; you’ll see what I mean if you get one or if you get to hear a setup that makes use of one. Thin walls? Angry neighbors will love you if you get a Subpac instead.

The takeaway here: music equipment is a useful but luxurious tool.
One of my friends came to my home one day and showed me a stunning album he made which totally blew me away. We quickly started talking production and he explained me that he was using Cool Edit (a very simple sound editor which in the early 2000s wasn’t even considered a DAW!) and no equipment whatsoever. None. Everything was made from scratch and with a lot of patience. Honestly, he changed my perspective on gear forever. Every time someone tells me they “need this” or “need that” to start working on their music, I have to yell “bullshit!” because I know and have heard otherwise.

The Role of Additional Gear

“Yeah but I love the feeling of touching knobs to produce!”

So, where should you start if you want to explore the tactile dimension of producing? If you still feel the need to buy equipment beyond a good pair of monitors, I would recommend the following:

  • Explore to know what you love doing and invest based on what you decide you like. Don’t fall for the classic “If I just have the [insert trendy piece of gear name here], then I will be okay.” Try to understand music on your computer first: play with synths, make beats, see what you like, and after a few songs, maybe you’ll notice you love synths that sound like a Moog. Learn to understand what kind of sounds you like, just like how you find out what labels an artist releases with. The more you know, the more you’ll be able to invest properly.
  • Buy used, rent if possible. Or go hang out with someone who has gear you can try. Make a song with their gear to see if it feels good for you.
  • MIDI controllers are always a good investment no matter what but aren’t essential.

Truthfully, there is no such thing as minimum equipment needed to make music, but the things I’ve outline here are things that will help you get started. I hope this helps!

SEE ALSO :  What is the Electronic Music Equipment Needed to Start Producing?   

The feeling of being behind: competition in music

cover photo by Emma Simpson

It’s interesting that somehow, music making has become a competition. If you think about competition in music and take the time to really examine this viewpoint objectively, this trend seems quite ironic. Before I debunk this common musical syndrome I often see in people I work with, I’d like to explain where I think it comes from.

One of the most common pitfalls of music making is comparing yourself to others. This is one of the most self-destructive things that can happen to a musician, but it’s so common that I sometimes feel like I need to de-brainwash people when they sit down with me to work on music.

Why comparing yourself is pointless.

Artists you’re comparing yourself with aren’t in the same category as you are. I’m not even talking about talent here, or gear; I’m talking about goals and needs. Similarly, the people who are usually using as your references for comparison were once in your shoes, but have evolved from there and are probably now making a living from music. Turning your hobby to a job requires huge changes to your music making process because you’re then dipping your toes in the business side of music, where your decisions are now in part based upon how it can generate some sort of “gain” for your career; financial or otherwise.  In other words, if you were in a car race, it would be like comparing your Jetta to a Ferrari driven by a pro driver.

I often hear this:

“I see this guy/girl making a track I can easily do but still I can’t get bookings or signed to labels.”

The truth is, it doesn’t work that way. You’re not less good or less qualified than him – you just don’t have the network he/she has.

You are comparing yourself to others because you have specific goals and needs you want to achieve. This is what you need to know.   

Your goals.

Are you aware of what your goals are? Knowing what you’re chasing will be a very helpful in terms of what exactly you need to do to achieve them. Some examples of goals in music might be:

  • Recognition: You want to be seen as someone talented for what you do and you feel that if you prove that you have skills, this will come by itself.
  • Gigs, bookings, money: Some people believe if they don’t have gigs, it means their music isn’t good or there’s something not good going on.
  • Be part of a community: If your music is good enough, you’ll be accepted and seen as important.

Your needs can be satisfied in many others ways and falling victim to musical competition by believing you’re behind might actually be the wrong way to think about it. Are you really behind others? or are you just in a different position?

Since I’m not alien to that feeling myself, I’ve often battled my inner dialogue about the competitive aspects of being a musician. I came up with a very solid way to calm myself down by reminding myself of the following points:

  • Your tastes > technical skills. No matter where you stand in terms of what you know, your tastes will always be your primary sense to help you find good ideas. Great songs are amazing because of the content they have; they are rarely good for their technical bravado. Sometimes, I find that overly produced music sounds cold and soulless. If you have great ideas, you can find people or resources online to help you consolidate it into something polished.
  • Distractions are disruptive. If your eyes and ears are looking/listening some place other than your music and the music you love, you have lost your focus. Spending time on magazines and social media make you lose track of what you’re doing. I’d rather be in my bubble until a song/album is completed than be distracted by the noise and lose my flow. For example, seeing your friends be signed a label or playing an event while you aren’t doesn’t mean anything at all; the good side of something like this is that your free time can be used in creating more music.
  • Is your network solid? Do you have supportive friends for what you do? Many people end up to having to change their “listening circle” and decide who they share their music with. If you understand that each time you send your music to X, he always bring you down, it’s definitely not someone reliable. Pick people who want to listen to your music, who have the same tastes as you do and give them feedback too.
  • How many projects do you have on the go? Crucial point here. I always encourage people to try to make music everyday, start many, many new projects and then surf around them to find the ones that are working best to push forward. It’s more important to get things done than for them all to be perfect.

The ego that loves to let itself drift into competition, once pushed aside, has a lot of room for creativity. But you must learn to understand when the ego takes over.


SEE ALSO :  Where to Get Fresh New Ideas for Tracks 

Free Ableton Live Mixing Template

(Update May 2023: When we moved to the new site, the template was lost. It was obsolete anyway as I’ve learned so much since that I can do better. I did a new one, but it’s more basic. In my opinion, it also does a better job. You can still gather ideas from this post and I will make another one but the basic is at the end of this post. The information below is for the old template, but the one to download is the new version. Sorry for the confusion. I will fix this soon.)

I’ve put together a free Ableton template after receiving feedback that it was very helpful for many people I’ve worked with. The template available on this page is aimed specifically at mixing. I’ve noticed that many aspects of mixing are often misunderstood; I’ve assembled a starting template that has bundled together many useful tools to deal with basic things – this free Ableton template will be useful for those involved in music making!

This template includes:

  • 6 Groups: Kick, Bass/low end, Percussions, Hihats, Atmosphere, Melodic.
  • 3 Busses: Low end (Where kick + bass are routed), Percussion, Melodic.
  • 1 MIXBUS: Where the busses are routed and is actually your pre-master channel.
  • 1 Reference channel: Where you drop the your reference track.
  • Multiple Sends as enhancers.
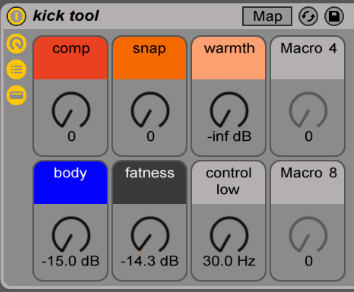
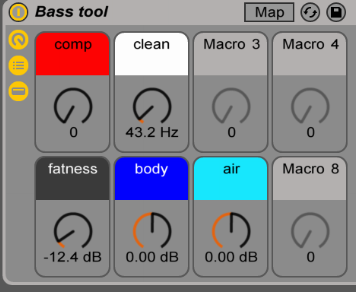
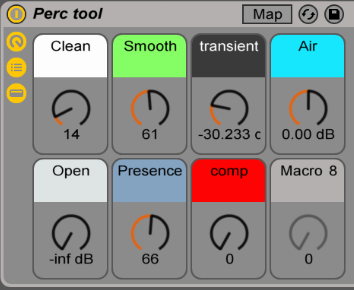
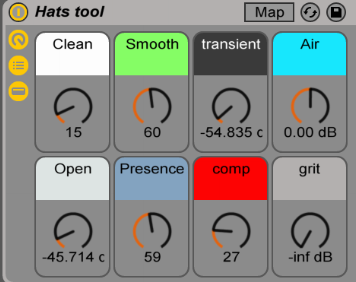
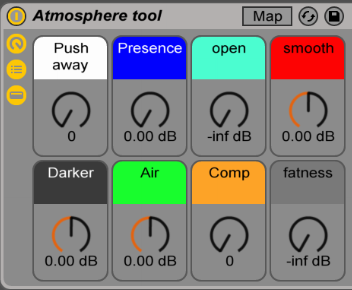
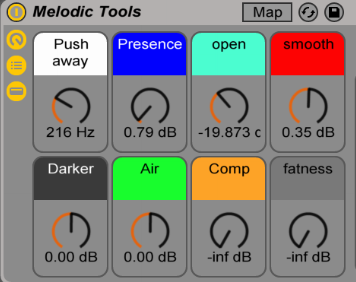
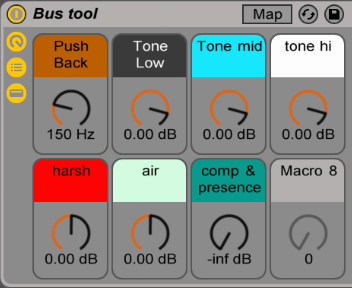
  • Macro tools on each groups and busses to help you tackle tone and potential issues.

This template looks very close to what pro engineers use like the one Andrew Scheps did for Puremix, but I found Andrew’s template wasn’t really as suitable for electronic music. I’m sure he would disagree but underground music isn’t really handled like commercial music is.


Is this template for producing or just mixing?

You could use this template to start producing with if you feel comfortable with it, but I’d encourage you to export stems from a project and then use this template to mix. Yes, it’s a bit more work, but it will also make free up your CPU and make your project ready for a new phase of production. It’s fun also to put an end to tweaking details and then focus on the mix alone.


How do I use this template?

There are many ways you could potentially use a template like this but I’d like to explain a few things to get you started quickly. First off, grouping your sounds is always a good start. I like to to think of it this way:

  • Kick group: This group is made to hold the different layers of your kick(s); the best way to make full range kick is to have up to 3 layers, but that will be handled by the group’s macro tool that uses compression and saturation. I created another little macro tool to help beef up your kick with a sub generator and a transient enhancer. I included some sounds from my collection for you and feel free to add more. If you balance everything properly, you’ll have beautiful, warm and punchy kicks.
  • Bass/Low end: This group is essentially the same thing as kicks, but to be used as the bass. Include the multiple layers of your bass (sub/mids), and I’d encourage you to also include anything that is below 200hz such as toms, synth, pads. The macro on that group will help balance it out.
  • Percussions: Anything percussive from bongos, claps, snares or percussive synthetic sounds. This group can get busy so don’t be afraid to add multiple new channels in the group itself.
  • Hihats: Hats or anything that is regular in your group and an important part of your groove could be put in this area. In my case, I sometimes include snares. Please note that there’s no right away to use the Percussion & Hihats group and experimenting might get you some interesting results.
  • Melodic groups: These two work hand in hand. One is for anything in the background and the other is for the melodic elements to be forward. The way the macros work, they will help you position properly the sounds and make the best of them. Try playing with the various knobs to see how they influence the groups.

Please note – I’m applying high pass on these groups and feel free to change the steep which can influence the sound in some good ways, sometimes.

The three busses are quite interesting to work with once you get the levels of your groups finished. For instance, you want to find the best relationship between bass and kick that are routed together. Once they are balanced, the bus allows you to control both the bass and kick at once; this can help you more easily decide on the tone of your track by moving the bus up and down.

I’ve also included a reference channel to remind you to use a track that can be used as a mood and reference board. Reference tracks are great to help you to take inspiration from parts of other tracks you like and would potentially like to use in your mix.

The various sends are simple tools to just beef up or open up your sound. Sends are really for finishing touches to your mix and they’re meant to be used as gently as they can be; subtlety can also make things intense.

Thanks to everyone who provided feedback for the development of this free Ableton template; I am glad I can continue to help everyone enjoy making music!

Click to download this free Ableton template: (New version 2023)

Pheek’s template 2.0 for Ableton Live 11.3+

My tracks always have the same song structure

(Cover Photo by Luca Bravo)

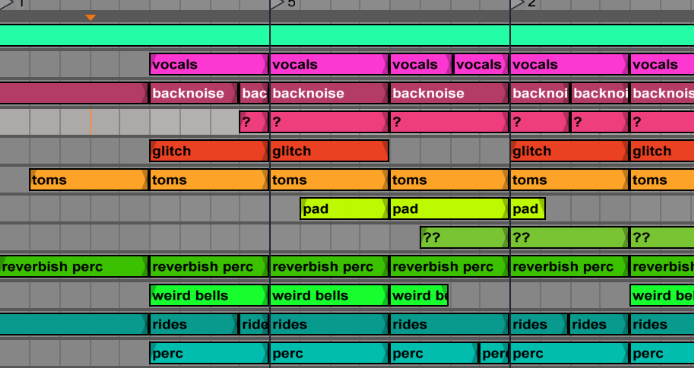
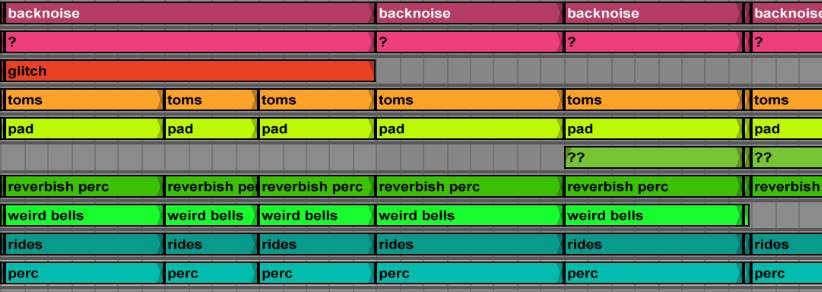
One of the common things I often see and also struggle with myself is that sometimes I feel like my songs are always arranged in the same way; my song structure is often the same. While there’s nothing inherently wrong with following a regular song structure, often I feel like I need to have more arrangement variations in my work and new ways to present my music.

ableton live, ableton, structure, arrangements

So, what’s wrong with repeating song structures you already know work?

There are secret ways to consistently get great results with certain arrangements that, for the most part, will always “work”. When I used to DJ hard techno or drum and bass in the late 90s, eventually I became really bored of all the tracks had the exact same structure. Yes, it was extremely easy to mix the tracks together once you understood the “tricks” but at the same time, it was also underwhelming for listeners and DJs with a creative minds who preferred more challenging music and mixing.

It’s important not to fall into repetitive habits and patterns; you might find new arrangement tricks while exploring and experimenting with new song structures.

Before jumping into slice mode to get your arrangements upgraded, let’s outline a few rules that will be very useful to consider before we actually begin editing:

  1. Export a wav file of the last track worked on (any project!), finished or unfinished. Especially if you’re working using my method of Parallel Music Production; this technique will be very useful. Start a new habit of not only saving your project at the end of your session, but also bouncing a wav file of what you have.
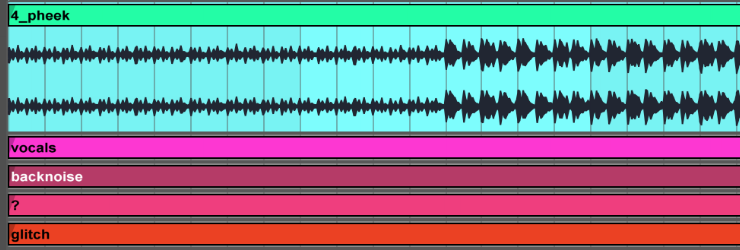
  2. Import your file into the current project you’re about to work on. By importing, I’m referring to the arrangement section where you can drop in an empty, dedicated channel.
  3. Use markers for the arrangements as for where there are key points, changes, transition. With these references, you can see if your current project has similar points as your previous wav file, and then you might want to change it up if they are similar.
  4. See if the two projects can be easily mixed by a DJ. This is a good test to see if your track has too much going on, or if things will be fun to mix. I’ve said countless times before that if your music is fun to mix, DJs will carry a copy of your track for all their sets.

Slice your song structure

With your new habits in place, now go into slicing mode and get things started. As I’ve discussed before in a previous article, How to Turn a Loop Into a Song, you’ll need to decide the bpm and length of your track as starting point and build from there. I invite you to refer to the post if you need the full tutorial on that topic.

So let’s say you finally have a structure made up that you’re happy with. Here are the main key points I often use to avoid redundancy:

  1. Find the main sections of your song, and slice off the beginning and the end. A “section” of a song is a part that is different than others for its content. In pop music, we refer to these sections as bridges, breakdowns, choruses, etc. In electronic music, these types of sections might be a bit more subtle or non-traditional, but they’re still there.
  2. With your sections isolated, determine if your perspectives are balanced. By “perspective”, I mean this just like it is used in photography; see if your track has balanced ratio.
  3. Insert empty slices in middle of the parts as well as some random points in the song. Check some “winks” that you might be able to make from the reference track you originally imported. “Winks” are when one song might “talk or reply” another if mixed properly.
  4. Move around your sliced blocks/sections. Try wild swaps and mess with perspective. Be creative. In contrast to the often useful “use your ears not your eyes” advice, in this case I highly suggest working on your structure visually alone without any sound at all so you’re not biased or held back in your arranging experimentation. If you’re new to the idea, make sure you make a backup copy first of your project. Personally, I spend quite some time to make something visually appealing with my blocks even before listening.
  5. Intentionally leave mistakes. Did you move something slightly off the grid? Did you paste a section at the wrong place? Try leaving in it the structure until next time you come back to it.

Try messing with your song structure; let me know how it goes!

SEE ALSO :   Lego Blocks as Song Structures