Golden Ratio In Music And Other Maths
It is often said that music is a form of mathematics. That is, if start wanting to quantize it and intellectualize it. Programming rhythms comes to specific formulas and engineering is also using precise measures to go to precision. While we all agree that music comes from the heart, certain elements rely on numbers. For rhythms, especially in quirky and complex time signatures, drummers will count in their minds to follow a specific structure. You might have done music without thinking about numbers which is absolutely fine but sometimes, using the maths can unlock a whole aspect of exploration you haven’t thought of. Using maths is also a way of detaching yourself from a certain control and letting logic take over. What’s interesting is how in electronic dance music, these complex theories can even create some magic on a crowd.
Some DJs are interested in deciphering the structure of a beat to find a counter song to mix it with. Using maths to build song is also a way to use a vocabulary that reaches people, subconsciously or consciously, on a an intellectual level that balances the emotional ride.
Let’s explore a few theories that can evoke some inspiration as well as how they’re used in music.
Golden Ratio & Fibonacci Sequence
The golden ratio, often denoted by the Greek letter φ (phi) and approximately equal to 1.618, is a mathematical proportion that occurs when a line is divided into two parts such that the ratio of the whole length to the longer part is the same as the ratio of the longer part to the shorter one. This elegant ratio has fascinated mathematicians, artists, and architects for centuries due to its visually pleasing properties. It appears abundantly in nature—in the spirals of seashells, sunflower seeds, hurricanes, and even the branching of trees or the proportions of animal bodies. In art, the golden ratio has been intentionally applied to create balance and beauty, from the compositions of Leonardo da Vinci to modern graphic design. Architects have also used it to structure harmonious spaces, most famously in the Parthenon and other classical buildings. The golden ratio remains a valuable tool for creating natural-looking, aesthetically pleasing structures and compositions across various artistic and design fields.
/indigomusic/media/post_attachments/wp-content/uploads/2025/02/The-Vitruvian-Man-and-the-Golden-Ratio-A-Mathematical-Masterpiece.png)
Leonardo
In music, the golden ratio can manifest in both structure and timing, often contributing to a sense of natural flow and aesthetic balance. Composers have been known to divide musical pieces according to the golden ratio, placing climactic moments or transitions around the 61.8% mark of a composition’s total duration. This can be observed in works by Bartók and Debussy, as well as in modern film scores, where the golden point subtly guides emotional peaks. On a smaller scale, the ratio can influence phrase lengths, chord progressions, or rhythmic development, creating sections that feel intuitively satisfying without sounding formulaic. Some producers and sound designers also use Fibonacci-based sequences (which approximate the golden ratio) to build patterns or modulate effects, subtly echoing nature’s growth logic in sonic form.
If you’re curious to explore the golden ratio in your music-making, here’s a simple experiment you can try in Ableton Live, using both arrangement and sound design. For arrangement, start by setting a clear total length for your track—let’s say 5 minutes (300 seconds). Multiply that by 0.618 to find your golden point: around 3 minutes and 5 seconds. Place a major transition, breakdown, or drop at that moment. You’ll notice how naturally it sits in the overall flow of the song. For sound design, try using a Fibonacci-based delay by setting delay times to values like 3ms, 5ms, 8ms, 13ms, and so on, which approximates the golden ratio rhythmically. You can stack delays or modulate reverb decay and feedback using these numbers to create organically evolving textures that feel alive and non-linear. These small adjustments, when made with intention, can lead to surprisingly coherent and satisfying results.
The Fibonacci sequence is a series of numbers where each number is the sum of the two preceding ones: 0, 1, 1, 2, 3, 5, 8, 13, 21, 34, and so on. Named after the Italian mathematician Leonardo of Pisa (known as Fibonacci), this sequence appears naturally in countless places—such as the arrangement of leaves on a stem, the spirals of pinecones, shells, or galaxies. What makes the sequence particularly fascinating is that as the numbers increase, the ratio between consecutive terms approximates the golden ratio (≈1.618). This connection makes the Fibonacci sequence a practical tool for modeling natural growth and structure. In music, Fibonacci numbers can be applied to define note groupings, bar lengths, tempo changes, or rhythmic structures, helping to create compositions that feel balanced and organic while still escaping rigid, predictable patterns.
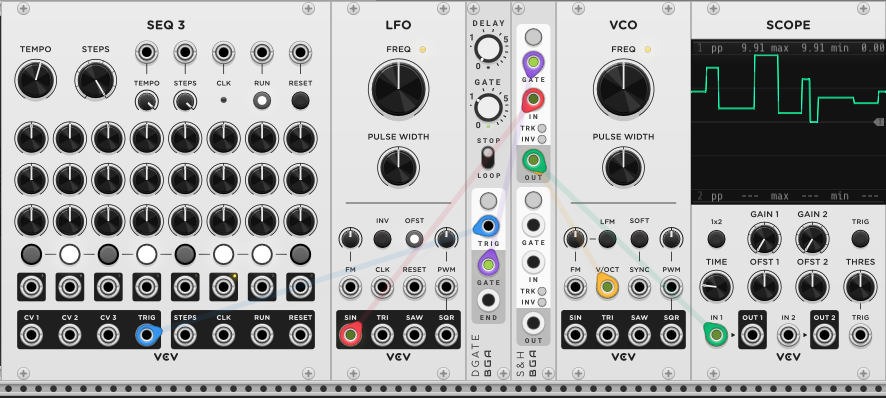
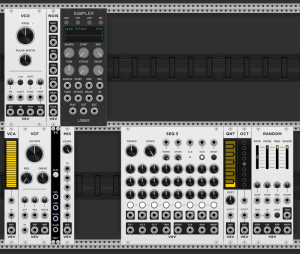
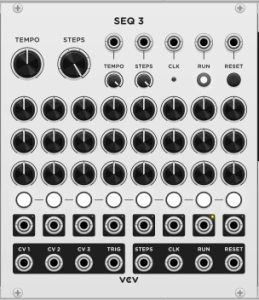
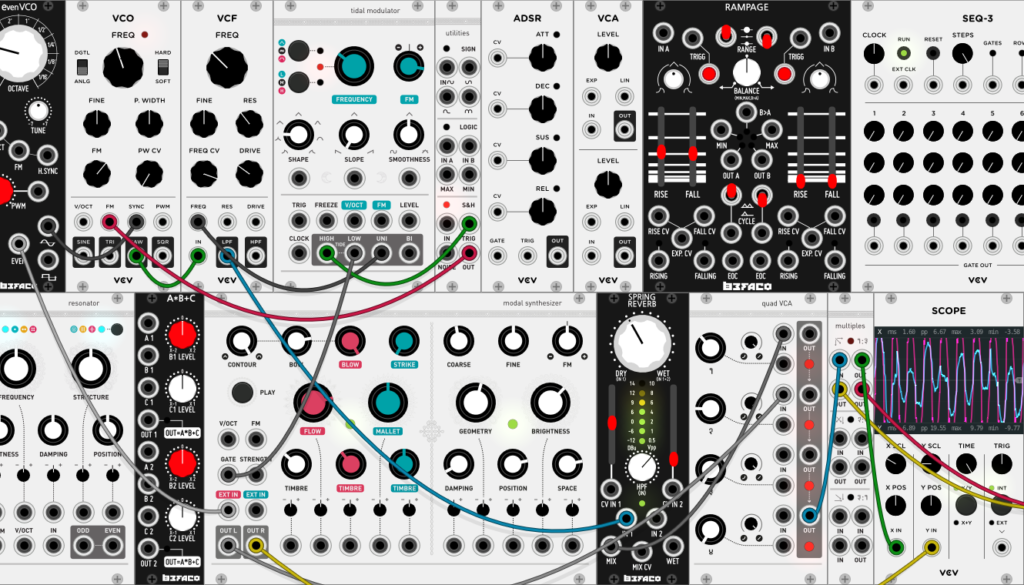
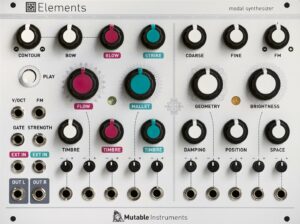
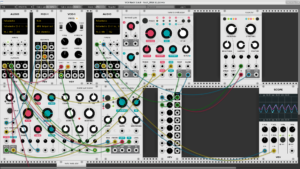
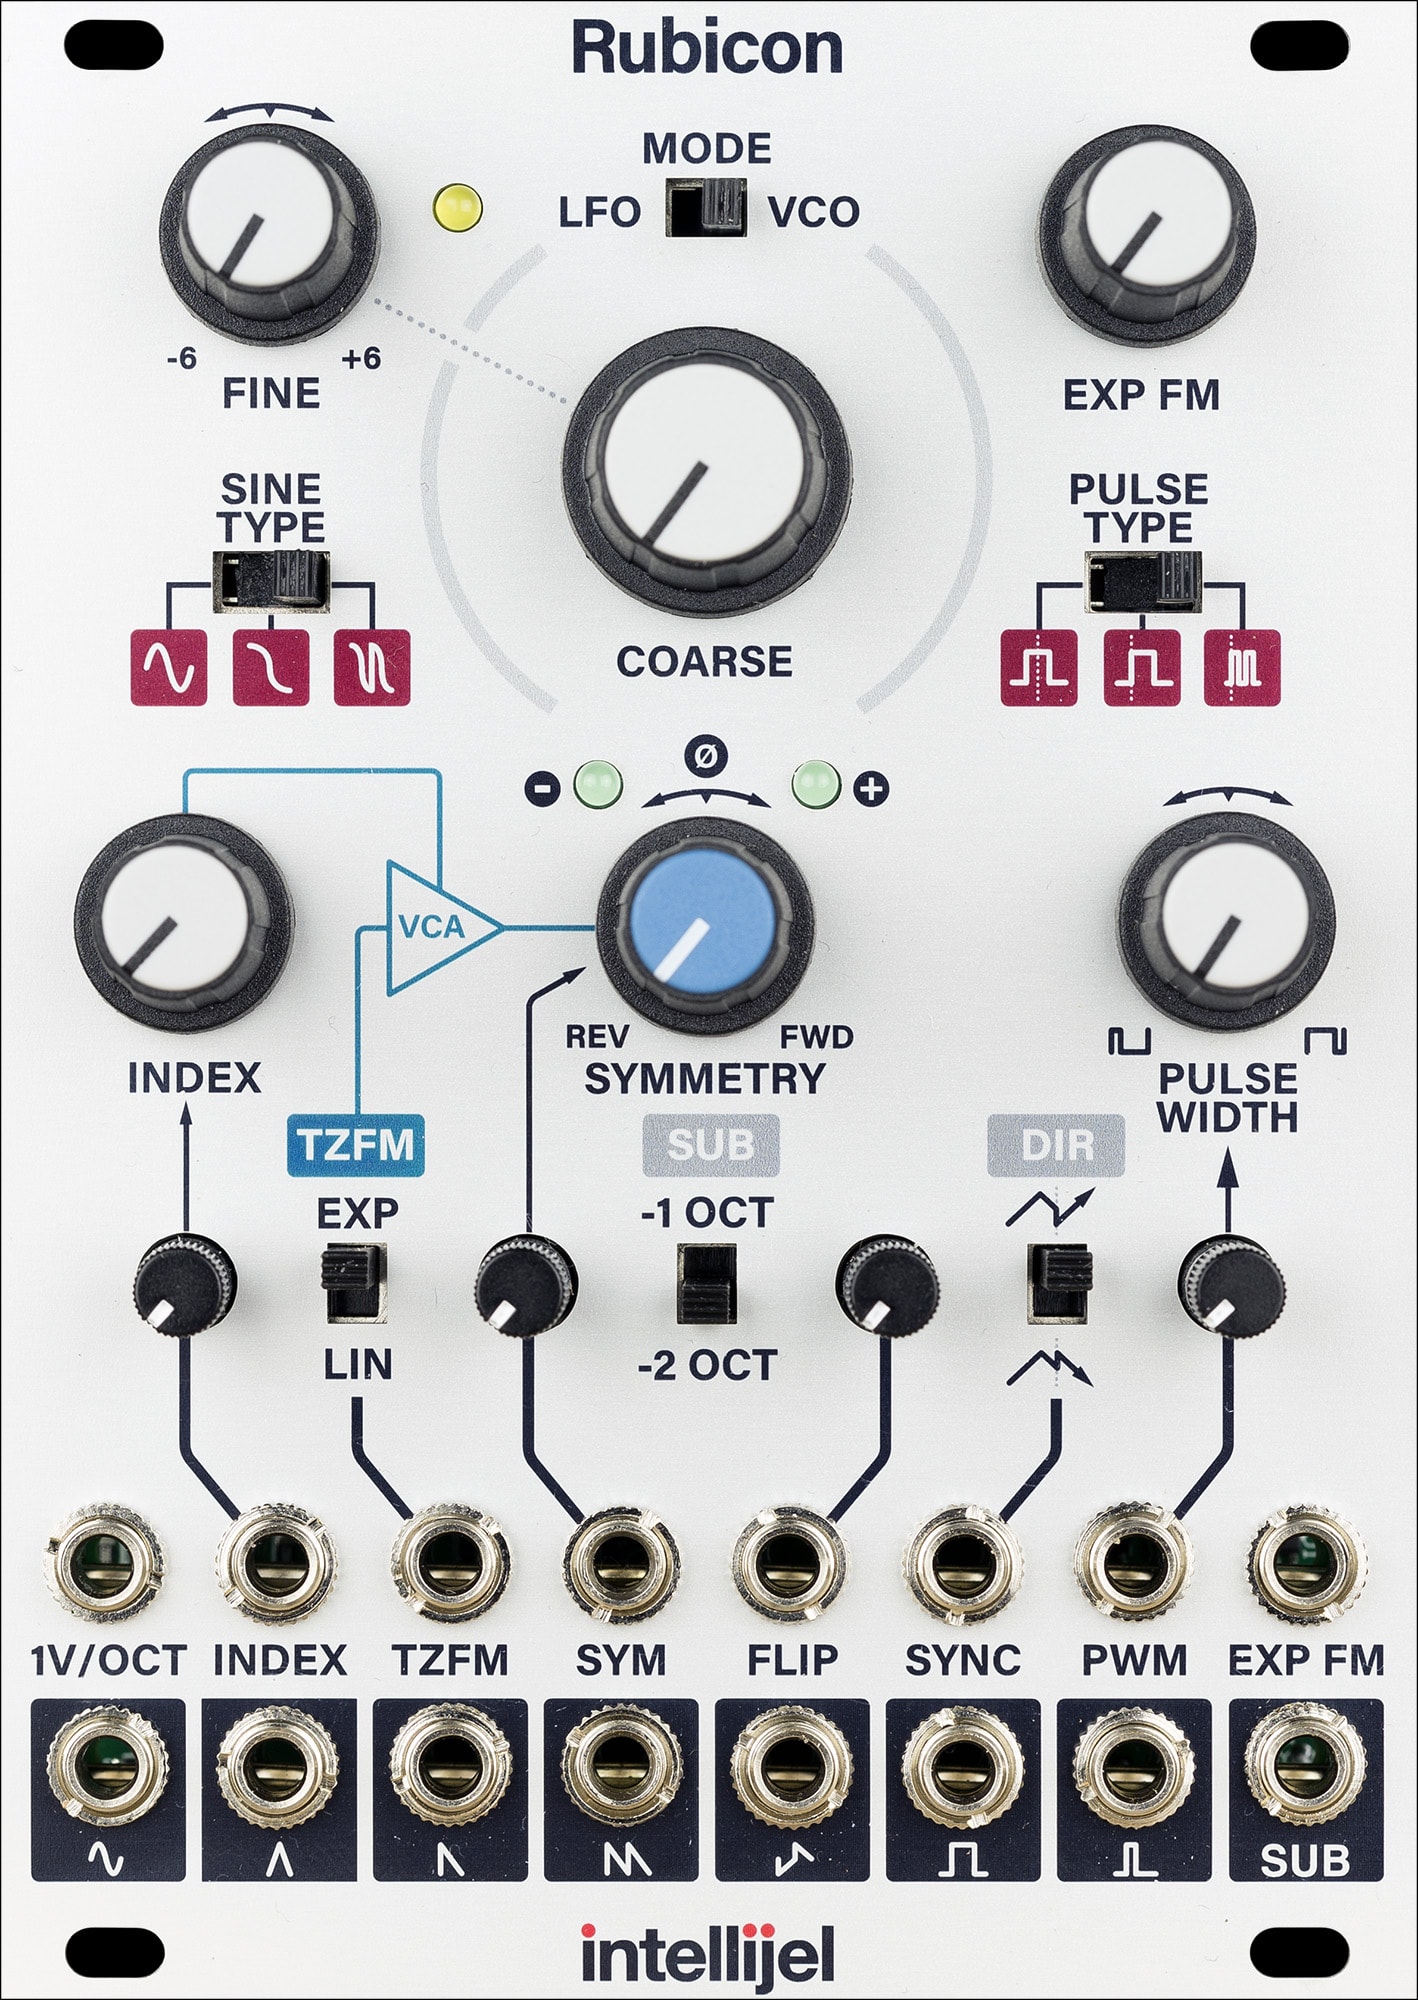
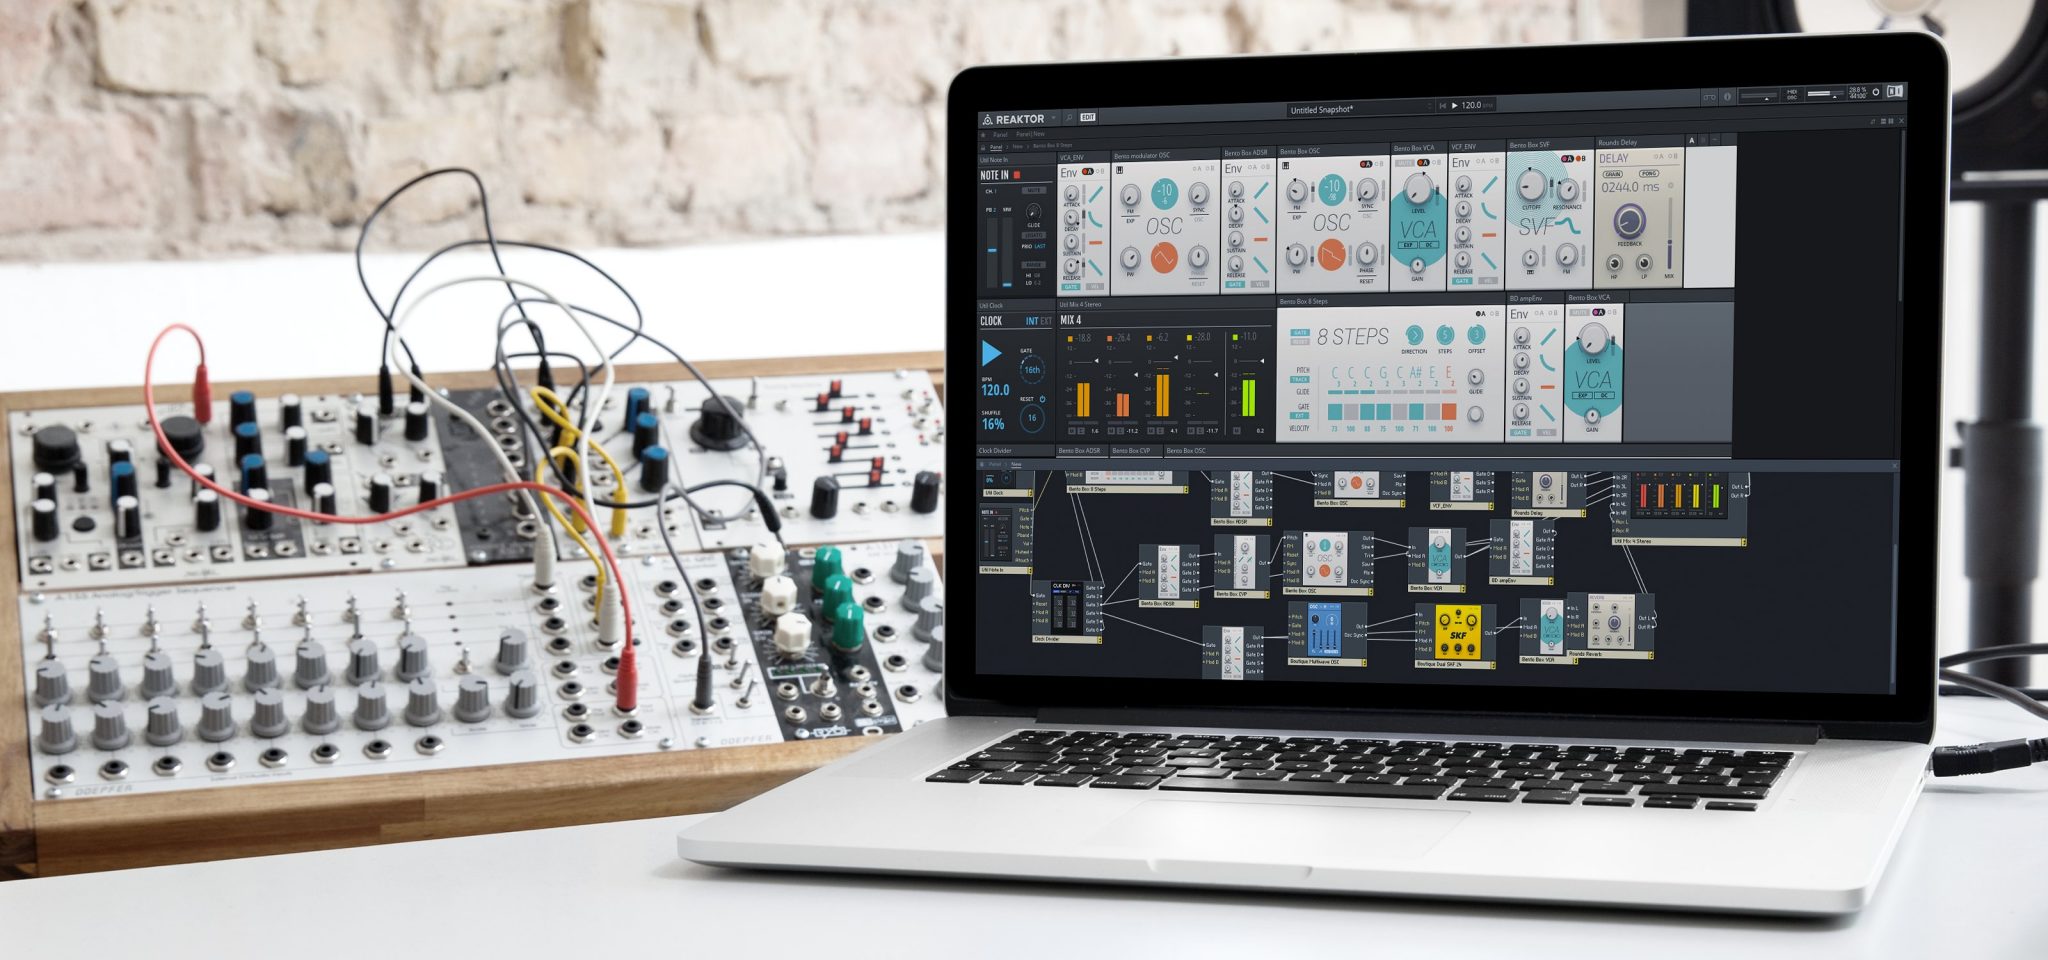
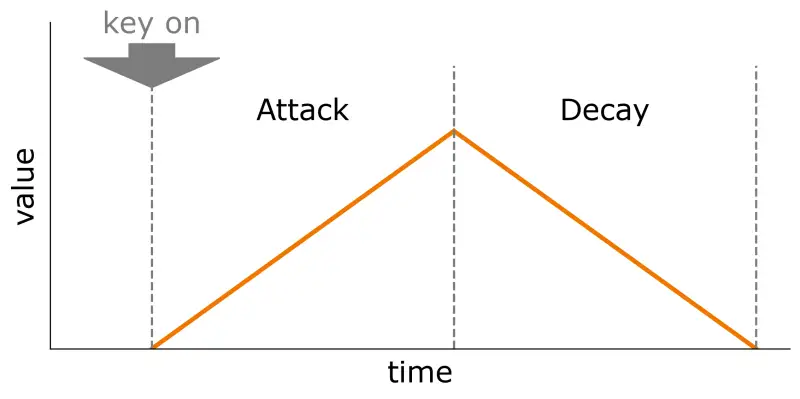
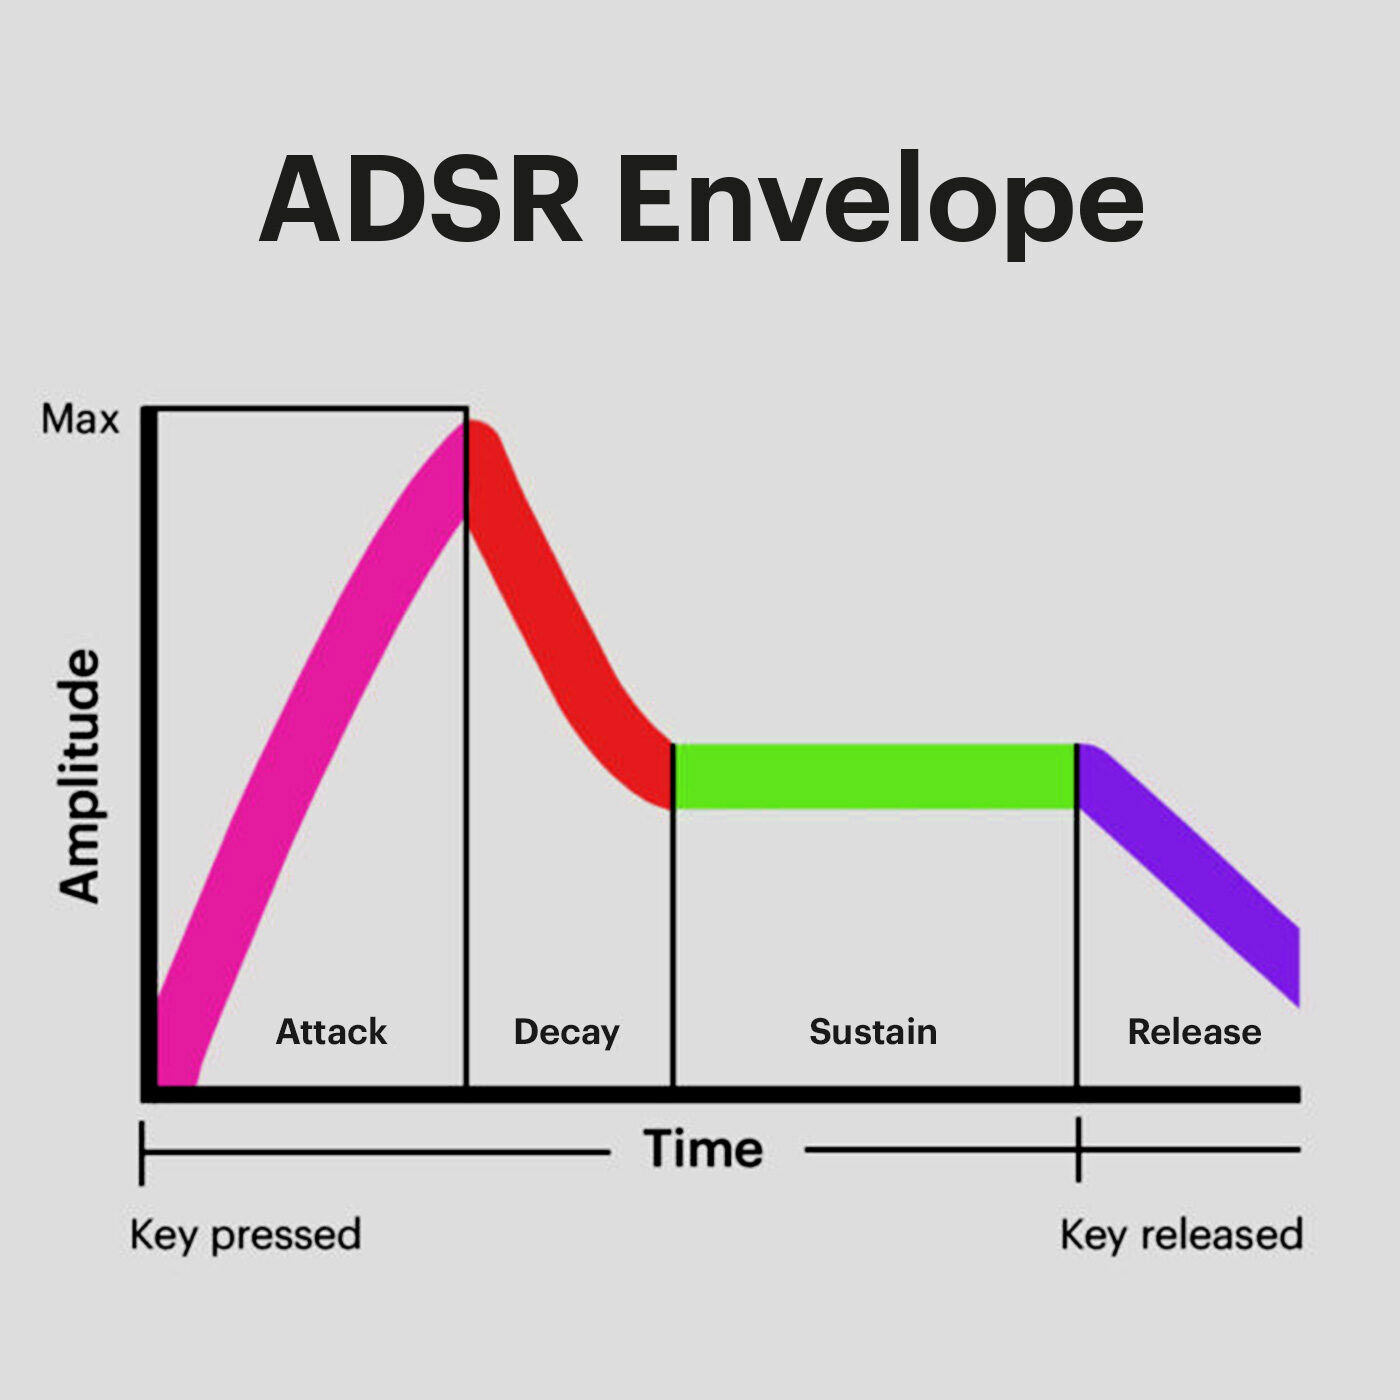
Using the Fibonacci sequence in a sequencer is a creative way to introduce natural, evolving patterns into your music. In a traditional step sequencer—whether in Ableton’s MIDI clips, a hardware device, or a modular environment like VCV Rack—you can set the number of steps in a sequence to Fibonacci values such as 5, 8, or 13. For example, using an 8-step melodic sequence alongside a 5-step rhythm loop creates polymetric interplay, where patterns phase in and out over time before looping back together. In VCV Rack, modules like SEQ-3, GridSeq, or Foundry can easily be configured to use these step lengths, and by using clock dividers or logic modules, you can modulate events based on Fibonacci triggers (e.g., send a signal every 13 pulses). Another approach is to apply Fibonacci values to parameter modulation, such as controlling envelope lengths (e.g., attack of 3ms, decay of 5ms, sustain level at 8, release at 13ms), which can result in dynamic shaping of sound that feels organic and nuanced.
Pi (π)
Pi (π) is an irrational number that represents the ratio of a circle’s circumference to its diameter, approximately 3.14159. Its decimal form goes on infinitely without repeating, which has fascinated mathematicians, scientists, and artists for centuries. In art, Pi has been used as a symbol of infinity, chaos, and order—sometimes metaphorically, and at other times, literally. Visual artists such as Roman Opalka and M.C. Escher have explored the theme of infinite patterns and sequences, resonating with the nature of Pi. Some composers and digital artists have also mapped the digits of Pi to musical notes, pitches, or durations, creating generative compositions that are mathematically grounded yet aesthetically unpredictable. Because Pi is tied to circular motion and endless cycles, it becomes a poetic reference point in any creative process involving loops, spirals, or infinite variation.
Here’s a fun and mind-bending exercise to incorporate the mathematics of Pi into your music-making, especially using a step sequencer or MIDI programming environment. Start by mapping the digits of Pi (3.141592653…) to musical notes or rhythmic values. For pitch, assign each digit (0–9) to a note in a scale—for example, in C major: 0 = C, 1 = D, 2 = E, up to 9 = A#. Using the digits of Pi as your input, the first melody becomes: E (3), C (1), D (4), C (1), G (5), A (9), F (2), A# (6), F# (5), E (3). You can input this into Ableton’s MIDI clip editor or a step sequencer in VCV Rack (like Seq-3 or PhraseSeq) to generate a unique melodic line. For rhythm, use the digits to set note lengths or gate durations—for instance, 3 = 3/16, 1 = 1/16, 4 = 4/16, and so on. The irregularity of Pi ensures a non-repeating, organic structure that still retains a mathematical backbone, resulting in patterns that feel alive and unpredictably balanced. You can loop a phrase, then shift the starting point (circularity!) to explore endless variations, just like the number itself.
Fractals
Fractals are complex geometric shapes that exhibit self-similarity, meaning their structure looks similar at different scales—zoom in or out, and you’ll still see the same kind of pattern. Mathematically, they’re created through recursive formulas, where a simple rule is applied repeatedly to generate intricate forms. In art, fractals are frequently employed to create visually rich compositions that replicate natural forms, such as trees, coastlines, or clouds. Artists like Jackson Pollock unknowingly tapped into fractal aesthetics with his layered drip paintings, while digital artists use algorithms to create endlessly detailed fractal landscapes. In generative music, fractal principles are employed to control parameters such as melody, rhythm, or structure, where patterns evolve through iteration, yielding music that is both structured and unpredictable. Tools like Koan or modular environments like VCV Rack with recursive modulation chains allow artists to sculpt evolving soundscapes rooted in mathematical logic. In concrete art, fractals can be found in compositions based on geometric repetition and transformation, such as the work of Max Bill or Josef Albers, where abstract forms echo the recursive nature of fractals through minimalist visual language.
In music making, fractals can be applied by using recursive patterns, where a simple motif is transformed and layered at multiple scales to create evolving, self-similar structures. This is especially effective in generative or ambient music, where looping patterns slowly morph over time. One way to experiment with fractals in Ableton Live is to start with a short MIDI sequence—say 3 or 4 notes—and duplicate it while applying slight transformations to each copy (change pitch, rhythm, or velocity). Repeat this across several tracks, nesting variations within variations. You can use Follow Actions to trigger clips unpredictably, mimicking recursive behaviour. In VCV Rack, try patching a quantized sequencer into a clock divider and then feeding its output back into a modulator or a VC-controlled sequencer. Add layers with random or LFO-driven CV modulating delay times or filters at different rhythmic resolutions. The key is to think recursively—every layer should be a variation of the previous one, creating depth and movement while staying thematically connected.

Polyrhythms and Ratios
Polyrhythms are the simultaneous layering of two or more rhythmic patterns with different pulse groupings. A classic example is the 3:2 polyrhythm, where one rhythm cycles in three beats while the other completes two in the same period. This creates rhythmic tension and resolution as the patterns phase in and out of alignment. Polyrhythms are deeply rooted in African, Indian, and Afro-Cuban musical traditions, where complex rhythmic layering forms the foundation of percussion-heavy music. In electronic and experimental music, artists such as Aphex Twin and Squarepusher have explored extreme polyrhythmic density, utilizing it as a tool to push rhythmic boundaries. At its core, rhythm is inherently mathematical—each beat, subdivision, and repetition can be described as a ratio or time-based equation. These ratios can also be visualized as geometric shapes: a 4/4 rhythm can be represented as a square loop, while a 5:3 polyrhythm might resemble overlapping polygons cycling around a circle. This geometric interpretation, often employed in software such as Polyrhythm Generators or visual sequencers, reveals the spatial relationships between pulses and helps producers explore how rhythmic cycles intersect, repeat, and evolve over time.
To explore polyrhythms in Ableton Live, Max for Live provides several creative tools that enable intricate rhythmic layering while maintaining control and musicality. Some standout patches include:
🎛️Polyrandom by Encoder Audio
A powerful rhythm generator that lets you layer multiple sequencers with independent step lengths, clock divisions, and playback modes. You can easily build 3:2, 5:4, or even non-integer rhythm ratios by setting different loop lengths and triggers per voice.
🎛️ML-185 Sequencer
Originally based on the classic Roland 185 step sequencer, this Max patch allows for gate-driven sequencing with adjustable steps, lengths, and gate modes—ideal for creating looping rhythmic structures that subtly shift over time. You can get the Max equivalent here.
🎛️MOOR by K-Devices
This step sequencer allows for independent control of pitch, velocity, duration, and time division per step. You can create layered rhythmical parts that evolve at different rates while staying locked to a master tempo.
Dos for Using Polyrhythms Creatively
-
Set a common clock base: Anchor your sequences to a shared BPM so they interlock instead of drift.
-
Use clear contrast: Combine rhythms with distinct subdivisions (e.g., 3 against 4, or 5 against 2) to create recognizable interplays.
-
Visualize interactions: Use Ableton’s clip grid or tools like Note Grid to see when patterns align or diverge.
-
Assign voices to different instruments: Helps the ear distinguish overlapping patterns (e.g., kick in 4, hi-hats in 5, synth accents in 7).
Don’ts: Avoiding Rhythmic Chaos!
-
Don’t stack without intention: Random polyrhythms without contrast or hierarchy will feel disjointed and overwhelming.
-
Avoid unclocked loops: Unrelated loop lengths can create drift unless bounded by some sync or cycle logic.
-
Skip over Boolean logic unless needed: In VCV Rack or more advanced Max setups, Boolean gates (AND, OR, XOR) are used to determine whether notes should trigger when overlapping conditions occur. While powerful, this can quickly lead to erratic or hard-to-follow rhythms if not well-structured. Use logical gates to filter complexity, rather than increasing it.
If you want to go deeper, a good practice is to assign mute conditions or probabilities to layers. For instance, a rhythm might only play if both a 5-step and a 3-step cycle hit simultaneously, mimicking how logic modules work in VCV Rack. This creates a controlled complexity that sounds deliberate rather than chaotic.
Group Theory and Symmetry
Group theory is a branch of mathematics that studies symmetry, specifically, how objects can be transformed (rotated, reflected, shifted, etc.) without changing their essential structure. A group is a set of operations that can be performed on an object, where doing one operation after another still results in something within the same system. For example, if you rotate a square by 90 degrees or flip it over, it still looks like the same square. These transformations form a group because they can be combined and reversed while preserving the overall shape.
In art, group theory and symmetry are visible in patterns, tiling, and repeating forms. Consider Islamic geometric art, M.C. Escher’s impossible shapes, or mandalas—all of which utilize reflections, rotations, and translations based on mathematical symmetry. Even color schemes or layouts can reflect symmetry operations. Artists may not always know they’re applying group theory, but when they repeat and transform visual elements in structured ways, they are often working within that mathematical framework. This same logic can be applied to music—especially in pitch, rhythm, and structure—which we’ll explore in the next section.

Activity: Musical Symmetry Using MIDI Transformations
Step 1 – Create a Simple Motif
-
Open a MIDI clip and write a short melodic pattern of 4–8 notes in your scale of choice (e.g., C minor).
-
Keep it rhythmically simple for now (e.g., 8th notes).
Step 2 – Apply Group Transformations
Now duplicate the clip a few times and apply one of these musical symmetry operations to each version:
| Group Theory Term | Musical Equivalent in Ableton |
|---|---|
| Translation | Shift the whole phrase forward by a few steps (e.g., 2 beats later). Use clip offset. |
| Reflection (Retrograde) | Reverse the MIDI notes (note order flips, rhythm preserved). Use the “Reverse” button in Clip view. |
| Rotation | Rotate the note order (move the first note to the end, repeat). Do this manually in the MIDI grid. |
| Inversion | Invert pitch intervals around a center note (e.g., C becomes G, D becomes F). Do this by hand or with a MIDI effect like “Pitch” or “Scale.” |
Step 3 – Layer and Explore
-
Stack these clips on separate tracks with different sounds.
-
Use Follow Actions or Scene Launch to play different transformations in sequence or randomly.
-
Add delay or reverb to accentuate the spatial feel of symmetry.
What You’re Learning
You’re essentially building a “group” of operations that preserve the core identity of your original idea while transforming its form. The fun part is noticing how the same melody can feel different when mirrored, rotated, or inverted—much like Escher’s visuals.
This exercise is ideal for loop-based music, minimalism, or generative setups, and it fosters a deeper understanding of how mathematical logic can influence musical variation.
Markov Chains
Markov Chains are mathematical models that describe systems which transition from one state to another, where the probability of each future state depends only on the current state, not the full history. In the context of music, this means that a set of probabilities can determine each note, chord, or rhythm based on what came right before it, allowing for controlled randomness that still feels coherent. Composer and Max developer Dillon Bastien has explored this concept extensively in his Max for Live patches, creating tools that generate melodies or rhythms based on Markov-based probability matrices. His patches let you define which notes follow which, and how likely they are to occur, resulting in sequences that evolve in an organic yet unpredictable way. The outcome isn’t pure randomness—it’s guided unpredictability, where musical ideas drift, return, and mutate without feeling disjointed. This technique is particularly effective for generative or ambient music, where subtle variations are key to maintaining interest without strict repetition.
Topology & Modularity
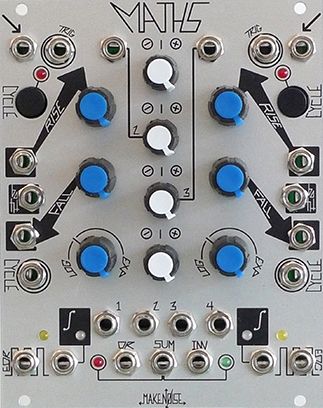
Topology is a branch of mathematics that studies the properties of space that remain unchanged under continuous deformation, like stretching, bending, or twisting, but not tearing or gluing. It’s less about exact measurements and more about relationships and connections between elements. In art, topology has inspired explorations of space and form, especially in modern sculpture and conceptual installations. Artists like Möbius-inspired M.C. Escher, or mathematically-informed sculptors such as Bathsheba Grossman, have used topological concepts to create visual works that challenge our sense of inside, outside, and continuity. In modular art, the concept of modularity—encompassing the assembly of complex systems from interchangeable parts—reflects a topological mindset: each module (or part) maintains a relationship with others through connection points rather than fixed placement. These ideas are not just visual; they inform how we think about structure, transformation, and spatial interaction—concepts that are especially useful when building music systems in environments like VCV Rack or Max/MSP.
Tuning Systems and Mathematical Temperament
Tuning systems and mathematical temperament refer to the ways in which musical pitches are organized and spaced. While most Western music today employs 12-tone equal temperament (12-TET), where the octave is divided into 12 equal parts, this is just one of many possible systems. In just intonation, pitches are tuned using whole-number frequency ratios (like 3:2 for a perfect fifth), which creates incredibly pure-sounding intervals, especially for drones and harmonic content. Pythagorean tuning, mean-tone temperament, and microtonality (which uses intervals smaller than a semitone) are all alternative approaches that shift the colour and emotional feel of music. Artists such as La Monte Young, Wendy Carlos, and Aphex Twin have employed alternative tuning systems to depart from the uniform grid of equal temperament, creating music that feels otherworldly, ancient, or even unsettling, often with rich tonalities that are mathematically precise yet sonically unfamiliar to modern ears.
To experiment with this yourself, try this simple exercise in Ableton Live: load a synthesizer (like Operator or Wavetable) and insert the Max for Live “Microtuner” device. Import a Scala tuning file—many of which are based on just intonation or other temperaments (you can find free libraries online, like the Scala archive). Choose a tuning like “5-limit Just Intonation” and play a simple triad. You’ll immediately hear how the relationships between notes feel smoother, more resonant, or in some cases, completely alien. Try composing a loop using only this scale and observe how your harmonic instincts change. If you’re using a modular setup like VCV Rack, modules like TUNATHA or Scala Quantizer allow you to explore the same concept using control voltage, turning tuning into a creative decision rather than a fixed rule.
Cellular Automata
Cellular automata are mathematical systems where a grid of cells evolves based on a set of simple rules. Each cell’s future state depends on its current state and the states of its neighbours—yet from these fundamental interactions, complex and often beautiful patterns can emerge. One of the most famous examples is Conway’s Game of Life, where pixels appear, disappear, or move depending on how many neighbouring cells are “alive.” These systems have been referenced in digital art, generative design, and video game simulations, and have inspired everything from glitch aesthetics to visual music videos. The appeal lies in their unpredictability that’s still rule-based, like nature simulating itself through logic.
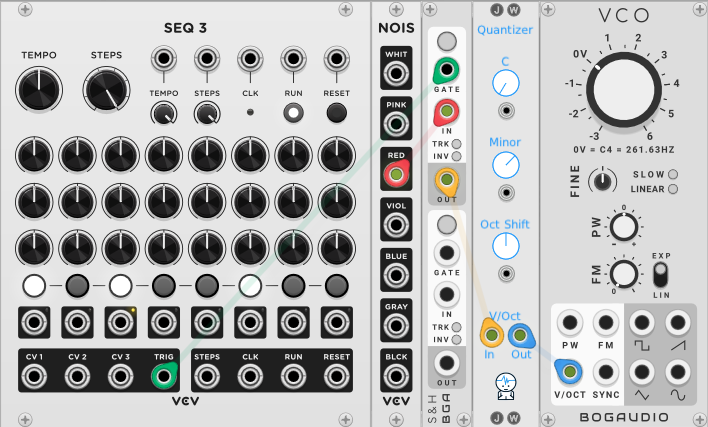
In VCV Rack, several modules harness cellular automata to control rhythm, pitch, or modulation. Modules like Voxglitch Glitch Sequencer, Caudal by Vult, or LIFE can act as evolving trigger sources or CV generators. For example, you can use a CA module to generate rhythmic gates that shift unpredictably but stay patterned, or to modulate parameters like filter cutoff, oscillator pitch, or delay feedback. This brings life and non-repeating behaviour into your patches, perfect for ambient, generative, or experimental music. You can patch a CA’s output to a sequencer clock input, letting the rhythm “breathe” over time, or assign it to modulate pitch quantizers for melodies that evolve based on logic rather than randomness. It’s a powerful way to introduce emergent complexity into your music, where chaos and order coexist in harmony.
Conclusion
Mathematics has long been a silent partner in the evolution of art, not just as a set of cold equations, but as a creative tool for solving problems, organizing ideas, and generating beauty. In music, math helps us go beyond instinct, offering frameworks for structure, coherence, and unpredictability. Whether it’s the balance of the golden ratio, the evolving logic of cellular automata, or the symmetry of group theory, these systems can be harnessed to break creative blocks, introduce fresh perspectives, and expand your sonic vocabulary. This blog post isn’t about making math academic or intimidating; it’s about offering unusual, inspiring entry points to spark the creation of new songs. By applying these ideas in small, playful ways—inside Ableton, VCV Rack, or any DAW—you invite deeper, more dimensional thinking into your workflow.
For listeners, these mathematical structures often translate into patterns and proportions that feel intuitive, even if they go unnoticed at first. But for those who pay attention, they offer codes to crack, hidden architecture beneath the surface of sound. This not only creates a deeper listening experience but also fosters a more intimate dialogue between the artist and the audience. Whether or not you’re a math enthusiast, embracing these concepts opens the door to a new kind of creativity—one that blends logic with emotion, structure with freedom, and chaos with control.


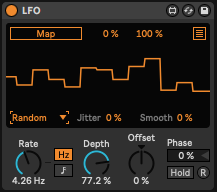 5. Random/Noise Wave: Chaotic and Experimental
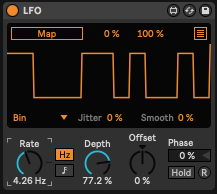 As of my last knowledge update in September 2021, Ableton Live’s “Binary” form might refer to a specific device, feature, or concept that was introduced after that time. However, if we’re discussing a feature related to binary operations or manipulation, here’s a general explanation of how binary operations might be used in a music production context: