The Inspiration Cycle
Most people enjoy discussing music technically in terms of production as we all wonder where to start and how to handle ideas in order to make a song. I also follow many magazines and articles which cover how the brain perceives creativity, where it starts, and how to invoke it and keep it alive. However, even if you know the techniques to make music, remaining inspired to make music can become a challenge. I struggle with musical inspiration as well, but also have a few tips if you’ve been struck with writer’s block that I find always work.
How is your inspiration cycle working?
This video about using flow is tightly linked to the experience of inspiration. Let’s dive deeper.
Through reading and my own personal experience, I’ve noticed that inspiration comes and goes through a number of phases, in a cycle:
- The stimulation and satisfaction of the mind.
- Conceptualization.
- Struggle.
- Release and creativity.
- Project completion.
- Transmission, validation.
- Celebration.
In the above video, the discussion is around flow, which is an important state of mind for a high level of creativity that can be reached by athletes and musicians during a performance. You can also access this level of creativity by making music, in your studio. But before a studio session, you need an idea and concept to make music around. Let’s examine the phases of the musical inspiration cycle I outlined above:
The stimulation and satisfaction of the mind
To sum up this phase, think about falling in love with something. For the writer, it’s a book or a scene description. The photographer gets excited about a landscape; the gardener, about the perfect trees; and the musician, sounds or a song. This can stimulation can occur anywhere at any time; in your car for example, or in many cases, during a “celebration” of some kind. The cycle becomes evident here, because the last phase is the celebration of completing your work, but this phase can also restart the cycle and restart the first phase of stimulation.
 For example, many people feel that they want to become a DJ after a special night in a club. This is an example of musical stimulation kicking off the cycle of inspiration. People also like to celebrate art, in search of some sort of new stimulation for the mind; to be inspired to create.
Describing his creative process, Mozart observed, “Those ideas that please me I retain in memory, and am accustomed, as I have been told, to hum them to myself. If I continue in this way,” he writes, “it soon occurs to me how I may turn this or that morsel to account so as to make a good dish of it… All this fires my soul” (Harding, 1948).
The mind will feel satisfied by certain things that will inspire it to bring different elements all together, into a collection that will lead to the creation of a concept.
Tip: Before investing and diving into production, try to make a personal collection of music that moves you. It could be a secret playlist on Youtube, Spotify or Soundcloud, for instance. The richer your collection, the more you are investing into potential sources of inspiration.
Conceptualization
Understanding your concept is key here; it’s about putting to words what you have in mind. The main writer’s block-inducing trap in electronic music is facing the limitless options of where you could go in a creative sense. Ideas and concepts help to box you in, and to create your sounds into a palette that matches your idea. For instance, knowing you want to make “banging techno” already provides you with a direction as to what you’ll be doing. The challenge in this particular case would be educating yourself and understanding how complex sounds are recorded as well as other technical details. Conceptualization leads to the next phase which is the struggle; an unavoidable part of the creative process necessary when trying to apply your concept.
I’ve always found there to be two main things that will help with conceptualization:
- Finding real life equivalent to what your vision is, such as finding songs that contain your idea or a part of it.
- Finding resources to help you understand what your idea actually is.
The more clear your initial idea or concept, the best you can explain it. From there you can find someone who has the experience or tools to help you get your there if necessary.
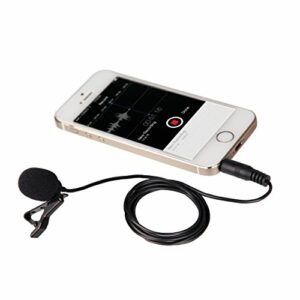
Tip: Using voice memos to record something you hear or to leave yourself notes is a very useful practice. If you can invest in a microphone to try to reproduce sounds with your mouth or found objects; this technique can lead to very interesting results.
Struggle
The struggle is the phase in which many people feel like they want to stop making music altogether and even sell all the gear they have in extreme cases. Perhaps you’ve been through this struggle before – it can manifest in many ways – but the best approach to handle a struggle effectively is to moderate what you like doing, by reducing the length of time or efforts you’re inputting into developing your concept.
For example, instead of being in the studio for four hours, how about going for just one? How about you go for a walk when you have negative ideas coming to you? There’s no rush in making music.
I’ve seen so many artists struggle through this phase by falling victim to substance abuse which is by far the most risky way to deal with writer’s block. If you need an external substance to make you creative, you’ll quickly become dependent on it.
Tip: My drug is jogging.
Release and creativity
 This phase can be when the “aha!” moment hits you full effect; all the technical details fall into place and you can express yourself entirely. I’ve had this moment with two albums I made, Tones Of Void and White Raven. However in previous albums, I’ve worked and worked to eventually find a pace that just made me feel unstoppable. I would finish songs in a day, which would normally take me months. Find a recipe, a patch, a series of effects that give you wings to turn anything in the sound you’re looking for.
For me, the “aha” moment is easy to hear on Tones Of Void. I had found the right series of effects that I loved and I was digging in my library, then could easily turn 1-2 sounds into a full song. I would record it live, do minor edits and felt entirely satisfied with whatever I had. I’ve also seen people using modular synths to make self-generative patches where songs are just written on their own and it’s really beautiful to see.
Tip: This phase isn’t linear and comes in moments. Find ways to save your tools and understand what uplifts your work.
Project completion
Finishing projects is something many people struggle with. The real question is when is it really done? Recently, I made a list of items to check to give yourself an answer but you can also give yourself certain criteria. I like the idea that something is never actually totally done, and that is part of the charm of it. Knowing the next project will be better is a way to let go of anything that has been revisited too often.
Once you can save your file and are happy with it, do a backup and call it done, this phase is simply done; it’s something you don’t want to drag on.
Transmission, validation & Celebration
You know when you love your song so much you want to share it with the entire world? That’s what the celebration phase I mentioned earlier is about. We want validation for our work, but there’s a part of ourselves that also wants to pass on our ideas to others. This creates the desire to have “the celebration” and to provide musical inspiration to others.
There are some people, however, who fear sharing their music. It’s no secret that most musicians seek validation from their community and music is a way to do it. What stops some people from sharing their work with others is the fear of being criticized. However, transmission and validation are necessary to move on to “the celebration”, which is the end of a cycle, but also the beginning of another.
I’d love to hear your stories about your inspiration. Please share!
SEE ALSO : Where to Get Fresh New Ideas for Tracks
 Filtering ideas into a concept
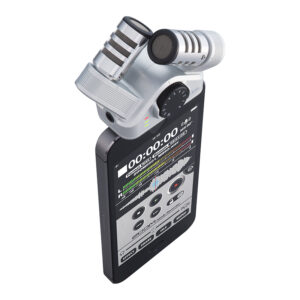
 View/purchase via Amazon
 View/purchase on Amazon
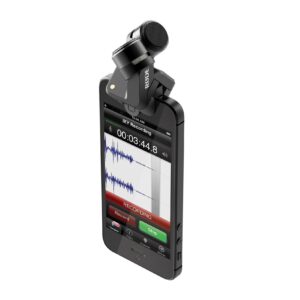 View/purchase via Amazon
 View/purchase via Amazon
 basslines. If that’s not enough you can also use the midi effect velocity which can not only alter the velocity of each note, but in Ableton Live it also has a randomizer which can be used to create a humanizing factor. Another way to add dynamics is to use a tremolo effect on a sound and keep it either synchronized, or not. The tremolo effect also affects the volume, and is another way of creating custom made grooves. I also personally like to create very subtle arrangement changes on the volume envelope or gain which keeps the sound always moving.
 modulate anything, and they will automatically create movement. For each LFO, I often use another LFO to modulate its speed so that you can get a true feeling of non-redundancy.
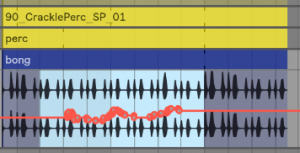
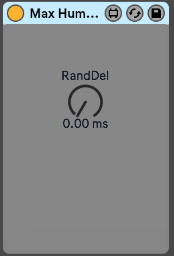 A sound’s position in a pattern can change slightly throughout a song to create feelings of movement; a point people often overlook. This effect is easier to create if you convert all of your audio clips to midi. In midi mode you can use humanizer plugins to constantly modify the timing of each note. You can also do that manually if you are a little bit more into detail editing but in the end a humanizer can do the same while also creating some unexpected ideas that could be good. Another trick is to use a stutter effect in parallel mode to throw a few curve balls into the timing of a sound every now and then.

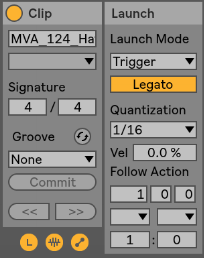 Legato: This is probably the most useful thing to activate for clips in variation. Basically, the Legato option will let the selected clip to take over the one that was previously played, based on the quantization you have set. So for instance, let’s say you play a hihat clip, then press the first clip of the variation. It will stop the activated clip and immediately switch to the other one you just started. On the image, I have set it to 1/16, meaning it will be played on the next 1/16th, keeping it on tempo. Keep in mind that the variation clips are “in sync” with the one playing so that it will continue at the same position in the clip. If legato wasn’t activated, it would start at the beginning of the clip.
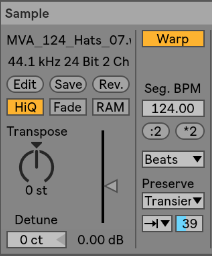 Intensity Variation: If you want to quickly go from open hihat to closed one, one of the fastest way is to play with the “Preserve” section and set it as in this image. Playing with the percentage will let you adjust how much of the end of each sound can be preserved. Having it at 100% is fully open and let’s say 25% is more closed, building tension. So one variation can be set low at first and then the other ones can be more open. If you see the need to boost the energy quickly, then you can go in one of the variation.
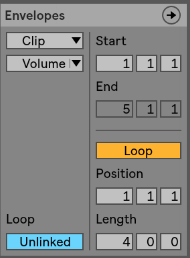 Envelopes: Super useful for variations as well because you can create automation on a very small scale or a longer one. Many artists will use this on EQ to give life to a clip and making sure it feels like it is alive. The important part is to make sure that the envelope isn’t linked and then you can decide of the length of the automation, on one attribute. Tip: make sure you select “Clip” in the first drop down to make sure the changes are made in the clip itself.
 Investing too much, too fast