Tag Archive for: mixing

Transient Shaping

In this blog, I’ve already discussed many ways of playing with your track to create new textures and variations and how to keep your sounds interesting. I’d like to discuss another way of colouring your music: transient shaping; something that can completely change the way a track sounds and feels, depending how you shape your sounds.

To experiment with transients, we will need to play with certain features of Ableton Live which can be very powerful. Alternatively, you could also invest in a type of plugin that is in the category of “Transient Shapers”; there are many out there but some of my favorites are the MTransient by Melda Production and Transient Shaper by Softubes. Both offer quality results at a decent price.

Firstly, if you’re not familiar with transients, they usually consist of the beginning of a sound/sample. If you’re familiar with the Attack-Decay-Sustain-Release (ADSR) envelope of the synthesizers, the attack would be generally manipulating the transient. Sometimes its fast and strong, or other times, it’s slow and smooth. For a kick that punches, you want it to be pronounced and snappy. If you’re after that specific feel, then the transient shaper will really be interesting for you. A plugin will allow you to make the transient more apparent or make it quieter; generally you will also be able to control the sustain of the transient. Sometimes you might want your transient to snap but the rest of the kick to feel quieter; a transient shaper plugin will be able to do that with 2 knobs. I have multiple versions of these types of tools and use them daily – it’s quite captivating what you can do if you exaggerate the attack of sounds which don’t have any transient at all.

In Ableton Live, you can also have fun with a feature integrated in the sample’s detail view. Let’s have a look at how you can manipulate it and how you can have fun with it…

First take a loop sample, and duplicate it in another channel.

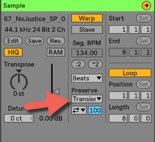
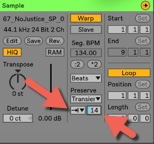
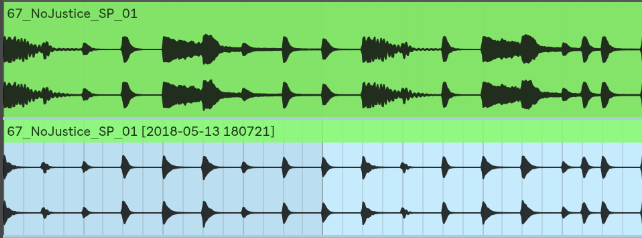
The on the duplicated loop, make sure you set up your details like this. Now turn down the percentage of the transient.

You’ll notice that as you lower down this box, only the transient will remain and the rest of each sounds will disappear. You’re basically trimming each sound to keep just the beginning of it, which is the transient. The new channel can be leveled up and layered with the other: you’ll now notice the transient is louder and you now have certain punch added if there was not enough originally.

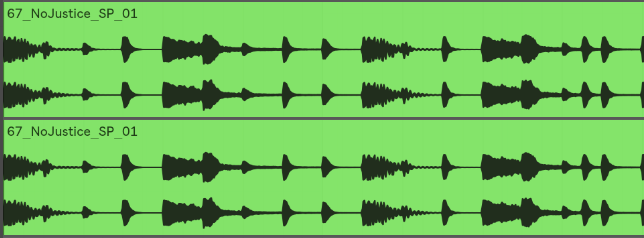
If you flatten or consolidate, you’ll get a new view:

See the difference and what we removed? By layering the beginning, you’re giving more punch.

Tip: try it with a kick loop or a hihat loop.

Now your fun really has just begun!

Here are a few suggestions to try for pushing your sound design even further:

  1. Control/lower the transients of the original loop with a compressor. If you set a compressor with a fast attack, it will control the transient. Play with the release to really tame it down.
  2. Add a reverb or any effect on the transient channel alone. This is really cool because the effect can either affect the beginning or the end of the sounds. I like to put reverb only on the sustain while leaving the transient dry, which gives more precision to your percussion instead of having them lost in a pool of reverb.
  3. EQ the transients to keep only the high end for sharp precision or just the mids for more oomph.
  4. Side-chain the transient with the original sound. Experiment with this one and you’ll achieve some fun results!
  5. Compress both channels by grouping them.

Feel free to share your thoughts about transient shaping!

Adding life to sounds: movement in electronic music

Creating movement in electronic music

One of the most misunderstood concepts in electronic music is movement. By movement, I am referring to the way that each sound constantly evolves throughout a song. I was once talking with someone who is very into modular synthesizers and he was saying that he cannot stand recorded sounds such as samples because according to him, those sounds are “dead”. With modular synths a sound can be repeated for minutes and it will never be exactly the same because the hardware components constantly give the sound slight variations. A recorded sound is frozen just like a picture. Since we don’t all have the luxury to own a modular synth, let me explain how we can use software tools to make sounds feel “alive” and develop some movement in our own electronic music.

First, let us agree that movement in electronic music is about having some elements that are in “motion”. There are a variety of different ways to create that feeling:

1. Changes in volume (amplitude)

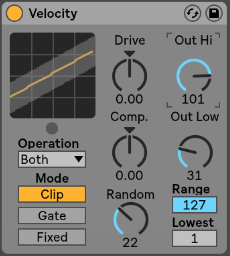
Volume change in percussion are often associated with groove and swing. Both can alter the volume of the sounds. That said, you can apply a groove template not only to percussion, but also to melodies and basslines. If that’s not enough you can also use the midi effect velocity which can not only alter the velocity of each note, but in Ableton Live it also has a randomizer which can be used to create a humanizing factor. Another way to add dynamics is to use a tremolo effect on a sound and keep it either synchronized, or not. The tremolo effect also affects the volume, and is another way of creating custom made grooves. I also personally like to create very subtle arrangement changes on the volume envelope or gain which keeps the sound always moving.
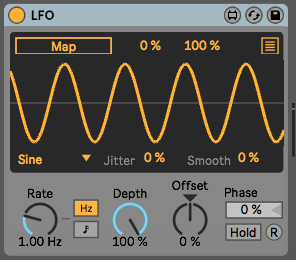
In general, using LFOs – such as what is offered in Max patches – can be used to modulate anything, and they will automatically create movement. For each LFO, I often use another LFO to modulate its speed so that you can get a true feeling of non-redundancy.
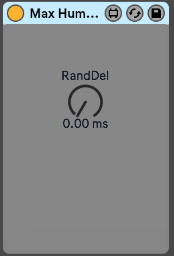
Tip: Combine the use of LFOs and manual edits and then copy sequences until the end of the song. I suggest you try stepping out of 4/4 and regular blocks structure to step out of a “template feel.”

2. Filter

Another great way to create movement is to have the sound always changing its tone. Using a filter in parallel mode is a very efficient way to create colours. The important part is to make sure that both the frequency and resonance are constantly in motion by using either LFOs or envelopes. By being in parallel the sound always appears to be the same but will have some added body to it because of the filter. What many people don’t know is there are different types of filters, so you can try different types of filters into different send channels and then your song will feel like its moving. While filters are great for subtle changes, you can also do the same trick with an equalizer but still in parallel. Adding an envelop on the filter so it detects incoming signal and change the the frequency is also a very nice way to keep things organic sounding.

Tip: Try comparing how a Moog filter can differ from any regular ones.

3. Textures

Background textures or noise is another great way to emulate analog gear. There are many ways to do that, but the one that I recommend is to get a microphone for your iPhone and then record a part of say, your next visit at the coffee shop or restaurant, or even in your house where we don’t realize that there is still a very low level of noise. Adding that recording at low volume to your song automatically adds a layer of every evolving sound. if you want, you can also convert certain noise into a groove pattern which creates a form of randomization on your sounds. Some high quality effects such as saturation used on certain sounds will add a form of texture that prevents your samples from sounding stale.

Tip: FM modulation on a filter or oscillation can create gritty textures.

4. Stereo and Panning

For this point there are different effects that play with the stereo image and – while you should be cautious – it’s good to have at least one or two sounds that have these kinds of effects. Some of these types of effects include of phaser, chorus, flanger, delay, reverb and auto-pan. They can all give the sounds movement if the modulation is unsynchronized and if the wet/dry is constantly being slightly modified.

Tip: Just be careful of what effects you use as overusing can create phasing issues.

5. Timing

A sound’s position in a pattern can change slightly throughout a song to create feelings of movement; a point people often overlook. This effect is easier to create if you convert all of your audio clips to midi. In midi mode you can use humanizer plugins to constantly modify the timing of each note. You can also do that manually if you are a little bit more into detail editing but in the end a humanizer can do the same while also creating some unexpected ideas that could be good. Another trick is to use a stutter effect in parallel mode to throw a few curve balls into the timing of a sound every now and then.
Tip: turn off the the grid locking in the arrangement section to intentionally be imprecise.


SEE ALSO :   Dynamic Sound Layering and Design 

Free Ableton Live Mixing Template

(Update May 2023: When we moved to the new site, the template was lost. It was obsolete anyway as I’ve learned so much since that I can do better. I did a new one, but it’s more basic. In my opinion, it also does a better job. You can still gather ideas from this post and I will make another one but the basic is at the end of this post. The information below is for the old template, but the one to download is the new version. Sorry for the confusion. I will fix this soon.)

I’ve put together a free Ableton template after receiving feedback that it was very helpful for many people I’ve worked with. The template available on this page is aimed specifically at mixing. I’ve noticed that many aspects of mixing are often misunderstood; I’ve assembled a starting template that has bundled together many useful tools to deal with basic things – this free Ableton template will be useful for those involved in music making!

This template includes:

  • 6 Groups: Kick, Bass/low end, Percussions, Hihats, Atmosphere, Melodic.
  • 3 Busses: Low end (Where kick + bass are routed), Percussion, Melodic.
  • 1 MIXBUS: Where the busses are routed and is actually your pre-master channel.
  • 1 Reference channel: Where you drop the your reference track.
  • Multiple Sends as enhancers.
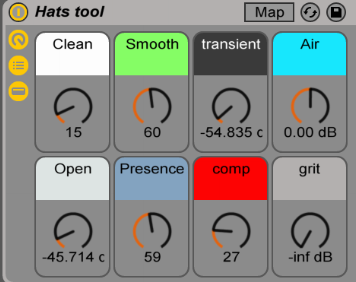
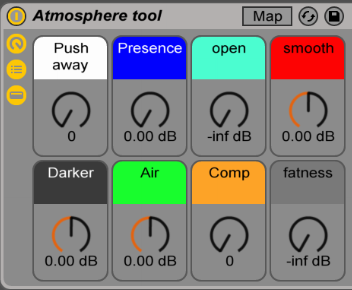
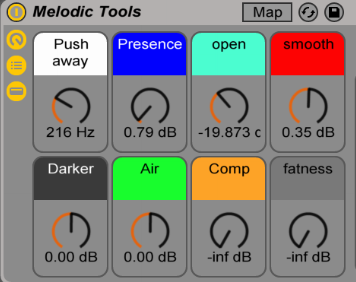
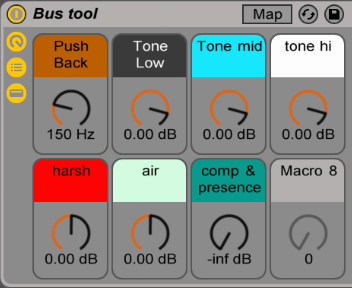
  • Macro tools on each groups and busses to help you tackle tone and potential issues.

This template looks very close to what pro engineers use like the one Andrew Scheps did for Puremix, but I found Andrew’s template wasn’t really as suitable for electronic music. I’m sure he would disagree but underground music isn’t really handled like commercial music is.


Is this template for producing or just mixing?

You could use this template to start producing with if you feel comfortable with it, but I’d encourage you to export stems from a project and then use this template to mix. Yes, it’s a bit more work, but it will also make free up your CPU and make your project ready for a new phase of production. It’s fun also to put an end to tweaking details and then focus on the mix alone.


How do I use this template?

There are many ways you could potentially use a template like this but I’d like to explain a few things to get you started quickly. First off, grouping your sounds is always a good start. I like to to think of it this way:

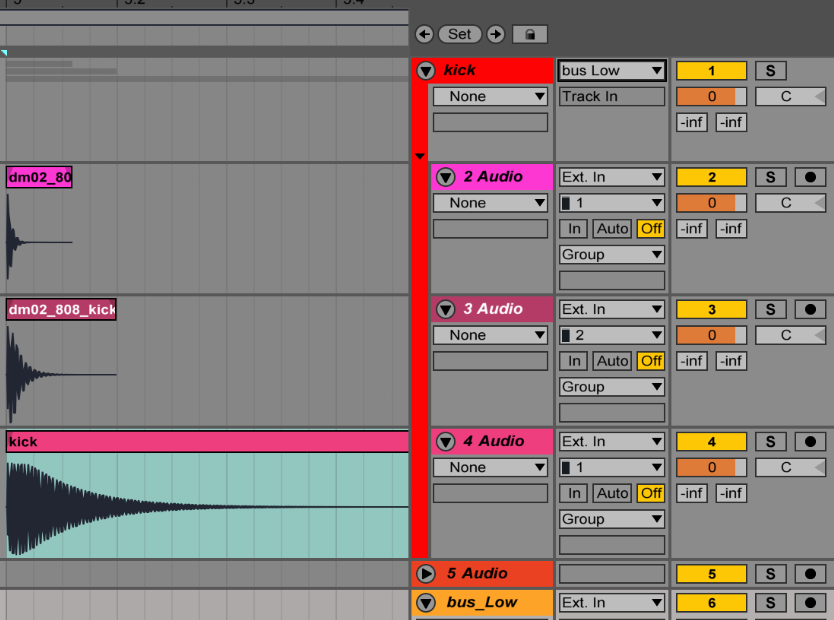
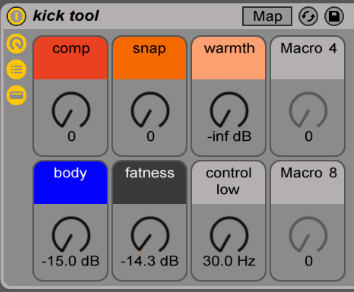
  • Kick group: This group is made to hold the different layers of your kick(s); the best way to make full range kick is to have up to 3 layers, but that will be handled by the group’s macro tool that uses compression and saturation. I created another little macro tool to help beef up your kick with a sub generator and a transient enhancer. I included some sounds from my collection for you and feel free to add more. If you balance everything properly, you’ll have beautiful, warm and punchy kicks.
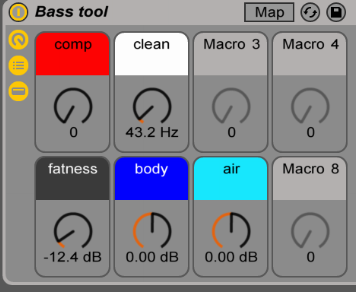
  • Bass/Low end: This group is essentially the same thing as kicks, but to be used as the bass. Include the multiple layers of your bass (sub/mids), and I’d encourage you to also include anything that is below 200hz such as toms, synth, pads. The macro on that group will help balance it out.
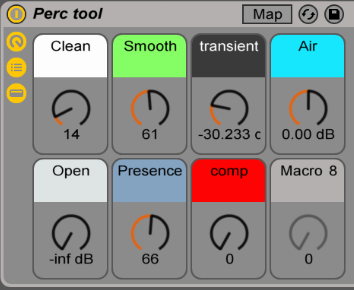
  • Percussions: Anything percussive from bongos, claps, snares or percussive synthetic sounds. This group can get busy so don’t be afraid to add multiple new channels in the group itself.
  • Hihats: Hats or anything that is regular in your group and an important part of your groove could be put in this area. In my case, I sometimes include snares. Please note that there’s no right away to use the Percussion & Hihats group and experimenting might get you some interesting results.
  • Melodic groups: These two work hand in hand. One is for anything in the background and the other is for the melodic elements to be forward. The way the macros work, they will help you position properly the sounds and make the best of them. Try playing with the various knobs to see how they influence the groups.

Please note – I’m applying high pass on these groups and feel free to change the steep which can influence the sound in some good ways, sometimes.

The three busses are quite interesting to work with once you get the levels of your groups finished. For instance, you want to find the best relationship between bass and kick that are routed together. Once they are balanced, the bus allows you to control both the bass and kick at once; this can help you more easily decide on the tone of your track by moving the bus up and down.

I’ve also included a reference channel to remind you to use a track that can be used as a mood and reference board. Reference tracks are great to help you to take inspiration from parts of other tracks you like and would potentially like to use in your mix.

The various sends are simple tools to just beef up or open up your sound. Sends are really for finishing touches to your mix and they’re meant to be used as gently as they can be; subtlety can also make things intense.

Thanks to everyone who provided feedback for the development of this free Ableton template; I am glad I can continue to help everyone enjoy making music!

Click to download this free Ableton template: (New version 2023)

Pheek’s template 2.0 for Ableton Live 11.3+

Dynamic Sound Layering and Design

Sound layering can be a very complex or very simple technique in music creation and production depending on your goals. In a past post, I gave some really basic sound design tips; I have a lot of readers who are just starting out with mixing and producing, so it made sense to start with something less intense. This second post about sound design, however, will focus on something a little bit more advanced but still very simple: sound layering. It’s actually surprising to me to see so many people who ignore techniques that allow them to get the most out of layering, so I thought I’d write about it.

First off, I would like to discuss Ableton’s groups. Many people use them as the equivalent of busses, where all the grouped sounds will all be treated in a specific ways and yes, that approach works really well indeed. However, I prefer using a solo channel as a bus instead and use groups for sound design or classification. A good example is for kicks or claps, which are usually a combination of up to 3 different samples or sound sources (ex. 2 samples, 1 synth, etc.). Basically, since each sound is a collection of multiple samples, then I could say that they will work best as a group.

Visually it looks better and is easier to manage, and additionally you can also put effects on the group to glue all the sounds together – generally you’ll need a compressor and one or two EQs for a relatively uniform group. Once I’ve done that, I usually like to have an additional bus for all sounds (eg. groups) that will glue everything else together.
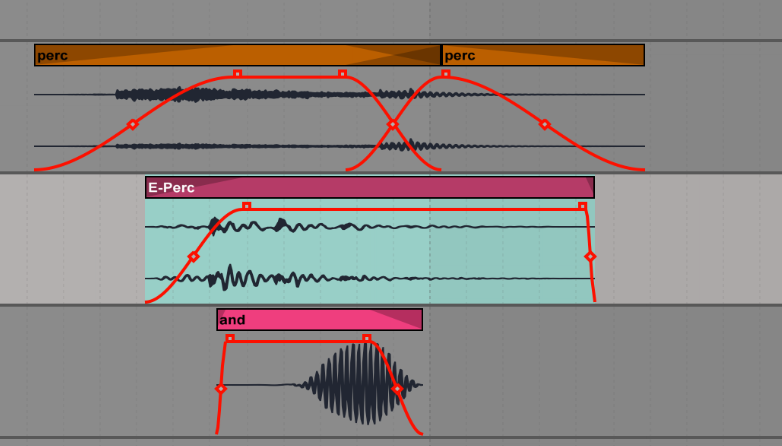
A second point to keep in mind, is that there’s always multiple ways to do sound design. Keep in mind that what I show you here is simply how I do it but there are other people who use different techniques; I try to keep it simple. Two methods Ableton will describe here that I like are the arranger and the drum rack.

If you work in the arranger, you drop sounds in the channel and it’s an easy way to see the layers. I like turning off the grid to do this so it feels a bit more natural.
You can adjust the volume for each layer and tweak the EQ to get part of the spectrum of one sound, and the complementary part of another.

You can do the same with the attack and release; there are so many options. I really recommend using the faders too for more control. So basically, volume, EQ are your best friends here. Brainworx has an amazing filter I recommend, it’s super solid for sound design.

If you prefer, you could also mainly use the Drum Rack to do the same thing. Load up the same samples in the pads of the tool and then sequence them by MIDI instead of putting them in the arranger. Some people dislike working this way because they can’t easily see the frequency shape of the audio file. But the advantage of this approach is that you get to have access to more options to manipulate your sounds, like the extra controls in Ableton’s Sampler window.

What I think is best in the end is to combine both the sound arrangement layering, with the an extra channel of Sampler use so you can work on constant movements. The main thing you want from your sound design, is a feeling of liveliness and emotion. The sampler has LFOs you can assign to filters, panning, or volume, which is a subtle touch that creates a nice layer of movement and liveliness. In the same way, I’d even add a synth of your choice to give richness to the sound with oscillators working to reinforce the fundamentals with a discrete tone; more complex sound layering.

Finally, on the group of the sound itself, I would add nothing but an EQ and compressor to “glue” everything together, but you could also use reverb to broaden your stereo image. These techniques should help you improve your sound design skills!

SEE ALSO : Sound design: create the sounds you imagine inside your head 

What Izotope’s Ozone Series Doesn’t Consider

It was a great surprise to see the release of Izotope’s new Ozone and Neutron update last week. Since I use both products, often I immediately got started looking for whats new.

There will undoubtedly be a ton of new tutorial and youtube review videos posted of these tools, but I want to approach this post around how I use these plugins, and also mention a larger problem I find all too common within the production of software, and an issue I feel Izotope’s Ozone series doesn’t consider.

But firstly, let’s talk about where Izotope really succeeded.

The sound. I can’t put my finger exactly on it, but to my ears, there is a noticeable improvement of the sound quality in Ozone 8. Perhaps it’s an oversampling issue or something with the filters, but the sound is tighter, bright, and more precise over earlier versions.
The workflow – Ozone 8 comes with several new features that provide a faster way for me to achieve the sound I want. The maximizer now includes a loudness target and the reference addition to comparing the versions via the tonal balance control.

Tonal Balance. A fascinating tool that allows you to visualize the frequency levels of your track, and will enable you to match to eq targets from a specific genre of music. Having visual feedback of where your tonal balance per frequency is, and easy access to eq those levels is a great and fast way to achieve a professional sound. I did some testing earlier today and found the target system pretty accurate, but in the end, I found the target ranges slightly off for the lows and highs (see below in my low points).

Visual Mixer. This is the bomb within Neutron 2, and for that feature alone I’d buy the entire package. The visual mixer allows you to place and position your tracks visually across the spectrum, (volume, pan, and width). It’s a beautiful process, and the edit window looks super sci fi and modern. If you work with multiple channels and often have mono tracks this is simply a killer addition. One of the things that blew my mind was that you can actually automate the panning, which opens the doors to many exciting and beautiful options in sound design.
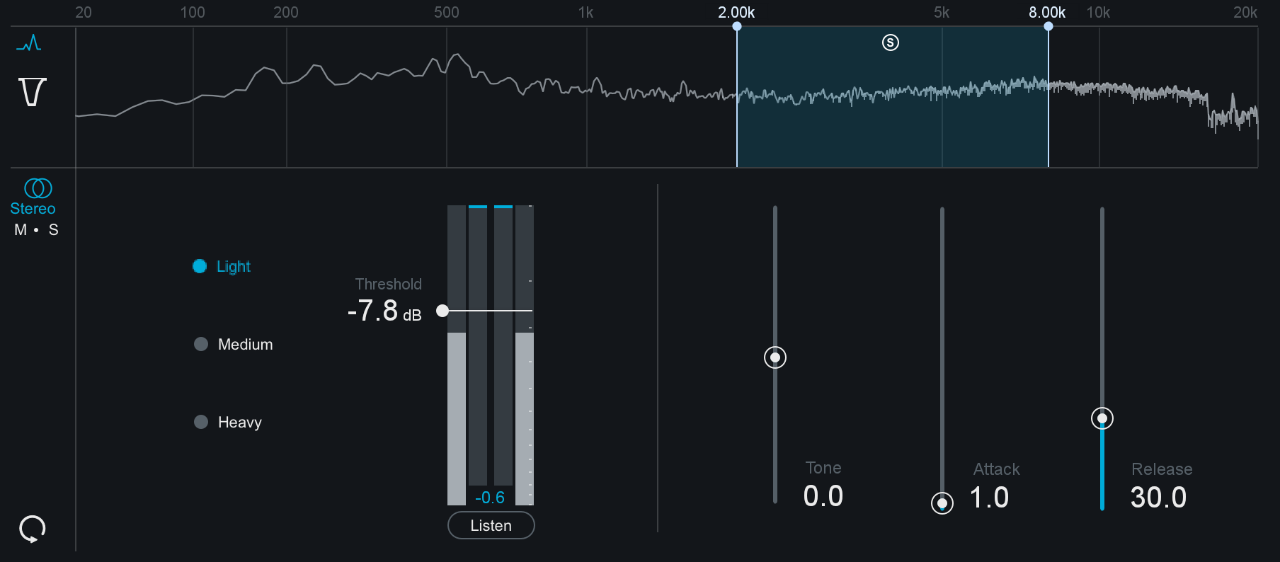
Improved Mix assistant. I really like the mix assistant by the way. I’ve heard many people mock the process, or are jaded to the idea  that it’s impossible for AI to do a man’s job but honestly if the assistant can pull up all the tools I need and set the table for me to tweak fast, you won’t hear me complain.

Communication between plugins. This feature is really cool. You may adjust EQ from one window on another incoming channel, which is reflected in other instances of the plugin. This is super useful when you want to tame the relation between kick and bass as you want to be EQing side by side, both channels. It works and looks seamlessly.

In the end, I’m really loving the update from Izotope and will be using many of the new and improved features. I also want to take a minute to point out a criticism I have with Izotope.

Generalization of customers – It’s unfortunate that I find many large, corporate companies narrow down potential customers into three simple types – pop, edm, and hiphop. I see how that makes marketing more manageable, but what about producers like me who are creating and working on underground and experimental music? I say this because many of the new tools shipped with Ozone and Neutron are built with presets as starting points to mix and master only three types of music. I my opinion, this is quite limiting, and the fact that you can only refer to 3 types of tonal shapes is, to me, a complete fail. It reminds me of LANDR giving only 3 types of loudness range. It’s disappointing because I feel like this software expects you to be either this or that, which is clear from the design of the genre-specific presets – as if there are no other types of musician in the world??

What Izotope’s Ozone series doesn’t consider is people like me, and many friends and colleagues of mine, who make our living from creating music, and don’t fit into the standard pop, edm, or hiphop category.

CPU hungry. I have a newish MacBook, fully geared up for performance, and while running several instances of Ozone my entire screen began flickering and making strange glitches. Izotope support claimed it was likely my CPU over-loading, however, I was only using 5 Neutron and 1 Ozone 8 instance, plus visual mixer. If my custom built computer is hit hard with CPU usage imagine how will the average Joe deal with such demands on the processor.

This goes along with the new mastering plugin by Eventide, Elevate that is so power hungry that it’s barely usable. Funny enough, a few days after Ozone 8 came on the market, Eventide droped the price of its plugin by 50%…

Still, in my opinion, the updated Ozone suite is a serious tool to consider having. It really delivers impressive quality sound. As always, I want to hear about what you think about these tools and feel free to leave a comment below and share your opinion.

Cheers,

JP