
Buses vs Groups in Ableton Live
The word “bus” may sound foreign to many beginner- and intermediate-level music producers who were not raised during the good old days of analog mixing on consoles. But rest assured, readers: the term “bus,” in this case, does not refer to a 33,000-pound vehicle, but to an audio channel that allows a multitude of audio signals to pass through it.
Buses are used to apply general processing to the mixed signal, so as to achieve a more cohesive effect over a particular range of instruments. This may sound daunting, but allow me to provide an example to clarify. If you have several drum channels (kick, snare, hats, toms, etc.) playing in the DAW that you are using, it would be wise to send and route them to a drum bus, onto which you could then apply some warmth or glue with mix bus compression.
There are several DAWs, including Bitwig and Ableton Live, that allow you to “group” tracks together. Other DAWs prefer to emulate traditional mixing consoles by routing the desired channels through a bus. Note that neither method is better than the other: they are exactly the same. Nevertheless, Ableton aficionados may want to begin using buses more often, given that their use simply opens up more possibilities in terms of mixing the music created.
How so? There are certain techniques that just aren’t available to you when you’re “grouping tracks,” such as sending a parallel compression return track to a group, or applying effects to two groups at once by grouping them together (groupception). But by using buses, you’ll be able to route any audio signal to any channel you wish.
So with all this being said, here are some pointers for creating your first buses.
Basic I/O Routing
- Open the Audio Routing section by clicking on the I/O button right below the master fader in the lower right corner (CTRL+I).
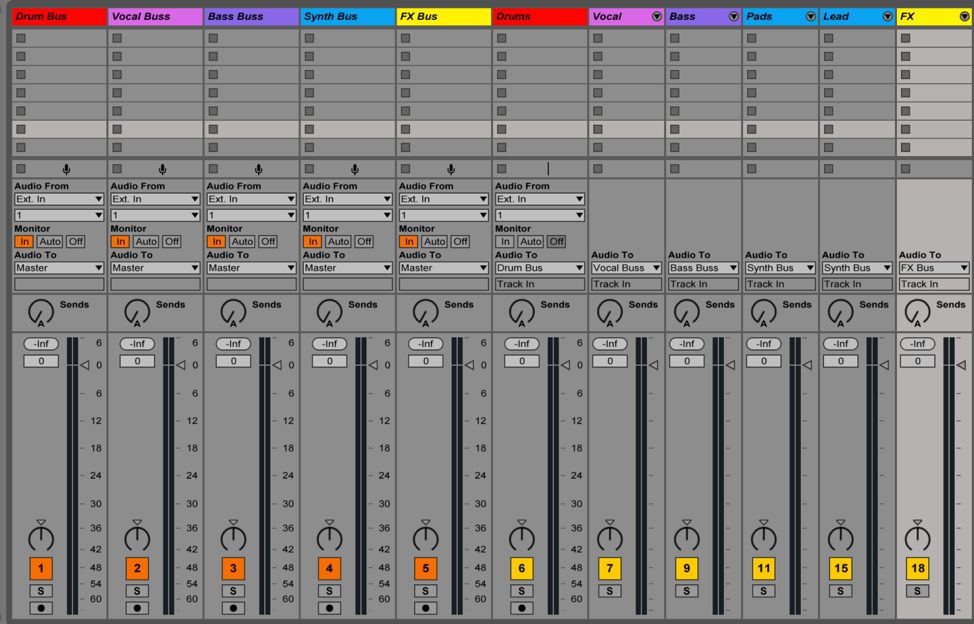
- Create an audio track (CTRL+T) for your bus. In my case (see screenshot below), I called it “Drum Bus,” because I am sending all of my drum tracks through it.
- Depending on how you organize your drums (I’m using a MIDI drum rack followed by several loop-based elements, like percussion, rides, etc.). Route them to the drum bus by:
- Selecting/highlighting all of your tracks.
- In the Audio To section, select “Drum Bus.”
- Set your initial channel as Drum Bus and set Monitor to
- You should now hear all of your tracks going through the drum bus.
- Try muting some of them to hear the difference.
- Apply a compressor to the drum bus to glue things together.
- Note that you can also route return tracks through your drum bus. I’m applying New York Style Parallel Compression by sending my drum channels through a channel with heavy compression, then sending its output through my drum bus to give it more power.

If you have groups of elements that share similar sonic features and would like to EQ or compress them all together, then you can create a bus and send them through it:
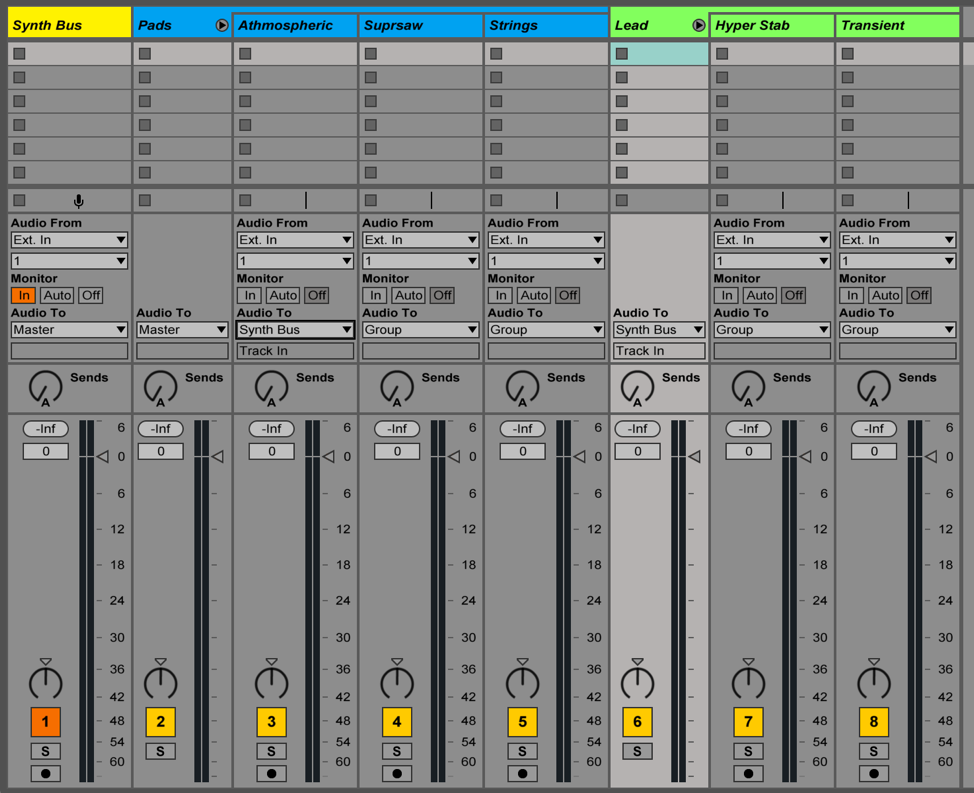
When I’m mixing, I’ll even go as far as creating individual buses for every group of tracks towards the end. This helps me get the levels right and apply broader strokes for every category of sound (bass, drums, etc.)
To conclude, I’d just like to emphasize that there is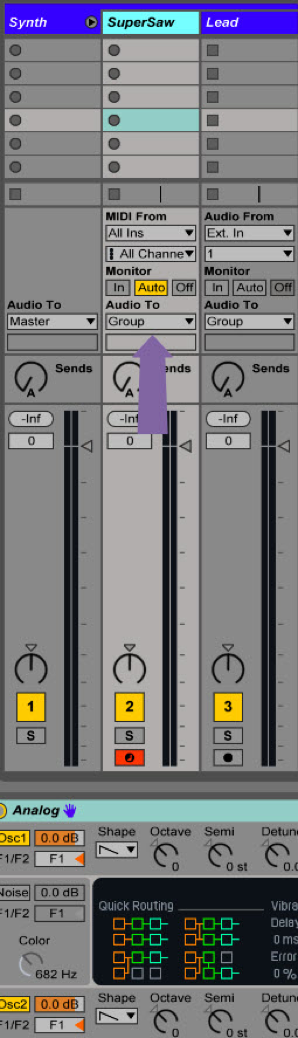 absolutely nothing wrong with using groups when mixing. It’s simply that they should be used more often to organize your channels while you’re writing music, composing, doing sound design, etc. to work faster and more efficiently.
Remember, you can always group channels together by pressing CTRL+G or CMD+G on Mac! The audio channel will be automatically routed through the group fader and will function exactly the same way as a bus does.
SEE ALSO : Reverb Tips to Boost Your Creativity


Hi i was hoping to find a solution to parallel compression ala Andrew Sheps in combination with groups.
I recognized that returns can not be send to a group, which is the VCA in Ableton for multiple elements.
If you do it by send Audio to -> Your Bus Track, than you can not fold/unfold your instruments to create
space, but this seams to be the only solution.
Background to the parallel compression: you create a aux for some elements of the group for example:
Kick and Snare out of drums and Crash it with a nice compressor and mix the output of the aux back
to the group.