Tag Archive for: movement

Creating a music sketch

In this post, I’d like to explain how making a music sketch can help you to stay on track when creating a song or track, much like how a painter creates an initial sketch of his/her subject. I’ve explained in previous posts that the traditional way of making music goes something like this:

  1. Record and assemble sounds to work from.
  2. Find your motif.
  3. Make and edit the arrangements.
  4. Mix.

Here we’re talking about a way of making music that was popularized in the 1960s and is still used frequently today. But what happens when you have the ability to do everything yourself, and from your computer alone? Can you successfully tackle all of these tasks simultaneously?

When I do workshops, process and workflow are generally questionable topics to address because everyone has different point of view and way of working. However, to me it always comes down to one thing—how productive and satisfied an artist is with his or her finished work. Satisfaction is pretty much the only thing that matters, but I often see people struggle with their workflow, mostly because they keep juggling between different stages of music-making and get lost in the process (sometimes even losing their original idea altogether). For example, an artist might start working with an initial idea, but then get lost in sound design, which then leads them to working on mixing, and then sooner or later the original idea doesn’t feel right anymore. For some people, perhaps its better to do things one at a time; the old before-the-personal-computer way still works. But what if breaking your workflow into distinct stages still doesn’t work? Is there another alternative approach?

In working with different artists and making music myself, I’ve come to a different approach: creating a music sketch—a take on the classic stage-based process I just mentioned. Recently, this approach has been giving me a lot of good results—I’d like to discuss it so you can try it yourself.

Sketching your songs and designs

I completed many drawing classes in college because I was studying art. If you observe a teacher or professional painter working, you’ll see that when they create a realistic painting of a subject, they’ll use a pencil first and sketch it out, doodling lines within a wire-frame to get an idea of where things are. Sketching is a good way to keep perspective in mind, and to get an idea of framing and composition. The same sketching process can be used in music-making.

When I have an idea, I like to sketch out a “ghost arrangement”. Sometimes I even sketch out some sound design. The trap a lot of people fall into when making a song—particularly in electronic music—is to strive to create a perfect loop right from the start. Some people get lost in the process easily which is, honestly, really not important. People work on a “perfect loop” endlessly in the early stages of making a song because when you are just starting a song, the loop will have no context and it will be much more difficult to create something satisfying. By quickly giving your loop a context through a sketch-type process by arranging or giving the project a bit more direction, you’ll hear what’s wrong or missing.

I’m of the belief that having something half-done as you’re working can be acceptable instead of constantly striving for perfection. I think this way because I know I’ll revisit a song many times, tweaking it a little more each time.

Sketching a song can be done by understanding at the beginning of the process that you’ll work through stages of music-making more quickly and roughly, knowing you’ll fix things later on. This is more in line with how life actually goes: we live our lives knowing some problems will get solved over time, and that there are many things we don’t know at a particular moment in time. In making music, some people become crazy control freaks, wanting to own every single detail, leading them down rabbit hole of perfectionist stagnation, in my opinion.

Creating a sketch in a project is simple. Since I work with a lot of sound design, I usually pick something that strikes a chord in me…awakens an emotion somehow. Since this will be my main idea, next I’ll try to decide how it will be use as a phrase in my song. In order to get that structured, I need to know how the main percussion will go, so I’ll drop-in a favourite kick (usually a plain 808) and a snare/clap. These two simple, percussive sounds are intentionally generic because I will swap them out during the mixing process. You want just a kick in there to have an idea of the rhythm, and the snare clarifies the swing/groove.

Why are the basic kick and snare swapped out later?

I swap out the snare and kick later because I find that I need my whole song to be really clear before I can decide on the exact tone of a kick. A kick can dramatically change the whole perspective of a song, depending on how it’s made. Same thing goes for a snare—it’s rare I’ll change the actual timing of the samples, but the sound itself pretty much always changes down the line.

For the rest of the percussion, I’ll sketch out a groove with random sounds that may or may not change later on, but I use sounds I know are not the core of my song.

With bass, I usually work the same way; I have notes that support the main idea but the design/tone of the bass itself has room to be tweaked later.

As for arrangements, when creating a music sketch I will make a general structure as to what goes where, when some sounds should start playing or end, and will have the conclusion roughly established.

Design and tweak

Tweaking is where magic happens—this is where, in fact, a lot of people usually start their music-writing process. Tweaking and designing is a phase where you clarify your main idea by creating context. I usually work around the middle part of the song; the heart of the idea, then work on the main idea’s sound design. I layer the main idea with details, add movement and velocity changes.

  • Layering can be done by duplicating the channel a few times and EQing the sub-channels differently. Group them and add a few empty channels where you can add more sounds at lower volume.
  • Movement can imply changes in the length of the sound’s duration (I recommend Gatekeeper for quick ideas), panning (PanShaper 2 is great), frequency filtering, and volume changes (Check mVibratoMB for great volume modulation). The other option is to add effects such as chorus, flanger, phaser, that modulate with a speed adjustment. Some really great modulators would be the mFlangerMB (because you can pick which frequency range to affect—I use this for high pitched sounds), chorus (mChorusMB) to open the mids, and phasers (Phasor Snapin) for short length sounds. Another precious tool is the LFO by XFER—basically you want the plugin to have a wet/dry option and keep it at a pretty low wet signal.
  • Groove/swing. This is something I usually do later—I find that adjusting it in the last stretch of sketching provides the best results. The compression might need to be tweaked a bit, but in general the groove becomes much easier to fix once everything is in place.
  • Manual automation. Engineers will tell you that the best compression is done by hand, and compressors are there for fast tweaks that you can’t do. Same for automation, I find that to be able to make your transition and movement using a MIDI controller is a really nice finishing touch that is perfect in this stage.

Basically, the rule of finalizing design is that whatever was there as a sketch has to be tweaked, one sound/channel at a time. Don’t leave anything unattended—this can manifest from a fear of “messing things up”.

When tweaking specific sounds from the original sketch, you should either swap out the original sound completely, or layer it somehow to polish it. I always recommend layering before swapping. I find that fat, thick samples are always the combination of 3 sounds, which make it sound rich. When I work on mixing or arrangements for my clients and I see the clap being a single, simple layer, I have to work on it much more using compression, sometimes doubling the sample itself, which in the end, gives it a new presence. Doubling a sound—or even tripling it—gives you a lot more options. For example, if you modulate the gain of only one of the doubles, you not only make the sound thicker but also give it movement and variation.

All this said, I would recommend making sure your arrangements are solid before spending a lot of time in design. Once you start designing, if your arrangements have a certain structure, you’ll be able to design your song and sounds specifically according to each section (eg. intro, middle, chorus, outro) which gives your song even more personality. Sound design completed after a good sketch can be very impactful when the conditions are right.

Try sketching your own song and let me know how it goes!

SEE ALSO : Creating Timeless Music

Tips to add movement and life to your songs

One of the most popular topics in music production is with regards to making music feel “alive” by creating movement in music. While I already covered this topic in a past article, I’ll focus today on tools you can use and some techniques you can also apply to create movement.

First, let’s classify movement into categories:

  • Modulation (slow, fast)
  • Automation (micro, macro)
  • Chaos
  • Saturation

One of the thing that makes modular synths very popular is the possibility of controlling and modulating many parameters the way you want, but the other aspect that makes it exciting is the analog aspect. You’ve probably seen and heard multiple debates about the analog vs digital thing and perhaps, what’s funny is, many feel they know what this is about but yet, can’t really figure it out.

Take, for example, something we all know well: a clock that shows time.

An analog clock is one with needles that are moved by an internal mechanism, making them move smoothly in harmony while time goes by. There’s a very, very preciseness to it where you can see the tiny moment between seconds.

The digital or numeric clock jumps from second to second, minute to minute, with the numbers increasing: there are no smooth, slowly incrementing needle that moves between numbers; they just jump.

Sound is pretty much the same in a way. Once it’s digitized, the computer analyzes the information using sample and bit rates for precision. The flow isn’t the same, but you need a really precise system and ear to spot the difference. Some people do but it’s very rare. This is why, in theory, there’s a difference between digital files and vinyl records.

One eye opener for me was that when I was shopping for modulars at the local store, I was talking with the store’s specialist who was passionate about sound. “The one thing I don’t like about samples is, the sound is frozen and dead”, he said. With modular synths, because there’s often an analog component, the sound, on a microscopic level, is never the same twice.

This is why using samples and playing with digital tools on your DAW, needs a bit of magic to bring it all to life.

Modulation

By modulation, we’re referring to tools that move parameters for you, based on how you have configured them. The two main modulators you can use are:

  • LFOs: As in Low Frequency Oscillators. These will emit a frequency in a given shape (ex. sine, triangular, square, etc.), and a certain speed. They can be synced to your song’s tempo or not. LFOs are often included in synths but you can also find once instances in the Max for live patches.
  • Envelopes: Envelopes react to incoming signal and then will be shaped in how you want. Compressors, as we discussed recently, kinda work with an envelop principle.

There are multiple aspects of a sound you can modulate. While there are numerous tools out there to help you with that, it’s good to know that there are a few things you can do within your DAW. The main things you can modulate are:

  • Amplitude (gain, volume): Leaving the level of a sound to the same position for a whole track is very static. While there’s nothing wrong with that, it’s means that the sound is lacking dynamics.
  • Stereo position (panning): Sounds can move from left to right if you automate the panning or use a autopanner.
  • Distance (far, close): This is a great thing to automate. You can make sounds go further away by high passing, filtering to higher frequencies. Combined with the volume, it really push the sound away.
  • Depth (reverb): Adding reverb is a great way to add space and if you modulate, it makes things very alive.
  • Sound’s length (ADSR, gating): If you listen to drummers, they’ll hit their percussion so that the length constantly changes. This can be done by modulating a sampler’s ADSR envelope.
  • Filtering: A filter’s frequency and resonance changing position as the song changes offers a very ear pleasing effect.

Some effects that are modulating tools you already know are chorus, flanger, autopan, phaser, and reverb. They all play with the panning and also depth. Adding more than 2-3 instances in a song can cause issues so this is why it’s good to approach each channels individually.

My suggestion: Have one LFO and one envelope on every channel and map them to something: EQ, filter, panning, gain, etc.

Some amazing modulators that offer really good all in one options that you might really enjoy (as I do for quick fix on a boring stem):

QuatroMod

LFO Tool by XFER Records

ShaperBox by Cableguys – My go to to really bring sound to life.

Movement by Output  – This one is stellar and really can make things feel messy if pushed too far but the potential is bonkers. You instantly turn anything into a living texture that is never boring.

AUtomation

Automation is what you draw in your DAW that allows you to make a quick-moving or long-evolving effect. You might already know this but you’d be surprised to know that it is too often, under used. How can you know this though?

I have my own set of rules and here are some:

  • Each channel must at least have one long, evolving movement. I’m allergic to straight lines and will sometimes slightly shift points to have them have smallest slant. My go: amplitude, EQ or filters.
  • In a drop down list of each potential parameters, I want to have at least 3 things moving.
  • Each channels, must have at least 3 quick, unique, fast change.
  • Include at least 3-5 recorded live tweaks. I like to take a midi controller and map certain parameters and then play with the knobs, faders. I record the movements and then I can edit them wherever I want in the song. This human touch really makes something special.

While working with automation, one thing I love is to use Max for live patches that create variations, record them as automation and then edit them. It’s like having an assistant. There are great options to chose from but my favorites would be:

Chaos

By “chaos” I mean using random generators. They would fit under the umbrella of modulators but I like to put them in their own world. There are multiple uses of generators. You can take any LFO and switch them to a signal that is random to make sure there’s always a variable that changes. This is particularly useful with amplitude, filtering. It really adds life. You can also use the random module in the MIDI tools to add some life. Same with the use of humanizer on a midi channel. Both will make sure the notes are changing a little, all the time.

Saturation

If we think of the earlier example of how analog gear is constantly moving, using a saturator is a good way to bend perception. We previously discussed saturators in an earlier post but we didn’t talk of a super useful tool named Channel strip which often has an analog feel included. It remains transparent but it does something to the signal that is moving it away from a sterile digital feel.

My favorite channel strips would be:

The Virtual Mix rack by Slate Digital. Raw power.

McDSP Analog channel

Slam Pro


SEE ALSO : Getting feedback on your music

Important Music Production Principles

As a label manager or as a teacher who regularly gives feedback (join our facebook group if you’re interested to participate!), I’ve realized I don’t listen to music like the average person; I listen for certain music production principles. There are a number of things that will get my attention that most people won’t really notice; I’m listen for a number of principles that make – according to my tastes – music that feels full, mature and deep. Many labels are after music that will sell, but I’m more interested in music that innovates, which to me comes from the design work involved in the song.

Why innovation first? I prefer treading new ground than releasing something vanilla. It might not pay, but the delayed gratification is more powerful and I can attract creative minds, which are my favorite kind of people.

I was reading about visual design and I was pretty interested in how it’s similar to audio production. I’ve compiled some basic music production principles that applies to both the audio and visual spheres.

Balance

Balance can be achieved in a variety of ways: from the stereo field being occupied, to the mid/side balance, or the balance between low end vs high end. I like to hear how balance has been designed and exaggerated – the emphasis of a zone that moves towards another. I want to feel the artist is playing with balance, or shows that he can propose balance shift during the whole timeline of his/her song. Balance is to me, the umami of audio, and I want to experience something that feels full.

TIP: In the final stage of arranging, try to check each zone (left/right, mid/side, lows, mids, highs) to see how they relate to each other.

Contrast

This one is a bit tricky. How do you apply contrast in audio? It can be in how you select your sounds for instance. Perhaps having a number of sounds that have very sharp attack compared to others that are soft. Maybe a contrast in volume, compression, harmonics or dull vs very detailed. As you bring in a number of sounds or melodies, think of how each of them can be different. This is useful as it can broaden up your palette of sounds or have them evolve into something else. One of my favorite contrasts is between textured sounds vs some that are smooth.Another type of contrast that I love to hear is a distinction between bold and subtle on certain elements.

TIP: Try to import two samples at a time that are very different. Ex. 2 claps, one bright and the other fat, then go from one to another to create contrast.

Emphasis

Which element that should grab your attention first? This is, in design, the focal point of your artwork and in audio, putting one sound forward will have the listener engage with it. This is usually in the mid frequencies, right in front of you. It’s rare that your key element will be panned to the right and if so, it will be really confusing to get something there through the entire song. A good way to create a focal point will be to decide what will be in front and what’s in the back.

TIP: Use one main element in mono and EQ the mids up to push it front forward. Group all sounds to be put in the back where you slightly remove mids in mid/side mode.

Movement

This one is all over this blog and if you haven’t consulted some of the past articles on how to get more movement in your tracks, I invite you to check some out. Movement is one of the most important parts of music arrangements. Movement is life, nothing less. When music is static, it feels dead, dull, redundant, synthetic in a bad way, and terribly alienating. You need to have your sound move in the space, in the stereo field as well as up and down – there are so many ways to achieve movement.

TIP: EQ, auto-pan, compression, filters are your best friends for movement.

Pattern

Ideas and hooks always are dependent on a precise pattern. Next time you listen to your favorite song, try to determine the pattern of the song. Sometimes it’s simple, sometimes it’s multiple patterns that are layered. Now, the pattern is more than just the percussion; it’s the order of elements that are also reappearing throughout the song. In techno, there’s a micro pattern (eg. within one bar) that is part of a much bigger pattern. Decoding it is a bit like reading morse code. But one of the key points of patterns, as explained by Miles Davis, is understanding the importance of silence because that’s what creates them.

TIP: When creating a pattern, try adding random additional ideas by using Ableton’s MIDI effect, “Random.” Having a developing pattern can do wonders to the timeline of a very simple song.

Rhythm

This is the perfect follow-up from the pattern principle as they go hand-in-hand but are slightly different. I like to see the rhythm as everything that amplifies the flow of the pattern you created. Groove templates in Ableton are particularly tied to rhythm as well as swing. But importantly, one thing to understand is the transition from section to section, as well as what’s regular vs irregular. You can have a very simple, almost boring pattern but with a great rhythm, you can make it very engaging for the listener. However, this doesn’t work the other way around; a poor rhythm will turn a great pattern to garbage.

TIP: Try to DJ your tracks at different stages of production. You can stretch your idea/concept to 5-6 min and see how it feels, mixed as a DJ. Of course, mix it with something you love the rhythm of and see how yours fits in.

Unity

This is the final touch to a song; “making sure all elements feel like they’re working together.”  Sometimes I hear music and I feel there are a few sounds that don’t fit in at all. Perhaps this has happened to you and you’re not sure exactly what it is. Here’s a quick list of things to consider while developing a new idea:

  • Make sure all melodies are in the same scale or in compatible keys.
  • Use the tuner to make sure the most important elements are in key.
  • Always have some sounds that are in the “call/answer” relation with some other.
  • Certain sounds should either be working together or complementing one another (eg. played at same time or shuffling).
  • Use a global swing/groove for main sounds.
  • Stick to just 1-2 reverbs for creating a common space.

Final principle: Make your work understandable, long lasting, and detailed

Here’s a personal motto that I apply to the analysis of my own work:

  1. “Is this song understandable?” If I ask a person to sing it, can he/she relate to one element?
  2. Is this song based on a trend or will it age well?” I like to analyze songs that I still love after 20 years and try to see what I still love about them. I then try to apply concept with my current knowledge. It can be a concept or a technique too.
  3. “Did I cover all details?” The last round of arrangements I do will be to cautiously pass through my song, one bar at a time to see if I am aware of all details, such as volume, tails, attacks, position, etc. If I don’t do that, the song isn’t done.

I hope this helps you to perceive your music differently and create your music more efficiently!

Adding life to sounds: movement in electronic music

Creating movement in electronic music

One of the most misunderstood concepts in electronic music is movement. By movement, I am referring to the way that each sound constantly evolves throughout a song. I was once talking with someone who is very into modular synthesizers and he was saying that he cannot stand recorded sounds such as samples because according to him, those sounds are “dead”. With modular synths a sound can be repeated for minutes and it will never be exactly the same because the hardware components constantly give the sound slight variations. A recorded sound is frozen just like a picture. Since we don’t all have the luxury to own a modular synth, let me explain how we can use software tools to make sounds feel “alive” and develop some movement in our own electronic music.

First, let us agree that movement in electronic music is about having some elements that are in “motion”. There are a variety of different ways to create that feeling:

1. Changes in volume (amplitude)

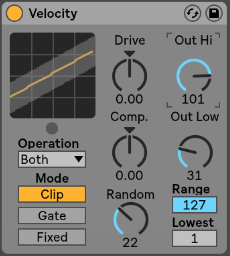
Volume change in percussion are often associated with groove and swing. Both can alter the volume of the sounds. That said, you can apply a groove template not only to percussion, but also to melodies and basslines. If that’s not enough you can also use the midi effect velocity which can not only alter the velocity of each note, but in Ableton Live it also has a randomizer which can be used to create a humanizing factor. Another way to add dynamics is to use a tremolo effect on a sound and keep it either synchronized, or not. The tremolo effect also affects the volume, and is another way of creating custom made grooves. I also personally like to create very subtle arrangement changes on the volume envelope or gain which keeps the sound always moving.
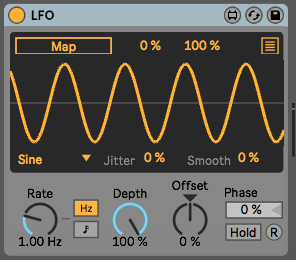
In general, using LFOs – such as what is offered in Max patches – can be used to modulate anything, and they will automatically create movement. For each LFO, I often use another LFO to modulate its speed so that you can get a true feeling of non-redundancy.
Tip: Combine the use of LFOs and manual edits and then copy sequences until the end of the song. I suggest you try stepping out of 4/4 and regular blocks structure to step out of a “template feel.”

2. Filter

Another great way to create movement is to have the sound always changing its tone. Using a filter in parallel mode is a very efficient way to create colours. The important part is to make sure that both the frequency and resonance are constantly in motion by using either LFOs or envelopes. By being in parallel the sound always appears to be the same but will have some added body to it because of the filter. What many people don’t know is there are different types of filters, so you can try different types of filters into different send channels and then your song will feel like its moving. While filters are great for subtle changes, you can also do the same trick with an equalizer but still in parallel. Adding an envelop on the filter so it detects incoming signal and change the the frequency is also a very nice way to keep things organic sounding.

Tip: Try comparing how a Moog filter can differ from any regular ones.

3. Textures

Background textures or noise is another great way to emulate analog gear. There are many ways to do that, but the one that I recommend is to get a microphone for your iPhone and then record a part of say, your next visit at the coffee shop or restaurant, or even in your house where we don’t realize that there is still a very low level of noise. Adding that recording at low volume to your song automatically adds a layer of every evolving sound. if you want, you can also convert certain noise into a groove pattern which creates a form of randomization on your sounds. Some high quality effects such as saturation used on certain sounds will add a form of texture that prevents your samples from sounding stale.

Tip: FM modulation on a filter or oscillation can create gritty textures.

4. Stereo and Panning

For this point there are different effects that play with the stereo image and – while you should be cautious – it’s good to have at least one or two sounds that have these kinds of effects. Some of these types of effects include of phaser, chorus, flanger, delay, reverb and auto-pan. They can all give the sounds movement if the modulation is unsynchronized and if the wet/dry is constantly being slightly modified.

Tip: Just be careful of what effects you use as overusing can create phasing issues.

5. Timing

A sound’s position in a pattern can change slightly throughout a song to create feelings of movement; a point people often overlook. This effect is easier to create if you convert all of your audio clips to midi. In midi mode you can use humanizer plugins to constantly modify the timing of each note. You can also do that manually if you are a little bit more into detail editing but in the end a humanizer can do the same while also creating some unexpected ideas that could be good. Another trick is to use a stutter effect in parallel mode to throw a few curve balls into the timing of a sound every now and then.

Tip: turn off the the grid locking in the arrangement section to intentionally be imprecise.


SEE ALSO :   Dynamic Sound Layering and Design