Checklist to see if my song is finished

Lately I’ve been working on a live set, and I realized that I have a personal checklist I use to see if I covered everything to help me decide if a particular song is finished; from little details to bigger things, sometimes it’s easy to overlook important factors. Just like with traveling, you want to make sure everything is ready before stepping out of your project.

This checklist outlined in this article is what I personally use before shifting to the mixing phase. In a past article, I explained the importance of exporting the stems out of your project once the production is done. This frees up CPU usage, lightens up your projct, gives you the option to backup or collaborate, or possibly to do some mixing into another DAW to get different textures. But mostly it’s a way to tell yourself “Ok, time to move on.”

Do you need to cross-check everything in this list to declare your song finished? No, not at all. Below is just a cheat sheet to help you have a better idea of everything that could potentially be covered (and I’m sure I’m missing one or two things here).

Below are what I believe to be the major categories of the “song is finished” checklist in terms of production (mixing is another phase altogether that comes afterwards):

  1. The Hook

The hook is where everything begins and ends, so ask yourself these simple questions to get started:

  • What is the main hook of your song? Remember, the hook is what someone would sing or recall to someone else to explain what the song is about. Your song might not have a main hook, which is okay, but a hook is one of the most important factors to help make a song memorable and timeless.
  • What elements supports the hook? A good hook is often not enough. Supporting it with complementary sounds or little blurbs of secondary melody is very helpful.
  • Are you aiming at a pop structure or more of a repeating mantra? There is also a grey area which combines both of these structures. But whatever your pick is, it helps to have a clear answer to this question in your head.

2. Sound design

Sound design is actually the most important section to me and this is usually where I spend the most time. I have sub-categories here that I will cover.

  • What is the direction and purpose of this song? Is it mainly for DJs or at-home or headphone listening? Vinyl or Spotify? Chill, dancefloor or experimental? This is something that can sometimes be good to keep in mind until the very end.
  • What song or artist would be a similar reference to your track? A reference track can be added in the project itself in a channel. See my past post on how to use a reference track.
  • What is the ratio of organic vs synthetic elements? This is something I sort of think about in the beginning but I am usually also open to revising at the end.
  • What is the main key for my song? This is not always essential, especially if you make atonal music. But it’s a good idea to be aware of a general tuning of bass, kick and melodies.
  • Kick drum: Is the kick in tune with the melody? Is it side-chained with other conflicting sounds? I recommend trying to have a different kick from whatever previous track you were working on. The kick is the last sound to be designed as it is there to support and complement the entire project.
  • Snare/clap: Often equally important to the kick, I usually alternate between more of a clap sound vs. a traditional snare and I also try to have multiple layers. In electronic music, the percussion sound that will go on the 2nd and 4th beat should vary otherwise it sounds a bit monotonous. I personally to try to offer different sound options here for when I play my songs live or DJ them.
  • Bass: Is it in key? Is it side-chained?
  • Melody: This one is a bit difficult but as explained in my non-linear production technique, I like to go back and forth with the track to see if the melody has an impact; if it feels good over time. Finding melody is hard enough, but to make a melody that stands the test of time is an art in itself.
  • Atmosphere: Is there a background to this track? What is in the background vs foreground? I like to use busses for creating atmosphere.
  • Recording: Have I used field recordings for this to add another layer of atmosphere or sound?
  • Textures: Are the textures clear and audible? Or is the song meant to be more subtle?
  • What’s the ratio of repeating sounds vs ever-changing? Some people like to always have the same clap through out the song while in Hip Hop for example, producers often like movement and change. Is this a rule you want to follow? If so, on what sounds?

3. Groove

My “groove” section is a bit less detailed, but is very important, especially if the song is more percussive and dancefloor-oriented.

  • Is the groove borrowed from a song or from a groove template? Or is it custom?
  • What is the time signature? Is it global or different for different parts?
  • Is there a global groove applied or is this song using multiple grooves depending on the part?
  • Export all percussion loops to MIDI to tweak the groove.
  • What is repetitive and what not? Find the healthy balance of sounds being repeated through the song and others that change over 1-2-3-4 bars.
  • Is there sidechain between channels to create subtle or obvious pumping? This can make a difference.
  • What are the sounds that are modulated? This is one of the most important thing to do if you want your song to have a more organic feel rather than synthetic. It’s one thing to select all organic samples but the way you program them will be critical for a general feel. In general, the human ear is very sensitive to movement, even if the music is played in the background; you’ll be surprised of what people notice, and what they don’t.
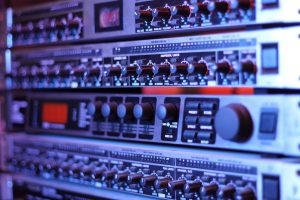
4. FX/Sends

Using sends is crucial for giving the track a unified feel. One of the most common mistake I see from new producers is to use multiple reverb effects everywhere in the project instead of mainly using one as a send. I usually use multiple sends to create elaborated and sophisticated 3D effects for percussion and melodies. One of the most important point I always remind myself is to use them with care, towards the end of the production phase.

  • Is this song more dry or wet in terms of effects? How much room have you left for reverb?
  • What type of reverb do I want for this track? long or short?
  • What is going to have a 3D effect? What makes the song 3D is the amount of sounds you put right up front vs the ones you put in the background. A healthy combination of both will have a better effect.
  • Use one delay for the project! Which time signature does it have?

5. Structure/Arrangements

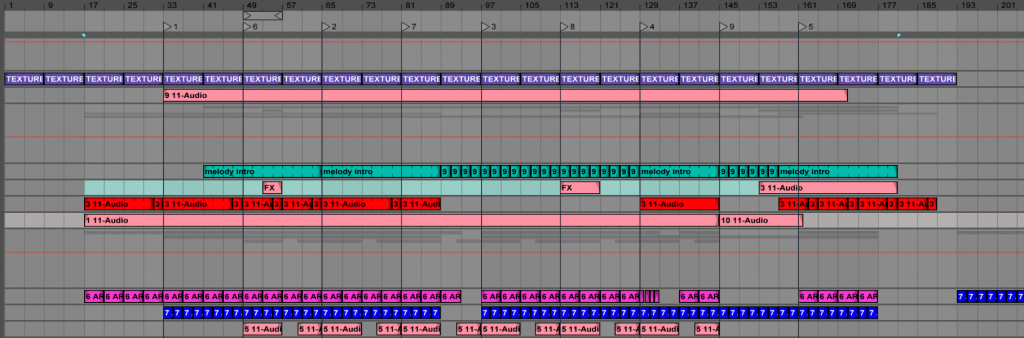
I previously referred to song structure as Lego building blocks in a previous post. Blocks are often constructed in the same way; this is why using a reference track can help break out storytelling ideas. I always recommend dropping Markers in the arrangements this way: One at the beginning, one at the end, and one in the middle. Markers will give you perspective, help you see if your general storytelling is balanced, and help you determine if things are properly organized.

From the middle marker, I would drop one additional marker between the very beginning and the middle markers, and then do the same thing in the second half. Your song should have four distinct sections. Sections one and four are intro and outro; the middle part is where your song develops and mostly exists.

  • Does your song have intro/outro? Does the action start immediately or slowly develop?
  • How much space have you left for the DJ to mix the track, if you’re making DJ-friendly music?
  • Are your melodic elements evolving properly through each section?
  • Does your song have at least one anchor point of interest per section? All the sections of your track should be interesting.
  • Does the song have any surprises about two-thirds through its duration ? I always recommend considering this to make your song even more interesting.

These sections cover the main points that I usually think about when determining if a song is finished or not. If I don’t like the answers I come up with to some of these questions, I usually go back and work on the track even more!


SEE ALSO : Is My Song Good? 

Playing Electronic Music Live – How to Prepare Your Live Set (Part 2)

After deciding the direction your live set will take, we will now discuss how to prepare a live electronic set in terms of how we approach each individual song, or moments as I call them. This article is the follow up to Playing Electronic Music Live – How to Prepare Your Live Set (Part 1)

Before continuing, make sure you have read the article linked above; after which you should have a better idea the style you’d like to play live. Since most electronic musicians are software users, we’ll start with that approach which is easier and allows for playing both at home for fun or in a club. A common mistake I often see from new artists who want to perform live is to make things too ambitious and overly complicated; the preparations become too demanding and actually playing the set loses its fun.

First idea in preparing your set: turn your tracks, finished or not, into moments to be played live.

In a previous post, I said that making many loops is something that eventually pays off. When you want to play live, it’s always best to have a lot of options on hand that you can trim, to see what works together and then turn these perhaps unfinished loops into new songs.

For years, I always had a main project file for playing live in which I would test drive any new ideas I would worked on done over a given period of time. This live set was like a laboratory for experimentation; it was where new ideas would sprout, where loops became completed tracks, and where some sounds were replaced or remixed into another track. In other words, I recommend turning your unused arrangement loops into a scene in Live, play them, and record the output. Rinse, repeat.

But where and how do I start? 

For example, let’s take this simple arrangement and see what we can make out of it. Let’s say you have a track in the works or done, partially set up in an arrangement view (Note: Any DAW, in arrangement, not just Ableton); firstly, you’ll need to know how the track is structured.

Figure 1 – Arrangement view with markers


Do you want to play the track like your arranged it or do you want to have the parts so you can improvised with the different section?

As you can see in the above screenshot, I have inserted markers in my arrangement which represent the main changes between sections; everything is mostly organized in blocks. You’ll need to slice out these blocks to trigger them, and also what will become important is how you decide to play them. If some parts are heavily chopped, I would recommend that you either turn that section into an entire block, or if you want to jam those sounds you could add them to a Drum Rack. It depends if you want to do some jamming in your set or not. The point here is to have a better view of how your blocks exist so that when you are in the session view, the parts are easy to see.

1st TO DO:

  • Stretch the little blocks that repeat to create bigger blocks that cover the area where they should be repeating (note: make sure the clip is in loop mode) .
  • Use cmd+j to consolidate chopped blocks into bigger block. If some blocks have changes in them, consolidate them as is.
  • Use colors to clarify where the blocks have changes. Say a block is repeating until a given time but then changes pitch; you could change the color of the one where the pitch is changed to symbolize this change.

Figure 2 – Consolidated vs. Unconsolidated blocks

In Figure 2, the left section has been consolidated, and the right side hasn’t. You can the Duplicate left section to the right after consolidating this way.

This may appear time consuming, but it’s not that much extra work and it will pay off once you move everything to session view.

When you’re finished here, you need to bring the new blocks into the session view.

If you have groups, I’d suggest to ungroup them. The reason is that it is not only inconvenient to use groups in session view, but there are chances that your groups differ from one song to another, and in the end it might be more confusing than helpful. If you have grouped FX, I’d suggest you export the entire channel as a stem and decide later how to use it in a live context. You could perhaps decide to use FX during the live and so, not to bounce the channel. It’s hard for me to tell you what to do here.

2nd TO DO:

  • Grab all clips using cmd+a, click to grab, press Tab and then drop them in the session view.

    cmd+a, click to grab, press Tab and then drop them in the session view

  • You might have a really large amount of clips. After moving things to session view you’ll see that some “scenes” are made up of the same clips. You’ll need to delete all scenes that are the same; you don’t need them. In the end, you might go from 60 possible scenes, to about 5 (!). In live situation, you want everything in front of you, and the simpler things are, the faster you’ll be able to get in the zone. You can also go from Scene A to B, to C to D in any order, which gives you the option to remix your music on the fly.
  • Some people might have a huge number of channels grouped in 5-8 groups. Groups make things difficult to play live as they add a lot of complexity. I’d suggest you perhaps export the track’s stems for the groups and then chop them in sections as I explained above. This might also eventually invite you to reconsider how you use channels – I often feel like people use too many. I never use a single channel for a one hit that happens once in a song. I’ll have a reserved channel where I drop all the one-hit sounds. This can be a game changer for you if you use many as smaller projects are easier to understand and you’ll feel more focused (and use less CPU!)


Regarding the number of channels to use, you’ll need to do tests on your own set up before deciding how to do this. In the previous post on this topic, I was advised to be careful with the number of channels/tracks you use. Ideally you want to deal with a max of 12. To trim down the number of channels you are using in the event that you are already using more, you’ll need to mix down a few that are similar or combine channels that don’t have much going on. For example, I’d have a channel that would be a longer loop that would combine all FX and random hits. Playing it as a longer loop as opposed to a shorter one creates more of a live feel that isn’t as “loopy”.

Rehearse your session by hitting certain clips or triggering a scene to see what happens. Once you have removed the redundant scenes and trimmed down the number of channels, you’ll start having a first real glance of what your song looks like in terms of playing it live.

Of course, you’ll deal with the existential question of if you want to play the track “as is” or have a special version just for a live context.

Personally, I think it’s a bit boring to not offer something different in a live set, Two ways you can change things up are through pacing and jamming. jamming will be touched on more in part 3 as it is a very important part of preparation and can also be something that can also forever change your approach regarding how you make music.

Pacing will be the last part of the preparation of your live set. I will cover most of the preparation phase of pacing below, and the following blog post will be more concerned with how to play your live set.

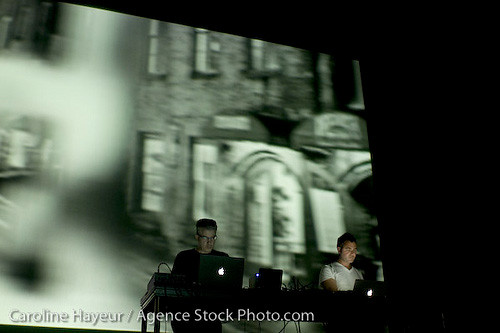
I think my best live sets were good mostly because they had a core to work around that had some preparation, but also had a lot of room to improvise, dependent on how the actual event turned out. These sets were versatile; I could open an evening with them or play peak time, mostly because of how flexible they were. These sets were more or less made up of the same songs but the variations would be so easy to perform on the fly that I could really just follow what felt good to me in that moment in time. I’ve never really understood the point of having an overly prepared set. I’ve tried the prepared approach before and it just made the whole experience boring, because there would be no risk-taking; it also felt out of sync with whoever was listening. For example, imagine that your track has been built to have a drop, breakdown at one precise point and a moment of tension after, but if the dance floor is just starting to warm up when you drop, you might lose people’s attention or it might feel out of place.

A well prepared set has moments for building tension, others to release, variations, and material to raise the intensity if needed, without it being a fixed bunch of parts that aren’t easily movable. Each songs need an intro and outro so that you can move from one song to another in a very flowing way, just like a DJ would do.

Last TO DO (3):

  • Try to decide on the first scene of your songs. They shouldn’t be too busy but usually, you want a solid groove plus some teasers of the melody to come. Establishing the groove is always important to get people’s–what I call–dancefloor trust. That trust usually comes from kick-low end that is clear and precise, which people can relate to, no matter what happens in other parts of the frequency spectrum.
  • Your intro should have openness and space. If you have a melody, try muting a part of it. This will allow the possibility of mixing a part of the melody of another song with the current song; they will be “talking to each other” by echoing. This happens when the first few notes of a melody are answering the last few notes of another melody. DJs love that in a song and by playing live, you’ll see why; you’ll discover “dialogs” between your tracks which could even teach you the good and bad of your track’s arrangements.
  • Define the hook. The main hook of your song will follow the intro. It doesn’t mean you’ll drop the hook right away, as you can build towards there.
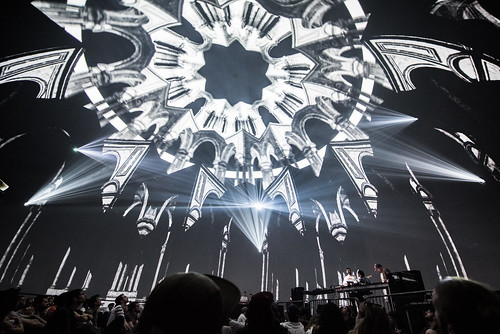
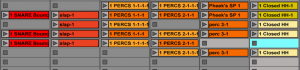
  • Set two variations of the hook with some complementary percussion. If you listen to a DJ set, especially techno or loop based music, you’ll see that it’s mainly a loop with variations. Try to have variations in your percussion, melody or bass. That way you can toggle between the hook and this part. I really really encourage you to listen to DJ sets to get ideas.
  • Create one tension-making moment. This can be a breakdown or a moment where something happens. I always loved to define this moment to be a scene where effects and atmosphere to create something exciting.
  • Release the tension. This scene is basically what would be played after the breakdown or tension-making moment and it’s usually the hook with some more intensity and or variations. This scene should be the most important one.
  • Outro. This is similar to the intro but it should be slightly different.

In the next post, we’ll go into more detail about the actual clips and how to create the perfect little “laboratory” for you to jam with. I’ll propose some ways to jam that will open doors to finally playing live and having all the fun that comes with it.

SEE ALSO : Playing Electronic Music Live – How to Prepare Your Live Set (Part 3)  

Playing Electronic Music Live – How to Prepare Your Live Set (Part 1)

Playing electronic music live is a huge topic and I could dedicate an entire blog to it; this is the first in a series of posts outlining some advice to help electronic and computer-based musicians perform a live set. My goal here is to cover everything you need to know to perform live.

Prior to writing this post, I talked with MUTEK Festival’s director Alain Mongeau about how the festival has been sticking to prioritize live acts. I asked him if live acts were still popular compared to when the festival’s debut in 2000. He said that while it is an important thing for them to promote live expression of music, there’s still confusion on what it really implies.

Firstly, we need to answer the essential question which has been debated for years:

What is a “live set” and why would you do it?

I’m not going to explain this in a ton of detail, but let’s clarify one thing, no one person has the right to say what a “correct” live set is. You should have your personal opinion about what a “live set” means in electronic music, which will then in turn be the foundation of your own approach to creating a live set.

Before I offer any answers to this question, let me share my personal interpretation of the phrase “live set” which has defined my own sets since the very first one I performed in 1999.

To me, a live set of electronic or computer-based music:

  • implies playing your own music.
  • is not playing songs as is. Nothing pre-recorded unless live tweaking is involved.
  • involves some improvisation; experiments and an element of risk taking.
  • means that there are some possible interactions with the audience; therefore the timeline of songs played shouldn’t be planned in advance (like they often are in a DJ set).
  • should be unique every time you play it. But I understand this is difficult and/or not important to everyone.

While I’ve always felt that these should be the basic “rules” of live sets, I’ve come across so many well-established artists who don’t follow any of these points and would argue that “live sets” are something different. Like I said previously, it’s not up to me to decide how “live sets” should be. Picture your own interpretation of a good “live set” so you can build your session accordingly.

This series of posts will address certain ways to prepare a live set in Ableton Live, mainly from my own perspective but I will also cover other points.

Why do you want to play live? This is an equally important factor to consider. I feel that live sets in electronic music are very important and meaningful to both the artist and the audience. It’s a rare moment for an artist to share, connect, explore and be creative with a lot of other people. I don’t believe it approaching live sets lightly unless, well, you’re music is light-hearted perhaps! But even then, I still think devoting time and love to your set can do great things.

Live set preparations

I’d like to cover three main types of live sets to start to help you decide on a direction you want to take for your own sets.

Live Set Type #1 – Playing close reproductions of your own tracks

This type of set is what I’ve been doing most when I play live, but I really make sure that no matter how I’ve prepared my set, it has room for improvisation. I remember a tour where I had one person see/hear my set three nights in a row and told me years later that each night was pretty different, and each felt like a different trip – that really made me happy!

  • The logic of this set type: You have songs that are done or halfway done and divide them into scenes and groups in Ableton (note: the new version of Ableton gives this approach crazy potential). I do not like the idea of an artist simply playing one scene at a time, one after the other until he/she gets to the end. I find there are no risks taken here but understand some genres are limited to this approach.
  • How much of a base should I use? I would say that an average song should have about 3 to 10 scenes and groups, and audio channels are more effective if you limit yourself to 6 to 12. Think of CPU too as you don’t want it to stutter in the middle of your set. A MIDI controller is often limited to 8 faders so if you have more channels, it gets a bit complicated, but more complex arrangements are still doable.

mutek 2008

Live Set Type #2 – Playing mainly improvisations with little-to-no preparation

In the early years of my live sets, this was how I approached live sets, but I came back to the first method as I find that for me type #1 is the most fulfilling. This method however, will definitely result in completely new versions of your music each time you play.

  • The logic of this set type: In my early live sets (circa 1998-2002), I would prepare the core of each important moment of the set at home; I would treat these moments like songs. I would know what the melody would be, a bit of the drum sequence, effects, etc. In those days I’d have analog gear alone, and I would save the melody in the piece of hardware I was using. The narrative of the set would be that I’d go from one song to another, in no precise order, sort of similarly to how you can now do this in Ableton Live. You can keep it simple and go from one scene to another in no particular order, which also opens doors to improvise or add new ideas on the fly. I call this approach the elastic live set.
  • How much of a base should I use?  In Ableton, contrasting to the approach I outlined in type #1, using this type (#2) I have only one scene but have 12-15 channels. In a live set of this type, I jam around one scene using the clips I already have saved, going from one scene to another in no particular order. In the past I would need to make sure all my hardware would be on the appropriate settings.

Live Set Type #3 – Playing with analog gear or hybrid with A laptop

This type of live set is fun and looks good on stage but is also very tricky, mostly because of the sync problems you might have between gear and the laptop. But if you make it work, it can be pretty damn epic.

  • The logic of this set type: There’s no formula here, as uses either of the type #1 or type #2 approaches, simply complemented by a piece of gear such as a synth, drum machine or modular stuff. You can use the computer for sequences or as a potential helper to handle things you can’t do alone. Bitwig is actually really really powerful if you are using modular because of the way it’s built. I’d consider running Ableton Live and Bitwig, sync with Link. I find Bitwig to be a bit more tight on the sync and Ableton to be more easy on playing sequences.
  • How much of a base should I use? The mistake you might run into with this type of live set is wanting to do too much, to cover too many aspects of your music and potentially to never be able to do it all in live set. I find that the less you have to do in terms of sync’ing and parameter tinkering, the more focused you’ll be, which means you follow the flow of your improvisations and music more easily.


mutek_2017_YoureMeBand_TRUNG-16

Other Live Set questions you might want to address

  • Are you going for one representation of your music or do you plan to play it multiple times?
  • Does it matter to you if you can repeat the same set exactly or do you want it to be evolving?

These two questions can also influence what type of live set you decide to build and play.

Concluding thoughts on live set types

Think ahead; think about which direction your live set might go. For instance, if you want to play your own tracks, think of which ones you’d want to use, and try to have them all in a folder (use the “collect all and save” from Ableton to make sure you have everything on hand ready to go). As for the improvisation and hybrid sets, think about what kind of setup you might want and feel comfortable with. And lastly, the audience you are performing in front of is important. You should never play the same set in a club as you would at an outdoor festival.

Stay tuned for part two of this series of posts on playing electronic music live.


SEE ALSO : Playing Electronic Music Live – How to Prepare Your Live Set (Part 2) 

Managing relationships, parenting, and music

I’m a father and have a family of my own. I’m often asked how I can still manage to find the time to make music amidst the chaos of all of the moving parts of my life. There’s no perfect way to balance everything life throws at you–balancing music and parenting is a challenge–but I manage to run a record label, play live sets, and release recorded music, all while being a parent. The life of someone who has the responsibilities of making music and parenting is very different than the life of a person whom only needs to focus on themselves and music alone. Knowing this fact and accepting it was, for me, the first step in taking ownership of my own time-constraint frustrations.

Your free time will become sacred

As a parent, you have to eliminate any possible distractions to when you’re ready to make music, because your time is limited. “That’s obvious” you might say, but when it comes down to it, as a musician and parent, this is the most important point I find one must follow to make the most of his or her time.

  • Schedule dedicated time for creation. This also involves your partner’s help, as she/he also deserves to get his/her own creative time in return.
  • Try to make music outside of your home. If this is possible, either share a studio with someone, or try to find a place where no one can interrupt you.
  • Turn off electronic notifications; social media, your phone, etc.

The number one enemy to creativity is to focus on too many things at once. Try to steal some time away from less productive things like playing video games or watching movies, to instead do things like learn how to use certain plugins that will be beneficial to your craft.

Echo Beach and Dahlia (Photo by Katherine Hoos)

Work faster, fix later

One thing I’ve noticed since becoming father, is how I’ve had to optimize my use of the little free time I have to maximize my productivity. For example, I’ll squeeze programming a percussion loop into a 5 minutes window of spare time. I’ve also developed tricks for myself to turn a loop into a full song in the fastest possible time. I tackle certain things in the creative process that don’t needed much critical thinking as fast as possible. Here are a few advisory points you can use to do the same:

  • Predetermine how you’ll be using your time. This will require discipline, but for instance, I know beforehand that my incoming session is meant to focus a specific task, like remixing or mixing. This helps me, once in studio, stop my mind from roaming to unrelated topics or chores. One of the things I realized after becoming a parent was that when I would get to the studio, I would be so excited that I wanted to do too many things at once, and ended up not progressing on anything at all.
  • Plan in advance how this or that track will be like. You’ll have to apply this to song making. Is there anything you can decide beforehand will free your mind from time consuming decision-making? For example, how long will the track you’re working on be? Is it ambient or dancefloor? Punchy or subtle? Athletes can go beyond their limits by visualizing in advance what they’ll do and this applies to you as well. The clearer things are beforehand, the more efficient you’ll be. Use a notebook if you have to.
  • Don’t focus on details until later. Details are time drains, so try to focus on the big picture and then do a sprint to fix all the small details in a future session.
  • See your time limitation as a creative tool, not a constraint. I’ve learned a lot from working in accordance with Matthew Herbert’s music manifesto and one thing I’ve learned from this is that leaving mistakes in your tracks isn’t a big deal. It can even be an artistic statement if you believe in imperfection. Sometimes, they can actually end up being okay… if you can let them go.

Not making music isn’t a waste of time

One of the things I’ve had to deal with is daydreaming. When not making music, sometimes I feel anxious that I might be behind or that I’m going to miss an opportunity. However, some of the best music ideas have come to me while I haven’t been making music at all. Sharing this with others has made me realize that I’m not alone in this phenomenon. It seems as though the brain can hatch great ideas when doing other things; everything comes in due time. In a past post I explained how to spot your creative triggers; this can be a game changer in this context if you are aware of them.

Echo Beach and Dahlia (Photo by Katherine Hoos)

Echo Beach and Dahlia (Photo by Katherine Hoos)

Don’t wait for the perfect conditions to start making music. Just get used working sometimes with headphones, at a very weird moments of the day. Get things done.

Make room for healthy habits

For some reason, I see a lot of people resisting the idea of forming habits. They associate music making with debauchery, partying and going a bit off the hook. Yes, it can definitely be that way, and if that’s how you see it, why not? But at the same time, if you aspire to be a bit more professional, organized and to actually get things done, you’ll need to focus on priorities. One of the most useful things to do is to make your art healthier.

  • Play more sports. Sports helps with concentration and ideas. This is factual. In my case, I can do way more creative work after jogging, and I’m usually am more enthusiastic about new ideas after I do yoga.
  • Don’t have dependencies. I don’t mean “dependencies” as in a partner or kids, but that if you’re dependent on substances or any odd conditions to make music, it’s time to break them. Making sure you can make music with no preparation, or lots of preparation, much is one of the most liberating things. If you need to “party” to make music, this will greatly limit your options.
  • Make the most of your morning hours. If you don’t already have experience with this, mornings are actually an excellent time to be creative. Some people believe they can only work at night, but this is–for the most part–not true. You can get a lot of things done with a clear mind and fresh ears. I always do mastering in the morning as at this time of day my ears are at their best.
  • Meditate. Actually, this was probably my secret weapon to remain productive through my parenthood. A simple 5-10 min practice of Mindfulness would clear out my mind and help me remain very creative, seeing through issues.

Last but not least, try to involve your child or loved ones in your music. It’s not something that has to work but it can help them understand what you do, how you do it and what it implies in terms of focus.


I hope some of these points help you maximize your time as a parent or partner! Remember that you can always ask for help, too.


SEE ALSO :  Make Your Music Bucket List Happen