Tag Archive for: reverb

Pheek’s Guide To Making Dub Techno

I think making Dub Techno is one of the most requested blog posts I have been asked to do, and for years, I resisted it. I think there was some sort of shyness and perhaps, a lack of technical vocabulary on where to begin when teaching others how to make Dub Techno. But I think it’s time to take a chance and open up on all the ideas I compiled about my beloved Dub Techno direction.

This post won’t necessarily explain how to do the typical dub techno. While I’ll cover some of the most asked questions about it, I want to expand on the philosophy and aesthetic itself so you can take the best part of it and merge it into how you work.

Origins of Dub Techno

Before we get into how to make dub techno, it’s very important to me to honor the artists who were behind the genre and to talk about where the genre started. For this, there are some nice videos by Dub Monitor. There are these 2 videos that explain the origins of dub techno better than I could about how the genre started and how it developed.

Dub techno is a subgenre that emerged from the fusion of two influential musical styles: dub and techno. Dub music itself has its origins in Jamaica in the late 1960s, with pioneers like King Tubby and Lee “Scratch” Perry. Dub music is characterized by its heavy use of effects, echo, reverb, and the manipulation of existing tracks, often stripping away vocals to emphasize the rhythm and instrumental elements.


The Techno Connection: Techno, on the other hand, had its beginnings in Detroit in the early 1980s, with artists like Juan Atkins, Derrick May, and Kevin Saunderson. Techno is known for its repetitive beats, synthetic sounds, and a futuristic, often industrial, aesthetic.


The Emergence of Dub Techno: Dub techno began to take shape in the early 1990s when electronic musicians started experimenting with the fusion of dub’s spacious and echo-laden soundscapes with the rhythmic patterns and synthetic textures of techno, thus making dub techno. The result was a genre that retained the hypnotic beats of techno but incorporated the atmospheric and dub-infused elements.


Basic characteristics to consider while making dub techno: Dub techno is characterized by a few key elements:

  • Reverberating Soundscapes: Dub techno producers use extensive reverb and delay effects to create deep and immersive sonic environments. These effects give the music a sense of spaciousness and depth.
  • Minimalism: Similar to techno, dub techno often relies on minimalistic compositions with a focus on repetition. The use of minimal elements allows for a meditative and trance-inducing quality.
  • Subdued Rhythms: While techno can have a pounding and relentless rhythm, dub techno tends to have more subdued and laid-back beats. The rhythm is often more relaxed and groovy.
  • Incorporation of Dub Techniques: Dub techno incorporates dub’s signature techniques like echo, dropouts, and phase shifting to create a sense of movement and exploration within the music.


Notable Pioneers: Some of the early pioneers of dub techno include Basic Channel, a German duo consisting of Moritz von Oswald and Mark Ernestus, and their various aliases like Maurizio and Quadrant. These artists were instrumental in shaping the genre and creating its distinctive sound.


Global Influence: Dub techno’s influence quickly spread beyond Germany, with artists and labels from around the world embracing the genre. Labels like Chain Reaction and Echocord played a significant role in promoting the making of dub techno, and artists from countries like Sweden, Finland, and Japan contributed to its global appeal.


Obsessing on the “How-To” While Making Dub Techno

Over the last 25 years, I’ve come upon multiple and countless discussions online about how the genre is made. People would discuss what piece of equipment was used and be obsessed with recreating the original sound. While this is a state of mind that I totally get – because I also get obsessed about how certain sounds are made – I can’t help myself asking why would you want to redo the exact same results. In a way, it explains why the genre never died in the last decades. There are always people who keep making dub techno.

I think there are a few motivations to join the sound of dub techno. On one side I see it as a self-soothing experience and on the other, by passion, to join others who also make it.

But my take is that people are puzzled about how something that sounds so simple can actually be so mind-boggling to do.

The Main Aspects Of Making Dub Techno

I’d like to cover multiple techniques and strategies to infuse your music with the dub techno approach while also making sure we apply certain tweaks that can make your music have a similar aesthetic.

The first thing to explain is that there are 3 main categories to consider while making dub techno:

  1. Sound Design
  2. Modulation
  3. Colour.

Dub techno has its own touch and sound which will be explored below.

Dub Techno sound design

One of the main characteristics of dub techno comes from the pads and stabs that are fuzzy, melancholic, and enigmatic. In itself, those pads aren’t necessarily that complex to do. I found numerous tutorials on YouTube and have 3 of the ones I prefer. I find they’re well explained and show in similar ways, how to reproduce them.


How To Make Dub Techno Chords

As you see in those tutorials, the way the synth is configured, is rather simple  – it’s usually one chord that repeats, but it has specific modulation and color, as I explained earlier. Once you start experimenting with this pad, you’ll already be in business and have the basis for making dub techno.

But honestly, when I found out how to do it, I thought it would make more sense to be inspired by those techniques but to go a bit deeper into the sound design.

In my past dub albums Tones of Void, Intra, and White Raven, I basically used a bunch of synths but kept them very dark in tone (eg. lower notes around 1-3 octaves) with not too many harmonics (eg. filtered). Once you understand that any synths can do that, you won’t be limited to the classic sound of dub techno.

How to make dub techno melodies

When it comes to melody-making, there are multiple approaches. There’s the classic one note (yes, one note) from the old school dub techno (Basic Channel, Chain Reaction) and there is also a more structured approach (Pablo Bolivar, Yagya), almost pop-oriented dub techno. Both work but the harmonic nature of the melodies are often in a minor key, with the root key of D being often a popular choice.

How to make dub techno bass

While making dub techno, bass is often, also very simple, with it being than often than not a one-note thing. Simply using sine oscillators and pushing them forward in the mix will often be the aesthetic of dub.

Dub Techno synth options

As we saw in the 3 videos, dub can easily be created in any context with any soft synth. Over the years, I have tried and tested many of them. While the native plugins of Ableton can do the job, VCV has been my playground but it’s not for everyone even if it’s free and there are so many tutorials out there. Here are some of the soft synths people love.

  • Diva:  So many tracks I hear in mastering use Diva. It has a distinct sound but in a good way. It sounds warm, and lush, and is close to some hardware options. It’s pricy but you get that sound we love.
  • Pigments: Pigments is versatile, open, powerful, and extremely creative. There is a huge playground here with the option of a preset store within the synth itself.  You need to work a bit to get the dub sound but it sounds nice.
  • TAL-U-NO-LX Synth: Juno has been used over the years as a default synth for dub techno, mainly the chords. This synth option works well and is close to the real thing.
  • Go2: Cheap in price but with big results. Even the presets will give you some nice options to start with. I love this one.
  • Blue-III: Rob Papen again and this one is deep. Not for the beginner as you can easily get lost in it but the sounds you get are very impressive.
  • Prophet VS-V: Not many people know but it was said that the Prophet VS was what the early guys of Chain Reaction were using. When there was a VST version of it, we were all drooling. While it is very powerful and nice, it is not the easiest to program. But the sound is very impressive.
  • Prophet 5: This is a synth we all used for years in the early 2000s when we wanted the dub sound. It aged so well and it’s fun to use. You get tons of options for synths, pads, and stabs. Recommended and often on sale.
  • Orange Vocoder: This is not a synth per se, as it is of course, a vocoder but this was used by so many people as you can basically throw any sound in it and this plugin will turn it into a lush synth sound. Really powerful and a nice alternative to just synths.


Dub is a vibe and an aesthetic, not a bible. You take the aesthetic and apply it to any sound.

Once you pick your aesthetic, you can apply the concept to any synths you have.

What you need is to create and amplify your harmonics with saturation (tube and tape do great), then have a colored filter and sent to delay and reverb for cosmetics. This means that if you have any synth of yours, you can make it dirty with a saturation and then filter it. The reverb will then do the trick.

What will make a difference is to juggle with the most genres of saturation: distortion, amp and saturation itself. Using a combination of the 3 will bring really lovely colours but be careful not to overcook your sounds. Keep in mind that in mastering, it will be boosted so what sounds like a pleasant distortion can become overwhelming later on.

Some of my saturation go-tos are below.

Saturation plugins used in making dub techno

  • Surge XT: (FREE!) This is a collective of developers who managed to create a badass synth and free, high-quality, effects. Their Chow Tape is quite amazing but also all other distortion/saturation tools. A must-have and hey, it’s free.
  • RC-20: This one came in popular in the lofi hip-hop community as a de facto plugin to have. It adds lofi vibes but this is an element dub techno also has so the cross use is totally on point.
  • Reamp: The guys behind this are very solid and this one has a beautiful series of plugins which are all very solid. I like the colour this one has.
  • Saturn 2: Anything Fabfilter is a leader in its domain. Saturn is not an exception, as it is very good at what it does, which is to make anything too pretty, a bit uglier, dirtier.
  • PSP Saturator: PSP is one of my favorite company for their plugins. I love their EQs and compressor and this saturator does a great job on pads.
  • Satin: This is such a handy tool here. It is tape saturation/simulation, but also a tape delay which can create weird reverbs and wobbly signals. Once you start using it, you’ll be using it all the time.

Reverb plugins for dub techno

While Ableton’s reverbs option can do the job, I always rely on third-party VST for that part. It’s hard not to mention Valhalla plugins for this. The Supermassive is free and the Digital Reverb is sort of a perfect match for dub. If you have to pick, I would recommend experimenting with “plate” models and some use of a “hall” as well for sustained notes.

Whatever you do, to me, Dub Techno really starts with a heavy use of reverb, which has to be modulated, filtered, and distorted. Understanding how to use your reverb and combining it with a delay will ensure that you have a proper dub mood. If you pick the reverb properly, you almost could say that you have 50% of your job done. The rest are the sum of a lot of details but when you have your reverb done right, you’ll automatically feel you’re making dub.

Anyone who knows me has heard my affectionate passion for reverbs. I compiled some of my favorites for Dub Techno.


The saturation tools native to Ableton aren’t too bad but can be recognizable easily by an educated ear.

  • Lexicon 224: I’m a big fan of Lexicon. It has a character and tone that I love. Not sure what it is, but the grain and how it feels just does it for me.
  • Springs: Spring reverb is a type that makes sounds sent through it, sound liquid. This works well with percussive sounds and you’ll feel like some classic dub vibes.
  • Fabfilter Pro-R: This one is amazing for spaces. It is a powerful tool to shape grandiose halls and give tremendous space.
  • Adaptiverb: There’s different tools on that ones that makes it unique. It has a big array of presets that are tuned to a root key, which can create pads out of unusual sounds. Quite unique.
  • SP2016: I call this one a Cadillac of reverbs. It’s elegant, warm, very ear pleasant and very visual. I feel immersed when using it.
  • bx_rooms: Extremely versatile but the interface can be intimidating. It has lovely options for different room types.
  • Blackhole: This one is spooky, deep, powerful. It is a reverb that makes you go in space as it sounds pretty sci-fi, rich, and gigantic sometimes.


Now reverbs for dub are essential but you’ll need delays as well. You can either use long delays or short. There’s no right or wrong but the use of delays helps you take very simple sounds and create repetition, which transforms the straight-forward pattern into psychedelic equations. Delays, combined with reverb, create a thick background and will make any sound – which feel empty at first – fill with a velvety, dreamy carpet. I think for a lot of fans of the genre, it’s a quality they’re after.

Echo and Hybrid Reverb in Ableton. They can do a long run if you don’t want to break your piggy bank.

Additional plugins for making dub techno (delays, pitch modulators, etc).

  • Diffuse: These guys are dub lovers and this tool here is a go-to for reverb/delay as it’s an emulation of the famous Roland Space Echo which was in so many studios.
  • Modnetic: Same guys as above. This one is a combination of all your need in one place to turn a single, boring sound, into a dub tune.
  • Echorec: The guys at Pulsar are very competent at recreating hardware toys and they created a tape delay with self-oscilating, magnetic fields and all you wish for in a dirty delay.
  • Galaxy Tape Echo: This is UAD’s recreation of the Roland Space Echo and it is really well done.
  • Tal Dub-X: As the name implies, this is a station with all the options to turn a simple delay into a modulated one.
  • Echo Cat: Another beautiful emulation of a tape delay. But a really solid one.
  • PSP 42: Popularized by Richie Hawtin in the early 2000s, where he’d loop-delay sounds and pitch them up/down, the PSP42 was used abusively in all his sets for years. Rich was basically doing dub techniques in his own way.


Modulation in dub techno

If you just take any synth sounds and send it to your effect chains, you have done the first step but it won’t be complete until you make it move, react, and evolve into modulations. There is a lot to take in in this section because this is also one of the most discussed topics in my blog – I have covered it inside out already but you now know why, because Dub Techno is all about modulations. Once you dip your toe in those waters, you’ll become excited about it and apply it everywhere.

If you watched those tutorials on how they make the dub pads and chords, you’ll see that they use modulation on the filter. There is both use of an envelope and LFO to modulate the frequency of the filter but also its resonance. That’s just the tip of the iceberg to me. If there is a parameter on a plugin, I like to think that it shouldn’t remain static and have it move, even a little bit.

But of course, a lot of this can be handled by my favorite “Swiss army knife”, Shaperbox which is designed for modulation on all levels. A must-have.

When to use envelopes and LFOs when making dub techno

Well, if it’s a modulation that is reacting to an incoming signal such as when a sound comes in, I want the filter to react, then you’ll use an envelope. That kind of modulation is excellent for accentuating or attenuating sounds, creating a more organic feel to the processed sound.

If you want constant movement, LFOs are excellent for that. They just move to the tempo or not. They give the illusion that things are constantly on the go and help blur the lines of linear arrangements.

There’s one precious bundle that I love from Make Noiss that has so many little tools, perfect for modulation and midi signal processing. Not to forget my friends at Manifest Audio and their large array of max patches as well that are perfect for modulation but they also curated many racks for dub.

The 3 Amigos are here to turn a static idea into an animated figure.

Colours of Dub Techno

I know you might be confused by colour here as we discussed of saturation as a form of colour but this is the last touch. The colours here are from different sources else than saturation and also, very complementary. What I’m referring to are the effects of the chorus, phaser, flanger, tremolo, vibrato, auto-pan, harmonizer, wobbler, and also, one of the most important parts which is the hiss. Apart from that last one, all those effects are often heavily used in dub and it’s quite a nice touch to pick one or 2 on your sounds.

These guys are a lot of fun and sound pretty lovely.

Chorus, phaser, and vibrato

Chorus, phaser, and vibrato work really well with synths, pads, stabs, and chords. They give this engaging, trippy, stereo effect that quite often, makes a dull sound jump out of the mix. Keep an eye to make sure you don’t get phasing issues which would be an overuse of one of those effects. Phasing is quite common in dub and I often fix those issues in mastering. It’s better to control it when decorating your mix.

Flanger

Flanger gives this jet-sound feel to anything. It brings pfshhh sound to metallic or noisy sounds and can be quite psychedelic if used at a low level. I like it on hats and delays.

Tremolo

Tremolos are sort of a secret sauce that everyone underuses. It’s basically a slow or fast modulation of the amplitude of a sound. It is a superb tool for creating 3D feel where you feel sounds go away from you and come back. It turns anything linear into a lively, feeling motion. At a faster speed, it can even be used as a swing/velocity for percussion. Combine it with an auto-pan and you have head spinning spaced out moments.

The hiss part is quite important as well. The noise floor is something deep in the DNA of dub. There are multiple noise makers. You can dig the internet for noise sources, recordings or noise-making tools (RC-20). Satin has a nice hiss that you can use as well.

Conclusion

Making dub techno should be a playground of experimentation. It’s a genre that I approach with a very open mind and so do many other fans as well. While often people feel like they’re just repeating the clichés and perhaps nothing new comes out of it, then I’d say, dig deeper. There are some gems from people who push the boundaries of the genre.

Mid Side Processing Explained

Often when I listen to tracks in my coaching group, I notice that the mid/side processing is often really off. Not having a solid M/S mix makes mixes sound thin, and muddy, rather than expansive and crisp. It’s often the M/S that is the make or break between an ok mix and a radiant one. Therefore, it felt prudent to write an article on what mid/side processing is, and how producers can have it done properly in the mix. Therefore, without further ado, here is Mid / Side processing, explained. 


What Is Mid/Side Processing? 

So what is Mid/Side processing? Basically, if you want a wide-sounding mix, you’re going to have to concentrate on mid/side processing. Often these sort of mixes sound “better” to the listener, and allow the producer to throw more sounds in their mix, without it sounding cluttered. While a wide-sounding mix can be accomplished through a bunch of different panning and stereo processes, mid/side is a strategy that can really dial that in, and create a spatial mix.


Mid in Mid/Side Processing, Explained

The “mid” part of the mid/side process is basically mono. It’s the sound(s) that sits in the center of the mix. Kick drums, snares, melodies between 200 – 500hz (like a pad), and any other “static” sounds can, and often should be placed in mid. Sure, there are artistic exceptions, but this is a good rule of thumb. 

Also, bass below 100hz. This is best practice. Why? If you print a vinyl, and if the bass is in stereo, the needle will jump. Also, in clubs, they do serial summing, where anything under 100 will be summed into 1 mono signal, but if your bass is in stereo, and it’s summed, it can quiet phased parts of the mix.


Side in Mid/Side Processing, Explained

The side-channel is the edges of the mix. Note: This is not to be confused with panning, where you can move sounds specifically into the left or right stereo field. Side processing is strictly hard to the right, or hard to the left, and is technically a mono signal.

When the side’s amplitude is increased, the listener hears a wider, fuller sound. A good way of using it is to increase the width of leads, or strategically move a percussion bus to the sides of a mix to create a fuller listening experience.

You can even get creative with this, and widen parts of the mix at different intervals in the song. For instance, whenever the chorus comes in, you can widen the leads on it, to give it a more present feeling, allowing it to become more expressive to the listener.

Pads are great for the sides as well, since it’s audio that “hugs” you, in a way. Other things that work well on the side are background noises, like field recordings, or weird ambiance -, that stuff works well on the side, it’s not present. Only present stuff should be in the middle. All decorative percussion can technically be on the side – swingy hi-hats, bells and whistles.


Side Processing May Cause  Phasing

Once mid/side processing is explained to many newbies, often they just go out and start messing around with it. However, side processing can reveal one of electronic music’s most dastardly foes: phasing. Basically what happens with phasing is when you have two of the same sound, on opposite sides of the stereo field, they cancel each other out. That means, we have to be judicious with the sounds we put on the sides. Generally, “less is more” is a good approach when dealing with phasing since there are fewer chances of frequencies canceling each other out. 


How To Correct Phasing

If you want to correct phasing while keeping them in stereo, the trick is to have one of the sounds reveal itself immediately after the other, so they don’t phase. This can be done with a very short delay. When dialed in, the sound will perceptually happen at the same time, but be delayed ever so slightly, allowing the other sound to peek behind the other one and be heard.

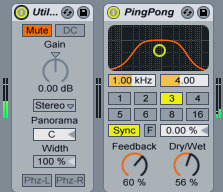
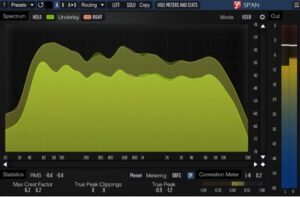
A more immediate, definitive way to correct phasing is to make the sound more mono. There is a tool you can use, called SPAN. This plugin allows you to see in yellow, mono, and in red, side signal. When the red goes beyond the yellow, you have to reduce. The tool you use to fix this is the utility plugin, native to Ableton. You can control the width in this. If you want it more mono, you just adjust the width down, and then turn the volume up. 

mid side processing can be explained well with the VST SPAN. Here's a photo of it.

However, let’s say you have a purely mono signal that you want to add some subtle stereo width to. There are certain effects that can impact this. You can use reverb with little decay (otherwise it will be too loud). 

You can also use a chorus. Eventide made a harmonizer that is beautiful for that. It’s two delays – left and right – and when you play with the delay of each other, it creates a weird signal/shape, and then you can play with the wet/dry to add degrees of stereo. However, if you don’t have the money, you can use the echo delay, and control the left-right, and create a very short delay to create a little more phasing and the width you can play with opening and closing it.


EQing in Mid/Side Mode Is A Must

In my opinion, all EQing should be done in MS mode. Sometimes people hear things that they don’t like in the mix, and if you just cut, you are cutting both the left and the right at the same time. However, sometimes you want a sound to be EQ’d differently, depending on the channel that it’s in.

For instance, let’s say you have a synth in your left channel, and it doesn’t exist as much in your right channel. When placing decorative percussion, there will most likely be a crossover in the panning.

But since the synth is primarily in the left channel, the percussion in the left channel is going to have to be EQ’d different to not conflict with that synth. However, since there is all this open space in the right channel, there is no need to EQ out some of the frequencies, allowing that sound to better express itself.

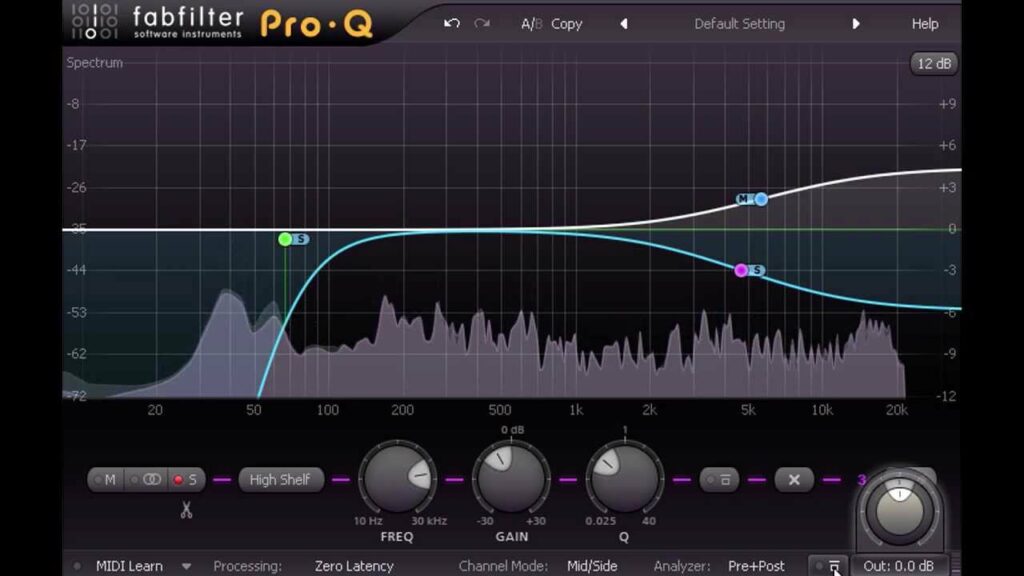
Fabfilter ProQ3 allows you to easily enter MS mode for EQing, and make precise cuts to the sound. If you don’t have ProQ3, you can unlink the left/right in Ableton as well. On EQ 8, there is a mode called stereo, but you can unlink left/right by clicking edit and then selecting left or right. You can also switch it to MS (Mid/Side), where you can edit either the mid or the side or you can treat left/right independently. When you do this, your sound feels more organic, because you’re not cutting in one place. 

A photo of ProQ 3 which has a mid/side processing mode.

More Plugins That Impact Width and Phasing:


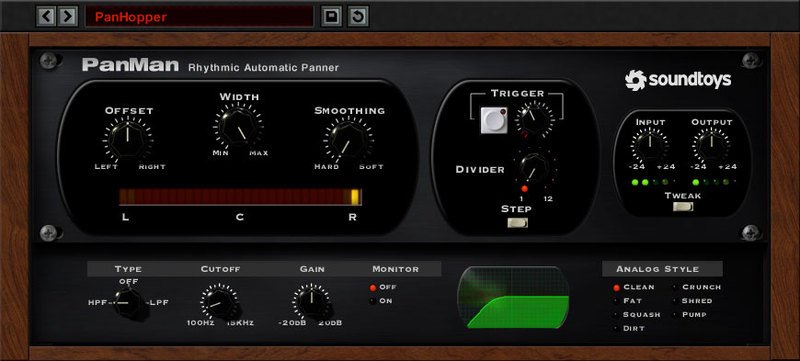
Panman

mid side processing explained through the vst Panman. This is a photo of that VST.


PanMan really splits open the possibilities of panning. First and foremost, it’s a hardware emulation, which allows producers to mimic the syle of vintage hardware panning gear. You can also trigger panning if the track hits a certain parameter. The automation allows you to generate complex rhythms and stunning sweets.


Microshift 

This is an image of Microshift, a great plugin for modifying your stereo field

Need some width? Well Microshift’s got width. It provides you 3 separate kinds of stereo widening in just a single button push. It uses a specific algorithm to pitch shift and add delay to your sound, that morphs over time to generate brilliant stereo width. It’s very easy to play around with and can be used to give more flavor to instruments, or create nice blends.


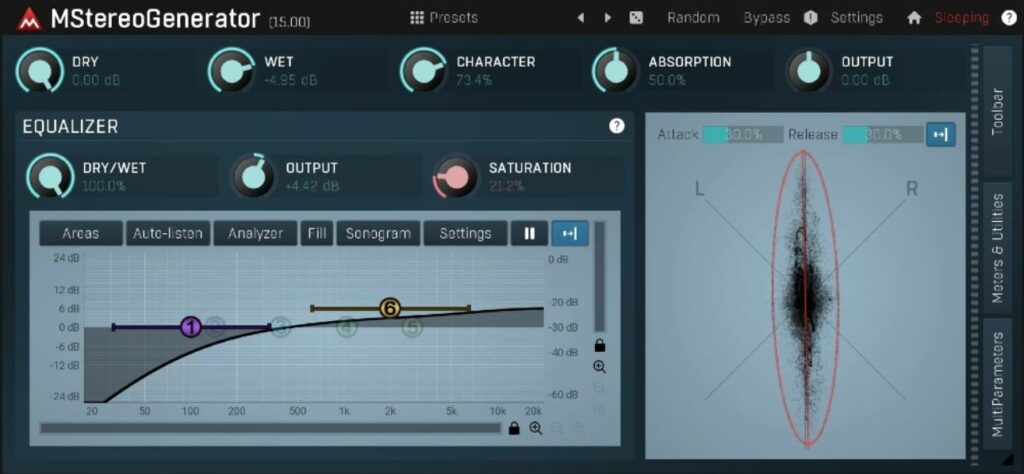
MStereoGenerator

an image of MStereoGenerator, an excellent plugin for stereo imaging

With MStereoGenerator, you can convert mono recordings into stereo (or even surround). MStereoGenerator is a unique natural-sounding mono to stereo (or even surround) expander, which makes your tracks sound wider, stronger and punchier.  It’s especially good for acoustic instruments. 


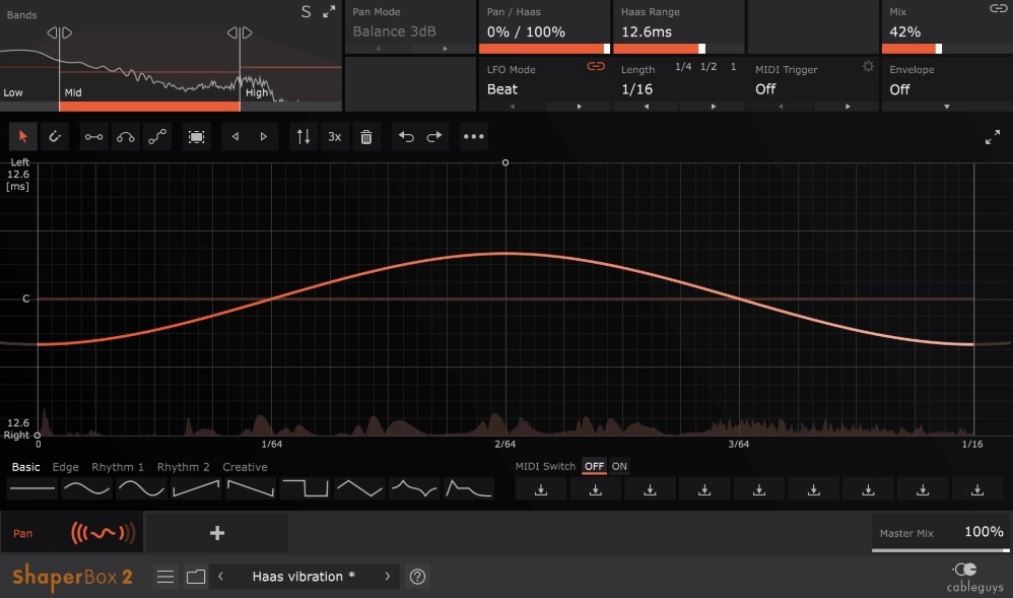
Panshaper 3 by Cableguys

An imagine of Panshaper, which allows you to do crazy stuff with MS Processing and panning.

PanShaper 3 takes control over your stereo field to another dimension. The real-time LFO that can be drawn on every band and the envelope follower allow you to design evolving, dynamic pan patterns and make dialed-in stereo edits in seconds.


Energy Panner

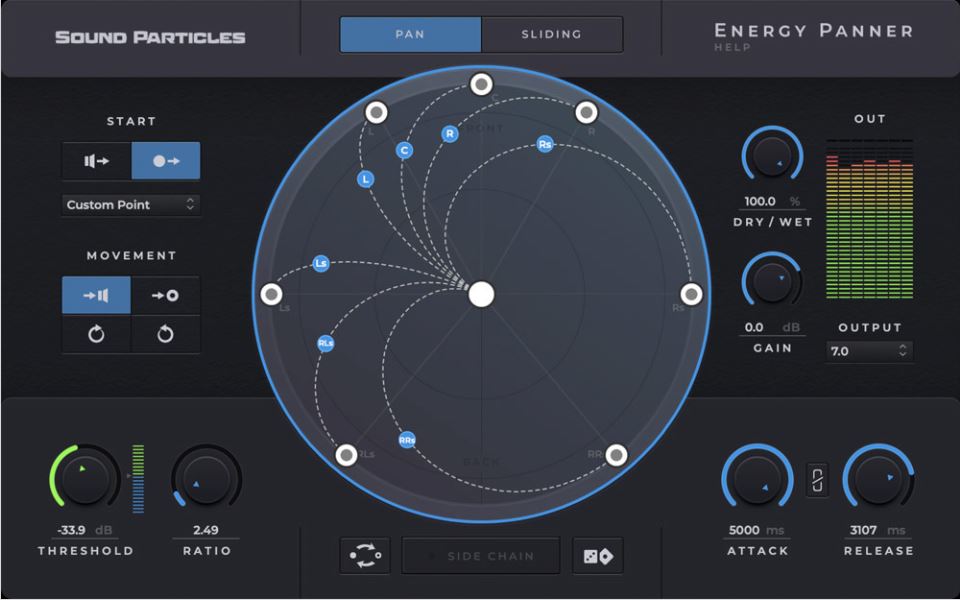
an image of Energypanner which allows for dynamic panning responsiveness to inputs

Energy Panner reacts to the sound intensity by moving in response to it. A drum kit that moves to the beat, synth notes that move on attack, and many other behaviors are possible. Whether it’s stereo or Dolby Atmos, Energy Panner is a plugin you shouldn’t be without.


Width Shaper 2 by Cableguys

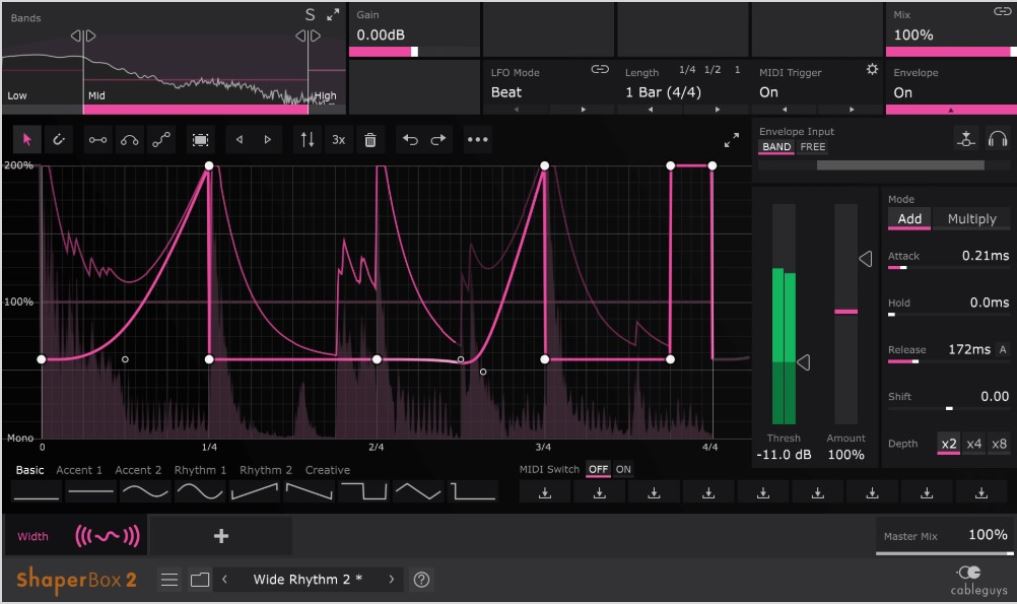
an image of the vst WidthShaper 2 which allows for amazing stereo mid/side processing.

With WidthShaper 2, you can fine-tune your stereo image to the finest detail. With three mid/side stereo adjustment bands, each with its own drawable LFO and envelope follower, you can gain precise control over the sound. It is perfect for sound design, mixing, and mastering, and can be used on single tracks and buses.

Once you have mid/side processing explained to you, you can see there is way more to stereo than just left and right. With M/S EQing you can surgically cut into sounds, and make them fit precisely in a mix. You can expand and retract sounds at different points in your mix, creating those illusionary, almost psychedelic effects in music that are almost inexplicable, since they are best described as space, rather than music.

However, with this power, comes the responsibility of not phasing your sounds out, and destroying the punch of your songs. Keeping in mind space, and how sounds relate to each other is a paramount skill in music production, and often an overlooked aspect.

I understand this can be complicated. If you need coaching or you just want to delegate this process to me, I’m available to help. Check out all of my services here.

Tips for better clarity in your mixes

Clarity in mixes is not something people understand or perceive well when they first start mixing, but it’s a magical part of a song that often distinguishes professional mixes from amateur mixes. Clear-sounding mixes instantly grab your attention because they feel precise, open, airy and easy to understand. While clarity in a mix might seem easy to create, it’s actually very difficult to achieve.

I can say that I’m starting to better understand clarity myself. If you’re familiar with my music, you know I like busy music and my songs are generally quite full, with multiple layers of sounds. It’s a challenge for me to get a clear mix because of the number of sounds I use, but for me this is also the best way to practice mixing clearly, as it’s more difficult than if I were only using a minimal amount of sounds.

Here are some of the things I’ve learned when creating clarity in my own mixes.

Less is more, and less is clearer

The less you have going on, the clearer your song will be. Nothing clashes and there’s less to try to find an appropriate spot for. When mixing, you need to find a fitting place for every sound you use. If you have 5 hihats, 3 claps, and 5 melodies, this can become quite a challenge.

How can you clean up a mix and make it clearer?

I see a lot of clients struggle with cleaning up their mixes. Most artists suffer from a strange thought process that goes something like “I’m afraid the listener is going to get bored, therefore I will fill my mix with as much as possible so the listener never feels let down.” To this I would reply that there’s a remedy in your DAW…the mute button! Let me explain:

1 – Loop a section of your song, the part where it’s the busiest.

2 – Mute everything, then start by un-muting your essential sounds. What are the fewest number of sounds that can communicate your song’s idea clearly? Toggling mute on parts of a song sometimes create interesting perspectives and can reveal things you didn’t realize about your arrangements—it often takes fewer sounds to create a clear mix. This can mean no fills, no decorations, no backgrounds, just the essentials.

3 – Are your essential sounds sharing space in the frequency spectrum?

Technically, if you have less, sounds are most likely to occupy less space and clash with one another less frequently. Generally, there are a few areas where your sounds can clash:

  • Frequency: If you divide the spectrum into 4 or 5 bands, you want each band to have the same number of sounds. Low-end would be under 100hz, then 100 to 1k for mids, 1k to 3k for high mids and then 3k to 10k for highs, then 10k+ for the air/transients. If you have a hard time muting your sounds, you can also isolate a few different sounds in different bands.
  • Amplitude: Also known as volume, amplitude is often not understood properly. People want everything LOUD and are afraid that secondary sounds won’t be heard. Everything gets heard in a mix and sometimes, things that are less loud are way better. Some sounds should be the loudest, then the others should be mixed in relation to those. The greater the amplitude distance you have between your sounds, the more they’ll feel like they’re breathing instead of fighting. This is your dynamic range, a concept that’s often misunderstood. I would recommend playing with levels here and there as well. Having modulation on the amplitude of a sound is a good way to create a breath of fresh air in a mix. You can use a tool like MTremolo to give you a hand with that.
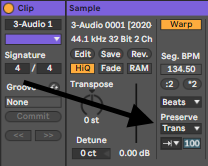
  • Sample length: This is something many overlook but is very important when it comes to samples. In many cases, samples people use are too long (too much decay) and that can cause a lot of noise, especially once compressed. Take kicks, for instance; people love big, badass kicks but don’t realize how problematic a long kick is in the low-end, especially in mastering. It bleeds in the bass and everything becomes mushy. I often use Transient Shaper (by Softubes) to shorten kicks or other percussive elements. You’d push the attack if you want and reduce the decay. You can also reduce the decay of a sample in Ableton if you go in the “Preserve” to be switched to “Trans” and then make sure it’s one-way, and play with the percentage to remove the decay.
  • Stereo space: I’ve explained this before and will refrain from repeating myself, but stereo clarity is crucial. If your sounds are spread wildly, you might get into phasing issues which means, you’ll end up with holes and sounds ghosting when they should be heard. I know that discovering phasing issues might be a bit of a mystery to many new producers, but with a good metering, you can see them. You can also listen to part of your song in mono to see if everything is coming out properly.

Chaos-inducing mixing errors

There are a number of tools and habits that can create chaos in a mix—I run into them often, and here are a few I see regularly that I can provide some advice for:

1- Using loop samples: There’s nothing wrong with using a pre-made loop or sampling something from source, but you won’t be able to access the loop’s sounds individually, and can get trapped dealing with issues that already exist within the loop or sample. If you’re using a loop, make it the centre of your song and make sure that you work the other samples around it. Tip: Using busy loops can be a bit of a problem, but you can use a multi-band compressor to control them, or put them in mono and use a multi-band stereo tool like the Shaperbox 2 to decide on the position of each sound.

2- Auto-panning nightmares: Making things move can feel exciting, but it doesn’t help mix clarity if you overdo it. Using multiple auto-pan effects on sounds can be cool, but the human ear can only handle a certain number of complex things going on. If on the first listen, one can’t understand the movement clearly, there are chances the modulation isn’t helping. TIP: Use just one auto-panning effect per song, max.

3- Delays and reverb: Reverb and delay multiply or make sounds longer, songs busier, and therefore, potentially more confusing. Reverb can be useful, but a type like Hall can make things sound a bit messy. I would recommend to have your reverb set to a short decay and low wet/dry. Darker reverb can also help preserve the highs in your song. Tip: Using reverb with a Chamber/Room at the beginning can help to know how much you should use. Also, if you can use a delay instead of reverb for creating wider sounds, use an EQ to tame the clashing frequencies.

4- Intense compression: Compression glues and adds body to sounds, but a compressor with a slow release and high ratio can also mess up the precision of a sound. Keeping some transients intact can really help a sound to pop out of a mix. If you compress, perhaps using the magic 1:1.5 ratio with slow attack to help the transient snap. TIP: Parallel compression is always useful for clarity.

My last general tip is to always check your mix in mono…it really helps!

I hope this was useful.

My Music Production Tips and Tools for 2020

As 2019 comes to an end, I’d like to discuss some of the most important things that went on, things I’ve talked about the most, plugins I loved, topics discussed in coaching, and so on.

Productivity and Writer’s Block

I was pretty busy in the first half of the year. I released my 22nd album and two EPs. While these achievements look great on paper, I can tell you that it was probably one of my least productive years of the last decade. I had a writer’s block (on-and-off) since May, and was unable to really finish a song, so I mainly focused on working on collaborations or engineering. Being hit by writer’s block at this point of my life was unusual, but reminds me that no one is really immune to it.

Signs of Writer’s Block:

  • Everything you do feels or sounds like crap or is uninspiring.
  • Other people’s music is not really hitting the spot either or feels old.
  • Being unable to make music for more than 20-30 minutes. A feeling of discouragement comes in really fast.
  • Mostly unable to turn a loop into a song.

If you’ve been making music for more than ten years, the signs are slightly different:

  • Feeling like you’re repeating yourself over and over.
  • Not feeling satisfied with the techniques or gear you have.
  • Unable to finish music in general or not able to start.
  • Mostly struggling to polish existing songs.

My solutions to resolve writer’s block are not necessarily going to work for everyone, as there’s no cure-all. Everything passes at some point, but you can’t resolve writer’s block without going through it—you can’t get around it.

Suggestions for Resolving Writer’s Block

  • Completely change how you work by trying a new DAW.
  • Test tons of presets from your synths and learn how they’re programmed.
  • Learn about modular synthesis.
  • Try online sound banks such as Archive.org, freesound.org, or even YouTube’s obscure archives.

But more importantly, figure out what the block is in your writer’s block. Is it linked towards your expectations? In my case, it’s simply a question of finding the next concept to build an album upon. The way I discover concepts is by trying to reverse-engineer sound design. The quest to make something similar with the use of different tools to shape the sound is more important than the result itself. I see many people getting writer’s block from trying to identically replicate a sound they want and discarding other techniques.

The difficulty in replicating a technique comes from the “early beginnings of a new producer“, in which someone starts on the wrong foot. I’m always happy to have someone who wants to start producing come to me to make sure he/she will start off well.

How and Where to Start Producing

In 2019, new producers have infinite access to information and tools. Too much information means a few things:

  • Giving you the wrong first impression that everything is easy and doable.
  • Misleading you into investing into things sold as being essential, while they’re not.
  • Having so many choices makes the task of picking one overwhelming. If you have access to all the sounds you could ever dream of, where would you start?

Counter-Productive Tips New Producers are Often Told

  • If you work hard enough, you can learn anything.
  • You can learn and do everything yourself.
  • Not watching tutorials or reading articles is better than education because you learn as you go.
  • Make all your sounds by yourself so you can be original. Hello, down the rabbit hole.

I see people coming into production with the wrong intentions/goals. Of course, if you come with the idea that: a. things are easy and that b. you can learn everything yourself, people set unrealistic goals for themselves before they’ve ever created a loop.

In the last five years, I have been frequently reminded of a client who once came to me with an artist page on Soundcloud and Facebook with thousands of followers, a logo, professional photos, etc., but not a single minute of experience in music production. He had to make some music that could match the image he had been selling, and the first step felt huge.

The other side to early production is the artist who finishes a first song quickly and gets signed. With no experience, keeping up the pace of releasing is difficult, and the quick rise can be a situation that might be difficult to handle.

My Suggestions for People Who Want to Start Producing

  • Listen to a lot of music when you have the time, and attend shows. This is super important for multiple reasons: you’ll learn the relationship between what you hear on your headphones vs. a venue. This is important to develop your mixing skills—learning how people react to sounds and how artists perform music in a live context. This is valuable information for music-making.
  • Try to befriend people who make music as well, a mix of newcomers and older producers. This is super important for building a network of contacts to ask questions, swap music with, share gear, get a bunch of info that you can’t find yourself, and also to break-up periods of isolation.
  • Ask as many questions as you have. No shame, just ask. Ask a lot of how do you do this or that? What is the name of that sound? What effect can create that impression?
  • Have studio jams. This is the best way to learn. You’ll learn so much because you’ll run into so many problems that you’ll have to troubleshoot them, and that’s useful. Jamming also puts music-making into a context that is impossible to replicate—alone in a studio.
  • Try to make loops everyday. You can make them all into one project file or start a new one each time. It’s important to make many because it’s good to first practice how to start making a loop. If you make a lot, you’ll get more efficient, develop tricks, and get faster at finding your way through a new tool.
  • It’s more efficient to do 10-20 minutes everyday than a five-hour session on a weekend. The optimal focus time for your brain is around 30 minutes, so you get the best of yourself. Working for five hours isn’t recommended at all: you’ll feel like you did a lot but after that time, your ears can’t really judge what you’re doing. You can do five hours in a day, but on multiple tracks. I just feel that it’s not the best of yourself that will come out of long sessions on a single project, but you’ll learn.
  • When you can start a loop in 10 minutes and feel great about it, then you’ve leveled up and you can now go back to all the loops you made and practice turning them into a song. Next level comes when you can finish them in a breeze.
  • One song, one idea. If you make a decent loop, it’s probably the middle part of your song. How many layers do you have? What is the main idea? Can you, or a friend, sing that idea?
  • Don’t make a big deal about not finishing songs. It will come naturally if you take things one step at a time.
  • Forget releasing your music or getting signed by a label. If you focus on that, you’re just distracted from doing what you have to do which is to have skills to make music like you want.

Common Issues Other Than Writer’s Block

People often share other struggles in music-making with me like:

  1. A loop or idea feels boring or repetitive at some point in the song. First, don’t reveal your main idea too quickly. Second, create multiple variations of that loop (ex. changing the timing or adding effects). Third, add modulation to the sounds so they’re constantly changing.
  2. A song feels like something is missing. This might be because you’ve heard it too many times. Try leaving it alone for a month. Otherwise, here’s the a quick checklist: percussion, bass, pattern or melody, background, and a supporting idea. If you have all those, you should be more than okay. Otherwise, try to compare your song to a reference, concentrate on all sounds and see if you have about the same number.
  3. A track feels empty compared to references. Often resolved by creating a noise-floor. Try a reverb or a hiss at low level.
  4. Sounds never feel right. You might have bad samples. If you are convinced you should do everything yourself, you’ll indeed sound off, for a while. Try buying and using pre-made sounds. If you can’t make them, find some, and learn how to make killer loops and songs. As you go, you’ll eventually train your ear on how these sounds are made and will be able to make them. Honestly, even after 20 years, there are plenty of sounds I’m slightly not sure how to make even though I know, in theory, how to… it’s harder than it seems!
  5. Creating original ideas and not cheesy ones. If you listen to a lot of music, this will train your ear. If you listen to a lot of music before making music, it will put you in a mood. If you use a reference track, or even try to compose music over it, it can greatly help with this issue.

Essential Music Production Tools From 2019

EQ

Even though it was released in 2018, Fabfilter’s Pro-Q3 has won many prizes this year and has gained prominence with many major engineers. I’ve been watching a lot of tutorials from Mixing With The Masters, and Pro-Q3 is often the EQ of choice. You can use multiple instances to see how each channels are interacting between one-another, do some side-chaining, corrections, and shelving. You can turn any points into a dynamic filter too, which is very useful. If you have the budget, try to get an analog inspired EQ such as the PSP E27. These types of EQs aren’t parametric and can add a musical colour.

Compression

The compressor I loved the most this year was the Avalon from Universal Audio. So badass, so powerful, so useful…no need to say more. If you don’t have a UAD, I always turn to PSP Vintagewarmer 2. Not only does it compress well, it adds warmth—people want both.

The Do-It-All Utility of the Year

No doubts, it comes to Shaperbox 2. It is perfect for resolving many, many issues like modulation, side-chaining, movement, variations, creative ideas on the fly…it’s so good that I blindly bought it when I received it in my newsletter from CurveGuys.

Reverb

If there’s one effect to have on top of your stock plugins is a good reverb. There are many out there such as this gorgeous reverb by Fabfilter but I suggest the Convolution by Melda—it’s fantastic and will be useful for years.

Quote of the Year

We make music to come together, and yet spend so much time alone. Reach out to others, create new concepts and see how viewing music as something fun will build things organically.

SEE ALSO : Design Thinking for Music Production

The acoustic-electronic combo

In the last 5 years, I’ve been seeing more and more projects that combine the use of acoustic sounds, samples, and recordings with synthetic, analog sounds. What’s interesting is that in the 90s, this combo wasn’t very popular, and in the eyes of many purists it was a huge no-no. The benefits of an acoustic-analog recording combination is what I’d like to discuss in this post.

There are a huge number of amazing musicians we could point to as being good references of this combination. For instance, in 2011, ECM asked Ricardo Villalobos to remix some songs from their catalog.

I remember that Ric had been playing many tracks from the jazz-influenced label mostly because he loves to create these epic moments of weirdness, where he’s play something totally unexpected in the middle of his sets. Sometimes even in a peak moment where most people would be expecting a bomb song, he’d drop some weird jazz music and layer it with some of his own techno songs he recorded in his studio, mostly from his modular. Seeing him play some of that during a few events circa 2005-2009, I saw how the acoustic-electronic combo always brought some magic into a very electronic set, but you’d have to be happy. I remember some people being weirded out by it but that, as he’d say, is not his problem.

In the 90s, this combination wasn’t always welcomed, mostly because people were really wanting to dive deep into pure electronic music, as in, if it was techno, it had to be techno and there was no room for anything that wasn’t on that agenda. I’m sorry to say that I was one of those guys as well! Especially when I entered my minimal techno era around 1996, I wanted the purest electronic aesthetic and anything acoustic would make me cringe, especially guitars.

I find that ever since Ric explored the ECM catalog, it really opened a lot of doors for people to combine the two worlds to unite them. One person that jumps to my mind as one of the artists that explored that the most is certainly Petre Inspirescu, who was really known for bringing classical vibes to techno—in his mix for Fabric or in his work with the Pi Ensemble. It’s important to note that it was an exploration, yes, but it also worked really, really well. Sometimes people explore something and it doesn’t really work, but Petre, in my humble opinion, brought it to a more refined result than what Villalobos did.

So, what should we take from this history exactly? How can one get into the acoustic-electronic aesthetic and make it work well?

Reverb and Room Acoustics

It’s crazy how a good reverb can bring life to anything, and since acoustic instruments are recorded in a room, organic reverb added to a sound brings a whole new world to it. The more realistic the reverb, the more warmth it can bring [to a mix]. This is what influenced me the most to start my own reverb collection, and my lust for finding the most realistic reverb. I did many tests with mastering, asking artists who have great reverb in their productions what can make a difference.

  • Convolution: If you can, always use the convolution reverb by max for live. One thing I noticed about stock plugins is the grain that comes out weird during mastering; this is never the case for convolution. If you’re not familiar with what convolution means, it’s basically taking the “image” of a place’s reverb and applying it as a preset for your plugin. You can then have special places such as a specific studio, concert room or even, a restaurant. It’s used in movies for creating proper atmospheres but it does such a great job on percussion. One of my favourite convolution reverb plugins is the one by Melda called mConvolutionMB—it’s multi-band, giving you a lot of options for creating really special spaces. You can also browse the internet in search of free impulse responses that you can load in your plugin. I also encourage you to randomly put sounds in it to get the reverb that is used in the sample to apply it to your song so you get a feeling that it’s all part of the same place.
  • Record your own: I know some people who buy pieces of drum kits separately to have the real thing then can play with. They’ll then record themselves playing percussion over their song. You’d be surprised about even with a cheap microphone, you can create something pretty interesting to layer your sounds with. It will catch the reverb of your place which is also unique. Snares, hats, cymbals are cheaper to buy than you think, and having them physically with you is pretty fun too.
  • Binaural recording: You can buy a binaural microphone that allows you to record sounds based upon your head, which is ideal to create stereo impression on the listener who uses headphones. If you record percussion at your ear level, it will give the listener the idea that the percussion is right in front of you. It really creates a special aesthetic for whatever you record and also some stereo placement that is unique. There are all kinds of tricks you can do with recording random things. Since it’s very precise for stereo, some people use frequency modulation using binaural technique to induce the brain in different states of mind like relaxation. I won’t get into that but there’s plenty to read on the topic if you’re curious.
  • Hardware reverb: This is hard to beat. If you can invest into a hardware reverb unit such as a pedal or a rackmount effect, you’ll get some really next level results. Something like an old DP4 by Ensoniq or Alesis, Lexicon ones can be a dramatic improvement. You can also look into a multi-effect pedal like the one by Big Sky.

Preamps and Other Tools

While the idea of acoustic layered over analog is magical, you’ll have to agree that the highest quality recordings will make a huge difference. This is why when you look for quality samples, you’ll look for the highest sample rate possible and something like 192khz will be the holy grail. This means you can re-pitch it with the least compromise, and you’ll get a lot of what we call the air-factor, where the complexity of the high end will be crystal clear.

Something else people overlook, especially when it comes to samples that were recorded, is the use of preamps. I’ve been shying away from this topic for years until I really saw how using them can completely change the quality of your sound, adding not only beefiness but also, a special texture, depending of the preamp you’re using. Ones by Neve will sound different than API, for instance, and using them on certain things will change the character of a sound. Plugins that emulate them are pretty solid at it. I tested all of the preamps this year, from Universal Audio, and found that the ones by Neve are the ones that feel the suitable for the music I want to do. I also saw a considerable amount of enthusiasm from clients when I used them on their projects. So, recording your own, even with a cheap microphone, if you use some nice preamp, you’ll get something pretty solid out of it. Cheap microphone can even be a source of coloration for your samples but nowadays you can find really nice, affordable microphones so it might be worth investing a bit more so you get something useful for years ahead.

Virtual drummers are also something you can look into. There are many out there but Slate Digital makes really high quality program that can help you have highly realistic percussion. Otherwise, you can look at Addictive Drummer that has a range of different drum kits to get sounds from. It’s very realistic as well and layering it over a rigid drum machine sequence can provide a lot of depth!

SEE ALSO : Integrating a modular setup with your DAW

Improving intensity in music

Intensity in music can be a tricky balancing act. In our Facebook group, one member recently asked about how he could improve the intensity and excitement of his tracks. He makes electronic music, and feels that compared to some producers he likes, his music doesn’t match in terms of excitement. After asking him a few questions, I realized that the tracks he shared as examples he wanted to emulate were mostly songs with high levels of density, and perhaps not the levels of intensity I thought he was referring to. The term “intensity” is very different from one genre to another; in this post, I’ll try to cover some of the different ways we relate to intensity, and also some tricks and tips as to how to make your tracks more intense-feeling.

Loudness

One of the main aspects of intensity is the loudness or volume of a song. Humans are often tricked into thinking that loudness directly correlates to the intensity of a song. Concerts at high volumes give music a physical sonic experience that people like. Artists often try to replicate the live experience through volume levels or even compression.

However, when making music, there are a lot of other things one needs to pay attention to in the process—loudness should be the very last thing to worry about. Volume/loudness levels can only be adjusted once your mix is proper and flawless. Some people play with mastering tools such as Izotope Ozone 9 as a mastering assistant to help push songs up to a higher level, but if you think loudness is the key to intensity, you might run into issues. Heavily boosting the loudness of a song ruins all the finer details that were worked on so much, via too much compression.

If you want to play with the perceived loudness experience, one thing you can do is make sure that your mid-range frequencies are mixed at sufficient levels, or even perhaps a bit louder than what you’d usually do. Humans will always hear something with a good mid presence as “louder”, even if the overall loudness is lower. A plugin like Intensity by Zynaptiq can really help bring intensity to a song, but can also do subtle wonders at lower levels.

Another thing you can do is play with saturation. This gives a gritty feel to your track’s sounds, adding textures, depth, and relative power as well. Harmonics by Softubes is often my go-to plugin when it comes to applying saturation to mids. It really brings out an organic brightness in sounds that almost always sounds good. Saturation also creates the impression that something is louder, but not in a compressed way.

Density

Similar to loudness, is density: how many sounds you have in your mix at a given time that have very little difference in volume. You could have multiple percussive sounds, for example, and all of them equally loud. Doing this occupies a lot of room in your mix and makes sounds feel more like they’re at the forefront. The denser a mix, the less room there is for depth, but a dense mix can have a lot of immediate power.

For certain techno songs, density is often in the form of a wall of machine-gun type hi-hats which are always going. This creates excitement in the highs. In tribal music, density comes from percussive sounds, but in the mids, and in dubstep, it’s pretty much all about the low end (although dubstep tends to overcharge the full frequency spectrum).

An interesting genre that people often simply refer to as ambient, is drone music. Drone, in a loud venue, becomes a pure noise show so intense, it can give you very powerful body sensation. At MUTEK, I almost puked after a drone show.

If you want an alternative way to create density, other than simply using a lot of tracks, you can also play with the decay of your sounds. Longer hats, kicks, claps, and other percussive sounds will add intensity via density. If you have certain sonic limitations, decay can also be “created” with a gated reverb which will add a tail, but I’d encourage you to use a darker tone.

Background and noise floor

If you go to the most quiet place you can think of and record with a field recorder, you’ll still hear noise in your recordings at a very low level. In general, there’s always some sort of noise surrounding us. It can be the fan of your computer, a car passing by your apartment, people talking in the background in a quiet coffee shop. When you put your headphones on and make music, you might have the impression that your music feels empty and that usually comes from a lack of noise floor. In Dub Techno, songs are often washed in a sea of reverb, which creates a space that feels comforting. Using a long reverb can create a low level of noise that is naturally pleasant to the ear, but there are also other ways to create a noise floor:

  • In many minimal tracks, people will mix in field recordings. You can find a lot of field recordings for free online. They can be from anywhere, but you can event record noise from where you live and use that (some producers love to have a microphone in their studio to pick up noises of themselves as they work). You can also spend time creating your own invented field recordings using day to day sounds that you mix with a white noise and reverb, then lower the volume to -24db or lower.
  • Use hardware equipment and use a compressor to bring up the noise.
  • Take a synth and use a noise oscillator to create a floor. You can then add volume automation to it to give it life, like side-chain compression.

In the tracks the member of our group shared which I mentioned at the beginning of this post, the noise floor was just as loud as the main sounds, which then created an impression that the song was really, really dense, loud, and busy.

Powerful low end

One thing people often do for intensity is create really powerful kicks or basses. They’ll have them mixed way louder than the rest of the track, but this often results in a muddy mix, as the details will then feel covered or too low. But in many genres, the importance of a solid kick is often directly related to the intensity of the song. A tip—the clap or snare, should also be equally intense, with a presence in the mids; this relationship will make the track feel very assertive and punchy.

Creating a powerful kick is not an easy task, but you can achieve better results with a combination of Neutron‘s transient shaper and multiband compressor. This will allow you to shape your kick so it’s fat and round. But even if you end up with the most powerful kick you can create, a mix can still feel like it’s lacking intensity unless the kick is properly mixed. Proper mixing of a kick’s low end can often be done by high-pass filtering or EQ’ing some parts of the bass so it doesn’t mask the kick. You can also use a tool like the Volume Shaper or Track Spacer to give clarity to the kick.

Exciting effects

Transitional effects, fills, and rises/falls are always a popular way to create excitement in your track. These are often effects you can use straight from presets and simply apply them on random sounds that are already in your project. I usually like to have two channels per percussive sound I use. Not only for layering, but sometimes the second channel of a percussion will have an effect that I’ll use once or twice. You can have dedicated channels that are effects only, and then drop sounds from your song into that channel. This can be done with a send/aux channel too, but I like to have a FX-channel on its own, as it’s more visually clear.

Popular effects that can help create intensity and excitement include delays, panning, reversing sounds, and reverb, but if you’re looking into something out of the ordinary, I suggest you look into unusual multi-effect plugins such as SphereQuad, Tantra, Fracture XT, Movement, and mRhythmizerMB.

Dynamics

A lot of people don’t seem to understand dynamics, and what they mean in music. Dynamics are often simply interpreted as compression, but if you really use dynamics in an exciting way, you need to think about it as the contrast or range between two levels. Imagine someone whispers something in your ear, and then, all of a sudden, starts talking really loudly; it will create a shock or surprise. Differences in sound are a good way to create surprise and intensity—the greater the difference between the two sounds, the louder or more intense the second sound will feel, or vice-versa. You could have section or certain sounds in your song that are quieter for a moment and then get louder. Dynamics don’t necessarily always refer to volume, however. For example, you can create a moment in a song in mono, and then go to full stereo mode—this difference is also surprising for the listener.

Finally, one thing to keep in mind about intensity in music: if you immediately give away everything your song is about in the first few seconds of a track, you’re mostly likely going to screw up the ability to create intensity, tension, and excitement in the entire work—it will be really hard to keep a listener interested for the entire duration of a song if he or she has already heard your “climax”.

SEE ALSO : Textures Sample Pack

More tips about working with samples in Ableton

Recently I was doing some mixing and I came across multiple projects in a row that had some major issues with regards to working with samples in Ableton. One of them is a personal issue: taking a loop from a sample bank and using it as is, but there’s no real rule about doing this; if you bought the samples you are entitled to use them in any way you want.

While I do use samples in my work sometimes, I do it with the perspective that they are a starting point, or to be able to quickly pinpoint the mood of the track that I’m aiming for. There’s nothing more vibe-killing than starting to work on a new song but losing 30 minutes trying to find a fitting sound, like hi-hats for instance. One of my personal rules is to spend less than 30 minutes tweaking my first round of song production. This means that the initial phase is really about focusing in on the main idea of the song. The rest is accessory and could be anything. If you mute any parts except the main idea(s), the song will still be what it is.

So why is it important to shape the samples?

Well basically, the real answer is about tying it all together to give personality to the project you’re working on. You want it to work as a whole, which means you might want to start by tuning the sample to the idea.

Before I go on, let me give you a couple of suggestions regarding how to edit the samples in ways to make them unique.

I always find that pitch and length are the quickest ways to alter something and easily trick the brain into thinking the sounds are completely new. Even pitching down by 1 or 2 steps or shortening a sample to half its original size will already give you something different. Another trick is to change where the sample starts. For instance, with kicks, I sometimes like to start playing the sample later in the sound to have access to a different attack or custom make my own using the sampler.

TIP: I love to have the sounds change length as the song progresses, either by using an LFO or by manually tweaking the sounds. ex. Snares that gets longer create tensions in a breakdown.

In a past post, I covered the use of samples more in-depth, and I thought I could provide a bit more in detail about how you can spice things up with samples, but this time, using effects or Ableton’s internal tools.

Reverb: Reverb is a classic, where simply dropping it on a sound will alter it, but the down side is that it muffles the transients which can make things muddy. Solution: Use a Send/AUX channel where you’ll use a transient designer to (drastically) remove the attack of the incoming signal and then add a reverb. In doing this, you’ll be only adding reverb to the decay of the sound while the transient stays untouched.

Freeze-verb: One option you’ll find in the reverb from Ableton is the freeze function. Passing a sound through it and freezing it is like having a snapshot of the sound that is on hold. Resample that. I like to pitch it up or down and layering it with the original sound which allows you to add richness and harmonics to the original.

Gate: So few people use Ableton’s Gate! It’s one of my favorite. The best way to use it is by side-chaining it with a signal. Think of this as the opposite of a compressor in side-chaining; the gate will let the gated sound play only when the other is also playing, and you also have an envelope on it that lets you shape the sound. This is practical for many uses such as layering percussive loops, where the one that is side-chained will play only when it detects sound, which makes a mix way clearer. In sound design, this is pretty fun for creating multiple layers to a dull sound, by using various different incoming signals.

Granular Synthesis: This is by far my favorite tool to rearrange and morph sounds. It will stretch sounds, which gives them this grainy texture and something slightly scattered sounding too. Melda Production has a great granular synth that is multi-band, which provides lots of room to treat the layers of a sound in many ways. If you find it fun, Melda also has two other plugins that are great for messing up sound with mTransformer and mMorph.

Grain Delay, looped: A classic and sometimes overused effect, this one is great as you can automate pitch over delay. But it is still a great tool to use along with the Looper. They do really nice things when combined. I like to make really shorts loops of sounds going through the Grain Delay. This is also fun if you take the sound and double its length, as it will be stretched up, granular style, creating interesting texture along the way.

Resampling: This is the base of all sound design in Ableton, but to resample yourself tweaking a sound is by far the most organic way to treat sound. If you have PUSH, it’s even more fun as you can create a macro, assign certain parameters to the knobs and then record yourself just playing with the knobs. You can then chop the session to the parts you prefer.

I hope this was useful!

SEE ALSO : Learning how to make melodies

Creating organic sounding music with mixing

I’m always a bit reluctant to discuss mixing on this blog. The biggest mistake people make in mixing is to apply all the advice they can find online to their own work. This approach might not work, mostly because there are so many factors that can change how you approach your mix that it can be counter-productive. The best way to write about mixing would be to explain something and then include the many cascades of “but if…”, with regards to how you’d like to sound. So, to wrap things properly, I’ll cover one topic I love in music, which is how to get a very organic sounding music.

There are many ways to approach electronic music. There’s the very mechanical way of layering loops, which is popular in techno or using modular synths/eurorack. These styles, like many others, have a couple main things in mind: making people dance or showcasing craftsmanship in presenting sounds. One of the first things you want to do before you start mixing is to know exactly what style you want to create before you start.

Wherever you’re at and whatever the genre you’re working in, you can always infuse your mix with a more organic feel. Everyone has their own way, but sometimes it’s about finding your style.

In my case, I’ve always been interested in two things, which are reasons why people work with me for mixing:

  1. While I use electronic sounds, I want to keep them feeling as if they’re as organic and real as possible. You’ll have the impression of being immersed in a space of living unreal things and the clash between the synthetic and the real, which is for me, one of the most interesting things to listen to.
  2. I like to design spaces that could exist. The idea of putting sounds in place brings the listener into a bubble-like experience, which is the exact opposite of commercial music where a wall of sound is the desired aesthetic.

There’s nothing wrong with commercial music, it just has a different goal than I do in mixing.

What are some descriptions we can apply to an organic, warm, rounded sound?

  • A “real” sounding feel.
  • Distance between sounds to create the impression of space.
  • Clear low end, very rounded.
  • Controlled transients that aren’t aggressive.
  • Resonances that aren’t piercing.
  • Wideness without losing your center.
  • Usually a “darker” mix with some presence of air in the highs.
  • Keeping a more flat tone but with thick mids.

Now with this list in mind, there are approaches of how to deal with your mix and production.

Select quality samples to start with. It’s very common for me to come back to a client and say “I have to change your kick, clap and snare”, mostly because the source material has issues. Thi is because many people download crap sounds via torrents or free sites which usually haven’t been handled properly. See sounds and samples as the ingredients you cook food with: you want to compose with the best sounding material. I’m not a fan of mastered samples, as I noticed they sometimes distort if we compress them so I usually want something with a headroom. TIP: Get sounds at 24b minimum, invest some bucks to get something that is thick and clear sounding.

Remove resonances as you go. Don’t wait for a mixdown to fix everything. I usually make my loops and will correct a resonance right away if I hear one. I’ll freeze and flatten right away, sometimes even save the sample for future use. To fix a resonance, use a high quality EQ with a Q of about 5 maximum and then set your EQ to hear what you are cutting. Then you lower down of about 4-5db to start with. TIP: Use Fabfilter Pro-Q3, buy it here.

Control transients with a transient designer instead of an EQ. I find that many people aren’t sensitive of how annoying in a mix percussion can be if the transients are too aggressive. That can sometimes be only noticed once you compress. I like to use a Transient designer to lower the impact; just a little on the ones that are annoying. TIP: Try the TS-1 Transient Shaper, buy it here.

Remove all frequencies under the fundamental of the bass. This means removing the rogue resonances and to monitor what you’re cutting. If your bass or kick hits at 31hz, then remove anything under that frequency. EQ the kick and all other low end sound independently.

Support the low end with a sub since to add roundness. Anemic or confused low end can be swapped or supported by a sine wav synth that can be there to enhance the fundamental frequency and make it rounder. It make a big difference affecting the warmth of the sound. Ableton’s Operator will do, or basically any synth with oscillators you can design.

High-pass your busses with a filter at 12db/octave. Make sure you use a good EQ that lets you pick the slope and high-pass not so aggressively to have a more analog feel to your mix.

Thicken the mids with a multiband compressor. I like to compress the mids between 200 and 800. Often clients get it wrong around there and this range is where the real body of your song lies. The presence it provides on a sound system is dramatic if you control it properly.

Use clear reverb with short decay. Quality reverbs are always a game changer. I like to use different busses at 10% wet and with a very fast decay. Can’t hear it? You’re doing it right. TIP: Use TSAR-1 reverb for the win.

Add air with a high quality EQ. Please note this is a difficult thing to do properly and can be achieved with high-end EQ for better results. Just notch up your melodic buss with a notch up around 15khz. It add very subtle mix and is ear pleasing in little quantity. TIP: Turbo EQ by Melda is a hot air balloon.

Double Compress all your melodic sounds. This can be done with 2 compressors in parallel. The first one will be set to 50% wet and the second at 75%. The settings have to be played with but this will thicken and warm up everything.

Now for space, I make 3 groups: sounds that are subtle (background), sounds that are in the middle part of the space, and space that are upfront. A mistake many people make is to have too many sounds upfront and no subtle background sounds. A good guideline is 20% upfront as the stars of your song, then 65% are in the middle, and the remaining 15% are the subtle background details. If your balance is right, your song will automatically breathe and feel right.

All the upfront sounds are the ones where the volume is at 100% (not at 0db!), the ones in the middle are generally at 75%, and the others are varied between 50% to 30% volume. When you mix, always play with the volume of your sound to see where it sits best in the mix. Bring it too low, too loud, in the middle. You’ll find a spot where it feels like it is alive.

Lastly, one important thing is to understand that sounds have relationships to one another. This is sometimes “call and response”, or some are cousins… they are interacting and talking to each other. The more you support a dialog between your sounds, the more fun it is to listen to. Plus it makes things feel more organic!

SEE ALSO : More tips about working with samples in Ableton

My Music Production Methodology Pt. III: Depth and spatial shaping tips

This post about music production methods is an important one. In the group I work with on Facebook, I give feedback to people and I’d say that while for many, the part they strugg le with the most is to nail down a proper mixdown, and for the majority there are issues with the stereo field. I have a bunch of tricks that can help turn a 2D pattern into a 3D realm to get lost in. Let’s start by discussing a few things regarding making music 2D, and then how you can slowly shape it.

One thing that is essential for music to sound clear, loud, and powerful in a club is to have the majority of your sounds “in mono”, or in engineering terms, to have your mids solid. This is why many people will tell that doing a mono test on your mix to see if everything is heard is a good way to know. Why? Because if the sounds are moved randomly around, they might phase with others, which will end up cancelling out once in mono.

While this might sound like voodoo magic if you make music as a hobby, you can drop a tool into your DAW to make the signal mono so you can check. (hint: in Ableton Live, it is the Utility effect that will let you do that)

Ableton’s Utility tool

This is why you want your low end (under 100hz) to be in mono; to make sure there are no conflicts and that it will be sounding fat and strong. Again, in Ableton Live 10, you can activate the “Mono bass” option on the Utility tool.

Why I’m saying this is clear and simple: depth is a fun thing to have on your music but if you go too crazy with it, it might end up being a problem. So, first and foremost, when you program your patterns and music, try starting in mono. Make sure everything is heard and clear.

Once you have created the arrangements and are pretty much done but before you get to mixing, start spreading your sounds around to occupy the space in front of you. You don’t want to have everything in the middle, it will feel narrow and lifeless. There are multiple ways to get this done and it goes a bit beyond than simple panning which might be a bit boring. (Note: many mixes I get have everything in mono!)

Tips to give your mix more space

Mid/Side is a great way to use space in a mix, but is often misunderstood.

Here are a few tips to give you mix space and life, and if you google this topic, you’ll find multiple others too:

  • If the sound/sample is in mono: Try doubling it by duplicating the channel a few times, then pan and experiment. In pop, soul, R&B, the producers often do that and have up to 4 duplicates, spread around and or pitched to different tones to give sounds textures. You can use a VST Doubler to do the same but there’s something exciting about doing it manually. Keep in mind, a clap is actually 4 layers and so on for your percussion. Try to create something wild.
  • Panning around your sounds can do but it will feel bland if you don’t couple it with a quality reverb. Even at very low levels, a reverb will create space around the panned sound. This is why I group percussion into families (ex. all organic, all metals, all wood, etc) then have a reverb per family, not per sound.
  • Use stereo effects: These will be super useful to help things around and for instance an auto-pan will help give life and movement. These include: chorus, delay, phase, flanger and wideners (of course). These should be applied to a sound, not a family. Only one of these effects per song to avoid issues.
  • Quality reverbs: as described above, a quality reverb is a game changer. Stock plugins are never as good as a whole team that work on making something special. For instance, all the plugins from Valhalla are now recognized as some of the best in the industry and for a reason, they sound just as good as some hardware units. Tip Top who make modular synths has licensed their reverb for their z-Dsp 2. If you can, always go for convolution reverb for your music and use only one, in a AUX/Send. So if you really a 3D sounding song, keep in mind that a reverb will do 80% of the job. The rest is about lowering the volume of certain sounds to give the impression they’re further away. Also, filtering out the low can give that impression. Mixed with a quality reverb, you will have a lovely space.
  • MID/Side: This is one of the most misunderstood aspects of mixing because it’s hard to really understand it. Keep it simple, this term refers to how your space is shaped as what you have in front of you is the mid and the sides are located where are the speakers/monitors are. If you misuse the sides too much, it will make your music phase (you’ll hear it in the mono-check). But it’s really interesting to play with the Mid/Side (Aka MS) of your groups to open them, a bit.

Last tip: Low end should always be in mono and I usually make sure that some part of the melody is also, while it can partly be spread around. The main hihat and percussion should also be strong in the mid but then you can have support sound of the same family be spread around to give room.

 SEE ALSO :   The “sous-chef” experience 

Reverb Tips to Boost Your Creativity

This isn’t just another article explaining what reverb is and what it does. If you dig a bit, you’ll find all the technical facts and information you need out there already. So instead, I’ll focus here on the little tips and tricks I use daily that you can try right away. And I’ll invite you to reflect on what reverb can do for you and your music.

Why?

Because reverb’s primary role is to add depth to a song.

I’m talking in the technical sense, but also in the way its 3D-like effect can give your song a soul. No kiddin’. Have you ever watched a movie where one of the characters is lost in thought or reliving a moment? Very often, the voice will be drowned in reverb to evoke an internal feeling, something deep and subconscious.

There could be a correlation between the reverb effect and the womb, perhaps, where it emulates the way a fetus hears the world, as if under water. Whatever the reason, the sound of reverb in our culture pretty much always conveys something hidden or profound, and using it in your music can change things dramatically.

Pros. Adds mysticism, warmth, and smoothness to percussion and melodies. Reverb can round out transients and stretch the release of sounds, which can also add dimension and that wet feeling you hear sometimes in songs.

Cons. Some people prefer a dry aesthetic in their music, which can also work very well. If the music is played in a warehouse or other large venue, adding reverb could make it sound more imprecise or confusing, perhaps removing a certain punch. This is why reverb should be used with care if you’re interested in producing dance-friendly music.

There are different types of reverbs, and each one has different uses. Here are some explorative avenues for you to try. They’re suggestions to get you started, but you could end up taking them in a completely different direction. I always encourage people to test out a few things, and most especially, to try whatever is contraindicated or not advised. This is the best way to figure out for yourself why it’s not recommended, but you might also find that you can pull something out of it.

My favourite tips are:

  • Convolution exploration. Convolution plugins extract the reverb from a song so you can apply the resulting image to other sounds. In theory, a good image is a white noise spread in a room, so that its impulse can be analyzed. You don’t have to respect this though. You can basically drop any short or long sample to see how the plugin will analyze its impulse. You can extract a sound from an old pop song, movies, your iPhone, or anything else you can think of. You can even drop a pad with no reverb and see what it does. Sometimes it gives you weird results. Same if you use a percussive loop, since it has a rhythmic impulse.
  • Panning reverb. Using multiple send channels or busses, you can combine multiple reverbs to create your own personal desired space. Pan one to the right and another to the left. Adjust the pre-delay and decay, and maybe change one to a hall and the other to a plate. See what happens.
  • Reverb EQing. Abbey Road made this popular with their trademark sound, which added an EQ before a reverb. Generations later, reverb plugins now often come with their own integrated EQ. One tip to increase precision is to cut off anything coming in the reverb for percussion and pads as it tames any edgy or problematic frequencies.
  • Adding subtle automation. A reverb that constantly moves will feel alive. You can use automation on the decay and pre-delay. These two usually add a lot of space. They will give the weird impression of being in a room that’s shrinking or expanding, as if you’re moving around it with the walls getting closer and further away. Used well, it can be very psychedelic.
  • Astronaut in spaceMultiband reverb. If you know how to split your signal’s in-frequency ranges, you could use a deeper reverb for your mids and a longer one for the highs. That can also be done with send channels, again where one filters out highs and the other filters out mids. This one is particularly effective with percussions, and it can add a really nice shimmering effect to them.
  • Resampling reverbs for convolution. Send a clap in your reverb experiment and resample it. That sample can then be dropped in the convolution. This will usually reshape the sound, giving you more freedom than managing multiple reverb plugins at once (unless you have a good controller).
  • Gates and envelopes. These are a lot of fun on a reverb, as they can create weird reactions. Imagine a strong impulse that drops abruptly, or one that shapes in a off-rhythmic. They can add a nice texture to pads.
  • Infinite reverbs. There are a few reverbs that have this feature. If so, you can send any sound you like through them and it can become a pad or smooth synth. If you resample it yourself, it can be dropped into a sampler where you can play notes from it.
  • Reverb + Chorus = killer combo. Just try it, no questions.

As a gift, I made these two convolution images for you to use in your music. Should work very well in dub techno as well.

I hope this helps. Please share any ideas or tips you come up with!


SEE ALSO : Intuition for decisions in music production