Tag Archive for: workflow and organization

Turning Efficiency Into Art With Ableton Templates

DOWNLOAD MY ABLETON TEMPLATES:

Production template here

Mixing template here.

Every musician, regardless of their experience level, has felt the excitement of sudden inspiration. It’s an ethereal sensation, demanding immediate translation into audible reality. Yet, how often do we find ourselves navigating from scratch through our Digital Audio Workstation (DAW), struggling to set up the basics when all we want to do is create?

Here, the power of templates in DAWs like Ableton Live becomes apparent.

If you haven’t started using templates, I would like to encourage you to do adopt them into your routine. At first, this might be difficult to master, but with some practice, this routine will pay off.


So, what’s a template (if you aren’t familiar)?

It is a project with or without material, that can be used as a starting point. Instead of starting with a new project, which would be 0% in a scale of work out of 100%, a template would be more like 10% or even 40% towards the completed piece of music. This may be confusing because 40% done usually means having a lot of material in a project. However, when everything is organized properly, you are way farther ahead than you imagine.

Creating an Ableton template

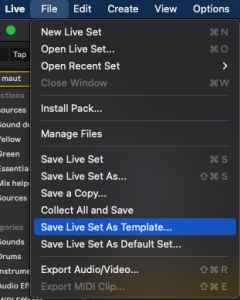
To create a template, all you have to do is open a project, go to the File Menu, and select “Save As Template.”

This will allow you to have your finished project as a starting point to start new projects, vastly speeding up the process and giving you a consistent sound.

Two ways to organize an Ableton template:

Two ways I usually organize a template is to either create a project where I organize in advance everything I need like channels with plugins and settings already set to what I usually do, macros, return channels, and master bus ready. Once this is all prepared, I save it as a template.

The other way is to take a successful project, remove all clips, audio, and automation, and then save it as a template.

However, this isn’t an exact science. It’s also fun to save projects with automations and or other weird settings and save it as a template, as inspired by Matthew Herbert Manifesto.

Starting Fresh vs. Jump-Starting with Ableton Templates


There are pros and cons when staring fresh vs jump starting a project with template.

Many musicians will start fresh every time, perhaps because they don’t know about the idea of using templates or perhaps because they just know that way. Starting fresh offers valuable practice, fostering familiarity with their DAW tools, and enabling a tailored approach to every project. However, there’s a flip side: it’s time-consuming.

Imagine being a painter and having to craft your brush every time you felt the urge to paint. While understanding your tools is essential, it’s equally crucial to be ready when inspiration strikes.

The solution? Find a balance.

By all means, start fresh when the situation permits. But also arm yourself with templates to expedite the process when needed.

Template Idea: Create a project where you add multiple midi channels with each armed with your favourite synths. For each synth, hit cmd+G to turn it into a macro (Group) and map your favourite synth parameters to each knobs. This will ease hands-on control or hit randomize for some new inspiration.

TIP: I would encourage you to grab this selection of free modulators named Mod Squad 2. This has so many useful, essential tools to add to your template.


Ableton Templates: More Than Just a Shortcut


At first glance, a template might seem like just a preset, a way to save time. But there’s no problem with presets and trust me, it is not cheating!

While templates are certainly is a time-saver, it’s actually much more. Think of a template as a supporting musician friend, always ready to jam when you are. With templates, you can:

  • Create Macros: Setting up macros that you frequently use ensures you have immediate access to your preferred settings and controls.
  • Organize Routing: Advanced routing configurations, once set, can be easily replicated across projects.
  • Form Groups: Grouping tracks or instruments that often go together saves time and offers a clearer view of your project.
  • Pre-set Effects and Plugins: Having your go-to effects and plugins already loaded lets you dive straight into tweaking sounds.

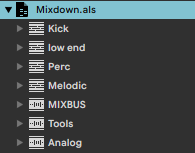
Ableton Template Idea: Create your own mixing template by creating 5 groups that will host your project’s channels. You can then drag and drop them in each groups. Those can have multiple plugins of your choice. You can even create a mixing template with multiple channel presets and then you can drag and drop them from your browser.

The Art of Crafting Abelton Templates

It’s not just about having templates but about having effective templates. An ideal template should inspire creativity, not box it. Here’s how:

  • Diverse Templates for Diverse Needs: Instead of a one-size-fits-all approach, consider multiple templates for various purposes: mixing, sound design, production, and perhaps a comprehensive one, like my “mothership” concept.
  • Incorporate Modulation Elements: Add pre-configured modulation tools that respond and interact with what you introduce. Tools like envelope followers or audio scrubbers, such as the ones Manifest Audio offers, can automatically detect and modulate sounds, adding depth and dynamics to your music.
  • Think Support, Not Supplant: A template should never feel like it’s directing your music. Instead, it should feel like a base on which you can build. The best templates enhance creativity, not limit it.

When Ableton Templates Truly Shine

The true test of a template’s efficacy is in its ability to enhance creativity. If using a template feels like you’ve brought an extra pair of hands into your studio, aiding and elevating your music, then you’ve hit the sweet spot. It’s not about replacing the organic process of music creation but about having tools that streamline it.

In the world of digital music production, where the landscape is vast and the tools are many, templates emerge as a beacon of efficiency. They are not just about speeding up the process but about enhancing the very essence of creativity. They ensure that when inspiration strikes, you’re not just ready but equipped to let your ideas soar. Embrace the power of templates, and watch as your music production process transforms from mere creation to pure artistry.


DOWNLOAD MY ABLETON TEMPLATES:

Production template here

Mixing template here.

The Dysfunction of Email Promos in Music

In an age where technology has simplified communication, it’s ironic how it has also, sometimes, made things more complicated. Take music promotion for instance. A once curated art of handpicking who you shared your work with has been lost in the deluge of the digital age. And nowhere is this more evident than in the world of email music promotions.

For a small- to medium-sized artist like me, my inbox is perpetually inundated with promotional tracks. In fact, I’ve had to set up an email rule to funnel these promos into a separate folder just to keep my primary inbox manageable. To give you a perspective, this folder recently crossed the 13,000 mark. It’s overwhelming and, frankly, dysfunctional.

Now, let’s put this into context. I’m not even a significant player in the music industry. Major artists are likely receiving 3-5 times the number of promos I get. The question then becomes, how effective is this method when even a smaller artist can’t keep up?

One of the most significant issues is the scattergun approach. I’m flooded with tracks from genres and artists that are miles apart from my musical tastes. It’s as though having access to my email address has become an open invitation to send anything and everything my way. This mass email system means that around 95% of the music I receive isn’t even relevant to me. And this poses a unique problem, not just for me, but for musicians as well. The handful of tracks that might genuinely intrigue me are lost in the noise.


This situation eerily mirrors another challenge – shopping for music. For every gem you find, you’re likely sifting through a mountain of tunes that aren’t quite your style. With email promos, the haystack has just grown exponentially, making the needle even harder to find.

Ironically, in this vast digital world, in-person connections seem to be the most efficient form of music promotion. When you meet artists face-to-face, there’s a directness and specificity to the exchange. But the reality is, these opportunities are limited.

Strangely, it’s hard to admit but Spotify has been my most reliable tool for discovering and curating music I listen to. I usually find music there, then continue my searches on Bandcamp and Soundcloud. But as much as I don’t like the ethics of Spotify, if there’s one thing they do right, it’s keeping me in the loop with music I will mostly like.


Where does this leave us?

Firstly, artists need to rethink the blind, bulk email strategy. The objective shouldn’t be about how many people you can reach, but rather about reaching the right people.

Secondly, as recipients, maybe we need platforms or systems to better communicate our music preferences. Labels have traditionally played this role to some extent, but there’s room for innovation.

Lastly, while personal connections remain invaluable, the digital age demands better solutions. We need platforms where specificity and personalization become paramount, ensuring that every promo an artist sends is a potential hit, not just another email in an overflowing folder.


But I also have a list of websites that can provide help with promotion.

  1. SubmitHub: A platform where artists and labels can submit their music to bloggers, playlist curators, YouTubers, and even record labels. It’s an excellent way to get feedback and potentially get your music featured.
  2. RepostExchange: This platform allows SoundCloud users to trade reposts. It’s a way to expose your music to a new audience by leveraging other artists’ followers.
  3. DistroKid: While primarily a music distribution platform, DistroKid also offers promotional tools like ‘HyperFollow’ which helps artists to maximize their pre-save counts on platforms like Spotify.
  4. PlaylistPush: Designed for artists to pitch their music to Spotify, Apple Music, and Deezer playlist curators.
  5. Hypeddit: Helps you grow your fanbase on platforms like SoundCloud, YouTube, Mixcloud, and more by trading likes, reposts, comments, and follows.
  6. Feature.fm: It lets artists get their music into streaming service playlists, and they also provide tools for pre-saves and other promotional campaigns.
  7. Groover: Similar to SubmitHub, Groover allows artists to send their tracks to a wide range of bloggers, record labels, radio stations, and playlist curators.
  8. Musosoup: Artists submit their tracks, and curators (bloggers, playlisters, etc.) can browse and select tracks they’re interested in featuring.
  9. Promo.ly: A music promo delivery system for artists, labels, and PR agencies to share their music to industry influencers.
  10. Echio: This is a place where you can follow artists, get workshops, pay for some feedback and more.


In conclusion, while the digital age has revolutionized music sharing, it’s also important to recognize its pitfalls. As we move forward, it’s crucial to find harmony between the old and new, ensuring that quality music doesn’t get lost in the digital shuffle.

Tools To Understand Your References


We’ve all been there—struggling to compose that perfect melody or write those captivating lyrics, only to be hindered by the relentless pursuit of originality. But what if we told you there’s a way to break free from this creative conundrum and discover a whole new dimension of musical ideas?


No matter how many times I get to my computer to make music, I’m often on 2 modes: trying to make music that will be completely original or trying to emulate ideas that I love (eg. the opposite of being original). In most cases, I forget that I have fun unless things feel flowy. Luckily there are multiple techniques that can be understood from music we love and there are also many facilitating tools to help understand whatever is the magic of certain songs. I’ll suggest some of the tools I use when I do production for clients.


Recently I read the book by Austin Kleon’s book, “Steal Like an Artist,” where we’ll uncover five valuable ideas to set your musical exploration. I felt like I could see how this applied to music.

Embrace the Remix Revolution:


In a world overflowing with music, finding absolute originality can feel like searching for a needle in a haystack. But fear not! Kleon suggests embracing the concept of the remix—a creative collage of existing ideas and influences. Remember, even the most renowned musicians have been inspired by the sounds of yesteryear. So, dive into the archives, explore different genres, and let the magic of cross-pollination unleash your musical prowess!

The first exercise I give to any client who is in a writer’s block that won’t go away, I suggest them to get a bunch of loops and start remixing, without any goal. I would like to say that while this is the best remedy for most cases, some feel like this is stealing samples and such. But if the mind is stuck, it’s mostly due to overthinking. Getting the ball rolling with a simple exercise of playing with premade ideas is just an opened door to jump back and then expand to whatever feels right.


TIP: It’s hard not to have fun by using the vast amount of quality loops you’ll find on Splice. It also offers possibilities of rent to own synths, plugins or have presets for the genres you like. It also has a desktop app where you can preview loops, then import them in your DAW. I like also that you can sync the app with your project’s tempo by using the Splice VST.


Another alternative is to use Loopcloud, which is a bit like Splice but also features some tools like a really lovely drum machine where you can import any sounds from the library. 


TIP 2: I like to use Soundsnap for samples. It features so many found sounds, foleys, random recordings. It’s used in movies and it can be used in your songs as well.


Swipe Ideas, Not Identity:

As musicians, it’s natural to aspire for a unique sound that sets us apart. However, trying to force originality often leads to creative paralysis. Instead, take a leaf out of Kleon’s book (literally!) and steal ideas shamelessly. But here’s the catch: focus on the elements you admire and rework them into something entirely your own. Give credit where it’s due, but don’t be afraid to put your personal spin on things. After all, the world doesn’t need another copycat—it needs the extraordinary blend that only you can create!

Now, remixing can be more subtle. You could listen to Keith Jarrett, some old Studio One dub, modern classical and then pay attention to the sound used, how they are said (melody) and the space created. 


What are you noticing? Are the notes slow or fast? Is it dense or open? What is the time signature?


Write down the notes, then apply the concept to whatever you do. That’s cross-pollination.

TIP: You can buy MIDI packs or MIDI melodies a bit everywhere and look into ideas that aren’t in the genre(s) you’re doing. The MIDI notes don’t make a sound, they’re just melodies. You can use random harmonic sounds or use synths of your choice so you can pull out melodies that are out of your routine.

TIP 2: So many clients don’t realize that one step towards their songs feeling more professional is to use one root key with a scale. I like the numerous tools from Captain Plugins. They have studio related plugins that lets you understand the key and scale of important ideas or your own melodies (eg. some clients just improvise some melodies to later find out it is in a specific scale without knowing!). You can also look at Tonic for that type of analysis.


Curate Your Influences:

Ever heard the saying, “You are what you eat”? Well, in the world of music, “You are what you listen to!” Surround yourself with a diverse range of musical influences. From classical compositions to avant-garde experiments, absorb it all like a musical sponge. By curating a unique tapestry of influences, you’ll develop a rich palette of sounds to draw from. So, don’t be afraid to embark on a sonic adventure—you might just stumble upon the spark that ignites your musical genius!


To make quality music, you need to be exposed to quality songs.


This means, listen to music as much as you make some. From what you listen, try to diversify your repertoire as much as possible. When you discover an artist you like, dig his roots, early works and recent ones.


Befriend people who have deep love for music and ask them for recommendations. People aren’t asked enough about their favorites but it’s a loved topic if you’re into music.


I love this max patch that opens up the directory of all the sounds from Freesound.org. I love that site because it’s free but also because you can ask for random samples. I also like this page that gives me random Youtube videos to watch…


TIP: Elphnt did a nice patch that gives you ideas for starting new ideas or if you lack ideas at some point.


Constraints Set You Free:


Contrary to popular belief, constraints can be a musician’s best friend. Kleon emphasizes the importance of setting limitations to unleash your creativity. By giving yourself specific boundaries, such as time restrictions, limited instruments, or even unusual song structures, you force your mind to think outside the box. These self-imposed challenges become the catalyst for innovation, paving the way for musical breakthroughs you never thought possible.


TIP: Make yourself a drum kit and just a few samples for your song making. Pick a random songs and use that as a template for yours (BPM, section, mood, key, scale, etc). I love the tool of Decoda because it can really help pulling out a melody or understanding of how a song is arranged.


Embrace the Journey:


Creating remarkable music isn’t a sprint; it’s a lifelong marathon. As you embark on your musical odyssey, remember to enjoy the ride. Kleon encourages artists to embrace the process rather than obsessing over the end result. Each composition, each practice session, and each stumble along the way is a vital part of your growth as a musician. So, buckle up and savor the adventure, because it’s the journey itself that shapes you into the artist you were meant to be.


But what happens when you’re a dad or you have a demanding job and you can’t invest much time into your favorite hobby? The journey becomes a bit more complicated. Can you still embrace the results without having the time to do what needs to be done to get your project going?


There you have it, intrepid musicians! Armed with Austin Kleon’s invaluable insights from “Steal Like an Artist,” you now possess the secret weapons to break free from the shackles of creative blockages. Embrace the remix revolution, swipe ideas with pride, curate your influences, thrive within constraints, and, above all, savour the journey.

Remember, the music world is your oyster. So dive in fearlessly, create unapologetically, and let your stolen melodies reshape the very fabric of musical innovation. 


How AI is Helping Musicians Break Free From Unoriginality


When it comes to creating music, there is a never-ending tension between the desire to innovate and the pressure to make money. Many musicians find themselves trapped in a cycle of producing unoriginal music that fits neatly into pre-existing categories, all in the name of pleasing their audiences and making a profit. But what if there was a way to break free from this cycle? 

We recently talked about slowing down to learn new skills, but let’s have a view on the the most techno-technology out there.

Enter artificial intelligence (AI), a tool that is increasingly being used by musicians to push the boundaries of what is possible in music production. As AI been bringing a lot of controversy in the artist community because it is a game changer in democratizing its access, I wanted to focus on the positive aspects.


Using AI to Generate Ideas We Wouldn’t Think Of


One of the reasons why musicians tend to produce unoriginal music is because they are constantly aware of the latest trends and what is popular among their audiences. In order to make money, they feel pressured to produce music that fits neatly into these trends, rather than exploring new territory. This results in a homogenization of music, where everything starts to sound the same. If you read this blog often you’ll know that we often refer to the “success trap” where one tries to repeat a success story and that leads to nothing.


AI, on the other hand, is not aware of these trends. It doesn’t have a preconceived notion of what is popular or what will sell. Instead, it is able to analyze vast amounts of data to identify patterns and connections that humans might not be able to see. This makes it a powerful tool for innovation in music production.


For example, AI can analyze existing music and identify common elements that could be used to create something new. It can also generate entirely new ideas that humans might not have thought of. By using AI, musicians can break free from the constraints of their own creativity and explore new territory that they might not have discovered otherwise.


AI Can Recycle Old Ideas In Innovative Ways


But AI is not just a tool for creating entirely new music. It can also be used to recycle existing ideas in innovative ways. For example, AI can take an existing melody and transpose it to a different key, or it can apply different rhythmic patterns to a familiar chord progression. By using AI in this way, musicians can create something that feels fresh and new, while still drawing on familiar elements that their audiences will recognize.


Of course, using AI in music production is not without its challenges. Some musicians worry that it will make their work feel less authentic, or that it will take away the human element that makes music so special. But the truth is that AI is just a tool, and like any tool, it can be used in a variety of ways. Musicians who embrace AI as a tool for innovation and exploration can use it to enhance their own creativity, rather than replacing it.


AI Tools For Making Electronic Music

  1. Amper Music: A platform that uses AI to generate original music tracks based on user inputs for genre, mood, and tempo.
  2. AIVA (Artificial Intelligence Virtual Artist): A composer and music generator that uses deep learning algorithms to create original pieces of music in different genres.
  3. Melodrive: A tool that uses AI to create personalized music for video games and other interactive media, adapting the music to the user’s behavior and emotions.
  4. Google Magenta: An open-source project that aims to advance the state of the art in machine learning for music and art generation, providing tools for creating and exploring new musical experiences.
  5. Amadeus Code: A tool that uses AI to help songwriters generate new musical ideas, providing suggestions for chord progressions and melodies based on user inputs.
  6. Humtap: A platform that uses AI to help users create original music by providing suggestions for chords, melodies, and lyrics based on their inputs.
  7. Emergent Drums: generate drum kits with a few clicks. Powerful!
  8. AI Kitchen: Still not public but this one looks promising. It is basically the Midjourney of audio. You enter prompts and the AI provides ideas.

How To Spot If A Tool Is Actually AI and Not Something Else:

It can be difficult to determine whether a music production tool that is described as AI-driven is really using AI, as the term “AI” is often used loosely and can mean different things in different contexts. I’ve noticed a number of plugins that say they use AI but aren’t really. However, here are some things to look for that may indicate that a tool is using AI:

  1. Machine learning algorithms: Many AI-driven music production tools use machine learning algorithms to analyze and generate music. If a tool claims to use AI, it is worth looking into what specific machine learning algorithms it is using, and how they are being applied.
  2. Training data: AI systems require large amounts of training data to learn from. If a music production tool claims to use AI, it is worth checking what training data it has been trained on, and whether it has been trained on a sufficiently diverse and representative set of data.
  3. Output variability: One hallmark of AI systems is that they can generate a wide range of outputs based on a given input. If a music production tool is able to generate a large number of unique tracks or variations based on user inputs, this may be a sign that it is using AI.
  4. Expert endorsements: If a music production tool is endorsed by experts in the field of AI or music production, this may be a sign that it is using legitimate AI techniques.
  5. Transparency: Finally, it’s important to look for transparency in how the tool is described and marketed. If a tool is vague about how it uses AI or makes unrealistic claims about what it can do, this may be a red flag.

Ultimately, the best way to determine whether a music production tool is really using AI is to do some research and ask questions. Look for reviews from reputable sources, ask the developers about their AI techniques, and talk to other users to get a sense of how the tool performs in practice.


Generative vs AI

Generative music is the ancestor of AI music. What we do in the modular realm is basically prehistoric cavemen stuff compared to the high tech approach of modelling systems. Modular is sort of relying on boolean logic and basic operations. I think it’s important to explore generative music to understand how machines are there to create material for you to use in your music. Generative music will provide you multiple outputs of ideas based on parameters of your choice. Generative music is something that is important to understand if you’re looking to break writer’s block.

One flaw I like from AI is its lack of understanding good or bad ideas.

It just does things it knows how to do.

You can then take clumsy takes to turn them into ideas of yours. A bit like one joke from a toddler can be used to make some funny stories in adult ways.

So, to all the musicians out there who feel trapped in a cycle of unoriginality: it’s time to reconsider your approach. By embracing AI as a tool for innovation, you can break free from the constraints of what is popular and explore new territory that you might not have discovered otherwise. Whether you are creating entirely new music or recycling existing ideas in innovative ways, AI can help you push the boundaries of what is possible in music production.


How I Classify My Projects and Files

I’m not sure if you’re like me, but it’s possible that your hard drive, after a while, becomes a total mess. There will be a few folders with some projects in them, and other folders with random samples. Not to mention all those projects named New project…


There are ways to organize folders and all your work that allows you to easily navigate it. The way I classify projects is also aimed at having a quick scope of which one I will work with next, which songs should go in an album, and those that need specific actions.


Before I explain myself, let’s talk about the different stages a project will go through and also, the different tasks related to that.

Note: If you’re new to this blog and aren’t familiar with my production technique, I would encourage you to read a few articles about this, which will give more sense to what I’m about to describe.


The different stages of music production (and labeling your projects so)


The way I work to maximize the results is to take each step in making music and call it a phase, or a stage. 


The different stages I label with are these:


1- Ideas digging, concept, testing techniques, hook finding, etc. 

2- Preliminary loop made from stage 1 that could be the heart of the song. Basic structure of the song.

3- Arrangements.

4- Mixing.

5- Song at 90% done and needs last minor tweaks.


The main reason why I give high priority to the state of the song is based on the idea that when I want to work on music, I might be in a specific mindset. Perhaps one day I’ll want to just have fun doing some sound design or another time, I need to work on an EP and will be checking for the few songs incubating. As you might know my approach for when I do music, when I reopen projects, I want to quickly know where that one is at. In an hour of work that I do on music, I hop from one song to another, while I also like to revisit projects that have been sleeping for weeks because what I want is to always have the freshest perspective on my work. If you work on something for hours, trust me, by the end of it, you might have lost all perspective and the work will suffer for it. 


Stages 1 and 2 can overlap


I’ll give you a study case of mine so we can have a clear understanding of how I can use a project and its evolution toward a finished song. But we’ll start with the 2 first stages. 


Projects that are in stage 1 are your pool for fishing ideas. 

So the idea of a project in stage 1 is really about ideas, not much more than that. It could be more if you want, it’s up to you.


Stage 2 is where we’re working on a precise hook or main idea. There are multiple ways to work and find hooks, we have talked about that in previous articles. I usually drop a very simple percussive loop to define what will be the rhythm of the song, its groove, and its accents, and then place what would be the hook on top. We often overthink the hook. It’s often very simple. 


Usually, in stage 2, I find that I should have:


  • A root key 
  • A scale
  • A hook, not longer than 1 bar
  • Rhythmic groove, time signature


If I have all of that, then I know the project has passed to that new stage and will rename it. Usually, when I rename a project, I make sure to save it, and do a “collect all and save” to make sure I copy all the needed files from its previous form. When you rename a project, it’s better you do “Save project as…” in the File Menu of Ableton and its original stage 1 will still exist. You can later decide if you archive the original project or keep it as an incubator. Usually, when I’m finding an idea from an incubator, I will make sure I save the different effect chains as macros so that they can be reused. I also will color code my channels, and name them as well so I can harvest them later from the right side browser of Ableton.


However, you might have an incubator at stage 1 that will never grow because you could mutate the original incubator to stage 2 but it’s completely different, but still came from a father project. For instance, I have projects that are sorely made for making sounds, where they never have evolved from there and tons of songs or even live sets have come from them.


Arrangements, the full story of Stage 3


I find that arrangements should start by working on the middle part of the song and then deconstruct that idea to the start of the song. So the early part of Stage 3 would consist of working in the middle part, roughly 1 minute long.


As you can see, you basically shift your initial Stage 2 loop and drag it to arrangements, then stretch it. Some people build their initial loop in arrangement mode so you can just move it from the start to the middle. When I work on arrangements, I usually love to make a quick draft of the song, where I’ll split it in 3 sections: intro, heart, outro. That draft is made quickly, sometimes in a surprising time of 20 minutes alone. I will come back later with a fresh look and listen from the beginning and will readjust the arrangements so it makes more sense. 


In stage 3, the mixing isn’t important. You can level it for pleasant listening but I wouldn’t worry much about it. 


Mixing as 4th stage


This doesn’t need much explanation here but one thing to clarify is that it’s not something rigid either. You might notice some arrangement problems in mixing that will make you redo them. As I always say to clients, if your sound design and arrangements are solid, there will be basically almost no mixing, or just touch-up.


Stage 5 is when your song is 90% done


To me, 90% done is my definition of done. I know it sounds weird but it is like that. First off, when you first accept that a song is never done, it’s easier to accept its imperfections and to move on. Second, you want to bring as many songs as possible to 90% because the day you want to do a release, you’ll take those and then wrap them all at once to 100%. This might sound confusing but letting your songs sleep at 90% and then wrap multiple songs at once means that the last stretch for all of them is your chance to unify them to make them coherent as a release. 


So what’s the difference between Stage 4 and 5?


Well, it’s kinda when you’re done arranging, you shift it to stage 5. It’s sort of like, I’m done with this one. Once in a while, I might reopen 5 to maybe do a little tweak but to me, when it gets to 5, it’s sort of saying that it’s ready.


In conclusion


When I open my folder with all my projects, I will see from 1 to 5, all songs being in order. With the file browser, I can also classify them from 5 to 1 as well. I like in mac OS to be able to put some tags as well. That can be for genre, if it’s signed or whatever is useful.

Photo by Amy Shamblen on Unsplash

How To Compose With Consistency

I’ve always been interested in the restaurant industry and particularly with the whole process of how they give awards like Michelin Stars. There are a number of criterias that will define if a chef will earn one and I find there is some inspiration to take from those points to apply them to one music producer’s work. While there’s no written notes on what the criteria are, what we do know is that there are key points such as ability, quality, and the chef’s personality. However, one that really stands out is consistency.


This is a common shared topic with clients of mine. Everyone pretty much dreams of finding a formula that will make sure each song is good and that each time they hit the studio, something worthy will come out from the time invested. There are straightforward ways to make sure we get there but there are also some points that I will explain that might be a bit unsettling.


Managing Expectations

It’s always a bit hard to talk about expectations with clients. There are a few points to keep in mind when it comes to that. First, many people are passionate about music in the first place and rely on that hobby for multiple hopes such as, acceptance and validation from their community or other hero producers of theirs. This alone creates some big goals, which creates stress that can glitch creativity and productivity. Same for other producers who have released some music and feel a pressure to do more, but they’re facing some tensions towards what they do: feeling of being inadequate, hitting technical limitations, unfair comparisons to others, etc.

I personally don’t really believe that having constant positive sessions from the studio, where you are 100% happy with your music, is humanly possible. For those who do, I would also question how much fun that is since in the long run it can be really stressful and tiring.


So rather than having perfect consistency in music, I think it’s better to change the approach to defining what your victory conditions are. In the Definition of Done article we covered how to set yourself clear points to know you’re done with a project while accepting how many imperfections you can live with. But victory conditions are slightly different, yet, also similar.


So for instance, I used to know some professional musicians that were forcing themselves to go to the studio everyday and make one song minimum. Since I worked with them, I had the chance to listen and I had to say I thought the songs they showered me were interesting about 5% of the time (there were a lot of them). We talked about it and realized not only was he not happy about the situation nor the outcome, but he also realized he was just not achieving anything he hoped for. So we worked together to shift his workflow and expectations.

I proposed my non-linear music making technique where he would work on several tracks at once instead of one song at a time. I also talked about what he loved doing so we can make sure that part would be at least 50% of his studio time. In his case, he loved sound design and creating new songs which are perfect. I showed him that music can also be about that and that making music is an important part of music making but it is not the only part of it. Starting new songs is, to me, just as important as finishing them. The more you start one, the better the odds to really create solid and original ideas. Then you harvest the best ones to turn them into a song. We also revised different ways to do sound design and techniques to try.


This changed a lot the outcomes of his music and the quality of the following tracks got much better, even if the pace of them coming out got a hit. This is why I sometimes encourage people to focus on tracks made per season instead of days, or weeks.  


Victory Conditions

We all have different conditions and there’s no real best way to do this but I find that victory conditions should be different than releasing goals. Some people feel victorious if they get their album out after months of work, but soon they want more of it and then they face a return to the studio that feels like a pain. In my case, after years of experience, I find that my victory conditions has boiled down to having a blast when I’m in the studio, even if that implies working hard on solving issues.


This implies two different things: First, there is a part of me that is there to solve issues, install gear, create an environment that is workable and fix details to ensure all is well. Second, I have to prepare for my conditions by making sure that I have all the necessary skills to make music. So, if in a Definition Of Done, we set the points that would make us see we’re done, in the Victory Conditions, we establish what is needed to go there and what is also to make it possible. 

Since for me, it is related to fun, I had to reverse engineer it. 


That implied that I had to look back at a really fun session and see what happened to make it work, and to enjoy it. More often than not, while a session can be ruined by technical problems, it’s clear that some sessions in the studio should be dedicated to preventing issues, but also, some other sessions would be dedicated to practicing a technique or new concept, so that when I hit the zone, I have all on hand.


So what about you?


In the development of an artist, there are numerous stages and phases. You might be in one that is so challenging that the fun doesn’t happen too much. It might be because you feel overwhelmed by a specific issue, some software limitation, lack of knowledge on a topic and aiming for fun might seem a bit of frustration. The thing is, if that can help, I have to say that there has been many years in my life where I accomplished so many things without knowing much and that the more I knew, the more I slowed down. I often say that it’s important to finish something and learn rather than chase perfection.


In other words, whatever you are struggling with might actually be a distraction. There are a lot of things to learn on Youtube and if you can’t find it, there are always people to help – that includes me. You don’t have to stay with a problem for long nowadays, compared to times before the internet’s abundant tutorials.


Perhaps you can create conditions where you work on a few things at once, small things and try to make the most of that.


Quality Control, being practical

We talked about the philosophical and workflow part of this topic but what about the technical side of things? What are some of the main elements that do maintain consistency between songs?


There are multiple points you could use a checklist. After years and years of working on music, I do see correlations between songs that manage to get some kind of success. I won’t dive into the promotion, releasing and anything unrelated to production though because that’s a bit of a rabbit hole which changes every 3-6 months. I can’t follow.


In music making, I feel there are 2 types: commercial and artistic.


By commercial, I don’t mean it in a derogatory way. I’m basically relating to music that is intended to be pushed for sales. If you make music and want distribution, there are chances the distributor might turn it down if they consider it will not sell enough. This is a norm for P&D (press and distribution) deals, because the distribution is basically covering the costs and will expect a ROI (return on investment). In my book, if you make music with the idea to make sales, it is mostly and clearly commercial (eg. we’re producing it in a sales angle). 

On the other hand, artistic music might be simply digital or released at the expense of the artist, without distribution and there is very little expectation of sales. This kind of music is often a bit more edgy, abstract, risky, not following many rules and has a bigger chance of not being able to be fitting any rules.


If we compare that to a restaurant, the commercial one is often knowing what sells and will feature a direction, style with some star dishes that people want each time they visit. The artistic ones would be a restaurant where they change the menu each day and take risks. 

They both need consistency on a number of things: fresh ingredients, recipes being respected, taste being coherent on each serving, temperature, etc.


It’s pretty much the same with music as well. There are certain criterias you can follow that will ensure that your songs will always deliver. Sometimes it might not have the same punch but if you cover the basics, you’ll have for sure some coherence.


Here are the criterias I have in mind:


  • Solid hook, main idea. What makes the reason for a song to exist is that you found a solid idea you want to share a story about. That’s how I see music. If you think of traditional music, people write a story and that will be the main idea. For electronic music, more than often there will be no vocals so the sounds and ideas are your story. Don’t make songs for the sake of it (note: I encourage people to make music for the sake of it though, which is different). Find an idea and build a story about it. It can be a sample, a pattern, a fun sound… There’s no rule here but to find one thing you want to listen for 3-6 minutes and really push forward that idea. 


  • Song in key, scale. This might sound weird, especially for people making atonal music or industrial techno who use a chromatic scale, but making sure all your elements are in key will give the song a much more wholeness to it. Not all songs follow one but having a coherent harmony will please many people, especially if in a specific genre, some scales are respected. Optional point here would be chord progression. You don’t always need one but if you have one, make sure that it is solid and coherent. Often when I give feedback to people who are starting in music production, I notice they aren’t respecting this basic point and once they do, they really bring it to another level already.


  • Rule of thirds in arrangements. This is a bit of a concept I bring up in feedback where I explain to producers that if they divide their song in 3 sections, they all should have some variation, to give the listener a sense of evolution and to keep the attention. If you understand the listening experience as a challenge of keeping attention, you know you need to bring new ideas, but not too much. The rule of third never fails. If you compose pop or anything needing a structure, keep that in mind as well.


  • Flat mix, coloured master. Clients don’t always understand what a good mix is. If you keep your tone flat but work with an engineer that can color it to match similar songs on the market, you’ll most likely always have a solid, enjoyable song that can compete well. Also, a flat mix means that your elements are not too all over the place, which is important.


  • Avoid masking, phasing. This is more technical but if you have a busy mix where many elements are used, you’ll most likely end up having a muddy mix. I won’t go into how to fix this in this post and you can google about it but keep in mind that it’s essential to quality.


  • Get Feedback. Show it to people you trust and ask for specific feedback. Otherwise people will say its cool. Be technical about what you need from them.


  • Get help. I don’t understand why people want to do everything themselves. It’s basically setting you up for average music. You’ll learn yes, but why not become a master at making music you love doing and get a master to help you mix so you get the most of it? It’s like, if you want to make a sandwich but you want to make the bread yourself, mayonnaise from scratch, grow the veggies, make the cheese, etc. Yes you can, but you could also buy the best ingredients possible and have a killer sandwich too.


  • Quantity for quality digging. If you see each song as an experiment to learn something new or master a technique, you can speed up your process and make more music. A good way to keep up with quality is to producer many, many songs and then trim down your output to the ones you know are shining. The more you finishing music, the more you’ll develop skills, which make sure the following tracks are better quality. Then when you can pick what you share abroad, to the outside world, they’ll only see quality.


If you cover these points, you’ll most likely have something you’ll be proud of and when you share a song, people will know what to expect from you, even if you take risks, creatively wise.


Thoughts On “Average” Ideas

What stops a lot of people from making music is chasing the perfect ideas. Often people think they need to make something groundbreaking for it to be worth working on. This is not true. There are plenty of songs that artists thought were mediocre, which ended up being hits for them. A good example of this is Deadmau5, who thought that his hit, “Strobe,” would only work as a B-Side. Turns out, it’s one of his most famous songs.

If you have a process and know how to create a mood board, it’s possible to turn average songs into great songs, or average songs into songs that people will appreciate for other reasons. That said, this post will be about the importance of working on average ideas.


Work On Things for the Sake of Working On Them

Sometimes the greatest surprises in music come from making it in the dark, oblivious if it’s going to be good or not. These moments involve tinkering away, creating loops, pulling sounds out of our sample bank, and fiddling around on synths just for the heck of it. However, sometimes we work on this for hours, don’t see any potential in it, and perhaps get frustrated. For instance, right now, I’m working on a new live techno set, and nothing sounds very inspiring to me. However, I realize that if I keep on working on it, and go through my checklist and process, eventually something interesting will happen. I understand that while it might not be the best composition, it could be a B-Side, which comes with its own set of benefits, which I’ll cover later in the article.


The Process

First, let’s cover going through my checklist and process. The first step in my process is what I call a “non-linear production.” Nonlinear production is a way of working where at first you, you sum up ideas, and you pile up a bunch of sounds that you like into the live view, instead of the arrangement. This allows you to essentially build a mood board of sounds that you can pull from and jam with. To build this, I force myself to record anything that just comes out, literally anything and everything. Then, I start activating and deactivating clips and see what happens. Quite often from doing this, I come up with way more than loops – I come up with entire phrases that become entire parts of the composition. And since I’m making techno, it’s loop-based and follows a predictable pattern, so things kind of just start happening.

Before I continue, I have a caveat:  I never go to the studio with an aim to average music. People who insinuate that I do this after saying they should work on average music, are kind of insulting. I’m always trying to make something good. 

However, I’m only human, and sometimes I have average ideas that I decide to work around and see what happens. Sometimes something fun happens, which allows me to make a ghost arrangement by going through my checklist. One part of my checklist is adding a groovy bassline. That’s fundamental to many of my tracks. Next, I figure out if it’s appropriate to respond to that call with a similar arrangement. For instance, does a lead respond well to the bassline?

Once I figure out that basic part of the structure, I think, “Can I make a complementary element, like a background sound?” So I start going through my mood board and picking out sounds that I think will fit nicely in the background – this could be noise, foley sounds, or even texture to add to the instrumentation. 

Next, I start building outwards, since normally what I do in the sketch ends up being the middle part of the arrangement. So I add an outro and an intro. Once these are done, I start thinking of all of the ear candy elements – the bells and whistles. This usually includes an oddball element that makes the song crazy and unusual. Then once I get all these elements together, sometimes something that is average, can be pretty cool.


Time Heals All Wounds

So what happens when you do all of this, and somehow everything is kind of “meh?” Easy. Just chill for a minute. Quite often, students will record something that they think is mediocre at the moment, but when viewed in a different mindset, that changes. What you thought was boring a while ago, could sound exciting now, or at the very least, feel worth working on.

Perception will always be the enemy of progress. We all have to remember that some music sounds good at some points in time, and at others, it doesn’t. Also, sometimes you have a sound that you don’t particularly like in the context that it’s in, but when paired with another sketch, it could take on a life of its own. Or it could just be average, and that’s ok! As I said before, the average to you might be awesome to another listener.


The Benefits of B-Sides

The thing is ordinary tracks, in my opinion, stand the test of time longer than complicated arrangements. When I do mastering, many of the ideas I love are not that original, or groundbreaking – instead, they are efficient because they cover all the elements of a song that I find important. The over-the-top stuff? Not so much. Perhaps some Chemical Brothers or Plastikman compositions, but overall, no – at least in my opinion.

B-Sides are often some of the best music out there, especially from a DJ’s perspective. They’re typically functional and filled with fewer frills than the main single. This allows for them to be easily mixed and used as a tool, allowing for DJs to create unique moments on the fly during their sets. Due to this, they might not get as many streams on places like Spotify, but they could perform better on places like Beatport or Traxsource.

Once again, I have to mention the Deadmau5 “Strobe” situation. He thought it would be a B-side, submitted it as a B-side to the label, and it became one of his biggest songs. What you think is a B-Side could be your main track.


Turning the Ordinary, Experimental

One thing that people forget is that sometimes it’s also good to make experimental music out of ordinary music. Remember that average idea that you had before? You can make it extraordinary with some simple tricks. First, build a long chain of effects on one of your return channels. Then take channels and start sending them to the return. By doing this, you can end up with some really weird syncopated patterns and textures far removed from what you originally made. You can either leave these textures throughout the whole thing or use them for some surprise moments to throw the listener off guard.  For instance, I recently went to see Chaos in the CBD and one of the strongest moments of their live set was right in the middle of the set where they had this wild, all over the place, sonic meltdown from an edit of a 90’s song. I thought it was brilliant because they took something old and made it new again – something that I touched on in the Murakami post


Make Music For Yourself

So many people are concerned about making music for other people, whether that is a DJ or a label. However, most great music comes from people just making it for themselves. When you make music for a DJ or a label, often, you might find yourself trying to read their mind and overanalyzing their intentions. This results in label owners complaining that all the tracks they get sound exactly the same. While this is a product of their own doing, as they often only sign tracks that fit their meta, at the same time, they aren’t wrong. Memorable producers don’t try to imitate. Instead, they create something that others try to imitate. And in order to create something unique, it has to come from a place of genuineness. And sometimes, if you’re just sketching out ideas, forming a mood board, and working on some songs that don’t quite fit into a paradigm, this is where some truly fascinating stuff happens. 


Greatness is the Sum of Averages

In other words, don’t worry about average – just start making stuff. After all, if you are trying to get noticed, algorithms favor frequency, so keep on putting things out. Most will miss, but if you keep doing it, occasionally, you may have a hit.

How To Prepare To Make Music

When I was 10 I was invited to be part of the track and field crew at my middle school. While I always considered myself a proficient runner, one thing that we started to do more was stretch. At first, it seemed like a huge waste of time, since all I wanted to do was run. Instead, we were spending all this time doing these exercises that, to me, had nothing to do with running. However, after months of stretching, I started to realize that I was getting significantly faster. This is because I was warming up. Just like you have to warm up to prepare for running, the same goes for music. In this post, we’re going to discuss warm-up techniques that help you prepare to make music. 


Your Tools Aren’t That Important

I’ve talked about this frequently in previous articles, but it deserves to be reiterated. In music production, clients often think that they can buy all the equipment they want, and somehow, miraculously, they will be inspired to create. However, more often than not, they get stuck and the most productive thing that happens is my client cleans the dust off their wall of useless gear. 

Just buying equipment doesn’t do anything if you’re not intimately familiar with it. Imagine buying a nice guitar and thinking you can play it right away despite not knowing how to play guitar. Sounds ridiculous, right? Of course, it does! It takes time to learn a new instrument. It takes frustration. It takes commitment. However, sometimes they do know how to use this gear, and still, nothing happens. More often than not, their problem is they don’t know how to prepare to make music. And just like I was warming up for track and field, so must a producer. 


Come Up With Your Own System When Preparing To Make Music

Now people think there is a uniform way to prepare, however, everyone is different. The mind is not a quadricep, where there are standardized stretches that make it more functional. So what we do in coaching is to come up with a system that works for them. I start with figuring out what their current habits are because one thing we do know is that what they have been doing isn’t working. 

So once we figure out what they have been doing it’s time to figure out a system that works for them. Like I said earlier, everyone is different, so everything I’m about to make is a suggestion, not a catch-all. 


Actively Listen To Music To Prepare To Make Music

a photo of preparing to make music by actively listening to musicThe first thing producers can do is listen to music before they make it. This might be a huge “duh” statement, but how many people actively listen to music? How many people come home, crack a beer, put on a record, and then just sit there, doing nothing else, except engaging with the music? 10%, maybe? However, it’s this 10% of people who have set themselves up for success if they are music writers themselves.

When listening to music actively, it’s best to think of it as a reference track, in a way. Listen to the song over and over again. Note the timbre and structure of the song. Like actually note it in a notebook. This will get your mind prepared to make music by actively engaging it.

When actively listening to music, make sure to concentrate on the appropriate parts of a song. Lots of producers obsess over the kicks, hi-hats, and the bass, but at the end of the day, it’s the melody that people remember. So do yourself a favor and try to concrete things that you can easily absorb. You will probably not remember the exact timbre of a hi-hat, but you might remember the melody enough to replicate something similar later.


Listening To A DJ Set Will Help You Prepare To Make Music

Many students tell me that they find inspiration while they are in the club, and can’t get home quick enough in order to harness it. A solution? Listen to a DJ set for 20 minutes to an hour. The longer you prepare the better. 

An image of someone DJing, which is a great way to prepare to make music

You can take notes on the transitions and compositional intricacies, something that you couldn’t do while in a club. While not exactly the same as a club, I often find that my students say that all the ideas they had in the club start manifesting themselves again.

One thing I like to do is put on a mix while scrolling through and listening back to the samples on my hard drive. By doing so, you can hear when a sample fits nicely into the mix, which you can categorize, and use later. Just make sure the volume levels match what you’re doing in Ableton. You want your samples to vaguely fit inside the mix, rather than being the predominant sound. This is a helpful way of managing samples as well, because otherwise when you’re just scrolling through samples, and not comparing it to music, you’re just comparing the samples to air.


DJing To Help Prepare To Make Music

I think DJing is a great way to prepare to make music. Similar to the other suggestions, DJing is a powerful form of active listening. DJing trains your ears to deeply understand the structure and mix of a song. You can easily add or subtract frequencies to see how they modify the song. You can also hear where transitions happen, allowing you to build your tracks out to be more DJ-friendly (if that is one of your goals). 


Build Categorized Playlists To Help Prepare To Make Music

I know earlier I said that it’s easier to concentrate on the melody of the song, rather than the rhythm of it. So what are you supposed to do when you want to work on a specific aspect of a song? Well, as you’re listening, throw the songs into playlists that are labeled based on the aspects of the song that are inspiring. So have one for the melody, have one for that really specific hi-hat or kick. Have one for a bassline. Then when you want to prepare to make music, you can go back to those playlists and warm-up actively listening to those.


Take Inspiration From Your Inspiration’s Inspirations

Another way to prepare to make music is to learn from the people who inspire your inspiration. For instance, I’m inspired by Ricardo Villalobos, so I often read articles about him. Through these articles, I found out that he’s inspired by pianist Keith Jarrett. Jarrett does not make electronic music, however, he’s clearly had a large influence on the genre, whether he knows it or not. So, naturally, I listen to Jarrett to see if I can’t harness some of that inspiration.


There Are Many Ways To Prepare Your Brain

At the end of the day, the goal is to get your brain engaged. You can play video games while listening to music, read a book, or go for a run. You can also paint, or write. These are all just suggestions and you should find the one that gets your mind warmed up, since as I stated at the beginning of the article, a mind is not a leg – there is no uniformity.


Ableton-Hardware Hybrid Setup

Producers often get comfortable in the computer and feel they are not getting enough, so they decide to invest in hardware.

Once you get good at something, it’s only natural to want to upgrade to the next level. You may get that feeling that you aren’t getting enough out of it, or that the medium is limiting in some way. With my students, often this feeling means leaping from a DAW like Abelton to a hardware-based setup. 

They often think that by doing so, they’re going to unlock a richer sound, and a more intuitive, instrumental interface. They believe they will be liberated, able to just jam out compositions without having to rely on an “unnatural” mouse click or MIDI mapping inside a DAW. 

The truth is that once they make this leap, and ditch Ableton for an Electron Octatrak, and a modular, they often find themselves being even more limited by the foreign user interface and the fact that modular doesn’t have an “undo” button, or patch saves.

That’s why I always recommend that they use an Ableton-hardware hybrid setup that incorporates the best of both worlds, where the tactile, plug and play nature of hardware meets the convenience of being able to easily save, and revert back to settings on the computer. 

Over the years, I think I have a pretty rounded philosophy of how to tackle this integration, which I would like to share with you in this post.

However, let’s talk about hardware first, so that you can understand its strengths and weaknesses. 

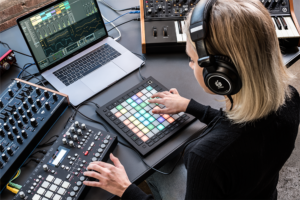
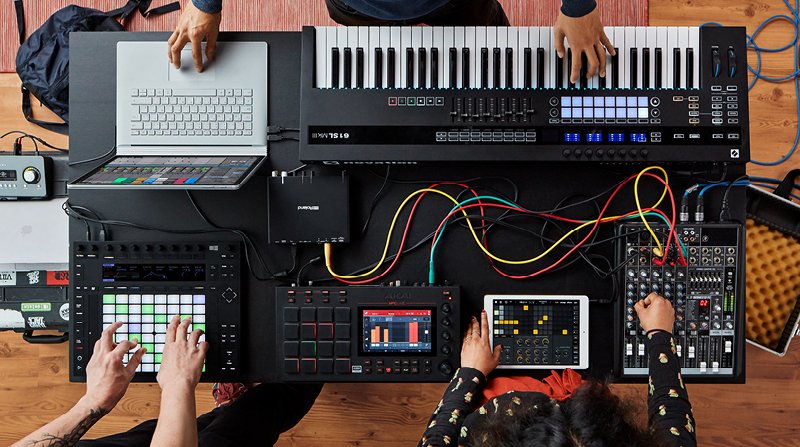
A photo of a simple example of an Ableton-hardware hybrid setup.


Myths About Hardware

It automatically Sounds Better

Just because something is hardware, doesn’t mean that it’s going to mythically sound better. In some cases, analog summing can fix some issues and enhance certain things but it can also be sounding different than digital and since our ears are used to the digital realm, it might be misleading. It’s not 2005 anymore; virtual instruments have grown leaps and bounds over the years. Even to a trained ear, it’s hard to tell the difference between an emulated TB303 and the Roland Cloud version. Analog does have charm and specific texture but it’s different than digital. Some people get confused once in front of certain pieces of gear.

However, there are things that happen with the sound in hardware that is difficult to emulate in software. For instance, the “ghost in the sound’ – that almost invisible hand that creates random, happy accidents due to the fact that you are working with pure electrical current, rather than a binary representation of it. 

This “hand” often results in sounds that are impossible to replicate, existing for only as long as they project from the speakers. To me, this is the magic of hardware – that unpredictability that exists for a fleeting moment, until it’s gone, never to be heard again, unless you capture it. 

In other words, analog has a sound that digital doesn’t have and that’s an aesthetic that pleases many people. Believe it or not, some people really do prefer the digital sound, mostly because our ears have got used to it.

However, what is this capability worth, if you can’t capture it properly? That’s why it’s imperative when buying hardware that you also buy a solid audio interface to be able to record the sound at the highest fidelity. Because at the end of the day, your hardware will only sound as good as the weakest part of the chain.

It’s More Intuitive

This is another fallacy. If anything, analog hardware can create a new set of problems, with the main problem being that you can’t just pull up a setting or patch. You also can’t revert back to a previous setting if something gets all messed up. 

Instead, you have to work backward in order to figure out where it went wrong. And if it’s analog, chances are that due to the “ghost in the machine” you won’t be able to get back to where you were. This results in endless hours of fruitless tinkering.

This also poses problems for live performance as well. I remember when I was performing at MUTEK with a modular setup. I was in the middle of soundcheck, jamming on my modular, getting lost in the frequencies. Then at the end of the check, I realized that I had to repatch everything back to where I wanted it for the beginning of the set. It was frustrating, to say the least. On a computer, I could have just reloaded the project. 

If you’re allergic to the mouse and sceen, perhaps hardware might be closer to your needs but it doesn’t mean it will be easier.

It’s DAWless

What is an MPC, Octotrak, Deluge if not a Digital Audio Workstation? They are digital, process audio, and they are a workshop. If anything, you are just substituting an intuitive interface that looks like a laptop, for a complicated interface that looks like a box with buttons on it (wait, isn’t that what a laptop is; just a box with buttons?). 

If you can’t stand the aesthetic of a laptop and want something sleeker, then that is your right as a creative. Just know, it’s way harder to drop a drum sample into an MPC than Ableton assisted by a Push or Maschine. If you hate the look of a laptop on stage, disguise it in a case.


How To Get The Most Out Of Your Hardware

Learn One Piece At A Time

People will often buy a lot of gear all at once without understanding their needs. Unless you are copying someone’s setup exactly from a YouTube video, and want their exact same sound, chances are people want their own thing to fit their artistic vision. 

So people will often be like ok, I need a synth, a drum machine, a set of effects, and a “brain” that I can route this all into. Then they set this all up, and realize that they are totally overwhelmed and have no idea how to use it, because there is no blueprint for it.

That’s why I recommend starting out with one piece of gear and getting really good at it. Once you know how it plays, then you can start thinking about the next part of the chain. 

So, let’s say you start with an analog synth. First, you must understand where all the filters are, and what they do. Understand how the oscillators sound, and how you can route them. Then you can consider your next addition.

So if you got a synth, the next thing you’re probably going to want is a way to sequence it. That is often a drum machine with a VC gate that can signal the synth to play (or not play) certain parameters. I recommend Beatstep Pro (Arturia) or Pioneer DJ Toraiz Squid. Of course, there are many you could add but those 2 are very versatile and fast to learn.

Once you figure that out, maybe you want an effect in order to get some more character out of the synth. Make sure that the effects that you buy are exactly what you want by testing it on the sequenced synthesizer. If they don’t create exactly what you want, then get new ones. No need to move on until you figure this out. 

By moving on too soon, you may just get tangled in your new setup, and not realize how to use it. Now you’re $5,000 deep into a headache, and not any more or less creative.

However, if you understand your pieces inside and out before expanding the chain, then you will run into fewer obstacles.

Record Everything

Remember, often with analog hardware, what you made will only exist at that moment. You may never be able to record that again. Therefore, make sure that you have plenty of space on whatever device you are recording onto because you should be recording nearly everything.

This works especially well if your creative process is to create a bunch of loops, and then assemble your loops into a song.

Truth be told, hardware doesn’t require endless MIDI mappings, and clicking, and is more instrumental, in a lot of ways. The knobs are properly dialed in with the circuits, and the keys are weighted to interact with the synth in ways that a standard MIDI controller may not be. Therefore, the loops that you create may very well be more interesting than anything you could have made with a soft-synth. 

Make Sure Your Recording Is Clean

Like I mentioned before, you need a good audio interface. I recommend Focusrite Scarlett or SSL2. These record at a high sample rate, and will capture the purest representation of what’s outputting from your setup. 

Also, you have to record it properly. Therefore, the signal has to come as close as possible to 0dB because the noise floor will always be the same on hardware. So if you’re recording at -6dB as you would with digital instruments, when your hardware recording is loaded into your “brain”, it will not seem loud enough in many cases. 

That’s because -6dB in the physical world is quiet. So, naturally, you will turn it up. However, when you turn it up you add 6dB of noise to the recording. Maybe you want this noise, but it won’t be accurate to the fidelity of your original recording. Therefore, always make sure that when recording, that it is as close to 0DB as possible.  

Realize You Will Be A Noob, Again

Just because you were a proficient Ableton user, doesn’t mean you will be a proficient hardware user. You will have to pick up the user manual again and start watching copious YouTube videos in order to get back up to speed. 

Your first stuff will probably sound terrible. This may be discouraging, but this is the reality you will have to accept. Just because you made electronic music “in the box”, doesn’t mean you will be able to “out of the box”

another photo of an Ableton-hardware hybrid setup

How To Get The Most Out Of An ABleton-Hardware Hybrid Setup


For the sake of this article, we’re going to assume you’re proficient with your DAW. In this article, we’ll use Ableton as our primary example. 

Play To Each Other’s Strengths

The goal with a hybrid setup is to buy what the computer can’t give you, and/or compliment what you’re doing on the computer with hardware. 

As you know, the process in Ableton is pretty intuitive, and not destructive in nature. If you screw something up, you can always undo, or revert to a previous version of the project.

It’s also way easier to visualize a song’s arrangement on Ableton than it is on an MPC. 

However, perhaps you like the playability of the MPC. Well, there is a solution to that – it’s called Ableton Push. I use it for basically everything; it’s amazing. It adds that tactile instrumentation that’s missing when dealing with a mouse. Additionally, all its MIDI mappings are designed to be standardized and intuitive with Ableton. 

Use Ableton As A Band Member

A good way to use Ableton in conjunction with your hardware is to use it as a session musician/band member. Write out a basic structure of a song on Ableton, MIDI clock it with your hardware, and then route your hardware into channels, and start jamming. Inside Ableton you can also create some complex effects chains that can modulate the hardware in unexpected ways, giving you something entirely fresh.

Use Ableton To Preserve Sounds

Another way you can use Ableton to compliment your hardware in an Ableton-hardware hybrid setup is to be able to have multiple versions of the same project that contains all the hardware loops that you recorded. Since Ableton’s environment isn’t destructive to waveforms like something like the MPC would be due to its limited hard drive space, you can modify the waveforms, without having to have multiple large files. Instead, you just have individual projects for different versions of the recording. 

Split Your Time Into Technical And Creative Sessions

This kind of works whether you are pure hardware, or using an Ableton-hardware hybrid setup. The fact remains, whenever you are integrating analog gear, there will be a setup process. You can’t just load settings. So you have to get all your patches set up, your effects set up and properly bypassed, your sequencer running, and your patterns in order. You then have to make sure that everything is playing back close to 0dB to avoid the dreaded noise. 

This will consume a good amount of brainpower. 

Therefore, once this is all ready, make sure to take a break. Go drink a beer, meditate, exercise, or do whatever you do to reset your mind.

Then come back and start jamming and being creative with your Ableton-hardware hybrid setup.

MIDI Controllers Are Your Friend

MIDI mapping is really easy on Ableton. Sure, it takes a little bit of time to set up, but it’s often nothing compared to the amount of time you will be tweaking hardware to get a similar result. Therefore, get some MIDI faders and knobs to control some internal processes in Ableton. 

MIDI will create that tactile sensation that hardware provides. The Push is, once again, a great way of accomplishing this, since it’s intuitive with Ableton. However, some people don’t want to spend that much money on a MIDI controller. In that case, there are dozens of great controllers out there that allow you to essentially create your own instruments on the fly.

Some suggestions: AKAI midimix, Novation Launch Control

These mappings will also affect your hardware as well, since you can map them to different internal faders that change the sound of the hardware, such as channel volume, or surgical EQ parameters. 


Ultimately, do what works best for your creative process. These are just my recommendations from my experiences using both exclusively, and then integrating the two. Just remember, there is a learning curve with everything, and things that were true for one, will not be for the other. There is no magic bullet when it comes to making music. Hardware won’t make you amazing, software won’t make you amazing. Only talent and dedication will.

Some links contain affiliate offers.

Electronic Music Coaching Lessons

There is this attitude in electronic music that if you share your secrets and techniques that somehow an essence of it will get lost, and some of the magic will dissipate. Additionally, people may take that advice, utilize it, and somehow outgrow and surpass the teacher. And nobody wants to feel like they dug their own grave. This philosophy about electronic music coaching took me some time to overcome, and I’m glad I did. 

Instead of the relationship between teacher and student becoming parasitic, instead I have found it to be purely symbiotic. Sure, some students have surpassed me in many aspects, but I find that they are reciprocal about their newfound knowledge. Now I have many people who are happy to help me with aspects of music making that I don’t enjoy doing as much as they do.

A photo of George Martin coaching the Beatles.

George Martin helping The Beatles. He would have been excellent at electronic music coaching.

Success Takes A Team

As I’ve harped on in previous posts, it makes sense to delegate some of the tasks of your music making, as this is what happens in every other genre of music, yet, for some reason, seems to be stigmatized in electronic music. Think about it, The Beatles had George Martin, Miles Davis had Herbie Hancock. Michael Jackson had Quincy Jones (as did Frank Sinatra). It doesn’t make you less of a musician to be the teacher and embolden your students; it empowers you and propels you to greatness.

That’s why, around Spring of 2016, I announced on my Facebook page that I’d do free electronic music coaching to anyone who would come to me. Back then, it was just a pure invitation to share my knowledge to people and using Mailchimp’s newsletter technology, I was hoping I could send emails to people and guide them in exercises. 

Initial Experiments In Electronic Music Coaching And The Lessons Learned

My initial attempt kinda failed pretty quickly as my lack of understanding of the email technology drove some of the participants mad and I had more damage control to do than coaching. So I closed that option and decided to open an electronic music collective / Facebook group with a precise goal – to provide a safe space for anyone who was unsure about their music before posting it publicly or sending it to a label. Of course, any question would be welcomed and we would have a hive mind to answer questions from various people.

As I’m approaching 5 years of free electronic music coaching, I’ve learned a lot from this. From giving feedback and to seeing mentees grow into solid musicians, these are the scenarios I saw play out.

Common scenarios In Electronic Music Coaching

Pretty much everyone who came to me to get some help had one thing that was blocking them from something. A minority would come to perfect their skills and some would come to have guidance in different situations but in the most part, people come to me because they’re blocked. In our electronic music collective, the more specific questions are usually searching for a specific effect used to replicate a sound or getting feedback on a song. These are quickly answered by the community that share a few ideas and hints. Often, it might not be exactly what the person needs but it often guides them down a path that may lead them to something more proactive.

However when doing one-on-one electronic music coaching, I often am presented with the same problems:

  • People who are experiencing a major writer’s block and are feeling helpless.
  • Aspiring artists that have worked really hard and are feeling stuck, not seeing improvements.
  • People who have the loopy syndrome, having countless loops but not being able to finish songs.
  • People who have deep love for what they create and are stubborn about any criticism, or conversely, they have intense hate towards what they create, and beat themselves up over it.

How Evolution Impacts Knowledge

If you look in hindsight at what happened in the world of electronic music production in the last 20 years, the software world paired with the internet has made it much simpler. 20 years ago, we were limited to a few resources and we’d always be in stasis waiting for our answers to come (if they ever did). We are now living in a world where we are constantly having our attention pulled in multiple directions, with each direction espousing that “this is the true way,” when there is rarely a “true way” for anything, especially in art.

It’s these conflicting statements that seeds a ton of doubt, or unnecessary confidence in their practitioners. This doubt, or this overconfidence that my one on one sessions seek to remedy. 

There is nothing wrong with being confident in your work, but overconfidence creates barriers to learning, and conflicts with progress. Sometimes I wonder why these people want electronic music coaching at all, but the fact that they get it, shows they at least have a conscious understanding of its importance, even if their subconscious confidence conflicts with it. 

Conversely, the doubt that many musicians have creates a similar problem. They may be in coaching to become more confident, but their lack of confidence results in that sort of barking little dog syndrome, where any bit of critique damages their already delicate creative ego, even if they consciously know it’s necessary. This can be likened to something like physical therapy; it’s going to hurt to walk again if you broke both your legs, and you’re going to hate it, but you know it’s necessary.

Successful Students

After coaching for over 15 years total, I had noticed that some people did better than others. At the beginning, I was working with a plan, and would teach all the people the same things but I quickly adapted that because it was not working well. Some were learning fast and would provide some interesting challenges or questions while others had some of the same questions but were always struggling on basic issues.

I understood one thing which is, you can’t really teach electronic music theory and music production training from a rigid approach because what makes it successful is to understand someone globally and then, as a team, find strategies to build a routine and work habits. More importantly, I tried to help the person find its own way of learning through the internet jungle.

Here are common points that people who succeeded had:

  • They had a clear direction: People that I see with a clear intention and direction, such as “wanting to sound like X”, are the easiest to guide. If you have a target and goal, you can always try to push what you do and technically study how it is done with music you have on hand.  With my help, we can reverse engineer some songs and try different things. Once that target is mostly reached, what’s interesting is how it leads them elsewhere. The fact that they know how something is done allows them to discover other artists or songs that are itching their curiosity. But working with targets, is always a clear indication of improvement.
  • They showed consistency: Anyone who works on a regular basis, over a constant time, has shown great improvement. More than people who started really strong but couldn’t keep up the pace. Working hard isn’t always smart. It’s more about knowing what you can do and try to consistently learn something new, practice it and then putting it into context of a song.
  • They asked a lot of questions: Often creative success and inquisitivity go hand in hand. Asking for advice and technical guidance is a must if you wish to go far. You can do everything yourself but you’re not giving yourself the chance to grow adequately. Even if someone thinks otherwise than you, there’s some part of his view that can be useful.
  • They stayed humble and always wanted to learn. If you come with the idea that you’ll learn something everyday, you won’t be stagnant in whatever you do and will always be looking forward.
  • They were not afraid of rejection and criticism. Because each song is an experiment in itself and anyone’s point of view is arbitrary.

electronic music coaching photo

Struggling points

These are individuals who have been facing a number of problems in the learning and while have learned a lot and improved much, they unfortunately haven’t rolled out as much as they wished. These are what commonly hinder them.

  • The student focuses on the success of a specific song.
  • They work in a linear fashion and won’t change.
  • Insisting on doing everything themselves.
  • The musician is often convinced they know more than they do.
  • Their expectations are set really high.
  • The belief that hard work brings success is deeply ingrained in them.
  • They see music in a hierarchical way.


What I’ve Learned In Electronic Music Coaching

The Latin proverb docendo discimus translates to “by teaching, we learn.” These are some of the lessons I’ve learned by teaching others.

Free isn’t always a good thing

If you give something for free, it doesn’t always have value. Free advice is cheap advice. Unless people pay for it, there is less of a chance that they will anchor said advice. Not saying that giving free advice is bad; that’s what these blog posts and the group flourishes on. It’s just that they can be easily dismissed. However, if you paid for advice, there is a greater chance that you implement it.

Consistency is key to development

Think of it like training for a sport. If you are training for a marathon, and decide to take a month off, you’re going to have to spend time ramping back up to that level. Additionally, the longer you put something off, the more chance you have to disregard it.  

Not be afraid of making mistakes

The comic strip artist Scott Adams has a really poignant quote about mistakes in the creative journey. He says, “Creativity is allowing yourself to make mistakes. Art is knowing which ones to keep.” I find this statement to be very true. Many of my favorite parts of my works have come unintentionally, or are a result of seriously messing something up. 

Bob Ross would have been great at electronic music coaching.

Being part of the community

No man is an island. Civilization was built by teams, and communities, not individuals. Teaching has allowed me to be part of a vibrant community, and for that I am extremely grateful. It has taught me at least as much, and provided me as many resources, as I have provided others.

Other Benefits of Electronic Music Coaching

Since my music is pretty esoteric, I learned over decades of performing that the people who attended my shows were cut from a similar cloth. They were musicians, and sound designers, eager to absorb some of the essence of the performance in order to translate it into their own creations. 

This gave me the realization that in order to grow and keep my fan base engaged, I had to give the people what they wanted. Therefore, electronic coaching became not only empowering creatively, it became a solid marketing channel. 

If you’re interested in becoming part of our community and getting some free coaching, join our electronic music collective, Pheek’s Coaching Corner. We also have a bunch of tutorials on YouTube as well. If you want more personalized coaching, I offer that as well.

Producing Music With Minimal Gear

In this pandemic, it’s especially easy to get apathetic, and start looking for excuses not to create. “The clubs aren’t open,” “nobody is dancing,” “DJs can’t even play my stuff,” “I’m stuck with my current gear, and I can’t afford to get new gear, because the economy is bad.” 

All of these things are just excuses. 

The clubs aren’t open and nobody is dancing? Well, make the music now and release it when they are open. Spend the extra time to work on getting the marketing set up, or consider what labels you want to send it to. 

DJs not playing music? Well, that doesn’t mean they aren’t listening to it, and stashing away music that they like. If anything, they are more responsive than ever because they aren’t on a plane, going on four hours of sleep in two days. Spend some time building relationships with them, so they actually care about you when you send them your stuff.

You can’t afford to get new gear, because the economy is bad? Well, don’t fear, there is tons of free, or low cost gear out there that can accomplish exactly what you need, and even provide some constraints that allow for true originality to shine. Producing music with minimal gear is a great way to make music.

What Are Some Free, Or Inexpensive Tools?

There are dozens of different tools that you can use to produce music with minimal gear.Moog, Korg, Image-Line, and predictably, Apple, have all thrown their hat into this creative ring. Here are some of the better ones for producing music with minimal gear.


Android Tools For Producing Music With Minimal Gear

GStomper Studio

A great way to produce music with minimal gear is the GStomper Studio app. GStomper Studio is an app that installs on any Android device, downloadable from the app store. Built for performance, it contains a full featured sampler/sequencer, microphone recording, a multi OSC and PCM enabled synth, piano roll, drum pads, mixer, master channels, timing and measure functions, and multiple effects. You can upload your own samples, or buy some inexpensive ones in the store. Feeling especially creative? Plug in your favorite MIDI keyboard with a simple USB converter. It’s only $12.99 in the Google Play Store.

image of gstomer. This is a great tool for producing music with minimal gear

FL Studio Mobile

Coming in at a cool $15.99, FL Studio Mobile is the little brother to the full fledged desktop version. While it lacks the VST support, and dynamics of the desktop version, this app is a powerhouse. It has a sequencer, mixer, low latency audio engine, audio recording, built in synths, effects, and samplers. 

If you use the desktop version, FL Studio Mobile comes with the FL Studio Mobile plugin that allows you to swap between desktop and mobile functionality. Also works for iOS. 

This is an excellent way to produce music with minimal gear.  

iPhone Tools For Producing Music With Minimal Gear
GarageBand iOS

Free with all iOS apps, this cultural icon has been responsible for tons of hits, and is the undisputed champion of producing music with minimal gear. While it wasn’t the best when it first debuted on iOS in 2011, now it is a full functioning miniature DAW, with virtual pianos, percussion, microphone recording, loops, MIDI functionality, and way, way more. With the right adapter, you can even plug your guitar into it, and record in the park.


Korg iElectribe

The Korg iElectribe is the mobile version of the renowned Electribe hardware. Think this piece of gear isn’t capable of creating a full album? Think again. Daman Albaran created an entire Gorillaz album using an iPad, a guitar, and this piece of software. It’s only $9.99 in the App Store. If Daman Albaran is capable of producing music with minimal gear, then microhouse can certainly be done on it.

Image of Korg iElectribe. A perfect tool for producing music with minimal gear

DAWs For Producing Music With Minimal Gear


Ardour

Ardour is a full functioning, open source DAW that has been maintained by a dedicated team of decentralized developers. It has full VST support, and uses audio engines that are just as good as any other major DAW, allowing for 32-bit, floating point playback and rendering.

It has recording capabilities only limited to the hardware you use, and has full mixing, mastering, and editing capabilities. It’s totally free, and is available on Windows, Mac OS, Linux, and FreeBSD. The only caveat is that if you use the free version, you have to code all of it together, which takes skill.

However, for a small donation, or a monthly subscription, you can get its full functionality. How much you pay determines what you get, naturally. According to them, “If you choose to pay less than US$45, you will get the current version and updates (e.g. buy version 6.0, get access to 6.1, 6.2, etc. but not 7.0). If you choose to pay US$45 or more: get the current version, updates and the next major version, plus access to nightly (development) builds”.

This is a very inexpensive way of producing music with minimal gear.

a picture of the Ardour DAW. A great app for producing music with minimal gear.

Cakewalk by BandLab

Cakewalk by BandLab is a full functioning, free DAW, with analog console-style virtual mixer, VST plugin support, multi-touch support, Bluetooth MIDI, a suite of in the box plugins, and more.

The only cons are that it’s only available for Windows, and that you have to sign up for a free BandLab account. However, there are no annoying ads that come up with this registration, so that’s cool. Cakewalk by BandLab is a great way for producing music with minimal gear.


Chasing The Dragon Of Perfection

One thing that many artists have in common is the strive for perfection. A tweak here, a tweak there, all to get that sound, color, or note to fit in exactly how you imagine it in your head. This can lead to endless hours of analyzing one aspect over and over again, when chances are that the other listener is never going to notice, and it’s just getting in the way of actually finishing and moving onto the next stage. It’s this need for perfection that starts the musical journey for a  lot of people – they hear a style of music, and think, “I can add something to this to make it perfect,” and thus from that, comes many’s signature. 

This strive for perfection doesn’t only extend to the composition; it extends to the medium that artists use to create. Currently using Ableton 10, and feel stuck? Well, maybe when you finally get Ableton 11, it will reinspire you to make music again, by giving you access to all these new features. 

So you wait until you have the money saved up to get Ableton 11, and decide that you’re not going to do anything music wise until it comes out, lest you start something in Ableton 10 that you can’t fix in 11. Then, like many before you, you drop hundreds of dollars on that new version, and lo-and-behold, you’re still not making music. That’s because often it’s not about the equipment that you have, it’s about using it as an excuse to not do anything. Many times its more fruitful to be producing music with minimal gear, rather than upgrading your fancy DAW.


Where To Find Help

However, sometimes you really can’t do something that you want done, like a vocal, guitar riff, or live percussion. Luckily, there are a lot of places you can go to get reasonably priced studio musicians. 

Before we into what the resources are, a quick note on individuality in music, especially electronic music. Most likely due to the 90’s DIY attitude towards dance music, there is a permeating attitude that somehow if you don’t do everything in the track, it’s somehow cheating. 

No other genre of music thinks like this. Michael Jackson isn’t less brilliant because he had Quincy Jones. The Beatles aren’t any less enigmatic and sonically revolutionary because they had Phil Spector and George Martin. The Beach Boy’s Pet Sounds isn’t any less game changing of an album, because it’s made primarily by session musicians. However, in dance music, if there is outside help, somehow it’s cheating. This is kind of ridiculous. Electronic musicians are not more legitimate musicians than The Beatles, sorry. Many of these albums were created with antiquated gear, that equates to producing music with minimal gear nowadays. If they could do it then, you can certainly do it now.

SoundBetter

Soundbetter is a platform where musicians can hire people to do things that they don’t want to do, or aren’t capable of doing. Need someone to play bass on your new house track? SoundBetter has that covered. Mixing or mastering? There are engineers that work with most conceivable genres, for a reasonable price.

Fiverr

Lots of people know Fiverr, and for good reason. It’s an excellent repository of services, from graphic design, to session musicians. Many critically acclaimed musicians sell their services on Fiverr for a reasonable rate.

Pheek’s Mixing And Mastering

Shameless plug. Here you can get mixing and mastering services, as well as track finalization. If you specialize in underground electronic music, and want your track to sound pristine, or need someone to help put finishing touches on the composition, then this is a sure bet, for a good price.


Examples Of Music Made On Minimal Gear

If you’re just getting started, or are looking to change up your medium to find new inspiration, don’t let brand names, and expense, get in the way of creating something great. Some truly great works of art have been made on stock, dated, repurposed, or even free software.

Here are a few:

Burial – Untrue

burial's untrue is a perfect example of producing music with minimal gear. This is the cover of the album.

If you’re not a stranger to Pitchfork’s social media feed, you have probably noticed how they absolutely gush over this album, reposting their article, Why Burial’s Untrue Is The Most Important Electronic Album Of The Century So Far ad nauseum. What’s most fascinating about this article, is that it is made on SoundForge, which is not a traditional DAW by any means.

The version he used didn’t have VST support or even multitracks. It didn’t have neat timing, or BPM features, or anything that modern DAWs use. It was simply a medium for designing sound. Yet, he used it to create an impeccably modern, important album, using old YouTube, and video game samples.

It’s this constraint that made such a unique, airy sounding album that still receives near daily praise the world over.

Justice – Cross

Pretty much the flag bearers of the post-Daft Punk “French Touch” revolution, Justice exploded onto the airwaves with their 2008 album, Cross. A distorted amalgamation of punk rock, disco, soul, and stuttering samples that were modern, and loud. Even to this day, the production value of Cross, while bordering on EDM, doesn’t feel plastic, or overproduced. By any stretch of the imagination, this album was made in an excellent studio, on well tuned gear, and warm, analogue synths. 

Well, that would be wrong. While there is definitely some post production magic, the majority of Cross was made by two French dudes with GarageBand, and clever sampling.   

Justice’s  Xavier de Rosnay says, “A lot of people think it’s bullshit when we say we use GarageBand, but it’s actually an amazing tool.”

Jon Hopkins – Immunity

An image of Jon Hopkin's Immunity, which is an example of producing music with minimal gear.One of the most revered electronic albums of the last decade is Jon Hopkins’ blistering techno/neo-classical masterpiece, Immunity. While he now uses Ableton, at the time, he built this album in a Frankenstein combination of his MacBook running Logic for arrangement, with a parallel processed version of Windows 98 running a 1999 version of SoundForge to do his sound design. 

This album was nominated for a Mercury Prize, and is #37 on Pitchfork’s Greatest IDM Albums of All Time.

Steve Lacy (Kendrick Lamar / The INternet / GoldLink, etc)

Steve Lacy is known for making beats on an iPhone and iPod. He has his beats on Kendrick Lamar’s DAMN with the song PRIDE, co-executive produced The Internet’s Ego Death, and has done collaborations with many other well known artists. 

Yes, it may not be the type of music that many people who read this blog care for, but you can’t deny its impact. If you can make hip hop on an iPhone, you can make ambient techno on one too.

There are many, many more examples of this, in pretty much every genre imaginable. If anything it’s the constraints that give these pieces of art their depth. Never underestimate the power of limitations.


Hopefully this article provides you with some resources, and inspiration for making music with minimal resources. Whether that is using an antiquated, or repurposed piece of software, an Open Source DAW, or even your phone, there is no shortage of brilliant pieces of art that have been made by minimal, and unconventional methods. 

Just remember, in the information age, there is a litany of resources available to help you get from A to B. And even if you have all the gear in the world, sometimes it’s good to try something new, and restrictive. You never know what will come out of it. Plus, making things in unconventional ways is a great story to pitch to media outlets to promote your music, so there is that too.

How To Make An EP

In my coaching group, someone asked:

So, how do you make an EP ( I ask this thing regarding the atmosphere, like all the tracks should be in the same way let’s say, or create a story)? I find it really hard, if I count my last 10 projects, all of them are really different. How can I approach this kind of vibe for more tracks? Can you tell me how to make an EP?

I replied a quick answer but I thought it would make sense to expand on this because the real answer of how to make an EP is a bit longer and covers multiple things. Why? Because as a producer, a music lover and label owner, there’s nothing that frustrates me more than having an EP that has no soul, no concept and no direction. It feels bland and empty. There are different kind of EPs you can find out there and all of them will find an ear but I get picky. Let’s see some successful EP types:

The utility:

This type of EP is more for DJs and has a collection of tracks with the function to be played in sets.

The compilation:

Either various or 1, this one is simply a collection of random tracks picked from unsigned material.

The conceptual:

Sometimes an artist has a patch, a system or a way of working that will make a series of songs sound the same, which a few songs will united because of the direction.

The last one is the preferred type of EP I want. If I listen to it on Spotify, I sometimes like the non-linearity experience of shuffling it. To me, it is successful if I can listen to this EP that way in repeat and not get bored or even better, wanting to dig for more music from the artist. As there are multiple people who enjoy an EP just as much as an album, there is value to make one. People were saying that streaming services killed these types of releases but I really think otherwise. As a label owner, if I see someone who put enough energy to do an album, it certainly shows a lot of maturity that makes it special to my eyes. These, whether instinctual, or planned, are perfect examples of how to make an EP.


Chicken Or The Egg: How to Make An EP from What I Have Vs Starting From Scratch

Many people make music on a regular basis with the idea to eventually publish it. If you think about it, if you go from one project to another, you certainly will explore different moods, techniques, softwares and ideas. If you work on hardware gear, your music will mostly have some sort of common aesthetic though but with the computer, it gets pretty much all over the place since you have access to so many tools and samples.

It’s a bit more difficult to keep something coherent and you can easily start making music that is completely different from previous song you did. If you remember some past posts I did about my approach of working in a non-linear way, you’ll be working here and there and you may borrow some ideas from a song that is not working to another one that needs something specific.

The idea of how to make an EP is, to my understanding, is to try and propose 3-4 songs that have the same direction and aesthetic. This is one of the idea behind my approach to always try to work on multiple songs, bring them to about 90% and export them to a folder as a reference.

Later on, when working on an EP or album, I’ll go in that folder, listen to the tracks. Then I’ll know which ones have relatives and similar ideas, so I can work on the last 10% that is lacking to call it done. Whenever clients come to me that they can’t finish songs, there’s need to clarify that it is not necessary a bad thing. You can practice wrapping them but it is not essential. Same thing for all the fuss about what if I do this or that. I believe those questions can be answered once you have let the song ripe for a few weeks.


How To Make An EP – Purpose And Direction

photo of how to make an EP record

Credit: Blocks

One of the things we talked about a lot on this blog is how there’s not many secrets to music making if you can analyze a reference song. When it comes down to it, how to make an EP is sometimes as simple as referring to previous artist’s formulas. Many people I work with are concerned that a reference track will taint their art direction in a way that will make them not sound like themselves.

The thing that is making smile is how those people are more likely to come to me and share they’re lost. You can use reference EP/LP as a way to pick your songs that are going to be part of the same project. For instance, perhaps a very important EP for you had 5 tracks, where 2 songs were ambient and the others had a different take. Perhaps that is something that you can consider.

The way I see the use of a reference project in this condition is that you get your framework around it and then discard it. How many tracks on an EP is a matter of preference, based on whatever your goal is for the EP.

A thing that boggles people a lot are when they start thinking about what the listener expects. There’s equally a balance between people who want the same type of music from an artist from release to release, and another who wants the artist to keep a core but evolve, change, and not repeat formulas. This can also be the same kind of balance of how people want an album or an EP – All tracks slightly the same or all the tracks very different from to another.

Where do you situate yourself in this?

Wherever you feel like. You don’t have to worry too much because no matter what, some people will like and some will dislike anyway. One approach I have is to imagine the project for a friend in particular. How would they like it? Or a DJ… what is it that they like?

Sometimes I find that a good exercise to compile some tracks all together for an EP is to think of my current purpose. How do these tracks answer my own need, today, when recording an EP?


Mindset

How to make an EP starts and ends with mindset. There are different moments where you will have time to make music. I like to approach my session with an intention otherwise I quickly lose my session either troubleshooting issues or getting lost in details that aren’t useful at the end of the day. The different intentions could be listed as:

What I Do

The mistake a rookie producer will do is to approach the use of his time without an intention and deal with whatever comes up. It works most of the time but you’re not using your time wisely. If you start a session with one thing in mind, you won’t get distracted by chasing something else that is taking you away from what you’re trying to achieve. Your mind can do something really well if you put all your energy to it. In that sense, I have developed a natural self-confidence that whatever happens, a future-me is going to fix it or recover it at some point.

photo of how to make an EP

Credit: Nguyen Dang Hoang Nhu

Having this approach is an open call to work on multiple projects and songs all at once, and makes the process of how to make an EP easier. You’ll create a huge pool of sounds and ideas that is ready for the moments where you want to feel creative and make loops, core to a song.

It’s important to capture the song mood and try to finalize it quickly so you don’t overwork it but you can also create a bunch of skeleton ideas that you’ll wrap later. Keep in mind that if you make music on a regular basis, you’re improving yourself and the future-you will be more skilled that your current-you.

That mindset has been my best approach in the last year when thinking about how to make an EP, allowing me to create a lot of music. To grind my skills to a point where I can, in full inspiration, make a song from scratch, gets easy. The other mindset I find useful is to record little live moments as often as possible.

The reason behind this is to know how it feels to jam, to play, to live the song instead of mouse-cliking it away. This is particularly important so you can perhaps imagine your music fitting an artist’s podcasts and sets. You want to have that fun factor as well as being essential for an artist to have your music in his arsenal.

Another benefit from having a focused mindset is that when it comes to working on an EP or LP, the 2 mindsets that will really benefit that will be the optimizing part as well as the finalization. I’d rather have 10 unfinished songs and then pick 4, wrap them based on a single aesthetic to unify them than have 10 finished songs that are not really coherent all together. If you shop for music often and look for EP, what grabs your attention and what kind of EP makes you go wow on it?


Aesthetics

Now that you know that you can have a bunch of songs almost done and that the last 10% of polishing can bring your entire project in a direction, I hear you asking how that last detail can be achieved. There are different things you can do but usually what unifies a project, if we refer to techniques, we can classify that into different clusters:

Sound design related

A good example is how the use of a same set of sounds can create unity. For instance, a 808 drum kit for all the songs gives a sense that all songs are the same for its core but you can add different ideas around it. Same for a synth in particular, where Mathew Jonson is a good example. In that sense, building a percussion kit is really useful.

There are multiple ways to build one but my favourite way is to use XO by XLN because it creates a map of all the sounds I have and also put them in a way that similar ones are closer on that map. So you can not only create a kit based on another but you always have the flexibility to search a huge selection and not go to far off. It’s the kind of tool that I’d be dreaming about but not only they made it happen but they made it better than what I would I have done it.

how to make an EP effects photo

Effect driven

The main effects that can bring a project together, from subtle to drastic, are the ones that are coloured. Think of reverb for Dub and distortion for breakbeats or lofi effects for some old school house. They are the key the the key signature of the genre, and help define how to make an EP that’s similar. Sometimes it’s interesting to grab all tracks part of the EP and use the same effect rack that you can create. It’s easy to import into each of them and you can save a few presets that are easily set.

There are multiple aesthetic related plugins you can use and try. I would also not hesitate to simply drop it ON the master bus (yes, I’m serious) which will give you a very coloured version that you can dial back after. But like I often say, you need to push things exaggerated to see how far you can otherwise, if you go with 2-3% of wet signal at a time, you’ll never really see the full picture. I find that a multi-effect like RC-20 by XLN can give you a really good idea of your song in a new space. It adds saturation and noisefloor. It makes your song sound as if it was taken from a dubplate. Pretty impressive.

Tone

One thing I see when I master an EP from an artist is a coherence with the tone. When there’s not, I usually emphasis it so it feels better. It’s weird to have a super bright song amidst a few dark ones. If it’s artistic, ok it can work but it makes the listening experience a bit bumpy. If you use Fabfilter Pro-Q3, You can apply one EQ curve from a song to another. Sometimes you can have a curve for an EP that you apply on all songs. That can provide some interesting results.

Complementary stories

In a past post I was saying how you can layer all your tracks and see how they would be mixed from a DJ’s point of view. Have you tried layering them to see if some nice combinations are possible?

Templates

As explained before, I like to save the arrangements of a song to keep them as templates for future ones. Really handy to speed up the process from a loop to a song.


Improving Your Workflow to Prevent Decision Fatigue

What makes on 30-minute block of music making painful versus some other 30-minute block where everything flows organically? The choices you make can make a huge difference in how you use energy. If you use all your energy in the first 30 minutes of a session, you likely faced too many decisions and ran out of gas.

This overwhelming feeling often comes about when you’ve worked on a loop and mess around with arrangements for a moment before getting discouraged. You’re pretty much burning your brain out and then expect a second wind, but that doesn’t happen right away so easily.

What I’ll advocate throughout this post is a reminder of multiple things explained on my blog that push people to dive into music production and thrive in how they make music instead of being stuck. Strategies to facilitate an easier flow of your music-making are fairly easy, too.

Let’s dive right into the 5 different prerequisites to reach a state of flow.

  1. Risk
  2. Novelty
  3. Complexity
  4. Unpredictability
  5. Pattern recognition

One of the things that I didn’t list here which is important to focus on is the intention to spend a moment making something you know well. By venturing too deeply into something that is difficult (something that is, however, sometimes necessary for self-education), you’re acquiring some new information and achieving a good state of flow is not possible. Once you’ve learned a new concept/theory by practicing it multiple times, you’ll get good at it.

Hence the importance of making yourself:

  • Start a lot of new projects.
  • See most of your songs as lessons where you practice. Forget the aim to create masterpieces or to release all of your songs.
  • Spike time where you actively rehearse something you love doing.

When I teach music production, I explain to people that I can teach them everything their DAW can do, but then they’d sit in front of their computer with the idea of making a song and they’d be lost. The approach I encourage is to start by creating a strong base and then modulating each new skill into lessons. The idea is to focus on what’s useful to get from A to B in order to go to C and not try to go from A to Z in one shot.

A strong base means that you know some essentials, but beyond that, you know what you enjoy doing and what you seem to do naturally.

Once this is set and clear, we can approach the first take in my list above—taking risks. To know what taking a risk means, you need to be at ease with something. By risk-taking, I mean to try something in a different way. This can’t be really done if you can’t do the thing first. For example, you can’t take beat programming risks if you don’t know the basics of how your sequencer works (well, you can actually, but just diving in, chances are, your beat may come out with too much risk).

What’s a Risk in Music-Making?

Is it trying a new technique? Is it finishing a song? Is it learning a new software?

Let’s classify it as a single question: “What if?” This can and often imply a notion of risk. So let’s say you’re making loops, perhaps you can ask “what if I extend it to a whole minute instead of 2-bar loops?”

If you observe how we live, we often will do something we love doing and that usually is because we’re flowing in it; we don’t think—things just roll. You don’t have to make a lot of choices because you already know what you have to do. Taking a risk is a way of elevating what you’re doing a notch.

It’s a personal affair, and it’s something to be asked once in a while. But this gives rise to a second point which is novelty.

Self-Learning, Novelty & Complexity

Another thing I’ve been advocating for in past articles is the importance to see the majority of your music projects as lessons. A cycle I often notice is:

  1. Getting interested in a specific sound, aesthetic, idea, genre direction.
  2. Research and exploration on how to reproduce or imitate it.
  3. Struggle.
  4. Acknowledging a new concept.
  5. Practice and expression.
  6. Perfect it.

Each time I’m interested in something specific for music, I spend a lot of time trying to acquire the knowledge and techniques behind it. I spend a lot of time on YouTube on several How-tos, read some blogs and forums, and then test what I have. For instance, when I was obsessed with Dub Techno, I was searching a lot about it, which led me to acquire a lot of information about filters, reverb, chorus and delay, but also something I didn’t expect—noise. When you dig for information, you’ll find one thing you didn’t know or may not have been searching for, which is the novelty that is precious. In the state of flow, the exploration, in a context where you already feel comfortable but are on a quest of expanding, feeds you with a lot of creative energy that makes you get lost in what you do. But usually just before this happens, you’ll have a moment of struggle and it’s important to go over it to really get to the plateau of full creative force.

Once you practice and work on really handling a new skill, you’ll perfect what you do more and more. You’ll be more able to express yourself properly and eventually, you’ll want to perfect things. To get back to my example of Dub, I started to learn about delay techniques, tried many delay plugins and started understanding their personality and types. Same for reverbs, where I really got into plates and how they sound. The new trick I learned was about noise and started to get very much into the different types of noise: pink, white, blue, brown and red. Which then led me to get really interested in random generators, LFOs and modulation. Always adding a layer of information, precision and personality was a way to feed myself with novelty and complexity hand in hand. They’d play ping pong together.

Imperfection and Unpredictability

Choice fatigue roots in the quest of perfection. When you have more than two choices, you have a moment of not knowing. This clicked one day as I was reading a silly article that a lot of CEO in Silicon Valley will start the day with simplifying how they’d dress to make the least number of decisions possible. They’d have a work wardrobe of only a few things and they’d pick one without thinking. I find that flow starts with the yes-man attitude, as well as the why not. So it’s enemy would be a no, without trying.

Being in the flow, in a certain way, is almost the straight opposite of searching perfection. That is, you’re in the moment and you’re grasping something real and spontaneous. In a way, that is a form of perfection. When you begin searching for problems and feel doubtful about your work, I usually suspect you’re not in the flow, at all. You’re trapped in your analytical mind, the ones that questions and doubts. That part is really important much later, but I don’t give it too much importance in how to improve your flow.

A good routine for improving flow includes the following music-making tasks:

  • Explore, play, improvise.
  • Record everything.
  • Tweak to improve, not to perfect.
  • Consider the future of what was done. Release or not?

I find that I prefer to record 2 or 3 new songs instead of trying to give one a new life by working on it for 10 hours. I could even recycle the best part of a song that’s not working. Making more tracks makes you practice being more spontaneous but also more accurate in what you do, just like a DJ would get better at mixing, transitioning or doing tricks. As you go, your results need less polishing. For years, I left some imperfections in my work as I felt it was part of what made my music unique and human. It received a lot of positive comments and with time, if I listen to my older tracks, there will be things I don’t like, but I don’t know what was left there purposely or should be considered as a problem. That issue is itself, is part of the soul of the song.

As a mixing engineer, I do get in the zone as well. This is why my first mix of the day is crucial for the rest of the day. I usually start with all corrections, and try to do them in one shot, otherwise I start fixing stuff that clients like. I noticed that with time that if it works, don’t change it.

Now, unpredictability is something that feeds all the other ideas I’ve listed above that help to improve flow:

  • Taking risks by not knowing what will happen.
  • Discover new ideas you maybe have filtered out.
  • Making your routine more complex by including new items.

To me, adding a dose of unpredictability starts by making all your elements dynamic with your sounds and effects used. For EQs, I would make sure they’re dynamic (like the Pro-Q3). Compression is dynamic, but I’d link an LFO on the threshold. Adding LFOs, randomizers, and reacting envelopes to the incoming signal would make everything reactive, yet you never are really sure of where it’s going. This is partly explaining how people get addictive to modular synths because it’s all about modulation and unpredictability. A good way to check that is by trying VCV (free) or Softubes’ Modular that is a lot of fun. Reaktor is also an excellent platform to experiment.

Having separate sessions where you prepare an environment for making music is quite encouraged. By opening Ableton Live and launch a starting template that doesn’t take an hour to setup, you’re allowing yourself to be in the zone. Types of “setup” sessions include:

  • Sessions for setting up your future sessions. I’d encourage you to make themes instead of having templates that have all the bells and whistles.
  • Record sessions and sound design moments. These will be precious if you want to make music later.
  • Tweak, arranging and polishing sessions are helpful, but do them later.

The last aspect of improved workflow I’d like to discuss in more detail is pattern recognition—the moment where you realize that you’ve had a good or bad session, and are able to reconcile what happened in order to prepare the next session.

I like to tell my students that if you struggle in a session, it’s mostly because your preparation wasn’t adequate. If you struggle to arrange your session, start small…like, really small. Start from bottom to top: low end, percussion, mids, highs.

If you also fail to finish a jam, maybe you get distracted—a crucial thing to fix. Try to mute all notifications on your phone. Close social media, have snacks and water nearby. Avoid anything that can make your body and mind leave the moment to be elsewhere. If your session lasted at least 20 minutes, you’ve succeeded. Sometimes people feel sessions have to be long, but 20 minutes is sort of the key to get in the zone (unrelated, but this is also why I believe 1 hour DJ sets aren’t fair for the artist).

Personal Rules and Studio Attitude

  1. Be a yes-man to any idea that comes up until tried in context.
  2. Avoid maybes. It’s either a hell yes, or no. A maybe is a no, by default.
  3. Save all rejected ideas for future use.
  4. If it doesn’t feel good, stop everything. After a pause resume, or change tasks.
  5. If something feels like a lot of effort, take a pause and come back later.
  6. If you only have negative points of view, do something else.
  7. If an inner voice insists that you can’t do this or that (music-wise), I suggest you do it anyway to see what happens. Sometimes we stop ourselves from doing things that are creative.
  8. Collaborate as much as possible.
  9. Each session should have a session of listening before or after.
  10. Stay curious and open!

Let me know your experiences with decision fatigue and improving your own workflow!

Make Music Faster: Self-Imposed Limitations for Expanding Creativity

“I think we need to go backward now”, is what I said to a friend who was asking what was ahead for the year—referring to a view I had years back about recognizing when it’s time to go with the flow, and when it’s time to reverse or deflect it to move in another direction. I was thinking back to the mp3 revolution of 2001; geeks downloaded all the music they wanted thanks to Napster or other software. There was a continuous debate about music being copied and shared. Back then, it was mostly pop and commercial music taking the biggest hit from file-sharing. In underground culture, Netlabels became a mysterious movement, sharing music for free. Now free music is common, but back then it was really seen as a nonsense approach to a label, “backward thinking” even, and often talked down and ridiculed.

Back then, Dennis De Santis (who now works for Ableton) and I were approached to be part of a compilation for a German Netlabel called Thinner (which eventually became fairly well-known netlabel). Why did I do it? There were two main contributing factors:

  • I wasn’t putting releases out at that time, and I was a yes-man to whatever would come my way.
  • There was a huge new audience flow of people who wanted music for free…so why not just give it to them?

I decided to go with the flow. In doing this, you get pushed in a direction and accept that you might not control where you’ll end up. In my case, I’d say it only led me to great things—meeting people, getting gigs, and a lot of attention.

It was no surprise that when I started my own label, Archipel, in 2004, I kicked it off as a netlabel as well. But in 2006, I decided to go against the flow and do what many didn’t really approve of, which was sell music on Beatport. It was the beginning of digital music sales and many people thought it wouldn’t work, but it did really well.

My point is, there are times when it makes sense to keep going in a certain direction, and there are other times when changing directions is more sensible. Keeping this in mind, being flexible is something that can applied to many spheres, such as your music aesthetic, or even a song itself.

As I’ve mentioned, I recently joined Weeklybeats—a challenge to create one song per week, for the entire year, and I’ve experienced a great feeling of freedom. Normally, I impose a very rigorous workflow on myself when I make music, and often it can take me months to finish a song. Switching up my approach to a faster pace forced me to think less. Yes, there’s a risk of reduced quality with increased speed, but at the same time, with the experience I’ve gained over time, I know I can at least make sure that the production is solid.

I also realized that my number one distraction is that I’m constantly bombarded with new music tools promising tons of new features and spend a hell of a lot time going through them and waiting for a sale to buy them, but never really pushing the stuff I already own to its maximum potential. With this weekly challenge in mind, now that I have self-imposed limitations, I feel like I’ve exprienced a huge breakthrough.

Time

Deadlines make you creative and productive. A friend who is a father of two told me recently that he realized that he was creating his best ideas in moments where he’d squeeze a quick session of music, knowing that he’d be limited to maybe 10 minutes. So, let’s say he had to go to the grocery store; while people were getting ready, he’d open Ableton and would test a new macro he made, or would try to make temporary arrangements. The time-constraint made him more efficient than when he’d have a full evening to himself to make music, which often led to nothing interesting.

My theory is that with too much time, you can spoil what you make. This is why I think 5 hours of studio time spent on one song is not the best idea—a thought I have proven to be correct for myself while taking part in this weekly challenge. Now, I take a few hours to create an idea, save it, and later will expand it—the next day I add a layer, and so on. I’m limited in time and I do multiple things at once, but I’ll squeeze in 20 minutes here, 40 minutes there, then 10 minutes before going to bed.

Try this fun Max patch that will time your work and give you an idea of how much time you’ve spent on things.

Tip: Give yourself a due-date for wrapping up a song and accepting that it is what it is, once you hit it. It’s more important to move on than to try to reach some illusory perfection. Use your agenda alarm as a reminder.

I decide the length of my song before trying to speed things up. This is a tip discussed many times in the blog but I will insist that doing this is a strong limitation that clarifies a lot of things.

Tools

If you’re a reader of this blog, you’ll remember that for one song I encourage you to focus on one main idea supported by two minor ideas. It’s really easy to get lost trying to find an idea to start with. My take is to try to use what comes out fast.

Synths: Know what you have—cycle through synths that came with your DAW, and some that didn’t. I encourage people to get at least one synth that is an analog emulation of a classic model (Arturia does a great job at these) and another that is focused on a wide range of sound design options (I’m a big fan of Rob Papen and encourage you to test his products).

Samplers: Honestly, Ableton Live’s Sampler does the job for me. There are a few more alternatives out there but in the end, they all do a similar job except some have more bells and whistles. I always come back to the stock sampler because it’s simple and extremely versatile.

Once you have decided if you’ll generate a sound or use a sample, it’s time to play with it. Mapping a MIDI controller is very useful for playing different notes. Sometimes I see people in front of their keyboard and they are not sure what to do. This might sound obvious but when jamming, I test:

  • different pitches by playing higher and lower notes.
  • harder or softer hits to see how the velocity influences things.
  • listening to the sound a different volume. Sometimes a sound at very low volume is much more interesting than loud.
  • alternating between short and long notes. Depending on your preset, it can play differently.
  • playing fast and slow notes to see how they feel.

Keep in mind that you can make a song out of any sound if you how to use it. The reason why we discard sounds is because we’re after something else. We’re not paying attention to the sound and its potential. Limiting yourself of only one tool per song eliminates a lot of exploration time. It also forces you to do something with what you have.

Same goes for reverb, compression and EQ. I’ll only use one or two, max. When I’m in mix mode, I usually explore different compressors.

Composition

If you use a modular, or hardware, you have your gear in front of you and you’ll just start working with what you have. This limitation forces you to be creative. But on a computer, you’ll have many ways to make music.

Templates. To speed up my work, I created a main template that I use to create macros and techniques, while recording everything. I mostly jam and will not spend too much time going into detail—raw on purpose. When I have something potentially interesting, I make a channel called “ideas” and put my clips in it. Later, when I start working on a song, from the left side browser, I can open the template and import the “ideas” channel in my new song to select from it. Have multiple templates that you import your sounds to, and in that other template, create sound modifiers. For instance, I have a dub template filled with tons of reverb modulators and delays. I can drop anything through it and something dubby will emerge.

Jam. I try to invite people to jam their song as much as possible. Whenever I have a loop as a main idea, I’ll automatically start recording and will mute it, play it, change volume and try different combinations. This lets me explore ideas I couldn’t discover if I just mouse-edit the clips in arrangements.

Sound

For the longest time, we wanted to have access to as many samples as possible, but now that we have them, we’re completely lost. Try to decide which snare or clap you want. Swapping out a sound isn’t super easy but I found this amazing step sequencer that fixed this problem. It’s made by XLN and it’s called XO.

If you want to make music quickly, you need to find your favourite sounds and create drum kits. Import them whenever you start a new song. Back in the day you’d have a 909 or a 808, and that would be your drum kit, end of story. So create a good main kit, then add a few different ones, and that’s it.

And for crying out loud, stop thinking that you need to do everything from scratch, all the time! Yes, it’s cool, but it slows you down a lot.

I mentioned that I’d “go backwards” this year. What I meant by that is that all my habits have to be upgraded or changed. Habits keep me safe and comfortable, while feeling uneasy forces me to be creative and think outside-the-box. Join me in this approach; I’m sure there’s magic waiting for you too!

SEE ALSO : Reverb Tips to Boost Your Creativity

Make Music Faster: Some Organizational Tips

We are constantly bombarded by information and it can be difficult to focus on anything properly. Making good music requires slowing down and a high level of focus—often people rush when making music and it comes out poorly. How can you make music faster while still giving the process the attention it deserves?

In terms of file and project organization, there are a number of things you can do to speed up your workflow.

Backup, Backup, Backup

I’ll never say this enough, and I’m sure you might shrug at this first tip, but you have no idea how many clients come to me telling me their computer crashed and they lost everything, hoping I saved their projects! Luckily, many times I have been able to help them with my own backups. After many of my own crashes, I’ve learned to have a number of external hard drives for all my projects, and I have an online backup for my main system that syncs multiple times a day, and I also use Time Machine (from Apple). Generally, I have to use one of these back ups at least a few times per year, because of corrupted data or other issues. Clients email me about issues of their own about once a week! No joke, if you do just one thing to improve your pace-of-output, make sure it’s taking backups of your work.

On backup drives, I keep everything organized by year, label, and project name. Having organized files and folders helps me find things quickly.

Personally, some brands I trust for reliable hard-drives are Western Digital, Samsung, and Seagate. If you can get an SSD, it’s a huge plus—you can work directly from it, without any noticeable decrease in speed. When it comes to online backups, I like iCloud (I personally hate Google Drive), but I recently discovered iDrive and find it pretty impressive and affordable, too. If you don’t have an account with Splice, it’s a good idea to back up all your projects online. Having multiple back ups on different systems can be quite useful.

File-Naming Conventions

All my song files have a title, but they also have a bit more information. On OSX you can use tags—I like to tag files as released/not released, and finished/not finished, for the most part. Avoid project titles like “new song” or “1”. As time progresses, chances are you’ll have many new songs, and titles like those are counter-productive.

I keep very few things on my primary computer hard-drive; I love to discard projects that I’m done with or that I haven’t touched in a while, so I can make room for new material. If you aren’t familiar with my creative process (see my series of videos on Youtube), I create a lot of source material to work with, but it takes up a lot of space on my hard-drive. I don’t like to re-use the same material twice, so cleaning up my hard-drive on a regular basis becomes a safety net against redundancy in sample usage.

When it comes to samples, I buy multiple loops and one-shots, as well as packs, and like to keep them organized in a sample-focused folder. Nothing too complicated, as I use multiple other tools to organize those in my DAWs, so I don’t spend much time on organizing samples into folders. I simply backup the sample folder and that does the trick.

Project Organization

Many producers work in an awkward way when it comes to managing their project(s)—their creative process is often irregular and they are easily distracted. It’s very hard to be completely organized when making music and balancing creativity with efficiency, but there are some approaches you can take to make things flow more easily. When it comes to making music, I work with motherships, which is a technique I covered in a past post and often refer to to make things productive again when I lack ideas. It’s basically one big Ableton Live session, where I drop-in all my current ideas. Recently, I found that I like to create multiple ideas in a single column in this project file. For example, I make all kind of grooves and percussion sequences in a column called “groove ideas.” If my mothership has multiple, well-separated content types, I can import an entire column from the mothership into another project and improve upon it. So let’s say I’m working on a dub project and feel like I’m lacking groove, I can simply go dig up whatever I have in the mothership by importing a full column filled with numerous grooves into my current project.

I think that working in a modular way (not in terms of using modular synths)—saving ideas by category—helps to import them faster later on, when they’re needed.

Leftovers & Going to the Store

Finished a new track? Create a new column called “leftovers” and place any unused ideas in it. Import that column into a project named “leftovers” and you’ll have all the leftovers from all your songs, which can easily be recycled in the future.

Going to the grocery store, is a phrase I use for days I spend recording noise, sounds, bleeps, and random jams from gear to my computer. I’m not a gear guy in general; I find using a lot of gear multiplies the risk of running into technical issues, which limits creative time. I usually record tons of sounds, or “audio produce”. I then work with that material for weeks or months, or even years. These types of sessions are super useful, but need to be organized as well. I cut down recordings to “moments”, which I identify as specific ideas or concepts. I also slice sections down to one-shot ideas, for percussion elements. Additionally, I like to have tons of low-end material with analog saturation, and analog transients I can use in digital percussion. Both add a very simple twist that can make a world of difference. I also like to use the mothership concept with the grocery store. I’ll create one template project with all my recordings and then slice them, then put them in different columns that I can use to import in any ongoing projects that need something.

Time

Time is precious. If you have a family, it’s even more difficult to find time to make music. How does one organize time given the obligations of social relationships, work, partners, hobbies, and Netflix binging?

My solution to not having enough time to work on my own music is to dedicate blocks of 30 minutes to work on music and try to get the most of them. Your brain can produce high-quality work for about that amount of time. This fact is liberating for parents—you have a human need to create, so you feed it what you can, and then move on. In the early years of being a dad, I thought that having a way to save ideas for music by leaving myself audio notes was the best way to calm my brain down from the restlessness of not making music as much as I wanted to. Sometimes I would have the computer nearby and I’d leave a loop playing and adjust as I could, between changing diapers. Part of who I was a musician changed in those years. The music I wanted to make was completely different, mostly because I was using music in a different ways.

Limiting your time to periods of intense focus is something I learned from the Pomodoro technique. I would make sure to listen to music for 10 to 30 minutes before working. Ideally, I would also exercise or stretch to have my body “activated.”

Since time is crucial, I recommend you eliminate any hindrances of the mind that can disrupt the flow: hunger, need to check phone, energy, thirst, discomfort, etc. A good studio has the phone at the entrance with minimum check-ins on whatever alerts it can send you. Have a water bottle and snacks on hand, a quality chair…make things comfortable.

I also encourage new students to create precise goals and deadlines. For instance, “next Saturday I will dedicate a moment to video tutorials on compression, then do some tests on kicks.”

References

If you want to make music without losing your sense of direction, you need references on hand. I’ve covered references in many past posts, but this is a reminder that having a Spotify playlist is a great idea to give yourself drive. Speaking of drive, it’s not a bad idea to leave your house before making music—go for a walk, jog, or drive around. Have you ever noticed how moving along with music stimulates creativity? If this doesn’t do it for you, try to find an external activity that involves music and that inspires you.

A self-education activity that is also essential is to have a personal YouTube playlist of videos that are reference tracks, mixed with tutorials of techniques you can try. I have a to-do list of videos that I go to for experiments.

That said, references should be archived eventually, too. I like to keep some for a while but change them regularly. It’s a good idea to have a folder on your backup drive for all the references you’ve used.

Plugins

It’s easy to get lost in the sea of plugins out there, and if you’re a collector like I am, once you have many installed, it’s also easy to forget about older ones. Ableton Live 10 has a classification for plugins where you can put them a category with a color—I use it all the time. In my case, I have these categories: Sound design, Compression, EQ, Saturation.

I have a rule that I don’t buy anything new unless I’ve already used what I have bought previously. I don’t mean just having played with it, but actually used it in a project—this also applies to gear and any gizmos I could potentially use. The crave to get something new happens every day, as I’m constantly under fire by ads and emails that promote something.

Networking

If you want projects to get finished, you will have to do some networking at some point, and it can be pretty hectic out there as everyone has an agenda of their own. I’ve discussed the importance of networking before, but here are some basic reminders about how to do so efficiently:

  • Never take any conversation personally, as well as any pauses, silences, or delayed conversations. This is something I sort of have to remind myself daily, as sometimes I get triggered by certain things. Think of networking like you’re chasing someone for something, and he or she is doing the same thing with someone else. Everyone’s chasing each other and yet, we don’t pay much energy to people who are there for us.
  • If you send demos or if you are collaborating with someone, expect no communication or long silences. The music business world attracts people who are full of anxiety and often change their mind. Finding the right moment to poke someone takes time to master.
  • Use an agenda to keep reminders of who to follow-up with.

SEE ALSO : How Long Does it Take to Make Professional Sounding Music?

Home studio essentials: Starter kits for electronic music production

Due to popular demand and because I receive questions about what to buy to start making electronic music almost daily, I decided to cover the topic based on various levels of investment. If you follow the plan I outline below, you won’t fail or be mislead into bad purchasing decisions. This list is based on years of discussions with people, consultation with clients, and testing a variety of this gear myself. As previously covered in a past article, we’ll start with the level where you are completely new to making electronic music and then build up from there. If you need guidance beyond first levels, scroll down to see tips for larger budgets and more advanced levels of producing. Just remember, the type of studio electronic gear that you choose to use will have a profound effect on your sound.

Level 1 kit: The beginner Studio Electronic Musician

Your level of knowledge:little-to-none; you’re contemplating making music.

Includes: Laptop, DAW and Headphones.

Music really doesn’t take much to get started with anymore. There’s a myth that many people believe, that the more equipment you have, the better the music you’ll make and thus it’s waste of time if you don’t have much money to invest in the early stages. This is false, I know some pretty amazing music that was done on the cheapest setups you can imagine. Remember, studio electronic music started as a DIY endeavour, in cultures that were not traditionally wealthy.

The only thing I’d strongly encourange you to do is get a demo version of Ableton, Reason, or Bitwig to see which one seems the best for you but my personal pick will always be Ableton, which I’ve been using since 2002.

For your laptop, if you can invest in one, I’d say try to get a PC or MAC with at least a i5 or i7 processor and an SSD hard drive; this will make a tremendous difference in how you’ll be able to manage the needed resources. Plugins and software are mostly dependent on a powerful CPU to process information, while the fast hard drive is to access how the samples are read. If your hard drive is slow, it can create bottlenecks if you’re reading large files. An external SSD is critical should you rely on something not internal. Also with regards to RAM, the higher the better. At the moment, I find that a minimum of 6gb will make a difference but if you can get more, that’s even better. High RAM is also a critical part of how smoothly your DAW will run.

Harddrives & Laptops For For Studio Electronic Music

You’ll need a good pair of headphones. If you don’t like making music, you’ll still have a good pair. I find that it can be misleading to not invest much in it so if you can, get the best you can get. I propose here pairs for different budgets.

Headphones

Level 2 kit: Getting confident In Studio Electronic Music

Your level of knowledge: You’ve made some songs and you start to feel limited by the level 1 kit (headphones and a laptop).

Includes: extra software/plugins, Speakers, MIDI controller.

Ok, so now you know you want to do this as a hobby or more. I think it’s important to have better monitoring than just your headphones so getting speakers should be among your next priorities. There’s nothing more important than to go to your local shop and spend time testing a few pairs of monitors with music you know. So get your phone ready and go listen, then you can make a decision and buy. My personal favourites might not work for your style, but here are some of them, including some for different budgets.

Just make sure that the music you listen to is similar to the type you will be making, since your studio electronic music will be influenced by whatever you get. 

Speakers & Monitors FOr Studio Electronic mUsic

MIDI Controllers

A good investment is adding some controllers for your DAW so you feel a bit more physical about how you interact with your music. This can go from a pad based midi controller, to a keyboard or a midi mixer. It really depends of what you do with your music but any of these will be useful somehow.

If you’re serious about your music, you will want some original material and investing in good synths is important; you can then combine controllers with sounds. KOMPLETE by Native Instruments is a powerful investment that will pay off for years to come. Otherwise, Arturia is also quite amazing.

Level 3 kit: The Studio ELectronic hobbyist

Your level of knowledge: You’re able to make music and finish songs, you spend considerable time making music.

Includes: extra software/plugins, Gear upgrades.

At this point you can make music, finish songs, and perhaps getting some of your tracks signed to a label. This is the stage where most of my clients are at. In general, their needs are pretty much the same. Many haven’t invested in good monitoring, either a proper sound card or monitors. A quality sound card/interface will make a big difference in the quality of your sound; this sounds pretty obvious but many people I work with still need to be convinced…until they get one and come to me to say I was right! Sound cards aren’t like monitors, it’s not a question of personal tastes but a matter of understanding what you need. The very first question you should ask yourself is “how much gear do I need to record?”, because that will determine how many inputs you need in your interface. You could always get a little mixing board to get all the audio in then route it to two stereo inputs, but some people prefer multiple audio in. In other words, studio electronics matter.

Audio interfaces & Sound cards

Most basic audio interface: Focusrite

Focusrite Scarlett-Solo Gen2 USB Audio Interface

Picture of Focusrite Scarlett-Solo Gen2 USB Audio Interface

Medium budget: MOTU – who also make killer converters for recording.

MOTU MicroBook IIc USB Audio Interface

Picture of the MOTU MicroBook IIc USB Audio Interface. It's an excellent piece of studio electronic gear.

My personal suggestion is to go with UAD Apollo Twin, which also gives you access to all their plugins and outboard CPU power. This is a solid piece of studio electronic gear.

I find that at this point, investing in software to define your sound and to get out of your DAW’s internal sound is a great move. Some companies I love are U-He with their amazing synths such as Diva, Bazille or the Presswerk compressor. I am also on the Plugin Boutique mailing list to get daily discounts on software. Not only do I learn about what exists, but it then also becomes possible to get discounts for plugins I’ve had my eye on. Following KVRAudio is also an essential habit. They are masters of studio electronic gear.

Level 4 kit: The serious bundle FOr STudio Electronic Music

Your level of knowledge: You’re getting very serious at it and want to be semi-pro.

Includes: extra software/plugins, Gear & studio upgrades.

At this point, you have an organized your studio and all essentials are covered. Usually this is where you’ll feel ready to invest into more gear such as modular synths, synthesizers, external effects, and fine tuning what you already have. Before anything else, I’d suggest you make sure you have something to cover your low end. If you have neighbors and still want good relationships with them, I’d go for a Subpac:

Bass & Subwoofers

This thing has really been helpful at home and helped me get more precise mixes; there’s this more expensive wearable version, or a cheaper version for your back while sitting in a chair. It’s a piece of gear that gives you a physical impression of having a sub. If you can get a sub though, that’s even better. I can recommend many, but usually something like the Yamaha HS8s Studio Subwoofer will do for a home or small studio.

Nailing the low end is really an important part in solid sounding music, and you can only get there by being able to hear what’s going on down there. To adjust it, you won’t really need to hear it as much as feel it, which is what the Subpac also does.

Synthesizers

In terms of synths, there are many great ones out there. If you can get to a shop to test some in person, I recommend you do so. I can explain in my own words the technicalities of sounds each synth can make, but test driving a synth is the best thing to do, to really know if it will fit what you do. I think my view on this is that when you get a synth, it will become an important part of your artistic identity. I’ll list some of my favorites, based on different branches and aesthetics: Roland, Korg, Moog, Elektron.

TIP: Always search for demos of the synths on Youtube to see how they sound!

Roland: aesthetic – classic sound

A staple player of the electronic music world, Roland basically shaped the beginnings with drum machines and the tb-303, source of the original acid tones or the Juno that shaped Trance/deep techno. After being silent for years, Roland has returned with force, deploying super solid products such as Roland Aira TR-8 Rhythm Performer for the 808, hugely recommended if you want classic kicks. The sound is very classic, clean, and efficient. I would recommend the Roland GAIA SH-01 Synthesizer which has made a big comeback in many genres in the last few years and is far from being out of date.

Korg: aesthetic – edgy, modern, clean, warm

Let’s cover the basics of Korg as I know some of them. The all favorite at the moment is definitely the Korg MS-20 Mini Semi-modular Analog Synthesizer which is a good cross of analog synths because of its patching options. It can sound very modern and experimental but it can also sound old school 50’s spooky sci-fi. There’s a bit of a learning curve but the investment is very rewarding once you dive in it. Very unpredictable at times, it can provide many outstanding ideas. These happy accidents define so much excellent studio electronic music, as well as live electronic music.

Another one is the Korg Minilogue 4-Voice Polyphonic Analog Synth which is a super slick synth that sounds very clean and modern. It is able to make tight basses and warm fuzzy pads. Excellent for techno.

There’s also the cheaper version as well too. Finally, super useful and fun is the Volca series. There’s a nice little FM synth in this series – a very powerful buddy that can provide really warm tones.

Moog: aesthetic – Fat, rounded, electroish sound, vintage and gritty)

Moog is a staple for its name and the legacy it’s left over the years in so many songs we have all heard. Fat and dirty basses are often from Moogs and bold melodies are pretty much a trademark. If you want to dip your toe in the modular world, the Mother is a great machine to get. Its sounds really, really warm and thick plus its patching board is well designed that you can get started intuitively. The Moog Sub Phatty is another favorite of many for the name it carries, and what you get in return. The Moog Mother is another beast that can make extremely powerful sounds, from basses to kick and leads. it’s also a good step in the semi-modular world if you’re looking to make some hard hitting studio electronic stuff.

Elektron: aesthetic – Berlin techno, modern/underground dance music

This company is the current leader for studio favourites. It’s defining a lot of the current techno tracks that are being released. The main bad boy here is the Elektron Digitakt. There are two things that define the success of this monster: it sounds right and the integration with Ableton/DAWs makes it an ideal desktop companion. If you have the budget, you could also get the Elektron Analog Four which is another beast. Crazy possibilities on this one and a resource to do pretty much anything you want.

SEE ALSO :   Equipment Needed to Make Music – Gear vs. Experience vs. Monitoring  

Music production techniques: Non-Linear Production

It’s been a while since I promised a post about one of a number of music production techniques I use: non linear music production. The very first album I did using this technique and really sticking to rules of it was Intra; and then I recently went deep in to produce multiple EPs in the same vein of non linear production, which were made between end of December 2017 until March 2018. While Intra was an album of 23 songs made over nine months, my last experiment produced 19 tracks over 3 months. I think I’m getting better at it, mostly because it’s becoming clearer in my mind.

Out of the 19 recent tracks, I kept 8 for this album – which you can hear above – I named Returning Home; a statement about home being a state of mind and not necessary a physical place. I’ve been making techno/dance music since 1998, and after diving into more electronic soundscapes, experiments, and ambient music, it just felt good to return to my roots. A funny thing also – I tried working with some other labels to find it a new spot as I wanted to keep my label Archipel for more down-tempo stuff, but I kept getting refusals or complicated compromises. I’m too stubborn to change things and since this album was made based on a very solid concept, I didn’t want to go back and change what felt good.

But back to the non linear production technique. I’ll cover how the process went, from the beginning of where I started from scratch until the end.

I know some people who are like, “but I don’t need a technique as I just do music.” Sure, that is not for you then. But this technique can bring benefit if you’re looking to expand your production. It surely contributed to make me more prolific through time.

Non-linear music production – A concept

This concept (which has been around for decades according to some research I did), encourages the producer to explore working on multiple songs at once, in a non-linear way.

This means that:

  1. You aren’t working on a song’s beginning first to bring it to its end, before starting a new one.
  2. Each track is approached individually for its needs but you also work globally. Keep in mind that what you did in the previous track should differ on the next.
  3. The technique is about repeating the same phases/rounds until you get a solid core. Then there’s the finalization to get ready for mixing.

It’s called “non-linear” because you constantly circle up in a series of rounds, on multiple tracks, all at once.

Note: A non-written rule also implies that working on a track should be done in short periods such as 20-30 min at a time on a song, then stop, save and move on. Why? Because it keeps you fresh.

For many people I explained this to at first, it felt unsettling and confusing. There’s some kind of embedded belief in people that when you go make music, you should find your idea, absolutely stick to it, and build it into a song; beginning at start and bringing it to an end. I usually see people’s projects having a few blocks right at the beginning of the track and then they get lost.

The number one thing I hear all the time: “I can make a great loop but don’t know what next.”

I’ve written a post in the past about this. However the non-linear technique is really aimed at making the loop issue something of the past, because it’s all about transforming small ideas into bigger concepts.

But where does it start? How do you begin?

Before diving into producing, let me explain the rounds of the non-linear music production technique, as this is what it’s all about:

  1. Content creation, generating ideas.
  2. Filtering ideas into a concept.
  3. Building a core loop.
  4. Template structure.
  5. Arrangements.

When you decide to create your project, the first thing you should do is decide on your project type. Is it an EP (3-4 songs) or LP (5-10 tracks)? Perhaps you just want to make a bunch of tracks; I personally believe that we should never make just one track at a time. If you have no precise project, invent one, such as “I’ll make 5 tracks for fun and want them to be mainly techno.” Once this has been decided, you’re ready for content creation. I usually spend a considerable amount of time in content creation and idea generation.

You can also start from unfinished tracks that you want to apply the idea to. The idea is to work on multiple projects in parallel. I usually it works best if you have at least five on the go, but there’s no limit of course. To newcomers, start small though to see if working this way works for you. The technique is about to bring your track from a simple idea to a finalized but unmixed, song. The mixing is not part of this. I find the mix down works better if you don’t do early, it but perhaps it can. Don’t hesitate to build a reference folder where you put songs that inspire you.

Content creation, generating ideas

From all the years of listening to music, running labels, doing mastering and DJing, I’ve come up with a theory: a solid song is – in general – a single, solid idea, supported with two others. The main idea can be a loop, a motif or even a sound. I remember Hans Zimmer describing a motif by saying it has to have an emotional impact on you, that it reappears in your mind later on. He was saying that the Batman motif he did was a simple two notes, but very powerful. You’ll play them and you’ll automatically think of Batman. The two other ideas are necessary because a song usually needs a development and a “surprise.” That said, in this production technique, you need to create fresh ideas. Lots of them.

I made a very long post about how to come up with new ideas but I’ll sum how I did mine:

  • Recycling older ideas: I have countless samples that I’ve used or never touched. I like to process them into new sounds.
  • Recording radio or other spaces with a microphone: When I’m in a creative mood, I’ll spend a lot of time recording sounds around me from that period of my life. I’ll leave the recorder somewhere for an hour to see what comes up.
  • Try demos: I love getting demos and try to see what I can come up with it by sampling them. Some have limited time or others are in days. It forces you to resample the hell out of the work and get something. Sometimes I end up buying it of course.
  • Pure sound design: Layering sounds from different takes is a great way to generate rich sounds. I do this a lot but its time consuming.
  • Jamming with the sounds: When I have plenty, I’ll generally put the sounds in a sampler and jam them with a midi controller or PUSH. I’ll record everything I do into a project.

A project that has many ideas will be recorded with the date of the day for the jam. It might turn out that I have a few hours of material which means there’s hypothetically 3-4 ideas in there.

The definition of done (DoD) of this phase is when you have a project with 3-4 ideas ready to go. I usually do one session per track needed for the project.

Filtering ideas into a concept

This phase is one that you need to do outside of jamming. Why? Because when you jam, you’re in your creative state (right brain) and have tons of ideas but your judgement is off. You can’t be a judge then. You need to feel free and explore without boundaries. This second phase is about going into a more analytical side where you will be curating your crop.

  1. Go through all recordings you’ve made and loop part of it. The question is, can you listen to a loop and feel inspired? If yes, you have something to hold on to.
  2. Use different size loops like 1, 2, 4 bars. Compile different ideas.
  3. Use the session view to make scenes of loops you like.
  4. Try to see if certain loops, once layered, make unexpected motifs.
  5. (optional) Add a kick & hihat to give you an idea of the groove and adjust the timing of the loop.

The definition of done (DoD) of this phase is when you have a few scenes in your session view that feel solid.

*Note that you may go back to create more ideas (Round 1) to complement what you have. You may also create a pool for all ideas of all sessions and then make ideas from that. No rules here, only possibilities.

Building a core loop

At this point, you should have X number of projects (based on your project definition you decided on at the beginning, i.e. EP, LP, whatever), each with material that has been organized into 2-3 ideas. Now comes the moment to put it all together.

The loop you’ll build here is the middle part of your song so it should have all the bells and whistles.

  1. Add a foundation. The fundamental part of your song is the low end and the bass. From the main idea, add a bass that either supports or responds to the idea. Adjust it so it’s in key.
  2. Add percussion. Complementary to the bass, you may add kick, percussion, or anything complementary of what will create the groove. I usually start right away to decide what groove template I’ll use on this core part.
  3. Add melodic touches if needed. Decide how long your melody will be and how it progresses (if it does).
  4. Create a background and space if desired. This is usually the reverb and textures. However, this can also come later on.

The definition of done (DoD) of this phase is that you have a main loop that you can place in the arrangement window, right in the heart of your song (which means you need to know roughly how long it has to be). A good loop is one that is centered around your motif where if you solo that part, it would be what someone would talk about to describe your song.

In the process of working through the core loop, you might need to go back to create more content or you may import some from other sessions.

Template structure

Now that you have the core part of the song, it’s easier to build out the remaining structure. In the arrangement view, create three sections: a beginning, middle and end. You will now lay out your structure to have an idea of what you can do with your core idea.

  1. Copy the elements from beginning to end  that will be present the whole time through the track.
  2. Work backwards by deconstructing the timeline of what comes in first and so, until you get to the middle part.
  3. Do the same process until the end. You may repeat some elements.

The definition of done (DoD) of this phase requires that you have a temporary structure from beginning to end. It might take you a while, I encourage you to do sprints of 30 minutes at a time. The problem with working too long on this phase is that you lose perspective regarding the strength of your song. I usually want some sort of structure to come out of this phase, but I may go back and forth with the other phases until I am happy with it.

Arrangements

This is the final phase. You might need to come back to it as everyone has different needs that will arise in this process. Arranging – in simple terms – is creating the story-line of your song, but also between songs for your project! How do your tracks relate to each other? I have songs that have brothers and sisters, while some are from a completely different family.

After working on the arrangement of song, the last thing I do is export what I’ve done so far. When I switch to another track, I import the last session in the arrangement to see what I did and compare. I adjust the arrangements so all my tracks don’t have the same structure; beginning, breaks, and punches. I adjust them so they can be fun for DJs to mix too.

Arranging is a massive topic that I will detail in a future post and is involved in most music production techniques – but this explanation is a full conceptualization of how I work. Hopefully it helps you somehow too!


SEE ALSO :   Non-Linear Music Production