Pheek’s Guide To Making Dub Techno

I think making Dub Techno is one of the most requested blog posts I have been asked to do, and for years, I resisted it. I think there was some sort of shyness and perhaps, a lack of technical vocabulary on where to begin when teaching others how to make Dub Techno. But I think it’s time to take a chance and open up on all the ideas I compiled about my beloved Dub Techno direction.

This post won’t necessarily explain how to do the typical dub techno. While I’ll cover some of the most asked questions about it, I want to expand on the philosophy and aesthetic itself so you can take the best part of it and merge it into how you work.

Origins of Dub Techno

Before we get into how to make dub techno, it’s very important to me to honor the artists who were behind the genre and to talk about where the genre started. For this, there are some nice videos by Dub Monitor. There are these 2 videos that explain the origins of dub techno better than I could about how the genre started and how it developed.

Dub techno is a subgenre that emerged from the fusion of two influential musical styles: dub and techno. Dub music itself has its origins in Jamaica in the late 1960s, with pioneers like King Tubby and Lee “Scratch” Perry. Dub music is characterized by its heavy use of effects, echo, reverb, and the manipulation of existing tracks, often stripping away vocals to emphasize the rhythm and instrumental elements.


The Techno Connection: Techno, on the other hand, had its beginnings in Detroit in the early 1980s, with artists like Juan Atkins, Derrick May, and Kevin Saunderson. Techno is known for its repetitive beats, synthetic sounds, and a futuristic, often industrial, aesthetic.


The Emergence of Dub Techno: Dub techno began to take shape in the early 1990s when electronic musicians started experimenting with the fusion of dub’s spacious and echo-laden soundscapes with the rhythmic patterns and synthetic textures of techno, thus making dub techno. The result was a genre that retained the hypnotic beats of techno but incorporated the atmospheric and dub-infused elements.


Basic characteristics to consider while making dub techno: Dub techno is characterized by a few key elements:

  • Reverberating Soundscapes: Dub techno producers use extensive reverb and delay effects to create deep and immersive sonic environments. These effects give the music a sense of spaciousness and depth.
  • Minimalism: Similar to techno, dub techno often relies on minimalistic compositions with a focus on repetition. The use of minimal elements allows for a meditative and trance-inducing quality.
  • Subdued Rhythms: While techno can have a pounding and relentless rhythm, dub techno tends to have more subdued and laid-back beats. The rhythm is often more relaxed and groovy.
  • Incorporation of Dub Techniques: Dub techno incorporates dub’s signature techniques like echo, dropouts, and phase shifting to create a sense of movement and exploration within the music.


Notable Pioneers: Some of the early pioneers of dub techno include Basic Channel, a German duo consisting of Moritz von Oswald and Mark Ernestus, and their various aliases like Maurizio and Quadrant. These artists were instrumental in shaping the genre and creating its distinctive sound.


Global Influence: Dub techno’s influence quickly spread beyond Germany, with artists and labels from around the world embracing the genre. Labels like Chain Reaction and Echocord played a significant role in promoting the making of dub techno, and artists from countries like Sweden, Finland, and Japan contributed to its global appeal.


Obsessing on the “How-To” While Making Dub Techno

Over the last 25 years, I’ve come upon multiple and countless discussions online about how the genre is made. People would discuss what piece of equipment was used and be obsessed with recreating the original sound. While this is a state of mind that I totally get – because I also get obsessed about how certain sounds are made – I can’t help myself asking why would you want to redo the exact same results. In a way, it explains why the genre never died in the last decades. There are always people who keep making dub techno.

I think there are a few motivations to join the sound of dub techno. On one side I see it as a self-soothing experience and on the other, by passion, to join others who also make it.

But my take is that people are puzzled about how something that sounds so simple can actually be so mind-boggling to do.

The Main Aspects Of Making Dub Techno

I’d like to cover multiple techniques and strategies to infuse your music with the dub techno approach while also making sure we apply certain tweaks that can make your music have a similar aesthetic.

The first thing to explain is that there are 3 main categories to consider while making dub techno:

  1. Sound Design
  2. Modulation
  3. Colour.

Dub techno has its own touch and sound which will be explored below.

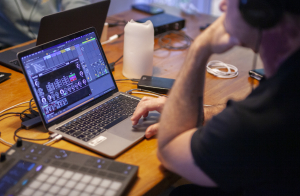
Dub Techno sound design

One of the main characteristics of dub techno comes from the pads and stabs that are fuzzy, melancholic, and enigmatic. In itself, those pads aren’t necessarily that complex to do. I found numerous tutorials on YouTube and have 3 of the ones I prefer. I find they’re well explained and show in similar ways, how to reproduce them.


How To Make Dub Techno Chords

As you see in those tutorials, the way the synth is configured, is rather simple  – it’s usually one chord that repeats, but it has specific modulation and color, as I explained earlier. Once you start experimenting with this pad, you’ll already be in business and have the basis for making dub techno.

But honestly, when I found out how to do it, I thought it would make more sense to be inspired by those techniques but to go a bit deeper into the sound design.

In my past dub albums Tones of Void, Intra, and White Raven, I basically used a bunch of synths but kept them very dark in tone (eg. lower notes around 1-3 octaves) with not too many harmonics (eg. filtered). Once you understand that any synths can do that, you won’t be limited to the classic sound of dub techno.

How to make dub techno melodies

When it comes to melody-making, there are multiple approaches. There’s the classic one note (yes, one note) from the old school dub techno (Basic Channel, Chain Reaction) and there is also a more structured approach (Pablo Bolivar, Yagya), almost pop-oriented dub techno. Both work but the harmonic nature of the melodies are often in a minor key, with the root key of D being often a popular choice.

How to make dub techno bass

While making dub techno, bass is often, also very simple, with it being than often than not a one-note thing. Simply using sine oscillators and pushing them forward in the mix will often be the aesthetic of dub.

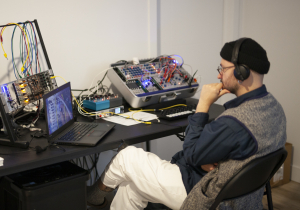
Dub Techno synth options

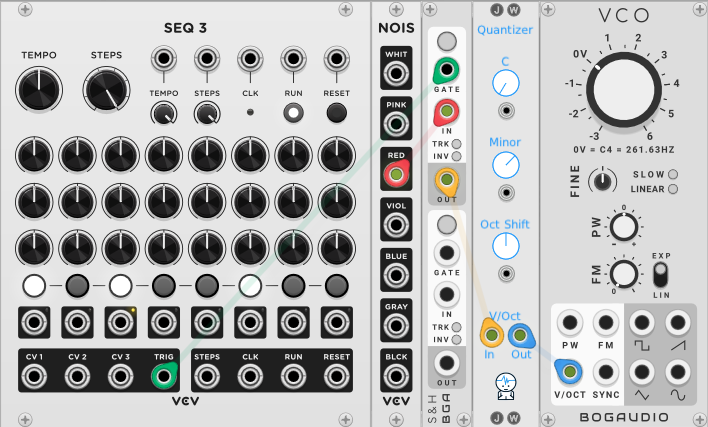
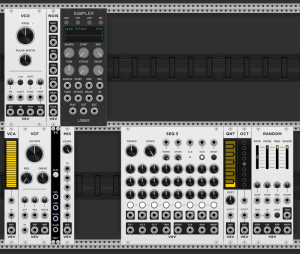
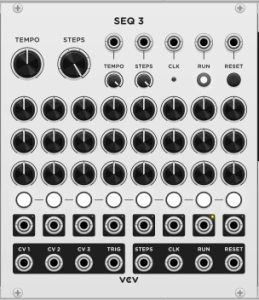
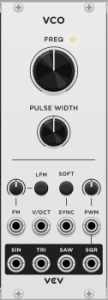
As we saw in the 3 videos, dub can easily be created in any context with any soft synth. Over the years, I have tried and tested many of them. While the native plugins of Ableton can do the job, VCV has been my playground but it’s not for everyone even if it’s free and there are so many tutorials out there. Here are some of the soft synths people love.

  • Diva:  So many tracks I hear in mastering use Diva. It has a distinct sound but in a good way. It sounds warm, and lush, and is close to some hardware options. It’s pricy but you get that sound we love.
  • Pigments: Pigments is versatile, open, powerful, and extremely creative. There is a huge playground here with the option of a preset store within the synth itself.  You need to work a bit to get the dub sound but it sounds nice.
  • TAL-U-NO-LX Synth: Juno has been used over the years as a default synth for dub techno, mainly the chords. This synth option works well and is close to the real thing.
  • Go2: Cheap in price but with big results. Even the presets will give you some nice options to start with. I love this one.
  • Blue-III: Rob Papen again and this one is deep. Not for the beginner as you can easily get lost in it but the sounds you get are very impressive.
  • Prophet VS-V: Not many people know but it was said that the Prophet VS was what the early guys of Chain Reaction were using. When there was a VST version of it, we were all drooling. While it is very powerful and nice, it is not the easiest to program. But the sound is very impressive.
  • Prophet 5: This is a synth we all used for years in the early 2000s when we wanted the dub sound. It aged so well and it’s fun to use. You get tons of options for synths, pads, and stabs. Recommended and often on sale.
  • Orange Vocoder: This is not a synth per se, as it is of course, a vocoder but this was used by so many people as you can basically throw any sound in it and this plugin will turn it into a lush synth sound. Really powerful and a nice alternative to just synths.


Dub is a vibe and an aesthetic, not a bible. You take the aesthetic and apply it to any sound.

Once you pick your aesthetic, you can apply the concept to any synths you have.

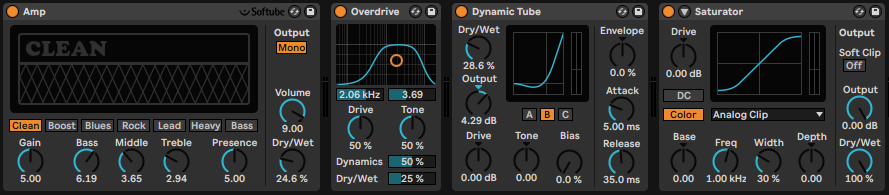
What you need is to create and amplify your harmonics with saturation (tube and tape do great), then have a colored filter and sent to delay and reverb for cosmetics. This means that if you have any synth of yours, you can make it dirty with a saturation and then filter it. The reverb will then do the trick.

What will make a difference is to juggle with the most genres of saturation: distortion, amp and saturation itself. Using a combination of the 3 will bring really lovely colours but be careful not to overcook your sounds. Keep in mind that in mastering, it will be boosted so what sounds like a pleasant distortion can become overwhelming later on.

Some of my saturation go-tos are below.

Saturation plugins used in making dub techno

  • Surge XT: (FREE!) This is a collective of developers who managed to create a badass synth and free, high-quality, effects. Their Chow Tape is quite amazing but also all other distortion/saturation tools. A must-have and hey, it’s free.
  • RC-20: This one came in popular in the lofi hip-hop community as a de facto plugin to have. It adds lofi vibes but this is an element dub techno also has so the cross use is totally on point.
  • Reamp: The guys behind this are very solid and this one has a beautiful series of plugins which are all very solid. I like the colour this one has.
  • Saturn 2: Anything Fabfilter is a leader in its domain. Saturn is not an exception, as it is very good at what it does, which is to make anything too pretty, a bit uglier, dirtier.
  • PSP Saturator: PSP is one of my favorite company for their plugins. I love their EQs and compressor and this saturator does a great job on pads.
  • Satin: This is such a handy tool here. It is tape saturation/simulation, but also a tape delay which can create weird reverbs and wobbly signals. Once you start using it, you’ll be using it all the time.

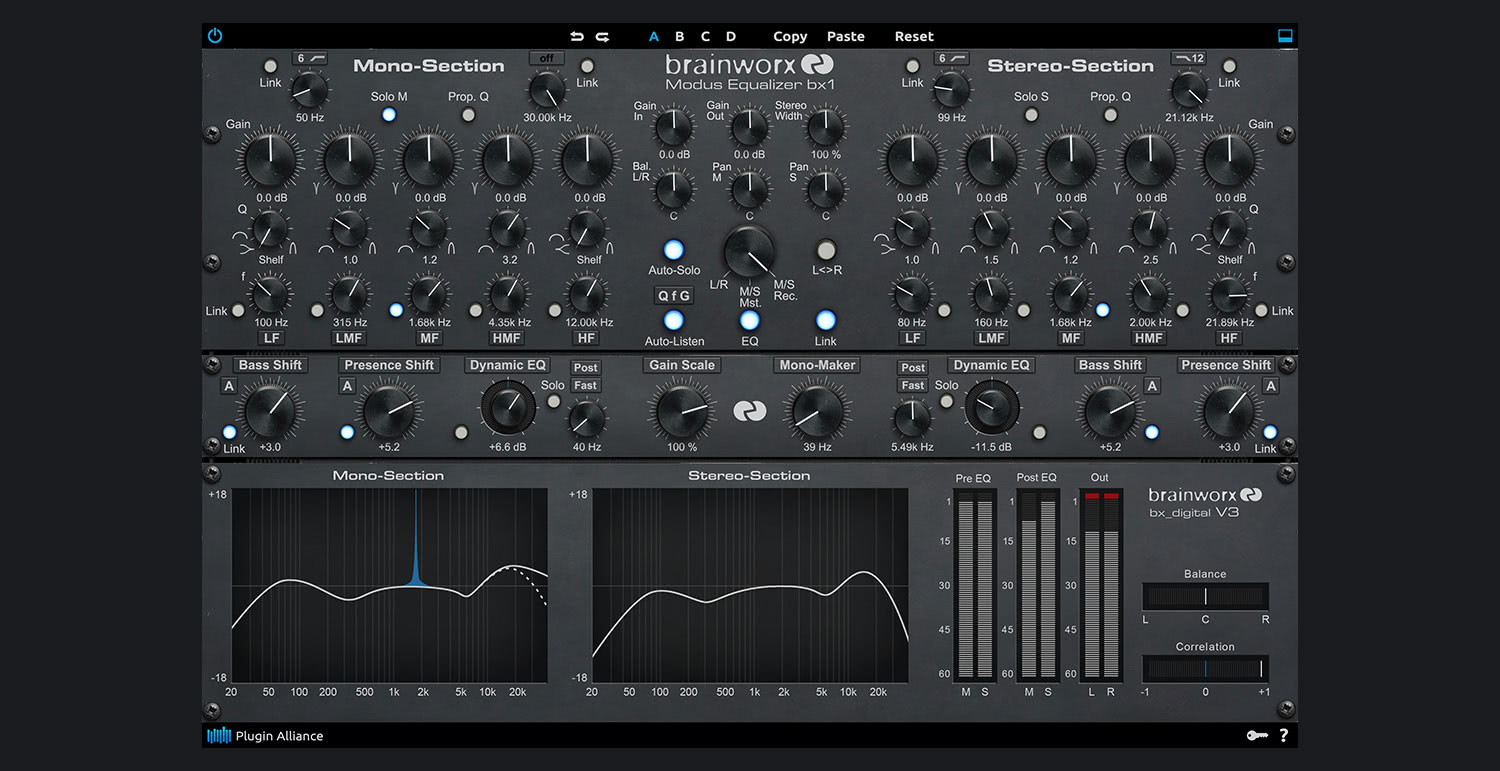
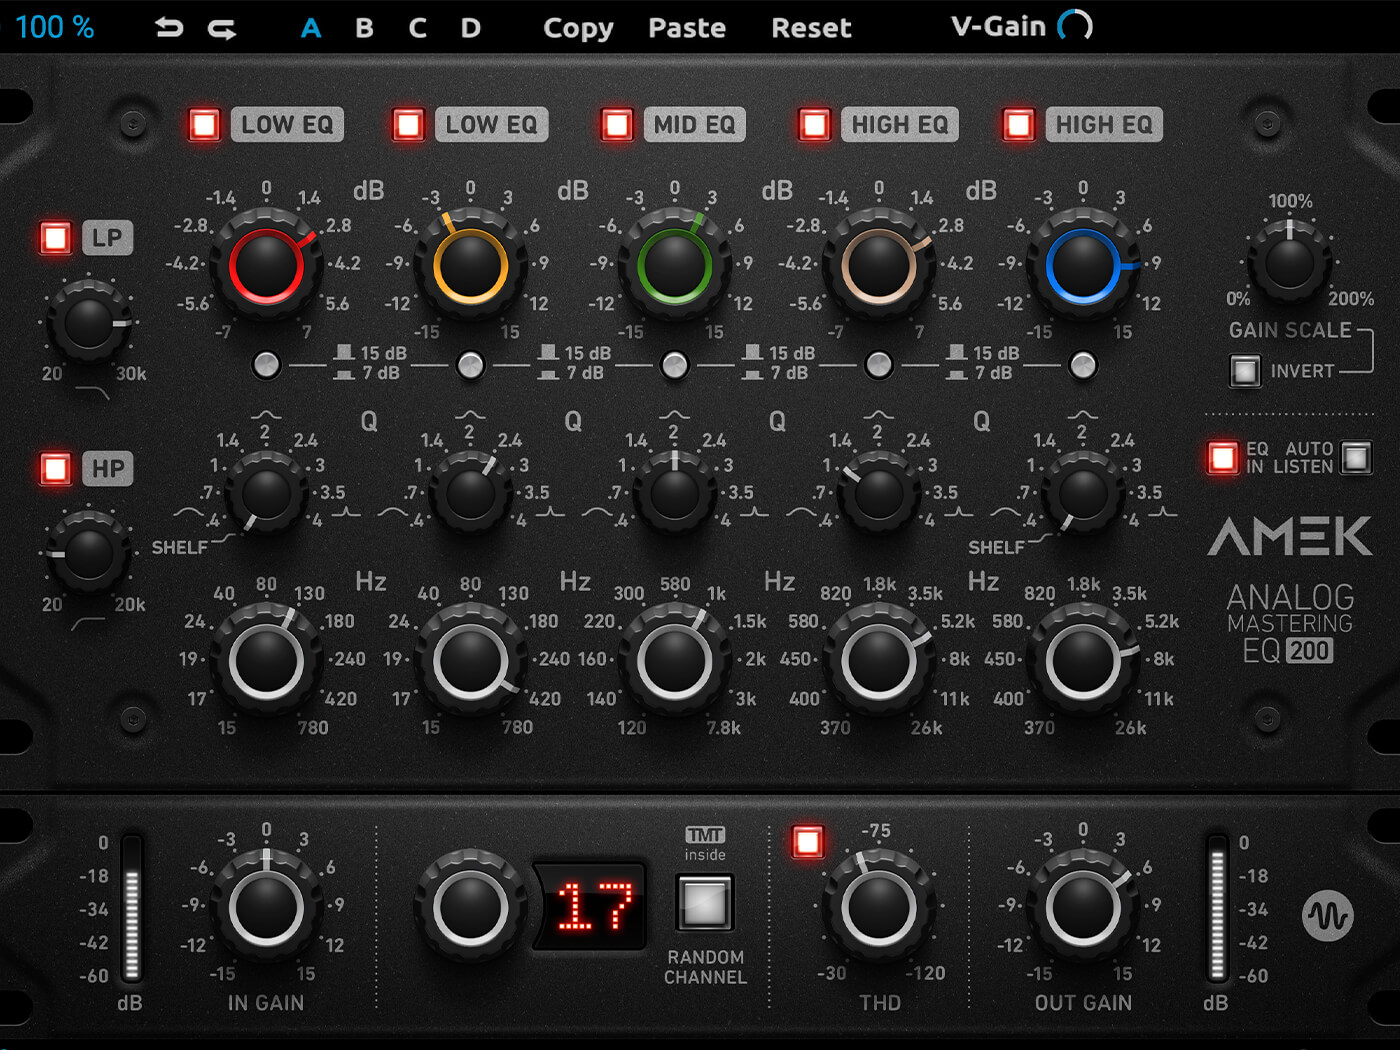
Reverb plugins for dub techno

While Ableton’s reverbs option can do the job, I always rely on third-party VST for that part. It’s hard not to mention Valhalla plugins for this. The Supermassive is free and the Digital Reverb is sort of a perfect match for dub. If you have to pick, I would recommend experimenting with “plate” models and some use of a “hall” as well for sustained notes.

Whatever you do, to me, Dub Techno really starts with a heavy use of reverb, which has to be modulated, filtered, and distorted. Understanding how to use your reverb and combining it with a delay will ensure that you have a proper dub mood. If you pick the reverb properly, you almost could say that you have 50% of your job done. The rest are the sum of a lot of details but when you have your reverb done right, you’ll automatically feel you’re making dub.

Anyone who knows me has heard my affectionate passion for reverbs. I compiled some of my favorites for Dub Techno.


The saturation tools native to Ableton aren’t too bad but can be recognizable easily by an educated ear.

  • Lexicon 224: I’m a big fan of Lexicon. It has a character and tone that I love. Not sure what it is, but the grain and how it feels just does it for me.
  • Springs: Spring reverb is a type that makes sounds sent through it, sound liquid. This works well with percussive sounds and you’ll feel like some classic dub vibes.
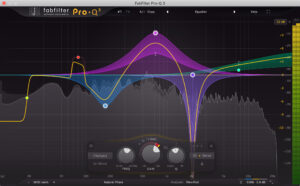
  • Fabfilter Pro-R: This one is amazing for spaces. It is a powerful tool to shape grandiose halls and give tremendous space.
  • Adaptiverb: There’s different tools on that ones that makes it unique. It has a big array of presets that are tuned to a root key, which can create pads out of unusual sounds. Quite unique.
  • SP2016: I call this one a Cadillac of reverbs. It’s elegant, warm, very ear pleasant and very visual. I feel immersed when using it.
  • bx_rooms: Extremely versatile but the interface can be intimidating. It has lovely options for different room types.
  • Blackhole: This one is spooky, deep, powerful. It is a reverb that makes you go in space as it sounds pretty sci-fi, rich, and gigantic sometimes.


Now reverbs for dub are essential but you’ll need delays as well. You can either use long delays or short. There’s no right or wrong but the use of delays helps you take very simple sounds and create repetition, which transforms the straight-forward pattern into psychedelic equations. Delays, combined with reverb, create a thick background and will make any sound – which feel empty at first – fill with a velvety, dreamy carpet. I think for a lot of fans of the genre, it’s a quality they’re after.

Echo and Hybrid Reverb in Ableton. They can do a long run if you don’t want to break your piggy bank.

Additional plugins for making dub techno (delays, pitch modulators, etc).

  • Diffuse: These guys are dub lovers and this tool here is a go-to for reverb/delay as it’s an emulation of the famous Roland Space Echo which was in so many studios.
  • Modnetic: Same guys as above. This one is a combination of all your need in one place to turn a single, boring sound, into a dub tune.
  • Echorec: The guys at Pulsar are very competent at recreating hardware toys and they created a tape delay with self-oscilating, magnetic fields and all you wish for in a dirty delay.
  • Galaxy Tape Echo: This is UAD’s recreation of the Roland Space Echo and it is really well done.
  • Tal Dub-X: As the name implies, this is a station with all the options to turn a simple delay into a modulated one.
  • Echo Cat: Another beautiful emulation of a tape delay. But a really solid one.
  • PSP 42: Popularized by Richie Hawtin in the early 2000s, where he’d loop-delay sounds and pitch them up/down, the PSP42 was used abusively in all his sets for years. Rich was basically doing dub techniques in his own way.


Modulation in dub techno

If you just take any synth sounds and send it to your effect chains, you have done the first step but it won’t be complete until you make it move, react, and evolve into modulations. There is a lot to take in in this section because this is also one of the most discussed topics in my blog – I have covered it inside out already but you now know why, because Dub Techno is all about modulations. Once you dip your toe in those waters, you’ll become excited about it and apply it everywhere.

If you watched those tutorials on how they make the dub pads and chords, you’ll see that they use modulation on the filter. There is both use of an envelope and LFO to modulate the frequency of the filter but also its resonance. That’s just the tip of the iceberg to me. If there is a parameter on a plugin, I like to think that it shouldn’t remain static and have it move, even a little bit.

But of course, a lot of this can be handled by my favorite “Swiss army knife”, Shaperbox which is designed for modulation on all levels. A must-have.

When to use envelopes and LFOs when making dub techno

Well, if it’s a modulation that is reacting to an incoming signal such as when a sound comes in, I want the filter to react, then you’ll use an envelope. That kind of modulation is excellent for accentuating or attenuating sounds, creating a more organic feel to the processed sound.

If you want constant movement, LFOs are excellent for that. They just move to the tempo or not. They give the illusion that things are constantly on the go and help blur the lines of linear arrangements.

There’s one precious bundle that I love from Make Noiss that has so many little tools, perfect for modulation and midi signal processing. Not to forget my friends at Manifest Audio and their large array of max patches as well that are perfect for modulation but they also curated many racks for dub.

The 3 Amigos are here to turn a static idea into an animated figure.

Colours of Dub Techno

I know you might be confused by colour here as we discussed of saturation as a form of colour but this is the last touch. The colours here are from different sources else than saturation and also, very complementary. What I’m referring to are the effects of the chorus, phaser, flanger, tremolo, vibrato, auto-pan, harmonizer, wobbler, and also, one of the most important parts which is the hiss. Apart from that last one, all those effects are often heavily used in dub and it’s quite a nice touch to pick one or 2 on your sounds.

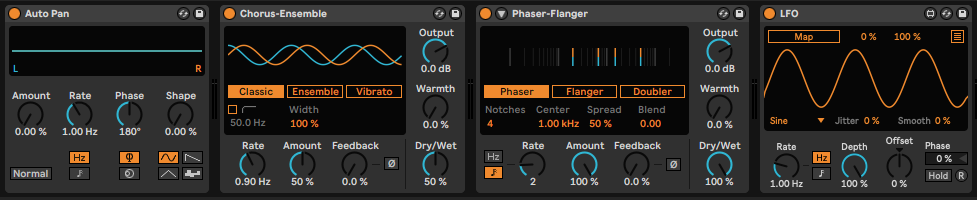
These guys are a lot of fun and sound pretty lovely.

Chorus, phaser, and vibrato

Chorus, phaser, and vibrato work really well with synths, pads, stabs, and chords. They give this engaging, trippy, stereo effect that quite often, makes a dull sound jump out of the mix. Keep an eye to make sure you don’t get phasing issues which would be an overuse of one of those effects. Phasing is quite common in dub and I often fix those issues in mastering. It’s better to control it when decorating your mix.

Flanger

Flanger gives this jet-sound feel to anything. It brings pfshhh sound to metallic or noisy sounds and can be quite psychedelic if used at a low level. I like it on hats and delays.

Tremolo

Tremolos are sort of a secret sauce that everyone underuses. It’s basically a slow or fast modulation of the amplitude of a sound. It is a superb tool for creating 3D feel where you feel sounds go away from you and come back. It turns anything linear into a lively, feeling motion. At a faster speed, it can even be used as a swing/velocity for percussion. Combine it with an auto-pan and you have head spinning spaced out moments.

The hiss part is quite important as well. The noise floor is something deep in the DNA of dub. There are multiple noise makers. You can dig the internet for noise sources, recordings or noise-making tools (RC-20). Satin has a nice hiss that you can use as well.

Conclusion

Making dub techno should be a playground of experimentation. It’s a genre that I approach with a very open mind and so do many other fans as well. While often people feel like they’re just repeating the clichés and perhaps nothing new comes out of it, then I’d say, dig deeper. There are some gems from people who push the boundaries of the genre.

Lessons I Learnt From Hosting A Music Producer’s Retreat

I don’t know about you but when you’re passionate about music, it’s both a blessing and a curse. In one way, it occupies a lot of space mentally and can become a bit obsessive, while it also creates this need to connect with others about it (so you know you’re not crazy). If I look at how things are at the moment, to connect and meet other musicians in the real world, we face limitations on where you can come across them. Perhaps you can meet them in a café, or a record store, but it’s not a sure thing. Realistically speaking, you’ll depend on clubs and festivals to have most music-oriented discussions.

But let’s be real here, the options are limited. Raves and clubs are fun but they’re also recess time where having a chat might be distorted by the loud music, noisy atmosphere, and perhaps distorted by mind-altering substances.

There was a time where I had the chance to have access to a rich community in Montreal, way before social media, where we would hang out after events (not after-parties) to make a meal and talk. We would do studio sessions, collaborate, and share tips. Nowadays, it’s still possible and while social media can give you access to anyone, it won’t assure you that you’ll be able to connect properly afterwards.

The idea of making retreats came to a friend named Fred and I, years ago, where we wanted to leave the city with friends and do a weekend of intense music immersion. We did 2 events and they were successful. We had to stop because of the pandemic but since I moved to the countryside, it became clear to me that I had to continue doing them, but in my home. The idea was to give access to my house, have people stay for a weekend, give workshops, share, discover friends’ music, and see where that leads us to.

I learned a lot in the last two retreats I did and I’d like to share some insights but also, some tips if you want to organize one with your friends.


Lesson I learnt #1: Being in the same place as other musicians for a moment opens up music options and leads you to be curious.

Why make a music producer’s retreat?


There are multiple reasons why one would want to make one. The first is to escape your routine and immerse yourself in a connection with your music, allowing you to start projects and/or finish them. I would say that people who come to the retreat will mostly be motivated to be in a space where others work on music. It’s not alien to say that if you’re surrounded by other people making music, it gives you an inner boost to do the same.

Collaborating and discovering music are also other reasons to throw a retreat.

But whatever you choose to do, I remind participants that there is no right or wrong way to do it. There’s also the option to not do much else than just being around people. However, if you use your time, it will have an impact later on.


Lesson I learnt #2: The reason why I do retreats is to connect with people who have the same intentions as I do, which is sharing passion.


The Loneliness of the Musician

It’s not new, but being alone in the studio is often a hard situation. There’s something frustrating about discovering new ideas but having no one around to hear it or validate it. Modern electronic musicians often go towards that genre because they can be a one-man band as you can get to results quickly but this means that success, or failures, will also be lived alone. Having fellow friends and a community is important to go far in the long run as your network will introduce you to new ideas and opportunities, and spending time in a place over a weekend, sharing fun moments, food, and discussions is a great way to build a community.

Lesson I learnt #3: My writer’s block and tendency to fall into a rabbit hole go away during a retreat.


Technical validation and diversity

Being around other musicians brings the opportunity to see how they work, what tools they use, and which plugins solve certain issues. It’s also a moment where gear can be shared, and you can see how each person handles it, giving it a new perspective.

Ironically, in the last years, I’ve always seen some producers being very secretive to how they work and the gear they use. I find that silly.

No one is the beholder of new techniques and there is nothing done that isn’t already known. Pretty much anything and everything is covered online, either in a blog, forum, or simply on YouTube. Holding on to how you work, in my opinion, reveals a good dose of anxiety and insecurity. There is this explanation that keeping secrets to keep your mysterious image is a thing, to which I say that it just takes a few audio engineers to reverse the knowledge. The only thing that no one can take away from you is your soul, your identity. Tools and techniques are simply there for that part of yourself to express itself. The more you open up to others, share what you know, and create dialogs, you’ll be rewarded by meeting like-minded people who will consolidate what you know with ideas you didn’t think about… because you were self-centered.

That said, people around me during a retreat are always a bit surprised and happy to find out that I have no secrets, and the only thing I want is to see others succeed. The teaching mindset goes beyond immediate success; I want to plant seeds in people’s minds to see what will emerge later. There have been so many times when people that I have coached have come back to me later on with ideas that inspired me while I struggled with writer’s block.

Lesson I learnt #4: Explaining concepts to others help me understand what I do.

The Impact on Creativity


One thing I noticed with people attending is how a sense of flow emerges by the last day. Flow is a mental state where people get into a zone where they create freely and where everything falls in place; where technical limitations seem to disappear and of course, lots of fun happens.

This flow state seems like the ideal way to create. While a continuous flow state may be too good to be true, if we can reach that state once in a while, it is, to me, one of the real goals of the retreat. Because once you experience that state and how you got there, you know you can bring back with you, this way of being as a musician.

Offering workshops is then a gentle push to unlock frustrations. I make sure these workshops are aligned with the technical level of the participants where I can offer tips on what they struggle with.

While we often search for big impacts to feel we have changed as an artist, I notice that the sum of many little tweaks provides more long-lasting results.

Lesson I learnt 5: Ironically, most of us make music to connect with others while we don’t organize enough community related events. Once reunited, goals of finishing songs or other related validation tasks become more than secondary.

Where to organize a music producer’s retreat

Any location could technically work to host a music producer’s retreat, but I would stress the importance of it being at least 1 hour away from home and ideally, in the countryside. There are many benefits from being able to take a break, go outside for a walk, and step back from anything that is too human-influenced (roads, concrete, asphalt, buildings, etc). In my case, I’m in the countryside with lots of land where we can easily walk for an hour before you get to see most of it. It’s like a big park, more or less, but wild and open. Sure, you can record sounds, but one of the important parts is to be able to breathe fresh air.

One option is to rent a cabin with friends. I would encourage you to have people who are in the same mindset as you. You can then have a space for music making and another for eating, and relaxing.

Space is important and having a place where you feel comfortable and inspired is crucial for the ambience.

Lesson I learnt 6: The ideal place is one you know. If you can find a place you’ve been and love, it will be successful.

Intention and commitment while at a music producer’s retreat

It’s easy to get this part wrong but it is probably the most important. One thing we clarify with this retreat is that it’s not a space and time to party. This is something accessible in other ways and the retreat is a commitment to get things done. Therefore, we have this no alcohol policy as well as a curfew at a certain time. Not only did I have no resistance from attendees, but everyone was extremely happy we did this once the weekend was over.

At the opening of the weekend, we had a meal where we all discussed our needs, our goals, and things we would like to do. As everyone talked, I noticed that there was some shyness at first but as we had multiple talks over the meals, by the end of the weekend, people were more and more open to sharing insights, struggles, or exciting finds. We all have the same difficulties in the end, which is why if one opens up, others will relate and follow suit.

Lesson I learnt 7: Having a moderator, leader or experienced musician is the best way to face difficulty while also making sure you can hold space for intentions to remain real.

Unexpected wins

To finish this post, I have learned that working on a song over the weekend isn’t the most ideal approach, I believe. I think there is much more to gain by trying to organize all your songs, macros, and presets and update all of those sleeping tunes in your backup drive. Being curious, trying new techniques, and facing some parts of music-making that are challenging are some of the best things to be in a context where you are supported.

Topics that were very useful and that participants enjoyed:

  • Techniques to start new songs and create unlimited hooks.
  • Sound design and reverse engineering ideas.
  • How to organize an idea into effective arrangements.
  • Mixing a song in 20 minutes.

Lesson I learnt 8: Always accept that there is something you might know enough or properly. Remaining open is a way to always grow.


Testimonials from Participants: Let’s hear directly from those who’ve attended:

  • Marino: “I had an unforgettable weekend at Pheek’s retreat. It was more than just music; I learned a lot of things, met wonderful people from different backgrounds, all of whom share the same passion as me – music. Pheek welcomed us with love and kindness in an amazing landscape, always there to help when we faced creative roadblocks. I recommend it to anyone wishing to develop their skills while leaving their comfort zone.”
  • North Motion: “My experience was simply fantastic. I had the opportunity to meet many artists who, like me, are passionate about electronic music. Beyond the skills I learned, I formed great friendships. Pheek’s retreat offers exceptional facilities in a breathtaking location, and J-P’s knowledge and hospitality are unmatched. I give it a perfect 10/10.”

Turning Efficiency Into Art With Ableton Templates

DOWNLOAD MY ABLETON TEMPLATES:

Production template here

Mixing template here.

Every musician, regardless of their experience level, has felt the excitement of sudden inspiration. It’s an ethereal sensation, demanding immediate translation into audible reality. Yet, how often do we find ourselves navigating from scratch through our Digital Audio Workstation (DAW), struggling to set up the basics when all we want to do is create?

Here, the power of templates in DAWs like Ableton Live becomes apparent.

If you haven’t started using templates, I would like to encourage you to do adopt them into your routine. At first, this might be difficult to master, but with some practice, this routine will pay off.


So, what’s a template (if you aren’t familiar)?

It is a project with or without material, that can be used as a starting point. Instead of starting with a new project, which would be 0% in a scale of work out of 100%, a template would be more like 10% or even 40% towards the completed piece of music. This may be confusing because 40% done usually means having a lot of material in a project. However, when everything is organized properly, you are way farther ahead than you imagine.

Creating an Ableton template

To create a template, all you have to do is open a project, go to the File Menu, and select “Save As Template.”

This will allow you to have your finished project as a starting point to start new projects, vastly speeding up the process and giving you a consistent sound.

Two ways to organize an Ableton template:

Two ways I usually organize a template is to either create a project where I organize in advance everything I need like channels with plugins and settings already set to what I usually do, macros, return channels, and master bus ready. Once this is all prepared, I save it as a template.

The other way is to take a successful project, remove all clips, audio, and automation, and then save it as a template.

However, this isn’t an exact science. It’s also fun to save projects with automations and or other weird settings and save it as a template, as inspired by Matthew Herbert Manifesto.

Starting Fresh vs. Jump-Starting with Ableton Templates


There are pros and cons when staring fresh vs jump starting a project with template.

Many musicians will start fresh every time, perhaps because they don’t know about the idea of using templates or perhaps because they just know that way. Starting fresh offers valuable practice, fostering familiarity with their DAW tools, and enabling a tailored approach to every project. However, there’s a flip side: it’s time-consuming.

Imagine being a painter and having to craft your brush every time you felt the urge to paint. While understanding your tools is essential, it’s equally crucial to be ready when inspiration strikes.

The solution? Find a balance.

By all means, start fresh when the situation permits. But also arm yourself with templates to expedite the process when needed.

Template Idea: Create a project where you add multiple midi channels with each armed with your favourite synths. For each synth, hit cmd+G to turn it into a macro (Group) and map your favourite synth parameters to each knobs. This will ease hands-on control or hit randomize for some new inspiration.

TIP: I would encourage you to grab this selection of free modulators named Mod Squad 2. This has so many useful, essential tools to add to your template.


Ableton Templates: More Than Just a Shortcut


At first glance, a template might seem like just a preset, a way to save time. But there’s no problem with presets and trust me, it is not cheating!

While templates are certainly is a time-saver, it’s actually much more. Think of a template as a supporting musician friend, always ready to jam when you are. With templates, you can:

  • Create Macros: Setting up macros that you frequently use ensures you have immediate access to your preferred settings and controls.
  • Organize Routing: Advanced routing configurations, once set, can be easily replicated across projects.
  • Form Groups: Grouping tracks or instruments that often go together saves time and offers a clearer view of your project.
  • Pre-set Effects and Plugins: Having your go-to effects and plugins already loaded lets you dive straight into tweaking sounds.

Ableton Template Idea: Create your own mixing template by creating 5 groups that will host your project’s channels. You can then drag and drop them in each groups. Those can have multiple plugins of your choice. You can even create a mixing template with multiple channel presets and then you can drag and drop them from your browser.

The Art of Crafting Abelton Templates

It’s not just about having templates but about having effective templates. An ideal template should inspire creativity, not box it. Here’s how:

  • Diverse Templates for Diverse Needs: Instead of a one-size-fits-all approach, consider multiple templates for various purposes: mixing, sound design, production, and perhaps a comprehensive one, like my “mothership” concept.
  • Incorporate Modulation Elements: Add pre-configured modulation tools that respond and interact with what you introduce. Tools like envelope followers or audio scrubbers, such as the ones Manifest Audio offers, can automatically detect and modulate sounds, adding depth and dynamics to your music.
  • Think Support, Not Supplant: A template should never feel like it’s directing your music. Instead, it should feel like a base on which you can build. The best templates enhance creativity, not limit it.

When Ableton Templates Truly Shine

The true test of a template’s efficacy is in its ability to enhance creativity. If using a template feels like you’ve brought an extra pair of hands into your studio, aiding and elevating your music, then you’ve hit the sweet spot. It’s not about replacing the organic process of music creation but about having tools that streamline it.

In the world of digital music production, where the landscape is vast and the tools are many, templates emerge as a beacon of efficiency. They are not just about speeding up the process but about enhancing the very essence of creativity. They ensure that when inspiration strikes, you’re not just ready but equipped to let your ideas soar. Embrace the power of templates, and watch as your music production process transforms from mere creation to pure artistry.


DOWNLOAD MY ABLETON TEMPLATES:

Production template here

Mixing template here.

Arpeggios Technical Dive

In the vast world of music, arpeggios have served as an integral element in composition, bridging the gap between harmony and melody. By understanding its roots, one can appreciate its profound effect on modern electronic music.

Origins of Arpeggios

An arpeggio, derived from the Italian word “arpeggiare,” which means “to play on a harp,” refers to the playing of individual notes of a chord consecutively rather than simultaneously. Historically, arpeggios have roots in classical music. Classical guitarists, pianists, and harpists frequently employ them to express chord progressions melodically.

Functionally, an arpeggio can convey the essence of a chord while providing movement. It serves as a bridge between harmony, where notes are sounded simultaneously, and melody, where notes are played sequentially. This bridging effect imparts a richer texture to compositions, allowing for a smoother transition between harmonic and melodic sections.


Arpeggios in Electronic Music


With the evolution of electronic music, arpeggios found a new platform for exploration. When synths started to be commercialized, they more than often included an internal arpeggiator. Even smaller options like Casios had some simple one. Synthesizers, with their ability to shape and modulate sound, provided the perfect tool to push the boundaries of traditional arpeggios.


  1. Synthesizers and Arpeggiation: Many synthesizers, both hardware and software-based, come with built-in arpeggiators. These tools automatically create arpeggios based on the notes played and parameters set by the user. Parameters like direction (up, down, up-down), range (number of octaves covered), and pattern (the rhythmic sequence of the arpeggio) can be adjusted to achieve specific tonal effects.
  2. Arpeggio Plug-ins: Beyond built-in synthesizer capabilities, there are standalone software plug-ins dedicated to advanced arpeggiation. These tools offer extended control over how the arpeggio behaves and can be integrated into digital audio workstations (DAWs). They often come with pattern libraries, giving producers a starting point which can be tweaked further.
  3. Sequencing Arpeggios: Sequencers, commonly found in drum machines and DAWs, allow for the programming of notes in a specific sequence. This technique offers a manual approach to arpeggiation, allowing for unique and intricate patterns beyond the capabilities of traditional arpeggiators.

For many people, when musicians would first test a synth, they would at one point test the arpeggiator. In the 70’s until the 90’s, electronic music had more than often, some arpeggiation used. It could be for the bass or for the main hook.

The Impact on Electronic Music


Arpeggios in electronic music often lend rhythmic drive and melodic structure, especially in genres like trance, techno, and synthwave. The repetitive nature of these genres marries well with the cyclical patterns of arpeggios.


Additionally, with the sound-shaping capabilities of synthesizers, the tonal quality of arpeggios can be manipulated. By modulating aspects like filter cutoffs, resonance, and envelope parameters in real-time, arpeggios can evolve and transform throughout a track, adding dynamic interest.

A fascinating aspect of electronic music lies in the observation that many of its melodies are constructed from sequences which can be effectively replicated using an arpeggiator. This isn’t mere coincidence. Electronic music, with its repetitive structures and emphasis on timbral evolution, often favors linear, cyclical melodic patterns. An arpeggiator excels in this realm, offering a systematic approach to crafting these melodies.

Consider classic electronic tracks: many feature melodies that iterate over a set pattern of notes, evolving more through sound manipulation (like filter sweeps or resonance changes) than through note variation. This approach provides a consistent foundation upon which the rest of the track can evolve, allowing other elements, like rhythm and harmony, to play more dynamic roles.


Parallel and Modulated Patterns


1. Parallel Arpeggios:

  • Method: Start by setting two arpeggiators with the same note input but adjust one to operate in a higher octave range than the other. You’ll achieve a harmonized melodic pattern where both arpeggios play in tandem, producing a richer sound.
  • Experiment: Tweak the rhythm or gate length of one arpeggiator slightly. This introduces a phasing effect, where the two arpeggios drift in and out of sync, creating rhythmic tension and release. Another fun experiment to try would be to create a macro from an arpeggio and then you have a a tool that is also parallel. Make sure your receiving instrument is polyphonic because there will be many notes. I’d recommend trying the arpeggios on different speeds with a pitch/octave modifier so they play notes from different octaves.


2. Side-by-Side Arpeggios Modulating Each Other:

  • Method: Use one arpeggiator’s output to modulate parameters of a second arpeggiator or its associated synthesizer. For example, you can set the velocity output of Arpeggiator A to control the filter cutoff or resonance of Arpeggiator B’s synth.
  • Experiment: Introduce a slow LFO (Low-Frequency Oscillator) to modulate a parameter on Arpeggiator A (like its rate/speed). This will cause the modulations impacting Arpeggiator B to change over time, introducing evolving dynamics to the piece. I like to have the first Arp to be slow and random and the second one, faster, higher notes.

Power user super combo


TIP: Arpeggiators become super powerful if you use an Expression Control tool so that you can modulate the gate, steps, rate and distance. This will spit out hook ideas within a few minutes of jamming.

Plugins

There are multiple plugins that can be good alternatives to your DAW’s regular arpeggio. It’s always good to have 3rd party plugins so you can step out of the DAW’s generic sound.

Stepic

This is definitely inspired by the various modular options existing. They’re all regrouped under one plugin that does a bit what many different free tools do like Snake, but of course, the played root note will influence the sequence, which something like Snake doesn’t. Stepic is often used online in Ambient making tutorials. It is great for creating generative melodies and psychedelic melodies.


Cthulhu

Everything the guys of Xfer do, is always solid and well thought out. This one doesn’t disappoint. With so many presets existing out there, you can also randomize and quickly tweak your own sequence.


Seqund

AlexKid has done multiple tools for Ableton Live and each of them found their way into so many people’s workflow, either to start an idea or to have a quick placeholder. This one is similar to Stepic in a way, but just a different workflow. The UI is cleaner and easier to read than Stepic, making it a quick tool for adding decorative melodies or simple basslines. The randomizer has nice options for controlling its results.


Conclusion

From their origins in classical expressions to their modern applications in electronic music, arpeggios have remained a compelling tool for musicians. Through synthesizers and plugins, electronic music producers have a vast palette at their fingertips to experiment and innovate. As technology advances, it’s certain that the use and evolution of arpeggios in electronic landscapes will continue to captivate and inspire.

Music Related Echo Chambers

In the intricate tapestry of music production, there’s an underlying thread that has been silently weaving its way through for years: the phenomenon of the echo chamber. Just as politics is sometimes ensnared in these chambers, the world of music production isn’t immune. While they might offer the comforting illusion of unity and harmony, these echo chambers can become a pitfall for creativity, authenticity, and growth.

Moreover, social media platforms and music streaming services with their algorithms can create a reinforcing feedback loop. An artist might gain popularity for a particular sound, and suddenly, that becomes the benchmark. New artists aiming for success tend to emulate that, leading to a saturation of similar-sounding tracks. While the initial artist might have been revolutionary, the subsequent floodwaters can drown the innovation.

In the political world, echo chambers arise when individuals surround themselves only with voices and opinions that align with theirs. In music, a similar phenomenon happens. If artists and producers only expose themselves to a narrow band of influences, it limits their growth and stifles innovation. In both spheres, these echo chambers can lead to a stagnation of ideas and a resistance to change or evolution.

For artists to grow, it’s essential to break out of their comfort zones. Collaborating with people from different genres, attending workshops that don’t directly align with their musical interests, or even actively seeking feedback from outsiders can be invaluable. A hip-hop producer might gain a fresh perspective by working with a classical musician, or a techno artist might find inspiration from folk melodies. It’s these intersections of diverse ideas that lead to the most groundbreaking music.

There’s been a huge fuss started by Guti recently about how many fake sets made by some artists have been going on for a while and to me, this is a pure side effect from an echo chamber. Artists encouraged by the industry to go with a pre-recorded show who anyone who would confront, would be pushed out of the way.

I believe the onus is on both industry veterans and newbies. Veterans should mentor and guide newcomers, encouraging them to learn the craft properly and not rely solely on tools. New artists should be hungry for knowledge, pushing boundaries, and not just following the beaten path.

Mr. Bill Masterclass @ KMGLife Inc. Youtube Video


This week I was watching an older video from Mr. Bill, who is a solid Youtuber with creative content and I noticed something about him that sort of irritated me. Over his video, he was explaining all kind of approaches about how to be loud and also, be cool. While I gave up on the whole debate of the loud is cool topic, i get annoyed at one thing precisely which is when someone spend time showing that his sound is cooler than my sound.

Like Deadmau5 said recently:”Who the F_ are you? The sound police?

I understand that if you want to sound like him and since he is very confident that he is cool, then it makes sense but in a world where trends flashes so quickly, I believe that Mr. Bill is probably looking at this years old video and probably think that his newer sounds are cooler. Don’t get me wrong, I’m not trying to put him down because I love his sounds and techniques, but not to the point of putting other genres or sound design down. I want to remain far from a competitive mind and his view could encourage that mindset.

If you’ve been reading this blog, you’ll know that I prefer having a much moderate approach to understanding sound. I prefer remaining open.

Calling some sounds cool or others not, creates duality. And that creates echo chambers, hierarchy, ego boosting. So I prefer nondualism (advaita).

At its core, non-duality emphasizes the interconnectedness and oneness of everything. Translated to the realm of music, it suggests that genres, styles, and techniques are all part of a vast, interconnected web of musical expression. Rather than pigeonholing oneself into a single genre or style, a non-dualistic approach encourages exploration across musical landscapes. By seeing all music as interconnected, producers can cross-pollinate ideas, techniques, and inspirations from diverse genres, leading to innovative and fresh sounds.

A significant barrier to innovation and growth in music can be one’s ego. An inflated ego might make one resistant to feedback, reluctant to explore unfamiliar genres, or even dismissive of new techniques. A philosophy that promotes selflessness can help dissolve the ego, allowing the artist to be more receptive to external influences, feedback, and collaborations.


1. The Allure of the Echo Chamber


On the surface, there’s undeniable allure in surrounding oneself with like-minded enthusiasts, especially when one embarks on the journey of music production. The initial phase is fraught with uncertainties and questions. In these moments, having a community that echoes your tastes and preferences is undeniably comforting. The conversations flow smoothly, validation is often just a nod away, and a bubble of shared enthusiasm and aspiration forms.

However, beneath this surface of congeniality, a subtle drawback emerges. When we insulate ourselves within a particular genre or style, the nuances of that very style start to become our universe. And while it’s essential to understand and master a niche, the danger lies in becoming so immersed that we miss the symphony of diverse musical expressions outside.


2. The Downside of Self-Referencing


As a music label owner and sound engineer with over two decades of experience, I’ve observed an interesting pattern. Artists and producers, particularly when starting, tend to lean heavily on references that mirror their own aspirations. This is entirely natural. However, when these references are flawed or limited in scope, the resultant art can lack the depth and polish it might otherwise achieve.

A case in point: I recently mastered tracks for a techno artist. His reference tracks, though popular, had many inherent issues. This artist, having always been in his echo chamber, hadn’t realized the potential flaws. But once I introduced him to more diverse, quality references, it was like a revelation. Suddenly, he could perceive the richness and depth his tracks could achieve, and the difference was palpable when played in a club with a top-notch sound system.


3. Breaking Free with New Tools


The world of music production is ever-evolving, with tools like Izotope’s recently released Ozone version offering fresh perspectives. Such innovations are a boon, not just for their technical prowess but for their potential to act as doorways out of these echo chambers. By leveraging the new features and capabilities they bring, producers can explore uncharted territories, challenging their ingrained notions and biases.

It was interesting how tools like Ozone (Version 11 came out this week and it’s really well done – I don’t even understand how they keep improving it!), while designed to improve the mixing and mastering process, can also inadvertently perpetuate these echo chambers. In the hands of a novice, presets and popular mastering chains can quickly become a crutch. Instead of learning the core principles of mixing and mastering, many young producers just slap on a preset, thinking that’s the ‘industry standard’. These tools, if used without proper understanding, can contribute to a homogenized sound in the industry.


There’s no denying that the familiarity of an echo chamber offers solace. But for an art form as dynamic and ever-changing as music, these chambers can sometimes stifle the very creativity they aim to foster. It’s imperative to recognize when we’re in one and muster the courage to step out. Only then can we truly hear the boundless melodies that the world of music has to offer.

Your Music Direction Coming From Your Community

The music industry, and more specifically the electronic music scene, has always thrived on the synergy between its creators and listeners. As an electronic music producer myself, I’ve come to realize that one’s journey to success often lies in understanding the pulse of the community. But what does that mean for the artists who feel disconnected, or those who gravitate towards genres with limited local support? Let’s delve into the heart of music communities and how they shape an artist’s journey.


The Role of Community in an Artist’s Growth


Having spent considerable time producing music and interacting with fellow musicians, a pattern emerges. Those producers who are part of an active music community tend to climb the ladder of success faster and more organically. It’s not just about having people to network with, but also about receiving immediate feedback, understanding what works and what doesn’t, and drawing inspiration from communal energy.

When you are plugged into a community, it’s akin to having your fingers on the pulse of the music you love. You not only learn about the intricacies of the genre but also understand what the audience desires. The shared knowledge and insights from a group of like-minded individuals can often be the difference between a track that falls flat and one that resonates deeply.

In my case, I quickly found my community of people loving the same music as me and got lucky there were events where everyone could meet. It was easy to connect and I felt quickly involved to it. One of the strength of this early boost was that I could present my music easily and got bookings organically. Nowadays I see people contacting venues for bookings but if you’ve never been to the venue, you will not know of it’s culture and direction. Going there is very important so you’ve seen and to see if the attendees are in the same mentality as yourself. There’s nothing more hard to play a gig where people don’t get what you do.

As I toured, I discovered bubbles of people in each city that reminded me of my local community. Even physically, I’d meet someone who reminded me of someone back home.


The Challenge of Non-Local Genres


But what about those producers who are passionate about a genre that isn’t prominent in their local surroundings?

Many artists look outward, connecting with labels or online groups that share their passion. While the internet has bridged many gaps, online connections often lack the depth and warmth of personal interactions. The very nature of digital communication can sometimes render these relationships impersonal.

There are people who live in smaller towns or aren’t close to a bigger city and this can be challenging because locally, there might be no chances of creating a community. How does this work?

Artists may produce exceptional tracks, but the age-old adage holds: people tend to support who they know. A community can sometimes be hesitant to welcome outsiders. This protective approach is natural, but it can inadvertently close doors for new talents who could have infused fresh perspectives and sounds. No need to think of labels who receive music from people they never heard of and those people expect them to reply. In the best of worlds, this would happen but in reality, this doesn’t happen much. It leaves artists confused.

So for people who aren’t well musically supported, there are multiple choices possible. One of them is to try to go to the closest place where there are events and a community to enjoy it as well as the music. Eventually you may find your role and space in that tribe. Then afterwards, using online communication tools maintain contact.

Let’s not forget that building your own local network and community is possible but can be challenging at first.


The DJ Solution


In such scenarios, one strategy that I’ve seen work is reaching out to DJs.

Why DJs?

Because they hold the power to introduce new tracks to an eager audience. DJs are always on the lookout for the next standout track, and they can be instrumental in helping an outsider’s music get the recognition it deserves. Having a DJ play your music can be the perfect bridge between the artist and a new community. You could also do the same with local restaurants or boutiques where you can ask them to play your music sometimes, but of course, you’ll need to do that in person after showing you care about their place and music tastes.

Also DJs love music for podcasts and that is a good way to breakthrough to a new bubble of people.


Building Inclusive Communities for a Vibrant Future


As we discuss communities and their importance, it’s also essential to talk about inclusivity. While protecting the integrity of a community is necessary, it’s equally vital to ensure it doesn’t become insular. By welcoming new members and being receptive to their unique musical offerings, a community not only adds to its diversity but also ensures its longevity.

To all the music communities out there: let’s remember that today’s outsider could be tomorrow’s trendsetter. By being open to new members and their distinct sounds, we guarantee that our community remains vibrant, fresh, and future-ready. Outsiders will bring new energy and ideas what will make sure the music won’t fall in the equivalent of an echo-chamber where everything sounds the same after a while.


Ideas to Discover and Connect with Music Communities:

  • Local Music Stores and Cafes: These places often have bulletin boards with events, gatherings, or workshops. Even chatting with the store owner or regulars can lead you to local music groups.
  • Music Workshops and Masterclasses: Enrolling in or attending these can introduce you to like-minded artists and instructors who can guide you to relevant communities.
  • Music Festivals and Gigs: Attend local and regional festivals. Even smaller gigs can be goldmines for networking. Often, they are organized or attended by people who are part of music communities.
  • Online Platforms: Websites like Meetup.com or Facebook groups often have local music groups where you can join and participate in discussions or events.
  • Community Centers and Universities: Many of them offer music courses and often have active music clubs. Engaging with these can open doors to local music communities.
  • Music Production Forums: Websites such as Gearslutz or KVR Audio have active forums where producers from around the world discuss music, equipment, and events.
  • Collaborate Online: Platforms like SoundCloud, Bandcamp, or Splice can be great places not just to share your music but to collaborate with others, which can organically introduce you to communities.
  • Attend Open Mic Nights: These nights often attract local musicians and enthusiasts. It’s a relaxed environment to meet people and get feedback on your music.
  • Visit Recording Studios: Interacting with studio managers or technicians can give insights about local musicians and communities they work with.
  • Engage with DJs: As mentioned before, DJs have their fingers on the pulse of music communities. Engaging with them can often lead to introductions to these communities.


Closing Notes: A Call to Artists


To my fellow artists feeling a tad adrift, remember that every community started small. If there isn’t a community for your genre, consider starting one! And if that seems like a monumental task, don’t hesitate to reach out in person. Attend local gigs, music events, or even workshops. Establishing a face-to-face connection can be more impactful than a dozen online interactions.

In the ever-evolving landscape of electronic music, one thing remains constant: the value of connection. So, whether you’re an artist seeking your tribe or a community member wondering about the next step, remember that it’s through inclusivity, understanding, and personal interactions that we’ll continue to thrive and create harmonious symphonies for the world to enjoy.

Keywords: electronic music, music production, community, DJ, networking, inclusivity, artists, local gigs, music events.

Noise In Music


In the realm of digital music production, there exists a fundamental concept known as the “noise floor.” It represents the level of background noise present in any audio system or recording environment. Interestingly, our world is never entirely silent; there is always a gentle hum of ambient noise surrounding us. Human hearing has evolved to appreciate and find comfort in these subtle noises, making them an integral part of our daily lives. 


If you record with your phone or a handheld device some sounds on the street, you’ll hear this smooth white noise in the background. Listening to the recording afterwards will have this reality with a blanket of noise that we get familiar with. Through the history of music recording, depending on the era and medium, the noise differed. If you grew up with a certain sound, there might have been a typical noise you associate with it.


Noise in music can be nostalgic.


Not to forget that some people actually love sleeping with noise in the background as it blocks outside sounds. With ADHD, some noise (like Brown) can help with focus.


The concept of noise finds a captivating application in the world of modular synthesizers. Modular synths offer a playground of endless possibilities, where musicians and sound designers can manipulate and harness different types of noise to create lush and music landscapes. In this blog post, we will go through the world of noise in modular synths, exploring the different types of noise available and the creative opportunities they offer.


White Noise – A Hissing Foundation:


White noise, resembling a gentle hiss, is one of the most common types of noise found in modular synthesizers. It features a consistent amplitude across all frequencies within the audible range. Embracing white noise in your patches can introduce exciting possibilities. For an exercise, patch a white noise generator to trigger an envelope, and use it to create rhythmic bursts of noise at irregular intervals. This technique can produce percussive and glitchy elements in your music, adding a touch of randomness to your compositions.


I also like to introduce a noise floor of white noise, slightly filtered, to create a feeling of proximity. It’s hard to explain, but sometimes clients feel their music is empty and will drown everything in reverb. Adding some white noise is a good alternative to that as reverb can also introduce various mixing issues.


Pink Noise – A Softer Alternative:


Pink noise, also known as 1/f noise, is characterized by equal energy in each octave. Unlike white noise, pink noise contains more low-frequency energy, resulting in a warmer and softer sound. To explore pink noise, connect it to a filter module and use an envelope or an LFO to sweep through the filter’s frequency cutoff. This exercise will help you understand how pink noise can add depth and character to your sounds, particularly in filter sweeps and ambient textures.


There’s also some theories about mixing with noise. Some people put a pink noise as a background and then will mix it over. The idea is that you want to mix each channel through the noise and when you hear it, then you know it’s levelled equally (since pink noise is full range). I’m not too keen of that approach but it can be useful to try it.


Gaussian Noise – Emulating Natural Sounds:


Gaussian noise, also known as normal distribution noise, features a bell-shaped amplitude distribution, mimicking natural sounds found in our environment. It is particularly useful for simulating wind or water sounds. Experiment with this type of noise by using it in a sample and hold module to generate random voltages. Then, patch the random voltages to various parameters in your modular system, such as oscillator pitch or filter cutoff. This exercise will demonstrate how Gaussian noise can add an organic touch to your patches.


Any noises passed through a quantizer will offer random melodies. A technique to generate random melodies is to to send noise through a sample and hold, then trigger a moment where the note should be played. The sample and hold will pick a note from the noise, which then you can pass through a quantizer to make sure it is set to a scale. The result will be musical.


Digital Noise – Infinite Possibilities

In the context of modular synths, digital noise refers to the generation of noise using digital algorithms and processes, as opposed to analog noise generated by analog circuits. The term “infinite possibilities” refers to the vast range of creative and unconventional sounds that digital noise sources can produce. Unlike traditional analog noise sources like white or pink noise, digital noise allows for extensive manipulation and sculpting, leading to unique and experimental textures.

Digital noise generators in modular synthesizers often provide various types of noise algorithms that can emulate natural or chaotic phenomena, simulate environmental sounds, or create entirely new sonic landscapes. Here are some examples of what digital noise can offer:

  • Granular Noise: Granular synthesis is a technique where sound is broken down into tiny grains, and these grains can be randomly rearranged and manipulated. Digital noise sources can implement granular synthesis algorithms, producing a vast array of grain-based noises that can range from glitchy textures to ethereal pads.
  • Custom Noise Algorithms: Some digital noise modules allow users to upload or create custom algorithms. This feature empowers sound designers to craft noise with specific characteristics, opening up possibilities for entirely novel soundscapes that push the boundaries of conventional synthesis.
  • Sampled Noise: Digital noise sources can incorporate sampled noise recordings, allowing for the recreation of real-world environmental sounds, machinery, or other interesting textures. These sampled noise sources can be creatively combined with other elements in the modular setup to create evocative and immersive sonic experiences.
  • Noise Modifiers: Digital noise modules often come with various modifiers and processing options. These may include waveshaping, filtering, amplitude modulation, and more, giving you the tools to sculpt the digital noise in unique ways and tailor it to fit your artistic vision.
  • Randomized Algorithms: Some digital noise sources have algorithms that introduce a degree of randomness into the sound generation. This stochastic nature can lead to unpredictable and evolving textures, which can add an element of surprise and excitement to your patches.

As you experiment with digital noise in modular synthesizers, you’ll discover a wide range of creative possibilities. Whether you seek to create atmospheric soundscapes, experimental textures, or unique percussion elements, digital noise sources offer a playground of sonic exploration. The ability to customize and manipulate noise algorithms within the digital domain gives you unparalleled control over the sounds you generate, making digital noise a powerful and indispensable tool for innovative sound design.


Noise as a Modulation Source – Adding Life to Your Patches


Noise can be a versatile modulation source in modular synthesizers. Use a noise source to modulate parameters like oscillator pitch, filter cutoff, or LFO rate. Adjust the amount of modulation to understand how noise affects the timbre and movement of your sound. This exercise will demonstrate how noise as a modulation source can introduce dynamics and unpredictability into your patches, bringing them to life.

This is not something you can do with Ableton Live, sadly and this is why sound design in modular contexts open up new options that are complementary to Live.


Noise-Based Percussion – Unconventional Drum Sounds


Create unique and unconventional percussion sounds by utilizing noise sources to trigger envelopes that control VCAs or other sound generators. This exercise will help you craft snare drum-like sounds, hi-hats, and other percussive elements with a distinctive character, setting your compositions apart from traditional drum kits. From a Pink Noise, you can easily build percussions with all octaves being covered so if you pair it with a filter or two, there can be very powerful results coming from that.


Noise in Feedback Loops – Chaos and Creativity

Create feedback loops involving noise sources and various modules. By adjusting the gain and routing of the feedback, you can explore chaotic and unpredictable sounds. Be cautious with the volume levels to prevent potential damage to your speakers or hearing. This exercise will challenge your creativity and inspire you to push the boundaries of sonic exploration. 

  1. Feedback Loops in Modular Synthesis: In a modular synthesizer, feedback loops occur when the output of a module is routed back into its own input. This setup creates a self-sustaining loop where the output continually feeds back into the input, generating a chain reaction of sound. Feedback loops are known for their potential to generate unique and evolving sounds, often characterized by self-modulation, harmonics, and sonic complexity.
  2. Noise in Feedback Loops – Unpredictable Oscillation: Introducing noise sources into feedback loops can lead to chaotic and unpredictable behavior. When noise is fed into the loop, it injects random variations into the signal chain. As the noise interacts with other elements in the loop, it produces intricate patterns of oscillation and modulation. This generates a sonic landscape that is ever-changing, with an array of dynamic textures and tonalities.
  3. Harnessing Chaos – Musicality from Disorder: While noise in feedback loops may seem disorderly, skilled sound designers and musicians can find musicality within the chaos. By carefully adjusting parameters, such as gain, frequency, or filtering, you can sculpt the noise-induced feedback to create musical tones, harmonics, and rhythms. This process requires experimentation and an intuitive understanding of your modular setup.
  4. Non-Repeating Patterns – Endless Exploration: One of the most intriguing aspects of noise in feedback loops is the creation of non-repeating patterns. Due to the chaotic nature of the feedback system, the resulting sounds may never repeat in the same way twice. This opens the door to endless exploration, where every patch becomes a unique sonic journey, allowing you to discover new sounds and compositions with each iteration.
  5. Sonically Evolving Patches: Noise in feedback loops can lead to sonically evolving patches that morph and transform over time. These patches are akin to living organisms, constantly changing and adapting. By letting your patches run and evolve, you can uncover unexpected and inspiring sonic discoveries that may serve as foundations for your musical compositions.
  6. Creating Textures and Soundscapes: Beyond musical tones, noise in feedback loops is an excellent tool for generating rich sound textures and atmospheric soundscapes. By tweaking the feedback parameters and manipulating the noise source, you can create immersive sonic environments that add depth and complexity to your music.
  7. Cautions and Limitations: While noise in feedback loops can lead to exciting results, it’s essential to be mindful of potential pitfalls. Excessive feedback or high gain settings can lead to uncontrollable and overwhelming sounds that might damage speakers or cause discomfort to listeners. It’s advisable to approach feedback patching with care and gradually increase parameters to explore the sonic boundaries safely.


In the world of modular synths, noise is a captivating element that adds depth, complexity, and a touch of unpredictability to your compositions. From white noise’s rhythmic bursts to pink noise’s warm textures, and the experimental possibilities of digital noise, each type of noise serves as a powerful tool for sound design and artistic expression. Embrace noise in your modular synth patches, and let it take you on a sonic adventure where creativity knows no bounds. Remember, in a world that is never truly silent, noise holds the key to unlocking your unique musical voice.


References From Clients And Exercises

When it comes to making music or mixing, you sort of need to start somewhere and to get inspired by others if often a good way to get started. There’s a lot of misconception on how to use references. While I covered that in a past article, I thought I’d go deeper on the topic. 


While there’s no right or wrong way to use references, I often use references for one thing in it. It can be a sound that intrigues me, a type of sequence, rhythm or concept that tickles my brain into trying to reverse engineer it. While I can most of the time understand what is going on, it doesn’t mean I can reproduce it as is. Some clients that I coach became really good at reproducing what they hear, sometimes with my help or not.


But the idea is to try something out and be open to where that will bring you next.


While I do a lot of production from clients, sometimes people wonder what others are into, who are the artists to follow but also, who are the artists that I personally follow for my own inspiration.


Many times, I have clients who start an idea based on a reference but they struggle to get it “right” as they want. I give here a few things to check first in order to get things started properly (in other words, this is where clients fail).


Load your reference song in Ableton (or other DAW) and you may solo it at first to be able to compare it to your project. I would advise to lower the volume of your reference as it may be mastered while yours isn’t.


There are a few initial points to consider:


  1. The tone: Use either an FFT analyzer (SPAN from Voxengo is free or Fabfilter ProQ3) on the master to see if the tone is similar. Is the curve similar or different from you


  1. Root Key/Scale: You can use a Key detector on your reference to see what is the root key and scale, then check if yours is set properly. While you don’t need to have the same as your reference, some clients don’t realize that their different elements are not in the same key. This will often translate with the feeling that the song doesn’t feel one or perhaps, that is sounds off. Note that it might sound off if you were overexposed and then you got used to it but for a fresh pair of ears, it might be awkward sounding.


  1. Speed and rhythm: Find the BPM of your reference and try to match it to yours. What is the time signature.


Lately I’ve been enjoying Decoda as a full analysis software. You can do so much with it as well as extract melodies in midi. I find it essential to work with demanding clients.


When it comes to artists my clients love the most, I compiled a few and will drop a few words why they are loved.


Ricardo Villalobos

Not a surprise here since he’s one of my favorite artists and a lot of people come to me know that I spent decades understanding his unorthodox style and can explain how certain of his songs are made. Love or hate him, that guy has certainly develop his own persona when it comes to production and his music composition is always opening new grounds to what you can do in music.


Things he has inspired us: 


  • Making super long tracks with more or less structure can be fun.
  • Leaving your songs sloppy has a more human side.
  • Combining really weird sounds all together can work if you keep some elements one can refer to.
  • Not afraid to sample obscure records as the main idea of his songs.


Ricardo is known to have a huge collection of modular synths but compared to many people who have a lot, he records new tests weekly so you can see the wide array of his tools. 


Exercises related to studying to his music:


– Use VCV to try the modular thinking he use and randomize some elements for madness.

– Polyrhythms are the key here with uneven time signature. Also look into Euclidean rhythms.

– Ric uses a lot of granular synthesis on percussion instruments or synths.


Vid


This is another that is often referred to as a reference. People love the simplicity and yet complex songs he makes. As opposed to Villalobos, his songs are quite polished and organized.


Things he has inspired us: 


  • Atmospheric techno is quite fun to make and is both exciting, while meditative.
  • Lush pads over field recordings are hypnotizing.
  • Dark tone gives a more mysterious vibe.


Exercises related to studying to his music:


  • Collect field recordings and ambient space sounds such as a restaurant or a church inside.
  • Grooves and beats that are groovy are worth being studied and I often recommend looking into pre-made loops and then copycat them. Removing a lot of the sustain of percussion to keep them short really helps having a minimal house feel.
  • He often doesn’t have bright elements and keeping sounds low will give a mysterious vibe.


Pablo Bolivar (Or Dub Techno)


Since I have a long background in dub techno, I get a lot of questions on how those pads are made. While it is not necessarily complicated, it still needs a bit of tweaking because what makes the dub techno pads captivating is the always moving side of them. That is coming from modulation or automation. Pablo does a great job of picking some nice sounds, pads and beautiful, lush melodies which makes him a reference for a lot of clients.


Things he has inspired us: 

  • A lot of classic dub techno has a 1 or 2 notes melodies, going full on minimal. Pablo brings in simple melodies but more complex than 2 notes which gives it memorable moments. 
  • Super clean production and mixes. Nothing unnecessary is ever added.
  • Just like Vid, his approach to have dynamic ambient makes it enjoyable for relaxation or dancing.


Exercises related to studying to his music:


  • Use a key root with a minor scale. Minor chords as well to complement the melody. Most of his melodies are 4-5 notes maximum. Consider doing chord progressions.
  • Use field recordings to complement the melodies.
  • Percussion are fairly straightforward here and repetitive. It does a fine job.


J Dilla

I wouldn’t say that anyone contacted me to make music exactly like him but I do have some clients into lofi hip hop, which in my opinion, is a derivative from J Dilla. He’s from the MPC generation where people would sample records and then play with it. His album “Donuts” is considered an innovative album for hip hop and is worth listening to it.


Things he has inspired us: 


  • Sampling blatantly and being bold about it. Sample some music from any source and use short notes of it, either to make your hook or to put an accent on whatever is happening. 
  • Go short. Learn to make songs that are under 3 minutes long. A challenge for techno but for electronic music, it’s an exercise that forces you to be straight to the point.
  • Exaggerate on swing for your percussion. Try to push it to the max to see what happens. 


Exercises related to studying to his music:


  • As stated above, those learning are also things to try. But I would recommend digging some records at a second hand shop and sample obscure parts.
  • Use a midi controller like the PUSH or with pads and try to manually punch in your beats.
  • Within a clip, play with the warp points to create weird stretches and elastic beats.
  • Slice up beats and reprogram them into a new patterns.


Fred Again

I’ve lost interest in pop music years ago and commercial electronic music has always been something I stay away from. But Fred Again has been impressing me for how he makes music and of course, for the end results. The thing about his music is that it’s basically the typical approach from any commercial, standard structure music that is made and good tastes is what matters here.


This means understanding chord progressions and working with key/scale is going to be the main focus. Using plugins like Captain Plugins suite will make a huge difference unless you have a lot of patience to learn music theory.


There are no shortcuts to this kind of music. But the tools you can use will make it easier.


His recent album with Brian Eno is what made me appreciate him. 


Daft Punk


I’ve been following the pair from 1995 until their separation. I don’t think there’s been many music acts that had the impact over their career like these guys did. It’s mostly due to their desire to innovate but also to take ideas that work really well and pull out some solid ideas to give it a new twist. 


In a past article, I was stating that there are 2 main modes when it comes to working on a project: you might want to repeat an idea you love from a song or artists vs you might want to innovate something from what you do.


The things I’ve learned from working with clients who want to get inspiration from them are mostly about, once more, digging for samples and then play with them. It’s sort of like what we covered from Dilla, but with a faster pace and 4/4 time signature. There was a point where the French Touch house/disco was all rage. That music was about using a sample with heavy filtering and the classic pumping/ducking effect. This technique is still used nowadays but with a bit more control where you perceive it less.


Besides filtering, some notable effects they use that you can explore today: Bit crushing, tape saturation, vocoder, heavy chorus/phaser. They also love a good 909 kit.


And to finish up, who are my personal references?


Ada Kaleh, Gigi Masin, Jan Jelinek, Rhythm and Sound, Vladislav Delay, Ricardo Villalobos, Matt Dear, Lawrence… but way too many to name.


Applying Da Vinci Principles to Music Coaching

As you already know (well I hope, at this point), one of my speciality is to work with young or veteran music producers and remove struggles so they can create freely. Recently I’ve been studying how Leonardo Da Vinci was learning and creating, so I saw a crossover to what I do. After all, each song we make is basically a creation in itself, an innovation and a prototype for future project of ours. If it’s not already, I invite you right away to think of each song you make as a step taken in a direction that will lead you to greater things.

Leonardo da Vinci, mastered the art of innovation and interdisciplinary thinking, modern musicians and producers can draw inspiration from his principles to unlock their potential in the realm of music production. In this blog post, we will delve into each of the seven principles from the book “How to Think Like Leonardo da Vinci” and explore how they can be skillfully applied to music production, enabling you to become a true maestro in your craft. If you’re seeking to enhance your music coaching journey, embrace these principles as guiding stars to navigate the musical cosmos.


Curiosità – Embrace Musical Diversity


Leonardo da Vinci’s insatiable curiosity fueled his passion for knowledge and exploration. As a musician and producer, nurturing curiosità involves delving into various musical genres, styles, and cultures. Too often, as a producer, we get obsessed by a genre, a song, an artist and we focus on it for a while, forgetting anything else. Sometimes, the answers to our questions and inspiration pitfalls come from another unexpected source.

Break free from creative boundaries and venture into new territories to experiment with new sounds and musical elements. Diving in genres you dislike, switching to past eras of time, exploring the roots of another country are good places to look into. Drum and Bass took loops from funk. Hip hop samples jazz, while dub techno is inspired by reggae, which has roots in old African music. All genres taps into another culture and this means you can softly break rules by doing the same, whatever genre you’re doing.

TIP for inspiration: Find a genre to explore, pick any song and isolate an instrumental moment where you can hear the main melody then convert it to midi in Ableton.


Attend music festivals, workshops, pay attention to street artists and listen to a wide array of musicians from different backgrounds. Learn who inspired your heroes such as Villalobos’ love for Keith Jarrett. This diverse exposure will not only enrich your musical palette but also infuse your productions with unique flavours.

Dimostrazione – Hands-on Learning and Experimentation


Da Vinci’s approach to learning through practical experience resonates with music production. Aspiring producers should engage in hands-on experimentation with different instruments, digital audio workstations (DAWs), and audio effects. There is different projects one can do such as DIY reverb units, foley ideas or simply recording percussion out of anything at home.

A fact that I share to clients all the time: practice, practice, practice and make mistakes.

Practice creating diverse arrangements, experiment with modulation and synthesis, and explore various mixing techniques. By consistently practicing dimostrazione, you’ll build a deeper understanding of music production that theory alone can never provide.

TIP: I am curating a Youtube list of experiments you can try. That list is growing everyday and is filled with ideas to try.

Sensazione – Developing a Keen Ear and sharp vision


Sensazione refers to the sharpening of one’s senses, and for a musician, this means cultivating a keen ear for music. Train yourself to listen actively to various musical compositions, both old and new. Pay attention to the nuances of melodies, harmonies, rhythm patterns, and the subtle production details that make each piece unique. Regularly practicing ear training exercises will help you identify and appreciate intricate musical elements, allowing you to apply them creatively in your own productions.


TIP: Write some few notes and test all music scales to see how it sounds for you. Try all different chords as well. Spending time to know them will help later to understand melodies.


While we know music is about the hearing and that ear training is important, I also encourage to train your eyes as well. One thing I disliked when I used to work in a music school was that all teachers were telling students to only rely on their ears and from what I was seeing, that tip was frustrating for them. This is why I tell people to first learn to trust your eyes when you use sound analyzers and then train your ears to make the link with what you see.

As we work with visual tools such as a DAW, training yourself to know what happens when you click here and there or where to find your tools comes with practice but the visual organization is essential for speed. The faster you are with your tools, the more you’ll be in the flow when you think of an idea and want to execute it. This speed and understanding can only happen with practice… yes, once more and now you know it. I notice that even for myself, if I skip a few days of not practicing, I forget some ideas I have.

One thing I invite you to do is to learn and practice critical listening. That skill is extremely important for whatever you want to achieve and you’ll thank me later.


Sfumato – Embracing Musical Ambiguity


In the realm of music production, Sfumato encourages you to embrace ambiguity and uncertainty. This is where many producers struggle but also, the average listener. In the psychology of music listening, people can be on various modes. One is about listening to a song to reconnect with the mood, emotion, idea because of the emotional craving of having the song inducing that. An other is about discovering something new. Even when someone is open to listening to something new, they’ll have a bunch of personal filters that will make them decide if they like it or not: sounds used, tones, density, speed, scale, etc. If you come with expectations, you’ll most likely be not enjoying it.

Understanding that your listener has it’s own personal story once they listen to your creation will help you understand how you want them to hear it. Finding the right balance of ambiguity is the key to educate your listeners to be able to deal with more.


Music is an art form where unexpected twists and creative risks often lead to remarkable breakthroughs. Allow yourself to explore unconventional chord progressions, atypical song structures, and unorthodox sound combinations. Question what others tell you that you can’t do. Of course, some technicalities are essentials but if it’s purely arbitrary and personal tastes, it might be worth exploring the why behind anyone’s discomfort. Embracing the uncertainty will open doors to uncharted musical territories and give your productions a distinct, avant-garde charm.

But uncertainty is also the path of the musician. We don’t know if people will like our music, we don’t know if what we do will be understood, what kind of reaction it will bring us and ultimately, open or slow down our ascension as an artist. To develop ambiguity endurance is a good investment.


TIP: Consider that there are so many songs that have technical imperfections that eventually became seen as a risk, that they set the path to new standards. Accepting ambiguity means to accept imperfection, which is hard for perfectionists.


Arte/Scienza – Balancing Artistic Vision with Technical Expertise

Leonardo da Vinci famously harmonized art and science, a practice that resonates with music production, especially in electronic music. I firmly believe if he was around, he’d certainly be interested in how electronics can mimic sounds. Balancing your artistic vision with technical expertise is essential for achieving a polished and professional sound. While artistic expression fuels creativity, understanding the technical aspects of audio engineering, mastering, and sound design empowers you to bring your musical ideas to life with precision and finesse.

Some classes, courses and technical knowledge you could look into that would be beneficial could:

  • Studying computer science. I often say that if you’re computer challenged, it will be a hurdle to make electronic music for all the technology needs behind it. Studying how your computer works, hard drive, files management, hardware optimisation and also, coding, will definitely help in one way or another, especially if you have to troubleshoot.
  • Signal flow. Understanding the basics of sound with phase, polarity but also basics as what is loudness, how speakers/monitors work will help. You don’t need to study engineering in itself. But if there’s one concept I find essential, it’s gain staging. Especially for DJs, since so many are completely clueless on how to use a DJ mixer properly, which leads them to misunderstand how music is made. This would also cover bits and sample rate, two concepts essential for basic quality upgrade of your music.
  • Music theory. Maybe not that much needed as one can go a long way with little knowledge but to know the basics will certainly help.
  • Computer logic. If you’re not familiar with Boolean maths, logic (If, Then, etc), I would encourage you to look into it.
  • Sound synthesis. Looking into envelopes, LFOs, MIDI, signal rate, etc. There’s a lot to learn but getting the base will help you across many tools you’ll use because those ideas are general and used across many plugins, synths.

If you want to break rules, you need to understand them first. It will be also useful to be able to criticize all the misleading feedback you’ll read online.


Corporalità – Nurturing Physical and Mental Well-being

In the fast-paced world of music production, it’s vital to prioritize your physical and mental well-being. Long hours in the studio can take a toll on your health and creativity. Make time for regular physical exercise, meditation, and activities that rejuvenate your mind. A clear and focused mind leads to enhanced creativity, allowing you to channel your emotions effectively into your musical compositions.

Over the past 30 years, the rave scene and electronic music world has built a lot of glorification upon drugs consumption and many artists received royal treatment for how poorly they’ve treated their body. While I value the importance to celebrate and do experiment, I also think that all the self care possible will do justice on the long run. If your art needs years to be recognized but your health won’t let you see it, then you’re failing your success.

In my case, I see how running, doing workouts and lots of yoga has paid off. The days where I run 10km are extremely productive and more creative than any evenings I spend partying and trying to accomplish something. Finding the balance helps much. I’m happy that in the last few years, there are more importance for healthy lifestyles and I totally see the point of that.

TIP: Learn to spot inner tensions when making music which should be a cue that you need to stop, go for a walk to think about whatever is happening and then come back.

Connessione – Uniting Musical Elements

Finally, embrace Connessione, Leonardo’s principle of recognizing interconnectedness. Music production involves various elements like melody, harmony, rhythm, and texture. Learn to see the bigger picture and identify how each component contributes to the whole. Effortlessly blend diverse musical influences and genres, making your productions a testament to the beauty of unity within diversity.

One exercise I’m doing much these days is to listen to melodies in any song and then pay attention if the notes are going up or down, what is the pattern. Then I pay attention to the rhythms of those notes and see if they come at the same time or not. That kind of attention is a way to observe how music is made across genres in order to see how I can create my own melodies. Any notes can then be applied to my music, maybe also reversed engineered in modular terms, such as a way to use an LFO to create regular melodies.


As you embark on your music production journey, channel your inner Leonardo da Vinci and embrace his timeless principles. Cultivate curiosity, experiment boldly, and listen attentively to the musical world around you. Embrace ambiguity, balance artistry with technicality, and prioritize your well-being. Recognize the interconnectedness of musical elements, blending diverse influences into your unique compositions. By applying “How to Think Like Leonardo da Vinci” to music production, you’ll unleash your creative genius and pave the way for a remarkable musical legacy.

Tools To Understand Your References


We’ve all been there—struggling to compose that perfect melody or write those captivating lyrics, only to be hindered by the relentless pursuit of originality. But what if we told you there’s a way to break free from this creative conundrum and discover a whole new dimension of musical ideas?


No matter how many times I get to my computer to make music, I’m often on 2 modes: trying to make music that will be completely original or trying to emulate ideas that I love (eg. the opposite of being original). In most cases, I forget that I have fun unless things feel flowy. Luckily there are multiple techniques that can be understood from music we love and there are also many facilitating tools to help understand whatever is the magic of certain songs. I’ll suggest some of the tools I use when I do production for clients.


Recently I read the book by Austin Kleon’s book, “Steal Like an Artist,” where we’ll uncover five valuable ideas to set your musical exploration. I felt like I could see how this applied to music.

Embrace the Remix Revolution:


In a world overflowing with music, finding absolute originality can feel like searching for a needle in a haystack. But fear not! Kleon suggests embracing the concept of the remix—a creative collage of existing ideas and influences. Remember, even the most renowned musicians have been inspired by the sounds of yesteryear. So, dive into the archives, explore different genres, and let the magic of cross-pollination unleash your musical prowess!

The first exercise I give to any client who is in a writer’s block that won’t go away, I suggest them to get a bunch of loops and start remixing, without any goal. I would like to say that while this is the best remedy for most cases, some feel like this is stealing samples and such. But if the mind is stuck, it’s mostly due to overthinking. Getting the ball rolling with a simple exercise of playing with premade ideas is just an opened door to jump back and then expand to whatever feels right.


TIP: It’s hard not to have fun by using the vast amount of quality loops you’ll find on Splice. It also offers possibilities of rent to own synths, plugins or have presets for the genres you like. It also has a desktop app where you can preview loops, then import them in your DAW. I like also that you can sync the app with your project’s tempo by using the Splice VST.


Another alternative is to use Loopcloud, which is a bit like Splice but also features some tools like a really lovely drum machine where you can import any sounds from the library. 


TIP 2: I like to use Soundsnap for samples. It features so many found sounds, foleys, random recordings. It’s used in movies and it can be used in your songs as well.


Swipe Ideas, Not Identity:

As musicians, it’s natural to aspire for a unique sound that sets us apart. However, trying to force originality often leads to creative paralysis. Instead, take a leaf out of Kleon’s book (literally!) and steal ideas shamelessly. But here’s the catch: focus on the elements you admire and rework them into something entirely your own. Give credit where it’s due, but don’t be afraid to put your personal spin on things. After all, the world doesn’t need another copycat—it needs the extraordinary blend that only you can create!

Now, remixing can be more subtle. You could listen to Keith Jarrett, some old Studio One dub, modern classical and then pay attention to the sound used, how they are said (melody) and the space created. 


What are you noticing? Are the notes slow or fast? Is it dense or open? What is the time signature?


Write down the notes, then apply the concept to whatever you do. That’s cross-pollination.

TIP: You can buy MIDI packs or MIDI melodies a bit everywhere and look into ideas that aren’t in the genre(s) you’re doing. The MIDI notes don’t make a sound, they’re just melodies. You can use random harmonic sounds or use synths of your choice so you can pull out melodies that are out of your routine.

TIP 2: So many clients don’t realize that one step towards their songs feeling more professional is to use one root key with a scale. I like the numerous tools from Captain Plugins. They have studio related plugins that lets you understand the key and scale of important ideas or your own melodies (eg. some clients just improvise some melodies to later find out it is in a specific scale without knowing!). You can also look at Tonic for that type of analysis.


Curate Your Influences:

Ever heard the saying, “You are what you eat”? Well, in the world of music, “You are what you listen to!” Surround yourself with a diverse range of musical influences. From classical compositions to avant-garde experiments, absorb it all like a musical sponge. By curating a unique tapestry of influences, you’ll develop a rich palette of sounds to draw from. So, don’t be afraid to embark on a sonic adventure—you might just stumble upon the spark that ignites your musical genius!


To make quality music, you need to be exposed to quality songs.


This means, listen to music as much as you make some. From what you listen, try to diversify your repertoire as much as possible. When you discover an artist you like, dig his roots, early works and recent ones.


Befriend people who have deep love for music and ask them for recommendations. People aren’t asked enough about their favorites but it’s a loved topic if you’re into music.


I love this max patch that opens up the directory of all the sounds from Freesound.org. I love that site because it’s free but also because you can ask for random samples. I also like this page that gives me random Youtube videos to watch…


TIP: Elphnt did a nice patch that gives you ideas for starting new ideas or if you lack ideas at some point.


Constraints Set You Free:


Contrary to popular belief, constraints can be a musician’s best friend. Kleon emphasizes the importance of setting limitations to unleash your creativity. By giving yourself specific boundaries, such as time restrictions, limited instruments, or even unusual song structures, you force your mind to think outside the box. These self-imposed challenges become the catalyst for innovation, paving the way for musical breakthroughs you never thought possible.


TIP: Make yourself a drum kit and just a few samples for your song making. Pick a random songs and use that as a template for yours (BPM, section, mood, key, scale, etc). I love the tool of Decoda because it can really help pulling out a melody or understanding of how a song is arranged.


Embrace the Journey:


Creating remarkable music isn’t a sprint; it’s a lifelong marathon. As you embark on your musical odyssey, remember to enjoy the ride. Kleon encourages artists to embrace the process rather than obsessing over the end result. Each composition, each practice session, and each stumble along the way is a vital part of your growth as a musician. So, buckle up and savor the adventure, because it’s the journey itself that shapes you into the artist you were meant to be.


But what happens when you’re a dad or you have a demanding job and you can’t invest much time into your favorite hobby? The journey becomes a bit more complicated. Can you still embrace the results without having the time to do what needs to be done to get your project going?


There you have it, intrepid musicians! Armed with Austin Kleon’s invaluable insights from “Steal Like an Artist,” you now possess the secret weapons to break free from the shackles of creative blockages. Embrace the remix revolution, swipe ideas with pride, curate your influences, thrive within constraints, and, above all, savour the journey.

Remember, the music world is your oyster. So dive in fearlessly, create unapologetically, and let your stolen melodies reshape the very fabric of musical innovation. 


Max For Live Gems For Ableton

(Updated June 23rd 2023)

I’ve been wanting to cover some of my favorite Max patches for a while. There are so many and sometimes, some are just meh and others, will be quite amazing. Since I’m basically hoarding digital tools for my studio, I thought I’d compile a list of some patches that feels like it’s hacking the production flow to the point where it’s like cheating.


Every now and then, I’ll be making music and whenever it feels too easy (it doesn’t happen enough though), I always the impression that it’s wrong. 


In coaching, I teach that it’s never a problem. My take on this is to harvest ideas when it feels too easy because you might have found a hack and if it sounds good, then it means you found a way to express yourself.


This is why I never have enough tools that ease my creativity but I don’t rely on them as a quick fix for something I can normally do. If there’s a shortcut to something that takes a long time, which provides the same results, I’ll always go with the shortcut. Decision fatigue is something that ruins many studio sessions, and the meter goes down whenever you need to fix something or run into a complicated workflow.


In terms of tools, I have a few categories and I’ll present them based on a need or problem.


I like to think of the different needs related to music coming from different spheres. 


Melodies: Sequencing, hook building, not harmonies, slicing/rearranging, generating.


Sounds: Design, harmonic/inharmonic, quantized, envelopes.


Effects: to be paired with sound sources so there can be variation and alteration.


Rhythms: generating, rearranging, unorthodox patterns, familiar patterns, ratcheting.


If you read my article about VCV and how the brain, the heart work, you’ll have one central source of sequences in one channel and then, you’ll have other channels that are the sounds who will receive the signal from. This is why I separate my sources and receivers. When you hunt for new ideas, you might have a nice melody but not the right sound or vice versa, so you want to be able to swap between them.


This is why I love VCV and modular because you can have built systems of melodies generating tools that send to multiple sound sources.


1- Sequencing : I want to create different rhythms or find patterns out of my usual flow


When it comes to sequencing, there are multiple ways to do it. You can use a note pattern from a midi clip if you want precise ideas. This is useful to lay the main idea of a song and to have direct control over the development of a pattern. But when it comes to generating ideas, I find that step sequencers that have random options, probabilities, phrase length adjustments to name a few, are super useful. It turns your machine into an idea maker and then you can cherry pick what suits your idea.


Drum sequencers that come top of the list for me are XO by XLN and Atlas. Both are quite similar but they offer in-context sample swapping, as well as sample organization, so it becomes really easy and fast to swap a sound to see what it would be like. Both offer different complementary ideas which is why I often use both but they’re not cheap.


Otherwise, if you want a quick fix, the Alexkid Instant Haus max patch is a free alternative. It will create some different rhythms for all your percussion instruments but you can use it to sequence notes or swap percussive for musical elements. Sadly there is no Max patch to hear percussions in context like Xo does. If you like that one, he also made other bundles that are pretty badass here, with more generating ideas for percussion.


I saw this patch here that is quite interesting. It is there to generate ideas so there are some nice potential. Also super powerful, comes Polyrhythm by Encoder audio, which is one of my favorite developers.


I also like Eucledean Pro because it uses the classic Euclidean approach to create beats.


Not long ago, a new max sequencer came out and it’s named Opal. It’s very influenced by Elektron machines. It’s really dope and can achieve so much for drums but also just for textures and even melodies. Powerful.


2 – Sequencing Melodies : Generate hooks, phrases and musical ideas


There are many ways to create a hook. You can use sampling (we’ll get there later), play melodies, extract melodies, combine sounds to make something catchy, record instruments or sounds… All those pretty much cover the main ways to find a hook. Depending on a specific genre, a technique might be used more frequently. 


For ambient and electronic music, in general, sequencing ideas/notes to a synth or sound source is quite popular. Basslines, pads, chords and melodies are often coming from the piano roll. But you could use a melodic sequencer to do so.


I’m obsessed with melody sequencers. They’re fun but they also feel like you have a partner which you can tap endless ideas from.


Here are some of my favorites:


Pattern Generator by Manifest audio. Solid for creating complex or simple melodies as well as can be used for drums.


Snake: Brilliant patch for quick sequences.


Ask and answer: Works for creating call and answer hooks.


Turing Machine: inspired by Allan Turing, this device spits out sequences randomly and then you can loop the parts you like.


Aisle: This complex generating tool finds original sequences and patterns based on repetition. I find that this is excellent for percussions and evolutive percussive melodies.


On the more experimental flavor, Dillon Bastian has been a hero. It’s hard to explain in a few words what they do but he’s basically creating patterns and sounds through a visual context. For instance, with Rhythmorphic, he uses visual maps that shape how the patterns happen and what notes are triggered. It’s a bit hard to explain but it’s something quite unique and you can shape some very unique patterns. This can be very organic sounding, sort of like a chime. Or you can also use it to trigger percussion.


3- Sounds: I want to have sounds that are new to me but still not too crazy (or not).


When it comes to making sounds, I often deal with 2 kinds of mindset. On one hand I often find myself wanting to emulate sounds from songs or artists that I really like. I will try to reverse engineer how it sounds and will noodle around a bunch of different presets, pick the one that is the closest and then try to tweak it to something close to the target. 


This is where “instruments” get handy. While you have a lot of options already with Ableton’s internal synths which are excellent, I compile a few ones here for you.


Chiral: Named holographic synth, it creates unreal sounds, based on multiple synthesis approaches. Hard to describe, these textures will sound very artificial, in a good way. Think of the ultimate synth for scifi score.


Iridescence: This is a delay unit that turns simple sounds into arpeggios. You can basically turn any sounds into a melody.


Grain Forest: The opposite of Chiral. It creates super organic sounds and environment. Bastian built an evolutive instruments with visuals of wind, seeds, trees that grow and die. It’s very relaxing and mesmerizing on its own.


poly-Plaits: The Plaits module is from Mutable Instruments and while this is an open source synth, it made its way to Max for live. It’s a synth with models. It sounds lovely.


Rings: Another take on Mutable instruments but this one is with the module of the same name. It’s a resonant synth with beautiful chime, bells sounds.


Copy Machine: This sampler takes a sample you pick and creates copies of it. The results are a bit mind boggling. Imagine you take a clap sample and turn it into a bunch of people who clap at the same time.


Fortrek: Inspired by the 4 tracker tapes of the 70’s and 80’s, this takes multiple recordings and scrubs through them. Really lovely for lofi feelings.

4 – Effects: Adding spices and colors


Never judge a boring sound as not useful because sometimes, adding the right effects can bring a whole amount of fun to it.


Granular Mirror Maze: A granulator that spits out super nice textures out of percussion or synths. Ideal for pads and backgrounds.


Maze: A looper, tape style with pitch. It is quite fun for creating off the grid ideas and have more of a musique concrète style.


Nube: a take on Clouds, an all time legendary modular effect that is a combination of delay, reverb and granulation.


Muse Concrète: This super advanced tool is not for everyone. It’s the ultimate tool to record and mangle sounds around. Big ups to my bro Offthesky for that one.


All effects from Encoder Audio are amazing.


I recently discovered the work of Robert K / Groov Mekanik and his vast collection of patches impressed me. Not only most of them are free and those who are for sale are at super low price, but the tools he has covers some needs that new and experienced producers want. I was appealed by the High Frequencies limiter that many artists should use as many often boost the highs too much. One patch I’d recommend getting right away is the Note Probability that is super useful for generative patches, adding flow and performances. It simply remove out some notes due to probability. Go have a look, there are some lovely tools in there.


But honestly, I think the most of what you have is by adding modulation to what you already have. This is why modulation options are useful. Here are some of my favorites:


Auto-Slider: Another brilliant essential tool from Offthesky. It records your movement and make turn it into a LFO or super long function signal.


Strange Mod: Dillon Bastian drops this amazing modulator that I use everywhere. Ideal for unusual random modulation.


Source: Inspired by the Buchla 266, it creates random signals.


All LFOs by Kentaro: Advanced and sophisticated, these can bring any modulation to the twilight zone…


I will update this page when I find new things so you might want to bookmark it. If you have suggestions, please share them!


Getting Started in VCV

Modular synthesis has been around for decades, but with the rise of digital technology, it’s become more accessible than ever. Then came VCV, Cardinal, Mirack to name a few. VCV Rack is a free and open-source software that allows you to explore the world of modular synthesis in a virtual environment. In this post, we’ll discuss the three types of modules in modular synthesis, the differences between VCV Rack and VCV Rack Pro, how to use VCV Rack in Ableton Live, essential free modules, and the benefits of using master sequences and modulations.


Creating sounds, then modulate them


Modular synthesis involves building a sound-generating system out of individual modules. 


There are three types of modules: sound generators, sound modifiers, and signal movers

Sound generators create the initial sound, sound modifiers shape the sound, and signal movers control the flow of the sound through the system. By combining these modules in different ways, you can create complex and unique sounds that would be difficult to achieve with traditional synthesizers.


VCV Rack is a popular modular synthesizer software that emulates a modular synthesizer system. It offers a vast library of modules, including sound generators, sound modifiers, and signal movers. While VCV Rack is a free and open-source software, VCV Rack Pro offers additional modules and features for a fee. These additional modules and features can enhance your sound design capabilities and workflow, but the free version of VCV Rack is still a powerful tool that can be used to create amazing sounds.


If you’re an Ableton Live user, you can use VCV Rack as a plugin in Ableton Live. This allows you to control and record VCV Rack within the Ableton Live environment. You can use Ableton Live’s MIDI clips to trigger VCV Rack modules and automate parameters in real-time. This integration makes it easy to incorporate VCV Rack into your production workflow.


Essential modules


When it comes to essential free modules, there are a few that every modular synthesizer enthusiast should have. For sequencers, the SEQ-3 module is a great starting point. It offers three independent sequencers with up to 16 steps each. The reason why you want to have a sequencer with 3 built in sequences is because you can use them for not only melody making but also for other types of modulations like velocity.

The VCO-1 (VCV) module is a simple yet powerful oscillator that can produce a wide range of 4 different wave shapes: sine, triangular, saw and square.The idea is usually to pair this with the 4 input mixer from VCV where you can decide how much of each sources you want to use to create your own signal. I would encourage you to add a noise source (VCV again) and have a bigger mixer such as the 8 inputs by Bog Audio and then add some noise to it. Noise seems to gel all of it together and also add harmonic content.


For filters, the VCF-1 (VCV) module is a great choice. It offers low-pass, high-pass, and band-pass filter modes, as well as a resonance control for shaping the filter’s frequency response. But I would also high recommend the simple VCF from Bog audio because it has more options (filter curve slope and v/oct) which is super useful for shaping your sound.


The heart and the brain


One of the biggest benefits of using VCV Rack is the ability to use master sequences and modulations. Master sequences are sequences that control multiple modules at once. This allows you to create complex patterns that evolve over time. Modulations are similar to master sequences, but they can be used to control any parameter in any module. This allows you to create dynamic and evolving compositions that change over time.


I put them into 2 categories:


The heart: Anything related to the tempo of the song. Is it constant or broken? Everything will be in sync or not, some might be following the tempo but perhaps double speed or half.


The Brain: This is for modulations that will be affecting multiple parameters across the patch such as scaling, transition, melodies/hooks, velocity, accent and even mixing.


Starting kit for a patch:


I’d recommend building a template patch to start with that has the essentials to get started. Then you can start adding to it. I think it’s important to start fairly simple too because it can easily get complicated.


Main tempo (Brain)

  • Simply use a LFO. I love the 4FO from Bog Audio because it features 4 of them at different phases. 
  • Then I’d add a divider to have a different multiple and speed from the heart. You could use Clocked by Impromptu both for tempo and divider but I prefer an LFO for tempo because the modulation is easier.
  • I love to have multiple dividers so my full sequence is offering 1/4th, 1/8th, 1/16th steps covered so I can decide what to populate and where.


Hook (heart)

  • This is where you could SEQ-3. It has 3 lanes so you could also have 3 variations.
  • Quantizer for global scale: use the VCV one.
  • I’d use a sequential switch to go through the lanes. Count Modula has a few but I also like the switch by ML Module because of the various options it has.


Voices:

  • Use samples or oscillators of your choice but you’ll need an ADSR, a VCA and 2 filters so you can properly control the signal. I’d add an octave shifter so you can have one voice per octave.
  • I find Bog audio has everything you need here or you can use the default modules by VCV.
  • You’ll need a mixer for all those voices. I’d recommend the one by MindMeld. It is perfect.


Percussions:

  • Using the SEQ 3’s sequencing, you can use that as triggers for your percussion.
  • I’d use a Bernoulli Gate to add probabilities to your percussion or switch between sounds. The one by Audible Instruments will do the trick.


Modulation

  • One master LFO. Again, a 4FO would do.
  • One master random. Use the random module from VCV.


Conclusion and Using VCV Rack In Ableton


In conclusion, VCV Rack is a powerful tool for exploring the world of modular synthesis. It offers a vast library of modules, including sound generators, sound modifiers, and signal movers. The free version of VCV Rack is a great starting point, but the pro version offers additional modules and features that can enhance your sound design capabilities and workflow. If you’re an Ableton Live user, you can easily integrate VCV Rack into your production workflow. Essential free modules like the SEQ-3, VCO-1, and VCF-1 can help you get started with creating complex and unique sounds. Master sequences and modulations allow you to create dynamic and evolving compositions that change over time. With VCV Rack, the possibilities are endless, and the only limit is your imagination.


Minimalism in Music Production: Drawing Inspiration from Arthur Russell, Brian Eno, and Terry Riley


Minimalism is an approach that emphasizes simplicity and a reduction in the number of musical elements. This approach can be applied to many genres of music, but it has been particularly influential in electronic music, where technology and sound design can lead to overwhelming complexity. In the end of the 90’s, minimal techno had a huge bloom in popularity. It was in reaction of maximal music such as trance and hard techno. This is when I started making music because I felt a strong connection with minimalist music.


In this article, we will explore how minimalism has been used in music production, drawing inspiration from three influential artists: Arthur Russell, Brian Eno, and Terry Riley.


The Power of Minimalism


The essence of minimalism in music production lies in the ability to create a focused and spacious sonic environment. By using fewer sounds, producers can create a clear and uncluttered atmosphere that allows the listener to focus on the details of each individual sound. This approach works well in electronic music, where sound design and texture are often the main focus. 


Modular and eurorack synthesizers, in particular, are great tools for exploring minimalism in music production. With their limited number of modules and limited space (but also their costs!), these instruments force the producer to be creative with fewer resources. This constraint can be a great source of inspiration, leading to innovative and original compositions.


One of the most important differences between now and the late 90’s is the accessibility to music production tools. Back then, you’d be caught to use only a few things you’d have, such as a drum machine and a sampler. Now we have so many things that it is hard to focus on what to pick. Minimalism starts with fully embracing limitations one has to impose to themselves.


 Simple, Constantly Evolving Phrases


One of the key challenges in minimalist music production is to create variation and development with limited musical material. A useful exercise for developing this skill is to focus on creating simple but constantly evolving phrases. These phrases can be created using a limited number of notes, rhythmic patterns, or sound textures. 


I also like to think about picking up to 4 different sounds i love and will try to make phrasing out of them.


Arthur Russell was a master of creating evolving phrases in his music. His use of repetition and subtle variation created a hypnotic and mesmerizing effect. In his track “Lucky Cloud,” for example, he uses a simple four-note bassline that repeats throughout the track, but he gradually adds layers of percussion, synths, and vocals, creating a rich and complex texture. He would rely on reverb, delays and use of panning to create all the tension and variations necessary to create engagement.

Brian Eno is another artist who has explored the possibilities of minimalist music. His approach is often characterized by the use of ambient textures and drones, creating a meditative and introspective atmosphere. In his album “Music for Airports,” he uses a limited number of simple chords and melodic fragments, layering them to create a constantly evolving soundscape. He is known for developing generative tools to create his music. He will let the machines come up with ideas and then will cherry pick the moments he loves.

Terry Riley is a pioneer of minimalist music, known for his innovative use of repetition and improvisation. His piece “In C” is a landmark work of minimalist music, consisting of 53 short phrases that can be repeated and combined in different ways, creating a virtually infinite number of variations.


 Exercises for Minimalist Music Production


Here are three exercises inspired by Arthur Russell, Brian Eno, and Terry Riley to help you explore minimalism in your music production:

  1. Arthur Russell Exercise: Create a simple four-note bassline and add layers of percussion, synths, and vocals to create a rich and complex texture. Focus on reverb and delays, panning. Challenge: use your voice (yes, do it).
  2. Brian Eno Exercise: Create an ambient soundscape using a limited number of chords and melodic fragments, layering them to create a constantly evolving texture. You may try to generative melodies scaled to a key and then keep what you love. Challenge: record 30 minutes of music, unedited.
  3. Terry Riley Exercise: Create a short phrase consisting of a few notes or a simple rhythm. Repeat and vary this phrase, gradually adding layers of texture and improvisation to create a complex and evolving composition. Challenge: Face ultimate repetition and stick to it.


Tools you can use:


Synths I love: I seem to always come back to Pigments as one of my favorites. It features multiple possible options when it comes to modulation and it makes it a very versatile tool. What I love is to start from a preset (it has a shop in the plugin!) and then tweak it to taste. The ones that are included are lovely starting canvas that are in tune with current genres. Quanta 2 and Diva would also be great here, for the quality of their sound.

When it comes to reverbs and delays: I’m a big fan of anything that comes from Valhalla’s effects. They are perfectly priced and the quality is trusted by top producers for a reason, because they sound amazing. Otherwise, if you want something solid, you could consider Fabfilter Reverb and Neoverb for a cheap option. Both are often used on my side.

Generative tools are numerous in the Ableton live environment. You could use simple max patches like Snake or Rozzer and have some LFOs mapping that make them evolve through time. Otherwise, the good old Riffer comes handy. I would recommend Alexkid VST Seqund that really wonderful as well. Otherwise, dive in VCV.


Conclusion


Minimalism in music production is a powerful tool for creating focused and spacious sonic environments. By using a limited number of sounds and musical elements, producers can create innovative and original compositions. Drawing inspiration from Arthur Russell, Brian Eno, and Terry Riley, we can explore the possibilities of minimalist music and develop our skills in creating simple but constantly evolving musical phrases.


Chasing success is a failed model

There’s something quite misleading about seeing artists we love in their studios, especially when there’s all the gear one can dream of. On one hand, you see someone accomplished with all that equipment and you might be thinking that the success brought all that gear or perhaps, the gear made that success. Then, on the other hand, you see yourself in that exact position where you dream to be the spotlight of everyone else. In both cases, you can imagine success all around and the studio is the key to get to your goals.


Chasing perfection is like running after a mirage in the desert. It is basically hunting a ghost, not knowing if that ghost is really exists in the first place.


In past posts, I explained some challenges regarding that and how to work with a definition of done so that you can have a better idea of where you’re heading.


The music industry has undergone a significant transformation in recent years. With the rise of digital music streaming services, social media, and other digital platforms, the traditional model of chasing success in music production is now an outdated approach. In this blog post, we will discuss why chasing success in music production is a failed model, and provide alternatives for musicians to achieve fulfillment in their music career.


The Misconception of Success

One of the biggest misconceptions in the music industry is the definition of success. Many musicians view success as achieving fame, wealth, and recognition for their music. However, this definition is narrow and incomplete. All those can’t be measured. You might think that a certain number of followers on a social media will provide some sort of success, but once you have that amount of people, you will realize that it doesn’t bring any passive income or more sales. You need to continue working hard times to get something out of it, which will be taking time away from your studio use. Same for sales. You might make a bunch, but then what? You’ll be chasing something else. Success in music should be viewed as a personal accomplishment, rather than an external validation. I often refer to that as perhaps, happiness.

Alan Watts, a British philosopher, once said, “The meaning of life is just to be alive. It is so plain and so obvious, and so simple. And yet, everybody rushes around in a great panic as if it were necessary to achieve something beyond themselves.” This quote perfectly illustrates the importance of finding personal fulfillment in the music-making process, rather than chasing external validation.


The Context of Success

Another aspect that musicians often overlook when chasing success is the context in which success occurred. The success of an artist is not just a result of their talent, but also a result of timing, luck, and other external factors. The movie “Searching for Sugarman” tells the story of Sixto Rodriguez, a musician who achieved critical acclaim in South Africa in the 1970s but remained unknown in the US. The film highlights the importance of context in success, and how success can be achieved in unexpected ways.


Alternatives view to Chasing Success

So, if chasing success in music production is a failed model, what are the alternatives? Here are some alternatives to consider:

  1. Focus on the Creative Process (the journey)

One of the best ways to find fulfillment in music production is to focus on the creative process. Rather than obsessing over the end result, focus on the journey and enjoy the process of creating music. This approach will help you stay motivated and inspired, and ultimately lead to a more fulfilling music-making experience. As this is easier said than done, how do I do that? Well, when one is focused on the end result, you’ll get annoyed if something goes wrong: for example, a synth doesn’t sound as you have in your initial vision. Focusing on the process mostly means that you’re curious about the task you’re doing at the moment and less trying to perfect things.

TIP: Try to have 50% of your studio sessions aimed at doing nothing but jamming and having fun instead of be productive.


  • Develop Your Skills

Another way to achieve fulfillment is to focus on developing your skills. The more you practice and refine your craft, the more you will grow as a musician. One thing I tell people is that you’ll learn more by starting 100 songs than trying to perfect one. When you start 100 different projects, the goal is to face a different challenge each time. It could be a new technique, the use of a new plugin or an unusual sound. This will not only lead to personal satisfaction but will also make you a more competitive and capable musician in the industry.

TIP: Try to start 100 songs then work with them in alternating.


  • Connect with Your Immediate Audience

One of the most rewarding aspects of music production is connecting with your audience. The mistake most people make is to try to reach out to people who don’t really care. What you need to do is foster the close people who could care, which I call (no pun intended) the circle of five (wink to the circle of fifth). This approach will not only provide a sense of fulfillment but will also help you build a sustainable music career.

TIP: Commit to connecting with your 5 people and create a dynamic where everyone can help each other.


  • Set Realistic Goals

While it’s important to focus on the journey rather than the destination, setting realistic goals can help you stay on track and motivated. Rather than setting goals based on external validation, focus on setting goals that are meaningful to you and align with your personal values. Question your goals, talk to experienced mentors and producers and then try to scale down your projects to a minimum.

Tip: make a list of different sounds you love or songs you often listen to and then aim at trying to understand what you love it. Then work towards in making music you love.


Conclusion

Chasing success in music production is an outdated and failed model. The music industry has undergone a significant transformation in recent years, and success can no longer be defined by traditional metrics such as album sales or chart performance. Instead, musicians should focus on finding personal fulfillment in the creative process, developing their skills, connecting with their audience, and setting realistic goals. 

As Alan Watts said, the meaning of life is simply to be alive. The same can be said for music production. The most important aspect of music production is finding personal fulfillment in the process of creating music. So, rather than chasing success, focus on the journey and enjoy the process of making music.


How I Classify My Projects and Files

I’m not sure if you’re like me, but it’s possible that your hard drive, after a while, becomes a total mess. There will be a few folders with some projects in them, and other folders with random samples. Not to mention all those projects named New project…


There are ways to organize folders and all your work that allows you to easily navigate it. The way I classify projects is also aimed at having a quick scope of which one I will work with next, which songs should go in an album, and those that need specific actions.


Before I explain myself, let’s talk about the different stages a project will go through and also, the different tasks related to that.

Note: If you’re new to this blog and aren’t familiar with my production technique, I would encourage you to read a few articles about this, which will give more sense to what I’m about to describe.


The different stages of music production (and labeling your projects so)


The way I work to maximize the results is to take each step in making music and call it a phase, or a stage. 


The different stages I label with are these:


1- Ideas digging, concept, testing techniques, hook finding, etc. 

2- Preliminary loop made from stage 1 that could be the heart of the song. Basic structure of the song.

3- Arrangements.

4- Mixing.

5- Song at 90% done and needs last minor tweaks.


The main reason why I give high priority to the state of the song is based on the idea that when I want to work on music, I might be in a specific mindset. Perhaps one day I’ll want to just have fun doing some sound design or another time, I need to work on an EP and will be checking for the few songs incubating. As you might know my approach for when I do music, when I reopen projects, I want to quickly know where that one is at. In an hour of work that I do on music, I hop from one song to another, while I also like to revisit projects that have been sleeping for weeks because what I want is to always have the freshest perspective on my work. If you work on something for hours, trust me, by the end of it, you might have lost all perspective and the work will suffer for it. 


Stages 1 and 2 can overlap


I’ll give you a study case of mine so we can have a clear understanding of how I can use a project and its evolution toward a finished song. But we’ll start with the 2 first stages. 


Projects that are in stage 1 are your pool for fishing ideas. 

So the idea of a project in stage 1 is really about ideas, not much more than that. It could be more if you want, it’s up to you.


Stage 2 is where we’re working on a precise hook or main idea. There are multiple ways to work and find hooks, we have talked about that in previous articles. I usually drop a very simple percussive loop to define what will be the rhythm of the song, its groove, and its accents, and then place what would be the hook on top. We often overthink the hook. It’s often very simple. 


Usually, in stage 2, I find that I should have:


  • A root key 
  • A scale
  • A hook, not longer than 1 bar
  • Rhythmic groove, time signature


If I have all of that, then I know the project has passed to that new stage and will rename it. Usually, when I rename a project, I make sure to save it, and do a “collect all and save” to make sure I copy all the needed files from its previous form. When you rename a project, it’s better you do “Save project as…” in the File Menu of Ableton and its original stage 1 will still exist. You can later decide if you archive the original project or keep it as an incubator. Usually, when I’m finding an idea from an incubator, I will make sure I save the different effect chains as macros so that they can be reused. I also will color code my channels, and name them as well so I can harvest them later from the right side browser of Ableton.


However, you might have an incubator at stage 1 that will never grow because you could mutate the original incubator to stage 2 but it’s completely different, but still came from a father project. For instance, I have projects that are sorely made for making sounds, where they never have evolved from there and tons of songs or even live sets have come from them.


Arrangements, the full story of Stage 3


I find that arrangements should start by working on the middle part of the song and then deconstruct that idea to the start of the song. So the early part of Stage 3 would consist of working in the middle part, roughly 1 minute long.


As you can see, you basically shift your initial Stage 2 loop and drag it to arrangements, then stretch it. Some people build their initial loop in arrangement mode so you can just move it from the start to the middle. When I work on arrangements, I usually love to make a quick draft of the song, where I’ll split it in 3 sections: intro, heart, outro. That draft is made quickly, sometimes in a surprising time of 20 minutes alone. I will come back later with a fresh look and listen from the beginning and will readjust the arrangements so it makes more sense. 


In stage 3, the mixing isn’t important. You can level it for pleasant listening but I wouldn’t worry much about it. 


Mixing as 4th stage


This doesn’t need much explanation here but one thing to clarify is that it’s not something rigid either. You might notice some arrangement problems in mixing that will make you redo them. As I always say to clients, if your sound design and arrangements are solid, there will be basically almost no mixing, or just touch-up.


Stage 5 is when your song is 90% done


To me, 90% done is my definition of done. I know it sounds weird but it is like that. First off, when you first accept that a song is never done, it’s easier to accept its imperfections and to move on. Second, you want to bring as many songs as possible to 90% because the day you want to do a release, you’ll take those and then wrap them all at once to 100%. This might sound confusing but letting your songs sleep at 90% and then wrap multiple songs at once means that the last stretch for all of them is your chance to unify them to make them coherent as a release. 


So what’s the difference between Stage 4 and 5?


Well, it’s kinda when you’re done arranging, you shift it to stage 5. It’s sort of like, I’m done with this one. Once in a while, I might reopen 5 to maybe do a little tweak but to me, when it gets to 5, it’s sort of saying that it’s ready.


In conclusion


When I open my folder with all my projects, I will see from 1 to 5, all songs being in order. With the file browser, I can also classify them from 5 to 1 as well. I like in mac OS to be able to put some tags as well. That can be for genre, if it’s signed or whatever is useful.

Photo by Amy Shamblen on Unsplash

How To Prepare To Make Music

When I was 10 I was invited to be part of the track and field crew at my middle school. While I always considered myself a proficient runner, one thing that we started to do more was stretch. At first, it seemed like a huge waste of time, since all I wanted to do was run. Instead, we were spending all this time doing these exercises that, to me, had nothing to do with running. However, after months of stretching, I started to realize that I was getting significantly faster. This is because I was warming up. Just like you have to warm up to prepare for running, the same goes for music. In this post, we’re going to discuss warm-up techniques that help you prepare to make music. 


Your Tools Aren’t That Important

I’ve talked about this frequently in previous articles, but it deserves to be reiterated. In music production, clients often think that they can buy all the equipment they want, and somehow, miraculously, they will be inspired to create. However, more often than not, they get stuck and the most productive thing that happens is my client cleans the dust off their wall of useless gear. 

Just buying equipment doesn’t do anything if you’re not intimately familiar with it. Imagine buying a nice guitar and thinking you can play it right away despite not knowing how to play guitar. Sounds ridiculous, right? Of course, it does! It takes time to learn a new instrument. It takes frustration. It takes commitment. However, sometimes they do know how to use this gear, and still, nothing happens. More often than not, their problem is they don’t know how to prepare to make music. And just like I was warming up for track and field, so must a producer. 


Come Up With Your Own System When Preparing To Make Music

Now people think there is a uniform way to prepare, however, everyone is different. The mind is not a quadricep, where there are standardized stretches that make it more functional. So what we do in coaching is to come up with a system that works for them. I start with figuring out what their current habits are because one thing we do know is that what they have been doing isn’t working. 

So once we figure out what they have been doing it’s time to figure out a system that works for them. Like I said earlier, everyone is different, so everything I’m about to make is a suggestion, not a catch-all. 


Actively Listen To Music To Prepare To Make Music

a photo of preparing to make music by actively listening to musicThe first thing producers can do is listen to music before they make it. This might be a huge “duh” statement, but how many people actively listen to music? How many people come home, crack a beer, put on a record, and then just sit there, doing nothing else, except engaging with the music? 10%, maybe? However, it’s this 10% of people who have set themselves up for success if they are music writers themselves.

When listening to music actively, it’s best to think of it as a reference track, in a way. Listen to the song over and over again. Note the timbre and structure of the song. Like actually note it in a notebook. This will get your mind prepared to make music by actively engaging it.

When actively listening to music, make sure to concentrate on the appropriate parts of a song. Lots of producers obsess over the kicks, hi-hats, and the bass, but at the end of the day, it’s the melody that people remember. So do yourself a favor and try to concrete things that you can easily absorb. You will probably not remember the exact timbre of a hi-hat, but you might remember the melody enough to replicate something similar later.


Listening To A DJ Set Will Help You Prepare To Make Music

Many students tell me that they find inspiration while they are in the club, and can’t get home quick enough in order to harness it. A solution? Listen to a DJ set for 20 minutes to an hour. The longer you prepare the better. 

An image of someone DJing, which is a great way to prepare to make music

You can take notes on the transitions and compositional intricacies, something that you couldn’t do while in a club. While not exactly the same as a club, I often find that my students say that all the ideas they had in the club start manifesting themselves again.

One thing I like to do is put on a mix while scrolling through and listening back to the samples on my hard drive. By doing so, you can hear when a sample fits nicely into the mix, which you can categorize, and use later. Just make sure the volume levels match what you’re doing in Ableton. You want your samples to vaguely fit inside the mix, rather than being the predominant sound. This is a helpful way of managing samples as well, because otherwise when you’re just scrolling through samples, and not comparing it to music, you’re just comparing the samples to air.


DJing To Help Prepare To Make Music

I think DJing is a great way to prepare to make music. Similar to the other suggestions, DJing is a powerful form of active listening. DJing trains your ears to deeply understand the structure and mix of a song. You can easily add or subtract frequencies to see how they modify the song. You can also hear where transitions happen, allowing you to build your tracks out to be more DJ-friendly (if that is one of your goals). 


Build Categorized Playlists To Help Prepare To Make Music

I know earlier I said that it’s easier to concentrate on the melody of the song, rather than the rhythm of it. So what are you supposed to do when you want to work on a specific aspect of a song? Well, as you’re listening, throw the songs into playlists that are labeled based on the aspects of the song that are inspiring. So have one for the melody, have one for that really specific hi-hat or kick. Have one for a bassline. Then when you want to prepare to make music, you can go back to those playlists and warm-up actively listening to those.


Take Inspiration From Your Inspiration’s Inspirations

Another way to prepare to make music is to learn from the people who inspire your inspiration. For instance, I’m inspired by Ricardo Villalobos, so I often read articles about him. Through these articles, I found out that he’s inspired by pianist Keith Jarrett. Jarrett does not make electronic music, however, he’s clearly had a large influence on the genre, whether he knows it or not. So, naturally, I listen to Jarrett to see if I can’t harness some of that inspiration.


There Are Many Ways To Prepare Your Brain

At the end of the day, the goal is to get your brain engaged. You can play video games while listening to music, read a book, or go for a run. You can also paint, or write. These are all just suggestions and you should find the one that gets your mind warmed up, since as I stated at the beginning of the article, a mind is not a leg – there is no uniformity.


Favorite Equalizer For Electronic Music

People often ask me what my favorite equalizer for electronic music is, and my answer is that it depends on what their goal is, as well as their skill level. However, the EQs that I like for electronic music generally fit a certain set of criteria. Not every equalizer in this article fits all of the criteria, but here is a not-so-exhaustive list of things that I like to see when I’m purchasing a new EQ.

Keep in mind that all EQ’s are at their core, just filters, but some go above and beyond this. Equalizer settings for electronic music vary based on the timbres and styles, but each one of these will work universally for electronic music.


Criteria

  1. They have previews of the band that you can solo (you can press the button and hear the band on its own). This allows you to hear things more specifically.
  2. The plugin needs to be able to do oversampling.
  3. The plugin needs to be able solo the filter (EQ band).
  4. The EQ needs to have a mid and side mode, aka M/S mode.
  5. The EQ can switch from digital approach to analog. A digital EQ is very clean, and an analog is a little bit more organic and less precise.
  6. The EQ can be dynamic
  7. While all don’t have this feature, it’s nice if an EQ has a piano roll, so you can see how frequencies quantize to notes (this is a good way of seeing if a note will fit inside the track).


Fabfilter Pro-Q 3

A picture of one of the best equalizers for electronic music, in my opinion, the Fabfilter Pro Q 3

First on the list is the Fabfilter ProQ 3 – an affordable, easy-to-use EQ that hits most of the points I look for in an equalizer. It’s versatile, as in it can be used in both mastering and mixing. On top of state-of-the-art linear phase operation and the ability to get zero latency readouts on your EQ, you get natural phase modes, mid/side processing, and a bunch of other intuitive options.


A Neat Pro-Q 3 Trick


One of my favorite features is that if you have the ProQ 3 on multiple channels or busses, it can communicate with the ProQ 3’s on the other ones and let you know if there are conflicts in frequences.

Then, with the side processing (sidechain), you can easily duck precise frequencies, and you can even solo these frequencies to hear exactly how the sidechain is affecting the relationship between all the individual sounds. Or sometimes you don’t even need a sidechain, and you can just grab the curve and bring the conflicting frequency down.

Another neat trick with the Fabfilter ProQ 3 is that you can use it to split the stereo, and modify the same frequency at different amplitude levels on the stereo. So for instance, sometimes in a recording, you have a sound that mixes well on the right pan, and doesn’t quite mix perfectly on the left, but should be somewhat present on the left panning in order to fill out the stereo field.

With the ProQ 3, you can leave the level on the right channel as is, and on the left, alter the amplitude in order to fit the frequencies it’s conflicting with.

All of these reasons are why it’s a favorite equalizer for electronic music. It produces some of the best equalizer settings for bass, mids, and highs in all genres.


Wavefactory Trackspacer

A photo of Wavefactory's trackspacer, which allows you to have some of the best equalizer settings for electronic music without the hassle.

This one is not necessarily an EQ, but if you’re familiar with Wavefactory’s Trackspacer you can see why it would fit well within this list. Basically, it uses a mathematical formula in order to automatically figure out where conflicting frequencies are between two tracks and then it will apply precise side compression to the parts that are necessary to compress to get them to meld better.

You can even apply a low pass or a high pass filter to each end of the frequency spectrum to isolate what part of the sounds you want to compress. It’s ridiculously easy to use.


HornetVST Total EQ

a photo of HornetVST's Total EQ. It's one of my favorite equalizers for electronic music.

Not everyone has the money to invest in VSTs. However, HornetVST makes VSTs that are ridiculously cheap, and they often do sales, so you can get decent plugins for 5 bucks. 

The HornetVST Total EQ is similar to ProQ 3, sounds really good, and is easy to work with. Personally, I believe it’s better than Ableton stock EQ’s because you have a team working specifically on developing the best equalizer for electronic music (or all music at that matter).

While it doesn’t have all the gizmos and detail goodies that the ProQ 3 has, it’s still really good. For instance, it has 12 bands, a real-time spectrum analyzer, a whopping 17 different kinds of filters for each band, individual analog response and emulation for each band, band soloing (like in the ProQ 3), mono/stereo for each band, and a bunch more features.


Melda Productions – MAutoEQ

Image of one of my favorite equalizers for electronic music - the Melda Productions - MAuto EQ

The thing that makes this EQ special is the MeldaProduction Filter Adaption (MFA) technology which uses a formula to analyze your recording and make suggestions based on your recording, another recording, or even a spectrum that you can “draw” inside the interface. It’s kind of the Photoshop of EQs, in a way. It can also be used extensively for mixing and mastering.

MAutoEqualizer can place a track into a mix using the spectral separation feature, where you can, like in Photoshop, pencil your preferred frequency response. MAutoEqualizer’s technology will search for the best settings and alter the parametric equalizer bands to fit the best form.

With a normal equalizer, you are listening to the spectrum and then increasing or decreasing the amplitude of the band to fit what you believe is the correct level, which can be a chore. With MAutoEqualizer it gives your ears a little bit of a break by setting things to levels based on its algorithmic predeterminations. 

Also, if you are allergic to resonance in your sound then this EQ is for you. One of the things it does best is listen to the incoming signal, where it then finds resonances that it can apply filtering suggestions to. Then with the wet/dry knob, you can determine how much resonance you want in the areas it pointed out. It’s really simple, and a favorite equalizer for electronic music.


Brainworks’ BX3

A photo of the Brainworks’ BX3, which produces some of the best equalizer settings for electronic music.

A mastering and mixing EQ I recommend is BX3 by Brainworks. It’s an extremely powerful, surgical EQ that I use extensively. It can make space, clean, and can really polish things up. This EQ is not meant for adding color or character to mixes, but rather making sure that everything sounds as clear and crisp as possible. It’s a bit difficult to use if you’re not super familiar with mixing and mastering, but it’s extremely powerful, making it a favorite equalizer for electronic music.

This EQ’s Auto Listen feature automatically solos each band’s Gain and Q (resonance) controls based on their respective settings while doing the same with the channel’s Frequency controller. By setting Gain, Q, and Frequency on an individual channel (L or R), Auto Solo switches the monitoring to that channel.

Your tweaks are illustrated with separate frequency-response graphs for each channel. With this feature, you may notice that your adjustments will become more visible and audible than ever before since it allows for some of the best equalizer settings for electronic music.


Brainworks’ AMEK200

photo of one of my favorite analog emulated EQ's for music, the Brainworks’ AMEK200.

My favorite analog emulation EQ is AMEK200 by Brainworks. This is modeled after classic 70’s and 80’s mastering EQ’s, such as the GML 8200 and vintage SONTEC vintage EQs, but with some plugin specific upgrades, such as Auto-Listen features, variable high-pass and low-pass filters, and M/S processing.

All of these features result in a very transparent mix that does a really beautiful finishing. Note that the AMEK200 has no spectral readout, just knobs you twist, which is good for learning how to trust your ears.


So, which one is my favorite equalizer for electronic music?

There is no specific one. All of these plugins will allow for the best equalizer settings for music, whether that’s minimal house, techno, jazz, rock, hip-hop or k-pop. They all allow for the best equalizer settings for rolling bass, or entrancing mids, it just depends on your experience level, and your desire to learn and experiment.

This article contains affiliate links which I may make a commission off of.