Music Goals: Using Signposts instead of Goals

You often hear about setting music goals to keep your drive going and to get you pointed in the right direction. I’ve previously discussed the best ways to set goals and reach them, but as time has gone on, I’m not totally sure if setting goals is still the most efficient way to get yourself going.

However, some goals on your bucket list still might be relevant; but this depends on how you set them. For instance, whenever I have people in coaching, we discuss that setting goals should be done in a way where you can actually quantify the success of your work. For instance, people often try to set a goal of “becoming a known artist”, which, in a way, doesn’t make sense at all compared to “finishing an album.”  The problem with the first goal involves two important things:

  • You can’t control your circle of influence. What does “becoming an known artist” mean exactly? That you’re appearing in charts or that 1,000 people have your tracks on their Spotify playlists? You can’t control that at all and being vague in your objectives will lead you to failure.
  • Becoming a known artist may or may not, happen. If it does, you might not even be aware of your reputation and some people think they’re known, when that’s actually not the case (for example, buying “likes” on Facebook doesn’t mean anything).

In the second goal, “finishing an album”, you’re in total control of that goal – you can clearly make a “definition of done.”  If this definition is reached, then you’re done, and the goal has been achieved. Working in this way can be useful, but I would also highly recommend that you also put an end date on your goal.

Now there’s another alternative to setting goals, which, for lack of better terminology, I’ll define as setting a signpostWhy? Signposts are signs you see when you’re driving that help you be aware of the direction to go, to get you where you want, and also to reliably re-guide you when you’re lost. I like the term in French for “repères” – it’s sort of like “landmark” but not necessarily for physical places.

What is a signpost in your musical journey?

They are something you can rely on from a community you want to be part of, or a specific sound that you want to immerse your life with. I’ll give you the best examples as of how I applied the community approach to my life and why I use them in parallel to the type of goal-setting we described above.

In Montréal in the late 90s, we were really lucky to have a solid core of people and producers that gathered around the MUTEK festival which was our community but also a sort of signpost; a direction. It was a place where we could perform the music we all appreciated (arranged based on our personal tastes) and where we could also discuss music production. So back then, a goal for me was to play at MUTEK, but at the same time, it was that community that dictated how we had to sound to achieve it.

Another signpost I’ve used was a sort of music “target” I set through Ricardo Villalobos. I’d study his music, his sets, and a recurring question I had was “will he play this track of mine?” There wouldn’t be any goals attached to this besides, perhaps, having him play my music, but it was more as a reference point of how my music could be made or adapted,

I often do mixing and mastering for artists and labels, or do coaching, and one thing I often see is how people are a bit lost on determining who their music is for. Who do you want to reach exactly? Who inspires you? Which community would support and encourage you? This is the type of question to seriously consider, as I often work with people who are far from the physical community they’d like to be part of and rely heavily on the internet to be in touch. For instance, I have in mind some guys from South America who love Romanian artists – that’s quite a distance!

In past articles, I’ve about the importance of networking. Here are a few ways to help you find your own set of signposts:

  • Locally. Is there a club, a venue, or promoter that is booking and playing the music you love? Where is the closest place to you that could be your local reference? This is very important as you can get to meet people who have the same tastes as you. Perhaps it’s a festival that you can attend in another city, like MUTEK (this reminds me of a huge community from Colorado used to visit MUTEK in a group of 20! They would forge bonds and networks on their trips).
  • Online. I find it’s important to find a crew that make good podcasts, DJ sets, or music that gives you goosebumps. A trap however, would be if you aim too high, at very big artists and organizations (ex. Time Warp in Germany) where it is so big that becoming part of organization might become a huge puzzle and is very difficult. There are many smaller festivals that exist that have the same kind of music but on a smaller scale, you can grow with them. That said, try to downscale your target, or follow the bigger names but try to connect with the other, smaller guys who like that same music but are also emerging.
  • Aesthetic, genre, mood, direction. Try to find artists you like that are emerging and look stable and serious about their craft. You don’t need to contact them; it’s more about following their production and supporting them. Be a fan, someone who encourages and gives, while not expecting anything in return. Feeding people that inspire you is a good way to invest in yourself as well. I’ve supported and encouraged artists that started to go well but then have disappeared; it’s a disappointment, and sometimes I wonder what else I could have done to help. Seeing someone you love perform and do well is a great motivation for your own art!

I’d love to hear what you consider to be your own signposts!

Playing Electronic Music Live – How to Prepare Your Live Set (Part 5)

In the previous four posts about playing electronic music live, I’ve basically covered everything you need to do before playing live. Now comes the moment of truth, where you’re basically ready and booked to play. This post will be covering the last mile of preparations including how to do a proper sound check, which is critical to play a quality set, and some bonus tips on the last things to do before hitting the play button.

Sound adjustments

Here are some main pointers about making final preparations for your sounds:

  • Clips don’t need to be perfect or mastered.
  • Leave everything with lots of headroom. We’re talking about -12dB.
  • The gain mainly comes from what you have on the master (bus). Keep it simple too.
  • The first 5-minutes of your live will be about fine tuning your sound.
Why the clips don’t need to be perfect

This is a bit hard to explain, but I’ll keep it simple. Over processing your sound might turn out horribly wrong in a venue, and if that’s the case, there will be no way back. I’d rather have something imperfect and tweak it at the sound-check to what feels best. If you’re doing multiple gigs, this also allows you to have different options for different venues. Playing on a very little sound system versus a open air festival will have totally different feel and you might have to use your compression/EQ differently.

Clips with headroom will do the job

One of the things people don’t notice is that for some sounds, channels might not be sounding like they do in the studio and thus, in a live context, you’ll need to push up the gain on certain elements that you may not have expected. Honestly, it’s more important that you sound right versus loud, and this means you need to be precise in all your sounds adjustments and find a balance. This also means that if a sound still needs to be louder than others, by leaving headroom, you’ll have space to push your fader up. If everything is maxed, you’ll only have a little space to work with which is inconvenient. Don’t hesitate to look at the meters of each channels to make sure they’re leveled. While not the perfect way to tell, it’s still useful and if you’re stressed, you’ll appreciate this quick tip regarding the gain stage, there are also two things you can do:

  • A compressor in a Send bus for all channels needing a boost. Have the compressor be aggressive with a high ratio, but a slow attack. Send to that channel as needed.
  • Routing channels to a “family bus.” Instead of having the channel sent to the Master, have it go to another channel which will act as a bus. I like to have 3 of them: low, mid, highs. Each gathering channels, having extra compression and EQ. Plus you can quickly adjust the tone of your set with these faders. All those busses will go to the master.
The Master bus will do the job

On the last bus, I like to have a limiter that will boost the incoming signal enough to see it pump with a gain reduction of about -2dB. So you might have to add +6dB to the gain for instance. This way, your channel faders might, at first, only be at 3/4 or half way but you’ll also have enough room to boost all the way to zero. Do not use Ozone or other “quick fix” mastering helpers unless you really knowing what you’re doing. I would encourage you to use a shelving EQ just before the limiter. The 3-band EQ in Ableton will do but there are also other you can use too. The idea of a shelving EQ is to quickly adjust frequency zones.

TIP: How to know what to adjust? Let’s say you feel there’s not enough low end (Kick/bass), then reduce the mids, followed by boosting the Limiter’s gain. Don’t boost the bass!!

Adjusting your sound in the first 5 minutes

I find the best way to find my levels is to take my time in the intro of my set and fade-in elements such as the kick, melody, etc. You can bring them at a level that feels like what you are familiar with. It’s important to spend time in the booth/stage before playing to be aware of the levels of the different elements in the room. I also like to go in the crowd area for five minutes to be aware of how the sound is, then go in the booth to see how the levels translate. Sometimes on the dance floor you have the highs piercing while its not the case on the stage or vice versa. This is a super important lesson for how you mix at home too and how it translates in the world.

Sound-checking

Ok, so now you’re at the venue and you’ve been given the opportunity to do a sound-check. Sometimes, you won’t have that luxury, so be grateful if you can. To make the best of this experience, focus on plugging in your sound interface so it’s ready to go and don’t worry so much about having the entire set-up ready. It’s common that sometimes there will be need for space and you might have to unplug or move some stuff. I’ve learned that leaving gear laying around might also be a bad idea, as I’ve seen people spilling drinks or even, some stuff getting stolen. Anyhow, here are main points of phase one of your sound-check:

  1. Beforehand, have your set saved so that when you press play, the most “intense moment” or peak time of your set plays. Most likely, the sound technician will ask for that to start with and I like to have than ready to fire when I arrive and be plugged. His first interest will be to see how he needs to adjust the limiter of the PA for your sound and he might also do a quick EQ curve.
  2. If you’re plugged in a DJ mixer on the stage, your first thing will be to make sure your channel is set to “Line-in”, then boost the gain of the channel to reach zero and avoid seeing any red peak indication both on the channel and the master.
  3. Make sure you can control the sound in the booth/stage and put it to a comfortable level. During your set, it’s important to mute it a few times to see what’s happening in the crowd.

If your sound reaches the PA and all is OK, then the first phase of your sound-check is completed. The gain is usually handled by the tech and you can control extra gain if needed.

Now, phase two of your sound-check: tonal adjustments.

How do I know if my sound is OK?

When at home, try to find a song that you know sounds similar to what you do, and that has its levels balanced (eg. kick vs mids vs highs) and load it up in a net channel of your set. That channel’s output should be set to “External out” and not master.

  1. Play the reference song to the venue and see how it sounds both in the booth/stage and the dancefloor. Make mental notes.
  2. Compare your master output to that reference first in the booth, then on the dancefloor.
    1. Is the volume more or less the same? Adjust limiter, compression.
    2. Are some frequencies harmful? Adjust the EQ.
  3. Go one by one, to the core of each moment/song of your set to see if there’s anything that clashes. My quick way to do this is to always start with the kick to make sure all kicks are at the same level, then bass, melody, percussion. You want all the kicks to be very close so that you don’t have nasty surprises when you jump from one song to another. Same for other parts.

You’re now basically ready to play. So if time allows you, try to quickly play between songs. See if something needs to be adjusted.

TIP: You might for instance see that all your percussion need a correction by EQ. You can add an EQ on the channel to do it or you might freeze & flatten that channel with the EQ to make it simple.

What if there’s no soundcheck?

If this happens and that means that phase one is not available. The venue might ask you to do a “line-check”, which means you send your audio to the mixer and the tech will deal with it. You might have no tech and then you have to do it in the mixer yourself. Just make sure your signal is about the same as the person before you and… good luck!

Extra tips for the minutes before you play from an experienced performer…

These are the things I always do and that took me time to figure out, so consider using them for some extra comfort:

  • Be mentally ready to play an hour before you play. Be around the booth, make sure your equipment is installed and tested that it works properly. On many occasions I had to change the mapping of my controllers – god knows why – so it’s good to have some buffer time.
  • Spend a moment without talking to anyone at least 15 minutes before you play. Keep focus.
  • Avoid drinks nearby your equipment. You know why.
  • Have a friend to filter around and help. I like to have someone to push away unnecessary people who want to talk to you while you play.
  • Bring extra cables of everything: USB, Audio cables and even a cable to play from your internal sound card.
  • If Ableton crashes, have something ready to play in iTunes in case and while you restart the program.
  • Use hearing protection if you can.

Let me know if you have questions and perhaps I’ll do a part 6 to playing live!

Transient Shaping

In this blog, I’ve already discussed many ways of playing with your track to create new textures and variations and how to keep your sounds interesting. I’d like to discuss another way of colouring your music: transient shaping; something that can completely change the way a track sounds and feels, depending how you shape your sounds.

To experiment with transients, we will need to play with certain features of Ableton Live which can be very powerful. Alternatively, you could also invest in a type of plugin that is in the category of “Transient Shapers”; there are many out there but some of my favorites are the MTransient by Melda Production and Transient Shaper by Softubes. Both offer quality results at a decent price.

Firstly, if you’re not familiar with transients, they usually consist of the beginning of a sound/sample. If you’re familiar with the Attack-Decay-Sustain-Release (ADSR) envelope of the synthesizers, the attack would be generally manipulating the transient. Sometimes its fast and strong, or other times, it’s slow and smooth. For a kick that punches, you want it to be pronounced and snappy. If you’re after that specific feel, then the transient shaper will really be interesting for you. A plugin will allow you to make the transient more apparent or make it quieter; generally you will also be able to control the sustain of the transient. Sometimes you might want your transient to snap but the rest of the kick to feel quieter; a transient shaper plugin will be able to do that with 2 knobs. I have multiple versions of these types of tools and use them daily – it’s quite captivating what you can do if you exaggerate the attack of sounds which don’t have any transient at all.

In Ableton Live, you can also have fun with a feature integrated in the sample’s detail view. Let’s have a look at how you can manipulate it and how you can have fun with it…

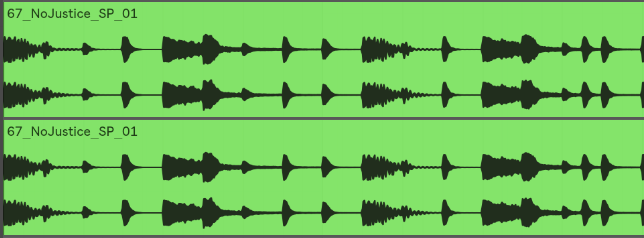
First take a loop sample, and duplicate it in another channel.

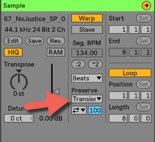
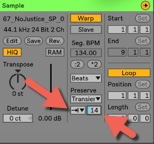
The on the duplicated loop, make sure you set up your details like this. Now turn down the percentage of the transient.

You’ll notice that as you lower down this box, only the transient will remain and the rest of each sounds will disappear. You’re basically trimming each sound to keep just the beginning of it, which is the transient. The new channel can be leveled up and layered with the other: you’ll now notice the transient is louder and you now have certain punch added if there was not enough originally.

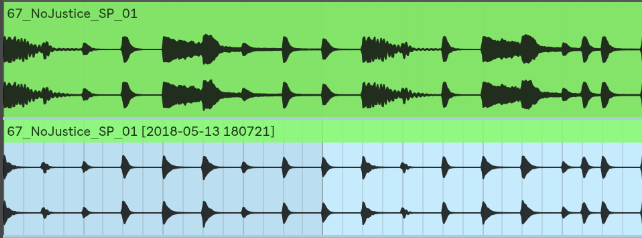
If you flatten or consolidate, you’ll get a new view:

See the difference and what we removed? By layering the beginning, you’re giving more punch.

Tip: try it with a kick loop or a hihat loop.

Now your fun really has just begun!

Here are a few suggestions to try for pushing your sound design even further:

  1. Control/lower the transients of the original loop with a compressor. If you set a compressor with a fast attack, it will control the transient. Play with the release to really tame it down.
  2. Add a reverb or any effect on the transient channel alone. This is really cool because the effect can either affect the beginning or the end of the sounds. I like to put reverb only on the sustain while leaving the transient dry, which gives more precision to your percussion instead of having them lost in a pool of reverb.
  3. EQ the transients to keep only the high end for sharp precision or just the mids for more oomph.
  4. Side-chain the transient with the original sound. Experiment with this one and you’ll achieve some fun results!
  5. Compress both channels by grouping them.

Feel free to share your thoughts about transient shaping!

Home studio essentials: Starter kits for electronic music production

Due to popular demand and because I receive questions about what to buy to start making electronic music almost daily, I decided to cover the topic based on various levels of investment. If you follow the plan I outline below, you won’t fail or be mislead into bad purchasing decisions. This list is based on years of discussions with people, consultation with clients, and testing a variety of this gear myself. As previously covered in a past article, we’ll start with the level where you are completely new to making electronic music and then build up from there. If you need guidance beyond first levels, scroll down to see tips for larger budgets and more advanced levels of producing. Just remember, the type of studio electronic gear that you choose to use will have a profound effect on your sound.

Level 1 kit: The beginner Studio Electronic Musician

Your level of knowledge:little-to-none; you’re contemplating making music.

Includes: Laptop, DAW and Headphones.

Music really doesn’t take much to get started with anymore. There’s a myth that many people believe, that the more equipment you have, the better the music you’ll make and thus it’s waste of time if you don’t have much money to invest in the early stages. This is false, I know some pretty amazing music that was done on the cheapest setups you can imagine. Remember, studio electronic music started as a DIY endeavour, in cultures that were not traditionally wealthy.

The only thing I’d strongly encourange you to do is get a demo version of Ableton, Reason, or Bitwig to see which one seems the best for you but my personal pick will always be Ableton, which I’ve been using since 2002.

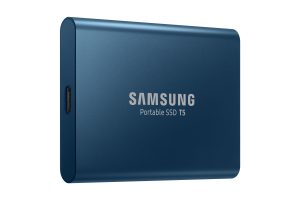
For your laptop, if you can invest in one, I’d say try to get a PC or MAC with at least a i5 or i7 processor and an SSD hard drive; this will make a tremendous difference in how you’ll be able to manage the needed resources. Plugins and software are mostly dependent on a powerful CPU to process information, while the fast hard drive is to access how the samples are read. If your hard drive is slow, it can create bottlenecks if you’re reading large files. An external SSD is critical should you rely on something not internal. Also with regards to RAM, the higher the better. At the moment, I find that a minimum of 6gb will make a difference but if you can get more, that’s even better. High RAM is also a critical part of how smoothly your DAW will run.

Harddrives & Laptops For For Studio Electronic Music

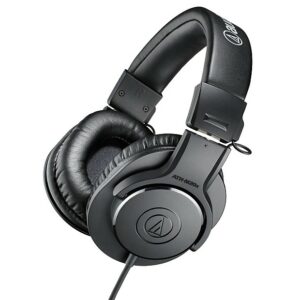
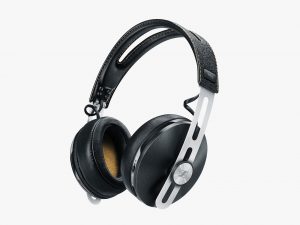
You’ll need a good pair of headphones. If you don’t like making music, you’ll still have a good pair. I find that it can be misleading to not invest much in it so if you can, get the best you can get. I propose here pairs for different budgets.

Headphones

Level 2 kit: Getting confident In Studio Electronic Music

Your level of knowledge: You’ve made some songs and you start to feel limited by the level 1 kit (headphones and a laptop).

Includes: extra software/plugins, Speakers, MIDI controller.

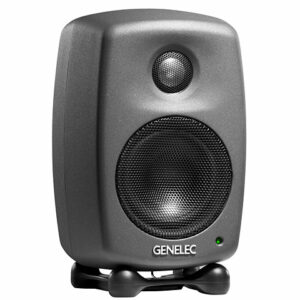
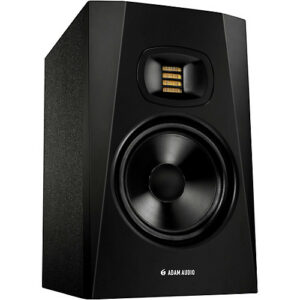
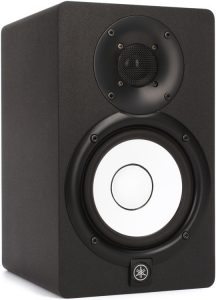
Ok, so now you know you want to do this as a hobby or more. I think it’s important to have better monitoring than just your headphones so getting speakers should be among your next priorities. There’s nothing more important than to go to your local shop and spend time testing a few pairs of monitors with music you know. So get your phone ready and go listen, then you can make a decision and buy. My personal favourites might not work for your style, but here are some of them, including some for different budgets.

Just make sure that the music you listen to is similar to the type you will be making, since your studio electronic music will be influenced by whatever you get. 

Speakers & Monitors FOr Studio Electronic mUsic

MIDI Controllers

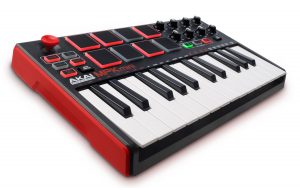
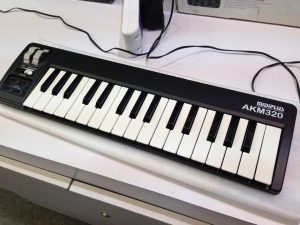
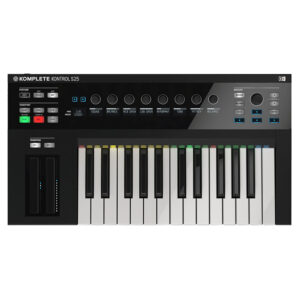
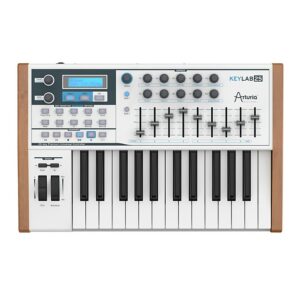
A good investment is adding some controllers for your DAW so you feel a bit more physical about how you interact with your music. This can go from a pad based midi controller, to a keyboard or a midi mixer. It really depends of what you do with your music but any of these will be useful somehow.

If you’re serious about your music, you will want some original material and investing in good synths is important; you can then combine controllers with sounds. KOMPLETE by Native Instruments is a powerful investment that will pay off for years to come. Otherwise, Arturia is also quite amazing.

Level 3 kit: The Studio ELectronic hobbyist

Your level of knowledge: You’re able to make music and finish songs, you spend considerable time making music.

Includes: extra software/plugins, Gear upgrades.

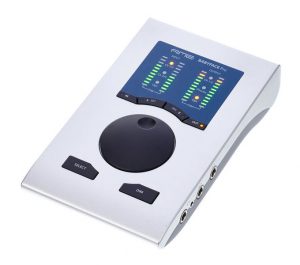
At this point you can make music, finish songs, and perhaps getting some of your tracks signed to a label. This is the stage where most of my clients are at. In general, their needs are pretty much the same. Many haven’t invested in good monitoring, either a proper sound card or monitors. A quality sound card/interface will make a big difference in the quality of your sound; this sounds pretty obvious but many people I work with still need to be convinced…until they get one and come to me to say I was right! Sound cards aren’t like monitors, it’s not a question of personal tastes but a matter of understanding what you need. The very first question you should ask yourself is “how much gear do I need to record?”, because that will determine how many inputs you need in your interface. You could always get a little mixing board to get all the audio in then route it to two stereo inputs, but some people prefer multiple audio in. In other words, studio electronics matter.

Audio interfaces & Sound cards

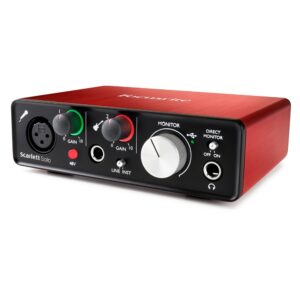
Most basic audio interface: Focusrite

Focusrite Scarlett-Solo Gen2 USB Audio Interface

Picture of Focusrite Scarlett-Solo Gen2 USB Audio Interface

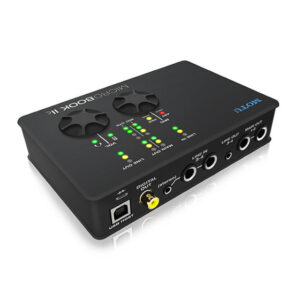
Medium budget: MOTU – who also make killer converters for recording.

MOTU MicroBook IIc USB Audio Interface

Picture of the MOTU MicroBook IIc USB Audio Interface. It's an excellent piece of studio electronic gear.

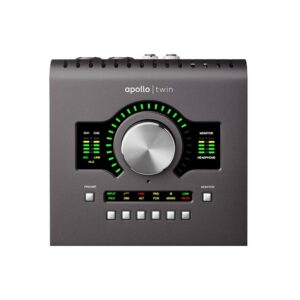
My personal suggestion is to go with UAD Apollo Twin, which also gives you access to all their plugins and outboard CPU power. This is a solid piece of studio electronic gear.

I find that at this point, investing in software to define your sound and to get out of your DAW’s internal sound is a great move. Some companies I love are U-He with their amazing synths such as Diva, Bazille or the Presswerk compressor. I am also on the Plugin Boutique mailing list to get daily discounts on software. Not only do I learn about what exists, but it then also becomes possible to get discounts for plugins I’ve had my eye on. Following KVRAudio is also an essential habit. They are masters of studio electronic gear.

Level 4 kit: The serious bundle FOr STudio Electronic Music

Your level of knowledge: You’re getting very serious at it and want to be semi-pro.

Includes: extra software/plugins, Gear & studio upgrades.

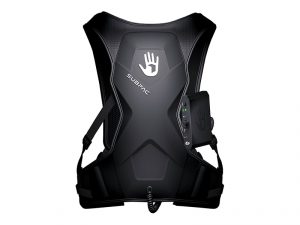
At this point, you have an organized your studio and all essentials are covered. Usually this is where you’ll feel ready to invest into more gear such as modular synths, synthesizers, external effects, and fine tuning what you already have. Before anything else, I’d suggest you make sure you have something to cover your low end. If you have neighbors and still want good relationships with them, I’d go for a Subpac:

Bass & Subwoofers

This thing has really been helpful at home and helped me get more precise mixes; there’s this more expensive wearable version, or a cheaper version for your back while sitting in a chair. It’s a piece of gear that gives you a physical impression of having a sub. If you can get a sub though, that’s even better. I can recommend many, but usually something like the Yamaha HS8s Studio Subwoofer will do for a home or small studio.

Nailing the low end is really an important part in solid sounding music, and you can only get there by being able to hear what’s going on down there. To adjust it, you won’t really need to hear it as much as feel it, which is what the Subpac also does.

Synthesizers

In terms of synths, there are many great ones out there. If you can get to a shop to test some in person, I recommend you do so. I can explain in my own words the technicalities of sounds each synth can make, but test driving a synth is the best thing to do, to really know if it will fit what you do. I think my view on this is that when you get a synth, it will become an important part of your artistic identity. I’ll list some of my favorites, based on different branches and aesthetics: Roland, Korg, Moog, Elektron.

TIP: Always search for demos of the synths on Youtube to see how they sound!

Roland: aesthetic – classic sound

A staple player of the electronic music world, Roland basically shaped the beginnings with drum machines and the tb-303, source of the original acid tones or the Juno that shaped Trance/deep techno. After being silent for years, Roland has returned with force, deploying super solid products such as Roland Aira TR-8 Rhythm Performer for the 808, hugely recommended if you want classic kicks. The sound is very classic, clean, and efficient. I would recommend the Roland GAIA SH-01 Synthesizer which has made a big comeback in many genres in the last few years and is far from being out of date.

Korg: aesthetic – edgy, modern, clean, warm

Let’s cover the basics of Korg as I know some of them. The all favorite at the moment is definitely the Korg MS-20 Mini Semi-modular Analog Synthesizer which is a good cross of analog synths because of its patching options. It can sound very modern and experimental but it can also sound old school 50’s spooky sci-fi. There’s a bit of a learning curve but the investment is very rewarding once you dive in it. Very unpredictable at times, it can provide many outstanding ideas. These happy accidents define so much excellent studio electronic music, as well as live electronic music.

Another one is the Korg Minilogue 4-Voice Polyphonic Analog Synth which is a super slick synth that sounds very clean and modern. It is able to make tight basses and warm fuzzy pads. Excellent for techno.

There’s also the cheaper version as well too. Finally, super useful and fun is the Volca series. There’s a nice little FM synth in this series – a very powerful buddy that can provide really warm tones.

Moog: aesthetic – Fat, rounded, electroish sound, vintage and gritty)

Moog is a staple for its name and the legacy it’s left over the years in so many songs we have all heard. Fat and dirty basses are often from Moogs and bold melodies are pretty much a trademark. If you want to dip your toe in the modular world, the Mother is a great machine to get. Its sounds really, really warm and thick plus its patching board is well designed that you can get started intuitively. The Moog Sub Phatty is another favorite of many for the name it carries, and what you get in return. The Moog Mother is another beast that can make extremely powerful sounds, from basses to kick and leads. it’s also a good step in the semi-modular world if you’re looking to make some hard hitting studio electronic stuff.

Elektron: aesthetic – Berlin techno, modern/underground dance music

This company is the current leader for studio favourites. It’s defining a lot of the current techno tracks that are being released. The main bad boy here is the Elektron Digitakt. There are two things that define the success of this monster: it sounds right and the integration with Ableton/DAWs makes it an ideal desktop companion. If you have the budget, you could also get the Elektron Analog Four which is another beast. Crazy possibilities on this one and a resource to do pretty much anything you want.

SEE ALSO :   Equipment Needed to Make Music – Gear vs. Experience vs. Monitoring  

Our First Music Retreat

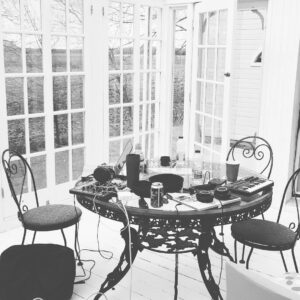
The idea for a music retreat came from a discussion I was having with my friend Fred about the need to just flee the city with some fellow music producers to spend a weekend making music. I mean, being in the country, being with friends, and then be able to make music seems like a recipe for something very special, right? Well, since returning from our retreat, I can only say it was beyond all my expectations; I believe it might even be something worth repeating on a regular basis.

When I first posted about my intentions to organize a music retreat on Facebook, I was mind-blown by the reaction and enthusiasm it generated. I think the excitement about a retreat comes from a need to be with others who share the same passion, but also to be in a context where we can connect about it.

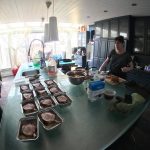
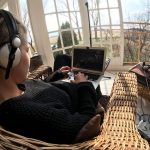
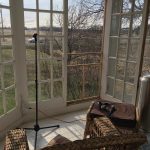
We ended up having 13 people signing (note: we even had people from France who wanted to come but we didn’t posted the dates soon enough for them to prepare) and we found a beautiful manor outside of Montreal with the views of fields and hills as the place for the retreat. The setting was perfect. Fred organized two separate studios and we had plenty of room to be with our laptops to get in our bubble.
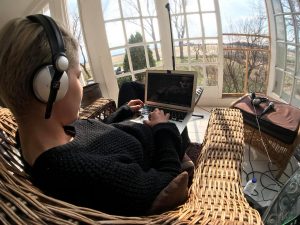
I had planned to do some workshops but after talking and deciding on the plan for the weekend, we didn’t really want to follow any structure. This first experience would determine our needs and how to deal with anything happening.

What came out was pure magic!

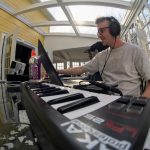
Imagine being in a room where everyone is making music, has gear and is focused on working on their own music, where you can show others what you’re working on to get feedback, to get answers to questions you have regarding technical issues, to observe everyone’s workflow and use of plugins…it really felt like a need was being met by everyone present: being part of a community, and getting instant validation and experience being in a creative environment.

We traded Soundcloud and Facebook for real human contact. Hanging out in clubs to find like-minds felt awkward; being around people who share the same interests, and working at the same time as others really responded to a common need we all shared: connecting physically.
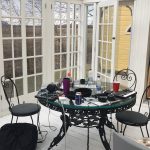
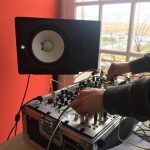
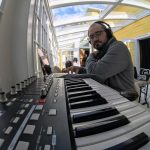
No matter how the internet is developing and the tools it offers, there’s nothing like physical closeness. Even myself, I felt overwhelmed with the desire to make sounds and also to comment on other’s or to answer questions people would share out loud. It’s pretty common for music producers to meet in bars and clubs but you can’t really talk because the context is loud and not appropriate, plus you can’t really share your tech set up or how you work. It seems like a retreat is creates a proper space to co-create and see everyone’s game get upgraded. I am under the impression that this could be the best way to shape the sound of a community all together.

As we’re preparing to already organize more retreats, we are also planning to gather music producers in cafes, on a Saturday afternoon. I think that is also something we would love to explore, elsewhere in the world as well.

How I used the Music retreat for my creative flow

I wanted to do exactly what I do with my days in the city but to really concentrate it in a short period of time to see what would come out. My usual routine is to take my sound generators such as synths and then jam. I did that intensively until Saturday afternoon, but then I had a mental crash. It usually happens at some point but it was pretty interesting to see it happen like that. But the cool part was to be around people, talking and exchanging about anything coming. I wasn’t home on Netflix waiting for my energy to come back.

Later, I realized there were some ways I could have improved our productivity on the retreat. Below are some ideas I’m noting down for next time, as well as to give you some suggestions in case you plan to embark on a music retreat yourself:

  • Make samples as a team. Since everyone has a different background and inspirations, we could analyze some songs to try to replicate certain sounds.
  • Try to finish one song where everyone is involved. Each participant could use one instrument, and one person collect them all to put them into arrangements.
  • Use multiple people to do complex field recordings, strange sounds and atmosphere.
  • Make convolution images of different spaces, such as using microphones to sample the different rooms of the place we were.
  • Do the relay method of music making, meaning “try to do as much as you can on this track then pass it on to the next person.”
  • Try to do a cadavre exquis, music related.

If you have suggestions for us to try at the next retreat, let us know as we’re already planning another one!