The Voice That Tells You What To Do
Understanding intuition, ego, and overthinking in music production
There are multiple topics that are difficult to write about or even teach, and one that I have wanted to write about for a long time is intuition. Intuition and talent are distinct yet deeply interconnected. When I work with artists, I often notice something interesting: some people have a natural talent for making music, but they lack intuition. Others might not have the same technical skills, yet they possess a strong instinct that guides them toward impactful decisions.
Over the years, I’ve become fascinated by the relationship among intuition, talent, creativity, and the inner dialogue that arises when we make music. I don’t claim to be a scientist or someone who has formally studied psychology. What I’m sharing here comes mostly from observation, experience, conversations with artists, and years spent making music, teaching, performing, and sometimes getting completely lost in my own creative process.
This is also a topic that can quickly become strange or mystical if approached the wrong way. That’s not really my goal. I want to keep this grounded and practical because, in the end, intuition is something most artists already experience, whether they realize it or not.
Over time, I started noticing that two voices often coexisted during the creative process.
One helps me move forward.
The other makes me doubt almost everything.
The Morning Set in Switzerland
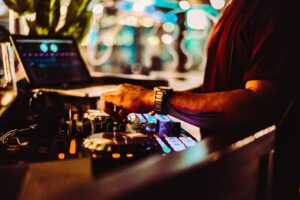
I remember one gig I played during a tour years ago. I believe it was in Switzerland. It was early in the morning, and I was playing an after-hours set after already performing at another event that night. I barely slept. My head was buzzing. I was exhausted, but somehow still focused.
I remember setting up my gear and slowly entering a state of flow.
Whenever I reach that state, it feels as if everything has already been rehearsed for years. Every movement feels natural. Every decision arrives at the right moment. You could say this comes from experience, and that’s probably partially true. After doing something repeatedly, you naturally develop routines and habits.
But there’s also another feeling that appears.
It feels as if things are beginning to fall into place on their own. As I started playing, every decision felt guided by a voice I can’t fully explain. It was almost as if something inside me was calmly saying:
“Now do this.”
“Bring this in.”
“Wait.”
“Remove that.”
It didn’t feel forced. It didn’t feel intellectual. It felt obvious. As if the music already knew where it wanted to go, and I simply had to follow it.
I know this might sound strange to some people, but many artists have experienced moments like this. Athletes talk about it. Actors talk about it. Improvisers talk about it. There are moments where thinking becomes quieter, and decisions happen naturally. Whether this comes from repetition, subconscious processing, experience, muscle memory, or something else entirely doesn’t really matter to me anymore. What matters is that those moments feel deeply aligned.
That, to me, is intuition.
Intuition Is Not Talent
One thing I’ve realized while teaching music production is that talent and intuition are not the same thing.
Talent creates options. Intuition chooses direction.
There are people who are naturally gifted technically. They quickly understand synthesis, naturally grasp arrangement structures, learn mixing techniques quickly, and manipulate software with ease. Then there are other people who struggle technically but somehow make emotionally compelling music because they instinctively understand what matters.
They understand tension.
Emotion. Timing. Space. Energy.
Sometimes they can barely explain why something works, but they can feel it immediately. I also believe intuition develops through exposure. Going to events, hearing DJs move a crowd, watching bands perform live, experiencing tension and release in real time — all these things slowly build an inner understanding of what works and when.
Intuition is partly natural sensitivity, but it’s also something that grows through repetition and observation. Technical skill is useful because it allows you to express ideas more clearly, but technical skill alone does not automatically create emotionally resonant music.
In fact, sometimes the opposite happens.
One thing I often notice with younger or beginner producers is that their early music can feel surprisingly alive. There’s rawness in it. A direct emotional quality. Then, as they become more technical, that raw energy sometimes starts disappearing.
They begin over-correcting. Over-editing. Overthinking.
Instead of focusing on impact, they focus on control.
Instead of asking:
“Does this feel good?”
They begin asking:
“Is this technically perfect?”
I also notice two broad approaches among artists. Some become obsessed with details that most listeners will never consciously notice. Tiny adjustments. Endless refinements. Constant corrections. Others stay connected to the bigger emotional picture. They focus on movement, feeling, atmosphere, groove, energy, tension, and release.
Interestingly, those artists often create music that feels more alive simply because they are less afraid of imperfection. Imperfections are not always problems. Sometimes they are the reason the music feels human.
When the Ego Disguises Itself as Intuition

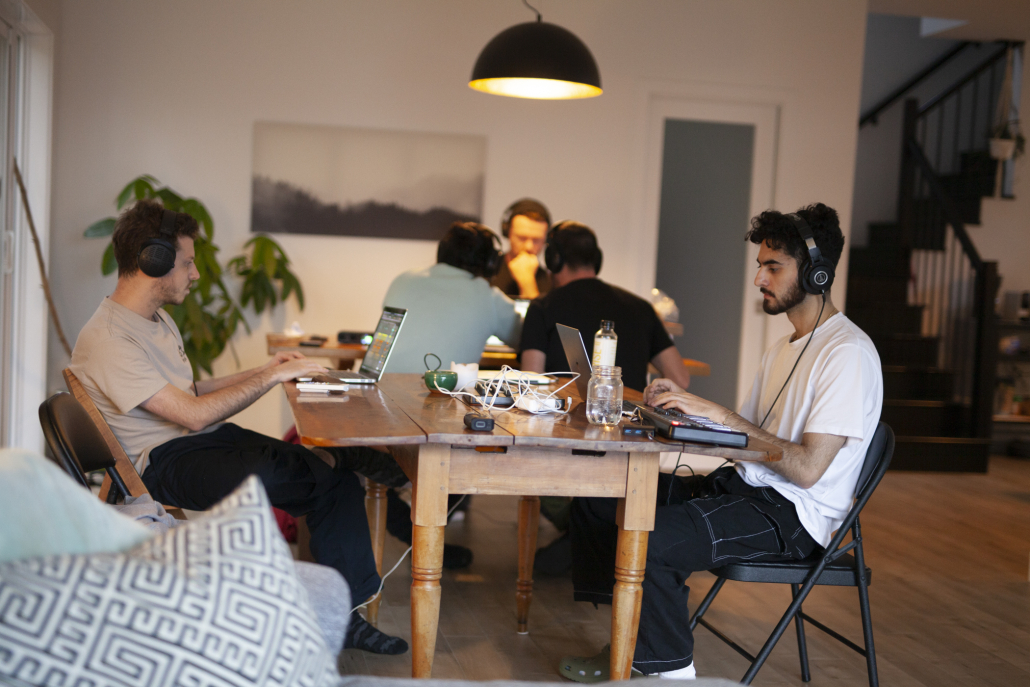
Photo by Sander Sammy on Unsplash
There’s another voice that often appears during the creative process. We could call it the ego.
The ego gets a bad reputation, but I don’t think it’s entirely negative. In many ways, the ego is useful. It can push us to improve. It can give us ambition. It can motivate us to finish songs, release music, perform live, and share our work publicly. Without a certain amount of ego, many artists would probably sit on hard drives full of unfinished tracks forever.
The problem is not the ego itself. The problem is that the ego often disguises itself as intuition.
It makes certain thoughts feel important even when they are simply forms of fear, insecurity, or self-consciousness.
The ego often sounds like this:
- “This is too simple.”
- “People won’t appreciate this.”
- “This doesn’t sound original enough.”
- “You should restart the track.”
- “You need more layers.”
- “This isn’t impressive enough.”
- “Others are better than you.”
That is usually not intuition but doubt. That is precisely the moment when you slowly lose the plot.
Intuition feels very different. Intuition is often quiet and direct.
It says things like:
- “This works already.”
- “This section is enough.”
- “The groove matters more.”
- “Move forward.”
- “Stop touching it.”
- “Trust the process.”
One thing I’ve noticed is that intuition rarely tries to impress anyone. The ego constantly thinks about how the work will be perceived.
Intuition only cares about alignment.
It follows an inner logic that often makes little sense at first, but becomes obvious later.
What Intuition Actually Feels Like
This is the part where things can become a little weird. I could easily start sounding mystical here, and that’s honestly not my intention. I’m trying to describe something deeply subjective and difficult to explain with precise language.
I don’t want to sound like Yoda here, even though it is my nickname, sometimes.
In my experience, intuition manifests as an inner dialogue. I literally hear a voice in my head telling me what to do. Not in a dramatic way — just the same kind of inner conversation most people already have with themselves constantly. For some reason, though, this voice often feels slightly separate from me. As if another version of myself has already seen the outcome and is calmly guiding me toward it.
Maybe it’s subconscious processing. Maybe it’s accumulated experience. Maybe it’s pattern recognition operating beneath conscious thought.
I honestly don’t know. But what matters to me is recognizing the state that comes with it.
When I’m deeply connected to intuition, I notice several things happen simultaneously:
- I feel emotionally stable.
- My confidence becomes extremely solid.
- Hesitation disappears.
- Momentum appears naturally.
- Decisions happen quickly.
- I stop second-guessing myself.
- Time feels different.
There’s also a strange sensation that what I’m doing has somehow already happened before. It’s like watching a movie a second time and already knowing what a character is about to say before they say it. That’s often how intuition feels for me in music. I somehow know what needs to happen next even though I’ve never technically done that exact thing before.
This happens especially when I perform or improvise.
When I make music, I rarely “write” arrangements in the traditional sense. I usually play them live. As soon as I begin interacting with sounds physically and emotionally, intuition tends to take over naturally. Now, this is not something I can teach someone directly.
But I do believe you can strengthen your connection to it. The more aware you become of your inner dialogue while making music, the more you build a bridge between conscious and intuitive decisions. Over time, experience feeds intuition.
Eventually, that inner voice becomes more trustworthy.
Overthinking Disconnects Us From Intuition
Every now and then, someone tells another person:
“Stop overthinking.”
Years ago, I realized how unhelpful that advice actually is. You might as well tell someone:
“Don’t think about an elephant.”
The next thing they will do is think about an elephant.
Overthinking is not always something you consciously choose. It often happens automatically. What matters more is recognizing the signs that you are currently trapped inside it.
For musicians, overthinking often appears as:
- Creative paralysis
- Endless revisions
- Inability to commit
- Doubting every decision
- Constantly comparing yourself
- Reopening finished tracks
- Adding more instead of refining
- Seeking validation too early
Usually, when this happens, you become fused with your doubts. You begin listening more to fear than to instinct. You become disconnected from the original emotional reason why you started making the track in the first place. I remember hearing an interview with Björk in which she said that the moment she starts thinking about what other people will think of her music, she recognizes it as a sign that she’s disconnecting from herself creatively.
That really stayed with me.
Comparison can be useful when learning technical skills or analyzing references, but comparison also pushes the brain into analytical mode. Pure creativity often requires the opposite state. This is one reason why improvisation helped me tremendously.
Here in Quebec, improvisational theatre is deeply embedded in the culture. Many people experience it at school at some point in their lives. Even if they never become performers, they still experience the mechanics of spontaneous creation.
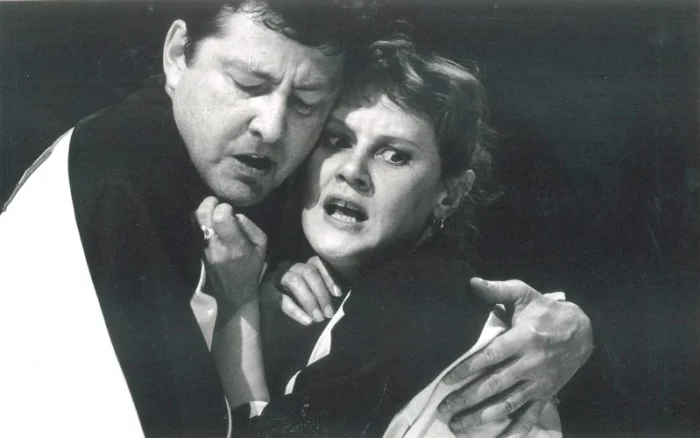
LNI is an invention of theatre improvisation in the form of a hockey game. Invented in the 70’s, it is now practiced internationally
Improvisation teaches you how to:
- react
- listen
- build tension
- release tension
- trust momentum
- stay present
At some point, these behaviours become embodied rather than intellectual. You stop planning every move. Instead, you respond.
That’s where intuition starts becoming stronger because action replaces analysis. The more you stay in motion, the less room there is for overthinking.
The remedy to overthinking is to move.
Play Is the Antidote
If there’s one thing I believe strongly, it’s that play is one of the strongest antidotes to overthinking. There have been countless studies showing that play is one of the most effective ways humans learn. But beyond learning, play also keeps us connected to the present moment.
When you play, you stop constantly evaluating yourself. You explore instead.
Apparently, even Albert Einstein approached many aspects of his work playfully. That mindset allowed him to explore ideas more deeply because curiosity replaced fear. I think this applies directly to music production. One of the core elements of my teaching is helping artists rediscover a sense of play in the studio.
The moment music stops feeling playful, overthinking usually starts taking over.
When creation becomes too serious, every decision begins carrying emotional weight. Every sound becomes a judgment of your worth. Every unfinished track becomes proof of failure. That’s an exhausting way to create.
Play changes the relationship completely.
Play allows experimentation.
Play allows mistakes.
Play creates discovery.
And discovery is often where intuition becomes strongest.
How I Teach Intuition
Like I said earlier, intuition is difficult to teach directly. I’m not Yoda teaching someone how to use the Force. But I do believe there are practices that strengthen intuition over time. And most of them are surprisingly simple.
Intuition grows through:
- repetition
- exploration
- exposure
- experience
- trust
- showing up consistently
Working with references trains recognition. Finishing songs develops confidence. Limitations sharpen decision-making. Repetition creates sensitivity. Mockups reduce ego attachment. Improvisation bypasses over-analysis.
Performance develops responsiveness.
The more you work this way, the more you start recognizing patterns emotionally instead of only intellectually. One thing I also often encourage is playing music rather than purely programming it visually in the arranger. The moment you physically interact with music in real time, intuition tends to emerge naturally because you enter a more embodied state.
These are things we often discuss during retreats and coaching sessions, but they can also emerge naturally as artists adjust their workflows to prioritize exploration and movement over perfection.
Conclusion
One thing I’ve learned over the years is that these inner voices never really disappear. You don’t necessarily need years of psychology studies or therapy to understand exactly where they come from. What matters more is learning how to recognize them and build a healthier relationship with them.
The ego is not always bad.
Sometimes it’s the thing that pushes you to finish a track. Sometimes it’s the force that gives you the courage to send music to a label or perform in front of people. It becomes a problem only when it completely takes over the creative process.
Intuition, on the other hand, often speaks much more quietly.
It usually asks for simplicity. Presence. Trust. Movement. Curiosity.
The more attention you give to that quieter voice, the easier it becomes to recognize it when it appears. And sometimes, the hardest part of making music is not finding ideas. It’s trusting the voice that already knows where the music wants to go.

 For much of history, music-making was a communal and accessible part of daily life—sung at home, shared at gatherings, and passed down through oral tradition. But during the classical era, particularly from the 17th to the 19th century, music began to shift into a more formalized and exclusive domain. As patronage systems flourished in the courts of Europe, composers such as Bach, Mozart, and Beethoven were commissioned by the elite—royalty, nobility, and the Church—positioning music as a symbol of status and cultural refinement. Public concerts became more common, but the ability to compose, perform, or even properly appreciate complex orchestral works often required wealth, literacy, and formal training.


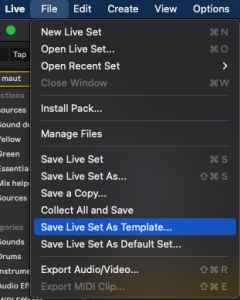
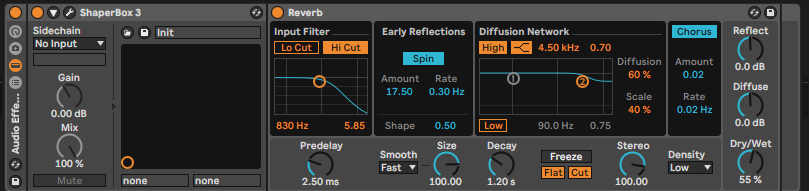
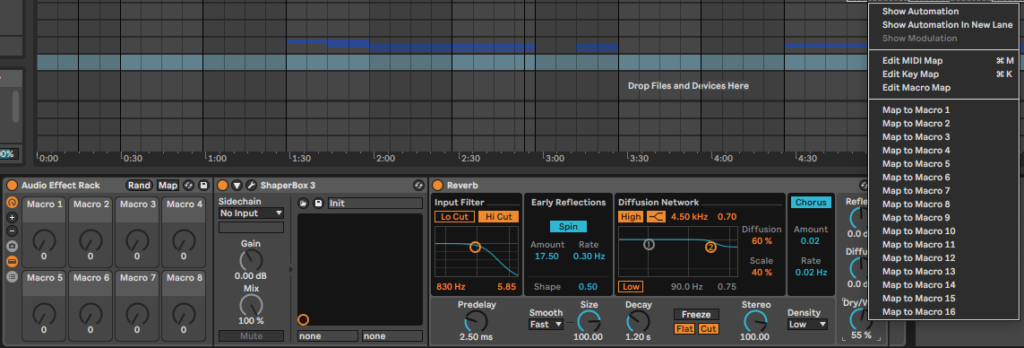
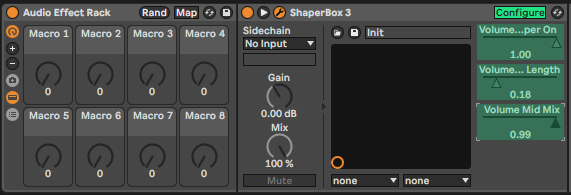
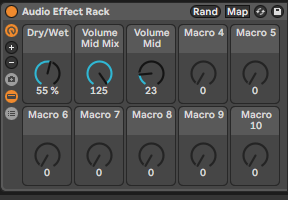
 This will allow you to manually record movements on some effects such as EQ, Utility, chorus or anything you want. The record option will pick up your movement and then loop it so you can boost sequences with the EQ, and then this will play in a loop, which can add a whole new range of variation to the original idea. You’ll need to unlink the envelope for a longer modulation duration.
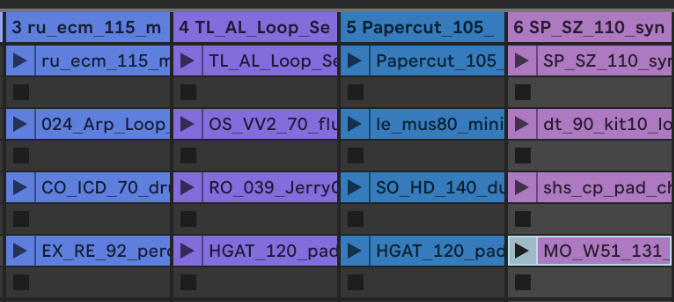
 This technique is quite known and fun. Take a clip (audio or midi) and duplicate it multiple times with a different play position or changes. You can then benefit from having follow actions on all of them to play randomly between the batches. By recording the results, you’ll have the same idea but arranged differently. This method is a way to remix clips or discover new hooks through a simple concept.
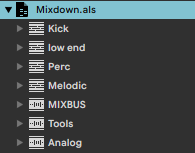


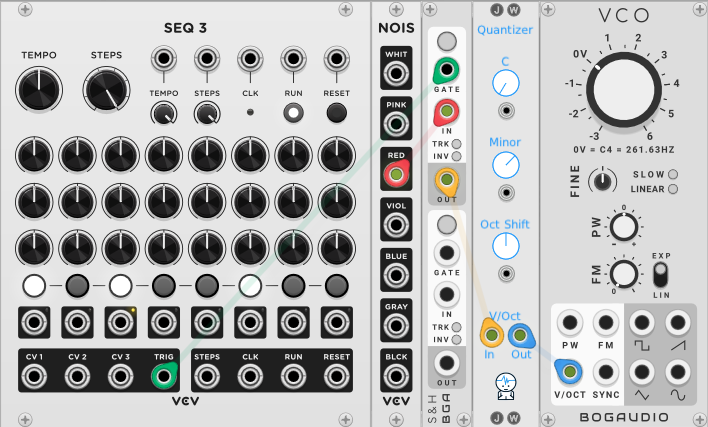


 Sampling and resampling. This is also a fun technique. You can play a loop in your Ableton Live session and apply effects, then apply effects, but you record the whole playing around into a new clip.
 The first thing producers can do is listen to music before they make it. This might be a huge “duh” statement, but how many people actively listen to music? How many people come home, crack a beer, put on a record, and then just sit there, doing nothing else, except engaging with the music? 10%, maybe? However, it’s this 10% of people who have set themselves up for success if they are music writers themselves.