Riding the Grooves in Ableton
Have you ever felt that your music’s rhythmic structure lacked a certain human touch? This seems to be the general consensus among producers, yet there is a simple solution to this hitch in the road. It’s caused by what I believe is the biggest drawback to producing music within a DAW: the musician tends to pigeonhole himself or herself by needing everything to sound perfectly aligned to the grid.
From experience, however, I think I can affirm – with a reasonable degree of certainty – that this method does not reflect how humans operate. We are not precise, monotonous machines, and we are most definitely prone to error when jamming live with acoustic instruments. There is even a certain beauty in this rawness, as music perfused with slight imperfections tends to appeal to the ear as more natural and groovy.
In order to achieve this particular “effect,” Ableton Live allows the producer to import a collection of rhythms, called grooves, into any MIDI or audio track, so as to either alter the current rhythm already written or to add an element of surprise or randomness to the audio.
The Ableton Core Library has a myriad of classic grooves that you can choose from, from MPCs to Latin percussion to hip-hop. However, in this tutorial, we’ll get really advanced and show you how to get creative by making your very own grooves.
Step 1: Record any percussive sound
I’ve recorded myself rattling my keys using nothing but a Macbook (you don’t need to get fancy).
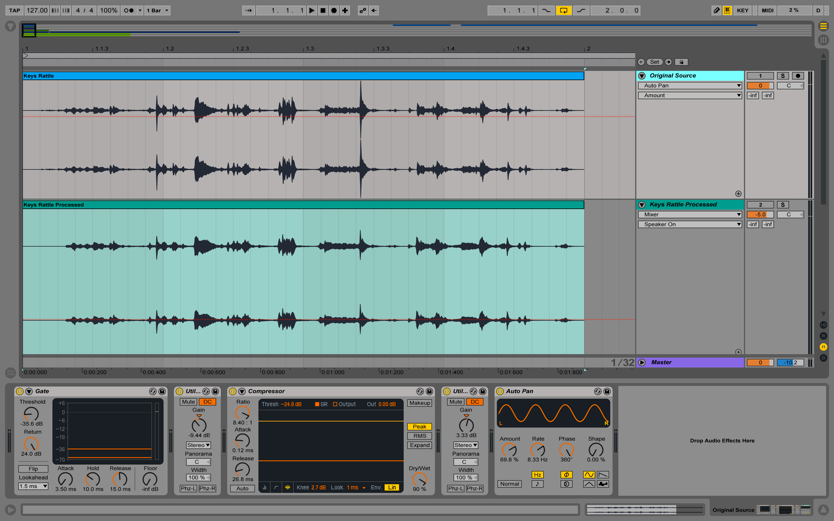
Your recording will most likely sound like crap, so feel free to cut out excess noise with gates or tame peak transients with compressors.
Step 2: Modulation (Optional)
Add a creative effect that will automate the gain (volume) of your signal. You can draw automation curves or pump (sidechain) it with Ableton’s Autopan. The point is to create as many dynamics as possible by playing with the volume so that it translates into the clip’s velocity once we extract the groove. You shouldn’t have to do this if your signal is already very dynamic.
Step 3: Bounce
Consolidate the clip and its effects by either resampling it onto another track or simply freezing and flattening the track (by right-clicking the track).
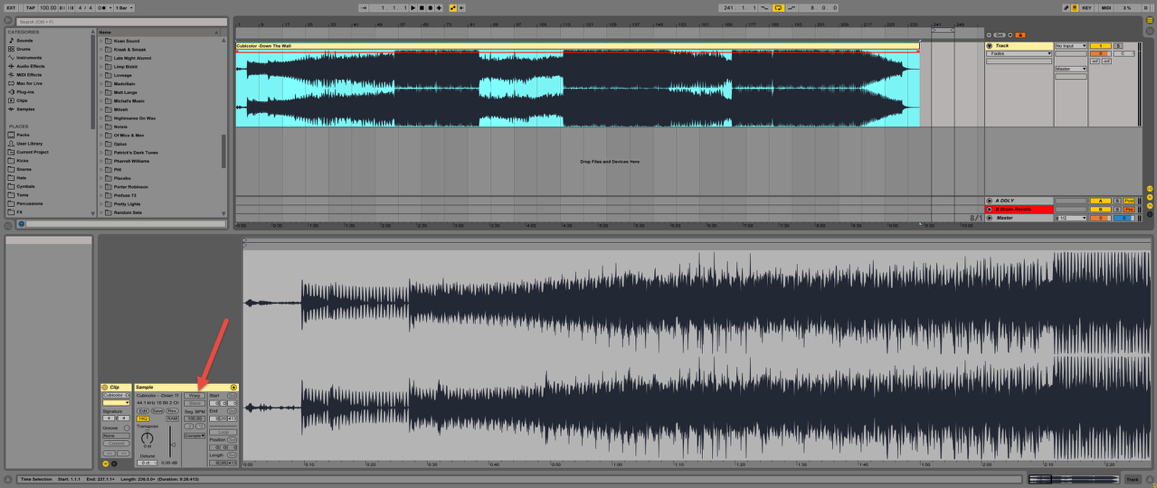
Step 4: Extract groove
Right click on your consolidated audio sample and select “Extract groove.”
Step 5: Groove pool
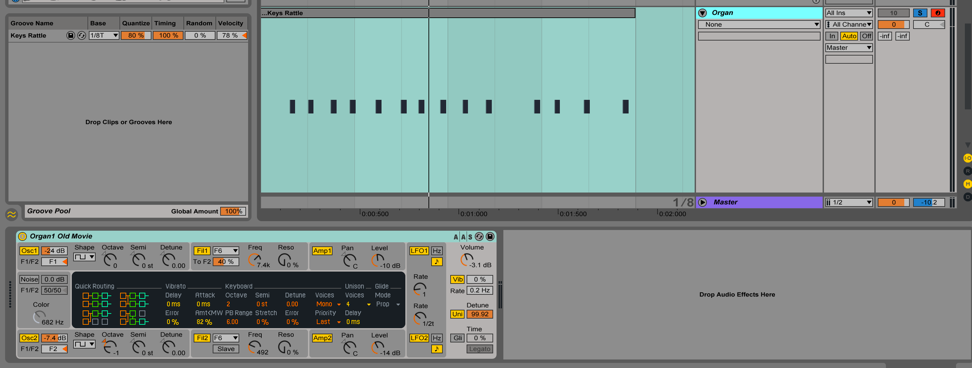
Open Ableton’s groove pool by selecting the wave in the lower left side. Your groove should appear in this box.
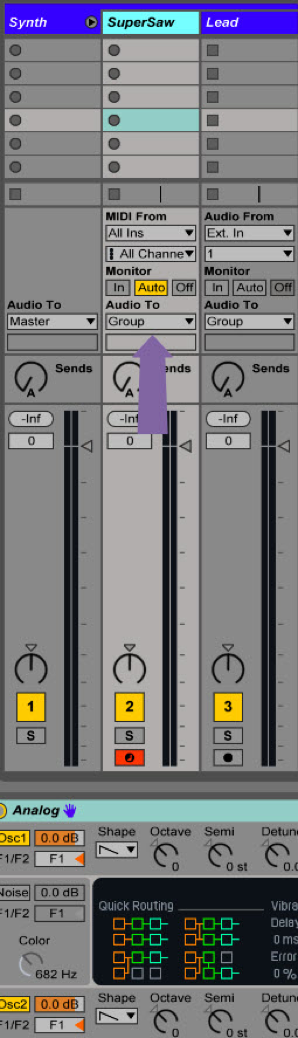
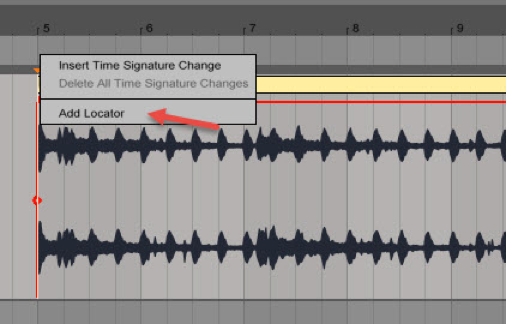
Step 6: Add groove
 You can consult the Live manual or other tutorials to better understand what things like “base” and “quantize” mean, but make sure the timing is set really high (i.e., how much the groove pattern will affect the clip). Drag the groove name onto any audio/MIDI sample or loop track, preferably something percussive like a drum loop. Notice how the rhythm of your track has changed, and how certain transients sound louder or quieter, or appear later or earlier. If you increase the velocity of your groove, your signal will respond heavily to the volume changes in your original signal (which is why I used the Autopan to create dynamics).
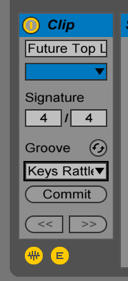
Press “Commit” in the clip view, to destructively write the current groove settings to your sample. This means the sample’s pseudo-markers will move in accordance with the quantization setting, and your transients will translate the rest of the settings you selected in the groove pool.
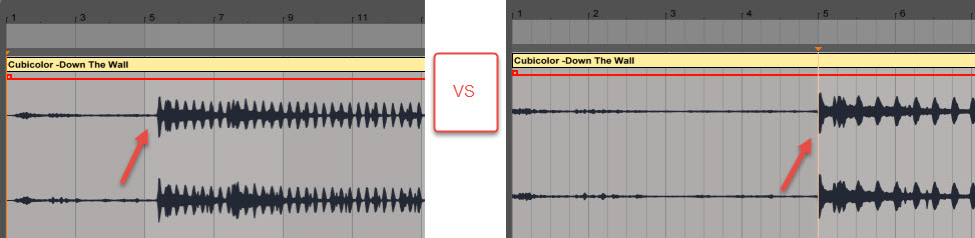
Original:
Processed:
Step 7: Layering
Hopefully, you’ve saved your original percussion loop so that you can play it with your newly made rhythm. Notice how there’s percussion a bit everywhere now, and that it’s a little bit off. Yet I’ve still opened doors to new possibilities that I couldn’t have predicted by simply drawing in MIDI notes. I even got a wonderful slap-back delay on the snare, which I can edit to my liking.
I’ll go so far as layering the two sounds with a reversed sample of my new groove, which gives me this:
I’ve then added back the original keys rattle sample, and simply applied sidechain compression to get this beat:
Although it sounds a little all over the place, I can always go back and edit it how I want, or even apply some effects! Note how it sounds more human now and not perfectly cut to grid.

Bonus: Step 8
Go back to Step 6, and drag your groove to an empty MIDI channel instead of an audio or instrument track. An empty MIDI clip will appear with notes matching the groove you created. Drag an instrument onto it to hear how it sounds. Although it will probably sound awful, you can always edit the MIDI notes to your liking!
Bonus: Step 9
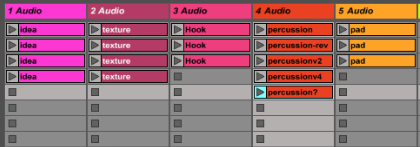
You can even get away with layering organic textures such as strings, or pad with grooves. Make sure to apply different groove settings to each layer by duplicating the groove (CTRL+D/CMD+D) and dragging it onto the track that you want. You can control all the different grooves together with the Global Amount value at the bottom right of your groove pool.
Examples:
SEE ALSO : Background vs forefront to create dimension