Tag Archive for: Ableton Live

Playing Electronic Music Live (Part 6, final)

I recently played a live set at StereoBar in Montreal for the launch of my album Returning Home and it was very interesting to create a live set from scratch, following the advice of this series I’ve written over the past few months about playing electronic music live. I’d like to share with you a bit about how it went, as well as some personal notes I took for future performances.

Notes about preparation of my set

Returning Home has many tracks; I wasn’t sure how I’d approach them in a live context considering they are all pretty intricate, full of details, and pretty much impossible to execute as the recorded version(s). I decided to go through all the songs and export the stems for each group of sounds – plus making sure the kick and bass would be isolated – so I could control how they would come and go in the set.

Exporting stems took me a while. I had also exported stems from certain songs that weren’t included in the album but that I wanted to play. I had a good 17 tracks ready, with about 8 channels exported per track. I imported everything into my new live set, and added everything in the right columns and with the colors I needed. I also started chopping the stems into sections so I could trigger some parts spontaneously.

After a few days of geeking out, I started playing the tracks to see how the flow felt and to see if the transitions were going well. I played with effects; trying to spice up the main ideas to surprise people. As I kept rehearsing and trying to see how to play the songs, I found myself becoming very bored out of what I was hearing. The thing is, when you spent months making an album, you get to a point where you can’t listen to your own music anymore – and playing it as is felt too safe, too simple.

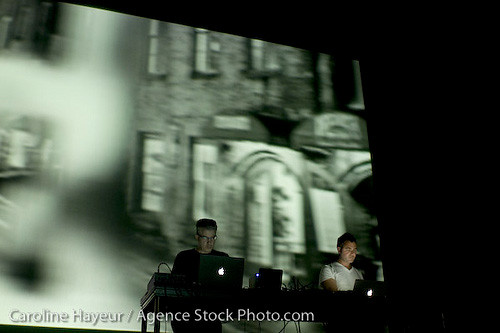
Live at MUTEK Chile 2006

Live in Zurich 2005

I scrapped everything. I remember thinking that this whole series advising people on how to play live was crap but I realized that after going through it myself again, it still had a lot of value, but even I had done the preparations wrong. I remembered then how I used to LOVE playing live, 15 years ago and had a flashback excited me: pure improvisation. I realized that using stems wasn’t improvising enough and that my music is in itself, pure chaos.

I went back to my pool of sounds which didn’t make the cut originally and started chopping sounds, deconstructing stems, and re-exporting new parts. Then I started creating a space where I could remix the whole album on the spot, plus adding unexpected, unused sounds. Basically, it was combining the bass of track 2 with the melody of track 7, then percussion of track 4…pure remixing. I found a core idea for each moment of my set, and left a lot of space for reinterpretation. It worked and I was having a lot of fun.

My setup for this Set

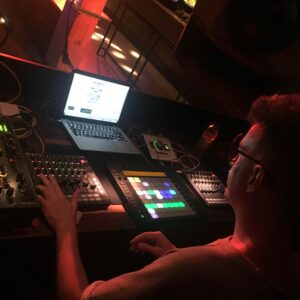
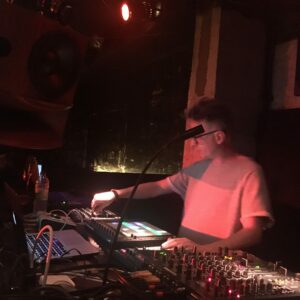
I was using Ableton Push and 2 Novation Launch XLs, as mixers for all the channels (I ended up using 10). For some reason, each time I’ve tried using PUSH live, it has never really helped, but I felt this time I wanted to use it. I love the Novations so using 2 felt really amazing.

Limitations: My Macbook pro only has 2 USB ports so I needed a port to accommodate multiple items.

Soundcheck at Stereo

Soundcheck

Arriving at the venue, I felt really confident; perhaps too confident. The soundcheck went so smoothly that – in my experience – when that happens it gives you the feeling that something will go wrong later.

I had spent time in the studio carefully tweaking each channel with EQs to make sure the sound wasn’t to harsh or piercing. I also decided to use a Manley compression from UAD on the master which made everything really smooth. It was important to use a reference track as an EQ curve. It really paid off in Soundcheck so I didn’t have to do much; everything went so smooth.

TIP: Listen to your reference track before soundchecking, then play it to adjust an EQ on the master.

The show/performance

After a great start, shit started to hit the fan. As a track was playing, I noticed my mixer wasn’t responding and realized it had rebooted. By rebooting, it made the second mixer crash and the PUSH too. I wasn’t even 5 minutes in and the wheel of death was spinning on my Mac. I waited patiently and luckily it went back to normal. But after this glitch, I disconnected one of the Novations to plug it directly in my computer instead of the USB-Hub I had bought the same day (cheap connectors are always a big mistake!). PUSH was frozen and not doing anything, I had to activate clips with my mouse. Luckily from my experience playing live for so many years, I was able to do this in a way so that people didn’t notice. The Novations kept crashing one after the other. Each time I had to unplug them patiently to restart them, and then the wheel would go off on my computer; for some reason they would work for a good 20 minutes but then crash again.

Luckily, no one noticed anything! I could have really played a great show that night if everything had worked properly because Stereobar has the perfect setup for me…it was a bit disappointing, but I still received a lot of good feedback.

MUTEK Montreal 2006

Live in London 2005

After the show

Despite the technical issues, it was great show and fun nonetheless.

To summarize, a few tips here based on this live experience:

  • Don’t buy gear the same day without testing. Soundcheck are never 100% of what a show will be and can never be a real test.
  • Deactivate Ableton Live’s auto-update feature. It actually upgraded to a version the day before with a bug in it – a pretty big one. I had to reinstall the software and that was stressful. Thanks for the swift reply from Ableton tech support on that one.
  • Never panic when problems arise. Most of the time, people don’t notice.
  • Try to avoid shitty USB hubs! I’m still trying to find a better alternative.

I hope this series was helpful!

Storytelling through arrangements and song arrangement techniques

When it comes to mixing and mastering, my work involves to listening to many, many songs. Some are great, while others need more love, but from the numerous songs I hear daily I can pinpoint one important thing that makes a song stand out the most: arrangements. I believe your arrangements and your song arrangement techniques are what really show your maturity as an artist.

Your track can have amazing sounds, a crazy good kick, and a really lovely mix, but if you have nothing to say, your song will not be memorable. Although, paradoxically, some songs are also memorable because they have no arrangements at all; no arrangements can also be a form of storytelling.

In this post, I’ll approach arrangements in two ways: the “technical” and “total”; a philosophical point of view. While so many people have different opinions about arrangements, there’s one thing that I feel is important to highlight: to invite you to step outside of the box of anything “commercial” sounding; so many articles at the moment are pointing out how every song sounds the same. I’ll also explain why.

Keep in mind: there is no magic wand recipe or solution for arrangements.

So fundamentally, how can we explain storytelling in electronic music? There are two critical points to keep in mind:

  1. Arrangements start with a simple idea that evolves. The clearer the idea, the more it becomes understandable from the listener. The catchier it is, the most memorable it is. Catchiness comes from being able to make something that people can have an emotional connection with. It is also known that, if we examine at the last 50 years of pop music, there are always songs trends through time. What makes a song “a hit” is usually when someone understand the current trend (which is “in demand”) and adds their own, personal twist to give it a “same old but different” feeling.
  2. Technical arrangements aim at creating music for DJs. One of the most exciting thing about making music for DJs is about being able to architect music that creates a structure that will find a logical place to move into another song, or to create a new song (as in 1+1=3, track 1, track 2 and the mix of both).

These two types of arrangements are different but can also be combined. They have different goals. The reason I find it important to relate this is, as a listener, you don’t listen to them in the same way. The first type, is what makes a track be a song. In terms of vocabulary, a track is music more oriented for DJs, that you can layer while a song is more about music that can be listened on its own and have its own story. Too often, I find that people who listen to tracks will go “something’s missing” but in theory, if that music is made to be layered, it’s because it has space for another song to be layered over it. I like to say that the track is part of a story that will be created by others and it’s important to let go of adding more and more layers. If you leave no space, how can another DJ use it?

So let’s talk about arrangements for tracks and what is useful to do/use.

  • Use a motif: For anything, always use a motif which can be a few notes or a loop. Sometimes the simplest ideas are the best. If for instance, your motif is a simple two note melody repeating (note: Batman’s powerful motif was just two simple notes too!), then keep in mind that those two notes are simply the core, then add variants or supporting notes; ideas.
  • Define your logic and stick to it: Usually the first 1/3 of your song will define the logic of the rest of your song. For instance, if you mute the kick after 4 bars, keep that logic for the entire song. So, whatever you define in terms of muting,  or adding, stick to it until the end of the song.
  • Divide your song in thirds (1st third is the intro, 2nd is core, 3rd is the outro): Keep in mind that each section has a purpose and demands balance. It should have a surprise, some coherence, a punch and a transition.
  • Leave space: Miles Davis loved the silence between notes and often said they were what would give the true meaning of any phrase. If you find your entire hook for the middle part of your song, make sure you have variants of that idea, with holes/silence.

The importance of defining your own language in your music is important to create your own persona. We all know music is a form of communication and therefore, certain codes can be used in order to create phrases in your music. Everyone has a different view, but I’d like to share my personal lexicon. But let’s consider this: techno is 4/4 music which means a “round” is basically 4 bars long; this is also where DJs try to mix in/out. Each of your songs based on this premise will have better coherence if you keep to a similar logic, and the music will be understood faster by DJs.

  • A phrase is basically a bar long (4 beats). A paragraph is 4 or 8 bars long.
  • Making sounds repeat, is a period (“.”). You usually want to do it at the end of a bar if you are doing a long phrase, but you can also have a period to underline a sound that needs to express something. Rolling sounds help move on to the other bar as it creates energy.
  • Muting the kick or multiple sounds at once is a comma (“,”), it can also mark the end of portion and prepare for another. Muting creates a mini tension and creates anticipation.

Now, these are the basics we can play with.

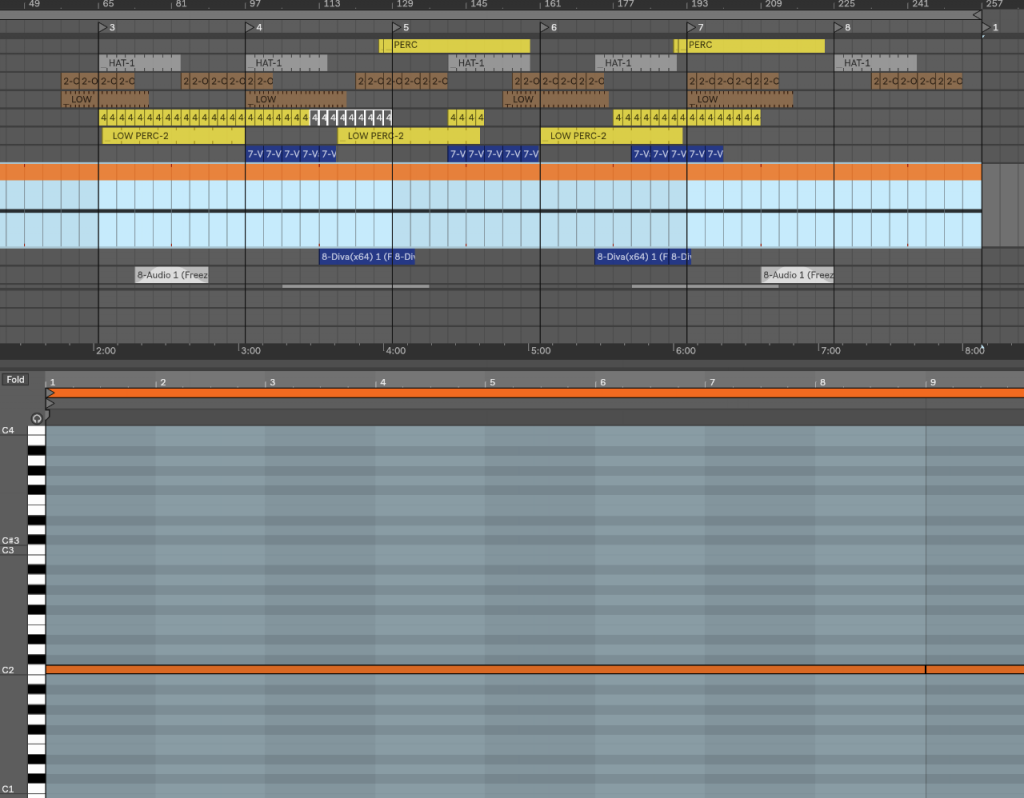
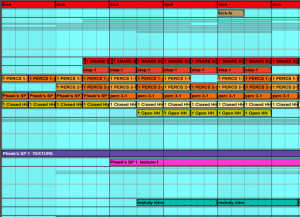
  • You can slice your entire song structure to clearly see all of your 4 bars in distinctive blocks. This crucial action really helps see the outline of your song and see the organization.
  • I usually go sound by sound (channel by channel) and decide that some sounds will have a change at some point, let’s say X number of bars. For example: hi-hats have a tiny change (a period) every 4 bars, toms will have one every 2 and claps, every bars. Then you slice all the bars in shorter one to be able to edit in details.
  • Add decoration if needed in the same logic. If you started muting and creating space here and there, those areas can be good spaces to insert effects; little, subtle blurbs of sounds.
  • Be very aware of where your song has its main elements, and if it is respecting the logic you have set in the first third of your song.

A song that has balance and repeating events will never feel empty, boring, or pointless because people will consciously (or not) understand the language behind it.

Now look at how it repeats and also, I will try to keep sequences of blocks repeating. For instance, if I have 4 blocks repeating and then there’s a 2 bar silence, I will repeat that through the song.

This is a good example of what I call arrangement logic. You decide of how things happen then follow through.

TIP: Always vary how sound come in and out. You have 2 choices: the sound starts playing or fades-in. Try to have variation between the sounds and how to come in and out later on as well.

The most important part – and I’ll finish with this – is to keep in mind that you should always have a surprise for the listener, and if you surprise him/her, he/she will want to listen to your song again; so be audacious and sometimes, unpredictable. I love the 1-2 punch method: do something, repeat it so the listener goes “ah yes!” then when the listener expects it again, punch him/her with something he/she didn’t see coming.

I hope this helps!

Playing Electronic Music Live – How to Prepare Your Live Set (Part 5)

In the previous four posts about playing electronic music live, I’ve basically covered everything you need to do before playing live. Now comes the moment of truth, where you’re basically ready and booked to play. This post will be covering the last mile of preparations including how to do a proper sound check, which is critical to play a quality set, and some bonus tips on the last things to do before hitting the play button.

Sound adjustments

Here are some main pointers about making final preparations for your sounds:

  • Clips don’t need to be perfect or mastered.
  • Leave everything with lots of headroom. We’re talking about -12dB.
  • The gain mainly comes from what you have on the master (bus). Keep it simple too.
  • The first 5-minutes of your live will be about fine tuning your sound.
Why the clips don’t need to be perfect

This is a bit hard to explain, but I’ll keep it simple. Over processing your sound might turn out horribly wrong in a venue, and if that’s the case, there will be no way back. I’d rather have something imperfect and tweak it at the sound-check to what feels best. If you’re doing multiple gigs, this also allows you to have different options for different venues. Playing on a very little sound system versus a open air festival will have totally different feel and you might have to use your compression/EQ differently.

Clips with headroom will do the job

One of the things people don’t notice is that for some sounds, channels might not be sounding like they do in the studio and thus, in a live context, you’ll need to push up the gain on certain elements that you may not have expected. Honestly, it’s more important that you sound right versus loud, and this means you need to be precise in all your sounds adjustments and find a balance. This also means that if a sound still needs to be louder than others, by leaving headroom, you’ll have space to push your fader up. If everything is maxed, you’ll only have a little space to work with which is inconvenient. Don’t hesitate to look at the meters of each channels to make sure they’re leveled. While not the perfect way to tell, it’s still useful and if you’re stressed, you’ll appreciate this quick tip regarding the gain stage, there are also two things you can do:

  • A compressor in a Send bus for all channels needing a boost. Have the compressor be aggressive with a high ratio, but a slow attack. Send to that channel as needed.
  • Routing channels to a “family bus.” Instead of having the channel sent to the Master, have it go to another channel which will act as a bus. I like to have 3 of them: low, mid, highs. Each gathering channels, having extra compression and EQ. Plus you can quickly adjust the tone of your set with these faders. All those busses will go to the master.
The Master bus will do the job

On the last bus, I like to have a limiter that will boost the incoming signal enough to see it pump with a gain reduction of about -2dB. So you might have to add +6dB to the gain for instance. This way, your channel faders might, at first, only be at 3/4 or half way but you’ll also have enough room to boost all the way to zero. Do not use Ozone or other “quick fix” mastering helpers unless you really knowing what you’re doing. I would encourage you to use a shelving EQ just before the limiter. The 3-band EQ in Ableton will do but there are also other you can use too. The idea of a shelving EQ is to quickly adjust frequency zones.

TIP: How to know what to adjust? Let’s say you feel there’s not enough low end (Kick/bass), then reduce the mids, followed by boosting the Limiter’s gain. Don’t boost the bass!!

Adjusting your sound in the first 5 minutes

I find the best way to find my levels is to take my time in the intro of my set and fade-in elements such as the kick, melody, etc. You can bring them at a level that feels like what you are familiar with. It’s important to spend time in the booth/stage before playing to be aware of the levels of the different elements in the room. I also like to go in the crowd area for five minutes to be aware of how the sound is, then go in the booth to see how the levels translate. Sometimes on the dance floor you have the highs piercing while its not the case on the stage or vice versa. This is a super important lesson for how you mix at home too and how it translates in the world.

Sound-checking

Ok, so now you’re at the venue and you’ve been given the opportunity to do a sound-check. Sometimes, you won’t have that luxury, so be grateful if you can. To make the best of this experience, focus on plugging in your sound interface so it’s ready to go and don’t worry so much about having the entire set-up ready. It’s common that sometimes there will be need for space and you might have to unplug or move some stuff. I’ve learned that leaving gear laying around might also be a bad idea, as I’ve seen people spilling drinks or even, some stuff getting stolen. Anyhow, here are main points of phase one of your sound-check:

  1. Beforehand, have your set saved so that when you press play, the most “intense moment” or peak time of your set plays. Most likely, the sound technician will ask for that to start with and I like to have than ready to fire when I arrive and be plugged. His first interest will be to see how he needs to adjust the limiter of the PA for your sound and he might also do a quick EQ curve.
  2. If you’re plugged in a DJ mixer on the stage, your first thing will be to make sure your channel is set to “Line-in”, then boost the gain of the channel to reach zero and avoid seeing any red peak indication both on the channel and the master.
  3. Make sure you can control the sound in the booth/stage and put it to a comfortable level. During your set, it’s important to mute it a few times to see what’s happening in the crowd.

If your sound reaches the PA and all is OK, then the first phase of your sound-check is completed. The gain is usually handled by the tech and you can control extra gain if needed.

Now, phase two of your sound-check: tonal adjustments.

How do I know if my sound is OK?

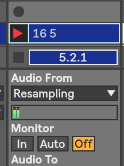
When at home, try to find a song that you know sounds similar to what you do, and that has its levels balanced (eg. kick vs mids vs highs) and load it up in a net channel of your set. That channel’s output should be set to “External out” and not master.

  1. Play the reference song to the venue and see how it sounds both in the booth/stage and the dancefloor. Make mental notes.
  2. Compare your master output to that reference first in the booth, then on the dancefloor.
    1. Is the volume more or less the same? Adjust limiter, compression.
    2. Are some frequencies harmful? Adjust the EQ.
  3. Go one by one, to the core of each moment/song of your set to see if there’s anything that clashes. My quick way to do this is to always start with the kick to make sure all kicks are at the same level, then bass, melody, percussion. You want all the kicks to be very close so that you don’t have nasty surprises when you jump from one song to another. Same for other parts.

You’re now basically ready to play. So if time allows you, try to quickly play between songs. See if something needs to be adjusted.

TIP: You might for instance see that all your percussion need a correction by EQ. You can add an EQ on the channel to do it or you might freeze & flatten that channel with the EQ to make it simple.

What if there’s no soundcheck?

If this happens and that means that phase one is not available. The venue might ask you to do a “line-check”, which means you send your audio to the mixer and the tech will deal with it. You might have no tech and then you have to do it in the mixer yourself. Just make sure your signal is about the same as the person before you and… good luck!

Extra tips for the minutes before you play from an experienced performer…

These are the things I always do and that took me time to figure out, so consider using them for some extra comfort:

  • Be mentally ready to play an hour before you play. Be around the booth, make sure your equipment is installed and tested that it works properly. On many occasions I had to change the mapping of my controllers – god knows why – so it’s good to have some buffer time.
  • Spend a moment without talking to anyone at least 15 minutes before you play. Keep focus.
  • Avoid drinks nearby your equipment. You know why.
  • Have a friend to filter around and help. I like to have someone to push away unnecessary people who want to talk to you while you play.
  • Bring extra cables of everything: USB, Audio cables and even a cable to play from your internal sound card.
  • If Ableton crashes, have something ready to play in iTunes in case and while you restart the program.
  • Use hearing protection if you can.

Let me know if you have questions and perhaps I’ll do a part 6 to playing live!

Music production techniques: Non-Linear Production

It’s been a while since I promised a post about one of a number of music production techniques I use: non linear music production. The very first album I did using this technique and really sticking to rules of it was Intra; and then I recently went deep in to produce multiple EPs in the same vein of non linear production, which were made between end of December 2017 until March 2018. While Intra was an album of 23 songs made over nine months, my last experiment produced 19 tracks over 3 months. I think I’m getting better at it, mostly because it’s becoming clearer in my mind.

Out of the 19 recent tracks, I kept 8 for this album – which you can hear above – I named Returning Home; a statement about home being a state of mind and not necessary a physical place. I’ve been making techno/dance music since 1998, and after diving into more electronic soundscapes, experiments, and ambient music, it just felt good to return to my roots. A funny thing also – I tried working with some other labels to find it a new spot as I wanted to keep my label Archipel for more down-tempo stuff, but I kept getting refusals or complicated compromises. I’m too stubborn to change things and since this album was made based on a very solid concept, I didn’t want to go back and change what felt good.

But back to the non linear production technique. I’ll cover how the process went, from the beginning of where I started from scratch until the end.

I know some people who are like, “but I don’t need a technique as I just do music.” Sure, that is not for you then. But this technique can bring benefit if you’re looking to expand your production. It surely contributed to make me more prolific through time.

Non-linear music production – A concept

This concept (which has been around for decades according to some research I did), encourages the producer to explore working on multiple songs at once, in a non-linear way.

This means that:

  1. You aren’t working on a song’s beginning first to bring it to its end, before starting a new one.
  2. Each track is approached individually for its needs but you also work globally. Keep in mind that what you did in the previous track should differ on the next.
  3. The technique is about repeating the same phases/rounds until you get a solid core. Then there’s the finalization to get ready for mixing.

It’s called “non-linear” because you constantly circle up in a series of rounds, on multiple tracks, all at once.

Note: A non-written rule also implies that working on a track should be done in short periods such as 20-30 min at a time on a song, then stop, save and move on. Why? Because it keeps you fresh.

For many people I explained this to at first, it felt unsettling and confusing. There’s some kind of embedded belief in people that when you go make music, you should find your idea, absolutely stick to it, and build it into a song; beginning at start and bringing it to an end. I usually see people’s projects having a few blocks right at the beginning of the track and then they get lost.

The number one thing I hear all the time: “I can make a great loop but don’t know what next.”

I’ve written a post in the past about this. However the non-linear technique is really aimed at making the loop issue something of the past, because it’s all about transforming small ideas into bigger concepts.

But where does it start? How do you begin?

Before diving into producing, let me explain the rounds of the non-linear music production technique, as this is what it’s all about:

  1. Content creation, generating ideas.
  2. Filtering ideas into a concept.
  3. Building a core loop.
  4. Template structure.
  5. Arrangements.

When you decide to create your project, the first thing you should do is decide on your project type. Is it an EP (3-4 songs) or LP (5-10 tracks)? Perhaps you just want to make a bunch of tracks; I personally believe that we should never make just one track at a time. If you have no precise project, invent one, such as “I’ll make 5 tracks for fun and want them to be mainly techno.” Once this has been decided, you’re ready for content creation. I usually spend a considerable amount of time in content creation and idea generation.

You can also start from unfinished tracks that you want to apply the idea to. The idea is to work on multiple projects in parallel. I usually it works best if you have at least five on the go, but there’s no limit of course. To newcomers, start small though to see if working this way works for you. The technique is about to bring your track from a simple idea to a finalized but unmixed, song. The mixing is not part of this. I find the mix down works better if you don’t do early, it but perhaps it can. Don’t hesitate to build a reference folder where you put songs that inspire you.

Content creation, generating ideas

From all the years of listening to music, running labels, doing mastering and DJing, I’ve come up with a theory: a solid song is – in general – a single, solid idea, supported with two others. The main idea can be a loop, a motif or even a sound. I remember Hans Zimmer describing a motif by saying it has to have an emotional impact on you, that it reappears in your mind later on. He was saying that the Batman motif he did was a simple two notes, but very powerful. You’ll play them and you’ll automatically think of Batman. The two other ideas are necessary because a song usually needs a development and a “surprise.” That said, in this production technique, you need to create fresh ideas. Lots of them.

I made a very long post about how to come up with new ideas but I’ll sum how I did mine:

  • Recycling older ideas: I have countless samples that I’ve used or never touched. I like to process them into new sounds.
  • Recording radio or other spaces with a microphone: When I’m in a creative mood, I’ll spend a lot of time recording sounds around me from that period of my life. I’ll leave the recorder somewhere for an hour to see what comes up.
  • Try demos: I love getting demos and try to see what I can come up with it by sampling them. Some have limited time or others are in days. It forces you to resample the hell out of the work and get something. Sometimes I end up buying it of course.
  • Pure sound design: Layering sounds from different takes is a great way to generate rich sounds. I do this a lot but its time consuming.
  • Jamming with the sounds: When I have plenty, I’ll generally put the sounds in a sampler and jam them with a midi controller or PUSH. I’ll record everything I do into a project.

A project that has many ideas will be recorded with the date of the day for the jam. It might turn out that I have a few hours of material which means there’s hypothetically 3-4 ideas in there.

The definition of done (DoD) of this phase is when you have a project with 3-4 ideas ready to go. I usually do one session per track needed for the project.

Filtering ideas into a concept

This phase is one that you need to do outside of jamming. Why? Because when you jam, you’re in your creative state (right brain) and have tons of ideas but your judgement is off. You can’t be a judge then. You need to feel free and explore without boundaries. This second phase is about going into a more analytical side where you will be curating your crop.

  1. Go through all recordings you’ve made and loop part of it. The question is, can you listen to a loop and feel inspired? If yes, you have something to hold on to.
  2. Use different size loops like 1, 2, 4 bars. Compile different ideas.
  3. Use the session view to make scenes of loops you like.
  4. Try to see if certain loops, once layered, make unexpected motifs.
  5. (optional) Add a kick & hihat to give you an idea of the groove and adjust the timing of the loop.

The definition of done (DoD) of this phase is when you have a few scenes in your session view that feel solid.

*Note that you may go back to create more ideas (Round 1) to complement what you have. You may also create a pool for all ideas of all sessions and then make ideas from that. No rules here, only possibilities.

Building a core loop

At this point, you should have X number of projects (based on your project definition you decided on at the beginning, i.e. EP, LP, whatever), each with material that has been organized into 2-3 ideas. Now comes the moment to put it all together.

The loop you’ll build here is the middle part of your song so it should have all the bells and whistles.

  1. Add a foundation. The fundamental part of your song is the low end and the bass. From the main idea, add a bass that either supports or responds to the idea. Adjust it so it’s in key.
  2. Add percussion. Complementary to the bass, you may add kick, percussion, or anything complementary of what will create the groove. I usually start right away to decide what groove template I’ll use on this core part.
  3. Add melodic touches if needed. Decide how long your melody will be and how it progresses (if it does).
  4. Create a background and space if desired. This is usually the reverb and textures. However, this can also come later on.

The definition of done (DoD) of this phase is that you have a main loop that you can place in the arrangement window, right in the heart of your song (which means you need to know roughly how long it has to be). A good loop is one that is centered around your motif where if you solo that part, it would be what someone would talk about to describe your song.

In the process of working through the core loop, you might need to go back to create more content or you may import some from other sessions.

Template structure

Now that you have the core part of the song, it’s easier to build out the remaining structure. In the arrangement view, create three sections: a beginning, middle and end. You will now lay out your structure to have an idea of what you can do with your core idea.

  1. Copy the elements from beginning to end  that will be present the whole time through the track.
  2. Work backwards by deconstructing the timeline of what comes in first and so, until you get to the middle part.
  3. Do the same process until the end. You may repeat some elements.

The definition of done (DoD) of this phase requires that you have a temporary structure from beginning to end. It might take you a while, I encourage you to do sprints of 30 minutes at a time. The problem with working too long on this phase is that you lose perspective regarding the strength of your song. I usually want some sort of structure to come out of this phase, but I may go back and forth with the other phases until I am happy with it.

Arrangements

This is the final phase. You might need to come back to it as everyone has different needs that will arise in this process. Arranging – in simple terms – is creating the story-line of your song, but also between songs for your project! How do your tracks relate to each other? I have songs that have brothers and sisters, while some are from a completely different family.

After working on the arrangement of song, the last thing I do is export what I’ve done so far. When I switch to another track, I import the last session in the arrangement to see what I did and compare. I adjust the arrangements so all my tracks don’t have the same structure; beginning, breaks, and punches. I adjust them so they can be fun for DJs to mix too.

Arranging is a massive topic that I will detail in a future post and is involved in most music production techniques – but this explanation is a full conceptualization of how I work. Hopefully it helps you somehow too!


SEE ALSO :   Non-Linear Music Production 

Adding life to sounds: movement in electronic music

Creating movement in electronic music

One of the most misunderstood concepts in electronic music is movement. By movement, I am referring to the way that each sound constantly evolves throughout a song. I was once talking with someone who is very into modular synthesizers and he was saying that he cannot stand recorded sounds such as samples because according to him, those sounds are “dead”. With modular synths a sound can be repeated for minutes and it will never be exactly the same because the hardware components constantly give the sound slight variations. A recorded sound is frozen just like a picture. Since we don’t all have the luxury to own a modular synth, let me explain how we can use software tools to make sounds feel “alive” and develop some movement in our own electronic music.

First, let us agree that movement in electronic music is about having some elements that are in “motion”. There are a variety of different ways to create that feeling:

1. Changes in volume (amplitude)

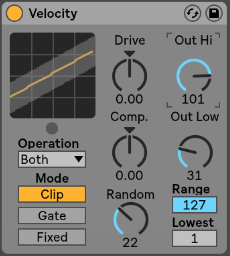
Volume change in percussion are often associated with groove and swing. Both can alter the volume of the sounds. That said, you can apply a groove template not only to percussion, but also to melodies and basslines. If that’s not enough you can also use the midi effect velocity which can not only alter the velocity of each note, but in Ableton Live it also has a randomizer which can be used to create a humanizing factor. Another way to add dynamics is to use a tremolo effect on a sound and keep it either synchronized, or not. The tremolo effect also affects the volume, and is another way of creating custom made grooves. I also personally like to create very subtle arrangement changes on the volume envelope or gain which keeps the sound always moving.
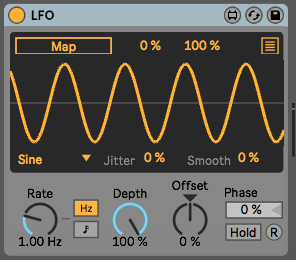
In general, using LFOs – such as what is offered in Max patches – can be used to modulate anything, and they will automatically create movement. For each LFO, I often use another LFO to modulate its speed so that you can get a true feeling of non-redundancy.
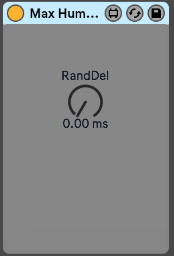
Tip: Combine the use of LFOs and manual edits and then copy sequences until the end of the song. I suggest you try stepping out of 4/4 and regular blocks structure to step out of a “template feel.”

2. Filter

Another great way to create movement is to have the sound always changing its tone. Using a filter in parallel mode is a very efficient way to create colours. The important part is to make sure that both the frequency and resonance are constantly in motion by using either LFOs or envelopes. By being in parallel the sound always appears to be the same but will have some added body to it because of the filter. What many people don’t know is there are different types of filters, so you can try different types of filters into different send channels and then your song will feel like its moving. While filters are great for subtle changes, you can also do the same trick with an equalizer but still in parallel. Adding an envelop on the filter so it detects incoming signal and change the the frequency is also a very nice way to keep things organic sounding.

Tip: Try comparing how a Moog filter can differ from any regular ones.

3. Textures

Background textures or noise is another great way to emulate analog gear. There are many ways to do that, but the one that I recommend is to get a microphone for your iPhone and then record a part of say, your next visit at the coffee shop or restaurant, or even in your house where we don’t realize that there is still a very low level of noise. Adding that recording at low volume to your song automatically adds a layer of every evolving sound. if you want, you can also convert certain noise into a groove pattern which creates a form of randomization on your sounds. Some high quality effects such as saturation used on certain sounds will add a form of texture that prevents your samples from sounding stale.

Tip: FM modulation on a filter or oscillation can create gritty textures.

4. Stereo and Panning

For this point there are different effects that play with the stereo image and – while you should be cautious – it’s good to have at least one or two sounds that have these kinds of effects. Some of these types of effects include of phaser, chorus, flanger, delay, reverb and auto-pan. They can all give the sounds movement if the modulation is unsynchronized and if the wet/dry is constantly being slightly modified.

Tip: Just be careful of what effects you use as overusing can create phasing issues.

5. Timing

A sound’s position in a pattern can change slightly throughout a song to create feelings of movement; a point people often overlook. This effect is easier to create if you convert all of your audio clips to midi. In midi mode you can use humanizer plugins to constantly modify the timing of each note. You can also do that manually if you are a little bit more into detail editing but in the end a humanizer can do the same while also creating some unexpected ideas that could be good. Another trick is to use a stutter effect in parallel mode to throw a few curve balls into the timing of a sound every now and then.
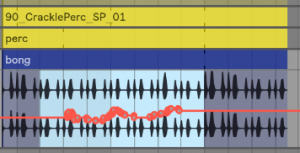
Tip: turn off the the grid locking in the arrangement section to intentionally be imprecise.


SEE ALSO :   Dynamic Sound Layering and Design 

Playing Electronic Music Live – How to Prepare Your Live Set (Part 4)

Following up on the previous post in this series, I’ll outline some final tweaks and advanced clip settings for your live set. There’s a lot to cover here but I’ll try to condense it down to the essentials.

Final Tweaks

As your set is likely now taking form, you should have different songs organized into scenes. You can think of this as the minimum you will need to play live but if you want the best result, there are still things to tweak. Personally, when I listen to a live set, I really want it to feel live; the artist can interact with the energy of the room and build around it. You should avoid playing each scene one after the other, without surprises. Again, this is my opinion and you might think otherwise, but what I’d like to explain is how to add a bit of “live” life in the last tweaks to your set.

1st – Rehearse and record.

This is pretty much the ultimate test to see if your live-lab is working properly. You’ll need to rehearse, play with your session, move things around, and test, again and again.

Don’t ever fall back on the idea that what you have is ready for the big show without rehearsing, because trust me, you’ll learn the hard way that if wait until being in club to test your set, it will hurt. That said, hit the record button and then start playing the clips, try to take you time as well to create a proper intro, then see how it goes when you launch scenes, fade-in some sounds, and add effects. The most important part of rehearsing your set is recording what you do.

You can then listen to see what you recorded and if you like a part of a moment, you can then drag it back into your set.


Since you only have two hands but you want each of your clips to have a feeling of “live”, you can pre-record certain subtle details you want to be played while you tweak other knobs. You’re not totally playback everything as-is, you’re interacting with other played elements you recorded. This can be particularly useful for creating unique and complex moment or breathtaking breakdowns.

You can also use +J (ctrl+J on Windows) to consolidate moments you like.

2nd – Add variations.

In my sets, I rarely have one scene repeating without having variations of it. The variations can be used for many things, such as having a more energetic variation of the same scene, one that has a little pause, or space for inserting a fill. Here are a few quick tips you can use to make creating variations easier:

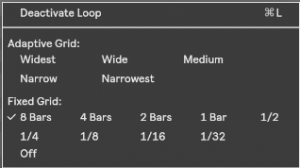
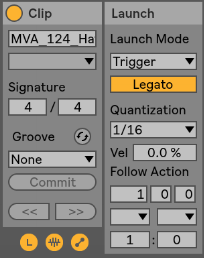
Legato: This is probably the most useful thing to activate for clips in variation. Basically, the Legato option will let the selected clip to take over the one that was previously played, based on the quantization you have set. So for instance, let’s say you play a hihat clip, then press the first clip of the variation. It will stop the activated clip and immediately switch to the other one you just started. On the image, I have set it to 1/16, meaning it will be played on the next 1/16th, keeping it on tempo. Keep in mind that the variation clips are “in sync” with the one playing so that it will continue at the same position in the clip. If legato wasn’t activated, it would start at the beginning of the clip.
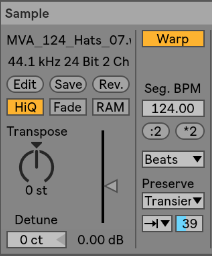
Follow Action: Once played, what do you want the clip to do? You could just play that clip but it could go back to the first clip or even randomly play something else. I suggest you experiment with this and find ways to surprise yourself. Don’t forget to record yourself playing them as you can go back to the arrangement section to seize the best part and create new ideas you didn’t even know of.

Intensity Variation: If you want to quickly go from open hihat to closed one, one of the fastest way is to play with the “Preserve” section and set it as in this image. Playing with the percentage will let you adjust how much of the end of each sound can be preserved. Having it at 100% is fully open and let’s say 25% is more closed, building tension. So one variation can be set low at first and then the other ones can be more open. If you see the need to boost the energy quickly, then you can go in one of the variation.
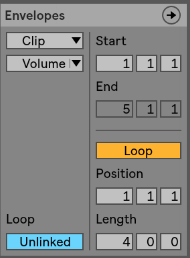
Reverse: this one can be fun but in a live context, if you do it at the wrong time it’s awfully awkward; perhaps introducing it in a variation instead would be a safer idea.

Transpose: This can be nice for melodies and basses. You can have them move in pitch in a variation.

Envelopes: Super useful for variations as well because you can create automation on a very small scale or a longer one. Many artists will use this on EQ to give life to a clip and making sure it feels like it is alive. The important part is to make sure that the envelope isn’t linked and then you can decide of the length of the automation, on one attribute. Tip: make sure you select “Clip” in the first drop down to make sure the changes are made in the clip itself.
Try: Using this with a filter to create fun swooshes.

Also try: Use this technique to create melodies and textures out of a stall pad.


3rd – Transitions.

This part is the final preparation needed to play live but is also the trickiest one. Mainly because this task will imply some practice. My approach and advice here might not totally work for you because your music is different than mine. In other words, doing transitions is something personal and each musician tends to develop his or her own way to do it based on what feels like the best flow possible.

How do transitions work?

In theory, a transition from one song to another is exactly like a DJ mixing one track into another. The puzzle with live transitions is – whereas the DJ only has one fader and EQ to do the trick – you have multiple channels to blend one into the another.

Whenever I teach people how to play live (yes, I do Ableton Live training), a first exercise I give them is to create a playlist with a few DJ sets they like and tell them to study the track transitions. Some people like very fast and abrupt mixing (i.e Jeff Mills-like), while others prefer something more subtle and blurring the lines one where a song starts and the other stops.

The other thing to know beforehand is if you want your live set timeline to be fixed and fluid, or if you will chunk which tracks to play as you go. This can also be a huge factor in how you prepare your transitions. Personally, I want to have the entire flexibility to be able to play track X as an intro then switch to track Z. No order will be established until the last minute when I hit the play button to start my live set.

Once this is clear, you’ll be able to decide how to bridge songs. The first row of each song is your intro bridge and the last one most probably your outro, but you could also start mixing the next track at any moment if you want. Here a few rules of my own for transitions:

  • Only one kick at a time is played. For a while I was mixing the kick of the first track and the other, but the results weren’t so great. I decided to stick to one channel for the kick and would switch when appropriate.
  • One bass unless its a call/response. Same as kick, 2 basses is most usually a set up for disaster so I’d play one or the other. Some bass have only a few notes, especially in dub techno, so it could work that I have one bass of a track talking to another (eg. call/response).
  • Bridge is usually atonal. I would try to stick to rhythmical elements but if I would use a melodic element, I thought it could be tricky as it can clash with the bass or other elements.
  • The bridge can be a song in itself. This one is interesting but not a necessity. But if you can play with your variations well enough, you can create a new song out of two songs. This is basically the techno approach of 1+1=3 (Listener hears track A, B but also a third track which is the meeting of both). I often would record my sets and sometimes noticed that the strong moments were sometimes when I’d bridge two songs.

Because of the number of channels you have in Ableton, you might be stuck with the fact that only one instrument at a time can play. This problem led me to organize bridges differently on occasion. For example, if I want 2 layers of hi-hats, I would have to “cheat” and have a layer of hats in the clap channel.  Quite often I found myself organizing this while playing, and it’s not the best because you can get lost easily in the arranging. I prefer having a few options in the intro with extra layers of claps, hats, percussion. Sometimes even some duplicates in different channels.

In the next post, we will talk about sound checking and performing, which will also conclude the series!

Playing Electronic Music Live – How to Prepare Your Live Set (Part 3)

After the first two parts on this series of posts about playing electronic music live, we arrive at our final topic: clip arrangements, song organization and sound preparation.

Clip Preparation

I hope you did your homework from part two where I asked you to take your arrangements and turn them into an Ableton Live session. If you’ve done this, you’ll see that this task is pretty demanding and can be confusing, because you might feel your song(s) aren’t the same anymore, or perhaps they don’t make any sense. But trust me, even if you feel like you have failed in arranging your sessions, it will start to make more sense as we continue. What really matters is that you now have material loaded into the session view.

What if my track is so simple that I have only a few clips in the session view?

That’s not a problem, the idea is to have something. Part of the beauty of a live set is that once you have all your tracks in the session, you’ll shape them into a longer set. A live set isn’t like a DJ set, where you focus on transitions and track selections; it’s way more flexible and involves constant shaping to create a bigger picture.

1st To Do: Import all Your tracks into one big project

For the sake of this exercise, please start by creating a blank new live set that you’ll name “My Live Set” where you’ll have 12 channels to start with.

Next we will import all songs into that project. There are two ways to do this and it’s up to you to decide what is the best for you. I personally like to open a track, grab all clips in the session, copy (cmd+c), then open your “My Live Set” project and paste. You can also copy through the browser and should you be more comfortable using that method, do it that way.

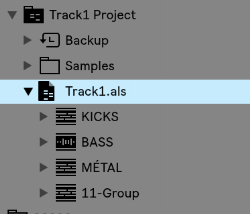
One of the great new features of Ableton 10 is that groups now appear in the browser; which could be a good way to organize your work to re-import later on.

You should also consider copying audio leftovers over from each track. These unused pieces are more precious than you think, in a live context. A leftover is anything in your track that was created but didn’t make the final cut. It could be a variation, some weird FX, vocals, whatever – basically, anything will do. The idea behind leftovers is to create material for your live version to make it differ from the original song; it will add an edge.

Once you have all your tracks imported, you have a better idea of your whole session.

“How many tracks do I need for a 1h set?”

The answer here is hard to figure out until you’ve rehearse and determine your natural flow. After years of playing and recording my sets, I’ve figure that each of my tracks average a rough 6 to 8 minutes in a live context. This also includes the transitions (i.e two songs overlapping for 1-2  minutes, to make things smooth enough like a DJ would).

The total time of the tracks is not necessarily important to figure out. If you’re creative, you might even play the tracks in a random order.

2nd To Do: Name and color all clips appropriately

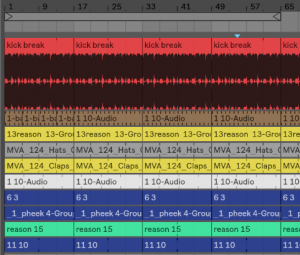
People often overlook this part but trust me, the better the organization, the less stress you’ll have in a live context. Never believe yourself when your mind says “oh I’ll remember what this clip is.” This is why names are important, but also, the clip color. All kicks should be the same color, basses and so on. My personal coding colors have been:

Kicks: red (grabs my attention)

Low end, bass: brown

Percussions: yellow

Claps/snare: Orange

Hihats: grey

Melodic elements: Blue, in various tons as some are different.

One thing about colors that helps is if you’re playing a track while in transition to another one, you can see the color of the other clip that you can’t see on screen.

Please note that I don’t necessarily recommend putting all of the same sounds in the same channels. You might want to mix, for instance, hihats of track A with the ones of track B. If both track’s hihats are in the same channel, you won’t be able to mix them and one will play after the other (only one clip can be played in a channel at a time).

Scene organization

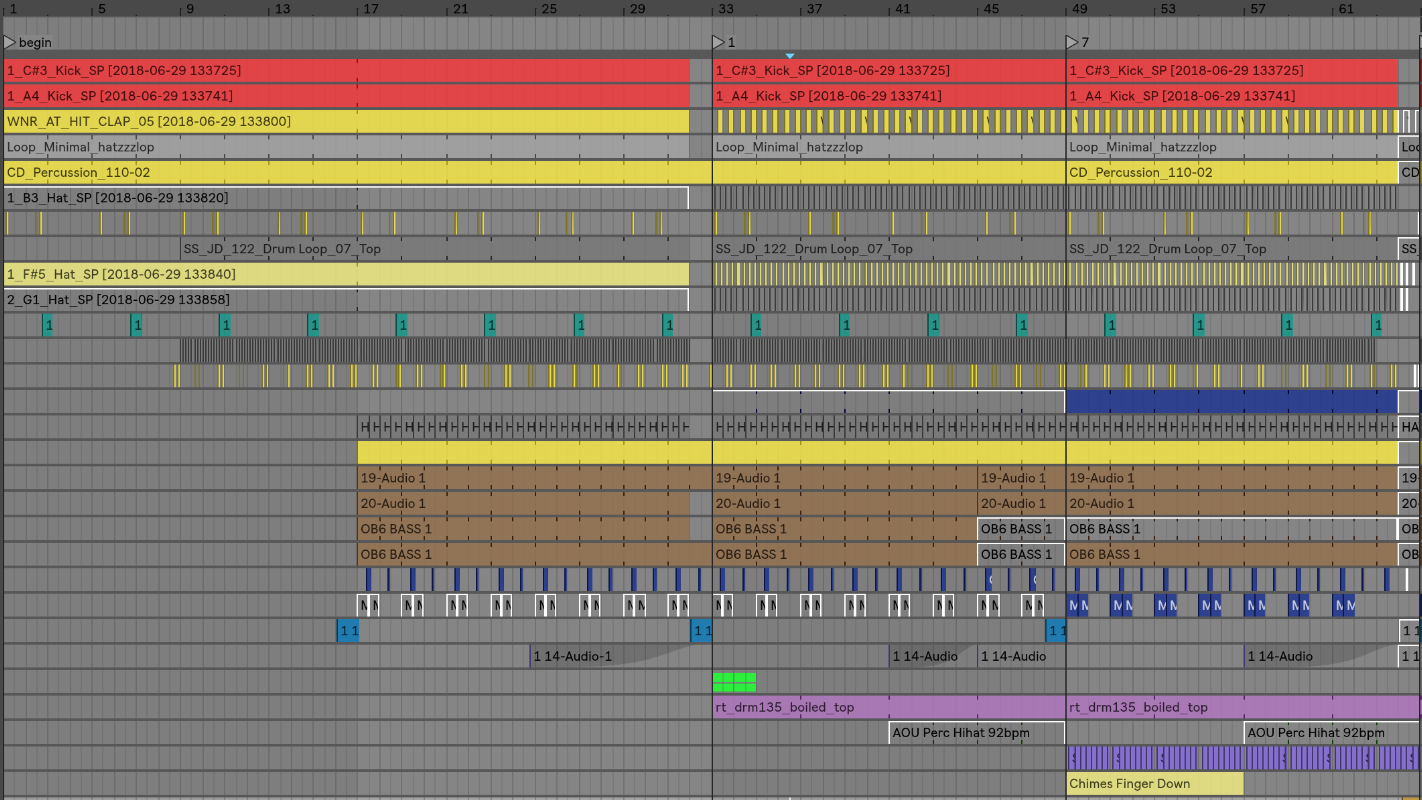
Organizing your scenes is time-consuming, and it will also be what you’ll be reworking the most. It will also get your songs to have more of a live feel. For this section, I’ll use an example of one of my latest live sets to explain what I did, and why.

This song starts at the second row (scene).

Channel headers: As you can see, header colors aren’t important to me so much but there is a section all in white. This is because I use two MIDI controllers for controlling the volumes and the second section is for the second controller. This is also why they’re numbered so I know which slider they refer to on the actual controller.

3rd To Do: Map your channels to the appropriate elements of your controllers

Think of how you want to control your set on a base level, which is the channels in most cases. This is the most important part to pin down, because as you prepare your set, you’ll need to control volume sliders. Map your channels to the appropriate elements of your controllers. If your controller has buttons, I’d also map them to the mute buttons. Mutes are very important.

Buffer rows: As you can see, alternating rows before and after each busy row have scene of empty clips. You can also see that they have the “stop” square in them. I create “buffer rows” for two reasons: the buffers help know where the song starts and begins, but they also serve as a quick way to toggle a clip to stop playing if necessary.

4th To Do: Add 1-3 buffer rows between each song

The first scene/row of each track: The first row, to me, is the most important one. Over years of playing, I’ve settled on a super minimalist version of my live set where I play mostly loopy music with variations which really enforced the importance of the first row of the set.

The first row has various various roles:

  • It is the introduction of your song: It will be used in the transition from the previous track.
  • It is the core idea of your song: All sounds that are playing from beginning to end of your song should be placed here and remove everything below. In my case, the kick will be the same from beginning to end. The length of the kick will be 4 bars long and include variations. Some people like to add multiple clips underneath as variations to trigger, so that is always another option, but think that whatever remains the same throughout should be there.
  • Tension relief: If you noodle around, create an improvised breakdown or start removing sounds. You can use the right side play to then trigger all sounds at once to come back to the song’s full intensity and main idea. This point is very important if you think you’ll be exploring and improvising as you’ll need an anchor.

5th To Do: Make a solid core

Supplementary/following scenes: There are multiple ways to use the scenes that follow your initial introduction. To “play it safe” you could simply have each scene play as the track evolves. The good thing about this approach is that by having all scenes on hand, you can deconstruct the timeline of your song by playing them in different orders. My favourite way of doing this is to have variations of a scene, such as one line with hihats, one with none, one with two playing and a clap, etc, same for melodies. This way I can play variations but I can also trigger one entire line and have a “ready-to-go” new take. If you look at my live set screenshot above, you’ll also see that under one sample “Tommydrum”, I have the same clip three times using variations in timing or tweaks in the versions. I can toggle between them as I need them.

Last To Do: Plan your follow-up lines/scenes and decide what you use.

In the next post, we’ll discuss rehearsing, sound calibration and advanced clip settings!

Playing Electronic Music Live – How to Prepare Your Live Set (Part 2)

After deciding the direction your live set will take, we will now discuss how to prepare a live electronic set in terms of how we approach each individual song, or moments as I call them. This article is the follow up to Playing Electronic Music Live – How to Prepare Your Live Set (Part 1)

Before continuing, make sure you have read the article linked above; after which you should have a better idea the style you’d like to play live. Since most electronic musicians are software users, we’ll start with that approach which is easier and allows for playing both at home for fun or in a club. A common mistake I often see from new artists who want to perform live is to make things too ambitious and overly complicated; the preparations become too demanding and actually playing the set loses its fun.

First idea in preparing your set: turn your tracks, finished or not, into moments to be played live.

In a previous post, I said that making many loops is something that eventually pays off. When you want to play live, it’s always best to have a lot of options on hand that you can trim, to see what works together and then turn these perhaps unfinished loops into new songs.

For years, I always had a main project file for playing live in which I would test drive any new ideas I would worked on done over a given period of time. This live set was like a laboratory for experimentation; it was where new ideas would sprout, where loops became completed tracks, and where some sounds were replaced or remixed into another track. In other words, I recommend turning your unused arrangement loops into a scene in Live, play them, and record the output. Rinse, repeat.

But where and how do I start? 

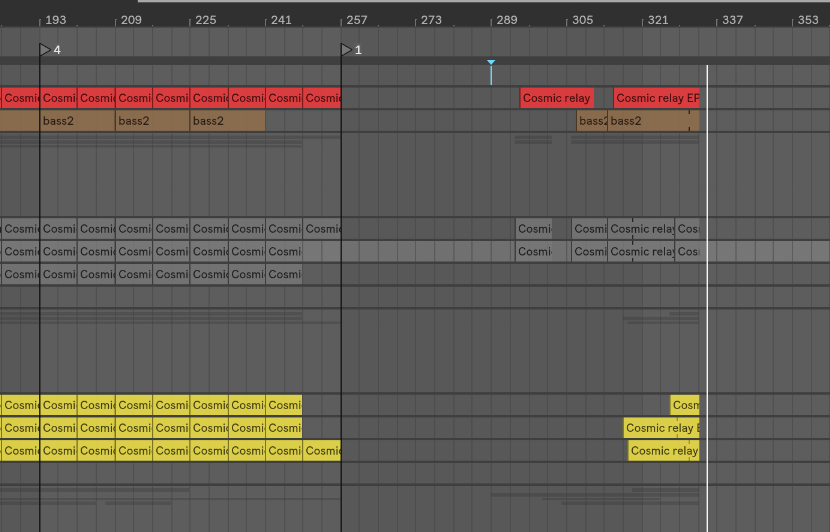
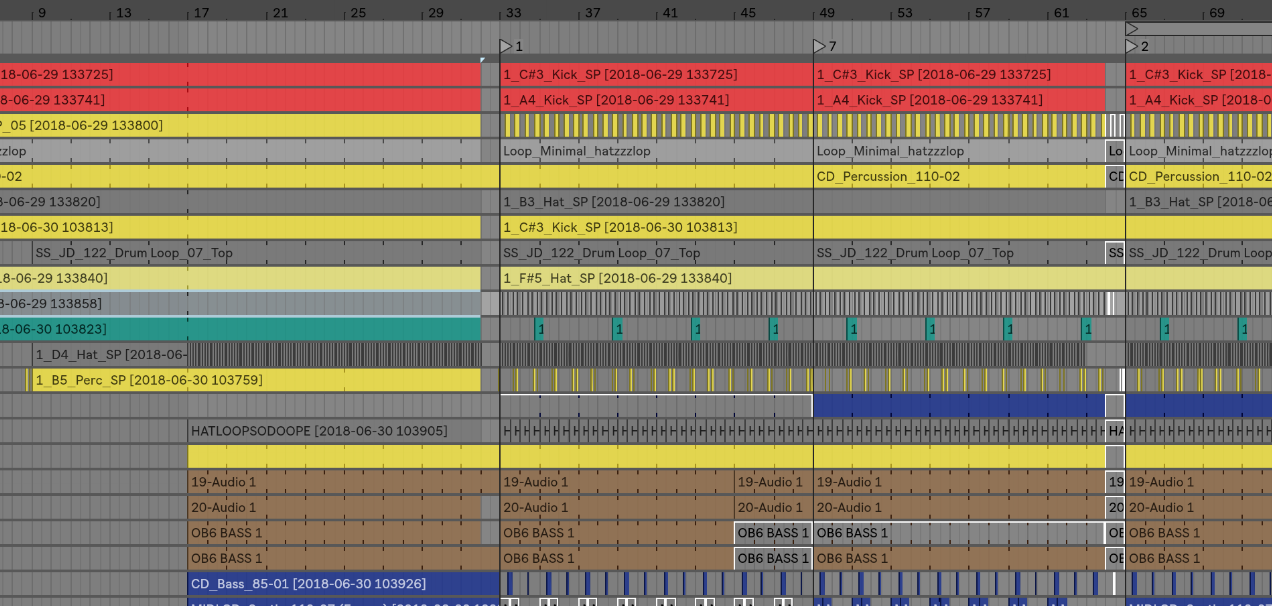
For example, let’s take this simple arrangement and see what we can make out of it. Let’s say you have a track in the works or done, partially set up in an arrangement view (Note: Any DAW, in arrangement, not just Ableton); firstly, you’ll need to know how the track is structured.

Figure 1 – Arrangement view with markers


Do you want to play the track like your arranged it or do you want to have the parts so you can improvised with the different section?

As you can see in the above screenshot, I have inserted markers in my arrangement which represent the main changes between sections; everything is mostly organized in blocks. You’ll need to slice out these blocks to trigger them, and also what will become important is how you decide to play them. If some parts are heavily chopped, I would recommend that you either turn that section into an entire block, or if you want to jam those sounds you could add them to a Drum Rack. It depends if you want to do some jamming in your set or not. The point here is to have a better view of how your blocks exist so that when you are in the session view, the parts are easy to see.

1st TO DO:

  • Stretch the little blocks that repeat to create bigger blocks that cover the area where they should be repeating (note: make sure the clip is in loop mode) .
  • Use cmd+j to consolidate chopped blocks into bigger block. If some blocks have changes in them, consolidate them as is.
  • Use colors to clarify where the blocks have changes. Say a block is repeating until a given time but then changes pitch; you could change the color of the one where the pitch is changed to symbolize this change.

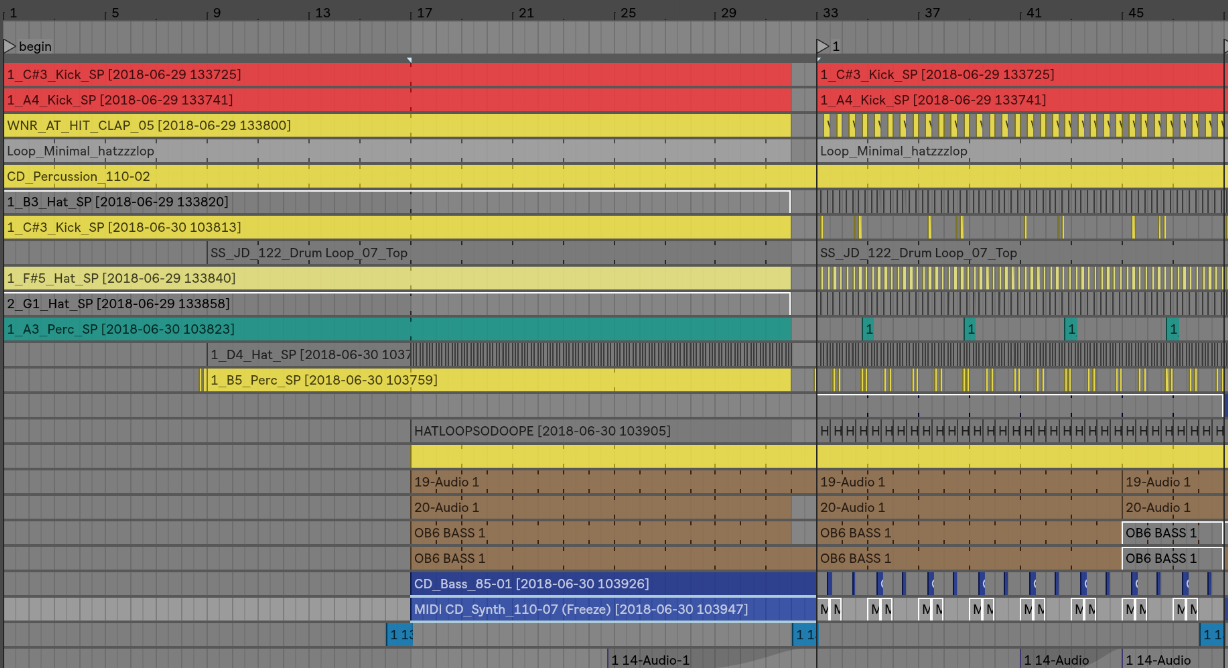
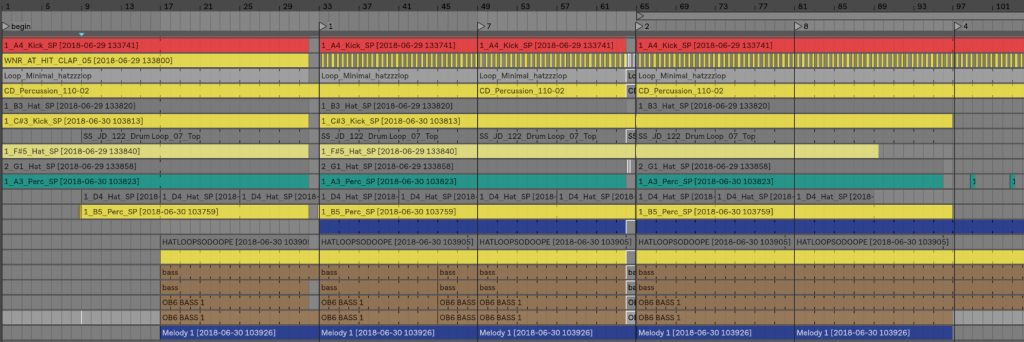
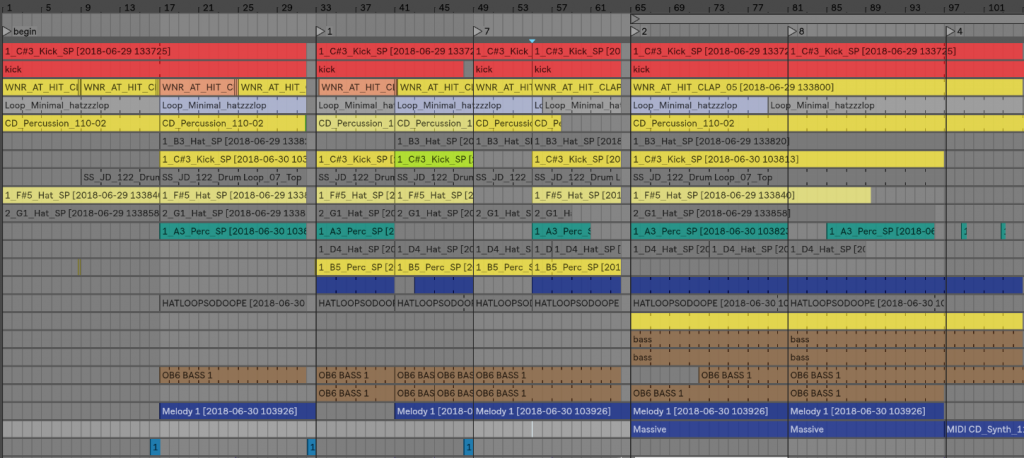
Figure 2 – Consolidated vs. Unconsolidated blocks

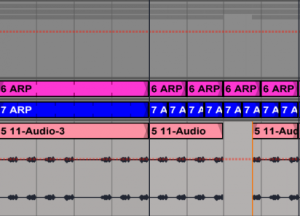
In Figure 2, the left section has been consolidated, and the right side hasn’t. You can the Duplicate left section to the right after consolidating this way.

This may appear time consuming, but it’s not that much extra work and it will pay off once you move everything to session view.

When you’re finished here, you need to bring the new blocks into the session view.

If you have groups, I’d suggest to ungroup them. The reason is that it is not only inconvenient to use groups in session view, but there are chances that your groups differ from one song to another, and in the end it might be more confusing than helpful. If you have grouped FX, I’d suggest you export the entire channel as a stem and decide later how to use it in a live context. You could perhaps decide to use FX during the live and so, not to bounce the channel. It’s hard for me to tell you what to do here.

2nd TO DO:

  • Grab all clips using cmd+a, click to grab, press Tab and then drop them in the session view.

    cmd+a, click to grab, press Tab and then drop them in the session view

  • You might have a really large amount of clips. After moving things to session view you’ll see that some “scenes” are made up of the same clips. You’ll need to delete all scenes that are the same; you don’t need them. In the end, you might go from 60 possible scenes, to about 5 (!). In live situation, you want everything in front of you, and the simpler things are, the faster you’ll be able to get in the zone. You can also go from Scene A to B, to C to D in any order, which gives you the option to remix your music on the fly.
  • Some people might have a huge number of channels grouped in 5-8 groups. Groups make things difficult to play live as they add a lot of complexity. I’d suggest you perhaps export the track’s stems for the groups and then chop them in sections as I explained above. This might also eventually invite you to reconsider how you use channels – I often feel like people use too many. I never use a single channel for a one hit that happens once in a song. I’ll have a reserved channel where I drop all the one-hit sounds. This can be a game changer for you if you use many as smaller projects are easier to understand and you’ll feel more focused (and use less CPU!)


Regarding the number of channels to use, you’ll need to do tests on your own set up before deciding how to do this. In the previous post on this topic, I was advised to be careful with the number of channels/tracks you use. Ideally you want to deal with a max of 12. To trim down the number of channels you are using in the event that you are already using more, you’ll need to mix down a few that are similar or combine channels that don’t have much going on. For example, I’d have a channel that would be a longer loop that would combine all FX and random hits. Playing it as a longer loop as opposed to a shorter one creates more of a live feel that isn’t as “loopy”.

Rehearse your session by hitting certain clips or triggering a scene to see what happens. Once you have removed the redundant scenes and trimmed down the number of channels, you’ll start having a first real glance of what your song looks like in terms of playing it live.

Of course, you’ll deal with the existential question of if you want to play the track “as is” or have a special version just for a live context.

Personally, I think it’s a bit boring to not offer something different in a live set, Two ways you can change things up are through pacing and jamming. jamming will be touched on more in part 3 as it is a very important part of preparation and can also be something that can also forever change your approach regarding how you make music.

Pacing will be the last part of the preparation of your live set. I will cover most of the preparation phase of pacing below, and the following blog post will be more concerned with how to play your live set.

I think my best live sets were good mostly because they had a core to work around that had some preparation, but also had a lot of room to improvise, dependent on how the actual event turned out. These sets were versatile; I could open an evening with them or play peak time, mostly because of how flexible they were. These sets were more or less made up of the same songs but the variations would be so easy to perform on the fly that I could really just follow what felt good to me in that moment in time. I’ve never really understood the point of having an overly prepared set. I’ve tried the prepared approach before and it just made the whole experience boring, because there would be no risk-taking; it also felt out of sync with whoever was listening. For example, imagine that your track has been built to have a drop, breakdown at one precise point and a moment of tension after, but if the dance floor is just starting to warm up when you drop, you might lose people’s attention or it might feel out of place.

A well prepared set has moments for building tension, others to release, variations, and material to raise the intensity if needed, without it being a fixed bunch of parts that aren’t easily movable. Each songs need an intro and outro so that you can move from one song to another in a very flowing way, just like a DJ would do.

Last TO DO (3):

  • Try to decide on the first scene of your songs. They shouldn’t be too busy but usually, you want a solid groove plus some teasers of the melody to come. Establishing the groove is always important to get people’s–what I call–dancefloor trust. That trust usually comes from kick-low end that is clear and precise, which people can relate to, no matter what happens in other parts of the frequency spectrum.
  • Your intro should have openness and space. If you have a melody, try muting a part of it. This will allow the possibility of mixing a part of the melody of another song with the current song; they will be “talking to each other” by echoing. This happens when the first few notes of a melody are answering the last few notes of another melody. DJs love that in a song and by playing live, you’ll see why; you’ll discover “dialogs” between your tracks which could even teach you the good and bad of your track’s arrangements.
  • Define the hook. The main hook of your song will follow the intro. It doesn’t mean you’ll drop the hook right away, as you can build towards there.
  • Set two variations of the hook with some complementary percussion. If you listen to a DJ set, especially techno or loop based music, you’ll see that it’s mainly a loop with variations. Try to have variations in your percussion, melody or bass. That way you can toggle between the hook and this part. I really really encourage you to listen to DJ sets to get ideas.
  • Create one tension-making moment. This can be a breakdown or a moment where something happens. I always loved to define this moment to be a scene where effects and atmosphere to create something exciting.
  • Release the tension. This scene is basically what would be played after the breakdown or tension-making moment and it’s usually the hook with some more intensity and or variations. This scene should be the most important one.
  • Outro. This is similar to the intro but it should be slightly different.

In the next post, we’ll go into more detail about the actual clips and how to create the perfect little “laboratory” for you to jam with. I’ll propose some ways to jam that will open doors to finally playing live and having all the fun that comes with it.

SEE ALSO : Playing Electronic Music Live – How to Prepare Your Live Set (Part 3)  

Playing Electronic Music Live – How to Prepare Your Live Set (Part 1)

Playing electronic music live is a huge topic and I could dedicate an entire blog to it; this is the first in a series of posts outlining some advice to help electronic and computer-based musicians perform a live set. My goal here is to cover everything you need to know to perform live.

Prior to writing this post, I talked with MUTEK Festival’s director Alain Mongeau about how the festival has been sticking to prioritize live acts. I asked him if live acts were still popular compared to when the festival’s debut in 2000. He said that while it is an important thing for them to promote live expression of music, there’s still confusion on what it really implies.

Firstly, we need to answer the essential question which has been debated for years:

What is a “live set” and why would you do it?

I’m not going to explain this in a ton of detail, but let’s clarify one thing, no one person has the right to say what a “correct” live set is. You should have your personal opinion about what a “live set” means in electronic music, which will then in turn be the foundation of your own approach to creating a live set.

Before I offer any answers to this question, let me share my personal interpretation of the phrase “live set” which has defined my own sets since the very first one I performed in 1999.

To me, a live set of electronic or computer-based music:

  • implies playing your own music.
  • is not playing songs as is. Nothing pre-recorded unless live tweaking is involved.
  • involves some improvisation; experiments and an element of risk taking.
  • means that there are some possible interactions with the audience; therefore the timeline of songs played shouldn’t be planned in advance (like they often are in a DJ set).
  • should be unique every time you play it. But I understand this is difficult and/or not important to everyone.

While I’ve always felt that these should be the basic “rules” of live sets, I’ve come across so many well-established artists who don’t follow any of these points and would argue that “live sets” are something different. Like I said previously, it’s not up to me to decide how “live sets” should be. Picture your own interpretation of a good “live set” so you can build your session accordingly.

This series of posts will address certain ways to prepare a live set in Ableton Live, mainly from my own perspective but I will also cover other points.

Why do you want to play live? This is an equally important factor to consider. I feel that live sets in electronic music are very important and meaningful to both the artist and the audience. It’s a rare moment for an artist to share, connect, explore and be creative with a lot of other people. I don’t believe it approaching live sets lightly unless, well, you’re music is light-hearted perhaps! But even then, I still think devoting time and love to your set can do great things.

Live set preparations

I’d like to cover three main types of live sets to start to help you decide on a direction you want to take for your own sets.

Live Set Type #1 – Playing close reproductions of your own tracks

This type of set is what I’ve been doing most when I play live, but I really make sure that no matter how I’ve prepared my set, it has room for improvisation. I remember a tour where I had one person see/hear my set three nights in a row and told me years later that each night was pretty different, and each felt like a different trip – that really made me happy!

  • The logic of this set type: You have songs that are done or halfway done and divide them into scenes and groups in Ableton (note: the new version of Ableton gives this approach crazy potential). I do not like the idea of an artist simply playing one scene at a time, one after the other until he/she gets to the end. I find there are no risks taken here but understand some genres are limited to this approach.
  • How much of a base should I use? I would say that an average song should have about 3 to 10 scenes and groups, and audio channels are more effective if you limit yourself to 6 to 12. Think of CPU too as you don’t want it to stutter in the middle of your set. A MIDI controller is often limited to 8 faders so if you have more channels, it gets a bit complicated, but more complex arrangements are still doable.

mutek 2008

Live Set Type #2 – Playing mainly improvisations with little-to-no preparation

In the early years of my live sets, this was how I approached live sets, but I came back to the first method as I find that for me type #1 is the most fulfilling. This method however, will definitely result in completely new versions of your music each time you play.

  • The logic of this set type: In my early live sets (circa 1998-2002), I would prepare the core of each important moment of the set at home; I would treat these moments like songs. I would know what the melody would be, a bit of the drum sequence, effects, etc. In those days I’d have analog gear alone, and I would save the melody in the piece of hardware I was using. The narrative of the set would be that I’d go from one song to another, in no precise order, sort of similarly to how you can now do this in Ableton Live. You can keep it simple and go from one scene to another in no particular order, which also opens doors to improvise or add new ideas on the fly. I call this approach the elastic live set.
  • How much of a base should I use?  In Ableton, contrasting to the approach I outlined in type #1, using this type (#2) I have only one scene but have 12-15 channels. In a live set of this type, I jam around one scene using the clips I already have saved, going from one scene to another in no particular order. In the past I would need to make sure all my hardware would be on the appropriate settings.

Live Set Type #3 – Playing with analog gear or hybrid with A laptop

This type of live set is fun and looks good on stage but is also very tricky, mostly because of the sync problems you might have between gear and the laptop. But if you make it work, it can be pretty damn epic.

  • The logic of this set type: There’s no formula here, as uses either of the type #1 or type #2 approaches, simply complemented by a piece of gear such as a synth, drum machine or modular stuff. You can use the computer for sequences or as a potential helper to handle things you can’t do alone. Bitwig is actually really really powerful if you are using modular because of the way it’s built. I’d consider running Ableton Live and Bitwig, sync with Link. I find Bitwig to be a bit more tight on the sync and Ableton to be more easy on playing sequences.
  • How much of a base should I use? The mistake you might run into with this type of live set is wanting to do too much, to cover too many aspects of your music and potentially to never be able to do it all in live set. I find that the less you have to do in terms of sync’ing and parameter tinkering, the more focused you’ll be, which means you follow the flow of your improvisations and music more easily.


mutek_2017_YoureMeBand_TRUNG-16

Other Live Set questions you might want to address

  • Are you going for one representation of your music or do you plan to play it multiple times?
  • Does it matter to you if you can repeat the same set exactly or do you want it to be evolving?

These two questions can also influence what type of live set you decide to build and play.

Concluding thoughts on live set types

Think ahead; think about which direction your live set might go. For instance, if you want to play your own tracks, think of which ones you’d want to use, and try to have them all in a folder (use the “collect all and save” from Ableton to make sure you have everything on hand ready to go). As for the improvisation and hybrid sets, think about what kind of setup you might want and feel comfortable with. And lastly, the audience you are performing in front of is important. You should never play the same set in a club as you would at an outdoor festival.

Stay tuned for part two of this series of posts on playing electronic music live.


SEE ALSO : Playing Electronic Music Live – How to Prepare Your Live Set (Part 2) 

Free Ableton Live Mixing Template

(Update May 2023: When we moved to the new site, the template was lost. It was obsolete anyway as I’ve learned so much since that I can do better. I did a new one, but it’s more basic. In my opinion, it also does a better job. You can still gather ideas from this post and I will make another one but the basic is at the end of this post. The information below is for the old template, but the one to download is the new version. Sorry for the confusion. I will fix this soon.)

I’ve put together a free Ableton template after receiving feedback that it was very helpful for many people I’ve worked with. The template available on this page is aimed specifically at mixing. I’ve noticed that many aspects of mixing are often misunderstood; I’ve assembled a starting template that has bundled together many useful tools to deal with basic things – this free Ableton template will be useful for those involved in music making!

This template includes:

  • 6 Groups: Kick, Bass/low end, Percussions, Hihats, Atmosphere, Melodic.
  • 3 Busses: Low end (Where kick + bass are routed), Percussion, Melodic.
  • 1 MIXBUS: Where the busses are routed and is actually your pre-master channel.
  • 1 Reference channel: Where you drop the your reference track.
  • Multiple Sends as enhancers.
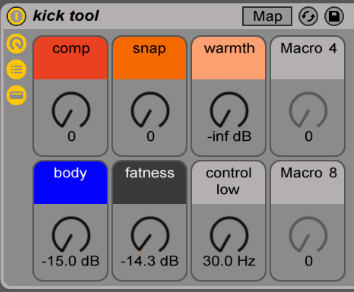
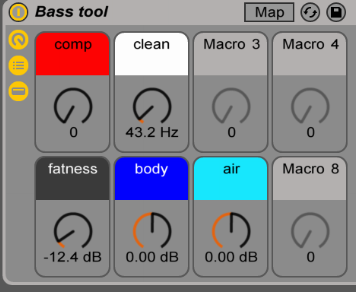
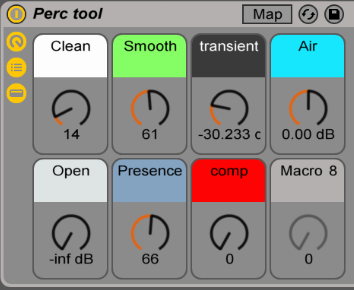
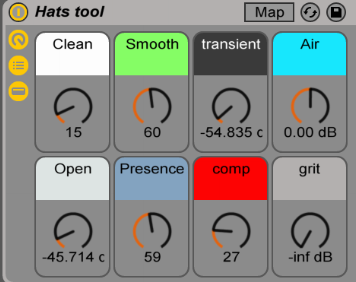
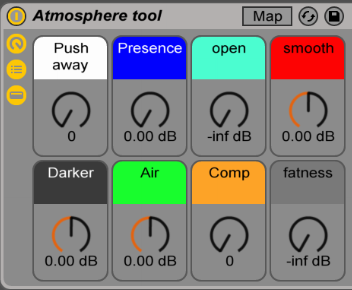
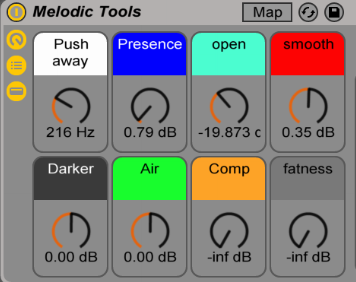
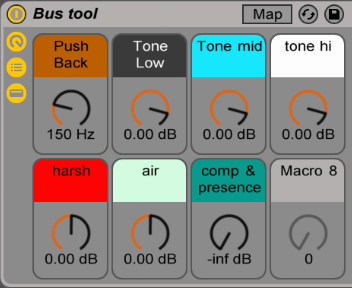
  • Macro tools on each groups and busses to help you tackle tone and potential issues.

This template looks very close to what pro engineers use like the one Andrew Scheps did for Puremix, but I found Andrew’s template wasn’t really as suitable for electronic music. I’m sure he would disagree but underground music isn’t really handled like commercial music is.


Is this template for producing or just mixing?

You could use this template to start producing with if you feel comfortable with it, but I’d encourage you to export stems from a project and then use this template to mix. Yes, it’s a bit more work, but it will also make free up your CPU and make your project ready for a new phase of production. It’s fun also to put an end to tweaking details and then focus on the mix alone.


How do I use this template?

There are many ways you could potentially use a template like this but I’d like to explain a few things to get you started quickly. First off, grouping your sounds is always a good start. I like to to think of it this way:

  • Kick group: This group is made to hold the different layers of your kick(s); the best way to make full range kick is to have up to 3 layers, but that will be handled by the group’s macro tool that uses compression and saturation. I created another little macro tool to help beef up your kick with a sub generator and a transient enhancer. I included some sounds from my collection for you and feel free to add more. If you balance everything properly, you’ll have beautiful, warm and punchy kicks.
  • Bass/Low end: This group is essentially the same thing as kicks, but to be used as the bass. Include the multiple layers of your bass (sub/mids), and I’d encourage you to also include anything that is below 200hz such as toms, synth, pads. The macro on that group will help balance it out.
  • Percussions: Anything percussive from bongos, claps, snares or percussive synthetic sounds. This group can get busy so don’t be afraid to add multiple new channels in the group itself.
  • Hihats: Hats or anything that is regular in your group and an important part of your groove could be put in this area. In my case, I sometimes include snares. Please note that there’s no right away to use the Percussion & Hihats group and experimenting might get you some interesting results.
  • Melodic groups: These two work hand in hand. One is for anything in the background and the other is for the melodic elements to be forward. The way the macros work, they will help you position properly the sounds and make the best of them. Try playing with the various knobs to see how they influence the groups.

Please note – I’m applying high pass on these groups and feel free to change the steep which can influence the sound in some good ways, sometimes.

The three busses are quite interesting to work with once you get the levels of your groups finished. For instance, you want to find the best relationship between bass and kick that are routed together. Once they are balanced, the bus allows you to control both the bass and kick at once; this can help you more easily decide on the tone of your track by moving the bus up and down.

I’ve also included a reference channel to remind you to use a track that can be used as a mood and reference board. Reference tracks are great to help you to take inspiration from parts of other tracks you like and would potentially like to use in your mix.

The various sends are simple tools to just beef up or open up your sound. Sends are really for finishing touches to your mix and they’re meant to be used as gently as they can be; subtlety can also make things intense.

Thanks to everyone who provided feedback for the development of this free Ableton template; I am glad I can continue to help everyone enjoy making music!

Click to download this free Ableton template: (New version 2023)

Pheek’s template 2.0 for Ableton Live 11.3+

My tracks always have the same song structure

(Cover Photo by Luca Bravo)

One of the common things I often see and also struggle with myself is that sometimes I feel like my songs are always arranged in the same way; my song structure is often the same. While there’s nothing inherently wrong with following a regular song structure, often I feel like I need to have more arrangement variations in my work and new ways to present my music.

ableton live, ableton, structure, arrangements

So, what’s wrong with repeating song structures you already know work?

There are secret ways to consistently get great results with certain arrangements that, for the most part, will always “work”. When I used to DJ hard techno or drum and bass in the late 90s, eventually I became really bored of all the tracks had the exact same structure. Yes, it was extremely easy to mix the tracks together once you understood the “tricks” but at the same time, it was also underwhelming for listeners and DJs with a creative minds who preferred more challenging music and mixing.

It’s important not to fall into repetitive habits and patterns; you might find new arrangement tricks while exploring and experimenting with new song structures.

Before jumping into slice mode to get your arrangements upgraded, let’s outline a few rules that will be very useful to consider before we actually begin editing:

  1. Export a wav file of the last track worked on (any project!), finished or unfinished. Especially if you’re working using my method of Parallel Music Production; this technique will be very useful. Start a new habit of not only saving your project at the end of your session, but also bouncing a wav file of what you have.
  2. Import your file into the current project you’re about to work on. By importing, I’m referring to the arrangement section where you can drop in an empty, dedicated channel.
  3. Use markers for the arrangements as for where there are key points, changes, transition. With these references, you can see if your current project has similar points as your previous wav file, and then you might want to change it up if they are similar.
  4. See if the two projects can be easily mixed by a DJ. This is a good test to see if your track has too much going on, or if things will be fun to mix. I’ve said countless times before that if your music is fun to mix, DJs will carry a copy of your track for all their sets.

Slice your song structure

With your new habits in place, now go into slicing mode and get things started. As I’ve discussed before in a previous article, How to Turn a Loop Into a Song, you’ll need to decide the bpm and length of your track as starting point and build from there. I invite you to refer to the post if you need the full tutorial on that topic.

So let’s say you finally have a structure made up that you’re happy with. Here are the main key points I often use to avoid redundancy:

  1. Find the main sections of your song, and slice off the beginning and the end. A “section” of a song is a part that is different than others for its content. In pop music, we refer to these sections as bridges, breakdowns, choruses, etc. In electronic music, these types of sections might be a bit more subtle or non-traditional, but they’re still there.
  2. With your sections isolated, determine if your perspectives are balanced. By “perspective”, I mean this just like it is used in photography; see if your track has balanced ratio.
  3. Insert empty slices in middle of the parts as well as some random points in the song. Check some “winks” that you might be able to make from the reference track you originally imported. “Winks” are when one song might “talk or reply” another if mixed properly.
  4. Move around your sliced blocks/sections. Try wild swaps and mess with perspective. Be creative. In contrast to the often useful “use your ears not your eyes” advice, in this case I highly suggest working on your structure visually alone without any sound at all so you’re not biased or held back in your arranging experimentation. If you’re new to the idea, make sure you make a backup copy first of your project. Personally, I spend quite some time to make something visually appealing with my blocks even before listening.
  5. Intentionally leave mistakes. Did you move something slightly off the grid? Did you paste a section at the wrong place? Try leaving in it the structure until next time you come back to it.

Try messing with your song structure; let me know how it goes!

SEE ALSO :   Lego Blocks as Song Structures 

Dynamic Sound Layering and Design

Sound layering can be a very complex or very simple technique in music creation and production depending on your goals. In a past post, I gave some really basic sound design tips; I have a lot of readers who are just starting out with mixing and producing, so it made sense to start with something less intense. This second post about sound design, however, will focus on something a little bit more advanced but still very simple: sound layering. It’s actually surprising to me to see so many people who ignore techniques that allow them to get the most out of layering, so I thought I’d write about it.

First off, I would like to discuss Ableton’s groups. Many people use them as the equivalent of busses, where all the grouped sounds will all be treated in a specific ways and yes, that approach works really well indeed. However, I prefer using a solo channel as a bus instead and use groups for sound design or classification. A good example is for kicks or claps, which are usually a combination of up to 3 different samples or sound sources (ex. 2 samples, 1 synth, etc.). Basically, since each sound is a collection of multiple samples, then I could say that they will work best as a group.

Visually it looks better and is easier to manage, and additionally you can also put effects on the group to glue all the sounds together – generally you’ll need a compressor and one or two EQs for a relatively uniform group. Once I’ve done that, I usually like to have an additional bus for all sounds (eg. groups) that will glue everything else together.

A second point to keep in mind, is that there’s always multiple ways to do sound design. Keep in mind that what I show you here is simply how I do it but there are other people who use different techniques; I try to keep it simple. Two methods Ableton will describe here that I like are the arranger and the drum rack.

If you work in the arranger, you drop sounds in the channel and it’s an easy way to see the layers. I like turning off the grid to do this so it feels a bit more natural.

You can adjust the volume for each layer and tweak the EQ to get part of the spectrum of one sound, and the complementary part of another.

You can do the same with the attack and release; there are so many options. I really recommend using the faders too for more control. So basically, volume, EQ are your best friends here. Brainworx has an amazing filter I recommend, it’s super solid for sound design.

If you prefer, you could also mainly use the Drum Rack to do the same thing. Load up the same samples in the pads of the tool and then sequence them by MIDI instead of putting them in the arranger. Some people dislike working this way because they can’t easily see the frequency shape of the audio file. But the advantage of this approach is that you get to have access to more options to manipulate your sounds, like the extra controls in Ableton’s Sampler window.

What I think is best in the end is to combine both the sound arrangement layering, with the an extra channel of Sampler use so you can work on constant movements. The main thing you want from your sound design, is a feeling of liveliness and emotion. The sampler has LFOs you can assign to filters, panning, or volume, which is a subtle touch that creates a nice layer of movement and liveliness. In the same way, I’d even add a synth of your choice to give richness to the sound with oscillators working to reinforce the fundamentals with a discrete tone; more complex sound layering.

Finally, on the group of the sound itself, I would add nothing but an EQ and compressor to “glue” everything together, but you could also use reverb to broaden your stereo image. These techniques should help you improve your sound design skills!

SEE ALSO : Sound design: create the sounds you imagine inside your head 

Background vs forefront to create dimension

Nearly every week I have a similar conversation with my clients. In good faith, and to save both my clients and myself time I’m writing this post to help answer the questions many producers keep wondering. The question of background vs. forefront to create dimension.

My clients often send me projects with a lot of sounds going on, which if you know me and my label well enough is something I’m a big fan of. That being said, there is a way to work with a song made up of lot’s of sounds without things becoming a bit too much.

During the production of your song, how many times have you listened to it all the way through? Twenty, thirty times? More? As songwriters, we need to consider the listening perspective of our audience, who will likely never hear all the nuances and details that we do. Perhaps if they’re big fans, they’ll listen to our track ten times. With that number of listens, the impression you get from a very busy song is very similar to looking at a very busy picture – You’ll discover different ideas on each view, but the whole image will be taken for what it is. What will sound like a mistake to you will likely be perceived otherwise by the casual listener.

When we use many different sounds together in an arrangement, it can be impossible to hear them all equally. As producers, we care for the work we’ve put into our sound design and often make the mistake (myself included) of trying to give every sound (big and small) the same amount of emphasis in hopes that nothing will be missed.

Even during active listening, both simple and complex music will often have subtle details we may not hear at first.

The important thing to understand is this – many sounds working together shape and create an experience. Some sounds only work when combined with others to form a unique layer, much stronger than the sum of it’s parts.

Sound design is a complex science that often takes years to understand fully. For many producers that ‘a-ha’ moment comes with the understanding that many sounds aren’t massive all by themselves, but rather a combination of several sounds carefully layered together.

For example, a punchy kick may have three layers (low, mids, hi-mids for transient shaping). A warm and full sounding pad may have harmonics created from a layer of richer oscillation in the hi-mids (using a square oscillator). This is the technical part of it but for someone not interested in sound design and is purely a listener, he/she will experience these sounds in an entirely different language, but he will get it though.

TRY: When listening to music, force yourself to identify layers in sounds.

With the concern that some sounds will not be heard equally at rest, we can start looking into how to create details with dimension and subtlety.
These details are as important as each of the featured sounds as they are needed to support the main element(s) of the song itself. Let’s see how to approach this:

  1. Decide what the core or backbone of your song is. If someone has to sing your song to someone else or attempt to explain what the song is about, what would that person say? In other words, the most memorable part of your song is the main idea. If you remove that, the song is not really there since most of the sounds are there to support that main idea.
  2. In the percussion sounds, identify what are the main elements that support the groove and the main idea. Usually, there’s the kick, a snare/clap, and a hat. Some tracks have multiple claps or additional  percussions here and there, but it’s important to decide what the main percussion sounds are.
  3. The other sounds will be EQed to create dimension. Only the use of EQ combined with volume changes will be enough here.

TRY: Next time you listen to a song, try to give attention to anything that is mixed low in the mix.


How to apply the distancing technique, on a very simple level, is to apply a low-pass filter/EQ on the sound. The more your filter up, the thinner the sound will feel and also the more pushed away it will sound. There’s no right or wrong here, but you’ll need to adjust the volume to your own taste and feel. I would suggest compressing your sounds to bring them together somewhat.

This is a regular cut that usually removes a lot of muddiness.


This cut would move sounds to a bit behind any of the featured sounds.


This place sounds far off


For subtle positioning.


The other trick would be to use reverb but that one is something to use with great care. Depending on your reverb unit, this technique can introduce muddiness which the previous trick won’t do. Like always experiment and find what you like in the process. You can also combine the EQ trick with the reverb use for better feel.

Let me know how it goes!


 SEE ALSO :  Dynamic Sound Layering and Design    

Templates As Seeds

As a producer, you’re likely trying to balance several tasks all at once while working on your music. If you’re spending time to look through four or five reverbs in search of the perfect sound, setting up buses and groups to pre-mix your tracks while you arrange it, or just feeling frozen looking at a blank project screen and finding it hard to get going, it’s no wonder you aren’t as productive as you’d like to be.

Good news, this post is all about setting yourself up to win before you begin. Begin to see your templates as seeds. 

Many DAWs can be setup to load a template as an initial starting point. Reason will propose a pre-made environment, and Studio One will propose if you’d like to setup a project for mixing to speed up your getting started time. Ableton Live doesn’t have that feature by default, but you can easily change that to open a custom startup project.

Even though most DAWs have this helpful feature, that wasn’t enough for me. But it felt like I could do better.

In one way this is a follow-up post to the previous Bonsai Technique that I shared a few weeks back. It was super popular, and many people sent in comments about how it really helped them develop tracks from little ideas. Now, I’d like to follow up with this idea as I realized that many people are missing out on the fun of using a template to get their projects started. Also, there are a few things we can add in that will also be valuable for your next productions. Let’s have a look at the techniques to get rolling fast.

I’m going to suggest something simple in essence, but it’s very effective to get new projects sounding great right from step one.

Start your next project using the last song used. I heard about this technique from Matthew Herbert’s manifesto, and it got me inspired. Herbert would pick up the mixing board where he left things off from the last session. Why is this a good idea?
Starting from the last mix would provide a faster workflow but also, the random EQs, compression, effects, would be set to something he would never have set up beforehand. I thought this concept was brilliant and began doing this myself. Very often I would start with the last project loaded but would make the next song right after the end of the previous one. The same configuration and settings for the kick, percussion etc… were the same, which often led me into directions I didn’t expect at all. This is a big advantage. 

Consider keeping the effects on each channel as is, but drop your new clips into existing channels at random. In some situations, I also would copy the arrangement of one song and paste it into another song’s arrangement view. Very strange results would come up, often leading to unexpected yet very usable sound design results. I often have one “mother” project which will be a safe place for me to develop and grow these ideas. Then I will copy some loops into another project’s arrangement view, and sometimes move the clips between channels to see which one fits the best. I even did the exercise of dropping a full arrangement into another project keeping it as intact as possible. From there I wouldn’t even listen to it before bouncing it out. I’d then listen to it weeks later and get blown away. I made a handful of tracks from my album Intra or White Raven this way.
Next, challenge yourself to keep your bus routing and groups intact. It’s great to have pre-made sends channels or busses that you can re-use quickly. Of course, an easy way would be to be to assemble a macro of the chain of effects you’ve used, but I like the idea of opening a template and have no idea what effects would be awaiting me. I will sometimes swap my most used effects with others I newly acquired or some I’ve forgotten about. It’s often nice to dig up older, legacy plugins that can bring up a particular grain to your sound.

Clear your finished project from the clips and save it as a template.

One exercise you can start applying today would be:

  1. Create a folder for your templates.
  2. Each time you finish a song, you do a “save as…” to that folder. You’ll then clean it from the clips in the Arranger view. I will often leave what I call ‘leftover’ sounds that weren’t used in the project. I’ll set these clips in the session view in a channel named “Leftovers.” Doing this allows you to re-purpose those sounds, which may be a perfect fit in your new project.
  3. Midi clips could be left there as well because it is usually interesting to have on hand some midi material you can quickly throw new sounds onto and see what it gets that sounds like.

Now, an extra tip, which is to make a template for the design of an EP/LP. As you know, it’s always great to have a common feel for an entire release, and one of the things I would recommend would be in the way you apply your effects.

  • Reverb. Either you pick a reverb from one specific company (ex. Altiverb) and use some presets to get started, or you try to remain in the same family of space such as Plates.
  • Delays. Using the same plugin but changing the delay speed.
  • Saturation. Try to pick one type and stick to it. I recommend applying this through a send channel where you have more control over how each sound is colored.
  • Compression/EQ. Some apply a distinct color and are more or less transparent. It can be a good idea to keep the same type of combination through your channels.

As always I want to hear your feedback on anything mentioned in this post. Feel free to share this post or leave a comment below and tell me how these creative, and time-saving techniques are working for you. 


SEE ALSO :  Pointers To Define Your Sound

Bouncing stems and mix

Recently I’ve been weighing the benefits of focusing on just one part of my production process exclusively, or, working on all the steps of a production simultaneously – arranging, mixing, pre-mastering, etc.. Very often producers ask me to explain a perfect workflow recipe and the truth is, there really isn’t a one size fits all answer.

But in theory, there are 2 main approaches I’ve been seeing in production to make a song.

  1. Classic way. Which involves taking one phase at a time but with the option to roll back to go fix something.
  2. Modern way. You go from one phase to the other in no particular order, as your needs change. You’ll mix as your arrange, change sounds of the percussion to match a melody, add saturation for aesthetics, etc.

One of Ableton’s feature that I find killer is the option to export all channels as separate stems. It really is great for so many reasons but also allows your to really divide the production from the mixdown, which you could do in another DAW.

There are many reasons why you’d like to do your mixdown into another DAW. One of the reason is, you’re basically blending, what I call, software grains. Think of the various apps on your smartphone that offer various filters for your images, where you can go from one to another, taking advantage of each strength. I would say it’s the same for DAWs.

  • Workflow. Each DAW has its own workflow, appearance, feel. Sometimes, just a change of platform is enough to, psychologically, feel your track in a different way. There are countless researches that have been done in between DAW, to which has the best sound, but in terms of summing, if you take a file with nothing on it and bounce it, they will all provide the exact same file. Where there will be a difference is on automation, interface and that alone can make you behave differently in a mix situation. There’s also all the macros and gizmos they all offer too.
  • Native plugins. Again, this might be a game changer. This of an any DAW, they will offer different plugins doing different things. Now, just for compression and EQ, it becomes a serious business. Mostly because there’s a big difference between what you see and hear, plus no one really does things the same way.

That last point is crucial here. You can take the same compressor concept (ex. FET compression), but it will sound different from one company to another. There are no real universal standards on how to approach compression or EQing. An EQ can show you a curve but the filter in the back might slightly be different to give a color, for instance.

So, when it comes to Ableton, I now export all channels as stems to do the mixdown. No more mixing as a arrange. I put a wall between the 2 phases. Some of the reasons are:

  • It liberates CPU usage. No surprises here. When you deal with a heavy load of VST’s and plugins it can often be a lot to manage. The act of bouncing out and mixing stems will force you to focus on only mix related plugins such as EQ and compression. No more delays, chorus and reverb adjustments. At this stage, you’ll focus on the volume levels alone.
  • It put’s an end to the endless adjustments you can make to every sound. You’ll have the option of correcting that little hihat detail that’s been bothering after hearing your track 100 times, but honestly, someone who has just heard your song for the first time will interpret that sound as part of the track, not as a mistake. It’s good to put an end to endless changes and adjustments and move on to finishing your production. Professionals keep their eye on the prize and get things done.
  • The audio summing seems to reveal imperfections. I’m not sure what’s happening here but sometimes, when you bounce the stems, things are just slightly different. I can’t pinpoint why and in theory, it’s not supposed to be but sometimes, it does sound slightly different. In fact, once you bounce it, that’s when you know exactly how it will be so it’s interesting to bounce all channels apart.
  • Ability to use other DAWs. As described earlier, this is the ultimate way to move from one platform to another. You’ll be to leverage the strength of each DAW.
    Build live sets or NI Stems. Having stems on hand can be useful to create live sets. Native Instruments offers a technology for creating a stems release to be played in Traktor, which is really cool, and super in demand by many of the world’s top dj’s.
  • Backup and remixing. Having stems is the ultimate way to have a real backup of your music. In 10 years time no one can predict what technology will be available, but having stems will prove useful as a way to be used with any new technology.

All an all, try it and see for yourself. Bouncing stems can only bring advantages to your workflow and I’d love to hear about it.

SEE ALSO : Use a main project for organizing yourself 

How To Quickly Audition New Plugins

Plugins – it seems every week there is a wave of new and exciting plugins released to producers. It’s true that using the right tools can make producing music more enjoyable, and help you make better sounding music. This post is very technical, but by the end of this you’ll know how to quickly audition new plugins and find the best way to use them.

With each new tool comes a learning process, and some plugins are more straightforward than others. As an audio engineer I often assume that music producers of all experiences know exactly how to use their tools, but during a recent coaching session I realized that this is not always the case.

For many music producers, finding a new plugin is a trip, a quest for the next great tool.

This post is very technical, but by the end of this you’ll know how to quickly audition new plugins and find the best way to use them.

What are some of the problems with learning something new?

  • Lack of patience: We all have busy lives and when you finally have the time to sit to make music, you often don’t want to dedicate time learning the science of sound, you just want to rock out and have fun.
  • Preset limitation syndrome: Some plugins aren’t very well laid out, and their knobs might have been labeled in counter-intuitive way. In that case, I’ve seen people only using presets to get their way through.
  • Lack of knowledge: I’ve seen people getting lost while learning how compression works, what the attack vs release means, and often listening to bad advice from the internet.

There are a many ways to audition your new tools, but what’s the best way to find out how a plugin really works?

brainworx, eqThrough years of exploring plugins, I’ve found the best way to learn what a plugin can do for you is to use it in test environment before using on a serious project.
1. Create an Ableton Lab Project. I’ve said this many times before but it’s really helpful to create and use a dummy project where you conduct all your experiments. When it comes to exploring new plugins, synth or techniques you’ve learned from a video. This will a testing ground where things can safely go wrong, and it also can be the nursery for your next great ideas.
2. Import specific ‘dummy’ sounds. You’ll need to equip yourself with specific types of different sounds to see what your new acquisition can do for you.

My selection will include these sounds/loops:
1. 2 bar percussive loop. I’m talking about something fairly busy like kick-clap-hihats.
2. 2 bar hi hat loop. This is an important one. Hi hats are very sharp which often makes it easy to hear the new effect.
3. 1 bar bass loop. A simple low bass with maybe 2 notes. Simple.
4. 1 to 4 bar Pads loop. This is to have something with a long sustain to easily hear what happens with a specific effect on something long.
5. Give full attention to specific details. This is where you need to be really attentive and undisturbed, especially when you first try this technique.

The use of headphones can be very helpful too. What I’ll listen for is this:

  1. Texture change. This is the first thing I listen for. Some plugins, by their simple presence turned on will change the sound somehow. With your eyes closed listen to how the sound changes simply by turning the plugin on and off.
  2. The length of effect. Is it short or long?
  3. Volume change. Is it altering the loudness of the sounds?
  4. Movement. Is it producing movement somehow?
  5. Dynamics. Do the sounds appear to be more flat or popping out? This means the dynamics might have been affected.
  6. Record the experiment’s results.
  7. Always use a limiter on the master to avoid your ears bleeding after something goes crazy.

Lastly, once you’ve got your testing ground project ready, I’ll now describe my own audition/exploration technique. This is quite easy to apply and will forever be useful. If you can map your knobs/faders to a controller this will be a real advantage. Ableton’s Push is also great for this.

  1. Play one of the loops to be tested.
  2. Chose a knob to start with, dial this knob at its minimum. Make a mental sonic image of your sound.
  3. Put the knob at it’s maxed level (the completely opposite of where it was). Did something happen? What was the noticeable change?
  4. Gradually bring it to the middle, where it’s exactly sitting in the 50%
  5. Repeat this with all knobs but explore leaving some at 50%, others at 25% and see what happens. Sometimes you need a combination of 2-3 knobs adjusted to really see something happening.
  6. Once you’ve found something interesting, change the loop to see how it behaves on something else.
  7. Try randomizing the knobs with Max4Live’s randomizer. This can also bring fun results.

As I said at the beginning there is no shortage of new tools available to producers, yet finding the right plugins for you will be a process of trial and experimentation. The process of learning something new and auditioning your plugins can be really fun and will hopefully make you a better producer.

SEE ALSO :  Plugin Review: Circle 2 VSTi 

Two birds one stone. Separating ideas.

I’m really excited to share a killer new exercise with you that I know will help you become really creative and productive. I’m using this exercise in my own productions and it’s a little like the Bonsai Method I wrote about in my last post. The key focus of this exercise is to duplicate your output in different ways with big benefits. Let’s call it Two birds one stone, and trust me, the takeaway from this exercise is huge.

This technique will improve your productivity in the studio, aid you in finishing more music, train your ears to produce better music, and creating tracks DJ’s will find easier to play and mix. 

When people ask me to listen to their tracks and provide feedback, most of the time I feel there is enough material in one track to make two entirely different songs.Why do I feel this way? DJ’s often prefer to mix tracks that are often stripped back, and have less sounds going on. They do so in order to blend one track with a complimentary one to make something new, and create an original mix. For your tracks to please the DJ consider producing songs that are less busy, and have less sounds going on. Doing this will give the sounds you do have more room to breathe, flex, and develop dynamically. These tracks that follow this production style allow the DJ to creatively mix and eq their tracks in very creative ways.

The objective in this exercise is to take whatever song you have and find a way to separate the elements in order to make 2 different songs out of the original idea.

When producing music, think of your track as a tool, and less of a song to be played on it’s own from start to finish. To some degree, let it be incomplete, and be created as part of an equation that will sum up to something out of your control. As a creator of music, it might be difficult to conceive but I believe that letting tracks be something someone else can mould and play with will attract the right person who can do the most with that track.
Related: How to create tracky music blog post.

Another interesting element in spreading your ideas across two tracks is that in doing so you’ll create a sister, or b-side for the initial track (hence the two birds one stone reference). When you are playing these tracks live you’ll know and hear they’re meant to work together well, hand in hand.

Now let’s get to business and see how to do so.

ideas, ableton, productivity, how to


  1. Select a track that you want to use for this exercise. It could be a track that you feel a little lost on, or some long forgotten project that was never finished.
  2. session view, arrangements, ableton

    Session view in Ableton

    Bring all your sounds to the session view. (This will make it easier to see what’s going on).

  3. Mute all percussions that are not related to the main idea of the song. Although, sometimes a conga or snare could be part of the hook, if so try to mute it and see how much of the main idea is affected.
  4. Organize your sounds in 2 groups. There’s no good or bad way to select the sounds, but by splitting the group you’ll see some sounds are complementary to the other. Sometimes, certain sounds are calling, and some are answering to the other, and for those, you want to separate in two different groups.
  5. Activate the crossfader option so you can see/hear the A/B.

    ableton crossfade

    Make sure the “x” is in yellow to activate the crossfader

  6. Assign your sounds to either A or B on the crossfader. Don’t assign any of the percussions on the crossfader.
  7. Do a “Save as…” to create a sibling to this project.


After you’ve gone through the previous steps you should be able to play with the crossfader and hear how well the sounds blend together. Hearing things in the middle of the crossfader will give you an idea of what a DJ will hear if he/she merges both ideas.

Let’s go back to your new project. Since you already have the percussion from the original track, you can use the sprouting technique to create complementary beats. Once you have main idea, you may then mute or delete the original percussions and you’ll have your second track’s main idea.
In both cases you’ll need to play with compression and perhaps add a bit more material to get your track moving along. But now, the great thing is, you have created two totally new tracks from one that might have been sleeping in your HD. It’s a killer two track combo ready to go. Win-win.

I hope this post will get you into the habit of creating tracks that avoid the busyness that often robs  a track from reaching it’s fullest potential. It’s natural to come to a point where your track has too many ideas going on and will begin to lack direction, which is the perfect time to use this technique.

The two birds one stone technique will improve your productivity in the studio, aid you in finishing more music, train your ears to produce better music, and creating tracks DJ’s will find easier to play and mix. 

As always let me know if you have any suggestions or questions about this post and leave a comment below and tell me what projects you’ve been working on.

JP

SEE ALSO : Pheek Talk 3: Productivity Tips