Tag Archive for: plugins

Arpeggios Technical Dive

In the vast world of music, arpeggios have served as an integral element in composition, bridging the gap between harmony and melody. By understanding its roots, one can appreciate its profound effect on modern electronic music.

Origins of Arpeggios

An arpeggio, derived from the Italian word “arpeggiare,” which means “to play on a harp,” refers to the playing of individual notes of a chord consecutively rather than simultaneously. Historically, arpeggios have roots in classical music. Classical guitarists, pianists, and harpists frequently employ them to express chord progressions melodically.

Functionally, an arpeggio can convey the essence of a chord while providing movement. It serves as a bridge between harmony, where notes are sounded simultaneously, and melody, where notes are played sequentially. This bridging effect imparts a richer texture to compositions, allowing for a smoother transition between harmonic and melodic sections.


Arpeggios in Electronic Music


With the evolution of electronic music, arpeggios found a new platform for exploration. When synths started to be commercialized, they more than often included an internal arpeggiator. Even smaller options like Casios had some simple one. Synthesizers, with their ability to shape and modulate sound, provided the perfect tool to push the boundaries of traditional arpeggios.


  1. Synthesizers and Arpeggiation: Many synthesizers, both hardware and software-based, come with built-in arpeggiators. These tools automatically create arpeggios based on the notes played and parameters set by the user. Parameters like direction (up, down, up-down), range (number of octaves covered), and pattern (the rhythmic sequence of the arpeggio) can be adjusted to achieve specific tonal effects.
  2. Arpeggio Plug-ins: Beyond built-in synthesizer capabilities, there are standalone software plug-ins dedicated to advanced arpeggiation. These tools offer extended control over how the arpeggio behaves and can be integrated into digital audio workstations (DAWs). They often come with pattern libraries, giving producers a starting point which can be tweaked further.
  3. Sequencing Arpeggios: Sequencers, commonly found in drum machines and DAWs, allow for the programming of notes in a specific sequence. This technique offers a manual approach to arpeggiation, allowing for unique and intricate patterns beyond the capabilities of traditional arpeggiators.

For many people, when musicians would first test a synth, they would at one point test the arpeggiator. In the 70’s until the 90’s, electronic music had more than often, some arpeggiation used. It could be for the bass or for the main hook.

The Impact on Electronic Music


Arpeggios in electronic music often lend rhythmic drive and melodic structure, especially in genres like trance, techno, and synthwave. The repetitive nature of these genres marries well with the cyclical patterns of arpeggios.


Additionally, with the sound-shaping capabilities of synthesizers, the tonal quality of arpeggios can be manipulated. By modulating aspects like filter cutoffs, resonance, and envelope parameters in real-time, arpeggios can evolve and transform throughout a track, adding dynamic interest.

A fascinating aspect of electronic music lies in the observation that many of its melodies are constructed from sequences which can be effectively replicated using an arpeggiator. This isn’t mere coincidence. Electronic music, with its repetitive structures and emphasis on timbral evolution, often favors linear, cyclical melodic patterns. An arpeggiator excels in this realm, offering a systematic approach to crafting these melodies.

Consider classic electronic tracks: many feature melodies that iterate over a set pattern of notes, evolving more through sound manipulation (like filter sweeps or resonance changes) than through note variation. This approach provides a consistent foundation upon which the rest of the track can evolve, allowing other elements, like rhythm and harmony, to play more dynamic roles.


Parallel and Modulated Patterns


1. Parallel Arpeggios:

  • Method: Start by setting two arpeggiators with the same note input but adjust one to operate in a higher octave range than the other. You’ll achieve a harmonized melodic pattern where both arpeggios play in tandem, producing a richer sound.
  • Experiment: Tweak the rhythm or gate length of one arpeggiator slightly. This introduces a phasing effect, where the two arpeggios drift in and out of sync, creating rhythmic tension and release. Another fun experiment to try would be to create a macro from an arpeggio and then you have a a tool that is also parallel. Make sure your receiving instrument is polyphonic because there will be many notes. I’d recommend trying the arpeggios on different speeds with a pitch/octave modifier so they play notes from different octaves.


2. Side-by-Side Arpeggios Modulating Each Other:

  • Method: Use one arpeggiator’s output to modulate parameters of a second arpeggiator or its associated synthesizer. For example, you can set the velocity output of Arpeggiator A to control the filter cutoff or resonance of Arpeggiator B’s synth.
  • Experiment: Introduce a slow LFO (Low-Frequency Oscillator) to modulate a parameter on Arpeggiator A (like its rate/speed). This will cause the modulations impacting Arpeggiator B to change over time, introducing evolving dynamics to the piece. I like to have the first Arp to be slow and random and the second one, faster, higher notes.

Power user super combo


TIP: Arpeggiators become super powerful if you use an Expression Control tool so that you can modulate the gate, steps, rate and distance. This will spit out hook ideas within a few minutes of jamming.

Plugins

There are multiple plugins that can be good alternatives to your DAW’s regular arpeggio. It’s always good to have 3rd party plugins so you can step out of the DAW’s generic sound.

Stepic

This is definitely inspired by the various modular options existing. They’re all regrouped under one plugin that does a bit what many different free tools do like Snake, but of course, the played root note will influence the sequence, which something like Snake doesn’t. Stepic is often used online in Ambient making tutorials. It is great for creating generative melodies and psychedelic melodies.


Cthulhu

Everything the guys of Xfer do, is always solid and well thought out. This one doesn’t disappoint. With so many presets existing out there, you can also randomize and quickly tweak your own sequence.


Seqund

AlexKid has done multiple tools for Ableton Live and each of them found their way into so many people’s workflow, either to start an idea or to have a quick placeholder. This one is similar to Stepic in a way, but just a different workflow. The UI is cleaner and easier to read than Stepic, making it a quick tool for adding decorative melodies or simple basslines. The randomizer has nice options for controlling its results.


Conclusion

From their origins in classical expressions to their modern applications in electronic music, arpeggios have remained a compelling tool for musicians. Through synthesizers and plugins, electronic music producers have a vast palette at their fingertips to experiment and innovate. As technology advances, it’s certain that the use and evolution of arpeggios in electronic landscapes will continue to captivate and inspire.

Max For Live Gems For Ableton

(Updated June 23rd 2023)

I’ve been wanting to cover some of my favorite Max patches for a while. There are so many and sometimes, some are just meh and others, will be quite amazing. Since I’m basically hoarding digital tools for my studio, I thought I’d compile a list of some patches that feels like it’s hacking the production flow to the point where it’s like cheating.


Every now and then, I’ll be making music and whenever it feels too easy (it doesn’t happen enough though), I always the impression that it’s wrong. 


In coaching, I teach that it’s never a problem. My take on this is to harvest ideas when it feels too easy because you might have found a hack and if it sounds good, then it means you found a way to express yourself.


This is why I never have enough tools that ease my creativity but I don’t rely on them as a quick fix for something I can normally do. If there’s a shortcut to something that takes a long time, which provides the same results, I’ll always go with the shortcut. Decision fatigue is something that ruins many studio sessions, and the meter goes down whenever you need to fix something or run into a complicated workflow.


In terms of tools, I have a few categories and I’ll present them based on a need or problem.


I like to think of the different needs related to music coming from different spheres. 


Melodies: Sequencing, hook building, not harmonies, slicing/rearranging, generating.


Sounds: Design, harmonic/inharmonic, quantized, envelopes.


Effects: to be paired with sound sources so there can be variation and alteration.


Rhythms: generating, rearranging, unorthodox patterns, familiar patterns, ratcheting.


If you read my article about VCV and how the brain, the heart work, you’ll have one central source of sequences in one channel and then, you’ll have other channels that are the sounds who will receive the signal from. This is why I separate my sources and receivers. When you hunt for new ideas, you might have a nice melody but not the right sound or vice versa, so you want to be able to swap between them.


This is why I love VCV and modular because you can have built systems of melodies generating tools that send to multiple sound sources.


1- Sequencing : I want to create different rhythms or find patterns out of my usual flow


When it comes to sequencing, there are multiple ways to do it. You can use a note pattern from a midi clip if you want precise ideas. This is useful to lay the main idea of a song and to have direct control over the development of a pattern. But when it comes to generating ideas, I find that step sequencers that have random options, probabilities, phrase length adjustments to name a few, are super useful. It turns your machine into an idea maker and then you can cherry pick what suits your idea.


Drum sequencers that come top of the list for me are XO by XLN and Atlas. Both are quite similar but they offer in-context sample swapping, as well as sample organization, so it becomes really easy and fast to swap a sound to see what it would be like. Both offer different complementary ideas which is why I often use both but they’re not cheap.


Otherwise, if you want a quick fix, the Alexkid Instant Haus max patch is a free alternative. It will create some different rhythms for all your percussion instruments but you can use it to sequence notes or swap percussive for musical elements. Sadly there is no Max patch to hear percussions in context like Xo does. If you like that one, he also made other bundles that are pretty badass here, with more generating ideas for percussion.


I saw this patch here that is quite interesting. It is there to generate ideas so there are some nice potential. Also super powerful, comes Polyrhythm by Encoder audio, which is one of my favorite developers.


I also like Eucledean Pro because it uses the classic Euclidean approach to create beats.


Not long ago, a new max sequencer came out and it’s named Opal. It’s very influenced by Elektron machines. It’s really dope and can achieve so much for drums but also just for textures and even melodies. Powerful.


2 – Sequencing Melodies : Generate hooks, phrases and musical ideas


There are many ways to create a hook. You can use sampling (we’ll get there later), play melodies, extract melodies, combine sounds to make something catchy, record instruments or sounds… All those pretty much cover the main ways to find a hook. Depending on a specific genre, a technique might be used more frequently. 


For ambient and electronic music, in general, sequencing ideas/notes to a synth or sound source is quite popular. Basslines, pads, chords and melodies are often coming from the piano roll. But you could use a melodic sequencer to do so.


I’m obsessed with melody sequencers. They’re fun but they also feel like you have a partner which you can tap endless ideas from.


Here are some of my favorites:


Pattern Generator by Manifest audio. Solid for creating complex or simple melodies as well as can be used for drums.


Snake: Brilliant patch for quick sequences.


Ask and answer: Works for creating call and answer hooks.


Turing Machine: inspired by Allan Turing, this device spits out sequences randomly and then you can loop the parts you like.


Aisle: This complex generating tool finds original sequences and patterns based on repetition. I find that this is excellent for percussions and evolutive percussive melodies.


On the more experimental flavor, Dillon Bastian has been a hero. It’s hard to explain in a few words what they do but he’s basically creating patterns and sounds through a visual context. For instance, with Rhythmorphic, he uses visual maps that shape how the patterns happen and what notes are triggered. It’s a bit hard to explain but it’s something quite unique and you can shape some very unique patterns. This can be very organic sounding, sort of like a chime. Or you can also use it to trigger percussion.


3- Sounds: I want to have sounds that are new to me but still not too crazy (or not).


When it comes to making sounds, I often deal with 2 kinds of mindset. On one hand I often find myself wanting to emulate sounds from songs or artists that I really like. I will try to reverse engineer how it sounds and will noodle around a bunch of different presets, pick the one that is the closest and then try to tweak it to something close to the target. 


This is where “instruments” get handy. While you have a lot of options already with Ableton’s internal synths which are excellent, I compile a few ones here for you.


Chiral: Named holographic synth, it creates unreal sounds, based on multiple synthesis approaches. Hard to describe, these textures will sound very artificial, in a good way. Think of the ultimate synth for scifi score.


Iridescence: This is a delay unit that turns simple sounds into arpeggios. You can basically turn any sounds into a melody.


Grain Forest: The opposite of Chiral. It creates super organic sounds and environment. Bastian built an evolutive instruments with visuals of wind, seeds, trees that grow and die. It’s very relaxing and mesmerizing on its own.


poly-Plaits: The Plaits module is from Mutable Instruments and while this is an open source synth, it made its way to Max for live. It’s a synth with models. It sounds lovely.


Rings: Another take on Mutable instruments but this one is with the module of the same name. It’s a resonant synth with beautiful chime, bells sounds.


Copy Machine: This sampler takes a sample you pick and creates copies of it. The results are a bit mind boggling. Imagine you take a clap sample and turn it into a bunch of people who clap at the same time.


Fortrek: Inspired by the 4 tracker tapes of the 70’s and 80’s, this takes multiple recordings and scrubs through them. Really lovely for lofi feelings.

4 – Effects: Adding spices and colors


Never judge a boring sound as not useful because sometimes, adding the right effects can bring a whole amount of fun to it.


Granular Mirror Maze: A granulator that spits out super nice textures out of percussion or synths. Ideal for pads and backgrounds.


Maze: A looper, tape style with pitch. It is quite fun for creating off the grid ideas and have more of a musique concrète style.


Nube: a take on Clouds, an all time legendary modular effect that is a combination of delay, reverb and granulation.


Muse Concrète: This super advanced tool is not for everyone. It’s the ultimate tool to record and mangle sounds around. Big ups to my bro Offthesky for that one.


All effects from Encoder Audio are amazing.


I recently discovered the work of Robert K / Groov Mekanik and his vast collection of patches impressed me. Not only most of them are free and those who are for sale are at super low price, but the tools he has covers some needs that new and experienced producers want. I was appealed by the High Frequencies limiter that many artists should use as many often boost the highs too much. One patch I’d recommend getting right away is the Note Probability that is super useful for generative patches, adding flow and performances. It simply remove out some notes due to probability. Go have a look, there are some lovely tools in there.


But honestly, I think the most of what you have is by adding modulation to what you already have. This is why modulation options are useful. Here are some of my favorites:


Auto-Slider: Another brilliant essential tool from Offthesky. It records your movement and make turn it into a LFO or super long function signal.


Strange Mod: Dillon Bastian drops this amazing modulator that I use everywhere. Ideal for unusual random modulation.


Source: Inspired by the Buchla 266, it creates random signals.


All LFOs by Kentaro: Advanced and sophisticated, these can bring any modulation to the twilight zone…


I will update this page when I find new things so you might want to bookmark it. If you have suggestions, please share them!


What Makes A Difference Before Mastering

I often explain to clients, almost daily, that a good master starts with a solid mix. Therefore, I thought I’d list what actually makes a difference for me when I get files to process. This article will also talk about certain things that producers do to their tracks that they think will make the job easier for me, but really, they just end up making me work hard.


I would like to start with what is obvious to me but seems to not be for many clients, which is about how people listen to their music. Many times, people send me a song that will have issues related to how their studio is set or because of a lack of understanding about how their studio translates to the outside world. If the way you listen to music in the first place influences how you perceive it, it is clear that you’ll misunderstand the song you will get, once mastered. When I get feedback from a client that their song has a tone-related issue (too bassy, too bright), I will always reply with “compared to what?” Because in the end, that’s what it is – a comparison. You will always have some people comparing you to other things and the definition of perfection is extremely arbitrary. That’s why it’s always a good idea to provide me a reference. 


Every mastering engineer has their own touch, therefore the idea of working with a mastering engineer is directly related to how you like their work. The engineer will work with a definition of what they think works best for what you have, related to a genre, within a range of technical points that will make the best out of it. Therefore, the first thing that can make a huge difference is trust. When you have your song done and need the last touches, there can be some wild differences, but in the end, it’s about communicating your vision and hoping the engineer can manage to do it. I often get people sending me files and asking me if they’re ready for mastering to which I always tell them that the best way to know is to do tests, where you send me a version to master, and I see how your mix translates after the process. This is, to me, a huge step to build trust.


Obvious Technical Details


These have been discussed inside out. They’re also covered on pretty much any mastering sites or forums. However, I still get files prepared wrong. Some people forget, but there are also some people think they know better too, so let’s see once more, here:


  • No compression or limiting on the master bus: If you have your gain staging done properly, there will be no need to really have compression on the master as your loudness and density will be already solid. If you want to glue things all together, leave it to the engineer. If you want a certain vision, bounce a home master as a reference. A limiter is useful during production in case you get hot and push things a bit. Still, for mastering, you need to remove that tool because otherwise, it creates some intense processing on your transients and density that will be problematic for mastering. Note that many use limiters within the mix itself, either on the low-end buss or percussion, which is ok but sometimes can cause distortions too. Also, be careful with saturation on the master. Many people actually mess up their mixes that way – a 3-5% of wet factor of saturation may feel huge once mastered, so treat it with care.


  • Headroom: The usual requirement engineers will ask for is -6dBfs but nowadays, I’m cool with -3dBfs too, as long as there’s no limiting on the master 0and the transients are healthy looking.


  • Resolution and sample rate: This keeps changing but I find that the bare minimum is 24bit, 48khz. Some people send files with better resolution than that but on my side, I run most of my sessions in 96khz to get the best headroom so I can deal with pretty much anything. Of course, files have to be in stereo, wav or aiff.


These points are easily handled by most clients. If you aren’t sure of one of these points, you’ll easily get answers on forums or straight from a Youtube tutorial. I would say I often get files that don’t meet those requirements, but often we can easily fix them.


Average Level Technical Details


This is where things get messy. It’s what I would call, mostly average level. Meaning that new producers will have some difficulty with these but if you’ve been making music for a few months, and finished a bunch of tracks, you’ll probably run into some of these issues and the lack of experience might lead you into trying different things. It takes time to really pinpoint how a mix will translate after a mastering. It comes down also to your pick of engineer, their aesthetic and communication with you. Of course, the more you work with someone, the more they’ll know what you expect. Most of my recurring clients never ask for a revision because it comes as they want.


Advanced Technical Details:


  • Loudness. This is where many people are confused. There’s a difference between the peak loudness and the density of a song. I’d encourage you to get a loudness measuring tool and look into the LUFS indicator. 


If your track is at t -6dB, it means that I will need to add 6 dB gain as I’m trying to get it as close to 0dB as possible. In order to do this, I will need to boost the density to match other songs on the market. If your song is close to 0dB without density measures, it probably means that it’s not loud enough. 


There are multiple ways to boost the density such as saturation and compression. Sometimes, people wonder why their song is compressed and the reason is always about matching loudness. We can’t simply boost the gain, that won’t be enough. That said, people need to do their gain staging properly. I can’t explain in this post how to do it but there are multiple tutorials online for that


So, in the end, I always prefer a mix to be roughly around -15LUFS ideally. I can do with less but you’ll have to accept there will  be a pretty steep difference.


  • Stereo width. Most people I know love their song to be returned with a nice width, as they love to be wowed. If it’s too wide, there will be a loss in punch and assertiveness. Usually, people are pretty ok with this but there are a lot of people who get addicted to plugin that use width and clients might boost the sides a bit too much. I often have to rebalance the signal between mid and side. It’s not much of a big deal but if, in some frequencies, I notice the sides are too loud, I’ll have to control that because it might be a sign of phasing. That is one type of issue that clients have a hard time spotting because it requires experience or good monitoring tools. 


  • Saturation. Every now and then, I’ll have clients who will push saturation a bit much without knowing that loudness matching will multiply that crunch by much. This results in weird clipping, distortions, noise, nastiness. Some people are ok with that but some need to redo their mixes to find the sweet spot. My general suggestion is to add saturation until you hear it and then dial back a bit. If you hear a lot of the saturation and your gain staging isn’t right, I will boost your track much and the saturation will be boosted a lot.


  • Noise floor. If you record from synths and analog gear, there might be some noise in the background. You need to record as loud as you can so the noise doesn’t get boosted by your gain staging. It often happens that people record with lots of noise in the back and when I boost, then it gets amplified. So, be careful.


  • Effects. In general two red flags occur here: overuse of phasing, MS or reverb that is way too loud. Often clients have to fix the reverb and send me a new file. Long reverb are super tricky and sometimes I suggest to use ducking on it so it doesn’t mess up the transients or make the entire mix messy.


  • Compression. This one is tricky. Sometimes people will put compression on the master to glue everything together but I don’t recommend doing that so much. This is something I like to control myself since I do the final gain staging and overall adjustment of that matter. People who use compression as gain on the master or all over the place will end up having a track with exaggerated tails on the sounds that are supposed to be a bit shorter, which can have dramatic effects on the bass or the kick for instance. If they bleed into one another, the low end will be mushy and messy. Snappy kicks need space to be cutting through and if the mids are also bleeding all over the place, there will be a lack of precision. Overall, compression is useful yes but with some moderation, unless you want a puffy, really inflated-sounding track.


  • Samples. The higher the quality of your samples, the better the mix you might get. In essence, using mp3s or youtube ripped sounds will sound lofi and that might be exaggerated, once more, in mastering. This is where aliasing and weird digital artifacts can make a pristine-sounding song into a harsh one. When I refer to quality samples, I not only relate to the bit rate, but also for a good balance of density, clarity and precision. Samples with sibilant resonances and sharp transients also can be hard to control in the mastering process.


What usually really helps and will make a huge difference:


  • Resonances removal: If you think that I might do gain staging, you’ll quickly see how they’ll escalate into a harsh ringing if you have any resonances in there. Removing resonances isn’t something you easily learn but once you start being aware of the impact they have on your mixes, you’ll want to handle them right in the sound design part. While I can control them with my mastering EQs, there’s nothing like having a clean mix to start with. I had a try at this Reso EQ and it turned out to be quite solid. There also the MAutoEQ by Melda that detects resonances and lets you cut to taste.


  • Transients taming: There’s nothing more annoying than harsh transients on big sound system or at high volumes. There’s a difference between snappy and harsh, sometimes people don’t really realize until they hear the master. While I can control things, if you do the most cleaning on your side, your mix will sound stellar. One of my favorite transient shapers is Impact by Surreal Machines. But if you want something that is game changer, you can go high level and get the Oxford Transmod.


  • Proper leveling: This is the mixing 101 of all tips. Not much you can do else than practice, take breaks, listen to references but if you get your levels right. This always is a win in mastering.


  • Sidechaining, unmasking: If you have multiple sounds that are in the same frequencies, it will soon head into a masking issue territory. You can spend some time cleaning the frequency of one to let the other be heard but the fastest fixing method is side-chaining. Using TrackSpacer is always clean and fast, but lately, the new Neutron 4 has proven to be quite amazing. It also has a lot of other practical tools and it has been in every songs I mixed lately.


  • Proper gating: Gating is often misunderstood but it is a technique that will bring punch, clarity, dynamics to drums or anything with tons of details. It also resolves masking sometimes, clean noise floor and avoid muchiness all around. If you don’t know much about it, go check tutorials!


The last stretch of points is what I’d consider advanced but those are actually the ones that I will have the most trouble with because they should always be handled in the mix. The cleaner your mix, the better the master.


Mid Side Processing Explained

Often when I listen to tracks in my coaching group, I notice that the mid/side processing is often really off. Not having a solid M/S mix makes mixes sound thin, and muddy, rather than expansive and crisp. It’s often the M/S that is the make or break between an ok mix and a radiant one. Therefore, it felt prudent to write an article on what mid/side processing is, and how producers can have it done properly in the mix. Therefore, without further ado, here is Mid / Side processing, explained. 


What Is Mid/Side Processing? 

So what is Mid/Side processing? Basically, if you want a wide-sounding mix, you’re going to have to concentrate on mid/side processing. Often these sort of mixes sound “better” to the listener, and allow the producer to throw more sounds in their mix, without it sounding cluttered. While a wide-sounding mix can be accomplished through a bunch of different panning and stereo processes, mid/side is a strategy that can really dial that in, and create a spatial mix.


Mid in Mid/Side Processing, Explained

The “mid” part of the mid/side process is basically mono. It’s the sound(s) that sits in the center of the mix. Kick drums, snares, melodies between 200 – 500hz (like a pad), and any other “static” sounds can, and often should be placed in mid. Sure, there are artistic exceptions, but this is a good rule of thumb. 

Also, bass below 100hz. This is best practice. Why? If you print a vinyl, and if the bass is in stereo, the needle will jump. Also, in clubs, they do serial summing, where anything under 100 will be summed into 1 mono signal, but if your bass is in stereo, and it’s summed, it can quiet phased parts of the mix.


Side in Mid/Side Processing, Explained

The side-channel is the edges of the mix. Note: This is not to be confused with panning, where you can move sounds specifically into the left or right stereo field. Side processing is strictly hard to the right, or hard to the left, and is technically a mono signal.

When the side’s amplitude is increased, the listener hears a wider, fuller sound. A good way of using it is to increase the width of leads, or strategically move a percussion bus to the sides of a mix to create a fuller listening experience.

You can even get creative with this, and widen parts of the mix at different intervals in the song. For instance, whenever the chorus comes in, you can widen the leads on it, to give it a more present feeling, allowing it to become more expressive to the listener.

Pads are great for the sides as well, since it’s audio that “hugs” you, in a way. Other things that work well on the side are background noises, like field recordings, or weird ambiance -, that stuff works well on the side, it’s not present. Only present stuff should be in the middle. All decorative percussion can technically be on the side – swingy hi-hats, bells and whistles.


Side Processing May Cause  Phasing

Once mid/side processing is explained to many newbies, often they just go out and start messing around with it. However, side processing can reveal one of electronic music’s most dastardly foes: phasing. Basically what happens with phasing is when you have two of the same sound, on opposite sides of the stereo field, they cancel each other out. That means, we have to be judicious with the sounds we put on the sides. Generally, “less is more” is a good approach when dealing with phasing since there are fewer chances of frequencies canceling each other out. 


How To Correct Phasing

If you want to correct phasing while keeping them in stereo, the trick is to have one of the sounds reveal itself immediately after the other, so they don’t phase. This can be done with a very short delay. When dialed in, the sound will perceptually happen at the same time, but be delayed ever so slightly, allowing the other sound to peek behind the other one and be heard.

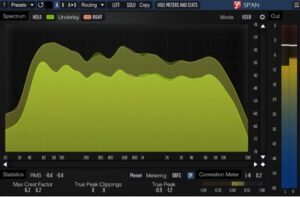
A more immediate, definitive way to correct phasing is to make the sound more mono. There is a tool you can use, called SPAN. This plugin allows you to see in yellow, mono, and in red, side signal. When the red goes beyond the yellow, you have to reduce. The tool you use to fix this is the utility plugin, native to Ableton. You can control the width in this. If you want it more mono, you just adjust the width down, and then turn the volume up. 

mid side processing can be explained well with the VST SPAN. Here's a photo of it.

However, let’s say you have a purely mono signal that you want to add some subtle stereo width to. There are certain effects that can impact this. You can use reverb with little decay (otherwise it will be too loud). 

You can also use a chorus. Eventide made a harmonizer that is beautiful for that. It’s two delays – left and right – and when you play with the delay of each other, it creates a weird signal/shape, and then you can play with the wet/dry to add degrees of stereo. However, if you don’t have the money, you can use the echo delay, and control the left-right, and create a very short delay to create a little more phasing and the width you can play with opening and closing it.


EQing in Mid/Side Mode Is A Must

In my opinion, all EQing should be done in MS mode. Sometimes people hear things that they don’t like in the mix, and if you just cut, you are cutting both the left and the right at the same time. However, sometimes you want a sound to be EQ’d differently, depending on the channel that it’s in.

For instance, let’s say you have a synth in your left channel, and it doesn’t exist as much in your right channel. When placing decorative percussion, there will most likely be a crossover in the panning.

But since the synth is primarily in the left channel, the percussion in the left channel is going to have to be EQ’d different to not conflict with that synth. However, since there is all this open space in the right channel, there is no need to EQ out some of the frequencies, allowing that sound to better express itself.

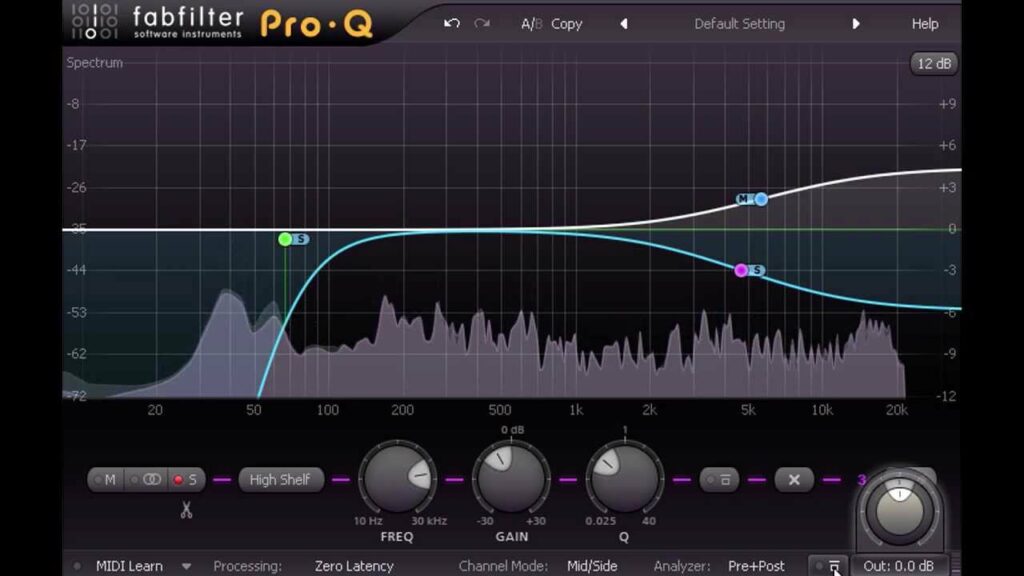
Fabfilter ProQ3 allows you to easily enter MS mode for EQing, and make precise cuts to the sound. If you don’t have ProQ3, you can unlink the left/right in Ableton as well. On EQ 8, there is a mode called stereo, but you can unlink left/right by clicking edit and then selecting left or right. You can also switch it to MS (Mid/Side), where you can edit either the mid or the side or you can treat left/right independently. When you do this, your sound feels more organic, because you’re not cutting in one place. 

A photo of ProQ 3 which has a mid/side processing mode.

More Plugins That Impact Width and Phasing:


Panman

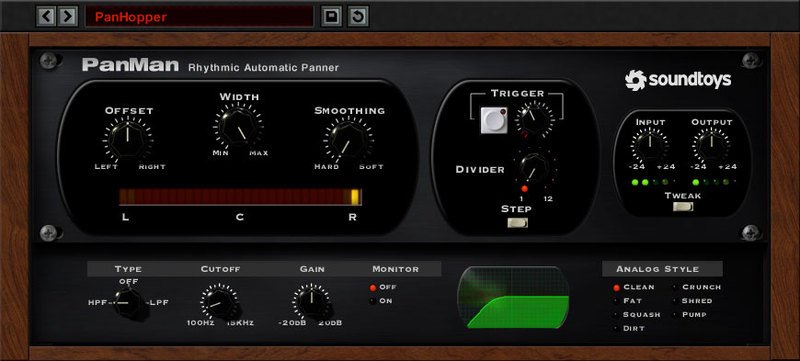
mid side processing explained through the vst Panman. This is a photo of that VST.


PanMan really splits open the possibilities of panning. First and foremost, it’s a hardware emulation, which allows producers to mimic the syle of vintage hardware panning gear. You can also trigger panning if the track hits a certain parameter. The automation allows you to generate complex rhythms and stunning sweets.


Microshift 

This is an image of Microshift, a great plugin for modifying your stereo field

Need some width? Well Microshift’s got width. It provides you 3 separate kinds of stereo widening in just a single button push. It uses a specific algorithm to pitch shift and add delay to your sound, that morphs over time to generate brilliant stereo width. It’s very easy to play around with and can be used to give more flavor to instruments, or create nice blends.


MStereoGenerator

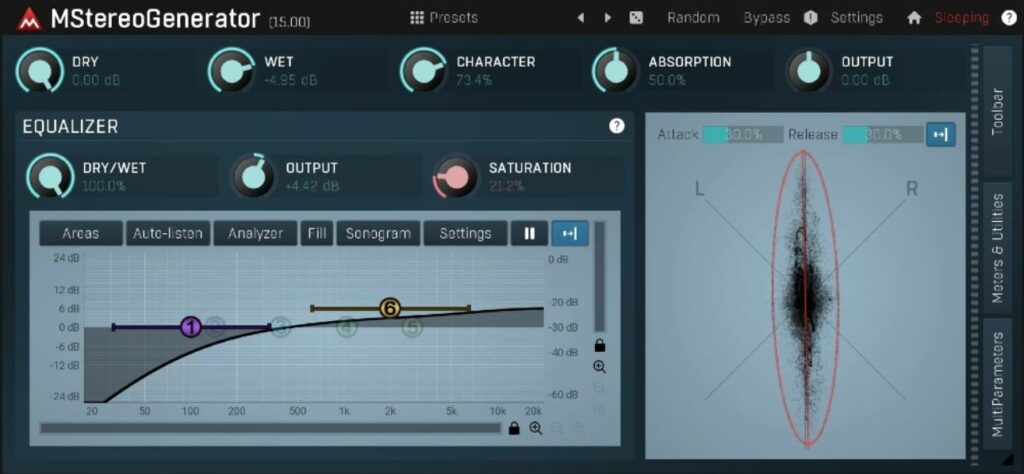
an image of MStereoGenerator, an excellent plugin for stereo imaging

With MStereoGenerator, you can convert mono recordings into stereo (or even surround). MStereoGenerator is a unique natural-sounding mono to stereo (or even surround) expander, which makes your tracks sound wider, stronger and punchier.  It’s especially good for acoustic instruments. 


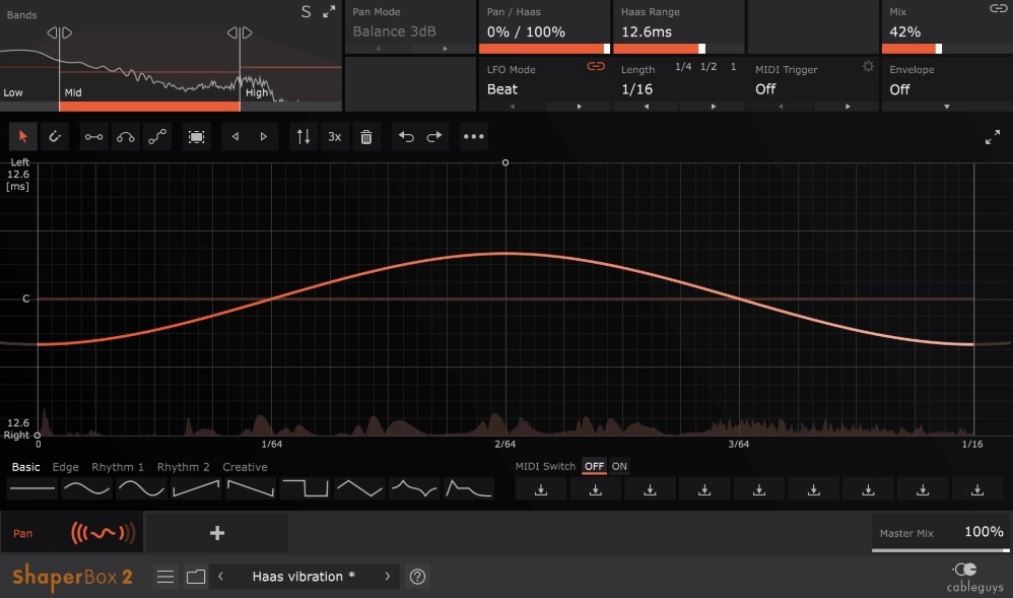
Panshaper 3 by Cableguys

An imagine of Panshaper, which allows you to do crazy stuff with MS Processing and panning.

PanShaper 3 takes control over your stereo field to another dimension. The real-time LFO that can be drawn on every band and the envelope follower allow you to design evolving, dynamic pan patterns and make dialed-in stereo edits in seconds.


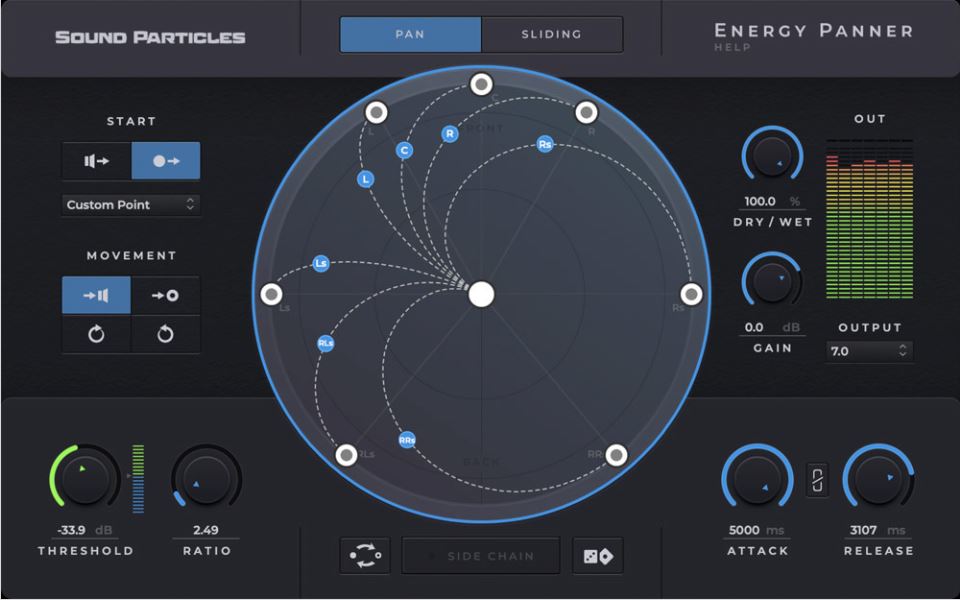
Energy Panner

an image of Energypanner which allows for dynamic panning responsiveness to inputs

Energy Panner reacts to the sound intensity by moving in response to it. A drum kit that moves to the beat, synth notes that move on attack, and many other behaviors are possible. Whether it’s stereo or Dolby Atmos, Energy Panner is a plugin you shouldn’t be without.


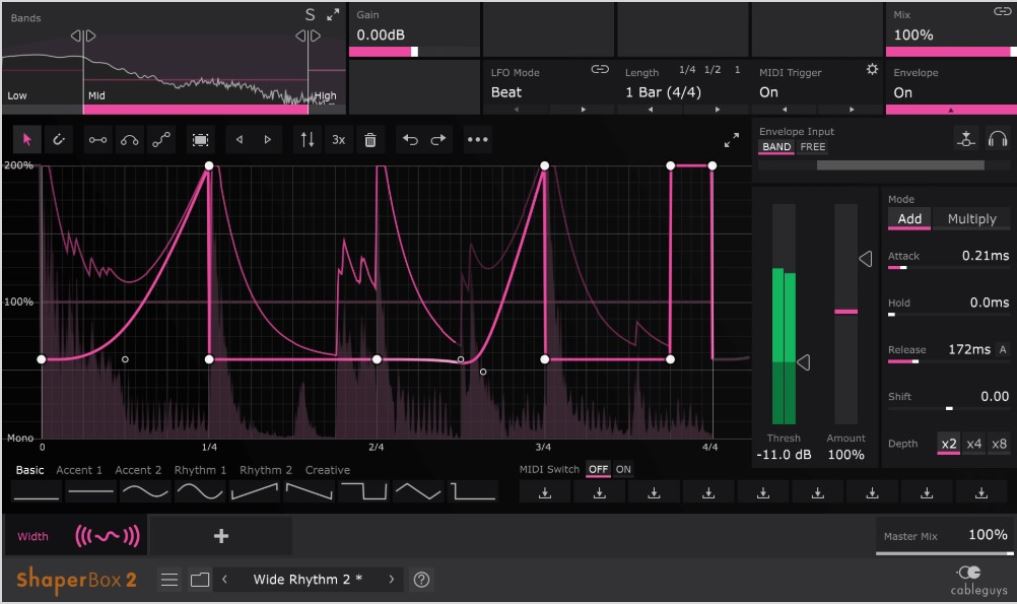
Width Shaper 2 by Cableguys

an image of the vst WidthShaper 2 which allows for amazing stereo mid/side processing.

With WidthShaper 2, you can fine-tune your stereo image to the finest detail. With three mid/side stereo adjustment bands, each with its own drawable LFO and envelope follower, you can gain precise control over the sound. It is perfect for sound design, mixing, and mastering, and can be used on single tracks and buses.

Once you have mid/side processing explained to you, you can see there is way more to stereo than just left and right. With M/S EQing you can surgically cut into sounds, and make them fit precisely in a mix. You can expand and retract sounds at different points in your mix, creating those illusionary, almost psychedelic effects in music that are almost inexplicable, since they are best described as space, rather than music.

However, with this power, comes the responsibility of not phasing your sounds out, and destroying the punch of your songs. Keeping in mind space, and how sounds relate to each other is a paramount skill in music production, and often an overlooked aspect.

I understand this can be complicated. If you need coaching or you just want to delegate this process to me, I’m available to help. Check out all of my services here.

My Music Production Tips and Tools for 2020

As 2019 comes to an end, I’d like to discuss some of the most important things that went on, things I’ve talked about the most, plugins I loved, topics discussed in coaching, and so on.

Productivity and Writer’s Block

I was pretty busy in the first half of the year. I released my 22nd album and two EPs. While these achievements look great on paper, I can tell you that it was probably one of my least productive years of the last decade. I had a writer’s block (on-and-off) since May, and was unable to really finish a song, so I mainly focused on working on collaborations or engineering. Being hit by writer’s block at this point of my life was unusual, but reminds me that no one is really immune to it.

Signs of Writer’s Block:

  • Everything you do feels or sounds like crap or is uninspiring.
  • Other people’s music is not really hitting the spot either or feels old.
  • Being unable to make music for more than 20-30 minutes. A feeling of discouragement comes in really fast.
  • Mostly unable to turn a loop into a song.

If you’ve been making music for more than ten years, the signs are slightly different:

  • Feeling like you’re repeating yourself over and over.
  • Not feeling satisfied with the techniques or gear you have.
  • Unable to finish music in general or not able to start.
  • Mostly struggling to polish existing songs.

My solutions to resolve writer’s block are not necessarily going to work for everyone, as there’s no cure-all. Everything passes at some point, but you can’t resolve writer’s block without going through it—you can’t get around it.

Suggestions for Resolving Writer’s Block

  • Completely change how you work by trying a new DAW.
  • Test tons of presets from your synths and learn how they’re programmed.
  • Learn about modular synthesis.
  • Try online sound banks such as Archive.org, freesound.org, or even YouTube’s obscure archives.

But more importantly, figure out what the block is in your writer’s block. Is it linked towards your expectations? In my case, it’s simply a question of finding the next concept to build an album upon. The way I discover concepts is by trying to reverse-engineer sound design. The quest to make something similar with the use of different tools to shape the sound is more important than the result itself. I see many people getting writer’s block from trying to identically replicate a sound they want and discarding other techniques.

The difficulty in replicating a technique comes from the “early beginnings of a new producer“, in which someone starts on the wrong foot. I’m always happy to have someone who wants to start producing come to me to make sure he/she will start off well.

How and Where to Start Producing

In 2019, new producers have infinite access to information and tools. Too much information means a few things:

  • Giving you the wrong first impression that everything is easy and doable.
  • Misleading you into investing into things sold as being essential, while they’re not.
  • Having so many choices makes the task of picking one overwhelming. If you have access to all the sounds you could ever dream of, where would you start?

Counter-Productive Tips New Producers are Often Told

  • If you work hard enough, you can learn anything.
  • You can learn and do everything yourself.
  • Not watching tutorials or reading articles is better than education because you learn as you go.
  • Make all your sounds by yourself so you can be original. Hello, down the rabbit hole.

I see people coming into production with the wrong intentions/goals. Of course, if you come with the idea that: a. things are easy and that b. you can learn everything yourself, people set unrealistic goals for themselves before they’ve ever created a loop.

In the last five years, I have been frequently reminded of a client who once came to me with an artist page on Soundcloud and Facebook with thousands of followers, a logo, professional photos, etc., but not a single minute of experience in music production. He had to make some music that could match the image he had been selling, and the first step felt huge.

The other side to early production is the artist who finishes a first song quickly and gets signed. With no experience, keeping up the pace of releasing is difficult, and the quick rise can be a situation that might be difficult to handle.

My Suggestions for People Who Want to Start Producing

  • Listen to a lot of music when you have the time, and attend shows. This is super important for multiple reasons: you’ll learn the relationship between what you hear on your headphones vs. a venue. This is important to develop your mixing skills—learning how people react to sounds and how artists perform music in a live context. This is valuable information for music-making.
  • Try to befriend people who make music as well, a mix of newcomers and older producers. This is super important for building a network of contacts to ask questions, swap music with, share gear, get a bunch of info that you can’t find yourself, and also to break-up periods of isolation.
  • Ask as many questions as you have. No shame, just ask. Ask a lot of how do you do this or that? What is the name of that sound? What effect can create that impression?
  • Have studio jams. This is the best way to learn. You’ll learn so much because you’ll run into so many problems that you’ll have to troubleshoot them, and that’s useful. Jamming also puts music-making into a context that is impossible to replicate—alone in a studio.
  • Try to make loops everyday. You can make them all into one project file or start a new one each time. It’s important to make many because it’s good to first practice how to start making a loop. If you make a lot, you’ll get more efficient, develop tricks, and get faster at finding your way through a new tool.
  • It’s more efficient to do 10-20 minutes everyday than a five-hour session on a weekend. The optimal focus time for your brain is around 30 minutes, so you get the best of yourself. Working for five hours isn’t recommended at all: you’ll feel like you did a lot but after that time, your ears can’t really judge what you’re doing. You can do five hours in a day, but on multiple tracks. I just feel that it’s not the best of yourself that will come out of long sessions on a single project, but you’ll learn.
  • When you can start a loop in 10 minutes and feel great about it, then you’ve leveled up and you can now go back to all the loops you made and practice turning them into a song. Next level comes when you can finish them in a breeze.
  • One song, one idea. If you make a decent loop, it’s probably the middle part of your song. How many layers do you have? What is the main idea? Can you, or a friend, sing that idea?
  • Don’t make a big deal about not finishing songs. It will come naturally if you take things one step at a time.
  • Forget releasing your music or getting signed by a label. If you focus on that, you’re just distracted from doing what you have to do which is to have skills to make music like you want.

Common Issues Other Than Writer’s Block

People often share other struggles in music-making with me like:

  1. A loop or idea feels boring or repetitive at some point in the song. First, don’t reveal your main idea too quickly. Second, create multiple variations of that loop (ex. changing the timing or adding effects). Third, add modulation to the sounds so they’re constantly changing.
  2. A song feels like something is missing. This might be because you’ve heard it too many times. Try leaving it alone for a month. Otherwise, here’s the a quick checklist: percussion, bass, pattern or melody, background, and a supporting idea. If you have all those, you should be more than okay. Otherwise, try to compare your song to a reference, concentrate on all sounds and see if you have about the same number.
  3. A track feels empty compared to references. Often resolved by creating a noise-floor. Try a reverb or a hiss at low level.
  4. Sounds never feel right. You might have bad samples. If you are convinced you should do everything yourself, you’ll indeed sound off, for a while. Try buying and using pre-made sounds. If you can’t make them, find some, and learn how to make killer loops and songs. As you go, you’ll eventually train your ear on how these sounds are made and will be able to make them. Honestly, even after 20 years, there are plenty of sounds I’m slightly not sure how to make even though I know, in theory, how to… it’s harder than it seems!
  5. Creating original ideas and not cheesy ones. If you listen to a lot of music, this will train your ear. If you listen to a lot of music before making music, it will put you in a mood. If you use a reference track, or even try to compose music over it, it can greatly help with this issue.

Essential Music Production Tools From 2019

EQ

Even though it was released in 2018, Fabfilter’s Pro-Q3 has won many prizes this year and has gained prominence with many major engineers. I’ve been watching a lot of tutorials from Mixing With The Masters, and Pro-Q3 is often the EQ of choice. You can use multiple instances to see how each channels are interacting between one-another, do some side-chaining, corrections, and shelving. You can turn any points into a dynamic filter too, which is very useful. If you have the budget, try to get an analog inspired EQ such as the PSP E27. These types of EQs aren’t parametric and can add a musical colour.

Compression

The compressor I loved the most this year was the Avalon from Universal Audio. So badass, so powerful, so useful…no need to say more. If you don’t have a UAD, I always turn to PSP Vintagewarmer 2. Not only does it compress well, it adds warmth—people want both.

The Do-It-All Utility of the Year

No doubts, it comes to Shaperbox 2. It is perfect for resolving many, many issues like modulation, side-chaining, movement, variations, creative ideas on the fly…it’s so good that I blindly bought it when I received it in my newsletter from CurveGuys.

Reverb

If there’s one effect to have on top of your stock plugins is a good reverb. There are many out there such as this gorgeous reverb by Fabfilter but I suggest the Convolution by Melda—it’s fantastic and will be useful for years.

Quote of the Year

We make music to come together, and yet spend so much time alone. Reach out to others, create new concepts and see how viewing music as something fun will build things organically.

SEE ALSO : Design Thinking for Music Production

Make Music Faster: Some Organizational Tips

We are constantly bombarded by information and it can be difficult to focus on anything properly. Making good music requires slowing down and a high level of focus—often people rush when making music and it comes out poorly. How can you make music faster while still giving the process the attention it deserves?

In terms of file and project organization, there are a number of things you can do to speed up your workflow.

Backup, Backup, Backup

I’ll never say this enough, and I’m sure you might shrug at this first tip, but you have no idea how many clients come to me telling me their computer crashed and they lost everything, hoping I saved their projects! Luckily, many times I have been able to help them with my own backups. After many of my own crashes, I’ve learned to have a number of external hard drives for all my projects, and I have an online backup for my main system that syncs multiple times a day, and I also use Time Machine (from Apple). Generally, I have to use one of these back ups at least a few times per year, because of corrupted data or other issues. Clients email me about issues of their own about once a week! No joke, if you do just one thing to improve your pace-of-output, make sure it’s taking backups of your work.

On backup drives, I keep everything organized by year, label, and project name. Having organized files and folders helps me find things quickly.

Personally, some brands I trust for reliable hard-drives are Western Digital, Samsung, and Seagate. If you can get an SSD, it’s a huge plus—you can work directly from it, without any noticeable decrease in speed. When it comes to online backups, I like iCloud (I personally hate Google Drive), but I recently discovered iDrive and find it pretty impressive and affordable, too. If you don’t have an account with Splice, it’s a good idea to back up all your projects online. Having multiple back ups on different systems can be quite useful.

File-Naming Conventions

All my song files have a title, but they also have a bit more information. On OSX you can use tags—I like to tag files as released/not released, and finished/not finished, for the most part. Avoid project titles like “new song” or “1”. As time progresses, chances are you’ll have many new songs, and titles like those are counter-productive.

I keep very few things on my primary computer hard-drive; I love to discard projects that I’m done with or that I haven’t touched in a while, so I can make room for new material. If you aren’t familiar with my creative process (see my series of videos on Youtube), I create a lot of source material to work with, but it takes up a lot of space on my hard-drive. I don’t like to re-use the same material twice, so cleaning up my hard-drive on a regular basis becomes a safety net against redundancy in sample usage.

When it comes to samples, I buy multiple loops and one-shots, as well as packs, and like to keep them organized in a sample-focused folder. Nothing too complicated, as I use multiple other tools to organize those in my DAWs, so I don’t spend much time on organizing samples into folders. I simply backup the sample folder and that does the trick.

Project Organization

Many producers work in an awkward way when it comes to managing their project(s)—their creative process is often irregular and they are easily distracted. It’s very hard to be completely organized when making music and balancing creativity with efficiency, but there are some approaches you can take to make things flow more easily. When it comes to making music, I work with motherships, which is a technique I covered in a past post and often refer to to make things productive again when I lack ideas. It’s basically one big Ableton Live session, where I drop-in all my current ideas. Recently, I found that I like to create multiple ideas in a single column in this project file. For example, I make all kind of grooves and percussion sequences in a column called “groove ideas.” If my mothership has multiple, well-separated content types, I can import an entire column from the mothership into another project and improve upon it. So let’s say I’m working on a dub project and feel like I’m lacking groove, I can simply go dig up whatever I have in the mothership by importing a full column filled with numerous grooves into my current project.

I think that working in a modular way (not in terms of using modular synths)—saving ideas by category—helps to import them faster later on, when they’re needed.

Leftovers & Going to the Store

Finished a new track? Create a new column called “leftovers” and place any unused ideas in it. Import that column into a project named “leftovers” and you’ll have all the leftovers from all your songs, which can easily be recycled in the future.

Going to the grocery store, is a phrase I use for days I spend recording noise, sounds, bleeps, and random jams from gear to my computer. I’m not a gear guy in general; I find using a lot of gear multiplies the risk of running into technical issues, which limits creative time. I usually record tons of sounds, or “audio produce”. I then work with that material for weeks or months, or even years. These types of sessions are super useful, but need to be organized as well. I cut down recordings to “moments”, which I identify as specific ideas or concepts. I also slice sections down to one-shot ideas, for percussion elements. Additionally, I like to have tons of low-end material with analog saturation, and analog transients I can use in digital percussion. Both add a very simple twist that can make a world of difference. I also like to use the mothership concept with the grocery store. I’ll create one template project with all my recordings and then slice them, then put them in different columns that I can use to import in any ongoing projects that need something.

Time

Time is precious. If you have a family, it’s even more difficult to find time to make music. How does one organize time given the obligations of social relationships, work, partners, hobbies, and Netflix binging?

My solution to not having enough time to work on my own music is to dedicate blocks of 30 minutes to work on music and try to get the most of them. Your brain can produce high-quality work for about that amount of time. This fact is liberating for parents—you have a human need to create, so you feed it what you can, and then move on. In the early years of being a dad, I thought that having a way to save ideas for music by leaving myself audio notes was the best way to calm my brain down from the restlessness of not making music as much as I wanted to. Sometimes I would have the computer nearby and I’d leave a loop playing and adjust as I could, between changing diapers. Part of who I was a musician changed in those years. The music I wanted to make was completely different, mostly because I was using music in a different ways.

Limiting your time to periods of intense focus is something I learned from the Pomodoro technique. I would make sure to listen to music for 10 to 30 minutes before working. Ideally, I would also exercise or stretch to have my body “activated.”

Since time is crucial, I recommend you eliminate any hindrances of the mind that can disrupt the flow: hunger, need to check phone, energy, thirst, discomfort, etc. A good studio has the phone at the entrance with minimum check-ins on whatever alerts it can send you. Have a water bottle and snacks on hand, a quality chair…make things comfortable.

I also encourage new students to create precise goals and deadlines. For instance, “next Saturday I will dedicate a moment to video tutorials on compression, then do some tests on kicks.”

References

If you want to make music without losing your sense of direction, you need references on hand. I’ve covered references in many past posts, but this is a reminder that having a Spotify playlist is a great idea to give yourself drive. Speaking of drive, it’s not a bad idea to leave your house before making music—go for a walk, jog, or drive around. Have you ever noticed how moving along with music stimulates creativity? If this doesn’t do it for you, try to find an external activity that involves music and that inspires you.

A self-education activity that is also essential is to have a personal YouTube playlist of videos that are reference tracks, mixed with tutorials of techniques you can try. I have a to-do list of videos that I go to for experiments.

That said, references should be archived eventually, too. I like to keep some for a while but change them regularly. It’s a good idea to have a folder on your backup drive for all the references you’ve used.

Plugins

It’s easy to get lost in the sea of plugins out there, and if you’re a collector like I am, once you have many installed, it’s also easy to forget about older ones. Ableton Live 10 has a classification for plugins where you can put them a category with a color—I use it all the time. In my case, I have these categories: Sound design, Compression, EQ, Saturation.

I have a rule that I don’t buy anything new unless I’ve already used what I have bought previously. I don’t mean just having played with it, but actually used it in a project—this also applies to gear and any gizmos I could potentially use. The crave to get something new happens every day, as I’m constantly under fire by ads and emails that promote something.

Networking

If you want projects to get finished, you will have to do some networking at some point, and it can be pretty hectic out there as everyone has an agenda of their own. I’ve discussed the importance of networking before, but here are some basic reminders about how to do so efficiently:

  • Never take any conversation personally, as well as any pauses, silences, or delayed conversations. This is something I sort of have to remind myself daily, as sometimes I get triggered by certain things. Think of networking like you’re chasing someone for something, and he or she is doing the same thing with someone else. Everyone’s chasing each other and yet, we don’t pay much energy to people who are there for us.
  • If you send demos or if you are collaborating with someone, expect no communication or long silences. The music business world attracts people who are full of anxiety and often change their mind. Finding the right moment to poke someone takes time to master.
  • Use an agenda to keep reminders of who to follow-up with.

SEE ALSO : How Long Does it Take to Make Professional Sounding Music?

Sound design: create the sounds you imagine inside your head

You might never really be able to make the sounds that you envision in your mind 100% accurately using sound design, but I can offer you some advice to build on a good starting point to make something close to it. Just like in painting and cinema, often our imagination will play tricks on us; you might imagine what you think could be “the best idea ever” but once you actually get down to working on it, you quickly realize that there’s a world of difference between your imagination and the final output.

So, is there a way to use sound design to transpose those ideas into something practical?

Yes, absolutely.

Sounds have a structure, shape, and form, and when you “hear” something in your mind, you have to translate this idea into a precise description which will enable you to get you started on actually creating it.

To get a good start in the sound design process, ask yourself the following question:

Can you explain your idea verbally?

The first step is to analyze the physical characteristics of the sound. Keep in mind that sound has multiple axes and characteristics:

  • Time: A sound can be short, long or somewhere in the middle. The temporal aspect of a sound is basically its duration.
  • Envelope: The ADSR (Attack, Decay, Sustain, and Release) envelop trick is what I’m referring to here. Foe example, does your sound start out loud and then fade away, or maybe it does the opposite?
  • Frequency Spectrum: Is the pitch of the sound high or low?
  • Harmonic or inharmonic: Does your sound have tonality or is it more noise based?
  • Position: Is your sound static or panned on a side? Is it moving?

Secondly, you need to identify a source material for your sound and decide how it will be shaped:

  • In a previous post, I talked about layering sounds. One great way to get started is to try to find already existing sounds, and layer them in a way to get to something close to what you have in mind. For instance, layering a tom, a clap and a snap–when glued together–will form a rounded sound that extends up into the highs. When combining your sounds and layers, I recommend using a good compressor of the Opto or Vari-MU type; they are musical and create a great feel to your sound. Check out Native Instrument’s Vari Comp or KUSH’s Novatron that came in strong in 2017 as one of the best tool on the market for a reasonable price.
  • If you’re more into synthesis, you can do something like experiment with a subtractive approach by using multiple Oscillators with a good filter. I usually use Ableton’s Operator but this year U-He’s Repro 5 has been really nice for me in terms of sound design; lovely, creamy sounds. I like to have my low end and mids set to sine and then will shape harmonics set to square or triangle. Experiment endlessly!
  • Another interesting option would be to use field recordings. You might think this approach is a bit odd, but you can even try to make the sound with your mouth, or try to find objects to hit; you’ll always end up with an interesting sound. You’ll also be surprised by how much you can do with recording your own voice. For a great, affordable field recorder, check out any of the field recorders by Zoom, they even make one that can plug into your iPhone, which is quite handy.

Sound design - Native Instruments' Vari Comp

Native Instruments’ Vari Comp


And lastly, once you’ve established your source material, you can then dive into carving your sound:

Time: there are a few things you can do to manipulate the time and duration of your sounds. Pitch-shifting something to slow it down or speed it up is fun. Granular synthesis is always an option as well; one of many options being the Mangle VST. I also enjoy having a dark reverb with a tail to stretch the length of a sound. Any reverb can do a good job here but you can easily experiment with free options found on KVR.

Sound design - The Mangle granular synthesizer

The Mangle granular synthesizer

Envelope: If you have a big chunk of sound that you want to shape, there are again multiple options to shape it. If you’re using Ableton, the easiest way would be to use Ableton’s envelope inside the clip, and draw out the envelope of the volume or gain. There are also a few volume envelope tools out there; one you can look into that I like is Volume Shaper by Cable Guys; really powerful and fun.

  • TIP: If you want a really fast transient on your envelope, try using a Transient shaper. Transient shapers can also help with sustain.
  • TIP2: A VCA compressor with a slow attack can also give you great results.

Frequency Spectrum: As I mentioned, personally I like to experiment with a pitch shifter, but I also experiment with a 3-band EQ and a compressor; mostly a FET one which is a bit more aggressive (I recommend to learn more about different compressor types if you’re unfamiliar with them all). This way you can control specific parts of your sound and manipulate which parts you want to have more emphasis. This is definitely not the only way you can do this; there are so many other creative ways to use an EQ alone (such as the UAD Cambridge),  but I like to combine multiple effects and then play with them as I am searching for the right sound.

Harmonics: Harmonics can often be manipulated with saturation and/or distortion. If you’re looking for a good distortion tool, you can check out the Scream VST by Citonic which offers tons of options. Otherwise, the Saturation Knob by Softubes is a great tool for a range of subtle to drastic changes. I suggest playing with filters as well; they can enhance some part of your sounds, especially if you use them in parallel (through a send/bus track).

Position: Try out any panner. There are multiple panning plugins on the market, but I’d be careful to make sure you aren’t making your sound spin too much in the design phase; you don’t know what the position of your other sounds will be yet and you might end up undoing everything later anyways. Beef up the sound with a chorus or a doubler to manipulate the sound’s position even more, but as I mentioned, try not to go too crazy with the panning when creating just a single sound.

These are just a few sound design techniques and ideas to get you started in creating and designing the sound you imagine inside your head. Have fun!


Bonus: A good way to come up with unexpected design ideas is to use randomization. Here’s an amazing tutorial by my buddy offthesky.


SEE ALSO :  Creating Beauty Out of Ugly Sounds 

2016: Studio Trends and My Clients

It’s been a crazy first year for the audio services I founded in November 2015. Things really got started with the website in January, and it fired up right away. I thought this would be a good time to look back at 2016, and to share some of the year’s highlights: of the plugins I used the most, the projects I worked on, and the producers I had the great pleasure to work with.

Where to start?

Let’s begin with some numbers. With online sales alone, I completed over 300 projects by early December, though the number for all sales combined is closer to 350 projects for the entire year. This includes sound design, mixing, mastering, and training services, both online and in person. This was indeed my biggest year since 2004.

Add to that my online coaching service that reached 450 people in 6 months. It’s been a bit overwhelming to be sure, but being able to help so many people fuels me as well.

Overall, the breakdown of services offered by my studio in 2016 looks like this:

Mastering: 43%

Mixdown: 24%

Arrangements: 15%

Coaching: 15%

Other: 3%

And in terms of musical styles, it broke down like this:

Tech house/house: 24%

Techno: 33%

Deep/dub techno: 14%

Hard techno: 4%

Experimental/Ambient/Chill out/IDM: 15%

Pop: 3%

Hip hop: 7%

The most frequent requests were:

  • Rounded lows.
  • Warm bass.
  • Punchy.

I’m really happy that people have generally stopped asking for the music to be “LOUD,” as this was a common request years back. In 10 years, I’ve seen that people’s tastes have slowly evolved, and that they’re more and more into the warmer sound that analog provides.

Plugins

In terms of plugins, these are some of the ones I used the most this year. In general, I try to create a different chain of compressors and EQ depending on the label or client, to create a unique aesthetic. One thing a lot of people don’t realize is that the combination of various effects adds grain to the sound. It’s like combining ingredients when you cook: you can try 2 different brands of a same spice, and the results will differ subtly.

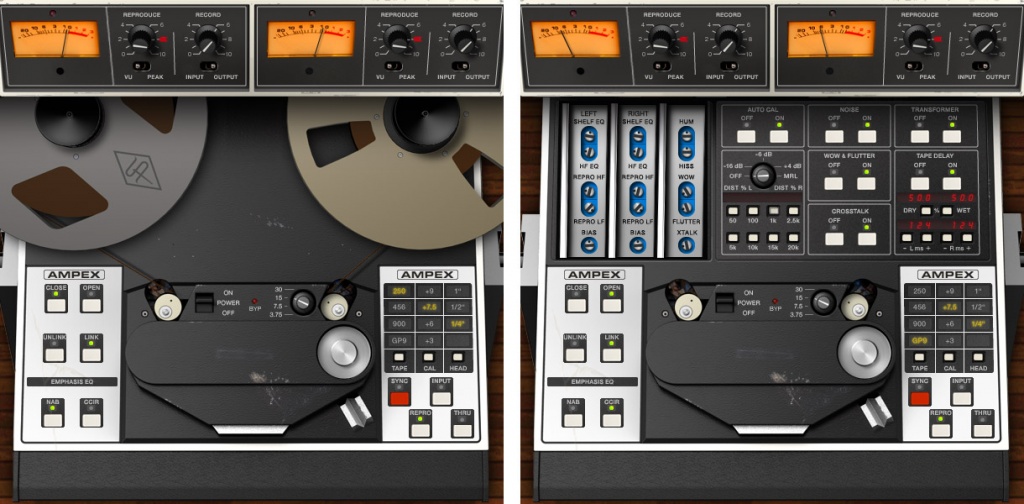
Universal Audio Ampex ATR-102 Mastering Tape Recorder Plug-In

This is certainly a very creative tool, as well as a nice mixing plugin. It adds saturation and will beef up flimsy parts. Anything that goes through it seems to come out in perfect shape.


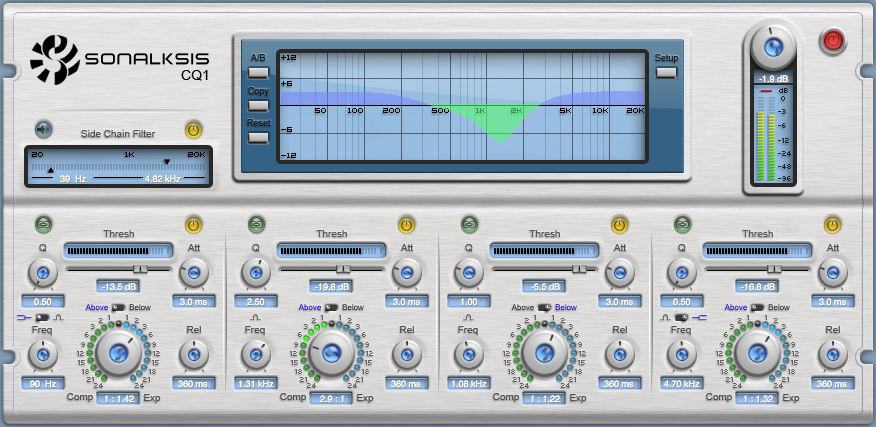
Sonalksys CQ1

This is certainly the best multiband tool out there — and trust me, I’ve tried them all. You will need multiband for mixing, but you can get very interesting results if you use drastic measures for sound design. This one never fails.


Harrison 32C

This is definitely an underestimated player in the EQ world, as I rarely hear people talk about it. This year was when I started using it almost every day though. It has this little thing that makes lows so warm.


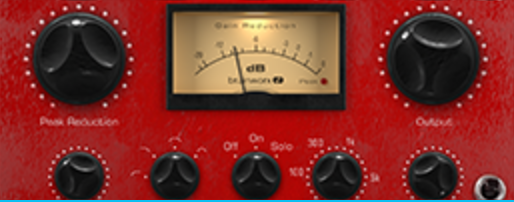
Bx_Opto

A simple compressor, but it works like a charm. Brainworx never fails to create quality products that use simple and intuitive controls. A huge help on percussions.


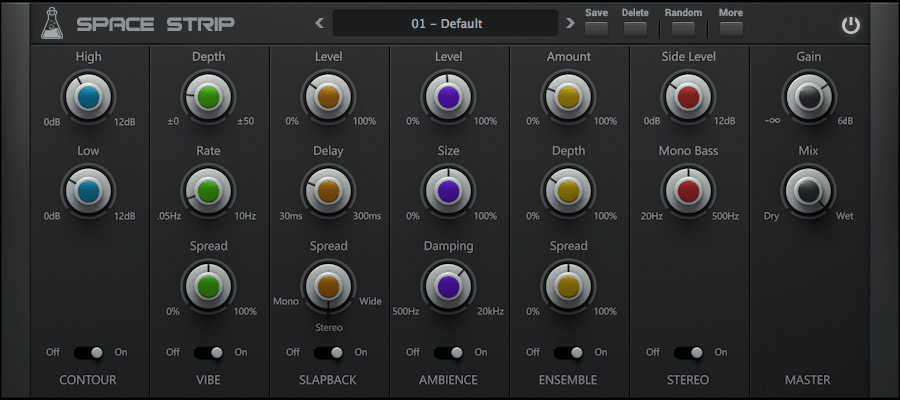
Space Strip

A fun little tool for sound design, it creates really cool spaces, as the name suggests. Throw it on the master and watch it craft lovely atmospheres out of so little.


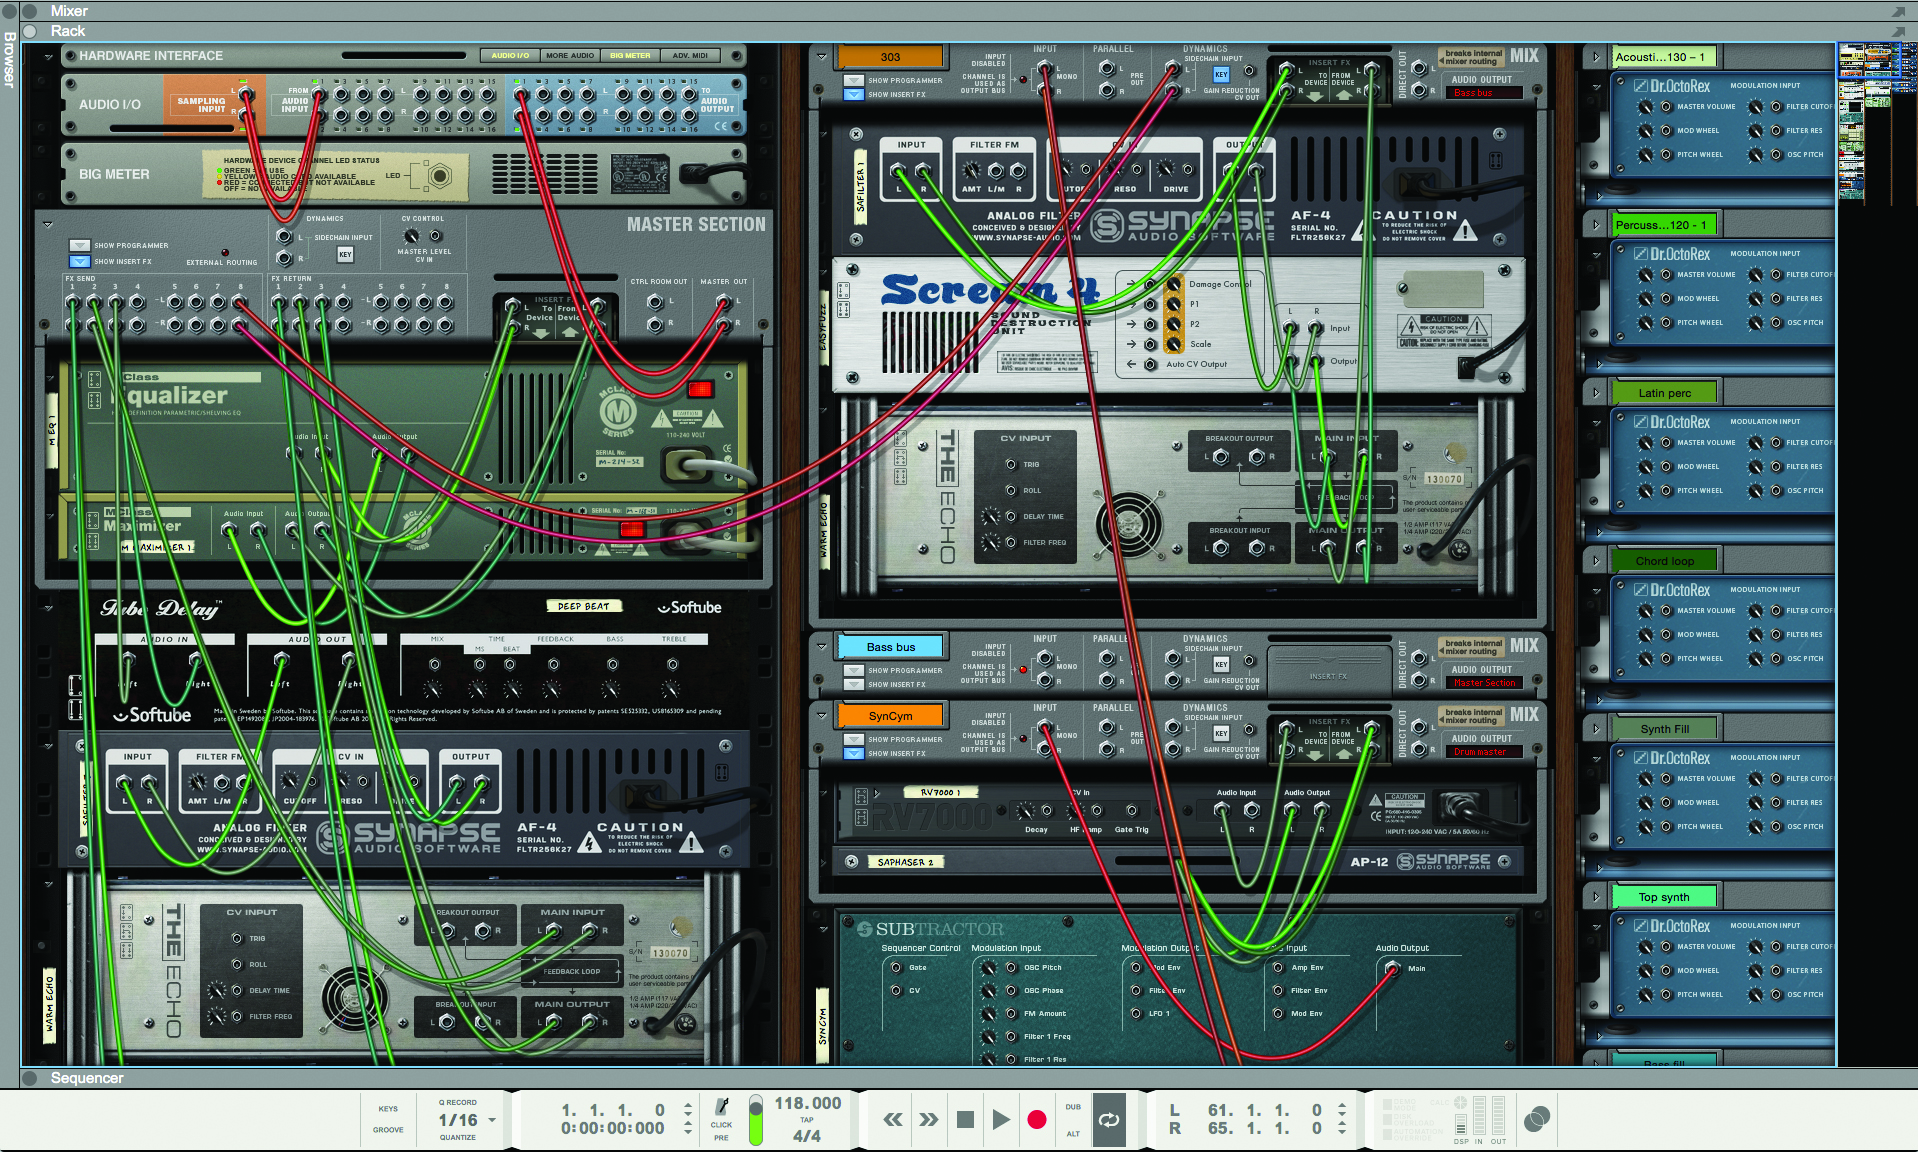
Reason 9

The DAW of the year without a doubt. If you’re one of those people that has been overlooking Reason, run now to get yourself the trial and be ready to have your jaw drop in awe. Rewired with Ableton, it is the most powerful tool to get over any creative block. It also does crazy (I mean it) sound design.


Adaptiverb

This reverb didn’t get the attention it deserved. If you’re not familiar with Zynaptiq, they really make state-of-the-art products. These guys are machines. Adaptiverb is hard to explain, so I’ll leave the descriptions to them, but suffice to say that it is not your typical reverb. It’s certainly a nice add-on to your plugin collection, as it can form creamy textures out of simple pads.

People


One of the things that really got me motivated this year was having clients who were interested in pursuing a long-term association with me. They’d come to me for all of their mixing needs so that they could focus their energies on recording new ideas. Some wanted their studio sessions arranged around songs. It’s great to have multiple contracts with someone, because you start by working with a reference artist, until eventually that shifts and the producer starts referencing themself.

It would be impossible to list all the clients I had in 2016 whose work I loved, but here are a few of the highlights that come to mind:

Pachyderme

From Argentina, Franco worked with my buddies at 31337 Records, producing a superb palette of ambient sounds, intricately organized into a beautiful microcosm.


Kike Mayor

Kike has been one of my most loyal clients this year, as we worked together to define his sound as something “fun and sexy,” as we both liked to call it. Kike’s style is hypnotic and catchy, and he always comes to me with projects I love.


Debbie Doe

Debbie had a breakthrough this year, as she managed to pull her very first project together and nail down a growing number of important gigs. This Lebanese-Montreal artist is not afraid of reaching into her Arabic influences to craft some exotic moods.


Ghini-B

Another very serious producer from Italy/France who booked me regularly to handle mixes and mastering for his music. He’s a nerd collector with a massive modular set-up, and he prefers focusing on designing quirky house instead of spending time on his computer.


Andrey Djackonda

From Moldova, Djackonda was a nice discovery for me this year. The guy makes really organic techno with dub influences. It’s been a headnodder for my mastering sessions. You know you have some groovy music when you start spending time shaping the track into these groove monsters.


Stereo_IMG

From Montreal, Stereo_IMG is a serious sound designer who builds weird devices to extract found sounds that are both beautiful and intriguing. Working with him in the studio turned some of his tunes into Audion-sounding gems.


Wiklow

A programmer and kind soul, Wiklow came to me for mentoring, and we spent the next 2 months discussing music philosophy and the mysteries of human behaviour. This fantastic trip of anything-but-music-related talks led him to create a beautiful EP that would make Jan Jelinek blush.


Ruslan

Ruslan runs a label in New York named Minim, and he has been one of the most supportive people for me this year. We worked together closely, talking almost daily, and it was wonderful to see him at MUTEK to dance to Barac’s set.


Dom Varela

A young producer from Laval who I’ve seen grow slowly, finally releasing his first track this year. It’s been a pleasure to coach him and work closely with him on his development.


Bmind

This was my most demanding mixdown this year, but man did it turn out well. Bmind is an artist I adore. His free-jazz perspective makes his music feel like a spiritual journey through an LSD trip. Nothing easy, but never flaky.


Mod303

Not to forget also 2 other clients who were super busy with me, Isaac and Luis.

These guys make albums in a matter of months, and each time, it’s spot on. Not only are they dedicated, but there’s a real depth to every song they make.

There are so many others I could mention, and I have to apologize if you’re disappointed that your name isn’t featured here. But the truth is that working with ALL of my clients has been amazing! 2016 has been an incredible year, and 2017 will be too, without a doubt.