Your First Ideas Often Feel More Alive
There’s something strange that happens when we start getting better at music production.
At first, our ideas often feel alive, surprising, and personal. They might not be perfectly mixed or technically refined, but they contain a certain energy that feels difficult to recreate later. Then, as we improve technically, our music sometimes becomes cleaner, more controlled, and more polished—but also more predictable.
Over the last month, I’ve been struck by an unusually high level of creative output, the complete opposite of how I ended the previous year. One thing became obvious very quickly: once I started making songs consistently, it became easier to make more. The more music I made, the more I practised certain skills, and the more those skills unlocked new ideas.
That momentum changed the way I approached creativity.
Instead of sitting on ideas and letting them float around unfinished for weeks, I started quickly turning almost every interesting idea into a temporary song skeleton. Not a finished song. Not even necessarily a “good” song. Just a rough structure that could preserve the original intention before it disappeared.
If you’re familiar with my workflow philosophy, you know I often separate music production into different stages: R&D, hooks, mockups, arrangement, and finalization. This new approach sits somewhere between the hook stage and the mockup stage. The goal is simple: when an idea appears, turn it into something tangible before your analytical brain starts rewriting it.
Because that’s the real problem.
When we leave an idea untouched for too long, we disconnect from the emotional state that created it.
Later, when we come back to it, we often reinterpret it through a different mood, different references, different technical habits, or a different level of energy. Sometimes that works out for the better, but many times the original spark gets lost somewhere in the process.
I realized this while working on two albums in parallel and rotating between roughly twenty songs. Every time I returned to certain tracks, I noticed myself removing elements that had initially worked very well. I wasn’t improving the song—I was unconsciously normalizing it.
This might explain why some bands lock themselves in a studio for a week or two while recording an album. They want to remain immersed in a specific emotional and creative context long enough to preserve the work’s identity.
The more disconnected we become from the original moment that generated an idea, the easier it becomes to reshape it into something more generic.
The Hidden Trap of Getting “Better”
Another thing I noticed while working on multiple projects simultaneously was that I sometimes started homogenizing tracks together. Instead of each song developing its own personality, they slowly drifted toward a shared middle ground.
I recently heard someone mention that many artists they loved had incredibly raw and original first releases, but after a few albums, they started sounding increasingly similar to everyone else.
I think there’s truth to that.
As producers improve technically, they often move closer to a shared language of production. They learn the same mixing techniques, the same arrangement structures, the same sound design trends, the same plugins, the same references, and eventually the same aesthetic expectations.
At some point, skill can unintentionally standardize creativity.
There’s also a social component to this.
People naturally want to belong to communities. Producers want their music to fit within the context of the scenes they admire. Over time, many artists unconsciously move toward what feels acceptable or recognizable inside their genre. The result is that music can become overly refined and lose some of its unpredictability.
This is why preserving the first emotional direction of an idea matters so much.
A rough idea still contains instinct. Once we over-edit it, we often replace instinct with justification.
What if your imperfection is what pleases the listener?
Here is a list of tips I compiled that have been very useful in the last few months.
Start Simple
One of the most important things I’ve learned recently is that simple ideas are often much more powerful than complex ones.
This sounds obvious, but many producers struggle with it.
Many beginners—and even experienced musicians—feel drawn to complexity because it can appear technically impressive. There’s often a subconscious belief that if something sounds intricate or difficult to reproduce, it must automatically be better.
But when you look at many forms of electronic music, especially minimal techno, house, ambient, and dub-oriented styles, some of the strongest tracks are built on incredibly simple foundations.
A hook can be one note. What makes that note memorable is not the pitch itself but the way it is distributed over time. Rhythm creates identity.
The placement of events creates movement. This is something I find fascinating about music in general: nothing exists in isolation.
If you hear a single kick drum by itself, you don’t know the tempo. You don’t know the groove. You don’t know the time signature. It’s only once a second event occurs that the brain starts to understand context.
Music is relational.
The same applies to sound design. A sound played alone doesn’t fully reveal what it is. The way it evolves, changes, responds, contrasts, and interacts with other sounds over time is what gives it meaning.
This is why static sound design often feels lifeless. A sound that evolves over time feels alive because the listener perceives transformation.
Starting with a simple musical foundation gives you room to create those transformations later.
You can always complexify a simple idea afterward by adding layers, movement, modulation, or contrast. But if the song’s core is unclear from the outset, adding more elements usually creates confusion rather than depth.
Preserve Ideas in MIDI First
One workflow decision that has helped me tremendously is keeping early ideas in MIDI form for as long as possible.
If you have a sequence made of one, two, or three notes, you suddenly gain incredible flexibility.
You can:
- test different synth presets,
- swap instruments,
- experiment with samplers,
- create call-and-response variations,
- duplicate the rhythm into new textures,
- generate alternative emotional directions.
The rhythm and movement remain intact while the sonic identity evolves.
This allows you to explore multiple versions of an idea very quickly without destroying its original structure. Many producers get stuck because they commit emotionally to the first sound they design, rather than to the musical behaviour beneath it.
Often, the rhythm is the real hook.
The sound source is simply one interpretation.
Use Time Instead of More Layers
One major shift in my creative workflow for producers has been focusing less on adding layers and more on introducing movement over time.
This is where Ableton’s comping feature completely changed my perspective. I ignored comping for years, but recently I realized it’s almost a superpower in sound-design-oriented workflows.
The process is simple.
Take a basic sound or simple MIDI sequence. Then record yourself manipulating parameters for several minutes:
- filter movement,
- resonance,
- envelope changes,
- delays,
- modulation depth,
- distortion,
- stereo width,
- texture changes.
Afterward, use comping to select the best moments. Instead of designing one perfect sound, you design a living stream of variations.
The interesting thing is that when the original idea is simple, almost all of the variations still work together. This creates continuity. It also creates the sensation that the sound is evolving naturally rather than being artificially replaced.
This is where MIDI controllers become incredibly important.
One of the major differences between beginners and experienced producers is that experienced producers often think in terms of gestures and movement. Veterans don’t just automate because it looks professional. They automate because movement creates life.
Even very subtle physical interventions can dramatically affect how a track feels emotionally.
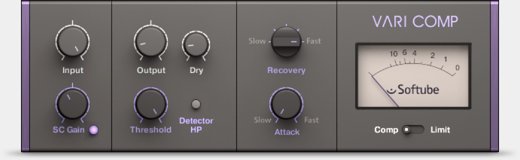
My recent addition of the Melbourne Instruments Roto-Control MIDI controller, which is permanently sitting on my desk, has been extremely productive for this exact reason. Because it’s always available, I constantly touch parameters while working.
Small changes become part of the composition itself.
Even tiny modulation movements can make a sound feel more human and less frozen in time.
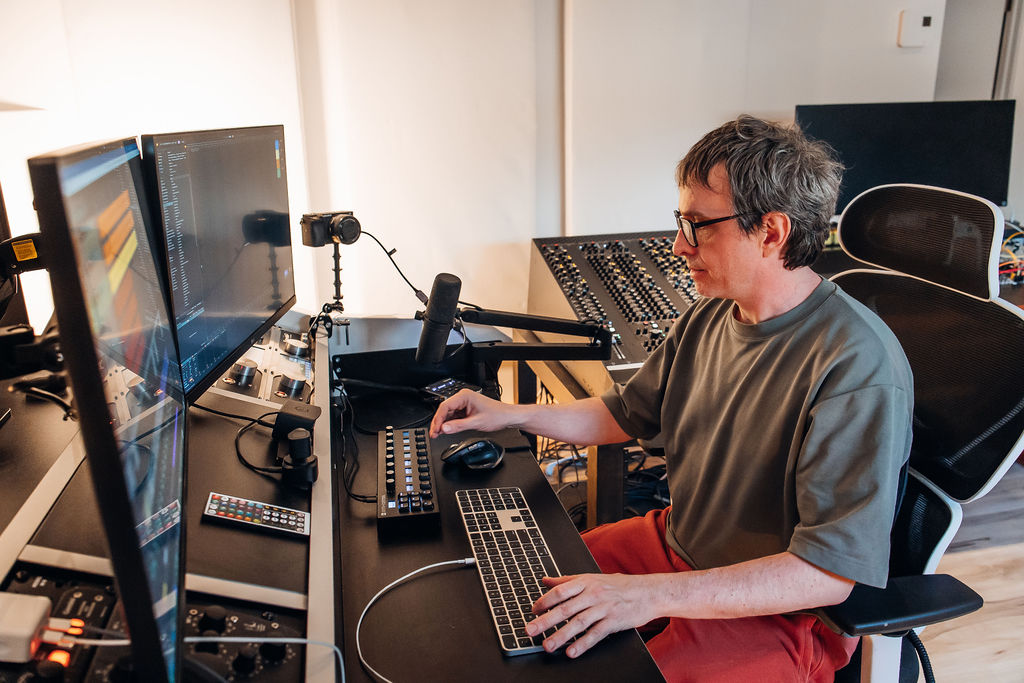
Pheek and the Roto-Control
Arrangement Is Often About Removal
One thing I constantly notice with inexperienced producers is that they tend to leave loops running continuously for the entire song.
The result is often a track that feels static, even when the sounds themselves are interesting.
One of the simplest yet most effective techniques is to stretch a loop across the entire arrangement first, then start removing pieces.
- Remove the hi-hats.
- Mute the bass.
- Create pauses.
- Insert silence.
Suddenly, the arrangement starts breathing. Rests and pauses create space for the listener to perceive contrast. Contrast is one of the most important principles in music.
A sound only feels loud because something quieter existed before it.
A stereo effect only feels wide because something narrower preceded it.
A drop only feels impactful because tension existed beforehand.
Too often producers keep adding layers because they feel something is missing, while in reality the track simply needs subtraction. Many great arrangements are not about adding more information.
They’re about controlling attention.
Consolidate and Move Forward
Another major issue in modern music production is the obsession with keeping every possibility open forever.
We leave plugins active.
We keep alternative processing chains.
We stack options in case we want to revisit them later.
&amp;amp;amp;amp;amp;amp;amp;amp;amp;amp;amp;amp;amp;amp;amp;amp;amp;amp;amp;amp;amp;amp;lt;blockquote&amp;gt;</p></p>
<p>&lt;p>The problem is that unlimited flexi
bility often creat
es creative paralysis.</p>
<s
trong>Once you’ve reached an interesting point with a sound, consolidate it.
Print it. Commit.
Move forward.
When you consolidate audio, something psychologically important happens. The sound stops being an infinite possibility and becomes a material object you can shape.
Instead of endlessly tweaking synth parameters, you begin editing the waveform itself:
- fades,
- cuts,
- reverses,
- timing shifts,
- repetition,
- stretching.
These simpler interventions are often more musical than endless technical refinement.
It also reduces distraction. The fewer open possibilities you have, the easier it becomes to focus on arrangement and direction.
Record Yourself Working in Real Time
One practice that has brought me a surprising amount of joy recently is recording myself actively working on a track while the song plays. Instead of searching for perfection through static editing, I simply hit record and interact with the song in real time.
- I tweak EQs.
- I automate filters.
- I change amplitudes.
- I move delays.
- I sculpt transitions live.
This introduces small imperfections and gestures that are difficult to recreate manually afterward.
More importantly, it creates continuous morphing.
The sound feels alive because it is constantly evolving.
This type of movement naturally creates ear candy.
Not because the sound itself is necessarily extraordinary, but because the listener perceives transformation over time.
Music is not static.
It’s the organization of change.
Relative Design
One concept I try to teach more advanced producers is what I call relative design.
Relative design is the understanding that sounds are perceived in relation to one another.
For example:
- mono versus stereo,
- quiet versus loud,
- dry versus wet,
- filtered versus bright,
- dense versus empty.
A common mistake in music production is applying an effect and leaving it active for the entire duration of the song. If something is wide from the very beginning and remains wide forever, the listener eventually normalizes that width.
The brain compresses perception.
But if a sound begins narrow and suddenly expands into stereo space, the listener perceives the transition itself. The effect becomes emotional because the ear experienced contrast. The same thing happens with dynamics.
Punch exists because silence or low amplitude existed beforehand.
Movement feels dramatic because stillness existed first. This means that when designing sounds, arrangements, or transitions, it’s often more effective to think in stages.
Instead of asking:
“How do I make this sound impressive?”
Ask:
“What does this sound evolve from?”
A sound rarely becomes powerful because of what it is alone. It becomes powerful because of what it becomes relative to.
There Are No Bad Ideas, Only Unsupported Ones
One story that stayed with me for years comes from Herbie Hancock,”jazz pianist”, talking about performing with “Miles Davis”:
During a live performance, Hancock thought he had played the wrong note. Instead of reacting negatively, Miles Davis responded to the note musically, transforming it into something that suddenly made sense in context.
That story perfectly represents how I think about creativity now. An idea is rarely bad on its own. What matters is the environment around it. I often watch videos of events where a DJ plays music that doesn’t make sense to me but aligns with everyone present.
This applies directly to sound design and arrangement. Sometimes a sound feels strange or awkward in isolation, but once you place it beside supporting elements, the entire idea suddenly becomes coherent.
Context creates meaning.
This is also why I stopped obsessing over whether presets are “acceptable” or not. After reading interviews from artists I admire—such as Four Tet, talking openly about using presets, I realized something important:
Most listeners don’t care where the sound came from.</p></blockquote&gt;
What matte
<p>rs is how you arrange it. How you sequence it. How you evolve it. How you contextualize it. A preset placed inside an emotionally compelling arrangement becomes your sound.</p>
<p>So when an interesting</em> idea appears, don’t waste energy questioning whether it’s valid. Build something with it. Turn it into a miniature song.
Explore where it wants to go.
Move Toward Flow Instead of Fighting Friction
One of the biggest sources of frustration in music production comes from trying to force sounds into becoming something they are not. When we imagine a song, we often project an idealized version of it far beyond our current technical capabilities.
This is normal. Imagination moves faster than skill.
But the danger is that the ego starts fighting reality. We tell ourselves the track needs to become “better,” even though the word itself is incredibly vague.
A song cannot objectively become better.
It can become:
- clearer,
- punchier,
- softer,
- stranger,
- more energetic,
- more emotional,
- more dynamic.
But none of those qualities automatically make it universally superior. Some listeners will love static music. Others will prefer hyperactive arrangements. Some people love rawness. Others prefer precision.
You cannot satisfy everyone.
The only thing you can really control is:
- your current skill set,
- your current taste,
- your current emotional direction,
- and your willingness to work with what naturally flows.
Sometimes the fastest path forward is simply accepting what the sound already wants to become. The moment we stop fighting friction and start collaborating with the material in front of us, creativity becomes much lighter.
And ironically, that’s often when music starts sounding more alive again.
Final Thoughts
I think one reason first ideas often feel more alive is that they haven’t yet been over-explained. They still contain instinct. They still contain uncertainty. They still contain emotional momentum.</p>
As producers, we often believe our role is to perfect ideas. But increasingly, I think our real role is to preserve an idea’s original energy long enough for it to fully emerge. Not every idea needs to become a masterpiece. Not every sound needs to be revolutionary.
Sometimes creativity is simply about recognizing that something small contains potential and moving quickly enough to protect that fragile initial spark before analysis slowly dissolves it. The more I work this way, the more I realize that music production is less about controlling sound and more about shaping movement.
You’re not just designing sounds. You’re designing evolution through time.
And sometimes the rough sketch contains more truth than the polished final version ever could.

 The first thing producers can do is listen to music before they make it. This might be a huge “duh” statement, but how many people actively listen to music? How many people come home, crack a beer, put on a record, and then just sit there, doing nothing else, except engaging with the music? 10%, maybe? However, it’s this 10% of people who have set themselves up for success if they are music writers themselves.


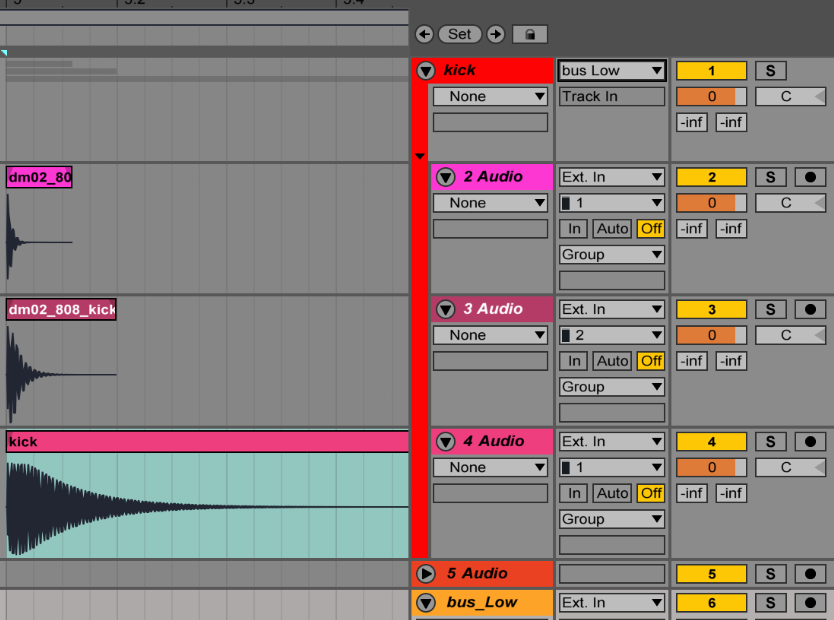 Visually it looks better and is easier to manage, and additionally you can also put effects on the group to glue all the sounds together – generally you’ll need a compressor and one or two EQs for a relatively uniform group. Once I’ve done that, I usually like to have an additional bus for all sounds (eg. groups) that will glue everything else together.
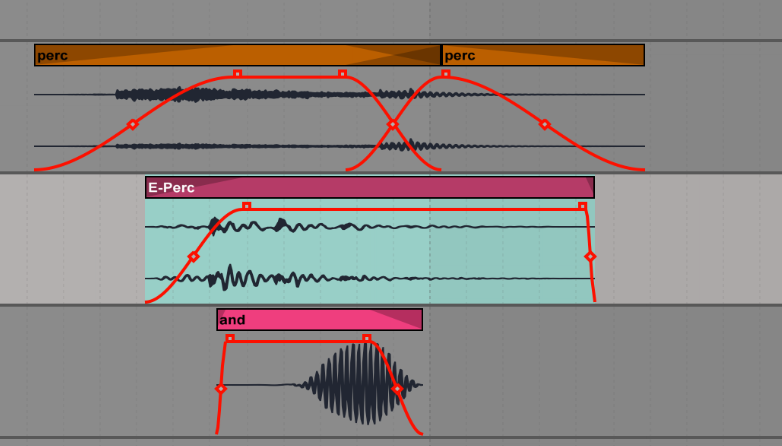 If you work in the arranger, you drop sounds in the channel and it’s an easy way to see the layers. I like turning off the grid to do this so it feels a bit more natural.