The benefits and risks of using a reference track when mixing
In the group I run on Facebook when we discuss using a reference track when mixing, I often ask people what sort of tracks they have been using as a reference—I ask so regularly that people find my predictability funny. There are so many reasons why I encourage people to use a reference track when mixing, but for me personally to give someone feedback, I find it critical that I provide commentary based on the artist’s views. In the early days of the Facebook group, someone posted a song and everyone was criticizing its kick, but after a bunch of people commented on it, we all realized that the song creator was trying to mimic the low end of a very lofi song where the kick was intentionally “ugly”. From the perspective of people who love highly-produced techno, this particular kick was “wrong”, but only from this point of view. There’s no one-size-fits-all kick.
I encourage people to be super careful with feedback they give to artists in the event one may not totally understand what that artist is trying to do. I’ve developed this habit as a mastering engineer—if you’re too technical and detached from what the person is actually trying to do, it will be hard to really achieve mastering results that will please them, while respecting the artistic direction he or she is trying to achieve.
Think about using a reference track in the same way as how a painter might draw someone—it would be easier for the painter if he/she had an image of the person to use as a reference. Of course, the painter could try to “freehand” the drawing from memory, but it would probably end up less accurate.
The main concerns people seem to have with respect to using a reference track is that it might be too much of an “influence” on what they’re working on, and that they’re trying to find their own original sound. Many people think using a reference track would sort of corrupt their vision.
The problem is, if you’re trying to “sound like no one”, you’ll get a lot of confusing feedback about your work because most people won’t understand it. People always have something already in mind when they listen to something new. They’ll compare and try to make sense of it, but if it’s totally unsettling, they might feel a bit lost. If you refer to something they know, then there’s link that can be made by the listener.
A reference track can only be used for certain portions of a song and not all of it, which to me is the reason why it can’t totally corrupt your vision. Plus, if you use the same reference a few times, you’ll introduce new habits into your workflow, and this will ensure that your tracks are on the right path.
How can a reference track benefit your mix?
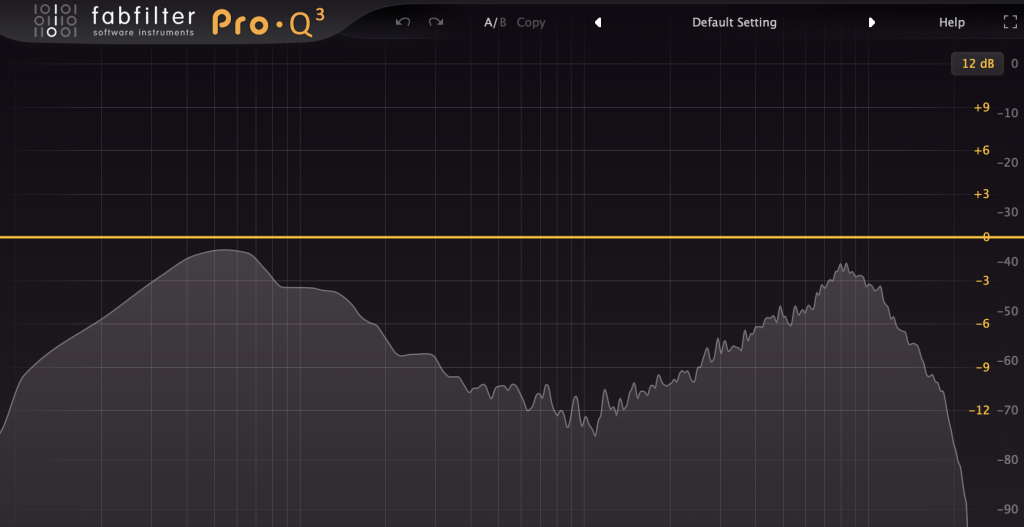
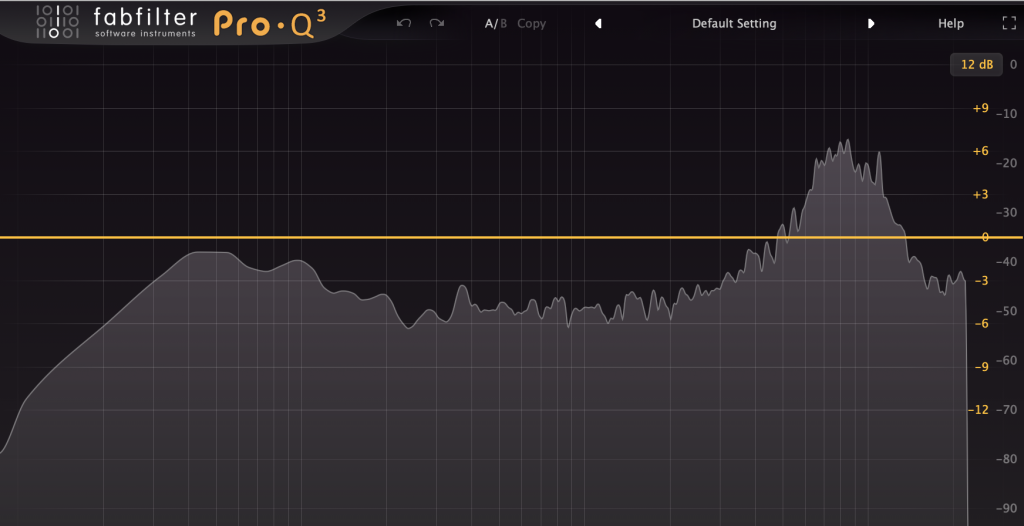
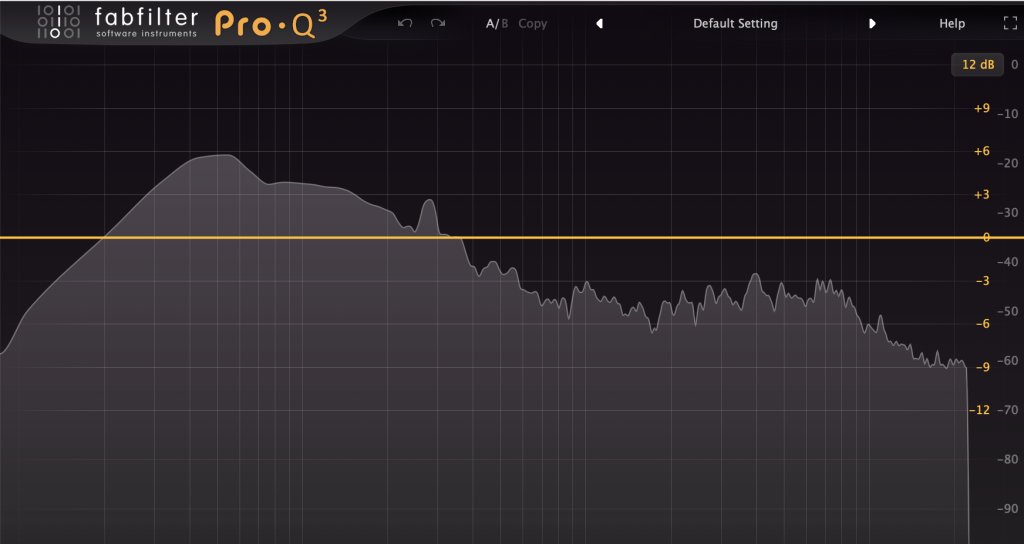
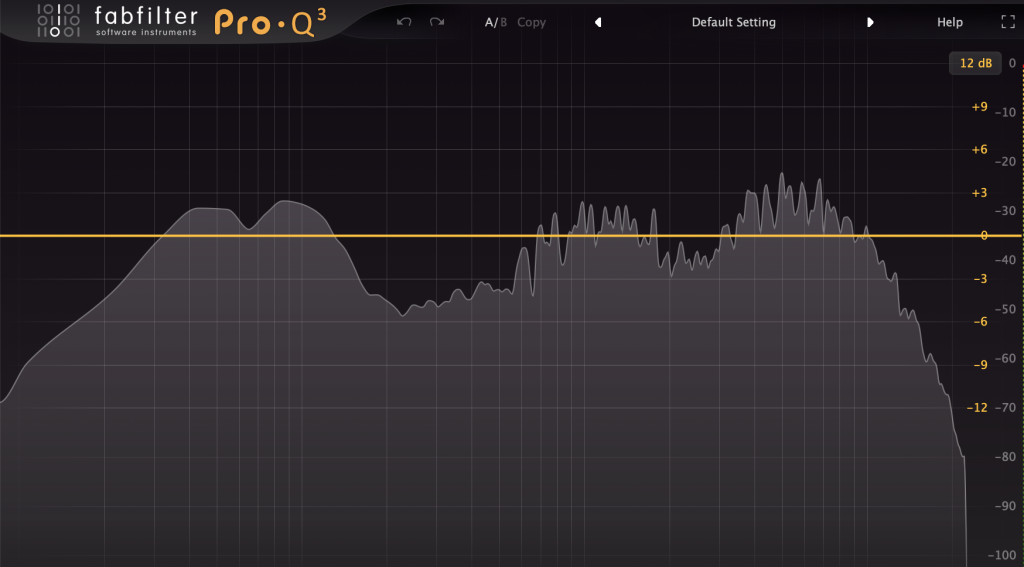
- Tone: This is mostly what I use references for, myself. The longer I work on a track, the more fatigued my ears get, and I lose sense of the lows and highs. If I can quickly A/B another track, I’ll know if I’m on the right path.
- Arrangements: If you know a track is really successful at, let’s say, creating a tension, or really nailing it with the timing of the drums in a timeline, you might want to study its structure to understand it.
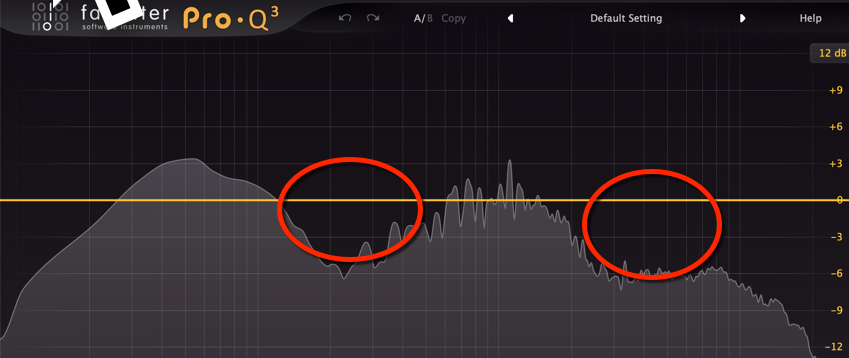
- Mix levels: Very useful if you want to know if one element of your sounds is loud enough in a mix, then you can see what kind of relation the reference has. People are often confused with the mids which is the part I always fix in clients’ works; I can fix it because I can check my references that have very clear, present mids. Mids are critical to have right on a big sound system.
- Loudness: You can also check if you’re matching the power of your reference—but keep in mind that your reference has probably already been mastered by someone with experience!
How can a reference track harm your mix?
Despite having many benefits, using a reference can have pitfalls as well. The most common error in using a reference track is using a song that’s actually poorly mixed or mastering and trying to emulate it. If your reference isn’t great from a production point of view, you risk messing up your whole perspective on music production and mixing up what’s “good” with what’s “bad”.
How should you find a good quality reference track?
If you’re in doubt, to me there are two main ways to find a reliable reference track:
- Ask a reliable source to validate something you’ve chosen, or to provide you with one that’s similar to your selection. The source can be someone in the industry, a record store owner, a DJ, a fellow producer, etc. Make sure your source is someone you trust.
- If you go out in a club and hear something that sounds really great, ask what it is. There are a lot of people who want to know what’s playing so if the DJ is unable to tell you, perhaps someone else can.
Once you have your reference track chosen, you can compare anything to it to see if it’s in the same “ballpark”. Try to get a 24-bit WAV or AIF version of the reference track. Once you have a high-quality version of the reference track, I recommend “audio jogging” everyday—listen to the reference on your sound system, not too loud but at a comfortable level, and then don’t change the volume for the whole duration of the session. Now your reference track has been set up as a guide for you to work from; cross-check your own project with the reference as you work!
SEE ALSO : How to balance a mix