Music Feedback: When to Take the Opinions of Others Seriously and When Not to Care

If you make music, you’ll get what I’m trying to explain here—the head space where you’re fully aware that it’s important to make music solely for yourself, but yet you really want to share it with the world, with other people who could potentially like it. If you love what you do, maybe someone out there also loves it, too?

Where should you draw the line between making music for others versus making it for yourself?

Honestly, it’s a tough question. The voice of reason in most people will answer it with something moralistic, like:

Making music for yourself is the way. Sharing is good, but don’t make a big deal out of what people say.

Unless you have a real mastery of your emotions, if you’re an artist, you will, at some point, want to share your work. If you share your work with “random” people, especially close friends or family, you’ll mostly get random feedback which can be confusing and hard to analyze constructively. Sharing your work is, at its most fundamental level, about seeking validation. Even old fart producers like me who have 20+ albums and have toured, still carry the need for validation. The difference I see between myself and younger artists, is that I carefully pick the people I share my music with—a way of knowing if you’re still relevant to people you trust. In past posts, I’ve explained how to network properly and how to build a circle of solid contacts.

A pattern I often see is artists having a very productive session, and the resulting track feels very emotionally powerful to them. Validation comes in when they seek to determine if the emotions in the session were valid, or if they were hyped over something bogus.

This sort of pattern results in an “they’re right, I’m wrong” thought process that causes cognitive dissonance. Let’s examine this pattern from a technical point of view:

  1. You make music absolutely for yourself, but this is artistic masturbation; it’s normal to want to connect with others to validate these feelings.
  2. The opposite is making music for a label, other artist, crowd, club, or festival, in which an artist is chasing other people’s opinions and lacks control over their own work—they usually end up frustrated.

If you ask someone for advice about music, sometimes people come at it from the problematic position of “I’m right, you’re wrong.” They’ll tell you what they think is good or not, based on their point of view. Sometimes people are not totally open to giving real feedback and will be biased. When most people are given the opportunity to criticize, they’ll find something wrong. It might not always be useful, but sometimes with music, particularly concerning technical aspects of production, there’s value in receiving good feedback.

When Should You Take Someone’s Feedback Seriously?

It’s up to you, but it’s heavily dependent on your ability and accuracy in evaluating your own work beforehand. Here are a few tips for evaluating your own work before seeking external feedback:

1. If your track creates emotion in you, never doubt it, even if it never reaches anyone. Not all tracks need to be released, heard publicly, or shared. You can make a song for yourself and perhaps a few friends—this is a totally valid way of making music. The “need” to release all your music is really a misconception that you’re entitled to be heard because you made a song. Honestly, you aren’t.

2. Listen to your song in different contexts to see what it feels like. For example, listen to it while commuting, in your living room, in your car, in front of a friend (in person!) or in the middle of your favourite playlist. This can reveal flaws in your work. If something feels off and you are limited technically, then you know that asking someone for feedback with a precise request should provide value to your work.

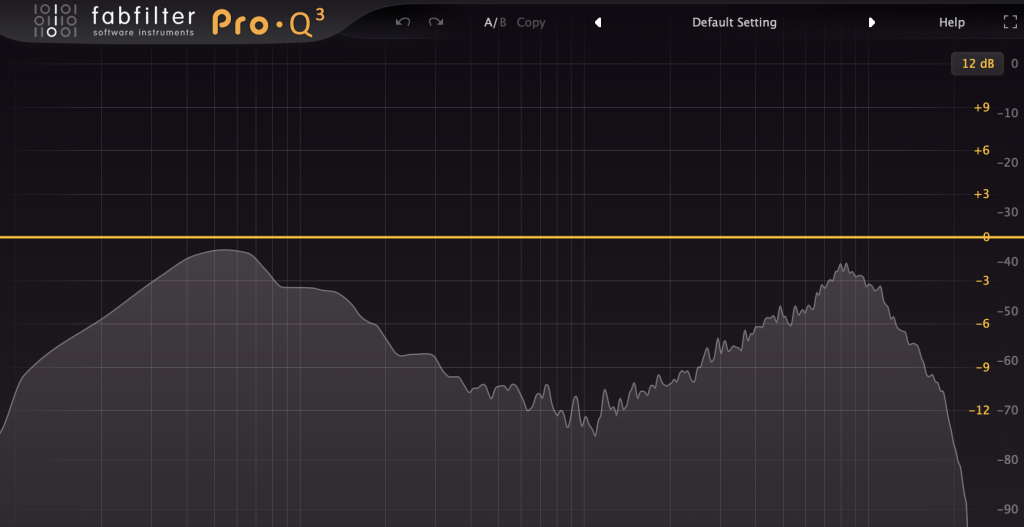
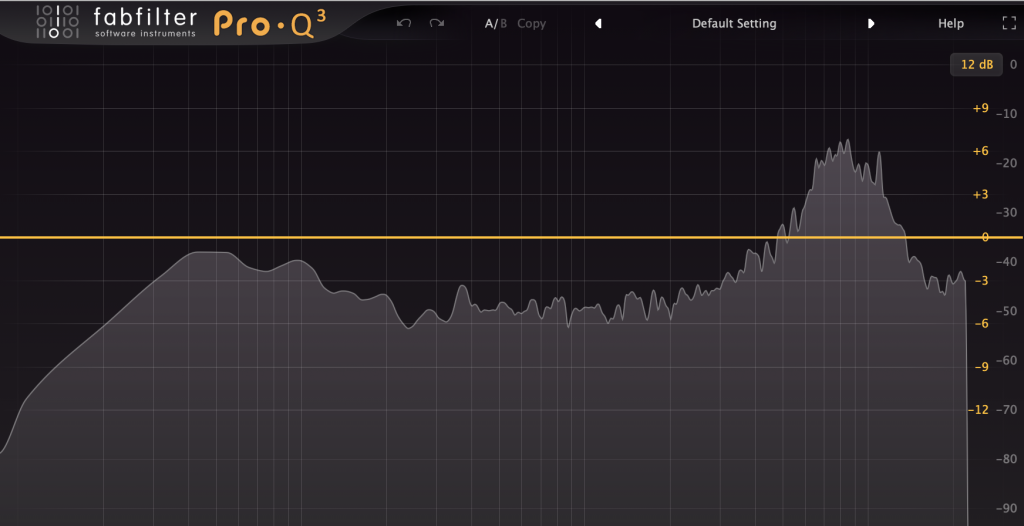
3. Use a reference tool such as Reference from Plugin Boutique which, if you compare your work with a song you like, you can easily see what is missing (tone or loudness). Fixing issues might be a roadblock for some artists, and that’s another reason it might be useful to get feedback.

Once you’ve done these three things, I’d upload a snippet to Soundcloud to get a reaction or share it privately with a few friends. I would never post music in forums without knowing what regular users are like in the first place. I also don’t share with close friends; they never get it and sometimes it can make the friendship awkward. I prefer having two circles of friends: music-related and non-music.

Never forget that it’s important to age a song for a few weeks or months, just like a wine, then come back to it afterwards—this trick reveals incredible details you can’t initially see or hear.

When is Feedback Disposable and Not Worth Taking Seriously?

  • When someone implies that you should change something in the arrangement or sound design based on their tastes.
  • When someone discusses some so-called “unwritten rules” about how music “should” be made (ex. you have to make all your sounds from scratch, you can’t use samples, etc).
  • When their technical feedback is questionable. For example, some people might comment on bass without having access to a sub.
  • When someone who lacks empathy can’t understand the vision of the track and tries instead to see it from their own point of view. For example, my ex never understood that music I made at home would translate differently in a club.
  • When someone tags your music with buzzwords. Sometimes people would listen to a song and say “oh, it’s chill” but not understanding that on a large system, it might groove.
  • When you receive comments such as “X is good” or “X is bad“. As if the person had the universal understanding of some permanent elements in music—such comments don’t mean anything at all. We all know that if person X finds it bad, person Y might think it’s genius.

I hope this helps you understand what type of feedback is worth taking seriously!

SEE ALSO : Common mindsets of musicians who have writer’s block and how to solve them

Changing Genres: Coming to Electronic Music from Other Genres

Since interest in electronic music really blossomed in terms of popularity, musicians from different spheres have all tried to capitalize on it. 20 years ago, big musicians in rock, pop, dabbled with it. We saw Madonna and some other bigger names venture into electronic sounds, but they sounded mostly like tourists in a country that they were visiting. With the recent victory of Billy Eillish at the Grammy’s for her album, not only it is mostly electronic, but it was also recorded in their modest home (precisely, in a bedroom) in Los Angeles. I’m currently involved in a few mixing engineer groups on Facebook, and while many were laughing at the album, some people took real interest in it—sometimes, less might be better, and you don’t need the latest toys to make something interesting.

Most newcomers to the scene, however, lack the knowledge of electronic music culture, and understanding of what electronic music is or sounds like. For people like me who have been listening to the genre for decades, when I hear someone with a rock background pick up synths and try to make techno, there’s something that always sounds slightly off: it doesn’t sound like what electronic is generally like, or it sounds something like rock, but not in a good way. In the 50s, people experimented with making classical music on synths—most of it was plainly horrible. Same goes for the early attempts of synth presets mimicking very colourful instruments like a trumpet. “Trumpet” presets make jazz musicians cringe, and with good reason.

Should an experienced musician restrain themselves from venturing into a new genre? Of course not. But knowing some tips to make the switch is probably the right course of action.

References and Getting to Know What Works

The biggest mistake I see from people who come to electronic music from a different scene, is not understanding who they are making music for. I can’t speak for how it works in the rock industry, but I think there are fewer fragmented areas of it than there are in electronic music. Electronic music has DJs, fans, labels, media, internet, etc., all with different sub-scenes. Knowing your specific audience can influence how you make music itself. For “musicians”, this is something many have a hard time getting their head around. For instance, if your track is made for DJs, you wouldn’t approach it the same way as if you make music for yourself, or for the general public.

“Why would I do it for DJs?”, a rocker once asked me.

Well, they expose your music to a public that might be interested to listen to it in a specific context. Your purpose is not the same as if you make music for, let’s say, home or even, after-parties.

“Oh, there are different types of DJs?”, he replied.

Yes indeed, I replied, and that’s another level of complexity in electronic music. You don’t make music for opening sets or after-parties, the way you would for peak time—and even for peak time, each genre has their own standards of what constitutes “peak music”. House, EDM (aka Vegas music), minimal, techno, etc., all have different styles. Even ambient and drone, have their own version of “peak time music”, which might sound bizarre if you’re not familiar with these genres, but go to an ambient or drone festival and you’ll know what I mean.

“But I just want to make cool music”, he then said.

Yeah, I know, I do too. But then again, if it’s for yourself and friends, you then know who you make it for and that’s very cool. If you’re aiming for a broader market and want to commercialize it, that approach probably won’t work well. Electronic music is a genre where you are free to do whatever you want and have unlimited resources to make many dream ideas come true, but the whole commercialization aspect of it is really messy, complicated, frustrating, paradoxical, and sometimes counter-productive. I’m aware this is the case in other genres as well, but the “successful” dance-oriented market is pretty tricky.

So what’s the real problem if you don’t follow a certain aesthetic?

Well, the most common scenario I see is enthusiastic people following their current tastes (often based on music that was cool 5-10 years ago) and without any self-criticism or feedback release music, and years later feel embarrassed about how off they sounded, or how badly it aged. Not a big problem, but it’s simple to not fall into this trap.

If you’re familiar with this blog, I frequently discuss the importance of references.

  • One thing that might surprise you is that I often recommend Spotify as an exploration tool. Let’s say you like the Chemical Brothers… Spotify can expose you to similar sounding artists. You can also see the latest releases by an artist and how he or she has developed. Personally, I love that.
  • Another thing I suggest is to spend some time listening to a lot of different artists. That also includes checking online magazines (I love XLR8R), get familiar with DJ charts, see what festivals book them or other artists you like, and get to know the other artists playing.
  • Going out to events is important, too. To hear music in context really gives huge insights to a musician. As an engineer and coach, I occasionally pop in to local events to see what’s happening.

Collaboration, Mentoring, and Networking

I think another very important thing to do when you venture into other genres is to quickly find someone of reference or reputation that you can trust. Develop a relationship where there’s no filter on your discussions or feedback—this can take quite a while to find or build.

Working with friends who have great taste or hiring professionals also, for the most part, provides you with some quality control.

  • Try to get to learn about plugins that are used on a daily basis by professionals.
  • Have some ideas of where to buy quality presets for certain soft-synths for the purpose of learning how some sounds are made.
  • Have a good idea of influential artists behind current trends. For every bigger, commercial trend, there’s a lesser-known artist who started a movement, an idea, or a musical direction that often “inspires” bigger names who commercialize it.
  • Get familiar with festivals that are fun and that could be good hubs for networking.
  • Build a network with media, promoters, and DJs. There are a lot of benefits and opportunities this type of network can produce.

However, when everything is said and done, collaboration is about making music, and getting to know the tips and tricks while networking. These are, in my opinion, some of the best things to know about if you aspire to make your way into a new genre!

SEE ALSO : Making and breaking genres in your music

Make Music Faster: Self-Imposed Limitations for Expanding Creativity

“I think we need to go backward now”, is what I said to a friend who was asking what was ahead for the year—referring to a view I had years back about recognizing when it’s time to go with the flow, and when it’s time to reverse or deflect it to move in another direction. I was thinking back to the mp3 revolution of 2001; geeks downloaded all the music they wanted thanks to Napster or other software. There was a continuous debate about music being copied and shared. Back then, it was mostly pop and commercial music taking the biggest hit from file-sharing. In underground culture, Netlabels became a mysterious movement, sharing music for free. Now free music is common, but back then it was really seen as a nonsense approach to a label, “backward thinking” even, and often talked down and ridiculed.

Back then, Dennis De Santis (who now works for Ableton) and I were approached to be part of a compilation for a German Netlabel called Thinner (which eventually became fairly well-known netlabel). Why did I do it? There were two main contributing factors:

  • I wasn’t putting releases out at that time, and I was a yes-man to whatever would come my way.
  • There was a huge new audience flow of people who wanted music for free…so why not just give it to them?

I decided to go with the flow. In doing this, you get pushed in a direction and accept that you might not control where you’ll end up. In my case, I’d say it only led me to great things—meeting people, getting gigs, and a lot of attention.

It was no surprise that when I started my own label, Archipel, in 2004, I kicked it off as a netlabel as well. But in 2006, I decided to go against the flow and do what many didn’t really approve of, which was sell music on Beatport. It was the beginning of digital music sales and many people thought it wouldn’t work, but it did really well.

My point is, there are times when it makes sense to keep going in a certain direction, and there are other times when changing directions is more sensible. Keeping this in mind, being flexible is something that can applied to many spheres, such as your music aesthetic, or even a song itself.

As I’ve mentioned, I recently joined Weeklybeats—a challenge to create one song per week, for the entire year, and I’ve experienced a great feeling of freedom. Normally, I impose a very rigorous workflow on myself when I make music, and often it can take me months to finish a song. Switching up my approach to a faster pace forced me to think less. Yes, there’s a risk of reduced quality with increased speed, but at the same time, with the experience I’ve gained over time, I know I can at least make sure that the production is solid.

I also realized that my number one distraction is that I’m constantly bombarded with new music tools promising tons of new features and spend a hell of a lot time going through them and waiting for a sale to buy them, but never really pushing the stuff I already own to its maximum potential. With this weekly challenge in mind, now that I have self-imposed limitations, I feel like I’ve exprienced a huge breakthrough.

Time

Deadlines make you creative and productive. A friend who is a father of two told me recently that he realized that he was creating his best ideas in moments where he’d squeeze a quick session of music, knowing that he’d be limited to maybe 10 minutes. So, let’s say he had to go to the grocery store; while people were getting ready, he’d open Ableton and would test a new macro he made, or would try to make temporary arrangements. The time-constraint made him more efficient than when he’d have a full evening to himself to make music, which often led to nothing interesting.

My theory is that with too much time, you can spoil what you make. This is why I think 5 hours of studio time spent on one song is not the best idea—a thought I have proven to be correct for myself while taking part in this weekly challenge. Now, I take a few hours to create an idea, save it, and later will expand it—the next day I add a layer, and so on. I’m limited in time and I do multiple things at once, but I’ll squeeze in 20 minutes here, 40 minutes there, then 10 minutes before going to bed.

Try this fun Max patch that will time your work and give you an idea of how much time you’ve spent on things.

Tip: Give yourself a due-date for wrapping up a song and accepting that it is what it is, once you hit it. It’s more important to move on than to try to reach some illusory perfection. Use your agenda alarm as a reminder.

I decide the length of my song before trying to speed things up. This is a tip discussed many times in the blog but I will insist that doing this is a strong limitation that clarifies a lot of things.

Tools

If you’re a reader of this blog, you’ll remember that for one song I encourage you to focus on one main idea supported by two minor ideas. It’s really easy to get lost trying to find an idea to start with. My take is to try to use what comes out fast.

Synths: Know what you have—cycle through synths that came with your DAW, and some that didn’t. I encourage people to get at least one synth that is an analog emulation of a classic model (Arturia does a great job at these) and another that is focused on a wide range of sound design options (I’m a big fan of Rob Papen and encourage you to test his products).

Samplers: Honestly, Ableton Live’s Sampler does the job for me. There are a few more alternatives out there but in the end, they all do a similar job except some have more bells and whistles. I always come back to the stock sampler because it’s simple and extremely versatile.

Once you have decided if you’ll generate a sound or use a sample, it’s time to play with it. Mapping a MIDI controller is very useful for playing different notes. Sometimes I see people in front of their keyboard and they are not sure what to do. This might sound obvious but when jamming, I test:

  • different pitches by playing higher and lower notes.
  • harder or softer hits to see how the velocity influences things.
  • listening to the sound a different volume. Sometimes a sound at very low volume is much more interesting than loud.
  • alternating between short and long notes. Depending on your preset, it can play differently.
  • playing fast and slow notes to see how they feel.

Keep in mind that you can make a song out of any sound if you how to use it. The reason why we discard sounds is because we’re after something else. We’re not paying attention to the sound and its potential. Limiting yourself of only one tool per song eliminates a lot of exploration time. It also forces you to do something with what you have.

Same goes for reverb, compression and EQ. I’ll only use one or two, max. When I’m in mix mode, I usually explore different compressors.

Composition

If you use a modular, or hardware, you have your gear in front of you and you’ll just start working with what you have. This limitation forces you to be creative. But on a computer, you’ll have many ways to make music.

Templates. To speed up my work, I created a main template that I use to create macros and techniques, while recording everything. I mostly jam and will not spend too much time going into detail—raw on purpose. When I have something potentially interesting, I make a channel called “ideas” and put my clips in it. Later, when I start working on a song, from the left side browser, I can open the template and import the “ideas” channel in my new song to select from it. Have multiple templates that you import your sounds to, and in that other template, create sound modifiers. For instance, I have a dub template filled with tons of reverb modulators and delays. I can drop anything through it and something dubby will emerge.

Jam. I try to invite people to jam their song as much as possible. Whenever I have a loop as a main idea, I’ll automatically start recording and will mute it, play it, change volume and try different combinations. This lets me explore ideas I couldn’t discover if I just mouse-edit the clips in arrangements.

Sound

For the longest time, we wanted to have access to as many samples as possible, but now that we have them, we’re completely lost. Try to decide which snare or clap you want. Swapping out a sound isn’t super easy but I found this amazing step sequencer that fixed this problem. It’s made by XLN and it’s called XO.

If you want to make music quickly, you need to find your favourite sounds and create drum kits. Import them whenever you start a new song. Back in the day you’d have a 909 or a 808, and that would be your drum kit, end of story. So create a good main kit, then add a few different ones, and that’s it.

And for crying out loud, stop thinking that you need to do everything from scratch, all the time! Yes, it’s cool, but it slows you down a lot.

I mentioned that I’d “go backwards” this year. What I meant by that is that all my habits have to be upgraded or changed. Habits keep me safe and comfortable, while feeling uneasy forces me to be creative and think outside-the-box. Join me in this approach; I’m sure there’s magic waiting for you too!

SEE ALSO : Reverb Tips to Boost Your Creativity

When life is hard, make more music

If you’ve been following the news since the beginning of 2020—what’s happening in Australia (the fires and political situation), Iran and USA, etc.—it’s clear that our lives are all effected by things we feel like we have very little control over. For many, global events and news may increase feelings of helplessness, anxiety, or frustration.

Feeling a lack of control is not alien to musicians, who constantly deal with the feeling of not being able to control their path or destination. Notable situations are, for instance, not knowing if a label liked your demo, not knowing sales figures of a release, waiting for news from a promoter that booked you, not knowing if people are really enjoying your music, not knowing how to really have the mix you want, etc.

Not knowing” becomes an uncertainty that musicians face daily, and it can haunt their thoughts. Some people also feel like the world is spinning out of control, so what, exactly, can we do about it?

For those of you who are musicians and going through a tough time, once piece of advice I can give you is make more music. To people who complain that they don’t have time, I say, find and make time for it as if your life depends on it. I know this sounds like an exaggeration, but I’d like to explain you why, in my case, it really, really helped, and I wouldn’t be exaggerating in saying it almost saved my life. As a musician or creative person, making time for making music is incredibly important.

Grieving, mourning

In a span of 3 years, I lost both my parents. My father passed away first in 2016—a huge shock as he was very healthy. I was left completely destabilized and felt a deep void which I couldn’t see the end of. The only thing that was really helping was to listen to ambient music when I’d be home. I would play music by William Basinski, which is lofi and loopy as hell, but very comforting in a way. In 1998, just before I decided to make music as Pheek, I had a rough separation from my girlfriend at the time and I was basically invalid, at home, not doing anything but listening to the same CD over and over. Music was the only thing that made sense at that moment, and made my path through life seem less negative. Listening to familiar music was a need for me, and my brain demanded that I listen to a specific sound. Nowadays, with the power and reach of what Spotify can do (or even YouTube), you can get suggestions based on what you listen to, and while being soothed, you also discover similar music. There’s an endless amount of music, and as a musician, you have the power to add to it, and to be inspired by it.

That break-up and these intense listening days led me to want to make my own, healing music. Plastikman’s music led to the creation of my Pheek moniker. The loss of my father caused me to make ambient music for 8 months, mostly creating soothing loops that I would listen while commuting or at home. What’s the use of making music if you don’t do it for yourself first?

I find that this is something people I work with sometimes seem to miss. It becomes more of a dispensable thing—the focus becomes where your song will end up instead of making music for oneself. I don’t mean to be judgemental, but this is something I often see.

Now, when it comes to immersing yourself in music creation and dedicating time to spend on it, it gives your brain something to focus on. To combat my own fears about climate uncertainty, I decided to register to this website called Weeklybeats, where artists are asked to make one song per week, for the entire year. I feel that I need to completely push myself to do more music for myself. I’ve been at the service of others for the last year, but recently I felt like my music was too low of a priority in my life and that my skills as a producer had suffered.

When the brain is on a mission, it will focus on resolving problems, being creative in new ideas, and finding inspiration everywhere. If you can swap the hopelessness with a creative flow, even if it doesn’t bring any solution to the world’s problems, at least you’re not being a problem yourself: you are making music and music brings people together.

Making time for making music

“I don’t have time” is the number one excuse I hear when I talk about making more music. I make it myself regularly, and also suffer also from the “I don’t know how I’ll do that” excuse. You get a better sense of free time when you become a parent. When you have a child, all your time and energy is focused on the family and you’ll forget about yourself and your own needs. A 5-minute moment of free time can feel like gold. I felt a shift in my music production when I had my son in 2010. I couldn’t just wake up and make music anymore, there were other responsibilities to manage, and everything felt out of control. I managed to use every 10-minute moment I could find to have some work done on music projects.

How did I do it while raising a child? I’m not totally sure, but I can recommend some ways to dedicate more time to making music in your own life that helped me:

  1. Move a “lighter” setup of your studio closer to your routine. This one might be difficult to figure out, but 100% of the people I talked into doing this came back to me with positive feedback. Most of the time, people have their studio in a far-off portion of their life. That means, studio either out of their apartment or in a room that is in the back of it. It’s slightly disconnected physically from you and it won’t have a place in your life, apart from being a image in your mind. I often encourage people to bring a simpler studio in the living room, kitchen, or the place they hang out the most. I also suggest to leaving your computer or gear on so that you can, without any delay, just pass by and play with music. You can leave a loop playing while cooking/cleaning. Having music as a physically proximal part of your life is a huge eye-opener for new methods of production.
  2. Go mobile. This might sound a bit weird, but making a bit of music on the go is quite fun. Don’t forget that a lot of people use Airpods to listen to music or will listen to it while commuting. I’m not saying that you’ll make a masterpiece this way, but if you can start a few ideas on your way to school or work, then you have something that keeps you busy and creative. I would also recommend to record some moments of your life. We see a lot of pictures on social networks, but not enough audio; recording moments and listening to them later is a surreal experience, plus you can use parts of those for songs, too. There’s nothing more surprising than adding a bit of random conversation into a song.
  3. Don’t wait on perfect conditions to work. The number one procrastination excuse that comes up for a lot of people is that they need certain “acceptable” conditions to make music. It can be with regards to the setup they have, missing gear, missing software, or time of day. Some people believe they can only make music at a specific moment of the day. If you are giving power to these conditions, you are not in control of your creativity and believe that external forces influence you. Sorry, but not sorry, this is false. You, and only you, can make it happen, and it starts by sitting down and just doing it. If it feels overwhelming, then commit to 5 minutes of music and see where that leads you.
  4. Commit. This is why I decided to take on the challenge of doing 1 track a week for 2020. Instead of making an album this year, I’ll make tons of music, on a regular basis. You can commit in many other ways. It can be by partnering with friends to swap music, or making music for local DJs or for your Bandcamp.
  5. Let yourself and your process be free-form. The biggest enemy of creativity is a mold or formula, and if you always follow the same patterns, you will forget that music can even be a simple few notes repeated. Try to listen to 60s-70s neo-classical, minimalist music to redefine how you perceive what you do. Let yourself explore random ideas. A song can be a simple idea and you don’t always need to make a template or a track. It can be something imperfect, recorded out of the blue. There are no rules, be free!

SEE ALSO : Music Making Is Problem Solving

My Music Production Tips and Tools for 2020

As 2019 comes to an end, I’d like to discuss some of the most important things that went on, things I’ve talked about the most, plugins I loved, topics discussed in coaching, and so on.

Productivity and Writer’s Block

I was pretty busy in the first half of the year. I released my 22nd album and two EPs. While these achievements look great on paper, I can tell you that it was probably one of my least productive years of the last decade. I had a writer’s block (on-and-off) since May, and was unable to really finish a song, so I mainly focused on working on collaborations or engineering. Being hit by writer’s block at this point of my life was unusual, but reminds me that no one is really immune to it.

Signs of Writer’s Block:

  • Everything you do feels or sounds like crap or is uninspiring.
  • Other people’s music is not really hitting the spot either or feels old.
  • Being unable to make music for more than 20-30 minutes. A feeling of discouragement comes in really fast.
  • Mostly unable to turn a loop into a song.

If you’ve been making music for more than ten years, the signs are slightly different:

  • Feeling like you’re repeating yourself over and over.
  • Not feeling satisfied with the techniques or gear you have.
  • Unable to finish music in general or not able to start.
  • Mostly struggling to polish existing songs.

My solutions to resolve writer’s block are not necessarily going to work for everyone, as there’s no cure-all. Everything passes at some point, but you can’t resolve writer’s block without going through it—you can’t get around it.

Suggestions for Resolving Writer’s Block

  • Completely change how you work by trying a new DAW.
  • Test tons of presets from your synths and learn how they’re programmed.
  • Learn about modular synthesis.
  • Try online sound banks such as Archive.org, freesound.org, or even YouTube’s obscure archives.

But more importantly, figure out what the block is in your writer’s block. Is it linked towards your expectations? In my case, it’s simply a question of finding the next concept to build an album upon. The way I discover concepts is by trying to reverse-engineer sound design. The quest to make something similar with the use of different tools to shape the sound is more important than the result itself. I see many people getting writer’s block from trying to identically replicate a sound they want and discarding other techniques.

The difficulty in replicating a technique comes from the “early beginnings of a new producer“, in which someone starts on the wrong foot. I’m always happy to have someone who wants to start producing come to me to make sure he/she will start off well.

How and Where to Start Producing

In 2019, new producers have infinite access to information and tools. Too much information means a few things:

  • Giving you the wrong first impression that everything is easy and doable.
  • Misleading you into investing into things sold as being essential, while they’re not.
  • Having so many choices makes the task of picking one overwhelming. If you have access to all the sounds you could ever dream of, where would you start?

Counter-Productive Tips New Producers are Often Told

  • If you work hard enough, you can learn anything.
  • You can learn and do everything yourself.
  • Not watching tutorials or reading articles is better than education because you learn as you go.
  • Make all your sounds by yourself so you can be original. Hello, down the rabbit hole.

I see people coming into production with the wrong intentions/goals. Of course, if you come with the idea that: a. things are easy and that b. you can learn everything yourself, people set unrealistic goals for themselves before they’ve ever created a loop.

In the last five years, I have been frequently reminded of a client who once came to me with an artist page on Soundcloud and Facebook with thousands of followers, a logo, professional photos, etc., but not a single minute of experience in music production. He had to make some music that could match the image he had been selling, and the first step felt huge.

The other side to early production is the artist who finishes a first song quickly and gets signed. With no experience, keeping up the pace of releasing is difficult, and the quick rise can be a situation that might be difficult to handle.

My Suggestions for People Who Want to Start Producing

  • Listen to a lot of music when you have the time, and attend shows. This is super important for multiple reasons: you’ll learn the relationship between what you hear on your headphones vs. a venue. This is important to develop your mixing skills—learning how people react to sounds and how artists perform music in a live context. This is valuable information for music-making.
  • Try to befriend people who make music as well, a mix of newcomers and older producers. This is super important for building a network of contacts to ask questions, swap music with, share gear, get a bunch of info that you can’t find yourself, and also to break-up periods of isolation.
  • Ask as many questions as you have. No shame, just ask. Ask a lot of how do you do this or that? What is the name of that sound? What effect can create that impression?
  • Have studio jams. This is the best way to learn. You’ll learn so much because you’ll run into so many problems that you’ll have to troubleshoot them, and that’s useful. Jamming also puts music-making into a context that is impossible to replicate—alone in a studio.
  • Try to make loops everyday. You can make them all into one project file or start a new one each time. It’s important to make many because it’s good to first practice how to start making a loop. If you make a lot, you’ll get more efficient, develop tricks, and get faster at finding your way through a new tool.
  • It’s more efficient to do 10-20 minutes everyday than a five-hour session on a weekend. The optimal focus time for your brain is around 30 minutes, so you get the best of yourself. Working for five hours isn’t recommended at all: you’ll feel like you did a lot but after that time, your ears can’t really judge what you’re doing. You can do five hours in a day, but on multiple tracks. I just feel that it’s not the best of yourself that will come out of long sessions on a single project, but you’ll learn.
  • When you can start a loop in 10 minutes and feel great about it, then you’ve leveled up and you can now go back to all the loops you made and practice turning them into a song. Next level comes when you can finish them in a breeze.
  • One song, one idea. If you make a decent loop, it’s probably the middle part of your song. How many layers do you have? What is the main idea? Can you, or a friend, sing that idea?
  • Don’t make a big deal about not finishing songs. It will come naturally if you take things one step at a time.
  • Forget releasing your music or getting signed by a label. If you focus on that, you’re just distracted from doing what you have to do which is to have skills to make music like you want.

Common Issues Other Than Writer’s Block

People often share other struggles in music-making with me like:

  1. A loop or idea feels boring or repetitive at some point in the song. First, don’t reveal your main idea too quickly. Second, create multiple variations of that loop (ex. changing the timing or adding effects). Third, add modulation to the sounds so they’re constantly changing.
  2. A song feels like something is missing. This might be because you’ve heard it too many times. Try leaving it alone for a month. Otherwise, here’s the a quick checklist: percussion, bass, pattern or melody, background, and a supporting idea. If you have all those, you should be more than okay. Otherwise, try to compare your song to a reference, concentrate on all sounds and see if you have about the same number.
  3. A track feels empty compared to references. Often resolved by creating a noise-floor. Try a reverb or a hiss at low level.
  4. Sounds never feel right. You might have bad samples. If you are convinced you should do everything yourself, you’ll indeed sound off, for a while. Try buying and using pre-made sounds. If you can’t make them, find some, and learn how to make killer loops and songs. As you go, you’ll eventually train your ear on how these sounds are made and will be able to make them. Honestly, even after 20 years, there are plenty of sounds I’m slightly not sure how to make even though I know, in theory, how to… it’s harder than it seems!
  5. Creating original ideas and not cheesy ones. If you listen to a lot of music, this will train your ear. If you listen to a lot of music before making music, it will put you in a mood. If you use a reference track, or even try to compose music over it, it can greatly help with this issue.

Essential Music Production Tools From 2019

EQ

Even though it was released in 2018, Fabfilter’s Pro-Q3 has won many prizes this year and has gained prominence with many major engineers. I’ve been watching a lot of tutorials from Mixing With The Masters, and Pro-Q3 is often the EQ of choice. You can use multiple instances to see how each channels are interacting between one-another, do some side-chaining, corrections, and shelving. You can turn any points into a dynamic filter too, which is very useful. If you have the budget, try to get an analog inspired EQ such as the PSP E27. These types of EQs aren’t parametric and can add a musical colour.

Compression

The compressor I loved the most this year was the Avalon from Universal Audio. So badass, so powerful, so useful…no need to say more. If you don’t have a UAD, I always turn to PSP Vintagewarmer 2. Not only does it compress well, it adds warmth—people want both.

The Do-It-All Utility of the Year

No doubts, it comes to Shaperbox 2. It is perfect for resolving many, many issues like modulation, side-chaining, movement, variations, creative ideas on the fly…it’s so good that I blindly bought it when I received it in my newsletter from CurveGuys.

Reverb

If there’s one effect to have on top of your stock plugins is a good reverb. There are many out there such as this gorgeous reverb by Fabfilter but I suggest the Convolution by Melda—it’s fantastic and will be useful for years.

Quote of the Year

We make music to come together, and yet spend so much time alone. Reach out to others, create new concepts and see how viewing music as something fun will build things organically.

SEE ALSO : Design Thinking for Music Production

The acoustic-electronic combo

In the last 5 years, I’ve been seeing more and more projects that combine the use of acoustic sounds, samples, and recordings with synthetic, analog sounds. What’s interesting is that in the 90s, this combo wasn’t very popular, and in the eyes of many purists it was a huge no-no. The benefits of an acoustic-analog recording combination is what I’d like to discuss in this post.

There are a huge number of amazing musicians we could point to as being good references of this combination. For instance, in 2011, ECM asked Ricardo Villalobos to remix some songs from their catalog.

I remember that Ric had been playing many tracks from the jazz-influenced label mostly because he loves to create these epic moments of weirdness, where he’s play something totally unexpected in the middle of his sets. Sometimes even in a peak moment where most people would be expecting a bomb song, he’d drop some weird jazz music and layer it with some of his own techno songs he recorded in his studio, mostly from his modular. Seeing him play some of that during a few events circa 2005-2009, I saw how the acoustic-electronic combo always brought some magic into a very electronic set, but you’d have to be happy. I remember some people being weirded out by it but that, as he’d say, is not his problem.

In the 90s, this combination wasn’t always welcomed, mostly because people were really wanting to dive deep into pure electronic music, as in, if it was techno, it had to be techno and there was no room for anything that wasn’t on that agenda. I’m sorry to say that I was one of those guys as well! Especially when I entered my minimal techno era around 1996, I wanted the purest electronic aesthetic and anything acoustic would make me cringe, especially guitars.

I find that ever since Ric explored the ECM catalog, it really opened a lot of doors for people to combine the two worlds to unite them. One person that jumps to my mind as one of the artists that explored that the most is certainly Petre Inspirescu, who was really known for bringing classical vibes to techno—in his mix for Fabric or in his work with the Pi Ensemble. It’s important to note that it was an exploration, yes, but it also worked really, really well. Sometimes people explore something and it doesn’t really work, but Petre, in my humble opinion, brought it to a more refined result than what Villalobos did.

So, what should we take from this history exactly? How can one get into the acoustic-electronic aesthetic and make it work well?

Reverb and Room Acoustics

It’s crazy how a good reverb can bring life to anything, and since acoustic instruments are recorded in a room, organic reverb added to a sound brings a whole new world to it. The more realistic the reverb, the more warmth it can bring [to a mix]. This is what influenced me the most to start my own reverb collection, and my lust for finding the most realistic reverb. I did many tests with mastering, asking artists who have great reverb in their productions what can make a difference.

  • Convolution: If you can, always use the convolution reverb by max for live. One thing I noticed about stock plugins is the grain that comes out weird during mastering; this is never the case for convolution. If you’re not familiar with what convolution means, it’s basically taking the “image” of a place’s reverb and applying it as a preset for your plugin. You can then have special places such as a specific studio, concert room or even, a restaurant. It’s used in movies for creating proper atmospheres but it does such a great job on percussion. One of my favourite convolution reverb plugins is the one by Melda called mConvolutionMB—it’s multi-band, giving you a lot of options for creating really special spaces. You can also browse the internet in search of free impulse responses that you can load in your plugin. I also encourage you to randomly put sounds in it to get the reverb that is used in the sample to apply it to your song so you get a feeling that it’s all part of the same place.
  • Record your own: I know some people who buy pieces of drum kits separately to have the real thing then can play with. They’ll then record themselves playing percussion over their song. You’d be surprised about even with a cheap microphone, you can create something pretty interesting to layer your sounds with. It will catch the reverb of your place which is also unique. Snares, hats, cymbals are cheaper to buy than you think, and having them physically with you is pretty fun too.
  • Binaural recording: You can buy a binaural microphone that allows you to record sounds based upon your head, which is ideal to create stereo impression on the listener who uses headphones. If you record percussion at your ear level, it will give the listener the idea that the percussion is right in front of you. It really creates a special aesthetic for whatever you record and also some stereo placement that is unique. There are all kinds of tricks you can do with recording random things. Since it’s very precise for stereo, some people use frequency modulation using binaural technique to induce the brain in different states of mind like relaxation. I won’t get into that but there’s plenty to read on the topic if you’re curious.
  • Hardware reverb: This is hard to beat. If you can invest into a hardware reverb unit such as a pedal or a rackmount effect, you’ll get some really next level results. Something like an old DP4 by Ensoniq or Alesis, Lexicon ones can be a dramatic improvement. You can also look into a multi-effect pedal like the one by Big Sky.

Preamps and Other Tools

While the idea of acoustic layered over analog is magical, you’ll have to agree that the highest quality recordings will make a huge difference. This is why when you look for quality samples, you’ll look for the highest sample rate possible and something like 192khz will be the holy grail. This means you can re-pitch it with the least compromise, and you’ll get a lot of what we call the air-factor, where the complexity of the high end will be crystal clear.

Something else people overlook, especially when it comes to samples that were recorded, is the use of preamps. I’ve been shying away from this topic for years until I really saw how using them can completely change the quality of your sound, adding not only beefiness but also, a special texture, depending of the preamp you’re using. Ones by Neve will sound different than API, for instance, and using them on certain things will change the character of a sound. Plugins that emulate them are pretty solid at it. I tested all of the preamps this year, from Universal Audio, and found that the ones by Neve are the ones that feel the suitable for the music I want to do. I also saw a considerable amount of enthusiasm from clients when I used them on their projects. So, recording your own, even with a cheap microphone, if you use some nice preamp, you’ll get something pretty solid out of it. Cheap microphone can even be a source of coloration for your samples but nowadays you can find really nice, affordable microphones so it might be worth investing a bit more so you get something useful for years ahead.

Virtual drummers are also something you can look into. There are many out there but Slate Digital makes really high quality program that can help you have highly realistic percussion. Otherwise, you can look at Addictive Drummer that has a range of different drum kits to get sounds from. It’s very realistic as well and layering it over a rigid drum machine sequence can provide a lot of depth!

SEE ALSO : Integrating a modular setup with your DAW

Making Digital Synths Sound Analog

In exploring online electronic music production groups and forums, you’ll see a lot of hate around the use of presets. Some people think it’s a lazy way to get things done, and others that it’s just less creative and adds to the pool of music that all sounds the same. I have no shame saying that I myself use presets. I use presets to help myself understand concepts, how my tools work, and to give myself ideas that are outside of my normal routine. However, I don’t use presets “as-is”; generally—at the very least—I’ll run the sounds through a hurricane of colouring tools. I’m mostly drawn to very, very bizarre sounds that presets are usually not made for, except for some made by Richard Devine (but he usually goes too far).

Personally, my biggest pet-peeve with presets comes from cold-feeling digital synths or pads—they sound like Kraft Dinner served cold with canned peas; plain and horrible. Not only do I dislike these sounds themselves, but I can’t get over the fact that very simple things could have been done to enhance them, which is why I am writing this post.

Why Digital Presets Sound Cold and Bland

Analog equipment involves slight, microscopic, ever-changing modulations. Digital plugins and presets do not have these variations—they operate in a linear way. Think of an analog watch—the hands slide from one number to another without pause. A digital watch jumps sharply from one number to another without anything in the middle. This is the simplest analogy I can think of to help you understand why digital synths often sound surgical and cold, and inversely, why analog synths sound round and warm.

There are things you can do with tools to remove a digital or cold feeling, which mostly involves embracing the world of subtleties and tiny modulations. Don’t be afraid to push things to the point of feeling slightly “ugly”. Let me explain:

One of the things that’s become more obvious for me lately is how a tiny bit of distortion and clipping can bring a lot more of precision to a sound in a mix. I’ve always been a fan of saturation (sometimes my clients tell me to reduce it a bit); in case you didn’t know, saturation is a mild form of distortion—wave-shaping that you can really push in a very subtle way. Subtle distortion sort of breaks a signal’s linearity, or coldness. Recently, I was in a studio with my friend Jason—a brilliant sound designer—and asked him how he turns something cold into something more analog sounding. While he could have applied a bunch of effects and processing to a sound, he said he was more interested in creating multiple layers around the pad or digital sound.

A good way to combat the cold side of digital sounding synths is to add a good dose of acoustic samples, field recordings or other organic sounding findings around it. The combination of digital and organic really guides the perception [of the listener] away from the digital aesthetic.

What makes some acoustic recording samples feel warm is a combination of a bunch of things. The quality of the microphone, for example, can translate a lot of the details and capture more depth. The sample rate of the recorder will also make a huge difference. Microphones are often overlooked, but they basically determine the level of precision in your recording; if it’s extremely precise, with a lot of high-end information, it will contribute in the definition of the sound quality. Another thing to consider is the preamp of the recorder. There’s a world of difference between preamps, and having high quality one will certainly add a lot to sounds. If your sounds are thin and lacking substance, you can also use preamp plugins. Some of the best out there are from Universal Audio, but you can also rely on Arturia’s preamp emulation for something quite impressive as well.

I had a talk with someone who was saying that one of the things that made Romanian techno so good was the combination of the acoustic kicks with the analog ones, to which I added that without good preamps, the acoustic kicks would sound like garbage.

If you have raw synthetic sounds, you can also pass them through some convolution—this helps create a space around it. The mConvolution Reverb by Melda is quite spectacular. It also has some microphone impulse response which mimics as if the sound had been recorded in a space. You can make it multi-band so you can assign specific bands to have a specific reverb type(s). This allows you to be very creative, and if you leave it at a very low wet rate, it will infuse the sound with a nice, warm presence.

Regarding warm presence, again, with distortion, I’d encourage you to look into trying various distortion plugins and use them with a wet factor of about 3-5% max. Depending on the plugin, you’ll see how they add a little bit of color to a sound. My way of using distortion is usually bringing it up to about 20% and then rolling down until I barely hear it. You want to hear it a bit, but not much.

Some nice distortion plugins I like include Decapitator by SoundToys, mDistortionMB by Melda, Wave Box by AudioThing, Saturn by Fabfilter.

Get Out of “The Box”

There’s no doubt that moving outside your computer will infuse your sound with some texture, presence, and some analog feel.

Use a little mixer for summing. If your sound card (audio interface) has multiple outputs, then you can send them to a little mixing board where you can group your channels into different buses. For instance, you can split them into a channel for kick (mono), stereo channels for bass and melodic elements, and another one for percussion. If your board has more channels, you can experiment with different things, but just these sound groups are a great start; the mixing board will give you a rawer feel than your DAW alone. For simple, affordable boards, look into Mackie’s latest series—pretty impressive and absolutely affordable.

Use external saturation. People love Elektron’s Analog Heat. It’s a good external distortion and does a pretty solid job of adding colour to sounds, out of the box. You can also look into using distortion pedals, reverb, or invest in a 500 series lunchbox and get some saturation modules—there are many to look into.

Use VHS, cassette, or tape. Some of my friends have been searching local pawn shops for cassette decks or old VCRs; they offer a static saturation that you can explore. There’s a whole world of possibilities too when you compress the recorded result—you’ll create something weird sometimes, but it will give you a lofi feel.

If you have other suggestions, please share!

SEE ALSO : “How do I get started with modular?”

Inspiration and Risk: Returning to FL Studio and Reason

As 2019 is comes to and end, I realized that it will be the 4-year anniversary of this blog. For the first time, I’ve had a hard time finding inspiration and motivation for writing, but also for music in general. After releasing an album this spring, I really felt like I’d explored techno inside-out, in terms of what I can bring to the genre. Motivation and drive are something that rise and fall for many people who make music—many try to find novel ways of keeping it going. 2019 also marked 20 years of releases as Pheek for me; I realized that I’ve kept this alias going for a long time. However, in 2009 I took a big break from music-making, before I became a father and after touring for 8 years—I felt like I had seen enough. The thing about being a musician, is that you may call it quits or feel you’ve had enough, but somewhere down the line, the drive to create something will always return.

You need patience—this was probably one of the things I said the most to others this year, and I also had to take this advice myself.

When you need a break from music—or anything that usually makes you happy but isn’t anymore—it’s mostly because you’ve created some lofty expectations that are very difficult to achieve. For example, maybe to feel satisfied with your music, you expected a release on a specific label? Or perhaps that after releasing music, that you should get more recognition, more gigs, or be more demand?

99% of people who come to me with writer’s block have lofty expectations. These expectations usually have nothing to do with reality and create a dissociation from the pleasure of making music. This issue often comes up when setting goals—we set goals too high and are hard on ourselves when we don’t meet them.

I’m no stranger to unrealistic goals, and have experienced this dissociation deeply myself. It’s a good thing to go through every now and then; I can relate to anyone who’s also stuck in that uncomfortable space.

However, I think I’ve slipped into the other 1% of causes of writer’s block, which is, in my case, boredom and being jaded. I mix and master music all day, so it’s hard to disconnect from my critical voice. Teaching Ableton Live and knowing it inside-out leaves me with fewer angles to explore to discover unknown territory (although I do love finding YouTube videos with new techniques to try; even if I was already familiar with a technique, people will often do things in a different way).

This boredom brought me to a tough decision which involves taking a risk: get rid of everything that makes my way of making music safe, easy, stable, effective, productive. Creativity is about problem solving—challenging your brain creatively will push it to become more flexible, alert, and open to new ideas.

In my case, I decided I’d go back to my very first DAW, FL Studio. I missed its awkward design and logic. It’s a bit of an odd-ball in the world of music because it wasn’t made by-musicians-for-musicians, but more by-nerds-for-nerds who wanted to make music, which is suitable for techno nerds like me. Honestly, I didn’t really understand what I was doing when I made my first few albums with FL Studio; I was doing my best to make things work and sound okay. The limitations created some interesting results; some people wondered why or how I did some things, to which I replied that it was because I didn’t know how to do them otherwise. FL Studio is often regarded as a toy or a not serious DAW, but it’s actually really badass, if you can learn to understand it.

It took me some time to sync it to Live because on the OS X version, Image-Line decided to not include the ReWire function. ReWire was something I heavily used circa 2002-2009. If you have this issue, here are some tips on how you can record audio/MIDI from anything in Live:

ReWire Alternatives

Many people love Soundflower, but I hate it. I find it frustrating and confusing. A really lovely alternative is Loopback by Rogue Amoeba. It’s not free, but it’s worth every penny—it can do a lot of internal routing to record audio from your internet browser or other software (very practical for audio artists). Loopback solves audio routing, but not MIDI sync.

On OS X, there’s a built-in tool called Audio MIDI Setup; here you can create a virtual MIDI channel to be used. Then, in FL Studio, in the MIDI out, you pick that channel as your out while selecting the “Send MIDI sync” option. On the other side, in Live, set it as slave, then in the preferences, set the MIDI channel to Track/Remote—this should work.

Things I love about FL Studio

  1. The automatic piano roll on all channels. You can drop a sample into a track and instantly play with its pitch, but what I love the most is the number of options to randomize sequences, quantize, slice and alter the notes. I have not seen anything like it in other DAWs, and in less than 5 minutes, I can have a solid groove going.
  2. Swing & quantization. FL Studio’s swing simply kills it. Logic has good swing also, reminiscent of classic MPC swing, but FL Studio has a killer, killer swing for techno.
  3. Automation, LFOs, and modulation. In FL, these are really a pleasure to use—not only do you get exactly what you want but often things come out even better than you expect.
  4. Native effects are solid. FL Studio has really high quality native plugins.

However, there are also many things I don’t like FL Studio, but they’re not the point of what I am discussing in this post. To put it briefly, I can’t see myself having a speedy workflow with arrangements in FL Studio; I tried for 10 years and eventually wanted to knock my head into a wall.

If you’ve missed out on all the hype about Reason, its latest version is making it the DAW of the year to me. Reason basically turned its effects and instruments racks into a VST, which lets you open it in any DAW. Reason does not crash—that’s the beauty of it; but don’t forget the power of the sound it makes as well. I’ve often done patching in Reason (the visual UI triggers my inspiration right away) and people weren’t sure if it was from my modular or not. 90% of my last album was done in Reason 10. What I loved doing was opening one of its native synths, and patching some LFOs, or envelopes to do some intricate routing and create a bunch of sounds that motivated me to turn them into songs right away.

Opening Reason with FL Studio, connected to Live, really felt like science fiction as I would have never imagined this trio 15 years ago. But, not only does it work like a charm, it’s absolutely a thrill to use! One thing I love about Reason is its feature to be able to rent plugins. They have an internal line of modular inspired tools that let you patch similar setups as you would with a rig.

The reason why I still route everything to Ableton is to be able to record all the tweaking in real time, with the mistakes as well as the good moments that might not be replicable. I still like to do my arrangements in Live, as it is the most efficient. I could export stems from FL Studio, but I find it more fun to grab things imperfectly.

If you work with multiple DAWs, I’d encourage you to create a folder where you save all your recordings, projects, and tests. Export everything as you go, and go fishing and build a mothership.

I wrote this post spontaneously, not really thinking of where it would lead me to. Spontaneity feels good, and so does music production these days.

SEE ALSO : Spending Long Hours in the Studio

Make Music Faster: Some Organizational Tips

We are constantly bombarded by information and it can be difficult to focus on anything properly. Making good music requires slowing down and a high level of focus—often people rush when making music and it comes out poorly. How can you make music faster while still giving the process the attention it deserves?

In terms of file and project organization, there are a number of things you can do to speed up your workflow.

Backup, Backup, Backup

I’ll never say this enough, and I’m sure you might shrug at this first tip, but you have no idea how many clients come to me telling me their computer crashed and they lost everything, hoping I saved their projects! Luckily, many times I have been able to help them with my own backups. After many of my own crashes, I’ve learned to have a number of external hard drives for all my projects, and I have an online backup for my main system that syncs multiple times a day, and I also use Time Machine (from Apple). Generally, I have to use one of these back ups at least a few times per year, because of corrupted data or other issues. Clients email me about issues of their own about once a week! No joke, if you do just one thing to improve your pace-of-output, make sure it’s taking backups of your work.

On backup drives, I keep everything organized by year, label, and project name. Having organized files and folders helps me find things quickly.

Personally, some brands I trust for reliable hard-drives are Western Digital, Samsung, and Seagate. If you can get an SSD, it’s a huge plus—you can work directly from it, without any noticeable decrease in speed. When it comes to online backups, I like iCloud (I personally hate Google Drive), but I recently discovered iDrive and find it pretty impressive and affordable, too. If you don’t have an account with Splice, it’s a good idea to back up all your projects online. Having multiple back ups on different systems can be quite useful.

File-Naming Conventions

All my song files have a title, but they also have a bit more information. On OSX you can use tags—I like to tag files as released/not released, and finished/not finished, for the most part. Avoid project titles like “new song” or “1”. As time progresses, chances are you’ll have many new songs, and titles like those are counter-productive.

I keep very few things on my primary computer hard-drive; I love to discard projects that I’m done with or that I haven’t touched in a while, so I can make room for new material. If you aren’t familiar with my creative process (see my series of videos on Youtube), I create a lot of source material to work with, but it takes up a lot of space on my hard-drive. I don’t like to re-use the same material twice, so cleaning up my hard-drive on a regular basis becomes a safety net against redundancy in sample usage.

When it comes to samples, I buy multiple loops and one-shots, as well as packs, and like to keep them organized in a sample-focused folder. Nothing too complicated, as I use multiple other tools to organize those in my DAWs, so I don’t spend much time on organizing samples into folders. I simply backup the sample folder and that does the trick.

Project Organization

Many producers work in an awkward way when it comes to managing their project(s)—their creative process is often irregular and they are easily distracted. It’s very hard to be completely organized when making music and balancing creativity with efficiency, but there are some approaches you can take to make things flow more easily. When it comes to making music, I work with motherships, which is a technique I covered in a past post and often refer to to make things productive again when I lack ideas. It’s basically one big Ableton Live session, where I drop-in all my current ideas. Recently, I found that I like to create multiple ideas in a single column in this project file. For example, I make all kind of grooves and percussion sequences in a column called “groove ideas.” If my mothership has multiple, well-separated content types, I can import an entire column from the mothership into another project and improve upon it. So let’s say I’m working on a dub project and feel like I’m lacking groove, I can simply go dig up whatever I have in the mothership by importing a full column filled with numerous grooves into my current project.

I think that working in a modular way (not in terms of using modular synths)—saving ideas by category—helps to import them faster later on, when they’re needed.

Leftovers & Going to the Store

Finished a new track? Create a new column called “leftovers” and place any unused ideas in it. Import that column into a project named “leftovers” and you’ll have all the leftovers from all your songs, which can easily be recycled in the future.

Going to the grocery store, is a phrase I use for days I spend recording noise, sounds, bleeps, and random jams from gear to my computer. I’m not a gear guy in general; I find using a lot of gear multiplies the risk of running into technical issues, which limits creative time. I usually record tons of sounds, or “audio produce”. I then work with that material for weeks or months, or even years. These types of sessions are super useful, but need to be organized as well. I cut down recordings to “moments”, which I identify as specific ideas or concepts. I also slice sections down to one-shot ideas, for percussion elements. Additionally, I like to have tons of low-end material with analog saturation, and analog transients I can use in digital percussion. Both add a very simple twist that can make a world of difference. I also like to use the mothership concept with the grocery store. I’ll create one template project with all my recordings and then slice them, then put them in different columns that I can use to import in any ongoing projects that need something.

Time

Time is precious. If you have a family, it’s even more difficult to find time to make music. How does one organize time given the obligations of social relationships, work, partners, hobbies, and Netflix binging?

My solution to not having enough time to work on my own music is to dedicate blocks of 30 minutes to work on music and try to get the most of them. Your brain can produce high-quality work for about that amount of time. This fact is liberating for parents—you have a human need to create, so you feed it what you can, and then move on. In the early years of being a dad, I thought that having a way to save ideas for music by leaving myself audio notes was the best way to calm my brain down from the restlessness of not making music as much as I wanted to. Sometimes I would have the computer nearby and I’d leave a loop playing and adjust as I could, between changing diapers. Part of who I was a musician changed in those years. The music I wanted to make was completely different, mostly because I was using music in a different ways.

Limiting your time to periods of intense focus is something I learned from the Pomodoro technique. I would make sure to listen to music for 10 to 30 minutes before working. Ideally, I would also exercise or stretch to have my body “activated.”

Since time is crucial, I recommend you eliminate any hindrances of the mind that can disrupt the flow: hunger, need to check phone, energy, thirst, discomfort, etc. A good studio has the phone at the entrance with minimum check-ins on whatever alerts it can send you. Have a water bottle and snacks on hand, a quality chair…make things comfortable.

I also encourage new students to create precise goals and deadlines. For instance, “next Saturday I will dedicate a moment to video tutorials on compression, then do some tests on kicks.”

References

If you want to make music without losing your sense of direction, you need references on hand. I’ve covered references in many past posts, but this is a reminder that having a Spotify playlist is a great idea to give yourself drive. Speaking of drive, it’s not a bad idea to leave your house before making music—go for a walk, jog, or drive around. Have you ever noticed how moving along with music stimulates creativity? If this doesn’t do it for you, try to find an external activity that involves music and that inspires you.

A self-education activity that is also essential is to have a personal YouTube playlist of videos that are reference tracks, mixed with tutorials of techniques you can try. I have a to-do list of videos that I go to for experiments.

That said, references should be archived eventually, too. I like to keep some for a while but change them regularly. It’s a good idea to have a folder on your backup drive for all the references you’ve used.

Plugins

It’s easy to get lost in the sea of plugins out there, and if you’re a collector like I am, once you have many installed, it’s also easy to forget about older ones. Ableton Live 10 has a classification for plugins where you can put them a category with a color—I use it all the time. In my case, I have these categories: Sound design, Compression, EQ, Saturation.

I have a rule that I don’t buy anything new unless I’ve already used what I have bought previously. I don’t mean just having played with it, but actually used it in a project—this also applies to gear and any gizmos I could potentially use. The crave to get something new happens every day, as I’m constantly under fire by ads and emails that promote something.

Networking

If you want projects to get finished, you will have to do some networking at some point, and it can be pretty hectic out there as everyone has an agenda of their own. I’ve discussed the importance of networking before, but here are some basic reminders about how to do so efficiently:

  • Never take any conversation personally, as well as any pauses, silences, or delayed conversations. This is something I sort of have to remind myself daily, as sometimes I get triggered by certain things. Think of networking like you’re chasing someone for something, and he or she is doing the same thing with someone else. Everyone’s chasing each other and yet, we don’t pay much energy to people who are there for us.
  • If you send demos or if you are collaborating with someone, expect no communication or long silences. The music business world attracts people who are full of anxiety and often change their mind. Finding the right moment to poke someone takes time to master.
  • Use an agenda to keep reminders of who to follow-up with.

SEE ALSO : How Long Does it Take to Make Professional Sounding Music?

How Long Does it Take to Make Professional Sounding Music?

For people who are just getting started with production and recording their own music, many wonder how much practice is involved before they can create professional sounding music that they are happy with. I often get asked questions like this:

I’ve been making music non-stop for 6 months. Why am I not happy with how it sounds yet?

In terms of life experience making music, 6 months is nothing. You’re basically a toddler in the world of music, but being a toddler is also a once-in-a-lifetime experience and has some advantages as well. In comparing yourself with people who have many more years of experience, it’s normal that it might feel like you’re still far behind. You’re not really being fair to yourself; you can’t expect to squeeze in so much knowledge in such a short time. Most people who make music for a long time usually have also worked in the company of other experienced artists, learned some valuable tips from their experiences, and many have also spent a lot of time at events or working with live sound. All these details are often overlooked by newcomers who often have the misconception that making professional sounding music is something that’s relatively easy to do. Making quality music takes a lot of time—it usually takes many years. However, the difficulty in being satisfied about what you do doesn’t decrease as you gain experience.

Each time I learn something new or that I understand that a type of detail is actually a mistake, I start hearing it everywhere in my past music and it drives me crazy. If you think that with over 20 years of production I might be more easily satisfied with what I make, then I have bad news for you—I still get frustrated, get writer’s block, and most of the time, I’m not entirely happy with how my songs sound. The difference between myself and someone new to making music is that in 20 years, I’ve learned something you’ll learn too: imperfection is a part of the process.

I met a DJ once who told me:

All quality producers I love are full of self-doubt, but the ones that sound like crap are so full of themselves.”

Not being satisfied with your own work also means you’re willing to learn. So, what are the options available for someone just starting out? Is it just a matter of time?

There are a lot of paths one can take, and unfortunately, sometimes friends or other music producers send new artists down the wrong one. Generally, people will advise others to take a direction that worked for them, but this might not necessarily work for anyone but themselves. I say this before I get into more detail about how long I think it takes for a new artist to make art he or she is satisfied with; the advice below is what has worked for me and what I have seen work for others.

Understanding a sound

If you’re not happy with your sound, you should first ask yourself what sound you’re after. There are a few things to really grasp to understant what’s “wrong” in how you perceive this sound.

Sound monitoring: What monitors are you using? Are you using KRKs? Genelecs? Yamahas? Some people have poor equipment and it’s a handicap in how you’ll “understand” your sound. The clearer and more reliable your tools, the easier it will be. Before buying anything else for your studio, monitoring should be where you invest the most of your budget. You can buy very expensive gear, but if you can’t hear it properly, you’ll always be on step behind.

People will recommend certain speakers or headphones, but monitoring is extremely personal—I encourage you to go to a store and spend a good amount of time comparing different brands and models. I swear, when you hear your favorite track on a specific system and it triggers goosebumps, you’ll know that system is for you. Prepare to invest in good speakers—there’s nothing professional about buying cheap monitors just to save a bit of cash.

A/B referencing: Cross-validating is one of the most important things to do when you make music, and though a lot of people seem to have reservations about it, this is how professionals and people who want meaningful results will work. This goes for not only audio, but in pretty much any craft; you need a model, a reference, and something to guide your vision, or to keep track of your progress. As you work, you need to constantly check what’s going on. You might hate it at first, but that’s how it’s done. In terms of audio, having good headphones and other output systems to cross-reference with is very beneficial.

There are many tools out there that can help make doing A/B checks easier and more pleasant. For instance, Reference is a great tool to see if your levels are right. Magic A/B is also great, but doesn’t have the precision of Reference. Levels is also another great tool to analyze the technical requirements of your song. But more importantly, I recommend a good FFT such as SPAN by Voxengo (free) or Izotope’s recently released Ozone 9, which is a good overall bundle of tools to have that can really help make a difference in what you do. Ozone comes with an “assistant” that listens to your music and can propose fixes, enhancements, and overall adjustments, while comparing your work to a preloaded reference track—it can be a big investment, but it will be a tool you’ll use every time you work on music.

Listening volume. The worst way to listen to music when you want to understand it is at high volume (eg. 85dB+). I try to keep my listening levels low so I can easily hear what’s wrong. You’ll be able to tell that the highs are too sharp or that the low end is too low at lower volumes (something that’s barely possible to do at high volume due to the Fletcher Munson Curve which says that after a certain volume level is reached, the human hear stops perceiving things in a neutral way). Make sure you keep the volume low and don’t touch the knob as you work. Take pauses every 20 minutes too—you’ll notice problems more easily.

Sound preparation and “mental jogging”. When you actually sit down to make music, you shouldn’t just start right away; you need to do some “mental jogging” first. Forget shortcuts like smoking spliffs or drinking beer. Just sit there and listen to music at around 65dB (I use my apple watch to monitor decibel levels). Listen to music for a good 30 minutes to an hour, then make music. Never touch the volume knob. Your ears need to adjust to the right levels of highs, mids, and lows. If you touch that master volume knob, you’ll screw up the exercise.

Learning

To get better at anything, you need to educate yourself. Perhaps you love to learn by yourself (like me), but I swear, it only takes one video or a bit of reading to feel like you’re improving, and you’ll feel silly you didn’t look for that information before. I’m personally always on the hunt for tutorials, even on matters that I know a lot about already, because I want to make sure I know as much as I can about each subject. You’ll often realize that a problem has many ways it can be solved, and it’s important to learn multiple different approaches to achieve a certain result. Why? Sometimes, a certain approach will reach its limits and another one might be a better fit. This also applies to plugins and gear. You might have 3 different compressors, but they all have their own persona and might work better than one another in different contexts.

However, I wouldn’t worry much about tools to start. It’s more important to create conditions where you can properly understand sound, develop healthy habits towards your work, and constantly allow for time and resources to dedicate towards self-improvement.

Tools come and go—what really makes a difference in going from an amateur to a professional is how you understand and use them. Understanding how audio engineering works and how you perceive sound is hugely important.

Good Quality Schools and Learning Hubs

Point Blank Online Music School. I only hear good things about Point Blank, and their tutorials on YouTube always are quality.

Noisegate. I’m currently testing it and got a few tips from there but it’s mostly for new comers.

Puremix. For advanced users and mostly oriented towards Protools. Even so, I’ve learned a lot from them.

Loopmasters. They sell classes and they’re very good; a favourable ratio of get-what-you-pay-for.

SEE ALSO : Make Music Faster: Some Organizational Tips

EQing Resonant Frequencies and Harsh Sounds

EQing resonant frequencies can be a very difficult task. Once in a while, I see ads in my Facebook feed that claim to reveal some “secret” EQ tips. Recently, I clicked on one just to see what they had to say, and was very disappointed to read stuff like “if your track sounds honky, you need to cut at 500hz…blah blah blah…”, as if a simple cut at a specific range would easily solve everyone’s EQ problems. The thing about EQ’ing music is that one simple solution cannot apply to every case—it’s more complex than that. Yes, there are things that you can do consistently that will make a difference, and yes, in some cases, cutting at a specific frequency can help, but there are other ways to EQ, too.

In this post, I will provide a very high-level outline of how to identify resonances and to fix them with surgical EQ’ing. If you’re an advanced audio nerd, I recommend you carry on with your online searches for EQ tips.

In past articles, I’ve referred to the benefits of shelving EQs in certain cases to fix tonal issues in a song. Using shelving EQs to correct tonal issues is one of the most misunderstood concepts in mixing and it is also, in some ways, probably the easiest to fix. Surgical EQ cuts are the exact opposite, as they are difficult to really explain—especially through a simple blog post—and can be a bit of an esoteric subject.

Training your ears to detect resonances

Ear training is the most important part of EQ’ing and it is also the most difficult to develop; it demands practice and guidance. I’d say roughly 90% of my clients’ projects have bizarre EQ correction(s). I often see multiple cuts, very sharp and very low. When I remove them, I hear no difference in my studio. Why? Probably because of how they hear things at home with their speakers/headphones. Bad referencing is counter-productive, as you might expect. It’s like wearing glasses with a stain on them; you’ll see it everywhere. Problems can also arise from the acoustics of the room which might overload certain frequencies, creating resonances that aren’t in the mix itself, but from the room, which results in people cutting valuable frequencies from their mixes and sounds.

I find it useful to mute a problematic sound and listen to an oscillator on its own, to train your ear to recognize that kind of frequency.

One trick I found useful in developing my understanding of resonances is the use of a keyboard and a simple oscillator (note: Ableton’s Operator will do). When I hear a resonances—which sound a bit like a delay with too much feedback—I would try to play the note on a keyboard with a sine oscillator to mimic what I hear. With the help of a FFT or a great EQ plugin like Fabfilter Pro-Q3, I can then “see” the frequency of my note and compare it to my sound. You want to play them roughly at the same level to see exactly where the resonance is in the spectrum.

Another way to identify a resonant frequency is to take your EQ, starting with a wide Q of about 1, and boost it by 5dB then scroll through the frequency spectrum. This will amplify what you hear in certain ranges and you might notice a resonance. Once you spot a sensitive area, leave your boost on that spot and slowly increase the Q to 2.5, then adjust the covered area to pinpoint where the resonance might be. Once you get to about 5 on your Q, then you can cut down on the problematic frequency, starting by cutting 3dB off. Toggle the bypass on the EQ to see how much of the frequency you removed.

Sometimes resonances are the sum of multiple incoming sounds that have similar frequencies that overload on top of one another. These are nasty because you might want to EQ one sound, but you can’t really pinpoint where the problem is coming from. It’s best to group similar channels and EQ them all together.

I usually tell people to group channels by “sound families” such as all metallic sounds, organic percussion, synths, etc. Grouping can be great for fixing issues, and also to place sounds into a specific spot in the bubble you’re creating in the mix (ex. fore front vs background).

Visually speaking, resonances are often difficult to see on the FFT. Sometimes people believe it’s a simple peak rising, but that might not actually be the case. This is why on the Pro-Q3 or Ableton’s EQ8, you can monitor what you’re altering. But before searching for a resonance, it’s important you hear it first. Otherwise, you’ll go hunting for problems that might not exist, which will create “holes” in your mix (a frequent problem I hear in mastering but luckily it’s easy to fix). If you’re checking for little peaks poking out only visually, sometimes those can actually be pleasant frequencies, but because of a poor listening environment, you might interpret them as bad ones.

My general tip on cutting frequencies is: never too sharp and always start with -4dB. Often you’ll hear resonances from 200hz to 800hz, mostly because a lot of melodic content and ideas have a fundamental note within that range, so some sounds might clash. Also, if you feel you need more than one EQ to fix a problem, just trash the thing you’re trying to fix. It might be garbage and if you need to really alter it that much, there’s something fundamentally wrong with it. Using too many EQ points might also result in phasing issues. Same thing goes for using more than one EQ plugin…it can be risky!

Optimizing your listening conditions and environment is a hugely important thing to do.

Detecting Harshness

Harshness or other difficult frequencies that aren’t resonances can be found at any level of the frequency spectrum. Most of the time, harshness-related issues are around 1-5khz. The human ear finds this range sensitive, and when there are too many sounds in it, it brings confusion, muddiness, and unpleasant feelings.

Harshness can also be a result of the sum of multiple sounds. It’s important to hear everything on its own—specifically similar groups of sounds—then mute them one by one to find out which ones are causing an issue. Once you find the problematic sound, I suggest you try the following corrective techniques:

  • Start by lowering the volume to see if that can help.
  • Try the EQ’ing cut method explained above to see if you can isolate a resonance or something annoying. Try cutting it by 3dB. Cutting along with the volume drop can sometimes be enough to fix a problem.
  • Try panning it to the opposite position. I often see that sounds that are crammed in a same location will clash.
  • Add subtle reverb. This trick can help smooth things out. I’d suggest a reverb at a 10% wet/dry.
  • A chorus effect can sometimes do wonders on certain sounds.
  • Controlling a transient can fix wonders. Instead of cutting with an EQ, just spot the problematic frequency and then use a multiband EQ like Melda’s mTransient to remove some of the attack of that band. Isolate the frequency. If you don’t have a transient shaper, you can create your own with a compressor that has a fast attack.
  • On higher-pitched sounds, a de-esser can really help. If you don’t have one, make sure to grab ERA4 De-esser as it’s affordable and super useful.

Harshness is easier to fix than resonant frequencies—it’s often simply the result of noisy sounds at wrong levels that need adjustments. With practice, your mixes will be clearer and smoother. Train your ears!

SEE ALSO : Creating Depth in Music

Integrating a modular setup with your DAW

Using modular in Ableton or another DAW of your choice opens up a range of possibilities—from simple multi-tracking where a modular is just one part of the musical whole, to MIDI style sequencing, and to the exchange of complex control voltages between the DAW and modular system.

I’m going to run through the three basic methods of integrating a modular system with your DAW:

  1. Basic synchronization with a clock signal
  2. Sending MIDI from the DAW to a MIDI to CV converter
  3. A purpose-built CV tool to output CV directly 

Clock synchronization

The simplest method of integration is simply sending a clock signal from your DAW to a clock module in your eurorack. That can be as straightforward as sending a regular 1/16th rimshot (or any short sound with a fast attack and sufficient volume) pattern to a clock module. With the volume as high as possible (Euro levels are higher than line) it should work. However, not all clock modules are the same—some might not respond at all to a line-level signal, in which case you’ll need a signal processor to boost your clock signal.

Syncing a clock is computer-modular integration at its most basic. With a clock signal you can record into your DAW and keep things in time with your plugins or other hardware. You don’t have transport controls or any sequencing options.

If the appeal of modular is escaping the computer and your DAW is a necessary evil just for recording purposes, this is the way to go.

MIDI to CV converter

Most synths and all DAWs use MIDI as their main control method. MIDI information includes pitch, note on and note off, and velocity. With the right MIDI to CV module you can utilize all of this information and convert it into CV and gate signals. For flexibility and price, I highly recommend the Mutant Brain module from Hexinverter Electronique, or the CV.OCD from sixty four Pixels (essentially the same thing but in a standalone box).

Unlike CV, which is a continuous signal, MIDI is made of discrete digital signals. These signals have a fairly low resolution, which means they  cannot express a smooth curve. Smooth LFOs and pitch slides—portamento—are beyond MIDI’s capabilities, except through cunning workarounds. So, portamento messages in MIDI simply tell the instrument when to turn on portamento and how long the oscillator should take to slide to the next pitch, but if the MIDI device controlled the oscillator directly and tried to implement portamento, you would hear distinct stepping of pitch. Similarly, you can send MIDI LFOs to some MIDI to CV converters (including the Mutant Brain) as CC messages, but they will be stepped audibly, depending how you are using the LFO.

Still, the ability to tap the vast world of MIDI sequencing—from your everyday piano roll in the DAW of your choice, to ingenious little Max for Live devices, to dazzling iOS apps like Patterning—will be enough for many people.

Custom software and hardware, or a DC-coupled interface

For a long time this section would have included only one company: Expert Sleepers. Their suite of plugins, Silent Way, in conjunction with their ES-series of modules, have offered high resolution integration between DAWs and analog equipment for around ten years. They support both the output and input of control voltages using either one or more of their own ES modules, a DC-coupled audio interface, or a non-dc-coupled interface and some pretty basic DIY circuitry.

What is DC-coupled?

All audio equipment deals with two types of electrical signals—AC and DC. All audio signals are AC (Alternating Current)—they alternate between a positive and a negative polarity. A DC (Direct Current) signal alternates between 0 and a positive voltage, never going into the negative. A DC current should never go into a speaker. Speakers work by pushing the speaker cone in and out/ When the cone is pulled backwards, into the speaker, the voltage is negative; when the cone is pushed outwards, towards the listener, the voltage is positive. A DC current would only push the speaker cone outwards, without letting it spring back equally far—you can probably imagine how this could damage a speaker.

So…in order to send CV signals from your computer you need a device that can output DC voltage. Expert Sleeper’s hardware fills this role. Or you can use a module to provide a DC-offset, such as Doepfer’s A-183-2 or A-138. You might already be using an audio interface with DC-coupled inputs; most notably, all of MOTU’s audio interfaces feature DC-coupled interfaces.

Once you have a means of outputting DC signals, Silent Way offers perfectly smooth LFOs, envelopes, pitch perfect sequencing, smooth portamento directly out of your computer, and lots more.

As I mentioned, for a long time Expert Sleepers was the only company offering this type of product. However, in the past few years a couple of other offerings have appeared. First, in Bitwig Studio, then Ableton came out with a suite of CV Tools in Max for Live. These all offer similar features to Silent Way and which one you prefer might come down to which DAW you’re using.

I’d like to finish by outlining one feature that’s found in all of these products—Silent Way, Bitwig and Abelton’s CV Tools—and which might just be their “killer feature”: automated frequency calibration. With the high resolution control voltage they can output, coupled with your DAW’s ability to analyse audio, you can calibrate your CV signals so that your oscillators track perfectly in tune, over the full audible frequency range–even if they don’t intrinsically track well at all. All those weird, characterful oscillators that are never in tune, the analog drum circuits, the self-resonating filter that sounds amazing but doesn’t respond to anything like 1v/octave – all of these can now be played in tune! This feature makes these products very tempting….

SEE ALSO : Live recording with the Ableton session view

Creating a music sketch

In this post, I’d like to explain how making a music sketch can help you to stay on track when creating a song or track, much like how a painter creates an initial sketch of his/her subject. I’ve explained in previous posts that the traditional way of making music goes something like this:

  1. Record and assemble sounds to work from.
  2. Find your motif.
  3. Make and edit the arrangements.
  4. Mix.

Here we’re talking about a way of making music that was popularized in the 1960s and is still used frequently today. But what happens when you have the ability to do everything yourself, and from your computer alone? Can you successfully tackle all of these tasks simultaneously?

When I do workshops, process and workflow are generally questionable topics to address because everyone has different point of view and way of working. However, to me it always comes down to one thing—how productive and satisfied an artist is with his or her finished work. Satisfaction is pretty much the only thing that matters, but I often see people struggle with their workflow, mostly because they keep juggling between different stages of music-making and get lost in the process (sometimes even losing their original idea altogether). For example, an artist might start working with an initial idea, but then get lost in sound design, which then leads them to working on mixing, and then sooner or later the original idea doesn’t feel right anymore. For some people, perhaps its better to do things one at a time; the old before-the-personal-computer way still works. But what if breaking your workflow into distinct stages still doesn’t work? Is there another alternative approach?

In working with different artists and making music myself, I’ve come to a different approach: creating a music sketch—a take on the classic stage-based process I just mentioned. Recently, this approach has been giving me a lot of good results—I’d like to discuss it so you can try it yourself.

Sketching your songs and designs

I completed many drawing classes in college because I was studying art. If you observe a teacher or professional painter working, you’ll see that when they create a realistic painting of a subject, they’ll use a pencil first and sketch it out, doodling lines within a wire-frame to get an idea of where things are. Sketching is a good way to keep perspective in mind, and to get an idea of framing and composition. The same sketching process can be used in music-making.

When I have an idea, I like to sketch out a “ghost arrangement”. Sometimes I even sketch out some sound design. The trap a lot of people fall into when making a song—particularly in electronic music—is to strive to create a perfect loop right from the start. Some people get lost in the process easily which is, honestly, really not important. People work on a “perfect loop” endlessly in the early stages of making a song because when you are just starting a song, the loop will have no context and it will be much more difficult to create something satisfying. By quickly giving your loop a context through a sketch-type process by arranging or giving the project a bit more direction, you’ll hear what’s wrong or missing.

I’m of the belief that having something half-done as you’re working can be acceptable instead of constantly striving for perfection. I think this way because I know I’ll revisit a song many times, tweaking it a little more each time.

Sketching a song can be done by understanding at the beginning of the process that you’ll work through stages of music-making more quickly and roughly, knowing you’ll fix things later on. This is more in line with how life actually goes: we live our lives knowing some problems will get solved over time, and that there are many things we don’t know at a particular moment in time. In making music, some people become crazy control freaks, wanting to own every single detail, leading them down rabbit hole of perfectionist stagnation, in my opinion.

Creating a sketch in a project is simple. Since I work with a lot of sound design, I usually pick something that strikes a chord in me…awakens an emotion somehow. Since this will be my main idea, next I’ll try to decide how it will be use as a phrase in my song. In order to get that structured, I need to know how the main percussion will go, so I’ll drop-in a favourite kick (usually a plain 808) and a snare/clap. These two simple, percussive sounds are intentionally generic because I will swap them out during the mixing process. You want just a kick in there to have an idea of the rhythm, and the snare clarifies the swing/groove.

Why are the basic kick and snare swapped out later?

I swap out the snare and kick later because I find that I need my whole song to be really clear before I can decide on the exact tone of a kick. A kick can dramatically change the whole perspective of a song, depending on how it’s made. Same thing goes for a snare—it’s rare I’ll change the actual timing of the samples, but the sound itself pretty much always changes down the line.

For the rest of the percussion, I’ll sketch out a groove with random sounds that may or may not change later on, but I use sounds I know are not the core of my song.

With bass, I usually work the same way; I have notes that support the main idea but the design/tone of the bass itself has room to be tweaked later.

As for arrangements, when creating a music sketch I will make a general structure as to what goes where, when some sounds should start playing or end, and will have the conclusion roughly established.

Design and tweak

Tweaking is where magic happens—this is where, in fact, a lot of people usually start their music-writing process. Tweaking and designing is a phase where you clarify your main idea by creating context. I usually work around the middle part of the song; the heart of the idea, then work on the main idea’s sound design. I layer the main idea with details, add movement and velocity changes.

  • Layering can be done by duplicating the channel a few times and EQing the sub-channels differently. Group them and add a few empty channels where you can add more sounds at lower volume.
  • Movement can imply changes in the length of the sound’s duration (I recommend Gatekeeper for quick ideas), panning (PanShaper 2 is great), frequency filtering, and volume changes (Check mVibratoMB for great volume modulation). The other option is to add effects such as chorus, flanger, phaser, that modulate with a speed adjustment. Some really great modulators would be the mFlangerMB (because you can pick which frequency range to affect—I use this for high pitched sounds), chorus (mChorusMB) to open the mids, and phasers (Phasor Snapin) for short length sounds. Another precious tool is the LFO by XFER—basically you want the plugin to have a wet/dry option and keep it at a pretty low wet signal.
  • Groove/swing. This is something I usually do later—I find that adjusting it in the last stretch of sketching provides the best results. The compression might need to be tweaked a bit, but in general the groove becomes much easier to fix once everything is in place.
  • Manual automation. Engineers will tell you that the best compression is done by hand, and compressors are there for fast tweaks that you can’t do. Same for automation, I find that to be able to make your transition and movement using a MIDI controller is a really nice finishing touch that is perfect in this stage.

Basically, the rule of finalizing design is that whatever was there as a sketch has to be tweaked, one sound/channel at a time. Don’t leave anything unattended—this can manifest from a fear of “messing things up”.

When tweaking specific sounds from the original sketch, you should either swap out the original sound completely, or layer it somehow to polish it. I always recommend layering before swapping. I find that fat, thick samples are always the combination of 3 sounds, which make it sound rich. When I work on mixing or arrangements for my clients and I see the clap being a single, simple layer, I have to work on it much more using compression, sometimes doubling the sample itself, which in the end, gives it a new presence. Doubling a sound—or even tripling it—gives you a lot more options. For example, if you modulate the gain of only one of the doubles, you not only make the sound thicker but also give it movement and variation.

All this said, I would recommend making sure your arrangements are solid before spending a lot of time in design. Once you start designing, if your arrangements have a certain structure, you’ll be able to design your song and sounds specifically according to each section (eg. intro, middle, chorus, outro) which gives your song even more personality. Sound design completed after a good sketch can be very impactful when the conditions are right.

Try sketching your own song and let me know how it goes!

SEE ALSO : Creating Timeless Music

The benefits and risks of using a reference track when mixing

In the group I run on Facebook when we discuss using a reference track when mixing, I often ask people what sort of tracks they have been using as a reference—I ask so regularly that people find my predictability funny. There are so many reasons why I encourage people to use a reference track when mixing, but for me personally to give someone feedback, I find it critical that I provide commentary based on the artist’s views. In the early days of the Facebook group, someone posted a song and everyone was criticizing its kick, but after a bunch of people commented on it, we all realized that the song creator was trying to mimic the low end of a very lofi song where the kick was intentionally “ugly”. From the perspective of people who love highly-produced techno, this particular kick was “wrong”, but only from this point of view. There’s no one-size-fits-all kick.

I encourage people to be super careful with feedback they give to artists in the event one may not totally understand what that artist is trying to do. I’ve developed this habit as a mastering engineer—if you’re too technical and detached from what the person is actually trying to do, it will be hard to really achieve mastering results that will please them, while respecting the artistic direction he or she is trying to achieve.

Think about using a reference track in the same way as how a painter might draw someone—it would be easier for the painter if he/she had an image of the person to use as a reference. Of course, the painter could try to “freehand” the drawing from memory, but it would probably end up less accurate.

The main concerns people seem to have with respect to using a reference track is that it might be too much of an “influence” on what they’re working on, and that they’re trying to find their own original sound. Many people think using a reference track would sort of corrupt their vision.

The problem is, if you’re trying to “sound like no one”, you’ll get a lot of confusing feedback about your work because most people won’t understand it. People always have something already in mind when they listen to something new. They’ll compare and try to make sense of it, but if it’s totally unsettling, they might feel a bit lost. If you refer to something they know, then there’s link that can be made by the listener.

A reference track can only be used for certain portions of a song and not all of it, which to me is the reason why it can’t totally corrupt your vision. Plus, if you use the same reference a few times, you’ll introduce new habits into your workflow, and this will ensure that your tracks are on the right path.

How can a reference track benefit your mix?

  • Tone: This is mostly what I use references for, myself. The longer I work on a track, the more fatigued my ears get, and I lose sense of the lows and highs. If I can quickly A/B another track, I’ll know if I’m on the right path.
  • Arrangements: If you know a track is really successful at, let’s say, creating a tension, or really nailing it with the timing of the drums in a timeline, you might want to study its structure to understand it.
  • Mix levels: Very useful if you want to know if one element of your sounds is loud enough in a mix, then you can see what kind of relation the reference has. People are often confused with the mids which is the part I always fix in clients’ works; I can fix it because I can check my references that have very clear, present mids. Mids are critical to have right on a big sound system.
  • Loudness: You can also check if you’re matching the power of your reference—but keep in mind that your reference has probably already been mastered by someone with experience!

How can a reference track harm your mix?

Despite having many benefits, using a reference can have pitfalls as well. The most common error in using a reference track is using a song that’s actually poorly mixed or mastering and trying to emulate it. If your reference isn’t great from a production point of view, you risk messing up your whole perspective on music production and mixing up what’s “good” with what’s “bad”.

How should you find a good quality reference track?

If you’re in doubt, to me there are two main ways to find a reliable reference track:

  1. Ask a reliable source to validate something you’ve chosen, or to provide you with one that’s similar to your selection. The source can be someone in the industry, a record store owner, a DJ, a fellow producer, etc. Make sure your source is someone you trust.
  2. If you go out in a club and hear something that sounds really great, ask what it is. There are a lot of people who want to know what’s playing so if the DJ is unable to tell you, perhaps someone else can.

Once you have your reference track chosen, you can compare anything to it to see if it’s in the same “ballpark”. Try to get a 24-bit WAV or AIF version of the reference track. Once you have a high-quality version of the reference track, I recommend “audio jogging” everyday—listen to the reference on your sound system, not too loud but at a comfortable level, and then don’t change the volume for the whole duration of the session. Now your reference track has been set up as a guide for you to work from; cross-check your own project with the reference as you work!

SEE ALSO : How to balance a mix

Live recording with the Ableton session view

Many people who sit in from of a computer to make music find this style of music work counter-productive or “too nerdy”, and will always prefer using gear, instruments, and live sounds to create music. If you’re finding your workflow too rigid when working in the arrangements view of a DAW and feel like your usual song structures are “too square”, it’s good to remind yourself that there are other ways to make music.

If you feel limited in your current production style, finding a better way might come from exploring alternatives.

This is partly why modular synth music feels free—tweaking a machine you can’t entirely control with often unexpected results. Similarly, in DJ’ing, the DJ is the master of when a song starts, stops, and how to control certain outputs. One of the best ways to see where you yourself stands is to understand what brings you excitement when you make music. I often hear stories of people struggling with an inner voice telling them how music should be made The Right WayTM and they’ll sit in front of their DAW hoping something happens, but what comes out feels weak, boring and not worthy of any energy. These individuals have been misled in what is believed to be The Right WayTM (though for some the DAW approach works).

The last thing you want to do if you’re bored of DAW-based production is to jump straight in the modular world, especially if you don’t know much about it. Even though you may have read a lot about modular, you might get started with it and not really enjoy it either, which is a waste of time and money.

Explore low-cost alternatives

My view and approach to finding a new way to produce your music is through low-cost gear or instruments, and a drive to explore less predictable music-making methods. When it comes to knowing how to make music, I always insist that what you should master first is the knowledge of your personal tools and how to get the best of them. It takes time and patience, but this approach starts you on a road to success with controllable results instead of facing a long list of failures resulting from never truly being an expert at any tool you use.

Using live audio recordings in Ableton Live (and other DAWs)

It’s easy to forget that you can totally turn your production methods with Ableton Live (or any DAW, for that matter) upside-down without spending a dime. One of the most powerful aspects of DAWs—though sometimes under-utilized in electronic music—are their ability to process live recordings. “Real”, original audio recordings feel more organic than pre-made samples or boring MIDI blocks. So, how can you go about working with live recordings in an effective way?

Gather your loops for source material to jam with

Pre-made loops

There’s a lot of bad-mouthing out there regarding the use of pre-made loops. If you use them “as-is”, you risk having the same loops as other people’s songs, and perhaps be accused of not being original. However, don’t write-off pre-made loops completely—there are many advantages to using them.

  • Search for quality loops. If you hunt for loops, chances are you’ll find some that sound great, and perhaps some will also have at least one sound that you might be interested in. It’s important that you train your ear to what good quality sounds are, and that you are able to see how they are sequenced and processed.
  • Slice the loops into smaller pieces. Once you have a loop, right click to use the option of Slice to MIDI. Once sliced, you can trigger the sounds you want to keep and reprogram them.
  • Drop the slices in a sampler. Using the sampler, you can also isolate one part of the loop, and by playing a note, you can control its pitch—another way to recycle sounds from pre-made loops.
  • Use envelopes. In the clip itself, you can draw automation for gain/volume, and have part of the loop playing while silencing other parts. You can also automate pitch if you want. The fun part in using envelopes is to create automation that isn’t linked to the length to the clip itself—a good way to create strange results or polyrhythms.
  • Adjust the length. You can make tiny loops out of long ones, and you can create strange rhythms by having the loop points a bit “off”.

Recording your own loops

If you are one of those people who doesn’t like tweaking things on a screen, of course you can always record organic sounds yourself, and create source material from those recordings instead of using pre-made loops created by someone else. Once you have recordings saved, you can always tweak them in a similar fashion to the methods we just discussed.

How many sounds or samples should you create for your song?

Collecting and creating quality sounds from pre-made loops takes a fair bit of time and research. You need to do part of the sound design yourself in order have decent material to make your song. As an example, below I’ve created a list of what I believe to be “the bare minimum” to create in terms of loops and slices before to have a productive jam. Keep in mind that this is for mostly electronic music, but it could also apply to other genres:

  • A 2-bar loop minimum of kick or low end sounds that mark the tempo.
  • A 2-4 bar loop of low end material. This can be bass, filtered low synths, toms, etc.
  • 3-5 loops of rhythmic elements to be used as percussive material. For percussive sounds, I strongly encourage you to have at least A/B structure, as in 1 bar of sequence and then a variation in the second. The AAAB pattern is also a great way to keep ears interested.
  • 1 main idea—as long as you like—which will be your hook. Often this can be a short phrase, a melody, or something one can sing. Main ideas work well if they can evolve and develop.
  • 2 sub-ideas to support the main idea. This can be through call-and-response with the main idea, or something in the background. These ideas are secondary to provide support, not to stand out.

I know this seems like a grocery list, and it feels perhaps still very far from the main topic of this post, but keep in mind that if you’re not so found of doing all this, you can also get pre-made loops to practice programming sequences with PUSH.

The power of the session view and recording yourself jamming

Ableton’s session view

Often misunderstood and misused, Ableton’s session view is a very powerful panel that allows you to jam, play, improvise and explore.

Start by building scenes, starting with the main idea from your song. Imagine your song and how it might sound right in the middle of it, when everything is playing together. I know it can be a bit confusing to imagine, but this helps you generate ideas. The second row of the session view could, for example, be the same clips as the first arranged differently. Following that, perhaps you add more new ideas, and so on. Just make sure that row X with, lets say kicks, only has kicks—one sound per column. Basically, you want 10 lines of material to jam with; then once you have this, you jam.

Now that you’re ready, hit the record button and record yourself jamming. Don’t aim for perfection, don’t aim to make a song at all, just jam and eventually you’ll end up with great moments you can use.

TIP: Change the global quantization to 1 bar or less and experiment with how it goes.

When you press the record button while in the session view, everything will be tracked and recorded on the arrangement view. Afterwards, you can slice out the best parts of your jam, and then arrange them in a way that makes the song interesting, while avoiding feeling too “on the grid”. You might even end up with material for multiple songs. I strongly encourage you to read about the creative process I use to start and finish tracks, but working out of jams is very pleasing. I often use jams myself when I have a lot of loops and aren’t sure how to use them in a song.

SEE ALSO : Integrating a modular setup with your DAW

How to balance a mix

In general, I find that there are certain common elements found in mixes I’m sent, and I’d like to share my thoughts on how to balance a mix. If you google “mixdown tips”, you’ll see that mixdowns have been covered in a lot of detail online, but most articles on the topic are geared towards rock music. Since I am dealing with electronic music and DAWs like Ableton, I thought adding my own perspective to help correct and polish different types of mixdowns might be beneficial.

Let’s run through a basic mixing exercise together. To do this, you’ll need an FFT—like SPAN by Voxengo—to analyze the overall frequencies in your mix. The more time you spend checking a frequency analyzer as you work on your mix, the more likely your mix will come out balanced and have fewer mistakes.

Why does a balanced mix matter?

Balanced mixes are important because you don’t really know how clubs’ PAs are EQed until you play on them. If a club has too much low end in its system, then a bass-heavy mix will sound incredibly messy. Yes, a DJ can tweak the mix , but it will never sound the same as if he/she started with a track with a nicely balanced mix.

When people send me music to be mastered, they often forget to double check the frequency analysis of their mix, and sometimes it’s just not balanced.

A balanced mix (or flat, if you prefer) usually has a full range of frequencies more or less hitting 0dB on an FFT reader. You can go -/+3dB around it, but keeping it around 0 is the best. For electronic music, it’s pretty normal to have the low end sticking out by about +3dB though.

Now, the classic mixdown curves I see most are fairly common—they have something appealing about them, but also create downsides with risks.

But I check masters, and they’re often not flat,” you say.

Well yes, that can happen, but the mastering engineer’s job is also to remove unwanted resonances before boosting. It’s always better to have something balanced that won’t need a lot of cutting before the engineer can make the critical decision(s) of boosting a range of frequencies.

That said, let’s examine some common mixdown curves I see that aren’t really balanced, according to how they look in a frequency analyzer.

How to balance a mix according to different types of mix curves

The Smiley Curve

Look at that smiley, similar to a shark I believe.

This shape is well-known, and sometimes you’ll see EQ presets with this name—it means the lows and highs are boosted, hence the curve looking a bit like a smile.

The good: First impressions with this curve is that it’s instantly gratifying. Exciting feel, bright and shiny highs, and low end power—pretty much what humans love in music; foundation and excitement.

The bad: A lack of mid-range frequencies can mean that on a large system it feels hollow, confusing, lacks body, presence, and emphasizes hi hats and kicks over everything else, making the main theme of the song hard to discern. Harsh, boosted highs are also quite tiring on the ear and produce listening fatigue.

The fix: If you look at the FFT and your mix is smiley, there are a few ways to fix it. The first, is to manually readjust the elements who have the hot frequencies and turn them down. Highs are mostly likely high-frequency percussion, such as hats, but could be transients or the very upper part of synths and atmospheric elements. If you can spot which sound(s) have that range exaggerated, filter it with a low pass curve of 6dB/octave. Another way to fix this curve is to put a 3 band EQ on the master and lower the lows and highs, then boost the master for the loudness lost. The mids will magically appear and might feel overwhelming at first, but that’s simply because the human ear is sensitive to mids—more mids mean more presence and power, plus clarity on most systems.

The bright mix

A bright mix is dominated by an accentuation of the highs. Many of my clients frequently mix this way because it’s exciting and electric, but bright mixes also very harsh on certain systems and as previously mentioned, they’re very tiring on the ears.

The good: Excitement, air and powerful transients.

The bad: Bright mixes will sound rough at high volume level and I swear that in 50% of the time it will be played in a club, the DJ will have to turn down the high-EQ. If the system isn’t great quality, bright mixes can also create distortion.

The fix: Use a shelving EQ and turn down those highs. Look at your curve and see where the steep part starts (sometimes at 5khz, sometimes at 8khz), then just lower it down by 3-5dB until the FFT becomes a bit more flat.

Note: If you feel like you really need it bright, try to keep it under +3dB.

The bass-heavy mix

Bassy mixes are ski slopes.

Bass-heavy mixes are very common in electronic music because of the lows needed to make people dance. It sometimes becomes a huge issue for me where clients really want their kicks to punch through, but a kick will sound powerful if it exists on a full-range frequency scale (also in the mids, and high mids).

The good: Bass-heavy mixes will be powerful and can blow away the crowd.

The bad: After a few minutes of pounding lows, if you can hear anything else, it feels very dull. Bassy mixes will sound muddy, messy, blurry, and insignificant. For instance, on a Sonos (like the one I own), all you’d hear would be a thump, thump, thump…annoying, not nice sounding.

The fix: Just like the bright mix, add a shelving EQ but work with the lows. I’d encourage you to revise your kick-design process if they sound too bass-heavy, and also get to familiarize yourself with how your favourite home sound system is calibrated.

The peaky mix

Look at this peaky curves! So sexy… not…

A “peaky” mix is my own term—it’s when I look at a mix and the curve has these big frequencies sticking out, while everything else is low (hence “peaks”).

The good: If done well, emphasizing certain peaks can be a good way to create dynamics in a song in terms of volume differences between your sounds. In some cases, it can create a sense of depth, but in doing so you demand a very active listening experience from the listener to be able to achieve this effect. This technique common in jazz, for instance.

The bad: Done wrong, a peaky mix just feels like there’s no power to it and the song will feel thin and some sounds will feel resonant.

The fix: Revise your mix entirely. Pull down the gain on the peaking sounds, then turn up the gain on the master to create something more even. Fixing peaks demands patience and practice.

The Gruyere mix

A rare specimen that is a mix between Gruyere and peaky, wearing red glasses.

A Gruyere mix is one with hole(s)—on a big sound system, they can feel partly empty, or just wrong. Basically, the feeling of holes in a mix is a sign that it could tweaked to cover the missing areas.

The good: Truth be told, you can always live with a mix with holes. You won’t really face any serious issues, but your sound might feel flat.

The bad: Let’s say you could cover more mids with your percussion to cover a hole—then perhaps your percussion would feel more powerful. If your pads are lacking body at around 200hz, they will lack power. These holes are simply pointing out that some sounds could use a bit of tweaking.

The fix: Revise your mix. Try to see if you can boost weak parts of certain sounds. On the master, use a high quality EQ and gently boost the holes up, as that can make a difference.

The thin mix

A thin mix is one that, on the spectrum, looks good, but somehow doesn’t seem to drive at all.

The good: It’s gentle. Maybe you like it that way on purpose?

The bad: No power, no loudness, dull.

The fix: Add a compressor in parallel mode (50% wet) on the Master bus to give the mix a bit of thickness.

The punch-less mix

Punch-less means a mix just doesn’t punch, slap, or kick as it should.

The good: Non-punching mixes could be good if your music on the ambient side of things.

The bad: For dance music, you need at least some elements with punch, like the kick and/or clap.

The fix: Use transient shapers and/or compression with a slow attack and high ratio to turn your lifeless elements into something with attitude.

All these fixes need practice before you come out with a nicely balanced mix—I hope this has been useful advice on how to balance a mix!

SEE ALSO : The benefits and risks of using a reference track when mixing

Mixing projects with many tracks or sounds

If you are familiar with my music, you know I love things complex and busy. Many people in our online community share songs they are currently working on that have a lot of content in them, so I thought it would be practical for me to share what I’ve learned about mixing too many tracks at once.

The pros and cons of using a large number of different sounds in a song

Pros

  • The song becomes exciting to listen to.
  • For listeners, there’s always something new to discover on each listen—this is good for replay value.
  • A song can develop complex call-and-response story-lines. After multiple listens, a listener might notice that certain sounds are “talking” to one another.
  • A song becomes very colorful—covering many frequencies of the spectrum in a single track can feel like a rainbow to the ears.
  • Movement—using multiple sounds can be a cool way to create the impression that many things are moving at once.
  • Stereo effects—if you like action and panning, playing with the panning of many sounds can be fun.

Cons

  • The song can feel overwhelming. Work by someone who is not familiar with producing with many sounds can feel irritating and hard to connect with if the brain of the listener doesn’t know what to focus on.
  • Complex tracks are harder to DJ. If there’s a lot going on in a track, it can be hard for a DJ to find other appropriate songs to mix it with.
  • Complex songs can feel confusing. If a sound isn’t well mixed, it can be confusing on certain sound systems.
  • Phasing issues—if you’re not careful, some sounds can technically disappear in mono, and on some sound systems, this effect can be weird.
  • The timelessness of the piece suffers—if you’re overdoing it, it might be difficult for people to get emotionally attached to the track and it will not age well.
  • Losing the hook in the mix—it’s super important to have your hook be very clearly discernible in a jungle of sounds.

Despite these cons, it can be quite fun to use a lot of sounds in your work; most of the risks come from technical challenges in mixing too many tracks or sounds at once.

Sometimes people crowd a track with tons of different sounds because they’ve spent too much time on it and they’re afraid people will get bored.

Mixing multiple sounds requires the producer to approach the mixing process in a few different phases. Let’s say you’re happy with the arrangements in the track—you can then move on to the next step(s).

Should you mix while working on your arrangements simultaneously?

Yes and no. When I’m arranging, I make sure the levels are OK but I won’t deploy an armada of plugins to polish the mix yet because it drains CPU and also because some unfinished arrangement details might completely change the mix itself; I would have to re-polish afterwards.

One of the first things I do when I get to mixing is to question if all of the sounds I’ve included in the project are essential to the narrative of the song or not. You can start by listening to the song and perhaps cross-checking with a reference.

How does one know if a sound is essential? Try removing it. Sometimes, having fewer sounds in a mix can be beneficial to other sounds so they can be heard properly. If you are in love with certain sounds, you can save them for the next track you’re working on if you don’t think they work in your current mix.

Establishing a hook

What’s your hook? Is it the bass? Or is it a 2-bar melodic sequence? Are the rest of your sounds either decorative, percussive, or supporting your hook? What’s the purpose of those additional sounds? People will remember the hook when listening to your song—the other sounds can be described as “decorative”. While some producers are really against using too many decorative sounds in a song, there are no rules to making the music you like and I encourage you to say to anyone telling you “you’re doing it wrong” to just mind their own business. If you like lots of sounds like I do, that’s all that matters, really.

In the late 90s, there was a huge interest in minimalist techno. One of the approaches that artists like Hawtin were obsessed with back then was trying to use as few sounds as possible in a track and still getting their message across. [Hawtin] would come up with an idea and surround it with only the bare-minimum; his idea was that a track was a part of a bigger picture that included assembling it with other tracks.

Mixing with groups

Mixing with groups can be done in many different ways, but to use groups effectively it’s essential that you have a good understanding of the nature of each sound in your project. For instance, I usually have a big group named “Percussion” which will have its own sub-groups. The sub-groups can be different themes on that main group:

  • Same “family”. All “metal” samples could be grouped together, wooded ones, synth, tonal, atonal, etc. Having a group for each family of sounds is excellent for EQing similar resonances these sounds might all have.
  • Same length. All short samples could be grouped together, all long ones, etc. This is useful if you want to use compression and control the groove.
  • By stereo position. All sounds in mono could be grouped together, sides on another. All high, forefront, or far-back sounds could be assigned to different groups. Grouping by position is useful for controlling a portion of the stereo field’s positioning and volume all at once.
  • Other sub-group types. You can come up with your own sub-groups based on what seems the best for your particular track. The idea of a group and sub-group is to control something common to all its members.

Leveling many sounds

Attaining proper volumes for each sound is critical for a mix with a lot going on. If you’re using Ableton, I suggest you switch to the session view to be able to see the meter of each channel. Just by eye, try to start by making sure that they’re all roughly even. After they’re even, lower some 20% lower, others 50%, and some very, very low. Which sounds you lower will depend on what sounds you want to be “decorative” and what sounds you think are a part of your main hook. One of the most common mistakes I hear in complex mixes with many tracks is that the producer is concerned that all of the sounds won’t be heard, so they’re all turned up too loud. The thing is, if you use a lot of sounds, it’s better to have some that are way lower in the mix, and just like in percussion—we call them ghost notes.

Creating unity in a busy mix

How can you make sure all your sounds feel like they’re a part of the same song? Sometimes when you use a lot of tracks and sounds, some might sound lost or it might feel as if two different songs are playing at once.

Grouping

Unity is something that groups can really help with. If your mix doesn’t feel like one song, the first fix you can try is to apply reverb to each of your groups. You can either use a AUX/Send bus, or apply different reverb per-group. I usually keep it at a low 10% wet only, but you can exaggerate too. Similarly, if you EQ a group, you modify the signal of each sound, and this usually helps blend all the sounds from the group together. I put an EQ on a group by default and then will do at least one cut where there’s a general resonance. Compression works magic on groups too—especially a vari-mu type of compression with a pretty aggressive setting; this will feel like adding butter to the whole thing.

Gating

There are multiple ways to use gating, but I like the simple gate from Ableton that has an envelope and an incoming side-chain. If you gate an entire group to one of the main percussion elements of your song—such as the regular clap for instance—it can provide a lot of room to other sounds and have them not be in conflict.

Side-chaining

Like I said, compression is great to bring all the sounds together and a bit of subtle side-chain is also really practical. I like to side-chain some decorative percussion to the main hats, so I make sure they peak through. The best option here is to use Trackspacer as side-chain because it will only use frequency of the incoming signal instead of the amplitude. So for instance, if you use it to side-chain hi-hats from a clap, only the conflicting frequencies of the clap will be removed from the hats.

Modulation

One of the riskiest things a producer can do when mixing many tracks or sounds is the use of stereo modulation such as auto-pan, chorus, phasing, or flanger. These effects make sounds move, and if multiple sounds are moving at once, then you’re going to face phasing issues. I always use these modulation effects on specific sounds in each song, but the sounds that are modulated are treated as “main” sounds. This means you have to give them a lot of room in the mix otherwise they’ll get lost.

Finalizing the mix

Finishing a busy mix is where most people get confused and many fail. The main percussion and other main elements of your song should be mixed first as-is. Then, all elements that are decorative should be mixed in, as a second layer like a “cloud” that completes it all—you’re bringing the main sounds and decorative sounds together. Usually, in the end—thanks to Live 10’s multiple groups feature—I end up having only two faders to mix with. You’ll need to compress them both with a gain reduction of about -3dB to create the impression they merge well together.

But before you get to your final mix, it’s important to get all your sounds right, group them, and control them all first. The final blending of these two major layers at the e nd will be pretty easy if you can get your levels together.

SEE ALSO : Creating organic sounding music with mixing