How to maintain consistency in the quality of your productions

The most consistent musicians have reached a comfortable flow and they finish tracks that they’re satisfied with fairly quickly. But how do they ensure that each of their tracks are maintaining the same level of quality as their first well-received works, as they complete more and more of them?

Making a lot of songs/tracks and actually finishing them is, to me, one of the most essential purposes of making music. Stalling on a particular idea or song builds up doubts, and eventually you’ll grow to hate it. If you finish up a track quickly—as opposed to more slowly—you capture an idea you liked at a precise moment in time and make the most out of it, then move on to the next idea.

FACT: you will always learn something new when you finish a song that you can apply to the next one.

The faster you become at completing tracks, the more you become articulate in your self-expression; if you dig a really good idea, you’ll know what to do pretty quickly to make the best out of it.

Many well-known and consistent artists make multiple songs (yes, songs!) in one day. Marc Houle, Ricardo Villalobos, and Prince to name a few, have expressed that they like to sit, jam, record, edit a bit, and then move on. Ricardo’s long songs are actually long sessions that haven’t been edited. “It’s more important to simply record something each time you hit the studio rather than make a perfect song“, I’ve heard him say.

How do you maintain consistency in your work when you’re creating a ton of tracks?

My personal mentality that I like to have is to not get too attached to the music I make, nor about its potential or future. With this mentality in mind, you can embrace imperfection, have more relaxed sessions, and have more fun. But yes, there are also some technical points you can keep in mind to avoid letting your work slowly degrade in terms of quality while trying to maintain a regular quantity of completing tracks:

  • Stay away from trends or gimmicks. Trends can be hard to spot when they’re first evolving, but usually there are signs. When many people use the same samples over and over, which can often define a style, you know that’s a road probably too often taken—in going there yourself, you might get lost in the sea of similar sounding songs. To me, production trends are about some samples, effects, and arrangements that become a norm. I’ll always remember a long time ago when I was into hard techno, I was at the record store listening to a pile of 30 records and every record had the exact same structure to the point where you could predict when the kick muted, the hats came in, and so on. Sounding like existing trends is not a good way to stand out as a memorable, original musician; timeless music is often “odd” when it’s first released, but something catchy about it makes it work.
  • Use scales. You don’t always have to be using an established scale when writing, but it will help your music age a bit better. Off-scale or highly dissonant music not only sounds a bit weird or off-putting to the average listener, but by working with established tonal scales people can reference your music decades later. When I think of high-quality music, the musicality in terms of scales is always top notch. If it’s purely experimental and still high-quality, it’s usually based on a concept that makes it relevant.
  • Cross validate with references. I can never stress this enough—your references, loaded in a playlist alongside your music, should feel right.
  • Have a friend as quality filter. A reliable friend is one that will tell you when things aren’t working. I personally like to have 5 people to send my music to in order to get reliable feedback. Sometimes I feel more excited sending them my music than submitting it to a label. You should have 5 responsive people that want to listen to your stuff; proper feedback is a great feeling when done right.
  • Keep your renderings/bounces at -6dB, 24bits. This is in case you want to release them in the future, but also because music with headroom is universally more well-received. Back when the trend was to have very loud mixes, your music was irrecoverable later on if you lost the original mix. Loudness has also aged terribly since this trend went out-of-style.
  • Use quality samples and quality tools. What makes a great mix is the use of great samples. Working with a harsh sample means you have to use more effort to make it sound better, but the end results could still bad, or even worse.
  • Simplicity ages best. Humans tend to remember simpler ideas. Complex intentions and complicated, draining music isn’t always the best in the long-run. I’m not saying “don’t do it” if you’re into it, but maybe to tone things down a bit if you’re interested in the longevity of your work. I’m in love with this quote by Da Vinci: “simplicity is the ultimate sophistication.”
  • Make sure your mixing is high-quality, and use quality effects. If you can make sure your song is properly mixed, it will certainly age much more gracefully. Otherwise, you might regret some decisions you made in your mix as it ages. Cheap effects and presets don’t age very well because others might also use them heavily. Further down the road, your originality might feel lacking as a result, and plus nothing ages worse than a gimmicky sounding effect (ex. think of cheesy effects used on audio in the 80s.)

The effects of your work habits on maintaining consistent quality in your work

There are things you can do to make sure all your tracks end up with a level of quality you are happy with and will continue to be happy with as they age. I believe that working on multiple tracks at once is a great way to maintain perspective on your quality levels. Personally, I also like to export half-completed tracks and listen to them later, or import them into the next track I’m working on to give myself better perspective(s). Sometimes, I encourage clients to bring in all the tracks they’ve made in the last few months so we can toggle between them easily and make comparisons—this task might reveal a lot to you regarding the patterns and trends you use the most.

Building a great groove

Have you ever been on a dance-floor and heard a track that connects with you in a very physical way? Physical connection creates a sort of energy that is infectious and makes you want to dance until your feet give up. This feeling is all about the groove in a track; creating a groove makes the combination of elements and arrangement feel just right to keep you dancing. What follows in this post is my personal take on groove, and the steps I’ve learned that I think work best to create a great groove.

Taking into account that everyone has a particular taste, a groove that can give me this irrevocable urge to dance may not do the same for you, and on the other hand, you may relate to other tracks in the same way which don’t do anything for me. To better understand groove, I recommend that you take a step back and subject yourself to some critical listening.

Critical listening includes listening to some reference tracks with your eyes closed and making mental notes of what seems to work best. How do the elements in the track relate to one another? What kinds of sounds are used? Is the groove driving or swing-y? Listening this way will give you great ideas with regards to what works and what feels forced for you personally. I cannot stress this point enough. Have you ever made a track which you felt was “good” but didn’t create a sense of physical movement or urge to dance? Review the groove and change it, and you’ll hear an improvement.

Based on my own personal taste, I feel that when it comes to groove, less is more in terms of what works best. Subtlety coupled with taking extra care in the sound design/sample-selection stage will help your ideas flow smoothly. Understand which sounds you want to be the “protagonists” from the get-go, and you will be able to fill the space much more naturally. 

Workflow for creating a groove

  1. Build a simple pattern. After designing some sounds you feel are nice, take them and start constructing the foundation of your groove. While most of the time drums and percussion are associated with the groove, they are not the only parts which have to work in order to have a nice flow. Pheek’s Guide to Percussion has some great tips on call and response—a concept you must focus on quite a bit to build a solid groove.
  2. Once you have your pattern, add some variations to it. A variation could be muting the kick every eighth bar, or having a hat come in and out sporadically, or even changing the note of a synth stab you are using for the groove. You’ll notice that your groove already feels more complete once you add some variations. Micro-variations help to keep the listener interested as the pattern evolves a bit within itself.
  3. Swing is your best friend! It doesn’t matter if you’re working inside the box or with hardware—take your pattern and apply some swing to it, whether it be via Ableton groove pool or just micro-timing changes (moving things just a tad off grid), this will make this pattern feel less robotic which is what we are going for. This last point is very important for a nice groove, but some kinds of music don’t apply this technique as aggressively because they are just hard hitting and energy driven, but many others rely on these small details and time changes to give a human touch to the pattern. 
  4. Add some effects to your sounds. Instead of programming each MIDI note or step, add some delays—both triplets and eighth notes work well—with some very short feedback and dry/wet. Here’s where you can go crazy experimenting—you will notice that when you use these delays and reverbs your sound begins to morph and ghost notes appear in the background, which make things feel fuller and glued together.
  5. To continue morphing it, apply some modulations and LFOs to control different aspects of a sound; from panning to volume, modulation allows a pattern to evolve on a macro-scale and creates movement, which is crucial in creating a great groove. 

Don’t forget that it’s important that all your elements work well together. If you feel something is out of place, take a couple of minutes to review it—experiment and you’ll create “happy mistakes” which end up being great. I like to use the word coherence to describe how things work together in a track. If a track has a coherent groove in which the drums, bass-line, synths, and other parts work well together, then it will be infectious. Many people use the coherence approach, and you can go crazy with it. Again, listen to some references and use them as a starting point while asking yourself the important questions:

How much swing does the pattern have?

How does the bass-line relate to the percussion and main drums?

Are synths being used rhythmically or as background sounds?

Don’t be afraid to revise a groove, but also learn when to compromise—after a session take a break and come back to it with fresh ears. If your groove is solid, you will feel it. If not, you’ll have an easier time fixing it when your perspective is fresh.

SEE ALSO : Honing your production skills before releasing music

Sending demos to record labels as an “unsigned” artist—an online experiment

Being a “signed” artist is a big topic; it’s both a good thing and a bad thing at the same time. People’s perceptions of being “signed” to a label is mainly the issue, in my opinion. In a past article, I stated that you could go label-less and still do fine in music. But what if you want to be signed and want to collaborate with others and constantly face obstacles? For the sake of this article—which took me a while to write—I went undercover using an alias: I made some music outside of my usual music signature and then contacted a bunch of labels to see how things go when you have a very low profile on Soundcloud and are sending demos to record labels online.

The idea of going undercover was primarily to see how labels reacted to an unknown artist with quality music, but also to decipher how to make things easier.

But before I share the story of what happened, let’s talk plain strategy and I’ll share a few facts with you that I had in mind before embarking on this experiment.

What a label will look for in new potential artists

1. Labels want music that fits the label’s sound/ethos, and an artist that fits their image, so it can be presented and sold properly. Listen to the latest releases of the label on Bandcamp/Soundcloud to see if your music fits. Note: many people will contact a label based on music they released years back, and that’s usually a big mistake.

2. Usually labels will want someone from within their network. If you’re not friends of friends, the odds you fit into “the circle” is less likely, so it’s important to do a bit of name-dropping or to get to know people that the label knows.

3. Having depth in your collection of tracks is critical. If the label likes 2 of the 4 songs you have, they might ask for more. Having a bunch more is very useful, plus it shows that you write on a regular basis. In other words, it shows you’re serious.

4. It’s a huge win if you tour, play gigs, or have important releases up your sleeve. This can be an issue for many. There are way too many producers and performers compared with the number of opportunities to release and play out. So it’s a catch-22; you’re more likely to release because you already release music, and you’re more likely to play out because you already play gigs. If you don’t, then you’ll get less traction. One doesn’t guarantee the other, but either definitely helps your profile. Your network of contacts is a very important factor for finding success with your music, so whatever you do, building a contact network is equally as important as making quality music.

Getting back to my unsigned alias experiment, I decided to take on a role of someone who is completely outside of the system, is new to production (but is knowledgeable), and never plays out or releases anything. I created an alias—which I won’t reveal here as I want this experiment to be ongoing—and I said I was from Scandinavia, where the scene for micro-house is not super strong. My communication skills were okay, but I didn’t know anyone in any of the label networks I contacted.

So how did it go?

This experiment went terribly.

I contacted thirteen labels with four tracks. I validated my work with a friend who said the tracks were good, playable, and release-worthy beforehand. As a label owner myself, I’m very picky about how someone should approach me, so I wrote a professional email for each label. I contacted each label on Soundcloud and through email if possible. Ideally, I knew the best way of getting a label’s attention would be to go through an artist on the label, but I didn’t want to blow my identity. Here’s the message I sent:

Hello! My name is [XXXXX] and I’m a young producer from Scandinavia. I got familiar with your label through discovering releases that I believe are similar to the music I’m making. I checked your latest releases on Beatport to see what you’re up to recently and I think you could probably enjoy these 4 tracks I’d like to present you. Let me know what you think.

The four tracks I sent out were in private mode on Soundcloud, and I made sure that people didn’t listen to them before sending them out. My account on Soundcloud had no followers, and the profile picture was pretty enigmatic as well.

Out of all of the thirteen labels I contacted, only four took the time to listen to some of the tracks, not all. Only one label replied to my initial message with a “thank you.” Honestly, if I was the guy I pretended to be, I would be pretty discouraged. I’d say that even myself as a veteran musician, when I try contacting labels sometimes it’s still, very, very hard. I even followed up with the non-responsive labels with my Pheek alias and even then, still no replies.

From this experiment, I concluded that no matter how talented, polite, and organized you are, it’s very unlikely for things to work out well for you if you submit your demos online like a cold-call. The most successful deals will happen because you’re part of a network that probably has in-person contact. In past posts, I have been insistent on the importance of working on what you can control: the quality of your music, originality of your ideas, working with people you can count on…etc.

What labels look for in the online profiles of artists

If you still want to submit your demo online despite the difficulty in getting it heard—let alone signed—here are some tips about what labels are looking for:

  • An online presence: presence on the most important websites such as Instagram, Soundcloud, Resident Advisor, Mixcloud.
  • Material published on a Soundcloud profile with comments from listeners. No one wants to see 5k plays or less and no likes or feedback. As a label owner, I also don’t like to see a profile with no music posted publicly. As an artist, it’s important to have some kind of portfolio. It can be published material, but if you’ve never had a release, posting music you’re working on is a sign that you’re serious about what you do.
  • Self-published material is always a plus. I like to see people who don’t wait for things to happen to them, but are proactive and have the energy to make things move, even if not much is going on afterwards. Seeing someone who has a non-empty Bandcamp profile shows some seriousness and experience with how to create a release.
  • An artist with tons of quality music that is unsigned. There’s nothing more exciting than to discover an artist that is emerging that has tons of quality tracks waiting for getting signed. I can’t emphasize enough on this to new artists I work with with mix and mastering. Keep making music—tons of it. Make sure your work is quality so that the day you find a label who wants to work with you, you’ll be more than ready to present them the best quality album you have. Additionally, when a label knows that you’re working with a mentor, an engineer (myself or someone else), it shows your dedication and passion, which is also something labels really want to see in you. One of the hardest parts of finding a label is presenting yourself to the world and to DJs, so anything that can leverage your release(s) is something that can make a big difference in the end.

If you’re unsigned and you’ve had feedback from people you trust saying your music is quality, stay focused on making music and dedicate some time to trying to find people who want to work on it with you. Part of me believes that anyone talented will always find a place to release. Usually my clients hate when I say that, but I’ve had people come back to me years later who’ve finally found some level of success. I think some of the best places to meet people that you can rely on are festivals, record stores, and other in-person events where you can spot artists. You can reach out to DJs right away, but perhaps it’s more effective to reach out to a network or a group of people. What if you’re socially awkward? Typical issue for us nerds. I’ve worked with people in this position and the ones who “made it” were the ones that were picky about the contacts they made. I’d encourage you to join our community on Facebook, too—we’re friendly 😉

SEE ALSO : How To Reinvent Your Sound

Tips to add movement and life to your songs

One of the most popular topics in music production is with regards to making music feel “alive” by creating movement in music. While I already covered this topic in a past article, I’ll focus today on tools you can use and some techniques you can also apply to create movement.

First, let’s classify movement into categories:

  • Modulation (slow, fast)
  • Automation (micro, macro)
  • Chaos
  • Saturation

One of the thing that makes modular synths very popular is the possibility of controlling and modulating many parameters the way you want, but the other aspect that makes it exciting is the analog aspect. You’ve probably seen and heard multiple debates about the analog vs digital thing and perhaps, what’s funny is, many feel they know what this is about but yet, can’t really figure it out.

Take, for example, something we all know well: a clock that shows time.

An analog clock is one with needles that are moved by an internal mechanism, making them move smoothly in harmony while time goes by. There’s a very, very preciseness to it where you can see the tiny moment between seconds.

The digital or numeric clock jumps from second to second, minute to minute, with the numbers increasing: there are no smooth, slowly incrementing needle that moves between numbers; they just jump.

Sound is pretty much the same in a way. Once it’s digitized, the computer analyzes the information using sample and bit rates for precision. The flow isn’t the same, but you need a really precise system and ear to spot the difference. Some people do but it’s very rare. This is why, in theory, there’s a difference between digital files and vinyl records.

One eye opener for me was that when I was shopping for modulars at the local store, I was talking with the store’s specialist who was passionate about sound. “The one thing I don’t like about samples is, the sound is frozen and dead”, he said. With modular synths, because there’s often an analog component, the sound, on a microscopic level, is never the same twice.

This is why using samples and playing with digital tools on your DAW, needs a bit of magic to bring it all to life.

Modulation

By modulation, we’re referring to tools that move parameters for you, based on how you have configured them. The two main modulators you can use are:

  • LFOs: As in Low Frequency Oscillators. These will emit a frequency in a given shape (ex. sine, triangular, square, etc.), and a certain speed. They can be synced to your song’s tempo or not. LFOs are often included in synths but you can also find once instances in the Max for live patches.
  • Envelopes: Envelopes react to incoming signal and then will be shaped in how you want. Compressors, as we discussed recently, kinda work with an envelop principle.

There are multiple aspects of a sound you can modulate. While there are numerous tools out there to help you with that, it’s good to know that there are a few things you can do within your DAW. The main things you can modulate are:

  • Amplitude (gain, volume): Leaving the level of a sound to the same position for a whole track is very static. While there’s nothing wrong with that, it’s means that the sound is lacking dynamics.
  • Stereo position (panning): Sounds can move from left to right if you automate the panning or use a autopanner.
  • Distance (far, close): This is a great thing to automate. You can make sounds go further away by high passing, filtering to higher frequencies. Combined with the volume, it really push the sound away.
  • Depth (reverb): Adding reverb is a great way to add space and if you modulate, it makes things very alive.
  • Sound’s length (ADSR, gating): If you listen to drummers, they’ll hit their percussion so that the length constantly changes. This can be done by modulating a sampler’s ADSR envelope.
  • Filtering: A filter’s frequency and resonance changing position as the song changes offers a very ear pleasing effect.

Some effects that are modulating tools you already know are chorus, flanger, autopan, phaser, and reverb. They all play with the panning and also depth. Adding more than 2-3 instances in a song can cause issues so this is why it’s good to approach each channels individually.

My suggestion: Have one LFO and one envelope on every channel and map them to something: EQ, filter, panning, gain, etc.

Some amazing modulators that offer really good all in one options that you might really enjoy (as I do for quick fix on a boring stem):

QuatroMod

LFO Tool by XFER Records

ShaperBox by Cableguys – My go to to really bring sound to life.

Movement by Output  – This one is stellar and really can make things feel messy if pushed too far but the potential is bonkers. You instantly turn anything into a living texture that is never boring.

AUtomation

Automation is what you draw in your DAW that allows you to make a quick-moving or long-evolving effect. You might already know this but you’d be surprised to know that it is too often, under used. How can you know this though?

I have my own set of rules and here are some:

  • Each channel must at least have one long, evolving movement. I’m allergic to straight lines and will sometimes slightly shift points to have them have smallest slant. My go: amplitude, EQ or filters.
  • In a drop down list of each potential parameters, I want to have at least 3 things moving.
  • Each channels, must have at least 3 quick, unique, fast change.
  • Include at least 3-5 recorded live tweaks. I like to take a midi controller and map certain parameters and then play with the knobs, faders. I record the movements and then I can edit them wherever I want in the song. This human touch really makes something special.

While working with automation, one thing I love is to use Max for live patches that create variations, record them as automation and then edit them. It’s like having an assistant. There are great options to chose from but my favorites would be:

Chaos

By “chaos” I mean using random generators. They would fit under the umbrella of modulators but I like to put them in their own world. There are multiple uses of generators. You can take any LFO and switch them to a signal that is random to make sure there’s always a variable that changes. This is particularly useful with amplitude, filtering. It really adds life. You can also use the random module in the MIDI tools to add some life. Same with the use of humanizer on a midi channel. Both will make sure the notes are changing a little, all the time.

Saturation

If we think of the earlier example of how analog gear is constantly moving, using a saturator is a good way to bend perception. We previously discussed saturators in an earlier post but we didn’t talk of a super useful tool named Channel strip which often has an analog feel included. It remains transparent but it does something to the signal that is moving it away from a sterile digital feel.

My favorite channel strips would be:

The Virtual Mix rack by Slate Digital. Raw power.

McDSP Analog channel

Slam Pro


SEE ALSO : Getting feedback on your music

The EQ and compression combo (Pt. 3)

After going into details with regards to EQ and compression, in this post I’ll cover some practical tips on how they work well together. I’ll try to also clarify why many engineers will tell you that all you need is these two tools to accomplish most of the work in mixing and mastering.

Here are a couple terms and ideas that have to do with this topic:

  1. There are no rules for how to use EQs or compressors. You’ll read many different views online, and some people will affirm loud and clear that their point of view is right, but after 20 years of trial and error, I still feel that I’ve accomplished a lot of great things when I knew less than now. Relying on your ears is really important. Some of the most innovative trends involve people who have no idea what they’re doing else than following their gut feeling.
  2. Substractive correction. It involves only cutting the junk out.
  3. Coloring correctives. This usually means that you’ll boost frequencies. Sometimes, cutting might necessary.

To start with, I’d point out that in mastering or mixing, one of the most common chain would look like this:

[Corrective EQ]  –  [Compression]  –  [Color EQ]

There’s precise logic behind this. Basically, you want to take the rogue frequencies out first, compress and readjust the good ones with the compression, and finally adjust the tone or highlight details with a coloring EQ. My personal preference for better results would be that whenever I cut, I do it with a pretty narrow Q (resonance) on the EQ. A great starting point is to start with 2 or 3 and then adjust. Don’t hesitate to use visual reference of the FFT that is often included in the EQ’s display, especially if this technique is new to you. Then, I’d cut about 3dB at first, up to 5. You see how this changes your sound by bypassing the EQ and comparing.

When it then comes to compression, there are a few different things you could do here. For instance, if you go with an aggressive setup, then you’ll beef up what you have “open” by cutting away the bad frequencies. I’d suggest starting with a more exaggerated approach to see what will pop as annoying. It might not be possible to hear what’s wrong if you don’t push the sound to its limit.

Once you see and hear issues more clearly, you can cut again, then you roll the compression into parallel mode to have some of the incoming dry signal mixed with the compression.

If you haven’t explored the side-chain frequencies, this is an option where you can decide that your compressor won’t apply anything starting at the target (ex, anything under 100hz). With this, you might want to filter only a part of your song with the EQ and then compress to accentuate the part you want to put to front.

The last process in the chain is the color EQ. You can take any EQ you like but ideally, I’d go for either an analog emulation or a shelving EQ. Those will provide a nice enhancement to complement what the compressor has been doing. For coloring, you can explore. One way to approach it is to completely exaggerate one band to see how it sounds, and then roll down. This is not only very interesting for sound design, but also for mixing more subtly annoying details. It can help build body for a sound that feels week too.

Examples of where to start – EQ and Compression

A pad that that lacks body and roundness. In this case, it’s most likely that a resonance is poking through too loudly and that good frequencies are hidden behind it. You could start by checking if there is one peak on the spectrum and with your corrective EQ, with a not so wide Q (ex. 1.5 to 3), try to bring that peak down pretty severely with a cut of 5-6dB. Get the threshold of your compressor to meet the highest peak and then adjust the output to be the same as the input. With the shelving EQ, bring the mids up but 2-3dB.

A kick that lacks bottom. This might be related to the mids of the kick that are too loud. You could lower them by 4-5dB, then compress with a ratio of 8:1. The shelving EQ should then bring the lows under 100hz up by 4db. If that doesn’t do, cheat by using the corrective EQ to notch up a bell curve at 50hz.

Percussion that are harsh. This is usually because one frequency is resonating around 4 to 8khz. It’s hard to say but try to cut by 8dB and scan around to see if there’s at any point, something more comfortable. Bypass to double check and then adjust your cut so that you can make the resonance almost there. Compress with a fast attack to control the transient and glue them. The shelving EQ could be used to lift the highs.

EQ suggestion: The TDR SlickEQ GE will do a great job for correcting.

Compression: The new SphereComp is super lovely and affordable. I tested it in sound design and it does really nice gluing.

Shelving EQ: I tried the demo of EVE-AT1 and I think you’d like it just like I did. The price is incredibly good for what it offers!

SEE ALSO : Saturation Tips and Hacks

Tips and recommendations for compression (Pt. 1)

After two important posts on EQs, it’s time to start discussing how to use compression, as these two work so well hand-in-hand, and I’ll offer my own recommendations on some of the best compression VST plugins. Your own selection of VSTs should always start with a few of these two categories:

For EQs:

  1. One Parametric EQ for surgical needs.
  2. One Shelving EQ for toning.
  3. One analog based EQ for coloring.

For compression, there are also several choices and it’s easy to get lost, so one of the things I find important to start with is to explain the different families of compressors (more suitable to relate them to as models).

FET

This type of compressor is one of the most popular out there. It’s known for its aggression and for its use of adding tons of punch to sounds, mixes, with a lot of attitude. The FET compressor, which means Field Effect Transistor, appeared later in the history of compressors, when they switched the tubes for to a model that helped make sounds warmer and richer; it became an instant favorite in studios. The 1176 is one compressor that became one of the most popular models in studios.

Use: Amazing punch on percussion and add life on textures, pads.

Recommended plugins:

FET Compressor (Softube)

FETpressor (PSP)

Black Limiting 76 (IkMultimedia)

Opto

This type is pretty much the opposite of the FET (although there are people who will argue about this). The Opto model is smooth and super warm. Not idea for percussion but I do use it in parallel (see techniques below), which can give beef to a kick, for instance. The way this model works is very interesting. It’s basically a lamp that reacts to the incoming sound and will light up depending of the incoming signal. I’m not the best at explaining this, but that pretty much sums it up,  and this makes the Opto compressor not the most aggressive, as it offers smoothness.

Use: Ideal for pads, synths, textures and I would recommend you experiment it with percussion, but in parallel mode.

Notable suggestions for VST:

Bx_Opto (Brainworx)

Opto compressor (IKMultimedia)

Renaissance Compressor by Waves also offers an Opto mode.

VariMu

VariMu is like the prince of compressors because it has finesse and elegance. Manley popularized the VariMu with their famous version of it. It is a cousin of the Opto in the way it works, and is also very smooth. Often used in mastering, it works like a charm to handle punch problems or to keep coherence in a mix that needs general glue to it. It’s not the best to create punch and this is why, but when used in pair with another compressor, it can really create beautiful results.

Use: On your mix or on a group. It will glue it all together in the most luscious way.

Suggestions of plugins:

The Manley Compressor from UAD

MJUC by Klanghelm

DynaMU by IKMultimedia

VCA

This type of compressor is also very popular just like the FET. I’d say that most generic compressors are often based on that model. Since it’s based on voltage control, this compressor is a surgical type of tool. It is really effective to produce snappiness to percussion but it can also be used to control harsh transients.

Use: Smack those kicks with it and control the transients of hats with another setting.

My favorites:

TDR Kotelnikov

U-He Presswerk

API 2500 (There are a few imitations from UAD and Waves, so check it out)

Techniques

You may have the best plugins but if you don’t know how to use them, you’ll miss the full potential of these amazing tools. I’d say that if you don’t, please know that a large number of producers out there, even experienced ones, struggle to fully understand them. So while you will find so many tutorials out there, I’d like to explain you my simple vision.

But first, let me explain what compression does. It takes the incoming sound and monitors the loudest peak and checks if it is louder than a certain point: the threshold. If that’s the case, it will push down the signal above the threshold, down. I like to picture it as when you sit in a bath, where the water rise as you sit in it. The way a compressor “pushes down” the audio will be controlled by the attack (how fast it reacts), release (for how long) and ratio (how much).

I’d like to compare a compressor to an oven and the incoming music as the dough. The compressor doesn’t work like, let’s say a reverb where if you put it on a sound, you’ll automatically hear what’s being altered. How compressor VSTs work are really, to me, like a oven. You need to bring in the sound, cook it, then push it out.

So, use these parameters when dealing with compression:

  1. Incoming signal. You’ll need to raise the volume of the incoming signal to make sure it meets or is above the threshold. If the signal is too low, it won’t be processed.
  2. Threshold. Lower it down if needed. You’ll see that most compressors have a “GR” for gain reduction meter. This will start to pump as the signal meets the threshold. If nothing happens, lower down the threshold and or boost the incoming signal.
  3. Attack/release. A fast attack will make the pumping start react quickly while a slow one will be less aggressive. You can then adjust the release to control for how long the pumping will last.
  4. Ratio. This is how much will be pushed down. For instance, a 2:1 ratio means that for 2dB over the threshold, it will be turned down by 1dB over the threshold. Eg. 8:1 is a more aggressive result.
  5. Make-up gain/Output. Your output signal will be turned down in the process so you can use the make-up gain to adjust the processed signal to match or be louder than the incoming signal.

So yeah, it sounds weird on paper, but compression is about lowering the volume to make things louder.

Regarding my analogy with the bread, you need to make sure it bakes (gets compressed) before pushing it out.

Now, the techniques you can use compression for:

  1. Limiting. This is the most known use of a compressor. It is a way of making sure the sound never goes above a certain level. Ideal on a master bus to avoid clipping. You can use it to a certain extent on busses to maximize the volume. But make sure it’s not too much as it can then distort in mastering.
  2. Side-chain, ducking. Popular in electronic music, this makes the compression work based on an incoming signal. I’ll get back to this in a future post.
  3. Parallel compression. To do this, you need to put the compression in an AUX/Send bus and then send whatever needs compression to it. This ensure the original signal is mixed with the compressed one, adding power, loudness, precision.
  4. Serial compression. To be used with care, but has very powerful results. This is about putting two (or more) compressors back to back. One can be in parallel (thanks to a wet/dry) and the second one, not. This makes sounds really powerful, punchy, fat. Ideal on sounds that are wimpy and pale.

That’s it for the basics of compression! I’ll discuss the art of sound design using compression and EQs next.


SEE ALSO : Tips for compression: The Multi-band compressor (Pt. 2)

Tips on how to pick your EQs and use them (Pt. I)

People often ask me about my opinions on what the best audio plugins are, and there are no doubts that investing in quality EQs and compressors is one of the most important things you can do for both sound design or mixing. You can do pretty amazing things just with EQ and compression, but of course you need to understand your tools to make the best of them. In this post I propose some exercises and tips, as well as covering the main tools I have gathered through the last years and my thoughts on the best EQ plugins.

Types of Equalizers

There are many types of EQs and I believe some are more important than others. It took me a while to understand how to fully use them all and how to select the right one for specific situations. This subject is actually so vast and complex, I could make a series of multiple posts and I wouldn’t get through it. I’ll try to avoid being too technical and will explain them in simple terms so anyone can understand.

The way I approach EQs are based on different actions:

  • Corrective. Sometimes a sound will have part of it that will feel aggressive and annoying. I will do corrective by spotting where where it looks like it’s an issue and then cut. Corrective cuts are usually not too narrow (Ex. Q of 3)
  • Surgical. A resonance in a sound makes your ears hurt and that will need a very narrow cut. (Q of 6-8+).
  • Tonal adjustments. An EQ can be used to make tonal changes such as deciding if you want your track more beefy or more light by either boosting lows or highs.
  • Coloring. Some EQs aren’t transparent and will have a musical touch to the changes it makes. This will add some personality.
  • Valley cuts. The opposite of surgical, where the Q will be make the curve really wide. It makes very subtle changes, somewhat tonal, a bit colored and sometimes a bit corrective. Try it at different points on a sound and see it change without being able to really know what’s happening.

TIP: The human ear will hear a noticeable difference if you cut 3-4dB minimum. If you cut 6dB, it will be quite obvious.

The main types of EQ plugin categories are:

  • Graphic/Fixed Frequencies. Influenced by older models and the first EQ, the frequencies you’d have access to are fixed and won’t be changed. In many of those models, the frequencies are based per octaves but certain companies will have their own way of deciding which ones are used.
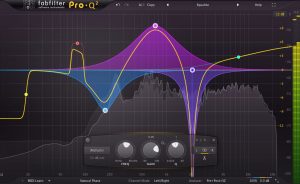
  • Parametric. One EQ that is very popular is the Q2 by Fabfilter which allows you to drop a point anywhere and then be able to shape how narrow you want to cut or boost.
  • Shelving/Band. This is a part of the spectrum that will be affected. For example, on DJ mixers, the 3-4 EQ buttons are basically shelves of frequencies that are altered.
  • Dynamic. This one is advanced. You can “order” a point of your EQ to react depending of certain conditions. For example, if you have a recording of a drum, you can order the highs to lower down by 3-4dB if the cymbals hit too loud. Very practical!

TIP: If you love the sound of analog, you might want to dig in Universal Audio’s suite that does emulation of classic pieces of gear. The fidelity of replication is absolutely mind boggling!

Now let’s make some associations regarding which EQ does what:

  • Surgical and valley cuts are mostly done with parametric EQs. This type of EQ will allow you to precisely identify the rogue frequencies and then cut or boost, in the way you want.
  • Corrective EQ can also be done with parametric but with graphical ones too. Sometimes a correction needs precision but sometimes, it can just be a way to realign the curve of the sound which a graphical EQ can do easily.
  • Tonal adjustments. This is done with shelving and band EQ.
  • Coloring. This is basically fixed frequencies, but if you look for analog emulation or EQs that provide a type of saturation, then you’ll also get some coloring and personality.

My favorite EQ plugins

Here are my thoughts on the best EQ plugins  that are precious tools to have in your arsenal. I’ve also included low budget EQs alternatives that are similar.

1. Fabfilter ProQ2 (Surgical, Valley cuts, Corrective, Tonal)

This plugin seems to have found it’s way in many producer’s tool kit mostly because it can pretty much do it all. From complex curves, mastering touch-ups to shelving tones and copying the frequency of a sound to apply it to another… the ways you can use this beast are so numerous that you’ll have to watch a bunch of tutorials to get all the hidden things it can do.

Budget Alternative: TDR Nova GE by Tokyo Dawn

2. Electra by Kush Audio (Shelving EQ, analog replica)

Not so known by the masses but this EQ is an absolute wonder to have on hand. I use it in every single mixes I do and the results are always amazing. A bit of a learning curve to understand as the GUI is a bit weird but even if you’re not sure of what you’re doing, it shapes the sound in a way that makes it pop out and warms it too.

Budget Alternative: RetroQ by PSP

3. BX_Hybrid V2 by Brainworx (Corrective, shelving)

I don’t think there’s any plugin that can do what this can do in terms of results. Not as versatile as the ProQ2 but where this one stands out is for how buttery it cuts in the sound, smoothing things out. When I have people studying mixing with me, I would always require them to buy this one as the very first EQ to have and use.

Budget Alternative: Voxengo Prime EQ

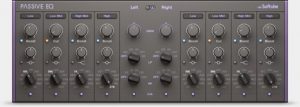
4. Passive EQ by Native Instruments (Shelving, correction, color)

This emulation of the famous Manley Massive-Passive EQ is a bomb EQ. I love to place it on a bus of all my melodic content and then smoothly shape it into something that magically turns organic and warm. It requires a bit of exploration but when you get your hands around it, you’ll always want to use it. I find it quite powerful for sound design as a way to warm up the lows.

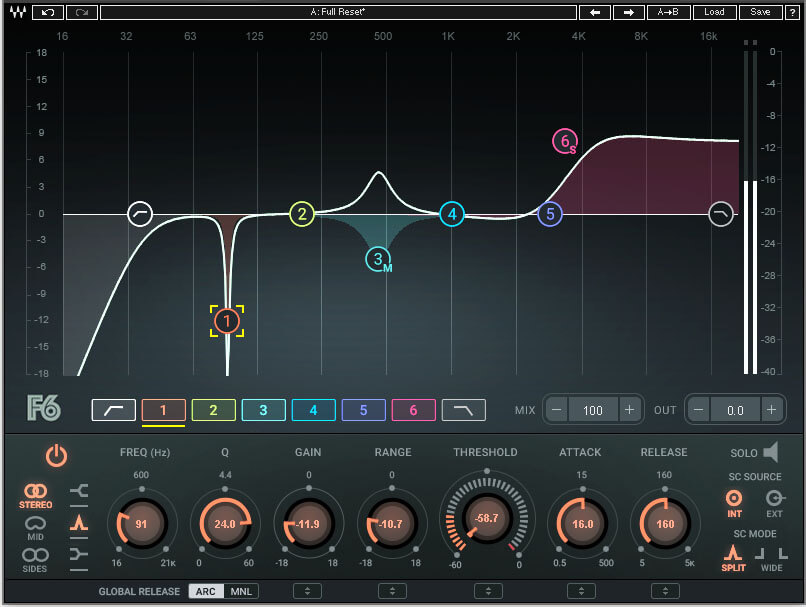
5. F6 Floating band dynamic EQ by Waves.

I’m not a big fan of Waves as well as their aggressive tactics for selling but this plugin is a really useful one to have. As described above, with a dynamic EQ, you can tame some frequencies that are randomly happening. The problem with a static EQ is, you’ll be cutting permanently a frequency so if what you’re trying to cut isn’t always there, you might cut something that doesn’t need adjustment. This is why you can have more control with a dynamic EQ. This one is also really easy to use if you’re familiar with the concept and the fact that you can use it in MS makes it really versatile. Not as easy and fancy looking as Fabfilter’s but it does more, in other ways. Wait for the price to fall but you might get it fro either 29$ to 49$ if you’re patient enough.

In the next post, I will go more in detail with my favorite plugins and will also explain certain ways, in details, for how to get the most of them.


SEE ALSO :

The best EQ plugins and various EQ’ing tips (Pt. II) 

Starting a label for the right reasons (Part 2)

Our last post was about deciding on the right reasons to start a label, and before you go on reading this post on starting a label yourself, I’d invite you to go back and read the first part of this series. If Part 1 was a bit of a reality check for you, or perhaps was a bit of a disappointment, Part 2 will be more positive and help you get in touch with your entrepreneur-self.

So, let’s get things straightened up and go over the “I want a label” checklist.

The name of the game is networking

If there is one thing that is essential to run a label, it’s to know the right people and to make good connections; this alone will make a tremendous difference. Believe it or not, I know a few people who have previously decided out of the blue to start a label because they had access to all the resources online to do it, but no network; no surprise then that the outcome of a these endeavors were very few sales.

But how does one network?

I’ve discussed this previously in past posts; I believe it starts on Soundcloud, where it’s important to connect with people who have similar tastes…these people will be supporters of your projects if you connect with them. People will be interested if they see some action on your music and profile. If you don’t mention, like, or reshare anything you’re going to be caught in a downward spiral.

Other ways to network include:

  • Connect with local DJs, clubs.
  • Follow labels you love and release music like you want to release. Connect with the artists.
  • Leave comments on podcast and music you like.
  • Go out, try to attend festivals and be social. Making physical contacts is incredibly empowering and important.
  • Tip: Investing 1-2h per day in networking will bring huge benefits down the road.

Be present

A long time ago, I read an article stating that humans get curious or engaged after a series of 3 notifications prompting them to buy a product. In other words, you need 3 ads or 3 different sources to get people’s attention or a sale. This article was current, but I still believe there’s some truth to that. This means that for your music, you want to get people’s attention multiple times so they get interested enough to listen to you. However, people are constantly submerged with solicitation so a no-solicitation approach might even be better. This means you want people to talk about your music but you don’t want your approach to be “Hear me! Buy this!”, but instead a “This is a great track!” kind of comment. People are way more likely to be curious if there’s no “call to action” to do something. This means that you need to be present, and have a web of contacts to share the news for you; this will only happen if your network is solid.

Have solid contributors

You can’t expect to have a solid label if you can’t consistently release great music. To do that, you need some solid artists and releases. You need a balance of new artists mixed with known artists, either through remixes or full releases. But to get artists on board, you need to create a safe ground and attractive platform to have people wanting to jump in.

But once you have artists on board, you need to keep them. Having ways to keep them stimulated such as with label nights in a club, a podcast series, or pushing their music to get reviews, promoted, etc. – these things are very exciting for anyone.

TIP: A new label will have a hard time getting a PR agent to do publishing and advertising but this is something you can slowly do yourself. Perhaps we can discuss that in a future article.

Think of your branding

Branding is also exciting for an artist, but also for fans. People love finding a community that makes music that speaks to them. That’s probably the most difficult part of starting a label because a branding will stick with you until the label’s over. You need to be sure of what image, values, sound, aesthetic you want to project. You’ll attract people in as a consequence.

TIP: You can totally find someone on Fiverr for a logo.

Be innovative

Innovation is about watching what trends are happening in the music world, and trying to fulfill the needs of people who support what you do. If people prefer to buy music on a certain store, try to focus your promo there. Nowadays, the main trend is to go through Bandcamp for selling and promoting the music. But you might want to work with an aggregator to have your music be on 100+ online stores plus streaming sites. There are many aggregators out there you can work with. They all do the same things, but have different fees so you might want to shop around.

TIP: Start small, grow as you go.

Be ready to invest

Running a label has nothing to do with making money out of it, seriously. Trust me, you pay to have a label and sometimes, there are moments where you get some money back in the process.

If labels don’t really make money, why start one?

Starting a label opens doors. It will become your platform of expression, a hub to connect and attract people who share the same tastes as you and who can grow together into a place where you can all spread the music you believe in. Running a label is not about doing anything yourself. I’ve started enjoying running my own when I started delegating tasks to people who wanted to participate in helping doing something they liked doing. To surround yourself properly takes time but is also fun.

To finish up, starting a label also requires some technical items. You’ll need to cover these if you want your label to be selling.

  • ISRC codes. These are necessary for selling and are a way to create a single number for each song.
  • Have a website, a Soundcloud account, a Facebook fan page, and a Paypal account for payments.
  • Create a Bandcamp account.
  • Get an online shop aggregator.
  • Have someone do artwork if you’re not good at it. You can find someone on Fiverr and use Canva for little needs.

Music Goals: Using Signposts instead of Goals

You often hear about setting music goals to keep your drive going and to get you pointed in the right direction. I’ve previously discussed the best ways to set goals and reach them, but as time has gone on, I’m not totally sure if setting goals is still the most efficient way to get yourself going.

However, some goals on your bucket list still might be relevant; but this depends on how you set them. For instance, whenever I have people in coaching, we discuss that setting goals should be done in a way where you can actually quantify the success of your work. For instance, people often try to set a goal of “becoming a known artist”, which, in a way, doesn’t make sense at all compared to “finishing an album.”  The problem with the first goal involves two important things:

  • You can’t control your circle of influence. What does “becoming an known artist” mean exactly? That you’re appearing in charts or that 1,000 people have your tracks on their Spotify playlists? You can’t control that at all and being vague in your objectives will lead you to failure.
  • Becoming a known artist may or may not, happen. If it does, you might not even be aware of your reputation and some people think they’re known, when that’s actually not the case (for example, buying “likes” on Facebook doesn’t mean anything).

In the second goal, “finishing an album”, you’re in total control of that goal – you can clearly make a “definition of done.”  If this definition is reached, then you’re done, and the goal has been achieved. Working in this way can be useful, but I would also highly recommend that you also put an end date on your goal.

Now there’s another alternative to setting goals, which, for lack of better terminology, I’ll define as setting a signpostWhy? Signposts are signs you see when you’re driving that help you be aware of the direction to go, to get you where you want, and also to reliably re-guide you when you’re lost. I like the term in French for “repères” – it’s sort of like “landmark” but not necessarily for physical places.

What is a signpost in your musical journey?

They are something you can rely on from a community you want to be part of, or a specific sound that you want to immerse your life with. I’ll give you the best examples as of how I applied the community approach to my life and why I use them in parallel to the type of goal-setting we described above.

In Montréal in the late 90s, we were really lucky to have a solid core of people and producers that gathered around the MUTEK festival which was our community but also a sort of signpost; a direction. It was a place where we could perform the music we all appreciated (arranged based on our personal tastes) and where we could also discuss music production. So back then, a goal for me was to play at MUTEK, but at the same time, it was that community that dictated how we had to sound to achieve it.

Another signpost I’ve used was a sort of music “target” I set through Ricardo Villalobos. I’d study his music, his sets, and a recurring question I had was “will he play this track of mine?” There wouldn’t be any goals attached to this besides, perhaps, having him play my music, but it was more as a reference point of how my music could be made or adapted,

I often do mixing and mastering for artists and labels, or do coaching, and one thing I often see is how people are a bit lost on determining who their music is for. Who do you want to reach exactly? Who inspires you? Which community would support and encourage you? This is the type of question to seriously consider, as I often work with people who are far from the physical community they’d like to be part of and rely heavily on the internet to be in touch. For instance, I have in mind some guys from South America who love Romanian artists – that’s quite a distance!

In past articles, I’ve about the importance of networking. Here are a few ways to help you find your own set of signposts:

  • Locally. Is there a club, a venue, or promoter that is booking and playing the music you love? Where is the closest place to you that could be your local reference? This is very important as you can get to meet people who have the same tastes as you. Perhaps it’s a festival that you can attend in another city, like MUTEK (this reminds me of a huge community from Colorado used to visit MUTEK in a group of 20! They would forge bonds and networks on their trips).
  • Online. I find it’s important to find a crew that make good podcasts, DJ sets, or music that gives you goosebumps. A trap however, would be if you aim too high, at very big artists and organizations (ex. Time Warp in Germany) where it is so big that becoming part of organization might become a huge puzzle and is very difficult. There are many smaller festivals that exist that have the same kind of music but on a smaller scale, you can grow with them. That said, try to downscale your target, or follow the bigger names but try to connect with the other, smaller guys who like that same music but are also emerging.
  • Aesthetic, genre, mood, direction. Try to find artists you like that are emerging and look stable and serious about their craft. You don’t need to contact them; it’s more about following their production and supporting them. Be a fan, someone who encourages and gives, while not expecting anything in return. Feeding people that inspire you is a good way to invest in yourself as well. I’ve supported and encouraged artists that started to go well but then have disappeared; it’s a disappointment, and sometimes I wonder what else I could have done to help. Seeing someone you love perform and do well is a great motivation for your own art!

I’d love to hear what you consider to be your own signposts!

Home studio essentials: Starter kits for electronic music production

Due to popular demand and because I receive questions about what to buy to start making electronic music almost daily, I decided to cover the topic based on various levels of investment. If you follow the plan I outline below, you won’t fail or be mislead into bad purchasing decisions. This list is based on years of discussions with people, consultation with clients, and testing a variety of this gear myself. As previously covered in a past article, we’ll start with the level where you are completely new to making electronic music and then build up from there. If you need guidance beyond first levels, scroll down to see tips for larger budgets and more advanced levels of producing. Just remember, the type of studio electronic gear that you choose to use will have a profound effect on your sound.

Level 1 kit: The beginner Studio Electronic Musician

Your level of knowledge:little-to-none; you’re contemplating making music.

Includes: Laptop, DAW and Headphones.

Music really doesn’t take much to get started with anymore. There’s a myth that many people believe, that the more equipment you have, the better the music you’ll make and thus it’s waste of time if you don’t have much money to invest in the early stages. This is false, I know some pretty amazing music that was done on the cheapest setups you can imagine. Remember, studio electronic music started as a DIY endeavour, in cultures that were not traditionally wealthy.

The only thing I’d strongly encourange you to do is get a demo version of Ableton, Reason, or Bitwig to see which one seems the best for you but my personal pick will always be Ableton, which I’ve been using since 2002.

For your laptop, if you can invest in one, I’d say try to get a PC or MAC with at least a i5 or i7 processor and an SSD hard drive; this will make a tremendous difference in how you’ll be able to manage the needed resources. Plugins and software are mostly dependent on a powerful CPU to process information, while the fast hard drive is to access how the samples are read. If your hard drive is slow, it can create bottlenecks if you’re reading large files. An external SSD is critical should you rely on something not internal. Also with regards to RAM, the higher the better. At the moment, I find that a minimum of 6gb will make a difference but if you can get more, that’s even better. High RAM is also a critical part of how smoothly your DAW will run.

Harddrives & Laptops For For Studio Electronic Music

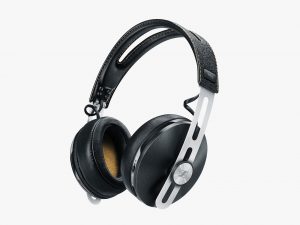
You’ll need a good pair of headphones. If you don’t like making music, you’ll still have a good pair. I find that it can be misleading to not invest much in it so if you can, get the best you can get. I propose here pairs for different budgets.

Headphones

Level 2 kit: Getting confident In Studio Electronic Music

Your level of knowledge: You’ve made some songs and you start to feel limited by the level 1 kit (headphones and a laptop).

Includes: extra software/plugins, Speakers, MIDI controller.

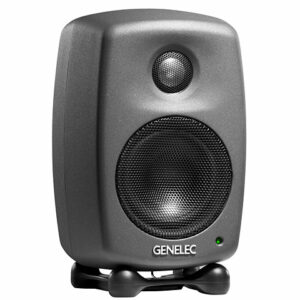
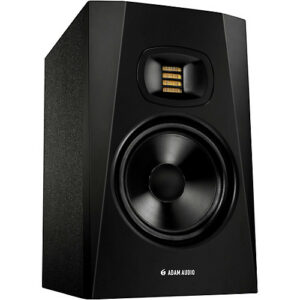
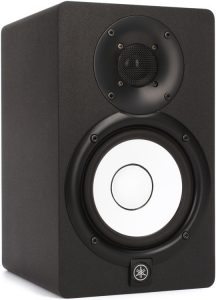
Ok, so now you know you want to do this as a hobby or more. I think it’s important to have better monitoring than just your headphones so getting speakers should be among your next priorities. There’s nothing more important than to go to your local shop and spend time testing a few pairs of monitors with music you know. So get your phone ready and go listen, then you can make a decision and buy. My personal favourites might not work for your style, but here are some of them, including some for different budgets.

Just make sure that the music you listen to is similar to the type you will be making, since your studio electronic music will be influenced by whatever you get. 

Speakers & Monitors FOr Studio Electronic mUsic

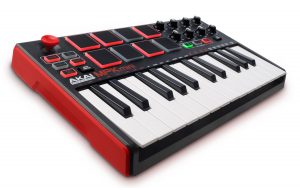
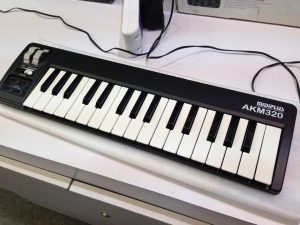
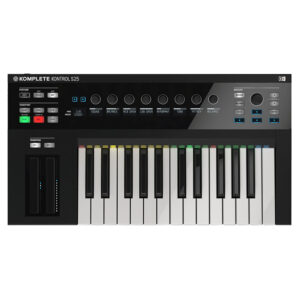
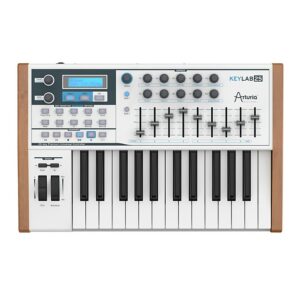
MIDI Controllers

A good investment is adding some controllers for your DAW so you feel a bit more physical about how you interact with your music. This can go from a pad based midi controller, to a keyboard or a midi mixer. It really depends of what you do with your music but any of these will be useful somehow.

If you’re serious about your music, you will want some original material and investing in good synths is important; you can then combine controllers with sounds. KOMPLETE by Native Instruments is a powerful investment that will pay off for years to come. Otherwise, Arturia is also quite amazing.

Level 3 kit: The Studio ELectronic hobbyist

Your level of knowledge: You’re able to make music and finish songs, you spend considerable time making music.

Includes: extra software/plugins, Gear upgrades.

At this point you can make music, finish songs, and perhaps getting some of your tracks signed to a label. This is the stage where most of my clients are at. In general, their needs are pretty much the same. Many haven’t invested in good monitoring, either a proper sound card or monitors. A quality sound card/interface will make a big difference in the quality of your sound; this sounds pretty obvious but many people I work with still need to be convinced…until they get one and come to me to say I was right! Sound cards aren’t like monitors, it’s not a question of personal tastes but a matter of understanding what you need. The very first question you should ask yourself is “how much gear do I need to record?”, because that will determine how many inputs you need in your interface. You could always get a little mixing board to get all the audio in then route it to two stereo inputs, but some people prefer multiple audio in. In other words, studio electronics matter.

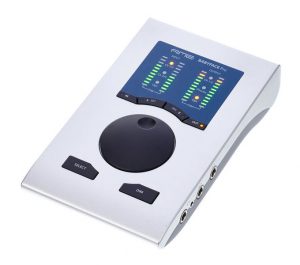
Audio interfaces & Sound cards

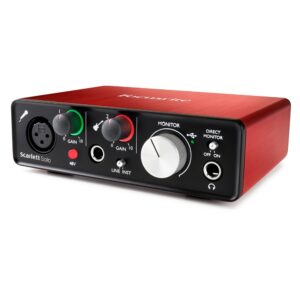
Most basic audio interface: Focusrite

Focusrite Scarlett-Solo Gen2 USB Audio Interface

Picture of Focusrite Scarlett-Solo Gen2 USB Audio Interface

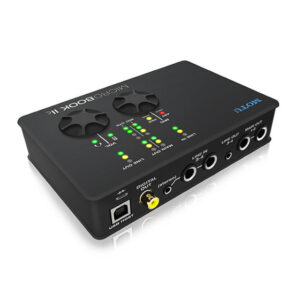
Medium budget: MOTU – who also make killer converters for recording.

MOTU MicroBook IIc USB Audio Interface

Picture of the MOTU MicroBook IIc USB Audio Interface. It's an excellent piece of studio electronic gear.

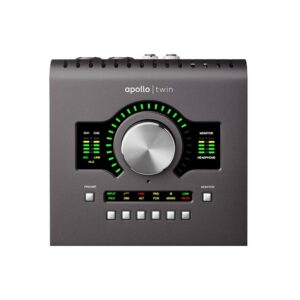
My personal suggestion is to go with UAD Apollo Twin, which also gives you access to all their plugins and outboard CPU power. This is a solid piece of studio electronic gear.

I find that at this point, investing in software to define your sound and to get out of your DAW’s internal sound is a great move. Some companies I love are U-He with their amazing synths such as Diva, Bazille or the Presswerk compressor. I am also on the Plugin Boutique mailing list to get daily discounts on software. Not only do I learn about what exists, but it then also becomes possible to get discounts for plugins I’ve had my eye on. Following KVRAudio is also an essential habit. They are masters of studio electronic gear.

Level 4 kit: The serious bundle FOr STudio Electronic Music

Your level of knowledge: You’re getting very serious at it and want to be semi-pro.

Includes: extra software/plugins, Gear & studio upgrades.

At this point, you have an organized your studio and all essentials are covered. Usually this is where you’ll feel ready to invest into more gear such as modular synths, synthesizers, external effects, and fine tuning what you already have. Before anything else, I’d suggest you make sure you have something to cover your low end. If you have neighbors and still want good relationships with them, I’d go for a Subpac:

Bass & Subwoofers

This thing has really been helpful at home and helped me get more precise mixes; there’s this more expensive wearable version, or a cheaper version for your back while sitting in a chair. It’s a piece of gear that gives you a physical impression of having a sub. If you can get a sub though, that’s even better. I can recommend many, but usually something like the Yamaha HS8s Studio Subwoofer will do for a home or small studio.

Nailing the low end is really an important part in solid sounding music, and you can only get there by being able to hear what’s going on down there. To adjust it, you won’t really need to hear it as much as feel it, which is what the Subpac also does.

Synthesizers

In terms of synths, there are many great ones out there. If you can get to a shop to test some in person, I recommend you do so. I can explain in my own words the technicalities of sounds each synth can make, but test driving a synth is the best thing to do, to really know if it will fit what you do. I think my view on this is that when you get a synth, it will become an important part of your artistic identity. I’ll list some of my favorites, based on different branches and aesthetics: Roland, Korg, Moog, Elektron.

TIP: Always search for demos of the synths on Youtube to see how they sound!

Roland: aesthetic – classic sound

A staple player of the electronic music world, Roland basically shaped the beginnings with drum machines and the tb-303, source of the original acid tones or the Juno that shaped Trance/deep techno. After being silent for years, Roland has returned with force, deploying super solid products such as Roland Aira TR-8 Rhythm Performer for the 808, hugely recommended if you want classic kicks. The sound is very classic, clean, and efficient. I would recommend the Roland GAIA SH-01 Synthesizer which has made a big comeback in many genres in the last few years and is far from being out of date.

Korg: aesthetic – edgy, modern, clean, warm

Let’s cover the basics of Korg as I know some of them. The all favorite at the moment is definitely the Korg MS-20 Mini Semi-modular Analog Synthesizer which is a good cross of analog synths because of its patching options. It can sound very modern and experimental but it can also sound old school 50’s spooky sci-fi. There’s a bit of a learning curve but the investment is very rewarding once you dive in it. Very unpredictable at times, it can provide many outstanding ideas. These happy accidents define so much excellent studio electronic music, as well as live electronic music.

Another one is the Korg Minilogue 4-Voice Polyphonic Analog Synth which is a super slick synth that sounds very clean and modern. It is able to make tight basses and warm fuzzy pads. Excellent for techno.

There’s also the cheaper version as well too. Finally, super useful and fun is the Volca series. There’s a nice little FM synth in this series – a very powerful buddy that can provide really warm tones.

Moog: aesthetic – Fat, rounded, electroish sound, vintage and gritty)

Moog is a staple for its name and the legacy it’s left over the years in so many songs we have all heard. Fat and dirty basses are often from Moogs and bold melodies are pretty much a trademark. If you want to dip your toe in the modular world, the Mother is a great machine to get. Its sounds really, really warm and thick plus its patching board is well designed that you can get started intuitively. The Moog Sub Phatty is another favorite of many for the name it carries, and what you get in return. The Moog Mother is another beast that can make extremely powerful sounds, from basses to kick and leads. it’s also a good step in the semi-modular world if you’re looking to make some hard hitting studio electronic stuff.

Elektron: aesthetic – Berlin techno, modern/underground dance music

This company is the current leader for studio favourites. It’s defining a lot of the current techno tracks that are being released. The main bad boy here is the Elektron Digitakt. There are two things that define the success of this monster: it sounds right and the integration with Ableton/DAWs makes it an ideal desktop companion. If you have the budget, you could also get the Elektron Analog Four which is another beast. Crazy possibilities on this one and a resource to do pretty much anything you want.

SEE ALSO :   Equipment Needed to Make Music – Gear vs. Experience vs. Monitoring  

Music production techniques: Non-Linear Production

It’s been a while since I promised a post about one of a number of music production techniques I use: non linear music production. The very first album I did using this technique and really sticking to rules of it was Intra; and then I recently went deep in to produce multiple EPs in the same vein of non linear production, which were made between end of December 2017 until March 2018. While Intra was an album of 23 songs made over nine months, my last experiment produced 19 tracks over 3 months. I think I’m getting better at it, mostly because it’s becoming clearer in my mind.

Out of the 19 recent tracks, I kept 8 for this album – which you can hear above – I named Returning Home; a statement about home being a state of mind and not necessary a physical place. I’ve been making techno/dance music since 1998, and after diving into more electronic soundscapes, experiments, and ambient music, it just felt good to return to my roots. A funny thing also – I tried working with some other labels to find it a new spot as I wanted to keep my label Archipel for more down-tempo stuff, but I kept getting refusals or complicated compromises. I’m too stubborn to change things and since this album was made based on a very solid concept, I didn’t want to go back and change what felt good.

But back to the non linear production technique. I’ll cover how the process went, from the beginning of where I started from scratch until the end.

I know some people who are like, “but I don’t need a technique as I just do music.” Sure, that is not for you then. But this technique can bring benefit if you’re looking to expand your production. It surely contributed to make me more prolific through time.

Non-linear music production – A concept

This concept (which has been around for decades according to some research I did), encourages the producer to explore working on multiple songs at once, in a non-linear way.

This means that:

  1. You aren’t working on a song’s beginning first to bring it to its end, before starting a new one.
  2. Each track is approached individually for its needs but you also work globally. Keep in mind that what you did in the previous track should differ on the next.
  3. The technique is about repeating the same phases/rounds until you get a solid core. Then there’s the finalization to get ready for mixing.

It’s called “non-linear” because you constantly circle up in a series of rounds, on multiple tracks, all at once.

Note: A non-written rule also implies that working on a track should be done in short periods such as 20-30 min at a time on a song, then stop, save and move on. Why? Because it keeps you fresh.

For many people I explained this to at first, it felt unsettling and confusing. There’s some kind of embedded belief in people that when you go make music, you should find your idea, absolutely stick to it, and build it into a song; beginning at start and bringing it to an end. I usually see people’s projects having a few blocks right at the beginning of the track and then they get lost.

The number one thing I hear all the time: “I can make a great loop but don’t know what next.”

I’ve written a post in the past about this. However the non-linear technique is really aimed at making the loop issue something of the past, because it’s all about transforming small ideas into bigger concepts.

But where does it start? How do you begin?

Before diving into producing, let me explain the rounds of the non-linear music production technique, as this is what it’s all about:

  1. Content creation, generating ideas.
  2. Filtering ideas into a concept.
  3. Building a core loop.
  4. Template structure.
  5. Arrangements.

When you decide to create your project, the first thing you should do is decide on your project type. Is it an EP (3-4 songs) or LP (5-10 tracks)? Perhaps you just want to make a bunch of tracks; I personally believe that we should never make just one track at a time. If you have no precise project, invent one, such as “I’ll make 5 tracks for fun and want them to be mainly techno.” Once this has been decided, you’re ready for content creation. I usually spend a considerable amount of time in content creation and idea generation.

You can also start from unfinished tracks that you want to apply the idea to. The idea is to work on multiple projects in parallel. I usually it works best if you have at least five on the go, but there’s no limit of course. To newcomers, start small though to see if working this way works for you. The technique is about to bring your track from a simple idea to a finalized but unmixed, song. The mixing is not part of this. I find the mix down works better if you don’t do early, it but perhaps it can. Don’t hesitate to build a reference folder where you put songs that inspire you.

Content creation, generating ideas

From all the years of listening to music, running labels, doing mastering and DJing, I’ve come up with a theory: a solid song is – in general – a single, solid idea, supported with two others. The main idea can be a loop, a motif or even a sound. I remember Hans Zimmer describing a motif by saying it has to have an emotional impact on you, that it reappears in your mind later on. He was saying that the Batman motif he did was a simple two notes, but very powerful. You’ll play them and you’ll automatically think of Batman. The two other ideas are necessary because a song usually needs a development and a “surprise.” That said, in this production technique, you need to create fresh ideas. Lots of them.

I made a very long post about how to come up with new ideas but I’ll sum how I did mine:

  • Recycling older ideas: I have countless samples that I’ve used or never touched. I like to process them into new sounds.
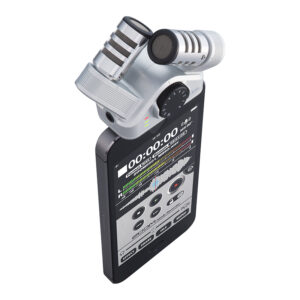
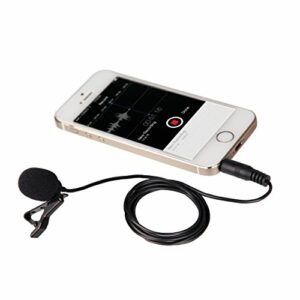
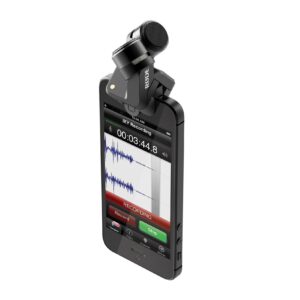
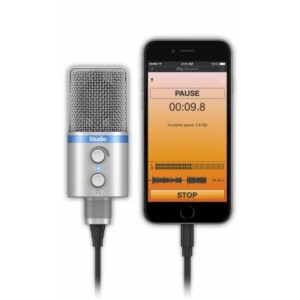
  • Recording radio or other spaces with a microphone: When I’m in a creative mood, I’ll spend a lot of time recording sounds around me from that period of my life. I’ll leave the recorder somewhere for an hour to see what comes up.
  • Try demos: I love getting demos and try to see what I can come up with it by sampling them. Some have limited time or others are in days. It forces you to resample the hell out of the work and get something. Sometimes I end up buying it of course.
  • Pure sound design: Layering sounds from different takes is a great way to generate rich sounds. I do this a lot but its time consuming.
  • Jamming with the sounds: When I have plenty, I’ll generally put the sounds in a sampler and jam them with a midi controller or PUSH. I’ll record everything I do into a project.

A project that has many ideas will be recorded with the date of the day for the jam. It might turn out that I have a few hours of material which means there’s hypothetically 3-4 ideas in there.

The definition of done (DoD) of this phase is when you have a project with 3-4 ideas ready to go. I usually do one session per track needed for the project.

Filtering ideas into a concept

This phase is one that you need to do outside of jamming. Why? Because when you jam, you’re in your creative state (right brain) and have tons of ideas but your judgement is off. You can’t be a judge then. You need to feel free and explore without boundaries. This second phase is about going into a more analytical side where you will be curating your crop.

  1. Go through all recordings you’ve made and loop part of it. The question is, can you listen to a loop and feel inspired? If yes, you have something to hold on to.
  2. Use different size loops like 1, 2, 4 bars. Compile different ideas.
  3. Use the session view to make scenes of loops you like.
  4. Try to see if certain loops, once layered, make unexpected motifs.
  5. (optional) Add a kick & hihat to give you an idea of the groove and adjust the timing of the loop.

The definition of done (DoD) of this phase is when you have a few scenes in your session view that feel solid.

*Note that you may go back to create more ideas (Round 1) to complement what you have. You may also create a pool for all ideas of all sessions and then make ideas from that. No rules here, only possibilities.

Building a core loop

At this point, you should have X number of projects (based on your project definition you decided on at the beginning, i.e. EP, LP, whatever), each with material that has been organized into 2-3 ideas. Now comes the moment to put it all together.

The loop you’ll build here is the middle part of your song so it should have all the bells and whistles.

  1. Add a foundation. The fundamental part of your song is the low end and the bass. From the main idea, add a bass that either supports or responds to the idea. Adjust it so it’s in key.
  2. Add percussion. Complementary to the bass, you may add kick, percussion, or anything complementary of what will create the groove. I usually start right away to decide what groove template I’ll use on this core part.
  3. Add melodic touches if needed. Decide how long your melody will be and how it progresses (if it does).
  4. Create a background and space if desired. This is usually the reverb and textures. However, this can also come later on.

The definition of done (DoD) of this phase is that you have a main loop that you can place in the arrangement window, right in the heart of your song (which means you need to know roughly how long it has to be). A good loop is one that is centered around your motif where if you solo that part, it would be what someone would talk about to describe your song.

In the process of working through the core loop, you might need to go back to create more content or you may import some from other sessions.

Template structure

Now that you have the core part of the song, it’s easier to build out the remaining structure. In the arrangement view, create three sections: a beginning, middle and end. You will now lay out your structure to have an idea of what you can do with your core idea.

  1. Copy the elements from beginning to end  that will be present the whole time through the track.
  2. Work backwards by deconstructing the timeline of what comes in first and so, until you get to the middle part.
  3. Do the same process until the end. You may repeat some elements.

The definition of done (DoD) of this phase requires that you have a temporary structure from beginning to end. It might take you a while, I encourage you to do sprints of 30 minutes at a time. The problem with working too long on this phase is that you lose perspective regarding the strength of your song. I usually want some sort of structure to come out of this phase, but I may go back and forth with the other phases until I am happy with it.

Arrangements

This is the final phase. You might need to come back to it as everyone has different needs that will arise in this process. Arranging – in simple terms – is creating the story-line of your song, but also between songs for your project! How do your tracks relate to each other? I have songs that have brothers and sisters, while some are from a completely different family.

After working on the arrangement of song, the last thing I do is export what I’ve done so far. When I switch to another track, I import the last session in the arrangement to see what I did and compare. I adjust the arrangements so all my tracks don’t have the same structure; beginning, breaks, and punches. I adjust them so they can be fun for DJs to mix too.

Arranging is a massive topic that I will detail in a future post and is involved in most music production techniques – but this explanation is a full conceptualization of how I work. Hopefully it helps you somehow too!


SEE ALSO :   Non-Linear Music Production 

Good quality microphones for iPhone

One of my favorite things about making music is to combine recordings of random things I find or field recordings to include in my music – a great, simple way to do that is with an iPhone microphone. Since this is a topic I often cover in this blog, I thought I’d go over some iPhone microphones I’ve had the chance to use, test, or have seen friends use.

Why use an iPhone microphone?

iPhone microphones (or any phone microphones) are ideal for portability as well as for using them when you have quick moment of inspiration to seize a moment. I believe smartphone microphones are an essential any electronic musician should have. Not only can you record a weird conversation you’re hearing in a cafe, but you can also record a moment of a track that sounds amazing at an event (although the quality won’t be great…at least it’s a way to remember something you liked). The idea is to create material you can use as sample or references. Recording sounds in and out of the studio is always a great source of inspiration.

Here are some microphones for smartphones:

Zoom iQ7 iOS Lightning X/Y Microphone (Amazon)

Zoom has been a top choice for many for a long time. If you don’t have the handheld recorder you can get this microphone with lightning connector. It’s probably one of the best out there hands-down, not only because of the great quality of the audio but also for the app that comes with the microphone. The app makes it way easier than the handheld recorder as not only do you get quick access to different parts of the configuration, but you can even send it to your Dropbox.

I recommend this one as my first pick.

Movo PM10 Deluxe Lavalier

Lavalier microphones are usually used to pick up someone’s voice, so you’ll see it on people on TV or people on stage when they do conferences. They have pros and cons, but the one thing I like about them is they also have their own sound profile. The guy I work with for my jazz project uses one for his saxophone and while at first I was a bit skeptical, the end results were beyond what I was expecting. This Movo does something really cool if you wear it subtlety and record yourself or play some instruments. It’s a bit annoying to install but if you’re creative, it can be pretty fun to try unusual ways to pick up sounds.

Cs-10em Binaural Microphones and Earphones

This one is amazing but it doesn’t work with a smartphone because these pods are also microphones for binaural recording. This means that you get a stereo microphone at the level of your ears, recording the world around you. What this does is, if you pass the recording to a friend who wears headphones, he will hear it exactly how you did when you wore the pods. So lets say you recorded yourself in a coffee shop and some people were talking in the back, the listener will also hear it in the back. For positioning and field recordings, this toy is a dream. The only downside is you need something like a handheld microphone with an entry or pair it with the iQ6.

Rode IXYL Condenser

Rode makes amazing condensers and the quality of their products is always outstanding. The only reason I don’t suggest this one at first is the price. It won’t fit everyone’s budget and can be overwhelming if you use it only occasionally. But if you think you really want to get into field recording, go with this. I’ve tried this model but don’t own one because I can’t have them all …but it’s certainly in my wishlist!

IK Multimedia iRig Mic Studio

This one is last on the list but could also be first. While the microphone is totally fine and you get something lovely for the price, what makes the iRig really cool is the number of things they offer, from other toys for picking up sounds to great apps that can help you make music on your iPad. They’ve been around for quite a while now and know what they’re doing.

SEE ALSO :   Home studio essentials: Starter kits for electronic music production 

Playing Electronic Music Live – How to Prepare Your Live Set (Part 4)

Following up on the previous post in this series, I’ll outline some final tweaks and advanced clip settings for your live set. There’s a lot to cover here but I’ll try to condense it down to the essentials.

Final Tweaks

As your set is likely now taking form, you should have different songs organized into scenes. You can think of this as the minimum you will need to play live but if you want the best result, there are still things to tweak. Personally, when I listen to a live set, I really want it to feel live; the artist can interact with the energy of the room and build around it. You should avoid playing each scene one after the other, without surprises. Again, this is my opinion and you might think otherwise, but what I’d like to explain is how to add a bit of “live” life in the last tweaks to your set.

1st – Rehearse and record.

This is pretty much the ultimate test to see if your live-lab is working properly. You’ll need to rehearse, play with your session, move things around, and test, again and again.

Don’t ever fall back on the idea that what you have is ready for the big show without rehearsing, because trust me, you’ll learn the hard way that if wait until being in club to test your set, it will hurt. That said, hit the record button and then start playing the clips, try to take you time as well to create a proper intro, then see how it goes when you launch scenes, fade-in some sounds, and add effects. The most important part of rehearsing your set is recording what you do.

You can then listen to see what you recorded and if you like a part of a moment, you can then drag it back into your set.


Since you only have two hands but you want each of your clips to have a feeling of “live”, you can pre-record certain subtle details you want to be played while you tweak other knobs. You’re not totally playback everything as-is, you’re interacting with other played elements you recorded. This can be particularly useful for creating unique and complex moment or breathtaking breakdowns.

You can also use +J (ctrl+J on Windows) to consolidate moments you like.

2nd – Add variations.

In my sets, I rarely have one scene repeating without having variations of it. The variations can be used for many things, such as having a more energetic variation of the same scene, one that has a little pause, or space for inserting a fill. Here are a few quick tips you can use to make creating variations easier:

Legato: This is probably the most useful thing to activate for clips in variation. Basically, the Legato option will let the selected clip to take over the one that was previously played, based on the quantization you have set. So for instance, let’s say you play a hihat clip, then press the first clip of the variation. It will stop the activated clip and immediately switch to the other one you just started. On the image, I have set it to 1/16, meaning it will be played on the next 1/16th, keeping it on tempo. Keep in mind that the variation clips are “in sync” with the one playing so that it will continue at the same position in the clip. If legato wasn’t activated, it would start at the beginning of the clip.
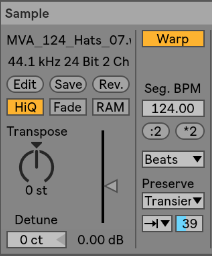
Follow Action: Once played, what do you want the clip to do? You could just play that clip but it could go back to the first clip or even randomly play something else. I suggest you experiment with this and find ways to surprise yourself. Don’t forget to record yourself playing them as you can go back to the arrangement section to seize the best part and create new ideas you didn’t even know of.

Intensity Variation: If you want to quickly go from open hihat to closed one, one of the fastest way is to play with the “Preserve” section and set it as in this image. Playing with the percentage will let you adjust how much of the end of each sound can be preserved. Having it at 100% is fully open and let’s say 25% is more closed, building tension. So one variation can be set low at first and then the other ones can be more open. If you see the need to boost the energy quickly, then you can go in one of the variation.
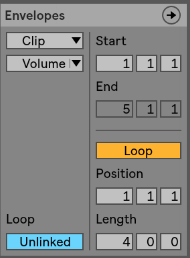
Reverse: this one can be fun but in a live context, if you do it at the wrong time it’s awfully awkward; perhaps introducing it in a variation instead would be a safer idea.

Transpose: This can be nice for melodies and basses. You can have them move in pitch in a variation.

Envelopes: Super useful for variations as well because you can create automation on a very small scale or a longer one. Many artists will use this on EQ to give life to a clip and making sure it feels like it is alive. The important part is to make sure that the envelope isn’t linked and then you can decide of the length of the automation, on one attribute. Tip: make sure you select “Clip” in the first drop down to make sure the changes are made in the clip itself.
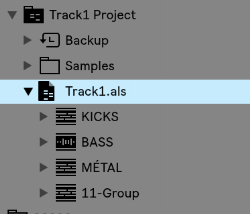
Try: Using this with a filter to create fun swooshes.

Also try: Use this technique to create melodies and textures out of a stall pad.


3rd – Transitions.

This part is the final preparation needed to play live but is also the trickiest one. Mainly because this task will imply some practice. My approach and advice here might not totally work for you because your music is different than mine. In other words, doing transitions is something personal and each musician tends to develop his or her own way to do it based on what feels like the best flow possible.

How do transitions work?

In theory, a transition from one song to another is exactly like a DJ mixing one track into another. The puzzle with live transitions is – whereas the DJ only has one fader and EQ to do the trick – you have multiple channels to blend one into the another.

Whenever I teach people how to play live (yes, I do Ableton Live training), a first exercise I give them is to create a playlist with a few DJ sets they like and tell them to study the track transitions. Some people like very fast and abrupt mixing (i.e Jeff Mills-like), while others prefer something more subtle and blurring the lines one where a song starts and the other stops.

The other thing to know beforehand is if you want your live set timeline to be fixed and fluid, or if you will chunk which tracks to play as you go. This can also be a huge factor in how you prepare your transitions. Personally, I want to have the entire flexibility to be able to play track X as an intro then switch to track Z. No order will be established until the last minute when I hit the play button to start my live set.

Once this is clear, you’ll be able to decide how to bridge songs. The first row of each song is your intro bridge and the last one most probably your outro, but you could also start mixing the next track at any moment if you want. Here a few rules of my own for transitions:

  • Only one kick at a time is played. For a while I was mixing the kick of the first track and the other, but the results weren’t so great. I decided to stick to one channel for the kick and would switch when appropriate.
  • One bass unless its a call/response. Same as kick, 2 basses is most usually a set up for disaster so I’d play one or the other. Some bass have only a few notes, especially in dub techno, so it could work that I have one bass of a track talking to another (eg. call/response).
  • Bridge is usually atonal. I would try to stick to rhythmical elements but if I would use a melodic element, I thought it could be tricky as it can clash with the bass or other elements.
  • The bridge can be a song in itself. This one is interesting but not a necessity. But if you can play with your variations well enough, you can create a new song out of two songs. This is basically the techno approach of 1+1=3 (Listener hears track A, B but also a third track which is the meeting of both). I often would record my sets and sometimes noticed that the strong moments were sometimes when I’d bridge two songs.

Because of the number of channels you have in Ableton, you might be stuck with the fact that only one instrument at a time can play. This problem led me to organize bridges differently on occasion. For example, if I want 2 layers of hi-hats, I would have to “cheat” and have a layer of hats in the clap channel.  Quite often I found myself organizing this while playing, and it’s not the best because you can get lost easily in the arranging. I prefer having a few options in the intro with extra layers of claps, hats, percussion. Sometimes even some duplicates in different channels.

In the next post, we will talk about sound checking and performing, which will also conclude the series!

The 2-minute Soundcloud preview method

The 2-minute Soundcloud preview method, as I call it, is about creating tracks previews that are 2 minutes long. Why that length?

If you look at most track previews labels and artists are sharing online, they’re about 2 minutes in length. This unofficial standard got popular during the early days of Soundcloud when a little problem was discovered involving people being able to download full tracks from the website; not the full resolution file, but the streaming version, which is very low quality. Many tracks leaked this way and it’s crazy to think some people used those versions to play in podcasts or even in clubs!

So then, why post 2-minute tracks?

Many labels look for artists by browsing their Soundcloud page and it doesn’t look good if the page is empty. As a result, some artists started creating “fake” songs, as 2-minute tracks, often with artwork created by an online app. The crazy outcome of this behaviour was that some people/labels started asking artists to release some of those two-minute tracks, which forced the artists to finish them.

The pros of uploading 2-minute mini-tracks is that if someone connects with you about one, you’ll know what’s working best from all the tracks you have online. This particularly useful if you have a large number of sketches and wonder which ones have the most potential. The cons of this approach, if done poorly, is that it can really backfire at you, and make you look (very) unprofessional.

That said, if your goal is to get some traction online, this method can really be effective. Some people also need motivation and direction to get things done so this approach might be good for you if you’re one of those artists. Here are some tips on how to approach this effectively, to get most out of it:

Use tracks that are in progress to avoid getting caught with unexpected requests. The more advanced you are in the arrangements, the better. You can actually use a complex 2-minute base as a way to find the final ideas of your track. Uploading a very simple loop is not a good idea as it might sound completely empty.

Make sure it is mixed properly. This might be the most difficult part of it, but make sure the mixdown is solid. Use some compression and have a limiter on the master to glue it together.

Make sure the main idea of the track is exposed in the preview. What I mean here is, be sure that if someone listens to your preview, they will have an idea of what the song is about. If you need a better idea, go to decks.de and listen to previews of records to see what I mean.

Have something strong to say. Make sure your loop is exciting, has something special in it and has a memorable element that might make people want to hear more. This is the most critical aspect of your 2-minute track.

Try to have very different song ideas from one to another. If you have too many previews that all sound exactly the same, it’s sort of like having a colour palette with a multitude of beige variations; have different colors but keep an aesthetic that is in tune with your style.

Make sure the mixdown is solid, then normalize. If you don’t use a limiter, export it normalized, this will create a louder version.

Limit the total number of tracks on your Soundcloud page. Try to pick a number between 10 and 15 then never have more. Why? Because you don’t want to be that artist that has zillions of unsigned tracks either. Remove older ones and remove ones that have no comments or likes. This is not good for momentum (see my previous post).

Indicate if the track is unsigned. Let people know the track isn’t signed or mastered; this helps clarify to people who listen to it.

So then, when do you finally finish one of these 2-minute tracks? You should decide to finish it when it generates some sort of buzz. If you get a DJ asking for a copy of a track for a podcast, this can be as important as if a label would like to sign it. If someone interested in your track, don’t sleep on it; let me know of your results!


SEE ALSOIntuition for decisions in music production   

Not getting booked for shows? Try this.

If there’s one thing that haunts all artists, it’s entering a phase where you’re not getting booked for shows, or not getting any attention in general. Perhaps you were enjoying a phase of being booked frequently that’s now coming to an end, or perhaps the music ecosystem is changing and you might be out of tune with what’s currently demand.

Not getting booked can actually be a good thing.

When I come into a period where bookings start slowing down (or requests to work with me), I think of this new phase as a sort of “hibernation”; it’s a time to focus on other things that are important for the next time I start getting booked again to re-create upward momentum. Getting booked regularly is sort of like a wave you can surf for a while, but it can end, and you should take a moment to question why the ecosystem isn’t supporting you anymore. Perhaps it needs to be re-energized, or perhaps it’s time to change waves.

Even if your wave fades out, you can still rebuild your momentum.

“Momentum is when you manage to get a certain amount of people to talk about something you created enough to generate a certain level of enthusiasm that reaches other people out of your circle of contacts, organically.”

For instance, you might publish a song on Soundcloud and have a certain number of people who comment, like, repost but you didn’t ask for it. You can view this as the beginning of a wave. The number one mistake people make that hurts their momentum is release a track out of the blue and expect people to listen to and engage with it without any additional preparation or planning; doing this will make you bitter and frustrated.

To remain humble and grounded, let me offer you a few rules I’ve applied throughout my musical life:

  1. You are in no way entitled to have people listening to and liking your music.
  2. It’s not because a track is published online that it will sell, get success, or get attention.
  3. You are work in progress. Your next one will be better.

Through the experience of running my label Archipel for years, as well as other projects, I noticed that what created momentum was the usually initiated through a few diverse actions. The more imaginative you are, the better the results will be. Some of these actions include:

  • Having a really cool picture of yourself online. Artwork is also cool.
  • Uploading a video to Youtube.
  • Sharing positive news regarding something that is not related to yourself.
  • Contributing to someone else’s success.
  • Hanging out with friends and sharing it on social media. Bonus points if you did something fun that people do want to hear about.

Some basic marketing rules also apply here. Apparently, if people see three things you’ve done, it will imprint an impression on their memory. Sharing something positive will leave a better impression. Another general rule is that people enjoy useful information. Helping others or being part of something always strikes a chord in people. Being selfless in most of your online posts vs self-promotion is a critical tone you want to hit on. If you’re constantly posting things that are egotistically and promoting “your brand”, no one will pay attention.

Let’s create a plan that uses all these points in a hypothetical scenario to promote a song you’re releasing. In this hypothetical situation, we will try to create momentum online to have people come and listen to the track. Our goal for this is to get more online followers, widen up your network, and hopefully get a bit of attention from labels and some DJs who might play it out.

Scenario: Release a track on Soundcloud; we’ll take two weeks to build up momentum but the more time you take, the better.

First, try to visualize a number of plays you’d like based on a model track you like. Find a producer you like who produces music similar to you and have roughly equal or a bit more followers than you do. The main mistake people make is to try to replicate plays of far more popular musicians. Let’s say your track has 140 plays, 3 reposts and 14 likes.

A relatively successful track is identified by the number of likes vs the number of plays. I would say that 10% ratio is very good already, but if you make it up to 15 pr 20%, then I’d say the track was a success. The trick to get your ratio in the right zone is to have interested people to listen. If you’re marketing to too many random people that aren’t your target listeners, you’ll end up with many plays, but few likes; this is why reposts are important.

Do not pay for followers and plays. It will make you look really, really unprofessional.

Now that you know all these details, let’s try to create momentum for the self-release:

  • Spend an hour a day on Soundcloud building up your network. People won’t follow out of nowhere. The need a reason to and usually they’re in the same boat as you: they want to connect with people who make music and also need attention. Find music you love, follow as many artists who share the same tastes as you and leave positive comments on their music if you like it. Repost music you really like, reply to comments people address to you. The more you’re present, engaged, active and cultivate good tastes, the more people you’ll attract online. People often feel staying on top of social media like this demanding, but remember that you only reap what you sow.
  • Clean up your social media accounts. For many artists, this is a chore they hate but it’s a necessary evil if you aspire to create momentum online. You need a specific look and feel; i.e having a solid picture of yourself, no posts that make you look unprofessional, etc. Keep it simple and solid, look at the profiles of other artists to get ideas or ask for help from a friend who’s good with social media.
  • Link your Twitter with Soundcloud using IFTT. This will make sure that when you post a new track or like one, a Tweet will be sent. This is a good way to make sure people are aware you are active.
  • Connect with groups on Facebook and connect with others. Contacting someone doesn’t mean sending a none sense message out of the blue saying “bro, check my Soundcloud”, but trying to befriend them. The best promotion is when others promote your music for you but to do that, you need their collaboration and support. That comes over time with social investment.
  • As the release date arrives, be socially active and focus on helping others. The more you focus on others, the better it will be when you need their support. No one has to help you, but it’s more likely they will feel like it if you show interest in what they do, too. This is what I was saying earlier, share other people’s music, or any related news to show interest and that you truly like in them.
  • Prepare a video on Youtube. There’s are multiple free resources out there to do this. Just make one. It can be a full version of the track or not. You can contact Youtubers that share a lot of music to see if they want to premiere it.
  • Have good artwork for your release done. You can check on Fiverr for some help or maybe ask a friend who’s willing.
  • Get the track mastered or checked.
  • Share it with DJs so they can play it in podcasts. Best case scenario, a podcast goes online premiering your track the day before or day it’s released. Perhaps you can delay the date if necessary to work with a podcast creator. If you feel like you can do a podcast yourself with a good series, that can help.

As the release date approaches, have some online presence about 3-4 times a day on different channels. You can post in groups (but not shamelessly about yourself!), share things, comment. Be active. When you want to release the track, you need to get it out in a huge blast.

It’s your time to shine, make it right! Cover all your channels and talk about your release, but stay as humble as possible. When you post it, don’t have a tone that gives the impression that you expect something from someone, but instead that you’re simply happy you finished the track and want to share it.

Releasing music during the beginning of the week at a moment when people can actually listen is a good strategy.

Post-mortem comes usually a week after. Look at your stats and see what worked and didn’t work.

I hope this helps!


SEE ALSO :    Make Your Music Bucket List Happen 

Playing Electronic Music Live – How to Prepare Your Live Set (Part 3)

After the first two parts on this series of posts about playing electronic music live, we arrive at our final topic: clip arrangements, song organization and sound preparation.

Clip Preparation

I hope you did your homework from part two where I asked you to take your arrangements and turn them into an Ableton Live session. If you’ve done this, you’ll see that this task is pretty demanding and can be confusing, because you might feel your song(s) aren’t the same anymore, or perhaps they don’t make any sense. But trust me, even if you feel like you have failed in arranging your sessions, it will start to make more sense as we continue. What really matters is that you now have material loaded into the session view.

What if my track is so simple that I have only a few clips in the session view?

That’s not a problem, the idea is to have something. Part of the beauty of a live set is that once you have all your tracks in the session, you’ll shape them into a longer set. A live set isn’t like a DJ set, where you focus on transitions and track selections; it’s way more flexible and involves constant shaping to create a bigger picture.

1st To Do: Import all Your tracks into one big project

For the sake of this exercise, please start by creating a blank new live set that you’ll name “My Live Set” where you’ll have 12 channels to start with.

Next we will import all songs into that project. There are two ways to do this and it’s up to you to decide what is the best for you. I personally like to open a track, grab all clips in the session, copy (cmd+c), then open your “My Live Set” project and paste. You can also copy through the browser and should you be more comfortable using that method, do it that way.

One of the great new features of Ableton 10 is that groups now appear in the browser; which could be a good way to organize your work to re-import later on.

You should also consider copying audio leftovers over from each track. These unused pieces are more precious than you think, in a live context. A leftover is anything in your track that was created but didn’t make the final cut. It could be a variation, some weird FX, vocals, whatever – basically, anything will do. The idea behind leftovers is to create material for your live version to make it differ from the original song; it will add an edge.

Once you have all your tracks imported, you have a better idea of your whole session.

“How many tracks do I need for a 1h set?”

The answer here is hard to figure out until you’ve rehearse and determine your natural flow. After years of playing and recording my sets, I’ve figure that each of my tracks average a rough 6 to 8 minutes in a live context. This also includes the transitions (i.e two songs overlapping for 1-2  minutes, to make things smooth enough like a DJ would).

The total time of the tracks is not necessarily important to figure out. If you’re creative, you might even play the tracks in a random order.

2nd To Do: Name and color all clips appropriately

People often overlook this part but trust me, the better the organization, the less stress you’ll have in a live context. Never believe yourself when your mind says “oh I’ll remember what this clip is.” This is why names are important, but also, the clip color. All kicks should be the same color, basses and so on. My personal coding colors have been:

Kicks: red (grabs my attention)

Low end, bass: brown

Percussions: yellow

Claps/snare: Orange

Hihats: grey

Melodic elements: Blue, in various tons as some are different.

One thing about colors that helps is if you’re playing a track while in transition to another one, you can see the color of the other clip that you can’t see on screen.

Please note that I don’t necessarily recommend putting all of the same sounds in the same channels. You might want to mix, for instance, hihats of track A with the ones of track B. If both track’s hihats are in the same channel, you won’t be able to mix them and one will play after the other (only one clip can be played in a channel at a time).

Scene organization

Organizing your scenes is time-consuming, and it will also be what you’ll be reworking the most. It will also get your songs to have more of a live feel. For this section, I’ll use an example of one of my latest live sets to explain what I did, and why.

This song starts at the second row (scene).

Channel headers: As you can see, header colors aren’t important to me so much but there is a section all in white. This is because I use two MIDI controllers for controlling the volumes and the second section is for the second controller. This is also why they’re numbered so I know which slider they refer to on the actual controller.

3rd To Do: Map your channels to the appropriate elements of your controllers

Think of how you want to control your set on a base level, which is the channels in most cases. This is the most important part to pin down, because as you prepare your set, you’ll need to control volume sliders. Map your channels to the appropriate elements of your controllers. If your controller has buttons, I’d also map them to the mute buttons. Mutes are very important.

Buffer rows: As you can see, alternating rows before and after each busy row have scene of empty clips. You can also see that they have the “stop” square in them. I create “buffer rows” for two reasons: the buffers help know where the song starts and begins, but they also serve as a quick way to toggle a clip to stop playing if necessary.

4th To Do: Add 1-3 buffer rows between each song

The first scene/row of each track: The first row, to me, is the most important one. Over years of playing, I’ve settled on a super minimalist version of my live set where I play mostly loopy music with variations which really enforced the importance of the first row of the set.

The first row has various various roles:

  • It is the introduction of your song: It will be used in the transition from the previous track.
  • It is the core idea of your song: All sounds that are playing from beginning to end of your song should be placed here and remove everything below. In my case, the kick will be the same from beginning to end. The length of the kick will be 4 bars long and include variations. Some people like to add multiple clips underneath as variations to trigger, so that is always another option, but think that whatever remains the same throughout should be there.
  • Tension relief: If you noodle around, create an improvised breakdown or start removing sounds. You can use the right side play to then trigger all sounds at once to come back to the song’s full intensity and main idea. This point is very important if you think you’ll be exploring and improvising as you’ll need an anchor.

5th To Do: Make a solid core

Supplementary/following scenes: There are multiple ways to use the scenes that follow your initial introduction. To “play it safe” you could simply have each scene play as the track evolves. The good thing about this approach is that by having all scenes on hand, you can deconstruct the timeline of your song by playing them in different orders. My favourite way of doing this is to have variations of a scene, such as one line with hihats, one with none, one with two playing and a clap, etc, same for melodies. This way I can play variations but I can also trigger one entire line and have a “ready-to-go” new take. If you look at my live set screenshot above, you’ll also see that under one sample “Tommydrum”, I have the same clip three times using variations in timing or tweaks in the versions. I can toggle between them as I need them.

Last To Do: Plan your follow-up lines/scenes and decide what you use.

In the next post, we’ll discuss rehearsing, sound calibration and advanced clip settings!

Checklist to see if my song is finished

Lately I’ve been working on a live set, and I realized that I have a personal checklist I use to see if I covered everything to help me decide if a particular song is finished; from little details to bigger things, sometimes it’s easy to overlook important factors. Just like with traveling, you want to make sure everything is ready before stepping out of your project.

This checklist outlined in this article is what I personally use before shifting to the mixing phase. In a past article, I explained the importance of exporting the stems out of your project once the production is done. This frees up CPU usage, lightens up your projct, gives you the option to backup or collaborate, or possibly to do some mixing into another DAW to get different textures. But mostly it’s a way to tell yourself “Ok, time to move on.”

Do you need to cross-check everything in this list to declare your song finished? No, not at all. Below is just a cheat sheet to help you have a better idea of everything that could potentially be covered (and I’m sure I’m missing one or two things here).

Below are what I believe to be the major categories of the “song is finished” checklist in terms of production (mixing is another phase altogether that comes afterwards):

  1. The Hook

The hook is where everything begins and ends, so ask yourself these simple questions to get started:

  • What is the main hook of your song? Remember, the hook is what someone would sing or recall to someone else to explain what the song is about. Your song might not have a main hook, which is okay, but a hook is one of the most important factors to help make a song memorable and timeless.
  • What elements supports the hook? A good hook is often not enough. Supporting it with complementary sounds or little blurbs of secondary melody is very helpful.
  • Are you aiming at a pop structure or more of a repeating mantra? There is also a grey area which combines both of these structures. But whatever your pick is, it helps to have a clear answer to this question in your head.

2. Sound design

Sound design is actually the most important section to me and this is usually where I spend the most time. I have sub-categories here that I will cover.

  • What is the direction and purpose of this song? Is it mainly for DJs or at-home or headphone listening? Vinyl or Spotify? Chill, dancefloor or experimental? This is something that can sometimes be good to keep in mind until the very end.
  • What song or artist would be a similar reference to your track? A reference track can be added in the project itself in a channel. See my past post on how to use a reference track.
  • What is the ratio of organic vs synthetic elements? This is something I sort of think about in the beginning but I am usually also open to revising at the end.
  • What is the main key for my song? This is not always essential, especially if you make atonal music. But it’s a good idea to be aware of a general tuning of bass, kick and melodies.
  • Kick drum: Is the kick in tune with the melody? Is it side-chained with other conflicting sounds? I recommend trying to have a different kick from whatever previous track you were working on. The kick is the last sound to be designed as it is there to support and complement the entire project.
  • Snare/clap: Often equally important to the kick, I usually alternate between more of a clap sound vs. a traditional snare and I also try to have multiple layers. In electronic music, the percussion sound that will go on the 2nd and 4th beat should vary otherwise it sounds a bit monotonous. I personally to try to offer different sound options here for when I play my songs live or DJ them.
  • Bass: Is it in key? Is it side-chained?
  • Melody: This one is a bit difficult but as explained in my non-linear production technique, I like to go back and forth with the track to see if the melody has an impact; if it feels good over time. Finding melody is hard enough, but to make a melody that stands the test of time is an art in itself.
  • Atmosphere: Is there a background to this track? What is in the background vs foreground? I like to use busses for creating atmosphere.
  • Recording: Have I used field recordings for this to add another layer of atmosphere or sound?
  • Textures: Are the textures clear and audible? Or is the song meant to be more subtle?
  • What’s the ratio of repeating sounds vs ever-changing? Some people like to always have the same clap through out the song while in Hip Hop for example, producers often like movement and change. Is this a rule you want to follow? If so, on what sounds?

3. Groove

My “groove” section is a bit less detailed, but is very important, especially if the song is more percussive and dancefloor-oriented.

  • Is the groove borrowed from a song or from a groove template? Or is it custom?
  • What is the time signature? Is it global or different for different parts?
  • Is there a global groove applied or is this song using multiple grooves depending on the part?
  • Export all percussion loops to MIDI to tweak the groove.
  • What is repetitive and what not? Find the healthy balance of sounds being repeated through the song and others that change over 1-2-3-4 bars.
  • Is there sidechain between channels to create subtle or obvious pumping? This can make a difference.
  • What are the sounds that are modulated? This is one of the most important thing to do if you want your song to have a more organic feel rather than synthetic. It’s one thing to select all organic samples but the way you program them will be critical for a general feel. In general, the human ear is very sensitive to movement, even if the music is played in the background; you’ll be surprised of what people notice, and what they don’t.

4. FX/Sends

Using sends is crucial for giving the track a unified feel. One of the most common mistake I see from new producers is to use multiple reverb effects everywhere in the project instead of mainly using one as a send. I usually use multiple sends to create elaborated and sophisticated 3D effects for percussion and melodies. One of the most important point I always remind myself is to use them with care, towards the end of the production phase.

  • Is this song more dry or wet in terms of effects? How much room have you left for reverb?
  • What type of reverb do I want for this track? long or short?
  • What is going to have a 3D effect? What makes the song 3D is the amount of sounds you put right up front vs the ones you put in the background. A healthy combination of both will have a better effect.
  • Use one delay for the project! Which time signature does it have?

5. Structure/Arrangements

I previously referred to song structure as Lego building blocks in a previous post. Blocks are often constructed in the same way; this is why using a reference track can help break out storytelling ideas. I always recommend dropping Markers in the arrangements this way: One at the beginning, one at the end, and one in the middle. Markers will give you perspective, help you see if your general storytelling is balanced, and help you determine if things are properly organized.

From the middle marker, I would drop one additional marker between the very beginning and the middle markers, and then do the same thing in the second half. Your song should have four distinct sections. Sections one and four are intro and outro; the middle part is where your song develops and mostly exists.

  • Does your song have intro/outro? Does the action start immediately or slowly develop?
  • How much space have you left for the DJ to mix the track, if you’re making DJ-friendly music?
  • Are your melodic elements evolving properly through each section?
  • Does your song have at least one anchor point of interest per section? All the sections of your track should be interesting.
  • Does the song have any surprises about two-thirds through its duration ? I always recommend considering this to make your song even more interesting.

These sections cover the main points that I usually think about when determining if a song is finished or not. If I don’t like the answers I come up with to some of these questions, I usually go back and work on the track even more!


SEE ALSO : Is My Song Good?