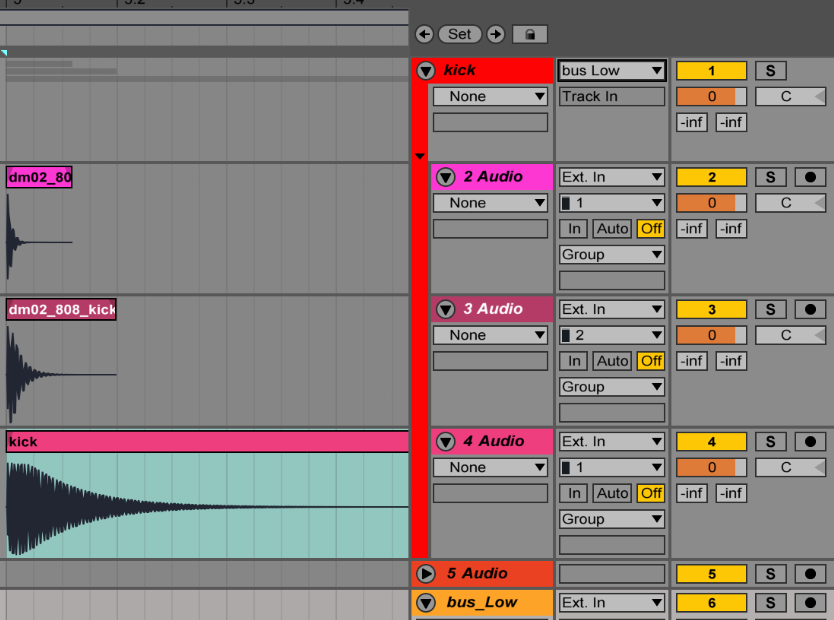
Tag Archive for: compression

Can you trust yourself to judge your own music?

This has been a popular topic recently—I think that because of the pandemic and the isolation that comes with it, people rely a lot on online contacts to get feedback on their music. The lack of in-person music testing as well as and lack of being able to go to clubs has changed the way we are able to analyze our own music.

I was a part of an organized live stream recently to support a friend named Denis Kaznacheev, who has been held in prison for something we all think is impossible (but that’s another topic). Being in a room with 4 people, playing live, and getting feedback after months of isolation was a weird experience. The first thing that came to my mind was, that my music sucked. Yeah, I also go through it once in a while, and I had forgotten how playing music for and in front of people changes the dynamic of a song. In studio, it sounds a specific way but add one listener and it’s all of a sudden, different.

Some song, different context, completely different mood. Was there something I could do to predict this?

Technically, there was absolutely nothing wrong with what I did. People who tuned in loved it. The thing that clashed was the mood, the feel of the track, compared to what I had in mind. In past articles I’ve discussed the importance of a reference track, and this could have helped me in this particular situation, and could have helped better classify my music as well. But as you know, there’s no do-it-all plugin that can prevent this. This is why many people struggle with judging their own music.

Technical Validation

When it comes to technical items, you can self-validate using some handy tools.

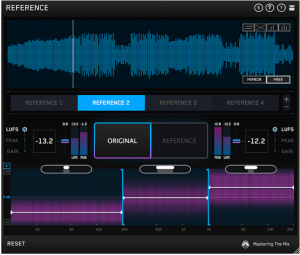
See if your track is, compared to a reference, feeling like the same tone and balanced, I’d recommend using Reference. This tool is my go-to plugin whenever a client insists that the track I’m working on doesn’t sound like a particular song. I’ll load up the reference song and then, after volume matching, I can see if the lows, mids, highs are adjusted in a similar way than my mix. It also shows you if you have, per band, the same level of compression or wideness. It doesn’t lie and you can match it to have something similar. But how do you raise one band to match the reference?

I use a multi-band compressor to compress and, or EQ. A shelving EQ, with 3 bands can be helpful to adjust, but a multi-band compressor really can set the tone. You’ll set the crossovers of each band to match Reference and by adjusting, you’ll see it react to your gain or reduction. While you could use any multi-band compressors, I’d highly recommend the Fabfilter MB.

The same company that makes Reference also made a plugin named Mixroom which, with the same idea as reference, focuses on everything in the mids and highs. It’s a bit tricky to use at first, but once I found reference songs that were analyzed properly, it gave me some interesting pointers on what to push or remove. I thought it was pretty interesting to reverse-engineer some complicated mixes.

Many times people will tell me they don’t like to compare to anyone or that they’re going for their own style but that’s like trying to draw your grandmother from your memory. Some people might do better than others, but audio is abstract and you need to compare yourself to someone else to know what’s lacking or overflowing. I mean, even within a mix, I compare my channels to see their peaks, densities, and panning to make sure one doesn’t cross another, unless to create something as a whole.

People struggle with loudness, but it’s is a bit easier to manage. You’ll need a metering tool such as the IKmultimedia TR5 Metering or the lovely Hawkeye from Plugin Alliance. They are costly but necessary. For a mix, you have to keep in mind a few details: the loudest peak should be -6dB, the RMS (more or less the density) around -13 to -20dB, in LUFS, I’d suggest to be around -15dB and dynamic range to be above 10. A plugin such as Reference will also indicate loudness, and that can be really useful to see if you’re in the same ballpark.

Please consider these are numbers I deal with, and that for certain genres, it can be completely different.

If you come to struggle with the low end, the guys from Mastering The Mix also have a low-end validation/enhancement with the excellent Bassroom plugin. Again, you’ll need a quality reference to do the trick, but once loaded and with some practice, a muddy, weak low end will be a thing of the the past.

These are the best technical validation tools I’ve used in the last few years. They’re efficient, affordable and very useful in whatever I do.

Self-Mastering and Mixing

Pretty much anyone who’s been making music for a while or has studied audio engineering will agree that mixing or mastering yourself isn’t the real deal. It’s doable, understand me right, but you’re not winning. With the previous listing of all the technical tools I shared, you can make some really efficient mixes, but perhaps sometimes that’s not enough.

As an engineer, the main thing I’ll say is that someone else might spot things that are in your blind spots, plus that person is also emotionally detached from the music itself, so making decisions feels like less of a risk in itself. If you’ve been reading this blog regularly, you know I often refer to our duality as humans to have a analytical side and a creative side. When I work with musicians, I invite them to see this duality as a muscle. Your creative side needs to be exercised; it needs to constantly be fed because it’s a sponge. You want to find the perfect routine and be efficient at it, then break it to pieces to reinvent your new way of making music by re-combining them for a new version of yourself.

The way I see music-making isn’t about trying to be in full possession of your potential, but more about always putting yourself into a state of instability and risk, so new creative ideas emerge. You’ll connect the dots of the past to create a path in the now.

This state of mind is one that is not always technical, and it’s raw. I would invite you not to tame it, but to create spontaneous ideas and raw projects.

This approach is basically the exact opposite of sitting in front of your computer to design and fix a snare. There’s nothing wrong with that if you like, it but like I say to people, artists should become experts at flow, not perfection. They want to be artists, not craftsmen. But I won’t stop you from being both—I just often feel that technical production doesn’t age as well as solid creative ideas. The only thing that stands the test of time is simplicity, and that comes with a mastery of both flow and technical expertise.

If you want to be a master at everything, you’ll be very average at everything as well for quite some time, or potentially forever.

So, imagine you have an amazing idea that you made but you are very average at mixing and new to mastering—you’ll probably be butchering your idea when you try to do either. Yes, you save money and learn by doing it yourself, but I think if you’re aspiring to release something on a good label, to get attention, it might be a good thing to have someone look into your mix, even a friend. But if you really want to do it all yourself, get yourself solid tools to make sure you get the most out of them.

If you want to practice mixing, I suggest trying to find what I call, a swap buddy who can send you their mixes and vice-versa. You both learn by tweaking each other’s work, and going back to your own music after will feel easier, and clearer as well.

Psychological Validation

Now, psychology is an area where don’t get any tools to help that we all have to deal with. It’s that limbo where you maybe made a few different mixes and feel unsure which one is best. You know technically everything is there and in order, but in the last bit you’ll try to label your song into one of these buckets: Good, Not Good, Still needs work, Ready for mastering…etc.

Are advanced, experienced, and veteran producers exempt from this state of mind? Not at all. After decades of making music, I still have no idea if my music is “good” or not, even if got in the top 10 on Beatport or if my friends all love it. Deep inside, sometimes, I’ll doubt myself. However, I came up with some personal rules to help me judge if I think my own work is decent or not.

Deal with technical points first: This is why I started this post with technical stuff. I see in our Facebook group, people giving feedback, and my observation is that it is often biased by their mood or listening situation. What has become clear to me is that when giving feedback, you need a common reference. I can tell you that your kick is too loud, but compared to what? I have clients sometimes who complain about the low end being overpowering but in the same mastering session on that day I had another client who loved really, really loud kicks. The difference was laughable and both had the exact opposite feedback: one had weak low end but he felt it was too much while the opposite was a bass orgy but he wanted more. Could it just be what they hear? Yes, probably, and this is why you need to be able to use a FFT to check, but also, listen to you music in the middle of a playlist that has other songs of the same genre to know if it sounds right.

A client was telling me “It sounds right in the studio, wrong in the car and at home, its a different song… which one is right?”

The one that is right should be your studio version, but it should be cross-validated technically with other songs. If it doesn’t sound right at home, then find a song that sounds good there and then study it at the studio to see what that song has that yours don’t.

Know that you’ll never really have a permanent opinion about your music. Each day your mood might change and affect how you appreciate your music. Down the road, you’ll learn new techniques and then hear mistakes in your song, you’ll hear a better song than yours… all these points will make you doubt yourself. You’ll always want to go fix something. Since you know you’ll never be really satisfied with it, then you can accept to move on faster. Just start another song, apply what you learned, use your new influences and try something new.

Nothing exterior will validate your music. No matter what you think or do with your song, you might doubt it. This means, you don’t need the latest synth or to be on that specific label. “...and then I’ll be happy.” is a fallacy. Knowing that, it re-centres you to count on a handful of friends for feedback.

4. Let things age. Nothing better than taking a few weeks off before listening to know how you feel about it.

What’s interesting is that, whenever I receive criticism, I start see a perspective I didn’t look into enough—super important. Music production and audio engineering is often discouraging and that’s the reality of the art. That said, I don’t think there’s a day where I make music that I don’t learn something new. Accept that everything is work in progress. This is why songs that take too long to finish are often because my perfectionist side took over, and that’s not where I can make magic happen—it’s often the other way around.

Bass Line and Low-End Mixing Tips

Tips on mixing low-end is an often-requested topic in our community and Facebook group. Handling low-end in electronic music is important to give it the glory it deserves, since it’s one of the most important parts of the genre. In this post, I’ll cover tips on how to handle low-end from multiple points of view, not only from the software side, but also from a monitoring perspective. As I’m writing this during the COVID-19 pandemic quarantine, I’ll also propose some tips on how to manage low-end at home.

The Theory

I won’t go into boring engineering theory here because it’s not my blog’s style. I like to keep things simple and straightforward. So for making low-end easy to understand, let’s cover a few important points:

  • For the purposes of this post, “low-end” means 20hz to 300hz.
  • The low-end is basically the fundamental part of your song. If it’s muddy, your track will not flow.
  • Low-end is the most powerful part of your song in terms of loudness. If your song has a lot of lows and not much mid, it will feel less loud while in theory while actually being very loud from a technical point of view.
  • Over-powering lows makes a song feel muddy and empty in a loud, club context.
  • Lacking lows will make your song feel wimpy.

When it comes to mixing, I usually start by cutting everything with a filter or high-pass EQ at 20hz with a 24db/octave slant. This cuts unnecessary rumble that most sound system can’t reproduce. If you feed monitors garbage frequencies, it takes away precision in the “good ones.” So I cut everything on the master/mix bus, but I will also high-pass every channel by removing any frequencies aren’t needed. When mixing claps, for example, I will remove everything under 300hz.

Low-End Frequency Bands

  • 20-30hz: The section is the sub area. Not always present in every sound system, but when it is, it really creates a warmth that is quite addictive.
  • 30-50hz: I find this section is where a song gains in power. Most clubs cut at 30, and on vinyl records they also cut there—this zone is critical.
  • 50-80hz: The range that creates a lot of punch.
  • 80-100hz: Punch, presence and precision.
  • 100-320hz: This is the body of the song. It gives a lot of weight.

I usually put everything under 150hz in mono. This really solidifies the low-end and avoids phasing issues that are often present, which can help in clarity. Vinyl cutting requires mono low end or the cut will make the record skip. I’ve seen producers who enjoy the weird effect of a stereo low-end but that’s for home listening mostly, and they know there can be issues.

Frequencies are shared by many sounds, and the more you free space for your low end content to breathe, the better it will perform. I know it’s time-consuming but there’s nothing like doing it this way compared to using a side-chaining tool. This phase of mixing is critical for clarity. The more care you put into each channel, the better the results will be in the end.

Since the low-end has fundamental notes, in electronic and dance-oriented music, it’s generally important to pick a key note for your song and not change it much. You can change it as much as you want, of course, but if you do, you’re going to deal with a few headaches.

The Challenges of Mixing Low-End

Handling low-end has multiple challenges, but with time, but hopefully some of my suggestions here help you to deal with those challenges more effectively.

Monitoring

In general, people who can’t hear or deal with low-end properly is because they’re not equipped to work with it. Using a sub is a good, but it will never have the precision of a tool like the Subpac. The Subpac is a wearable device that reproduces the low-end more physically, making it easier to understand what’s happening down there—you feel low-end on your back directly. Headphones, on the other hand, can mislead you, as you cannot hear lower frequencies.

After figuring out the bet monitoring options for your setup, you need to A/B your mix with something to see how your low-end compares to it. There are two main plugins I highly recommend for A/B tasks: Bassroom and REFERENCE. Both allow you to pick a song you like, and then it measures your work in reference to that song to show you how to manage your song to get the desired result. Doing this without these plugins is very hard unless you’re a veteran engineer.

A/Bing requires something very important that a lot of people find difficult to understand when I explain it: you need to find quality song that has well-mixed low-end to compare your work to.

You can’t make quality music if you have never been exposed to it beforehand.

Low-end mixing approaches also vary widely in genres and producers. I would recommend that you pick a song to A/B that you like the feeling and sound of, and then try to emulate it with those plugins. For instance, some techno producers prefer the bass too be present all the way to 20hz and the kick to hit at around 80hz, while some other genres, it will be the opposite. One isn’t better than the other—they’re just styles—but both will create a certain feel on a dance floor.

Shared Frequency Ranges

Speaking of the kick, I should also mention pads, toms, and synths, as they all share space in the low end with the bass elements. It can quickly get messy down there, and the more shared space, the muddier it gets. If you look at the different bands I mentioned, I try to make sure one one sound per section occupies each band. This is why side-chain compression can come in handy—when the kick hits, you can apply ducking to all the rest of the signals that could be present in that range as well. You can also side-chain the bass with percussion or synth so they all have a moment but not at the same time. For quality side-chain compression, I highly recommend looking into the Shaperbox 2 plugin. It’s a “knife” for extremely precise ducking, filtering, and applying mono to your low end—it’s crazy-good.

Space is not only shared in frequencies but also in time. We all love low-end and I see people getting a little bit too excited and have way too much decay on all their sounds down there, which means a lot needs to be removed. The shorter the sounds, the clearer your low-end will feel. You can do that with Shaperbox 2 but also with the very useful mTransientMB that can help you make super punchy sounds.

This means that picking your envelope can be a very delicate task. If your low-end has too much attack, it will compete with the kick and make things muddy. If it lacks attack, it will feel slow and lifeless. To shape your sounds, I would say Shaperbox is the best tool, but if you can look into understanding the attack/decay/sustain/release of your tools and perhaps looking into a good envelope follower, too. Some max patches can really come handy for this as well.

Density

It’s not because your low-end is loud that it’s dense. If you have your low-end coming in loud, it might need some compression to have more density. I find that the best way to get that is by having side-to-side compression (eg. insert 2 compressors), both in parallel mode (wet/dry at 50%) which will condense the signal and make it thick, warm, and fat—pretty much what we love in low-end. You can also add harmonics by using some saturation. I personally find that the most interesting saturation for the low-end is tape; it just works very well. My favorite is the Voxengo CRTIV Tape Bus plugin, it’s a marvel.

Practice Mixing Low-End

Practicing the mixing and design of the low-end of your song takes time, good monitoring, and understanding of each of the challenges that come with it. Once you start working on it and start feeling something isn’t right, check which challenge you’re facing. Try to be methodological about this.

Here’s how I approach it, step by step.

  1. Pick the root key of your song; G, for example.
  2. Find the hook, motif and main idea of your song, then tune it to the key. Usually the main idea, which could be an arpeggio, will situate itself in around G5.
  3. Use the same idea, pitched down to G1-2 to define your low end. It could be one or two octaves difference. It will support your main idea in the same key, making sure your song feels unified.
  4. Put in mono—all your elements under 150hz should be mono.
  5. Add your percussion. You can tune each element to the root key. Tuning the kick can really give a whole different feel.
  6. High-Pass all channels to remove garbage frequencies.
  7. Clear the decay. Fine tune the decay of all sounds so there’s no bleed and they have more dynamics.
  8. Side-chain elements that are masking one another.
  9. Add or control the attack of each sound for precision.

If you do the items in this checklist, you’ll have much better results already. The rest will come with time.

Writing Bass Lines

This tip builds on my previous post about chord progressions and music theory. I come from the dub techno world where we had one-note, one-bar bass lines that felt satisfying enough, so when people ask me if a bass line can be monotone, I sometimes reply that the simplier the low end, sometimes the more effective it can be. Sometimes making it complicated doesn’t mean good. That said, having a bass line over two bars instead of one is often pretty lovely for variation.

I also find that powerful basses are the ones that are reply to the main idea. Support is efficient, but it will make your bass line lack interaction and making it less engaging.

A good way to find a dialog for a bass is to put a square LFO modulating the volume and then using it to mute parts of your bass. If you change the speed of the LFO, you’ll gate parts out, and might find a good combo or variation. In Hip Hop, they often use a pure sine tone and they’ll duck with an LFO or kick. This makes the low end very full and thick.

Oscillators

If you’re going to pick a synth to design with, it might be wise to consider the use of certain wave shapes. For instance, a sine is warm and pure but it can have resonances which are difficult to remove with a bell EQ because they can phase. You want to control your low end only using filters (high-pass) or a shelving EQ. A filter’s slant will help control a rumble. You can put it at 30hz and then switch the slant from 6dB/oct to 12,18, 24 and see how the low-end changes. They all make it very different, from taming to numbing it out. I like to use a square oscillator, but I’m not a fan of the harmonics it creates, so I will filter some out. I’m very careful with resonances in the low-end, but they can also bring a certain warmth to it. For instance, you can use resonance as an extra sine oscillator, which brings fullness to the low-end.

I hope this covers low-end sufficiently for you. Feel free to share your own findings, techniques, or extra questions!

Tips for better clarity in your mixes

Clarity in mixes is not something people understand or perceive well when they first start mixing, but it’s a magical part of a song that often distinguishes professional mixes from amateur mixes. Clear-sounding mixes instantly grab your attention because they feel precise, open, airy and easy to understand. While clarity in a mix might seem easy to create, it’s actually very difficult to achieve.

I can say that I’m starting to better understand clarity myself. If you’re familiar with my music, you know I like busy music and my songs are generally quite full, with multiple layers of sounds. It’s a challenge for me to get a clear mix because of the number of sounds I use, but for me this is also the best way to practice mixing clearly, as it’s more difficult than if I were only using a minimal amount of sounds.

Here are some of the things I’ve learned when creating clarity in my own mixes.

Less is more, and less is clearer

The less you have going on, the clearer your song will be. Nothing clashes and there’s less to try to find an appropriate spot for. When mixing, you need to find a fitting place for every sound you use. If you have 5 hihats, 3 claps, and 5 melodies, this can become quite a challenge.

How can you clean up a mix and make it clearer?

I see a lot of clients struggle with cleaning up their mixes. Most artists suffer from a strange thought process that goes something like “I’m afraid the listener is going to get bored, therefore I will fill my mix with as much as possible so the listener never feels let down.” To this I would reply that there’s a remedy in your DAW…the mute button! Let me explain:

1 – Loop a section of your song, the part where it’s the busiest.

2 – Mute everything, then start by un-muting your essential sounds. What are the fewest number of sounds that can communicate your song’s idea clearly? Toggling mute on parts of a song sometimes create interesting perspectives and can reveal things you didn’t realize about your arrangements—it often takes fewer sounds to create a clear mix. This can mean no fills, no decorations, no backgrounds, just the essentials.

3 – Are your essential sounds sharing space in the frequency spectrum?

Technically, if you have less, sounds are most likely to occupy less space and clash with one another less frequently. Generally, there are a few areas where your sounds can clash:

  • Frequency: If you divide the spectrum into 4 or 5 bands, you want each band to have the same number of sounds. Low-end would be under 100hz, then 100 to 1k for mids, 1k to 3k for high mids and then 3k to 10k for highs, then 10k+ for the air/transients. If you have a hard time muting your sounds, you can also isolate a few different sounds in different bands.
  • Amplitude: Also known as volume, amplitude is often not understood properly. People want everything LOUD and are afraid that secondary sounds won’t be heard. Everything gets heard in a mix and sometimes, things that are less loud are way better. Some sounds should be the loudest, then the others should be mixed in relation to those. The greater the amplitude distance you have between your sounds, the more they’ll feel like they’re breathing instead of fighting. This is your dynamic range, a concept that’s often misunderstood. I would recommend playing with levels here and there as well. Having modulation on the amplitude of a sound is a good way to create a breath of fresh air in a mix. You can use a tool like MTremolo to give you a hand with that.
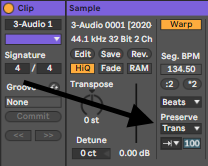
  • Sample length: This is something many overlook but is very important when it comes to samples. In many cases, samples people use are too long (too much decay) and that can cause a lot of noise, especially once compressed. Take kicks, for instance; people love big, badass kicks but don’t realize how problematic a long kick is in the low-end, especially in mastering. It bleeds in the bass and everything becomes mushy. I often use Transient Shaper (by Softubes) to shorten kicks or other percussive elements. You’d push the attack if you want and reduce the decay. You can also reduce the decay of a sample in Ableton if you go in the “Preserve” to be switched to “Trans” and then make sure it’s one-way, and play with the percentage to remove the decay.
  • Stereo space: I’ve explained this before and will refrain from repeating myself, but stereo clarity is crucial. If your sounds are spread wildly, you might get into phasing issues which means, you’ll end up with holes and sounds ghosting when they should be heard. I know that discovering phasing issues might be a bit of a mystery to many new producers, but with a good metering, you can see them. You can also listen to part of your song in mono to see if everything is coming out properly.

Chaos-inducing mixing errors

There are a number of tools and habits that can create chaos in a mix—I run into them often, and here are a few I see regularly that I can provide some advice for:

1- Using loop samples: There’s nothing wrong with using a pre-made loop or sampling something from source, but you won’t be able to access the loop’s sounds individually, and can get trapped dealing with issues that already exist within the loop or sample. If you’re using a loop, make it the centre of your song and make sure that you work the other samples around it. Tip: Using busy loops can be a bit of a problem, but you can use a multi-band compressor to control them, or put them in mono and use a multi-band stereo tool like the Shaperbox 2 to decide on the position of each sound.

2- Auto-panning nightmares: Making things move can feel exciting, but it doesn’t help mix clarity if you overdo it. Using multiple auto-pan effects on sounds can be cool, but the human ear can only handle a certain number of complex things going on. If on the first listen, one can’t understand the movement clearly, there are chances the modulation isn’t helping. TIP: Use just one auto-panning effect per song, max.

3- Delays and reverb: Reverb and delay multiply or make sounds longer, songs busier, and therefore, potentially more confusing. Reverb can be useful, but a type like Hall can make things sound a bit messy. I would recommend to have your reverb set to a short decay and low wet/dry. Darker reverb can also help preserve the highs in your song. Tip: Using reverb with a Chamber/Room at the beginning can help to know how much you should use. Also, if you can use a delay instead of reverb for creating wider sounds, use an EQ to tame the clashing frequencies.

4- Intense compression: Compression glues and adds body to sounds, but a compressor with a slow release and high ratio can also mess up the precision of a sound. Keeping some transients intact can really help a sound to pop out of a mix. If you compress, perhaps using the magic 1:1.5 ratio with slow attack to help the transient snap. TIP: Parallel compression is always useful for clarity.

My last general tip is to always check your mix in mono…it really helps!

I hope this was useful.

Creating organic sounding music with mixing

I’m always a bit reluctant to discuss mixing on this blog. The biggest mistake people make in mixing is to apply all the advice they can find online to their own work. This approach might not work, mostly because there are so many factors that can change how you approach your mix that it can be counter-productive. The best way to write about mixing would be to explain something and then include the many cascades of “but if…”, with regards to how you’d like to sound. So, to wrap things properly, I’ll cover one topic I love in music, which is how to get a very organic sounding music.

There are many ways to approach electronic music. There’s the very mechanical way of layering loops, which is popular in techno or using modular synths/eurorack. These styles, like many others, have a couple main things in mind: making people dance or showcasing craftsmanship in presenting sounds. One of the first things you want to do before you start mixing is to know exactly what style you want to create before you start.

Wherever you’re at and whatever the genre you’re working in, you can always infuse your mix with a more organic feel. Everyone has their own way, but sometimes it’s about finding your style.

In my case, I’ve always been interested in two things, which are reasons why people work with me for mixing:

  1. While I use electronic sounds, I want to keep them feeling as if they’re as organic and real as possible. You’ll have the impression of being immersed in a space of living unreal things and the clash between the synthetic and the real, which is for me, one of the most interesting things to listen to.
  2. I like to design spaces that could exist. The idea of putting sounds in place brings the listener into a bubble-like experience, which is the exact opposite of commercial music where a wall of sound is the desired aesthetic.

There’s nothing wrong with commercial music, it just has a different goal than I do in mixing.

What are some descriptions we can apply to an organic, warm, rounded sound?

  • A “real” sounding feel.
  • Distance between sounds to create the impression of space.
  • Clear low end, very rounded.
  • Controlled transients that aren’t aggressive.
  • Resonances that aren’t piercing.
  • Wideness without losing your center.
  • Usually a “darker” mix with some presence of air in the highs.
  • Keeping a more flat tone but with thick mids.

Now with this list in mind, there are approaches of how to deal with your mix and production.

Select quality samples to start with. It’s very common for me to come back to a client and say “I have to change your kick, clap and snare”, mostly because the source material has issues. Thi is because many people download crap sounds via torrents or free sites which usually haven’t been handled properly. See sounds and samples as the ingredients you cook food with: you want to compose with the best sounding material. I’m not a fan of mastered samples, as I noticed they sometimes distort if we compress them so I usually want something with a headroom. TIP: Get sounds at 24b minimum, invest some bucks to get something that is thick and clear sounding.

Remove resonances as you go. Don’t wait for a mixdown to fix everything. I usually make my loops and will correct a resonance right away if I hear one. I’ll freeze and flatten right away, sometimes even save the sample for future use. To fix a resonance, use a high quality EQ with a Q of about 5 maximum and then set your EQ to hear what you are cutting. Then you lower down of about 4-5db to start with. TIP: Use Fabfilter Pro-Q3, buy it here.

Control transients with a transient designer instead of an EQ. I find that many people aren’t sensitive of how annoying in a mix percussion can be if the transients are too aggressive. That can sometimes be only noticed once you compress. I like to use a Transient designer to lower the impact; just a little on the ones that are annoying. TIP: Try the TS-1 Transient Shaper, buy it here.

Remove all frequencies under the fundamental of the bass. This means removing the rogue resonances and to monitor what you’re cutting. If your bass or kick hits at 31hz, then remove anything under that frequency. EQ the kick and all other low end sound independently.

Support the low end with a sub since to add roundness. Anemic or confused low end can be swapped or supported by a sine wav synth that can be there to enhance the fundamental frequency and make it rounder. It make a big difference affecting the warmth of the sound. Ableton’s Operator will do, or basically any synth with oscillators you can design.

High-pass your busses with a filter at 12db/octave. Make sure you use a good EQ that lets you pick the slope and high-pass not so aggressively to have a more analog feel to your mix.

Thicken the mids with a multiband compressor. I like to compress the mids between 200 and 800. Often clients get it wrong around there and this range is where the real body of your song lies. The presence it provides on a sound system is dramatic if you control it properly.

Use clear reverb with short decay. Quality reverbs are always a game changer. I like to use different busses at 10% wet and with a very fast decay. Can’t hear it? You’re doing it right. TIP: Use TSAR-1 reverb for the win.

Add air with a high quality EQ. Please note this is a difficult thing to do properly and can be achieved with high-end EQ for better results. Just notch up your melodic buss with a notch up around 15khz. It add very subtle mix and is ear pleasing in little quantity. TIP: Turbo EQ by Melda is a hot air balloon.

Double Compress all your melodic sounds. This can be done with 2 compressors in parallel. The first one will be set to 50% wet and the second at 75%. The settings have to be played with but this will thicken and warm up everything.

Now for space, I make 3 groups: sounds that are subtle (background), sounds that are in the middle part of the space, and space that are upfront. A mistake many people make is to have too many sounds upfront and no subtle background sounds. A good guideline is 20% upfront as the stars of your song, then 65% are in the middle, and the remaining 15% are the subtle background details. If your balance is right, your song will automatically breathe and feel right.

All the upfront sounds are the ones where the volume is at 100% (not at 0db!), the ones in the middle are generally at 75%, and the others are varied between 50% to 30% volume. When you mix, always play with the volume of your sound to see where it sits best in the mix. Bring it too low, too loud, in the middle. You’ll find a spot where it feels like it is alive.

Lastly, one important thing is to understand that sounds have relationships to one another. This is sometimes “call and response”, or some are cousins… they are interacting and talking to each other. The more you support a dialog between your sounds, the more fun it is to listen to. Plus it makes things feel more organic!

SEE ALSO : More tips about working with samples in Ableton

The EQ and compression combo (Pt. 3)

After going into details with regards to EQ and compression, in this post I’ll cover some practical tips on how they work well together. I’ll try to also clarify why many engineers will tell you that all you need is these two tools to accomplish most of the work in mixing and mastering.

Here are a couple terms and ideas that have to do with this topic:

  1. There are no rules for how to use EQs or compressors. You’ll read many different views online, and some people will affirm loud and clear that their point of view is right, but after 20 years of trial and error, I still feel that I’ve accomplished a lot of great things when I knew less than now. Relying on your ears is really important. Some of the most innovative trends involve people who have no idea what they’re doing else than following their gut feeling.
  2. Substractive correction. It involves only cutting the junk out.
  3. Coloring correctives. This usually means that you’ll boost frequencies. Sometimes, cutting might necessary.

To start with, I’d point out that in mastering or mixing, one of the most common chain would look like this:

[Corrective EQ]  –  [Compression]  –  [Color EQ]

There’s precise logic behind this. Basically, you want to take the rogue frequencies out first, compress and readjust the good ones with the compression, and finally adjust the tone or highlight details with a coloring EQ. My personal preference for better results would be that whenever I cut, I do it with a pretty narrow Q (resonance) on the EQ. A great starting point is to start with 2 or 3 and then adjust. Don’t hesitate to use visual reference of the FFT that is often included in the EQ’s display, especially if this technique is new to you. Then, I’d cut about 3dB at first, up to 5. You see how this changes your sound by bypassing the EQ and comparing.

When it then comes to compression, there are a few different things you could do here. For instance, if you go with an aggressive setup, then you’ll beef up what you have “open” by cutting away the bad frequencies. I’d suggest starting with a more exaggerated approach to see what will pop as annoying. It might not be possible to hear what’s wrong if you don’t push the sound to its limit.

Once you see and hear issues more clearly, you can cut again, then you roll the compression into parallel mode to have some of the incoming dry signal mixed with the compression.

If you haven’t explored the side-chain frequencies, this is an option where you can decide that your compressor won’t apply anything starting at the target (ex, anything under 100hz). With this, you might want to filter only a part of your song with the EQ and then compress to accentuate the part you want to put to front.

The last process in the chain is the color EQ. You can take any EQ you like but ideally, I’d go for either an analog emulation or a shelving EQ. Those will provide a nice enhancement to complement what the compressor has been doing. For coloring, you can explore. One way to approach it is to completely exaggerate one band to see how it sounds, and then roll down. This is not only very interesting for sound design, but also for mixing more subtly annoying details. It can help build body for a sound that feels week too.

Examples of where to start – EQ and Compression

A pad that that lacks body and roundness. In this case, it’s most likely that a resonance is poking through too loudly and that good frequencies are hidden behind it. You could start by checking if there is one peak on the spectrum and with your corrective EQ, with a not so wide Q (ex. 1.5 to 3), try to bring that peak down pretty severely with a cut of 5-6dB. Get the threshold of your compressor to meet the highest peak and then adjust the output to be the same as the input. With the shelving EQ, bring the mids up but 2-3dB.

A kick that lacks bottom. This might be related to the mids of the kick that are too loud. You could lower them by 4-5dB, then compress with a ratio of 8:1. The shelving EQ should then bring the lows under 100hz up by 4db. If that doesn’t do, cheat by using the corrective EQ to notch up a bell curve at 50hz.

Percussion that are harsh. This is usually because one frequency is resonating around 4 to 8khz. It’s hard to say but try to cut by 8dB and scan around to see if there’s at any point, something more comfortable. Bypass to double check and then adjust your cut so that you can make the resonance almost there. Compress with a fast attack to control the transient and glue them. The shelving EQ could be used to lift the highs.

EQ suggestion: The TDR SlickEQ GE will do a great job for correcting.

Compression: The new SphereComp is super lovely and affordable. I tested it in sound design and it does really nice gluing.

Shelving EQ: I tried the demo of EVE-AT1 and I think you’d like it just like I did. The price is incredibly good for what it offers!

SEE ALSO : Saturation Tips and Hacks

Tips for compression: The Multi-band compressor (Pt. 2)

Continuing with more compression tips, I’d like to discuss of my all time favorite tool for anything and everything: the multi-band compressor. For many, this beast is a bit of a difficult tool to tame, but I’d like to break it down for you so you can include it in any of your routine and needs. In order to continue, I hope you’ve first read the first post about compression, and also the two posts about how to use EQs.

Compression guidelines

Common Use-Cases for Compression

Controlling harshness. Using a compressor, you can set the attack to be fast and the release to also be pretty fast. This makes the whole action of the compressor fast, controlling any aggressive sounds and taming them. If the attack is too fast however, it can distort, so you need to juggle with the settings to find your sweet spot.

To add punch. This is the opposite of harshness. You’ll want the attack to be slow and the release to be fast. The compressor won’t jump on the transient immediately but will instead create some snappiness. The ratio should be around 5:1 or even higher to achieve this effect in most situations.

To add thickness. Using your compressor in parallel mode, you can set it to about 50% wet/dry, then compress with a medium attack and a medium-fast release. I’d make sure the ratio is as high as possible too. If your compressor doesn’t have a parallel option, then you can use the compressor in a AUX/Send bus.

To glue together a mix. Very similar to thickness and punch, you’ll want to add this to multiple channels and busses at once. Again, parallel compression, slow attack, high ratio. That should do it. Experiment with exaggerated effects and then tone it down.

To sum it up, a fast attack makes the compressor react quickly, which means it is there to control something. A slow attack is to enhance the beginning of the sound. The ratio is how much of that effect you want in action, and the release is for how long.

Multiband action

The multi-band compressor works exactly as the use-cases explained above, but with a multi-band compressor, we can set a range of frequencies to be affected. Therefore, you can set thickness in the mids, control the high-mids for harshness, and enhance the high’s transients with a single compressor, but with different settings for each section.

The multi-band compressor has an additional feature: the use of crossovers that set points for where each section starts and ends. A crossover is simply a frequency you set. For instance, Ableton’s 3-band multi band will have 2 of crossover frequencies. You set the lower crossover which will set where the low end ends in the mids (ex. 200hz) and the other crossover will be where the mids end and the highs start (ex. 6khz).

My perspective on multi-band compressors is that I use them like a shelving EQ where I control each section’s aesthetics in a different way. You can then shape the tone of a sound or mix, or extract minute details. Ideal for finishing touches, multi-band compression can also be used to bring forward parts of your sounds in the most effective way.

Now, here are some situations where the effects of multi-band compression can be useful:

  • Wimpy percussion: If your percussion needs presence, thickness and power, set your crossovers so you can control what’s happening between 200hz and 800, then up to 3khz. Beef up the first section with slow attack and high ratio and aim to add punch up there (refer to the notes above regarding how to do this).
  • Pale pad: Again, say a weak pad needs presence, beefiness between 250 and 600 hz. I’d also compress between 4 and 8khz to add some shimmering, which is like adding thickness. You could even lower your section to hit all the way down to 90hz to get some analog feel.
  • Crazy swirl: Sometimes transitional effects are great but can be not appropriate for your song. I like to control the highs over 7khz in a way were they don’t hit aggressively but will have the mids over 1khz enter smoothly. This is a way to control the harshness and presence; often very useful to create wobble, rubbery movement.
  • Dull mix: A dull mix usually needs brightness which can be created by stimulating the highs and mid highs. This can be a combination of adding thickness or stimulating the transients. I’d say try sharp sections around 4khz to 8, then another one until 11khz and even compress above that with a 3rd section to create what we call pixie dust.
  • Stellar reverb: A multi band with a reverb is pack of fun for me! I like to beef up the mids above 300hz and also create thickness between 2khz to 6. You can then control the levels to decide on the tone of the space you’re creating for your song.
  • Deep kick design: Compress a section under 50hz and then another until 120, plus a last one that goes all the way to 500hz. I can guarantee you that if you have the lower sub purring, then you can also add a bit of punch around the mids to have a super deep, but punchy kick.

When it comes to my favorite multi-band compressors, here are some of them:

Neutron 2 (Izotope)

General tool for mixing that makes pretty much the best all around assistant to deal with numerous problems. Transient shaper, exciters, gate, compressors and all of them are in multi-band mode. You can’t get better than that.

Drawmer 1973 (Softubes)

The Drawmer compressor is amazing for creating ambient so imagine if you can set it in multi band mode, then you get awe dropping moments.

Fabfilter Pro-MB (Fabfilter)

Elegant, precise and transparent would be the best way to describe this one. Really useful for the finishing touch of your mixdown.


SEE ALSO : The EQ and compression combo (Pt. 3)

Tips and recommendations for compression (Pt. 1)

After two important posts on EQs, it’s time to start discussing how to use compression, as these two work so well hand-in-hand, and I’ll offer my own recommendations on some of the best compression VST plugins. Your own selection of VSTs should always start with a few of these two categories:

For EQs:

  1. One Parametric EQ for surgical needs.
  2. One Shelving EQ for toning.
  3. One analog based EQ for coloring.

For compression, there are also several choices and it’s easy to get lost, so one of the things I find important to start with is to explain the different families of compressors (more suitable to relate them to as models).

FET

This type of compressor is one of the most popular out there. It’s known for its aggression and for its use of adding tons of punch to sounds, mixes, with a lot of attitude. The FET compressor, which means Field Effect Transistor, appeared later in the history of compressors, when they switched the tubes for to a model that helped make sounds warmer and richer; it became an instant favorite in studios. The 1176 is one compressor that became one of the most popular models in studios.

Use: Amazing punch on percussion and add life on textures, pads.

Recommended plugins:

FET Compressor (Softube)

FETpressor (PSP)

Black Limiting 76 (IkMultimedia)

Opto

This type is pretty much the opposite of the FET (although there are people who will argue about this). The Opto model is smooth and super warm. Not idea for percussion but I do use it in parallel (see techniques below), which can give beef to a kick, for instance. The way this model works is very interesting. It’s basically a lamp that reacts to the incoming sound and will light up depending of the incoming signal. I’m not the best at explaining this, but that pretty much sums it up,  and this makes the Opto compressor not the most aggressive, as it offers smoothness.

Use: Ideal for pads, synths, textures and I would recommend you experiment it with percussion, but in parallel mode.

Notable suggestions for VST:

Bx_Opto (Brainworx)

Opto compressor (IKMultimedia)

Renaissance Compressor by Waves also offers an Opto mode.

VariMu

VariMu is like the prince of compressors because it has finesse and elegance. Manley popularized the VariMu with their famous version of it. It is a cousin of the Opto in the way it works, and is also very smooth. Often used in mastering, it works like a charm to handle punch problems or to keep coherence in a mix that needs general glue to it. It’s not the best to create punch and this is why, but when used in pair with another compressor, it can really create beautiful results.

Use: On your mix or on a group. It will glue it all together in the most luscious way.

Suggestions of plugins:

The Manley Compressor from UAD

MJUC by Klanghelm

DynaMU by IKMultimedia

VCA

This type of compressor is also very popular just like the FET. I’d say that most generic compressors are often based on that model. Since it’s based on voltage control, this compressor is a surgical type of tool. It is really effective to produce snappiness to percussion but it can also be used to control harsh transients.

Use: Smack those kicks with it and control the transients of hats with another setting.

My favorites:

TDR Kotelnikov

U-He Presswerk

API 2500 (There are a few imitations from UAD and Waves, so check it out)

Techniques

You may have the best plugins but if you don’t know how to use them, you’ll miss the full potential of these amazing tools. I’d say that if you don’t, please know that a large number of producers out there, even experienced ones, struggle to fully understand them. So while you will find so many tutorials out there, I’d like to explain you my simple vision.

But first, let me explain what compression does. It takes the incoming sound and monitors the loudest peak and checks if it is louder than a certain point: the threshold. If that’s the case, it will push down the signal above the threshold, down. I like to picture it as when you sit in a bath, where the water rise as you sit in it. The way a compressor “pushes down” the audio will be controlled by the attack (how fast it reacts), release (for how long) and ratio (how much).

I’d like to compare a compressor to an oven and the incoming music as the dough. The compressor doesn’t work like, let’s say a reverb where if you put it on a sound, you’ll automatically hear what’s being altered. How compressor VSTs work are really, to me, like a oven. You need to bring in the sound, cook it, then push it out.

So, use these parameters when dealing with compression:

  1. Incoming signal. You’ll need to raise the volume of the incoming signal to make sure it meets or is above the threshold. If the signal is too low, it won’t be processed.
  2. Threshold. Lower it down if needed. You’ll see that most compressors have a “GR” for gain reduction meter. This will start to pump as the signal meets the threshold. If nothing happens, lower down the threshold and or boost the incoming signal.
  3. Attack/release. A fast attack will make the pumping start react quickly while a slow one will be less aggressive. You can then adjust the release to control for how long the pumping will last.
  4. Ratio. This is how much will be pushed down. For instance, a 2:1 ratio means that for 2dB over the threshold, it will be turned down by 1dB over the threshold. Eg. 8:1 is a more aggressive result.
  5. Make-up gain/Output. Your output signal will be turned down in the process so you can use the make-up gain to adjust the processed signal to match or be louder than the incoming signal.

So yeah, it sounds weird on paper, but compression is about lowering the volume to make things louder.

Regarding my analogy with the bread, you need to make sure it bakes (gets compressed) before pushing it out.

Now, the techniques you can use compression for:

  1. Limiting. This is the most known use of a compressor. It is a way of making sure the sound never goes above a certain level. Ideal on a master bus to avoid clipping. You can use it to a certain extent on busses to maximize the volume. But make sure it’s not too much as it can then distort in mastering.
  2. Side-chain, ducking. Popular in electronic music, this makes the compression work based on an incoming signal. I’ll get back to this in a future post.
  3. Parallel compression. To do this, you need to put the compression in an AUX/Send bus and then send whatever needs compression to it. This ensure the original signal is mixed with the compressed one, adding power, loudness, precision.
  4. Serial compression. To be used with care, but has very powerful results. This is about putting two (or more) compressors back to back. One can be in parallel (thanks to a wet/dry) and the second one, not. This makes sounds really powerful, punchy, fat. Ideal on sounds that are wimpy and pale.

That’s it for the basics of compression! I’ll discuss the art of sound design using compression and EQs next.


SEE ALSO : Tips for compression: The Multi-band compressor (Pt. 2)

Tips on how to pick your EQs and use them (Pt. I)

People often ask me about my opinions on what the best audio plugins are, and there are no doubts that investing in quality EQs and compressors is one of the most important things you can do for both sound design or mixing. You can do pretty amazing things just with EQ and compression, but of course you need to understand your tools to make the best of them. In this post I propose some exercises and tips, as well as covering the main tools I have gathered through the last years and my thoughts on the best EQ plugins.

Types of Equalizers

There are many types of EQs and I believe some are more important than others. It took me a while to understand how to fully use them all and how to select the right one for specific situations. This subject is actually so vast and complex, I could make a series of multiple posts and I wouldn’t get through it. I’ll try to avoid being too technical and will explain them in simple terms so anyone can understand.

The way I approach EQs are based on different actions:

  • Corrective. Sometimes a sound will have part of it that will feel aggressive and annoying. I will do corrective by spotting where where it looks like it’s an issue and then cut. Corrective cuts are usually not too narrow (Ex. Q of 3)
  • Surgical. A resonance in a sound makes your ears hurt and that will need a very narrow cut. (Q of 6-8+).
  • Tonal adjustments. An EQ can be used to make tonal changes such as deciding if you want your track more beefy or more light by either boosting lows or highs.
  • Coloring. Some EQs aren’t transparent and will have a musical touch to the changes it makes. This will add some personality.
  • Valley cuts. The opposite of surgical, where the Q will be make the curve really wide. It makes very subtle changes, somewhat tonal, a bit colored and sometimes a bit corrective. Try it at different points on a sound and see it change without being able to really know what’s happening.

TIP: The human ear will hear a noticeable difference if you cut 3-4dB minimum. If you cut 6dB, it will be quite obvious.

The main types of EQ plugin categories are:

  • Graphic/Fixed Frequencies. Influenced by older models and the first EQ, the frequencies you’d have access to are fixed and won’t be changed. In many of those models, the frequencies are based per octaves but certain companies will have their own way of deciding which ones are used.
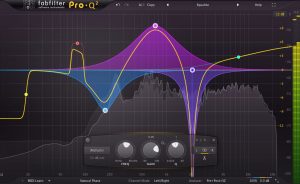
  • Parametric. One EQ that is very popular is the Q2 by Fabfilter which allows you to drop a point anywhere and then be able to shape how narrow you want to cut or boost.
  • Shelving/Band. This is a part of the spectrum that will be affected. For example, on DJ mixers, the 3-4 EQ buttons are basically shelves of frequencies that are altered.
  • Dynamic. This one is advanced. You can “order” a point of your EQ to react depending of certain conditions. For example, if you have a recording of a drum, you can order the highs to lower down by 3-4dB if the cymbals hit too loud. Very practical!

TIP: If you love the sound of analog, you might want to dig in Universal Audio’s suite that does emulation of classic pieces of gear. The fidelity of replication is absolutely mind boggling!

Now let’s make some associations regarding which EQ does what:

  • Surgical and valley cuts are mostly done with parametric EQs. This type of EQ will allow you to precisely identify the rogue frequencies and then cut or boost, in the way you want.
  • Corrective EQ can also be done with parametric but with graphical ones too. Sometimes a correction needs precision but sometimes, it can just be a way to realign the curve of the sound which a graphical EQ can do easily.
  • Tonal adjustments. This is done with shelving and band EQ.
  • Coloring. This is basically fixed frequencies, but if you look for analog emulation or EQs that provide a type of saturation, then you’ll also get some coloring and personality.

My favorite EQ plugins

Here are my thoughts on the best EQ plugins  that are precious tools to have in your arsenal. I’ve also included low budget EQs alternatives that are similar.

1. Fabfilter ProQ2 (Surgical, Valley cuts, Corrective, Tonal)

This plugin seems to have found it’s way in many producer’s tool kit mostly because it can pretty much do it all. From complex curves, mastering touch-ups to shelving tones and copying the frequency of a sound to apply it to another… the ways you can use this beast are so numerous that you’ll have to watch a bunch of tutorials to get all the hidden things it can do.

Budget Alternative: TDR Nova GE by Tokyo Dawn

2. Electra by Kush Audio (Shelving EQ, analog replica)

Not so known by the masses but this EQ is an absolute wonder to have on hand. I use it in every single mixes I do and the results are always amazing. A bit of a learning curve to understand as the GUI is a bit weird but even if you’re not sure of what you’re doing, it shapes the sound in a way that makes it pop out and warms it too.

Budget Alternative: RetroQ by PSP

3. BX_Hybrid V2 by Brainworx (Corrective, shelving)

I don’t think there’s any plugin that can do what this can do in terms of results. Not as versatile as the ProQ2 but where this one stands out is for how buttery it cuts in the sound, smoothing things out. When I have people studying mixing with me, I would always require them to buy this one as the very first EQ to have and use.

Budget Alternative: Voxengo Prime EQ

4. Passive EQ by Native Instruments (Shelving, correction, color)

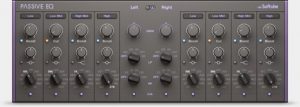
This emulation of the famous Manley Massive-Passive EQ is a bomb EQ. I love to place it on a bus of all my melodic content and then smoothly shape it into something that magically turns organic and warm. It requires a bit of exploration but when you get your hands around it, you’ll always want to use it. I find it quite powerful for sound design as a way to warm up the lows.

5. F6 Floating band dynamic EQ by Waves.

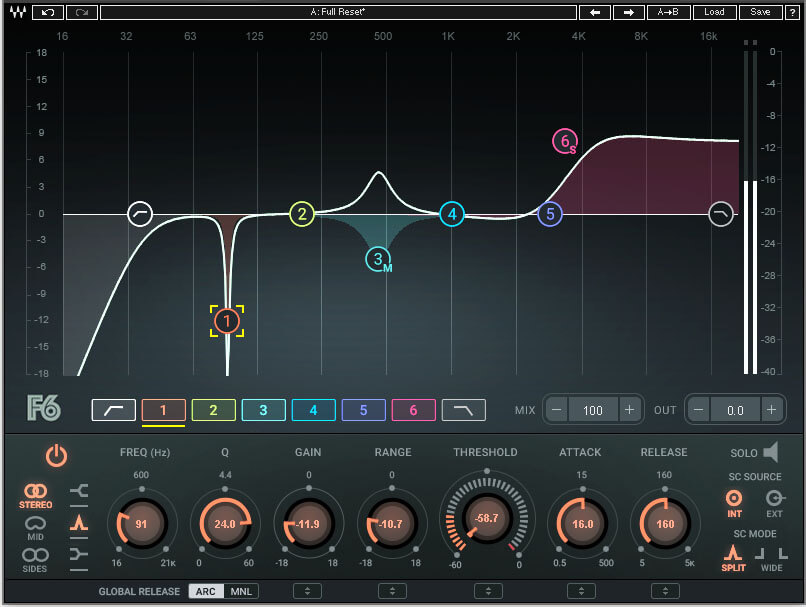
I’m not a big fan of Waves as well as their aggressive tactics for selling but this plugin is a really useful one to have. As described above, with a dynamic EQ, you can tame some frequencies that are randomly happening. The problem with a static EQ is, you’ll be cutting permanently a frequency so if what you’re trying to cut isn’t always there, you might cut something that doesn’t need adjustment. This is why you can have more control with a dynamic EQ. This one is also really easy to use if you’re familiar with the concept and the fact that you can use it in MS makes it really versatile. Not as easy and fancy looking as Fabfilter’s but it does more, in other ways. Wait for the price to fall but you might get it fro either 29$ to 49$ if you’re patient enough.

In the next post, I will go more in detail with my favorite plugins and will also explain certain ways, in details, for how to get the most of them.


SEE ALSO :

The best EQ plugins and various EQ’ing tips (Pt. II) 

How to get the right tonal balance for a mix

One of the biggest challenge of finishing a song is to properly adjust the tonal balance. There’s no doubt this part of track-making is puzzling; many people – even experienced producers – are still going to have some issues with tonal balance some days. There are tools and methods to correct tonal balance, but it’s always a challenge; I feel that it’s important to share some tips on how you can make adjusting tonal balance easier.

What is tonal balance?

I’ll keep this as simple as possible: tonal balance, from my perspective, is dividing your song into three frequency sections and figuring out how to adjust them. For instance, in certain genres, you want the tone to be totally balanced, while for dance oriented, electronic music, you’d want the lower end louder in the mix. While this sounds extremely simple to achieve, in reality, it can be a nightmare.

The biggest issue with tonal balance is that if your tone is wrong, your work when played in a specific context (ex. in a club) will sound completely off compared to similar songs of the same genre.

Common problems with tonal balance include:

Lower end anemic: The song will feel weak, energy less and hollow.

Lower end too loud: The song will feel muddy and lacking in body.

Mids lacking: The song will feel empty, no punch or body, far off.

Mids too loud: The song becomes unnecessarily aggressive and obnoxious.

Highs lacking: The song lacks definition and precision in the sounds.

Highs too loud: The song is fatiguing and harsh.

Using the right tools for tonal balance adjustments

Monitoring is of course, crucial to adjusting the tonal balance of a song. I’d say 75% of the time I get a file for mastering and the tonal balance is completely off, mostly because of the artist’s listening environment. While we don’t all have the budget or space to have a fully treated studio, there are some things you can still do:

  1. Cross-validating. With my speakers, I’ll always check a mix periodically with headphones as I work. I like to have a different perspective and I find that the sound I have between the two often reveals a perspective I missed.
  2. Mixing at a low volume. You’d be surprised at how you’ll automatically hear what’s wrong. Reduce by half the volume level you’re working with and listen to how the kick comes through, then the melody compared to it, then the high end, etc. Cross-validate with a reference track.
  3. Using a subwoofer. Many people will tell you that you don’t need a sub to do a good mix but it certainly helps to have an idea of what’s happening down there. Many of us will have issues with the neighbors so I suggest to only use sparingly just to check your mix. A good alternative is getting a Subpac.

There are also tools you can use in your productions to help you. I use many but here are some of my favorites:

Reference

This plugin is a life-saver, no doubt. You load in your reference track, adjust the volume to match and then you can swap between your mix and the reference. There are even some dynamic graphics to show you what part of your mix is too loud or lacking in comparison to the reference track.

If the track is already mastered, you won’t be able to rely on the compression meter but the levels will be used the same way. For 60$, this is certainly an essential to have in anyone’s collection.

Shelving/Band EQ

When I first started to make music, I really didn’t like shelving EQs as I felt they weren’t useful, but once I started looking into them, I have to say that it almost became one of those obsessions one can have for a plugin. There are many of them, so I’ll name a few and then explain how to get the best out of them.

  • Tonelux (Softubes): One of the most recognized and acclaimed tools out there. It gets things done, quickly. Often on sale too.
  • Solid EQ (Native Instruments): I love this one because you have some precision on what you do and it is a good mix between being a musical EQ and a transparent one.
  • Maag Audio EQ4: This one is great for highs. It’s one of the most used in the industry in mastering to get the proper “air” sound, right.
  • Hammer DSP (Kush Audio): Crazy musical, warm and outstanding all the time. Often something to just play with on the master bus to see all the different moods one song can have.
  • Sie-Q (Sound Toys): A bit like Hammer. Musical, and slightly magical in how it handles the mids.
  • ValvEQ (Kazrog): A good alternative to the expensive Bax EQ by Dangerous. It’s handling your tone in MS mode as well.

Using the right techniques in tonal balance

If the EQ, cross validation and other tools don’t seem to work for you, I’d recommend a very simple technique to help you nail down the tone.

Basically, we’ll limit it our tone balance to three sections but you can pull it to four or five if you want, but the lower the number, the easier it gets later on. Knowing this, I’d encourage you using Ableton Live 10 for the use of the groups in groups feature. You can make alternative groups where you push all the channels using lower end in one group, then mids, finishing with highs.

If you have only three groups or busses, you really limit your options to these 3 faders to control. The less you have in front of you, the more focused you’ll be.

The way I usually do it, I’ll start with the main, loudest channel and put it as the loudest one, then mix the 2 others accordingly. Pretty often I feel like knowing the level of the low end first will greatly help settle the rest.

Sound design: create the sounds you imagine inside your head

You might never really be able to make the sounds that you envision in your mind 100% accurately using sound design, but I can offer you some advice to build on a good starting point to make something close to it. Just like in painting and cinema, often our imagination will play tricks on us; you might imagine what you think could be “the best idea ever” but once you actually get down to working on it, you quickly realize that there’s a world of difference between your imagination and the final output.

So, is there a way to use sound design to transpose those ideas into something practical?

Yes, absolutely.

Sounds have a structure, shape, and form, and when you “hear” something in your mind, you have to translate this idea into a precise description which will enable you to get you started on actually creating it.

To get a good start in the sound design process, ask yourself the following question:

Can you explain your idea verbally?

The first step is to analyze the physical characteristics of the sound. Keep in mind that sound has multiple axes and characteristics:

  • Time: A sound can be short, long or somewhere in the middle. The temporal aspect of a sound is basically its duration.
  • Envelope: The ADSR (Attack, Decay, Sustain, and Release) envelop trick is what I’m referring to here. Foe example, does your sound start out loud and then fade away, or maybe it does the opposite?
  • Frequency Spectrum: Is the pitch of the sound high or low?
  • Harmonic or inharmonic: Does your sound have tonality or is it more noise based?
  • Position: Is your sound static or panned on a side? Is it moving?

Secondly, you need to identify a source material for your sound and decide how it will be shaped:

  • In a previous post, I talked about layering sounds. One great way to get started is to try to find already existing sounds, and layer them in a way to get to something close to what you have in mind. For instance, layering a tom, a clap and a snap–when glued together–will form a rounded sound that extends up into the highs. When combining your sounds and layers, I recommend using a good compressor of the Opto or Vari-MU type; they are musical and create a great feel to your sound. Check out Native Instrument’s Vari Comp or KUSH’s Novatron that came in strong in 2017 as one of the best tool on the market for a reasonable price.
  • If you’re more into synthesis, you can do something like experiment with a subtractive approach by using multiple Oscillators with a good filter. I usually use Ableton’s Operator but this year U-He’s Repro 5 has been really nice for me in terms of sound design; lovely, creamy sounds. I like to have my low end and mids set to sine and then will shape harmonics set to square or triangle. Experiment endlessly!
  • Another interesting option would be to use field recordings. You might think this approach is a bit odd, but you can even try to make the sound with your mouth, or try to find objects to hit; you’ll always end up with an interesting sound. You’ll also be surprised by how much you can do with recording your own voice. For a great, affordable field recorder, check out any of the field recorders by Zoom, they even make one that can plug into your iPhone, which is quite handy.

Sound design - Native Instruments' Vari Comp

Native Instruments’ Vari Comp


And lastly, once you’ve established your source material, you can then dive into carving your sound:

Time: there are a few things you can do to manipulate the time and duration of your sounds. Pitch-shifting something to slow it down or speed it up is fun. Granular synthesis is always an option as well; one of many options being the Mangle VST. I also enjoy having a dark reverb with a tail to stretch the length of a sound. Any reverb can do a good job here but you can easily experiment with free options found on KVR.

Sound design - The Mangle granular synthesizer

The Mangle granular synthesizer

Envelope: If you have a big chunk of sound that you want to shape, there are again multiple options to shape it. If you’re using Ableton, the easiest way would be to use Ableton’s envelope inside the clip, and draw out the envelope of the volume or gain. There are also a few volume envelope tools out there; one you can look into that I like is Volume Shaper by Cable Guys; really powerful and fun.

  • TIP: If you want a really fast transient on your envelope, try using a Transient shaper. Transient shapers can also help with sustain.
  • TIP2: A VCA compressor with a slow attack can also give you great results.

Frequency Spectrum: As I mentioned, personally I like to experiment with a pitch shifter, but I also experiment with a 3-band EQ and a compressor; mostly a FET one which is a bit more aggressive (I recommend to learn more about different compressor types if you’re unfamiliar with them all). This way you can control specific parts of your sound and manipulate which parts you want to have more emphasis. This is definitely not the only way you can do this; there are so many other creative ways to use an EQ alone (such as the UAD Cambridge),  but I like to combine multiple effects and then play with them as I am searching for the right sound.

Harmonics: Harmonics can often be manipulated with saturation and/or distortion. If you’re looking for a good distortion tool, you can check out the Scream VST by Citonic which offers tons of options. Otherwise, the Saturation Knob by Softubes is a great tool for a range of subtle to drastic changes. I suggest playing with filters as well; they can enhance some part of your sounds, especially if you use them in parallel (through a send/bus track).

Position: Try out any panner. There are multiple panning plugins on the market, but I’d be careful to make sure you aren’t making your sound spin too much in the design phase; you don’t know what the position of your other sounds will be yet and you might end up undoing everything later anyways. Beef up the sound with a chorus or a doubler to manipulate the sound’s position even more, but as I mentioned, try not to go too crazy with the panning when creating just a single sound.

These are just a few sound design techniques and ideas to get you started in creating and designing the sound you imagine inside your head. Have fun!


Bonus: A good way to come up with unexpected design ideas is to use randomization. Here’s an amazing tutorial by my buddy offthesky.


SEE ALSO :  Creating Beauty Out of Ugly Sounds 

Dynamic Sound Layering and Design

Sound layering can be a very complex or very simple technique in music creation and production depending on your goals. In a past post, I gave some really basic sound design tips; I have a lot of readers who are just starting out with mixing and producing, so it made sense to start with something less intense. This second post about sound design, however, will focus on something a little bit more advanced but still very simple: sound layering. It’s actually surprising to me to see so many people who ignore techniques that allow them to get the most out of layering, so I thought I’d write about it.

First off, I would like to discuss Ableton’s groups. Many people use them as the equivalent of busses, where all the grouped sounds will all be treated in a specific ways and yes, that approach works really well indeed. However, I prefer using a solo channel as a bus instead and use groups for sound design or classification. A good example is for kicks or claps, which are usually a combination of up to 3 different samples or sound sources (ex. 2 samples, 1 synth, etc.). Basically, since each sound is a collection of multiple samples, then I could say that they will work best as a group.

Visually it looks better and is easier to manage, and additionally you can also put effects on the group to glue all the sounds together – generally you’ll need a compressor and one or two EQs for a relatively uniform group. Once I’ve done that, I usually like to have an additional bus for all sounds (eg. groups) that will glue everything else together.
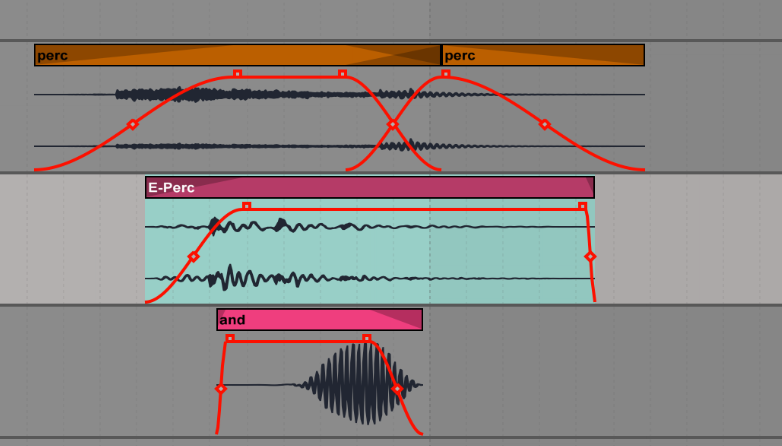
A second point to keep in mind, is that there’s always multiple ways to do sound design. Keep in mind that what I show you here is simply how I do it but there are other people who use different techniques; I try to keep it simple. Two methods Ableton will describe here that I like are the arranger and the drum rack.

If you work in the arranger, you drop sounds in the channel and it’s an easy way to see the layers. I like turning off the grid to do this so it feels a bit more natural.

You can adjust the volume for each layer and tweak the EQ to get part of the spectrum of one sound, and the complementary part of another.

You can do the same with the attack and release; there are so many options. I really recommend using the faders too for more control. So basically, volume, EQ are your best friends here. Brainworx has an amazing filter I recommend, it’s super solid for sound design.

If you prefer, you could also mainly use the Drum Rack to do the same thing. Load up the same samples in the pads of the tool and then sequence them by MIDI instead of putting them in the arranger. Some people dislike working this way because they can’t easily see the frequency shape of the audio file. But the advantage of this approach is that you get to have access to more options to manipulate your sounds, like the extra controls in Ableton’s Sampler window.

What I think is best in the end is to combine both the sound arrangement layering, with the an extra channel of Sampler use so you can work on constant movements. The main thing you want from your sound design, is a feeling of liveliness and emotion. The sampler has LFOs you can assign to filters, panning, or volume, which is a subtle touch that creates a nice layer of movement and liveliness. In the same way, I’d even add a synth of your choice to give richness to the sound with oscillators working to reinforce the fundamentals with a discrete tone; more complex sound layering.

Finally, on the group of the sound itself, I would add nothing but an EQ and compressor to “glue” everything together, but you could also use reverb to broaden your stereo image. These techniques should help you improve your sound design skills!

SEE ALSO : Sound design: create the sounds you imagine inside your head