It’s been a while since I promised a post about one of a number of music production techniques I use: non linear music production. The very first album I did using this technique and really sticking to rules of it was Intra; and then I recently went deep in to produce multiple EPs in the same vein of non linear production, which were made between end of December 2017 until March 2018. While Intra was an album of 23 songs made over nine months, my last experiment produced 19 tracks over 3 months. I think I’m getting better at it, mostly because it’s becoming clearer in my mind.
Out of the 19 recent tracks, I kept 8 for this album – which you can hear above – I named Returning Home; a statement about home being a state of mind and not necessary a physical place. I’ve been making techno/dance music since 1998, and after diving into more electronic soundscapes, experiments, and ambient music, it just felt good to return to my roots. A funny thing also – I tried working with some other labels to find it a new spot as I wanted to keep my label Archipel for more down-tempo stuff, but I kept getting refusals or complicated compromises. I’m too stubborn to change things and since this album was made based on a very solid concept, I didn’t want to go back and change what felt good.
But back to the non linear production technique. I’ll cover how the process went, from the beginning of where I started from scratch until the end.
I know some people who are like, “but I don’t need a technique as I just do music.” Sure, that is not for you then. But this technique can bring benefit if you’re looking to expand your production. It surely contributed to make me more prolific through time.
Non-linear music production – A concept
This concept (which has been around for decades according to some research I did), encourages the producer to explore working on multiple songs at once, in a non-linear way.
This means that:
- You aren’t working on a song’s beginning first to bring it to its end, before starting a new one.
- Each track is approached individually for its needs but you also work globally. Keep in mind that what you did in the previous track should differ on the next.
- The technique is about repeating the same phases/rounds until you get a solid core. Then there’s the finalization to get ready for mixing.
It’s called “non-linear” because you constantly circle up in a series of rounds, on multiple tracks, all at once.
Note: A non-written rule also implies that working on a track should be done in short periods such as 20-30 min at a time on a song, then stop, save and move on. Why? Because it keeps you fresh.
For many people I explained this to at first, it felt unsettling and confusing. There’s some kind of embedded belief in people that when you go make music, you should find your idea, absolutely stick to it, and build it into a song; beginning at start and bringing it to an end. I usually see people’s projects having a few blocks right at the beginning of the track and then they get lost.
The number one thing I hear all the time: “I can make a great loop but don’t know what next.”
I’ve written a post in the past about this. However the non-linear technique is really aimed at making the loop issue something of the past, because it’s all about transforming small ideas into bigger concepts.
But where does it start? How do you begin?
Before diving into producing, let me explain the rounds of the non-linear music production technique, as this is what it’s all about:
- Content creation, generating ideas.
- Filtering ideas into a concept.
- Building a core loop.
- Template structure.
- Arrangements.
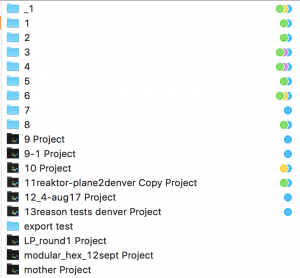
When you decide to create your project, the first thing you should do is decide on your project type. Is it an EP (3-4 songs) or LP (5-10 tracks)? Perhaps you just want to make a bunch of tracks; I personally believe that we should never make just one track at a time. If you have no precise project, invent one, such as “I’ll make 5 tracks for fun and want them to be mainly techno.” Once this has been decided, you’re ready for content creation. I usually spend a considerable amount of time in content creation and idea generation.
You can also start from unfinished tracks that you want to apply the idea to. The idea is to work on multiple projects in parallel. I usually it works best if you have at least five on the go, but there’s no limit of course. To newcomers, start small though to see if working this way works for you. The technique is about to bring your track from a simple idea to a finalized but unmixed, song. The mixing is not part of this. I find the mix down works better if you don’t do early, it but perhaps it can. Don’t hesitate to build a reference folder where you put songs that inspire you.
Content creation, generating ideas
From all the years of listening to music, running labels, doing mastering and DJing, I’ve come up with a theory: a solid song is – in general – a single, solid idea, supported with two others. The main idea can be a loop, a motif or even a sound. I remember Hans Zimmer describing a motif by saying it has to have an emotional impact on you, that it reappears in your mind later on. He was saying that the Batman motif he did was a simple two notes, but very powerful. You’ll play them and you’ll automatically think of Batman. The two other ideas are necessary because a song usually needs a development and a “surprise.” That said, in this production technique, you need to create fresh ideas. Lots of them.
I made a very long post about how to come up with new ideas but I’ll sum how I did mine:
- Recycling older ideas: I have countless samples that I’ve used or never touched. I like to process them into new sounds.
- Recording radio or other spaces with a microphone: When I’m in a creative mood, I’ll spend a lot of time recording sounds around me from that period of my life. I’ll leave the recorder somewhere for an hour to see what comes up.
- Try demos: I love getting demos and try to see what I can come up with it by sampling them. Some have limited time or others are in days. It forces you to resample the hell out of the work and get something. Sometimes I end up buying it of course.
- Pure sound design: Layering sounds from different takes is a great way to generate rich sounds. I do this a lot but its time consuming.
- Jamming with the sounds: When I have plenty, I’ll generally put the sounds in a sampler and jam them with a midi controller or PUSH. I’ll record everything I do into a project.
A project that has many ideas will be recorded with the date of the day for the jam. It might turn out that I have a few hours of material which means there’s hypothetically 3-4 ideas in there.
The definition of done (DoD) of this phase is when you have a project with 3-4 ideas ready to go. I usually do one session per track needed for the project.
 Filtering ideas into a concept
This phase is one that you need to do outside of jamming. Why? Because when you jam, you’re in your creative state (right brain) and have tons of ideas but your judgement is off. You can’t be a judge then. You need to feel free and explore without boundaries. This second phase is about going into a more analytical side where you will be curating your crop.
- Go through all recordings you’ve made and loop part of it. The question is, can you listen to a loop and feel inspired? If yes, you have something to hold on to.
- Use different size loops like 1, 2, 4 bars. Compile different ideas.
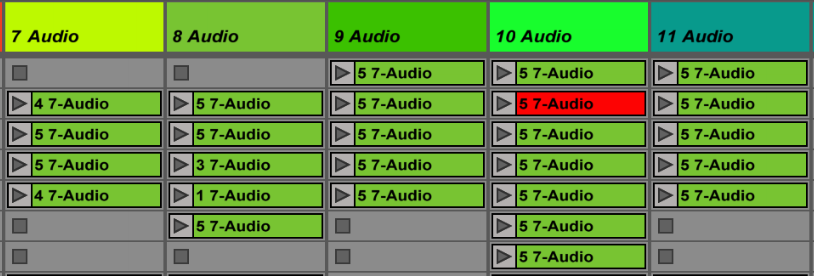
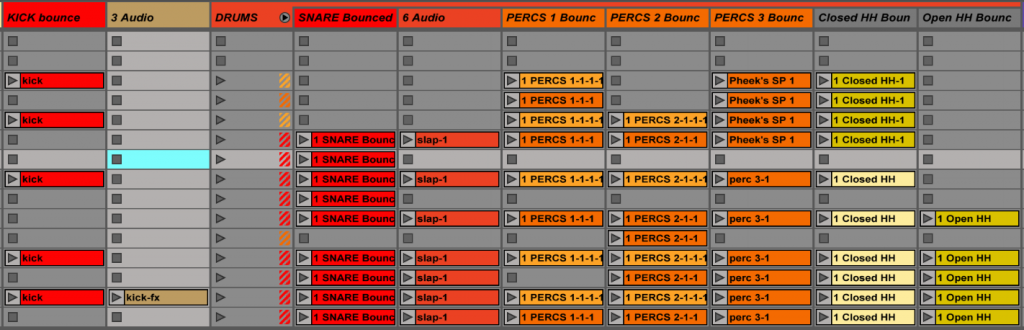
- Use the session view to make scenes of loops you like.
- Try to see if certain loops, once layered, make unexpected motifs.
- (optional) Add a kick & hihat to give you an idea of the groove and adjust the timing of the loop.
The definition of done (DoD) of this phase is when you have a few scenes in your session view that feel solid.
*Note that you may go back to create more ideas (Round 1) to complement what you have. You may also create a pool for all ideas of all sessions and then make ideas from that. No rules here, only possibilities.
Building a core loop
At this point, you should have X number of projects (based on your project definition you decided on at the beginning, i.e. EP, LP, whatever), each with material that has been organized into 2-3 ideas. Now comes the moment to put it all together.
The loop you’ll build here is the middle part of your song so it should have all the bells and whistles.
- Add a foundation. The fundamental part of your song is the low end and the bass. From the main idea, add a bass that either supports or responds to the idea. Adjust it so it’s in key.
- Add percussion. Complementary to the bass, you may add kick, percussion, or anything complementary of what will create the groove. I usually start right away to decide what groove template I’ll use on this core part.
- Add melodic touches if needed. Decide how long your melody will be and how it progresses (if it does).
- Create a background and space if desired. This is usually the reverb and textures. However, this can also come later on.
The definition of done (DoD) of this phase is that you have a main loop that you can place in the arrangement window, right in the heart of your song (which means you need to know roughly how long it has to be). A good loop is one that is centered around your motif where if you solo that part, it would be what someone would talk about to describe your song.
In the process of working through the core loop, you might need to go back to create more content or you may import some from other sessions.
Template structure
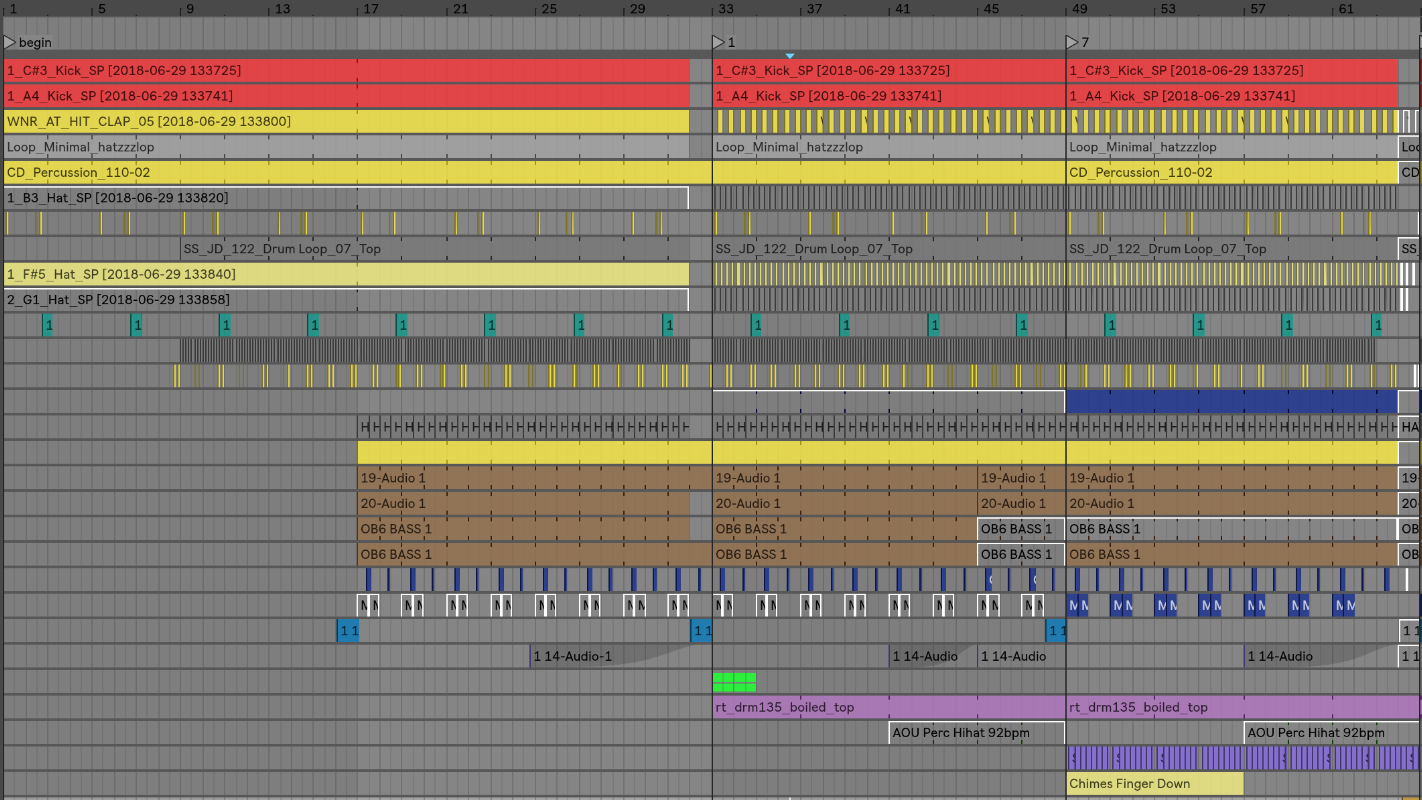
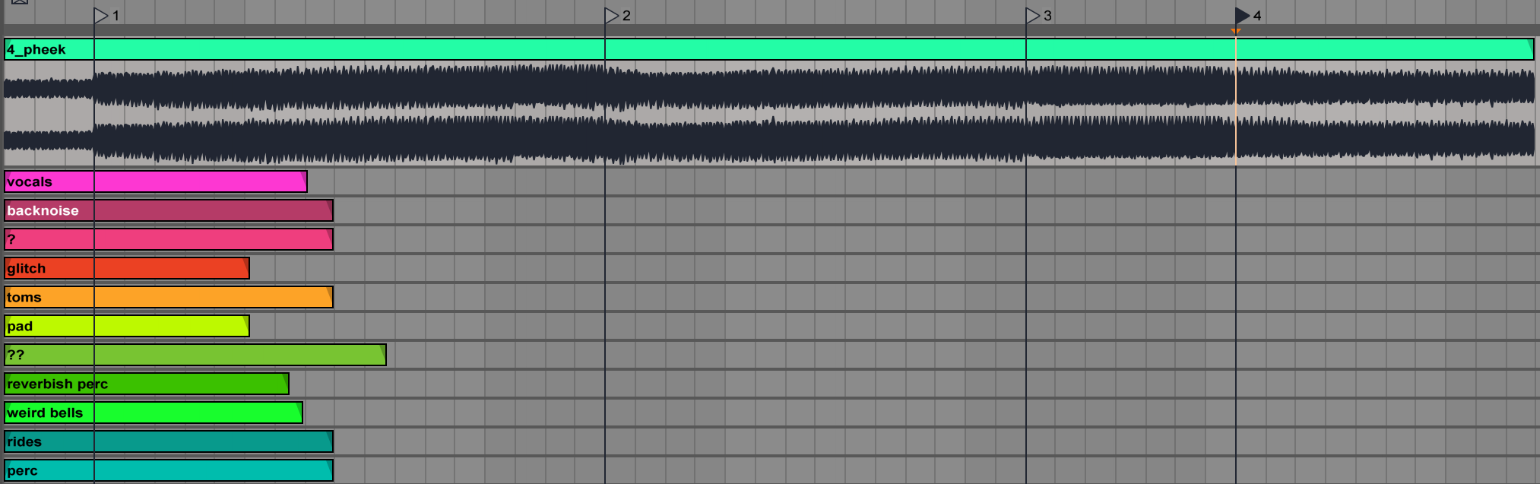
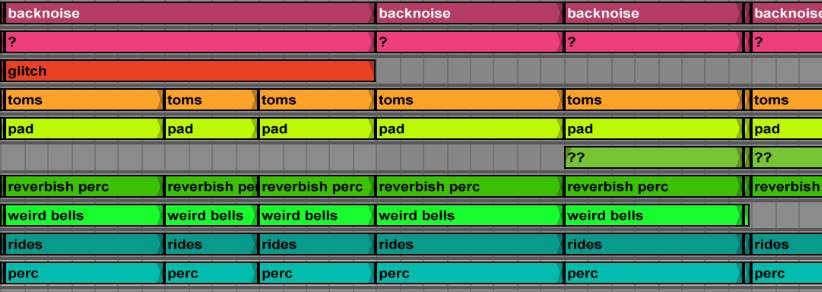
Now that you have the core part of the song, it’s easier to build out the remaining structure. In the arrangement view, create three sections: a beginning, middle and end. You will now lay out your structure to have an idea of what you can do with your core idea.
- Copy the elements from beginning to end that will be present the whole time through the track.
- Work backwards by deconstructing the timeline of what comes in first and so, until you get to the middle part.
- Do the same process until the end. You may repeat some elements.
The definition of done (DoD) of this phase requires that you have a temporary structure from beginning to end. It might take you a while, I encourage you to do sprints of 30 minutes at a time. The problem with working too long on this phase is that you lose perspective regarding the strength of your song. I usually want some sort of structure to come out of this phase, but I may go back and forth with the other phases until I am happy with it.
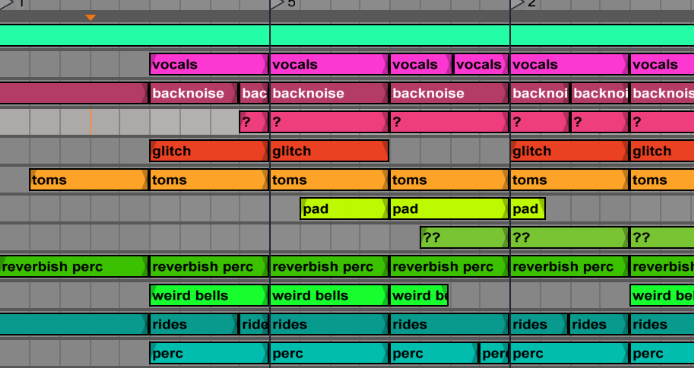
Arrangements
This is the final phase. You might need to come back to it as everyone has different needs that will arise in this process. Arranging – in simple terms – is creating the story-line of your song, but also between songs for your project! How do your tracks relate to each other? I have songs that have brothers and sisters, while some are from a completely different family.
After working on the arrangement of song, the last thing I do is export what I’ve done so far. When I switch to another track, I import the last session in the arrangement to see what I did and compare. I adjust the arrangements so all my tracks don’t have the same structure; beginning, breaks, and punches. I adjust them so they can be fun for DJs to mix too.
Arranging is a massive topic that I will detail in a future post and is involved in most music production techniques – but this explanation is a full conceptualization of how I work. Hopefully it helps you somehow too!
SEE ALSO : Non-Linear Music Production
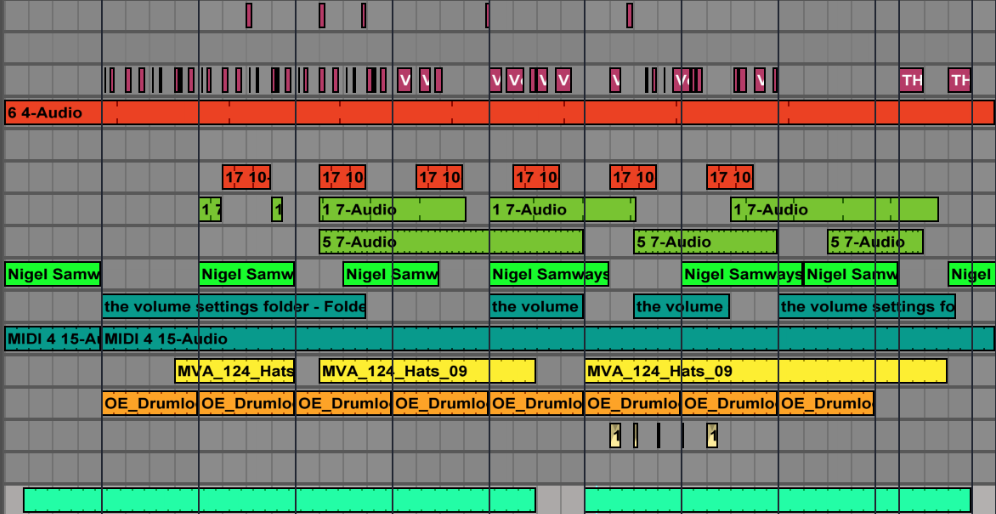
 Before consolidation
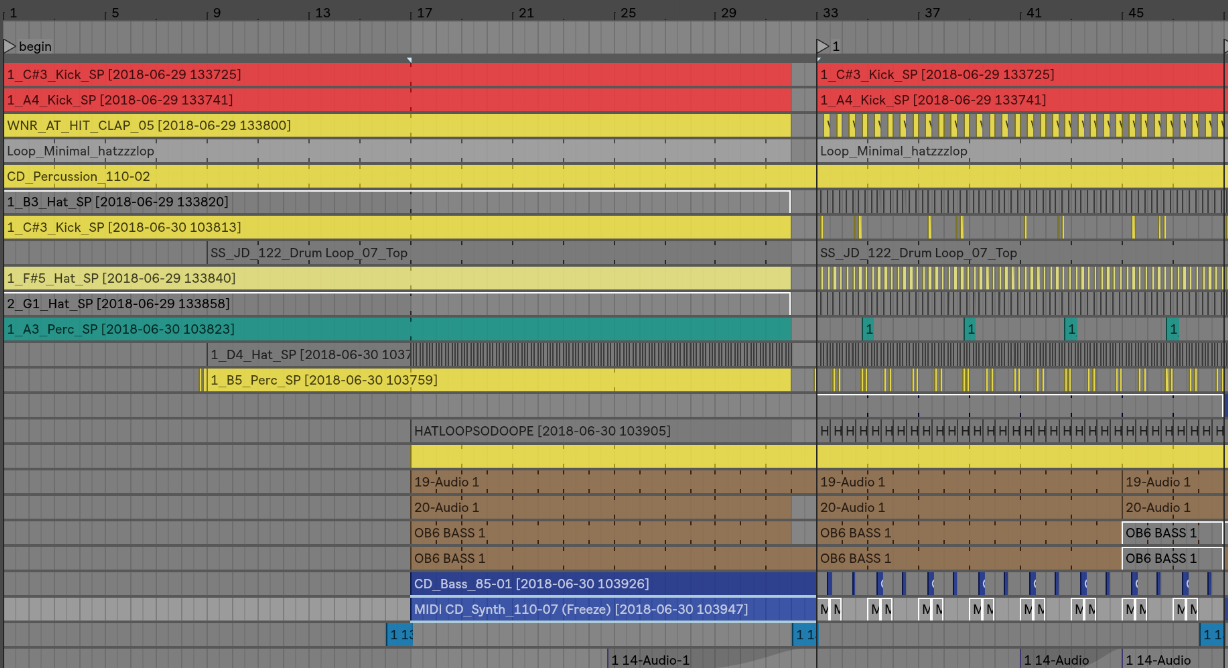 Clips consolidated
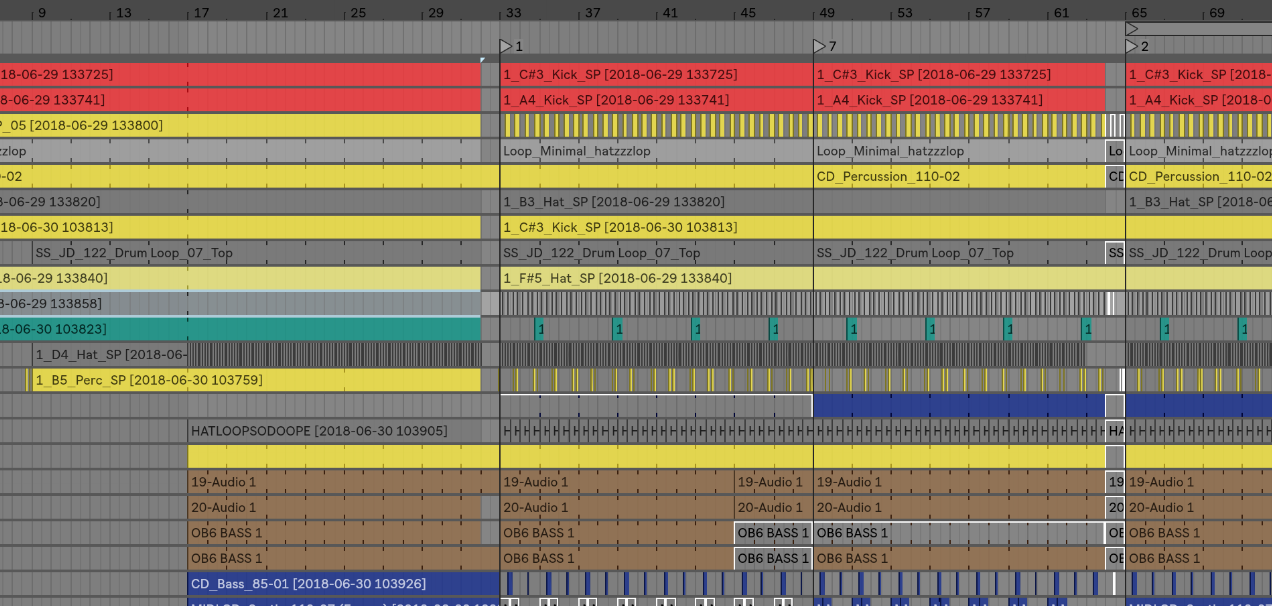 And duplicated
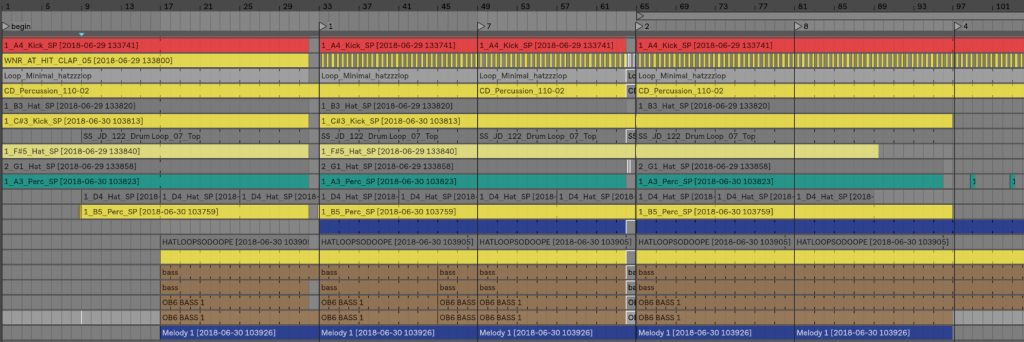
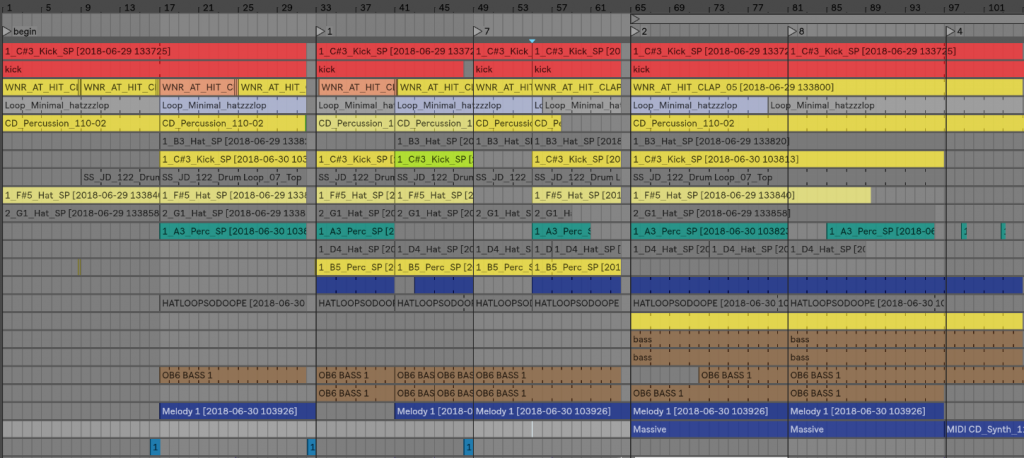
 the organization.
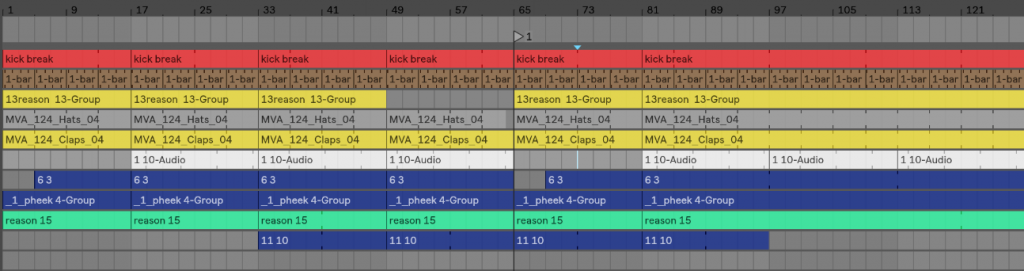
 basslines. If that’s not enough you can also use the midi effect velocity which can not only alter the velocity of each note, but in Ableton Live it also has a randomizer which can be used to create a humanizing factor. Another way to add dynamics is to use a tremolo effect on a sound and keep it either synchronized, or not. The tremolo effect also affects the volume, and is another way of creating custom made grooves. I also personally like to create very subtle arrangement changes on the volume envelope or gain which keeps the sound always moving.
 modulate anything, and they will automatically create movement. For each LFO, I often use another LFO to modulate its speed so that you can get a true feeling of non-redundancy.
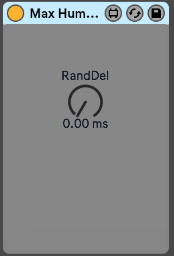 A sound’s position in a pattern can change slightly throughout a song to create feelings of movement; a point people often overlook. This effect is easier to create if you convert all of your audio clips to midi. In midi mode you can use humanizer plugins to constantly modify the timing of each note. You can also do that manually if you are a little bit more into detail editing but in the end a humanizer can do the same while also creating some unexpected ideas that could be good. Another trick is to use a stutter effect in parallel mode to throw a few curve balls into the timing of a sound every now and then.
 1. The Hook
 2. Sound design
 5. Structure/Arrangements
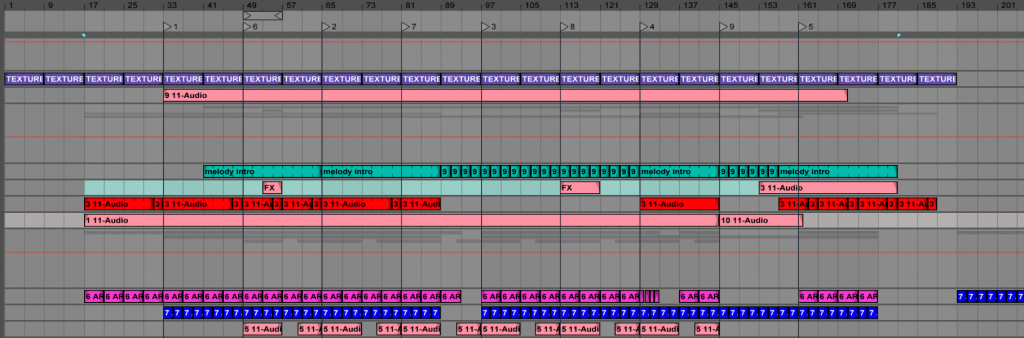

 I think my best live sets were good mostly because they had a core to work around that had some preparation, but also had a lot of room to improvise, dependent on how the actual event turned out. These sets were versatile; I could open an evening with them or play peak time, mostly because of how flexible they were. These sets were more or less made up of the same songs but the variations would be so easy to perform on the fly that I could really just follow what felt good to me in that moment in time. I’ve never really understood the point of having an overly prepared set. I’ve tried the prepared approach before and it just made the whole experience boring, because there would be no risk-taking; it also felt out of sync with whoever was listening. For example, imagine that your track has been built to have a drop, breakdown at one precise point and a moment of tension after, but if the dance floor is just starting to warm up when you drop, you might lose people’s attention or it might feel out of place.
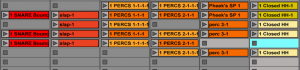 Set two variations of the hook with some complementary percussion. If you listen to a DJ set, especially techno or loop based music, you’ll see that it’s mainly a loop with variations. Try to have variations in your percussion, melody or bass. That way you can toggle between the hook and this part. I really really encourage you to listen to DJ sets to get ideas.
 It’s given that there are many reasons why a listener might be engaged with your song – the quality of the mix, a
 Going back to the article
 Many DAWs can be setup to load a template as an initial starting point. Reason will propose a pre-made environment, and Studio One will propose if you’d like to setup a project for mixing to speed up your getting started time. Ableton Live doesn’t have that feature by default, but you can easily change that to open a custom startup project.
 That last point is crucial here. You can take the same compressor concept (ex. FET compression), but it will sound different from one company to another. There are no real universal standards on how to approach compression or EQing. An EQ can show you a curve but the filter in the back might slightly be different to give a color, for instance.