Recently I read this article about one of my favorite authors, Haruki Murakami. This article wasn’t so much about him as it was about his lessons for being a good writer. While reading this, it dawned on me that his lessons can be applied to writing music as well, and figured I should write an article on this perspective.
If you’re not familiar with Murakami, he creates surreal stories that invoke a sense of wonder and deep connection to the main character and their psychology. They’re easy to read, divided into clear, conscience paragraphs that leave plenty of space for the reader to get lost in his vivid metaphors and similes. These words often transport you into the narrative and have the opportunity to rattle you in ways you never expected, not unlike a song.
So without further ado, here are my interpretations of Murakami’s advice for good writing, as it applies to music.
Read
“I think the first task for the aspiring novelist is to read tons of novels. Sorry to start with such a commonplace observation, but no training is more crucial. To write a novel, you must first understand at a physical level how one is put together . . . It is especially important to plow through as many novels as you can while you are still young. Everything you can get your hands on—great novels, not-so-great novels, crappy novels, it doesn’t matter (at all!) as long as you keep reading. Absorb as many stories as you physically can. Introduce yourself to lots of great writing. To lots of mediocre writing too. This is your most important task.”
–from Murakami’s 2015 essay “So What Shall I Write About?,” tr. Ted Goossen
This one is pretty self-explanatory. Just substitute reading for listening. By listening to a ton of music, good and bad, you open your mind up to new patterns and perspectives. You get an idea of what sounds good to you, and what doesn’t. At a certain point, you may be able to ascertain aspects of mediocre songs that you find appealing, as well as aspects of good songs that you find unappealing, and apply that to your own skillset. It’s only by listening to tons of different songs that you will find your own sound.
Also, don’t only listen to songs within your genre. Listen to all sorts of music, especially music that is outside of the periphery of electronic music, such as folk, classical, and even country. There is perspective in everything, and more perspectives allow for a richer understanding of music.
 the old words and make them new again.
“One of my all-time favorite jazz pianists is Thelonious Monk. Once, when someone asked him how he managed to get a certain special sound out of the piano, Monk pointed to the keyboard and said: “It can’t be any new note. When you look at the keyboard, all the notes are there already. But if you mean a note enough, it will sound different. You got to pick the notes you really mean!”
I often recall these words when I am writing, and I think to myself, “It’s true. There aren’t any new words. Our job is to give new meanings and special overtones to absolutely ordinary words.” I find the thought reassuring. It means that vast, unknown stretches still lie before us, fertile territories just waiting for us to cultivate them.”
–from Murakami’s 2007 essay “Jazz Messenger“
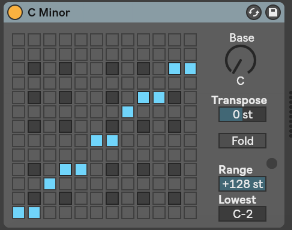
It’s interesting because he uses a composition metaphor to explain writing while I am trying to use writing metaphors to explain composition. What Thelonius Monk said is spot on. There are only so many notes and those notes have always existed and will continue to exist. What you have to do is put them in new contexts. In electronic music, this often means timbral ones. We are allotted more tools than ever before to shape and design sound; way more than Monk probably could have imagined during his storied career as a jazz pianist. Using an acid bassline that’s in C minor isn’t really a new timbre for the context, but taking an acid bassline and putting it in a Thelonius Monk song, now that’s making the old new.
Explain yourself clearly.
“[When I write,] I get some images and I connect one piece to another. That’s the story line. Then I explain the story line to the reader. You should be very kind when you explain something. If you think, It’s okay; I know that, it’s a very arrogant thing. Easy words and good metaphors; good allegory. So that’s what I do. I explain very carefully and clearly.”
–in a 2004 interview with John Wray for The Paris Review
What I appreciate from his explanation is the accent on clarity which is also crucial in arrangements. You need to have an idea that is understandable and accessible so the listener feels intelligent because he got it. By balancing the complexity and accessibility of the motif, you can extend the listener’s attention to the song. Too complex and the person feels lost, too simple and ther listener is bored. That’s what he relates as good metaphors and allegory, as in, something parallel to explain an idea, which is the same thing in music.
The images and scenes you create need to be clearly understood by your audience. For instance, there are certain moments in a song, such as the chorus. How do you connect the chorus with the pre-chorus? You can be very smooth if you use a transitional element too to ease it. If you don’t have this element, it might be too abrupt and jar the listener (unless this is what you’re trying to do).
Share your dreams.
“Dreaming is the day job of novelists, but sharing our dreams is a still more important task for us. We cannot be novelists without this sense of sharing something.”
–from Murakami’s 2011 acceptance speech for the Catalunya International Prize
Dreaming is a full-time thing for musicians as well. We often dream about what other people think of our music, whether that’s a crowd, a label, or a friend. Those thoughts you have about your music in the context that makes you happiest are powerful motivators when it comes to finishing songs.
Many times this means realising your music, whether that’s just to your friends, or a full-scale distribution plan. It’s a lot of work to finish and release a song, but in general it’s a lot of work to manifest a dream into reality.
Another form of dreaming is the act of composing songs in your head. As a musician, you’re probably always bombarded with clips and snippets of songs that may or may not be original. It’s sometimes hard to capture these ideas, but if you can focus, you may be able to harness one of these ideas for a future composition. However, there are also easier ways of capturing these daydreams. if it’s a melody, hum or whistle it into your phone. Drum patterns can even be finger tapped out and then exported to Ableton where they can be converted into MIDI.
Write to find out.
“I myself, as I’m writing, don’t know who did it. The readers and I are on the same ground. When I start to write a story, I don’t know the conclusion at all and I don’t know what’s going to happen next. If there is a murder case as the first thing, I don’t know who the killer is. I write the book because I would like to find out. If I know who the killer is, there’s no purpose to writing the story.”
–in a 2004 interview with John Wray for The Paris Review
If you already know exactly how a song is going to turn out, then what’s the excitement in composing it? We’ve all been there where we aim to do something, and then it turns out to be completely different in exciting ways we never could have imagined. That’s because, in a lot of ways, song writing is about piecing together ideas that manifest themselves out of creative motivation, rather than dedicated intention.
A great way to harness this unpredictability is to jam. Instead of drawing everything in a grid and using loops, try playing those out using some sort of reactive tactile motion, like playing a keyboard, drum pattern, or even live programming a sequencer. The spontaneity of live performance and the “accidents” that come as a result are rarely something your conscious mind can replicate.
Repetition helps.
“When I’m in writing mode for a novel, I get up at four a.m. and work for five to six hours. In the afternoon, I run for ten kilometers or swim for fifteen hundred meters (or do both), then I read a bit and listen to some music. I go to bed at nine p.m. I keep to this routine every day without variation. The repetition itself becomes the important thing; it’s a form of mesmerism. I mesmerize myself to reach a deeper state of mind. But to hold to such repetition for so long—six months to a year—requires a good amount of mental and physical strength. In that sense, writing a long novel is like survival training. Physical strength is as necessary as artistic sensitivity.”
–in a 2004 interview with John Wray for The Paris Review
By repetition, Murakami means having unwavering habits. However, I would like to add something to that. By having scheduled habits, you are also creating a moment where you are the most fresh. I find that there is only one time per day where I have that initial creative plasticity that allows ideas to flow from me unencumbered by other thoughts or distractions. That’s why I make sure to dedicate out a block of time for music, and then once I’m done, I’m done for the day, because I know that anything else made outside of that pre-planned time won’t have the same impact.
Hoard stuff to put in your novel.
“Remember that scene in Steven Spielberg’s film E.T. where E.T. assembles a transmitting device from the junk he pulls out of his garage? There’s an umbrella, a floor lamp, pots and pans, a record player─it’s been a long time since I saw the movie, so I can’t recall everything, but he manages to throw all those household items together in such a way that the contraption works well enough to communicate with his home planet thousands of light years away. I got a big kick out of that scene when I saw it in a movie theater, but it strikes me now that putting together a good novel is much the same thing. The key component is not the quality of the materials─what’s needed is magic. If that magic is present, the most basic daily matters and the plainest language can be turned into a device of surprising sophistication.”
First and foremost, though, is what’s packed away in your garage. Magic can’t work if your garage is empty. You’ve got to stash away a lot of junk to use if and when E.T. comes calling!
–from Murakami’s 2015 essay “So What Shall I Write About?,”
Everything in your life should be captured as a source of inspiration, because you never know when you’re going to need it. Obviously it’s impossible to grab everything, but make a conscious decision to know how to locate things. In music this can be sounds, samples, field recordings, snippets from movies, anything. They can be the most mundane of things. Just as Muramaki said in his essay, it’s not about the quality of the components, it’s about the magic that is applied to them.
For instance, some songs are extremely simple. However, that doesn’t matter, because there is magic in them. It’s hard to say exactly how to create magic, but usually what makes a song gel together and feel magical is the right balance of different factors like technicality, emotion, and timing. There are songs that are very technical but have no emotion, and the magic is difficult to happen because there is no balance. But when you have enough of the two – the emotion vs the technical part – you have this sort of familiarity and humanity to it. The familiarity comes from the technical side, where you know that it’s going to sound correct, because it’s composed fluidly. Then the emotion is the human side; the unpredictable side that makes music fresh and interesting.
Focus on one thing at a time.
“If I’m asked what the next most important quality is for a novelist [after talent], that’s easy too: focus—the ability to concentrate all your limited talents on whatever’s critical at the moment. Without that you can’t accomplish anything of value, while, if you can focus effectively, you’ll be able to compensate for an erratic talent or even a shortage of it. . . Even a novelist who has a lot of talent and a mind full of great new ideas probably can’t write a thing if, for instance, he’s suffering a lot of pain from a cavity.”
–from What I Talk About When I Talk About Running
“Although I compose essays as well as works of fiction, unless circumstances dictate otherwise, I avoid working on anything else when I am writing a novel . . . Of course, there is no rule that says that the same material can’t be used in an essay and a story, but I have found that doubling up like that somehow weakens my fiction.”
–from Murakami’s 2015 essay “So What Shall I Write About?,” tr. Ted Goossen
If you’re always looking for something to fix, or improve on, rather than concentrating on one aspect of a song at a time, you can get lost and scattered. When starting to work, set an intention. For example, focus only on the percussion for this section, or better yet, focus only on the syncopated aspects of percussion. Or if you start doing sound design in your session, focus on that, rather than figuring out how it will fit in the arrangement. Then when you’re finally ready to arrange, direct your focus there. In short, have an intention.
Cultivate endurance.
“After focus, the next most important thing for a novelist is, hands down, endurance. If you concentrate on writing three or four hours a day and feel tired after a week of this, you’re not going to be able to write a long work. What’s needed for a writer of fiction—at least one who hopes to write a novel—is the energy to focus every day for half a year, or a year, or two years. You can compare it to breathing.”
–from What I Talk About When I Talk About Running
In order to be able to focus on one aspect of a song, you must be able to endure the dedication to takes to do such a thing. If you’re only able to concentrate for an hour or two at a time, you’re going to have a heck of a time trying to create anything meaningful. At first, you’re going to feel tired after a few hours a day, 7 days a week. But eventually, by making this habit, it’s going to be just as Muramaki says, “like breathing.” You’re going to have to get to a point where you are doing it every day, for long stretches of time, sometimes up to a couple of years to create your most meaningful work. However, just like an athlete trains in the off season, when you’re done with your work, you must keep training, to keep your stamina at a certain baseline.
Experiment with language.
“It is the inherent right of all writers to experiment with the possibilities of language in every way they can imagine—without that adventurous spirit, nothing new can ever be born.”
–from “The Birth of My Kitchen Table Fiction,”
It’s easy to compose the same thing over and over again once you have a template. However, people may get bored with this palate because everything is just more of the same. If you feel like you’re stagnating, or you are getting feedback from your audience that it’s more of the same, trying changing up keys, and scales. Harmonics are the language of music. Changing them will create something unexpectedly new, even if you use the same tones and tempo. Some may be concerned about alienating their crowd if they change their language too much, but if you keep similar timbres, if they are fans, they’ll hear you within it and usually will be pleasantly surprised.
Have confidence.
“The most important thing is confidence. You have to believe you have the ability to tell the story, to strike the vein of water, to make the pieces of the puzzle fit together. Without that confidence, you can’t go anywhere. It’s like boxing. Once you climb into the ring, you can’t back out. You have to fight until the match is over.”
–from a 1992 lecture at Berkeley, as transcribed in Haruki Murakami and the Music of Words, Jay Rubin
Trust what you’re doing. Some people can spend too much time on little things like their kick, or clap because they keep on second guesing themselves, due to a lack of confidence. If you start second guessing yourself, sometimes it’s best to just take a break from it and come back. Trust what you know you have the ability to do at that moment, and know your limitations. Just know that you may be able to exceed your limitations with the right dose of practice and confidence. That’s how we improve. But first, it takes trust in yourself and knowing what you are capable of.
Write on the side of the egg.
“[This] is something that I always keep in mind while I am writing fiction. I have never gone so far as to write it on a piece of paper and paste it to the wall: Rather, it is carved into the wall of my mind, and it goes something like this:
‘Between a high, solid wall and an egg that breaks against it, I will always stand on the side of the egg.’
Yes, no matter how right the wall may be and how wrong the egg, I will stand with the egg. Someone else will have to decide what is right and what is wrong; perhaps time or history will decide. If there were a novelist who, for whatever reason, wrote works standing with the wall, of what value would such works be?”
–from Murakami’s 2009 Jerusalem Prize acceptance speech
Sometimes we create something that we fear might be too abstract or might even sound incorrect, despite enjoying it. This is the egg – a fragile, messy, yet critical part of life, whether that’s as it’s function as an incubator for life, or as food. If you create an egg, and it seems to fit, yet you still feel a sense of controversy, keep it. These are often the indescribable factors that make people remember songs. You just have to rely on the listener to decode it.
Observe your world.
“Reflect on what you see. Remember, though, that to reflect is not to rush to determine the rights and wrongs or merits and demerits of what and whom you are observing. Try to consciously refrain from value judgments—don’t rush to conclusions. What’s important is not arriving at clear conclusions but retaining the specifics of a certain situation . . . I strive to retain as complete an image as possible of the scene I have observed, the person I have met, the experience I have undergone, regarding it as a singular ‘sample,’ a kind of test case as it were. I can go back and look at it again later, when my feelings have settled down and there is less urgency, this time inspecting it from a variety of angles. Finally, if and when it seems called for, I can draw my own conclusions.”
–from Murakami’s 2015 essay “So What Shall I Write About?,” tr. Ted Goossen
If you judge something as being an absolute truth then you’re going to be disappointed. There is no objective right and wrong, especially in art. Everything is subjective, and the “rules” created are put in place by societal norms, rather than a cosmic order. Sure, there are standards that people have for their art, but that doesn’t make it right or wrong. It just makes it a personal standard.
This sense of objectivity is helpful when evaluating the art that surrounds you on a day to day basis; art that is often not your own. These are where we get our influences from. So rather than dismissing an entire genre or style, because of societal pressure, try to think objectively about it. For instance you might despise EDM, but why is it so popular? One could argue it’s popular because it has pop music structure and hooks. Perhaps that’s a lesson you can take away from it. In other words, pay attention to trends, because you never know what nuance you can take from a trend for your own art.
Try not to hurt anyone.
“I keep in mind to ‘not have the pen get too mighty’ when I write. I choose my words so the least amount of people get hurt, but that’s also hard to achieve. No matter what is written, there is a chance of someone getting hurt or offending someone. Keeping all that in mind, I try as much as I can to write something that will not hurt anyone. This is a moral every writer should follow.”
–from Murakami’s 2015 advice column
In 2017, producer Dax J took a verse from Islamic prayers and sampled it in his music. Then, in all of his wisdom, he decided to play in in Tunisia. And as all of the murdered cartoonists who tried to draw Muhammed demonstrate, Islamics do not take kindly to people altering their religious symbols. Despite receiving death threats, Dax wasn’t beheaded. However, he was sentenced to jail in Tunisia for a year.
This is an extreme example though. A good rule of thumb is to wein on the side of not culturally appropriating, or at the very least, when you do decide to sample someone else’s culture, know the audience you are playing to. An Islamic country is a terrible choice to play an Islamic prayer in. This is not uncommon knowledge. Dax should have known better. But playing an Islamic prayer in your techno song at Burning Man? Many burners suck up cultural approrpiation like it’s oxygen. I know that Muramaki says to write on the side of the egg, but there are things that are already determined to be culturally sensitive, and you should respect that, or else face the consequences.
Another way you can look at this is to not steal other people’s work and call it your own. However, there is always a fine line with this because electronic music is sample music.
 Take your readers on a journey.
“As I wrote A Wild Sheep Chase, I came to feel strongly that a story, a monogatari, is not something you create. It is something that you pull out of yourself. The story is already there, inside you. You can’t make it, you can only bring it out. This is true for me, at least: it is the story’s spontaneity. For me, a story is a vehicle that takes the reader somewhere. Whatever information you may try to convey, whatever you may try to open the reader’s emotions to, the first thing you have to do is get that reader into the vehicle. And the vehicle–the story–the monogatari–must have the power to make people believe. These above all are the conditions that a story must fulfill.”
–from a 1992 lecture at Berkeley, as transcribed in Haruki Murakami and the Music of Words, Jay Rubin
Take listeners on a journey. I’m an avid fan of trying to create a song that you don’t want to end, because it keeps evolving and is never boring. Whatever genre you’re making, the best songs transcend space and time, where there is always this feeling that time passes, unknowingly. When you lose track of time you know you’ve been in a musical journey. I also believe that DJs are collecting music to create journeys and one of our tasks is to feed them with memorable ideas for them to use. This is about letting the ego aside and see your music as part of something bigger than you but also important in other’s people lives.
Write to shed light on human beings.
“I have only one reason to write novels, and that is to bring the dignity of the individual soul to the surface and shine a light upon it. The purpose of a story is to sound an alarm, to keep a light trained on The System in order to prevent it from tangling our souls in its web and demeaning them. I fully believe it is the novelist’s job to keep trying to clarify the uniqueness of each individual soul by writing stories—stories of life and death, stories of love, stories that make people cry and quake with fear and shake with laughter. This is why we go on, day after day, concocting fictions with utter seriousness.”
–from Murakami’s 2009 Jerusalem Prize acceptance speech
All music is an expression of human dedication and emotion. In order to be a great artist, one must be dedicated to their craft, and have the ability to recognize and alter emotion. Electronic music is often lyricless so we have to figure out how to express the emotions of a narrative in other ways, especially in music that can be seen as robotic to many. A good way to add humanity in electronic music is to add swing, quantazation, randomization, and actually performing and jamming your tracks, whether that’s in the studio, or live. Human recognizes human.
No matter what, it all has to start with talent. . .
“In every interview I’m asked what’s the most important quality a novelist has to have. It’s pretty obvious: talent. No matter how much enthusiasm and effort you put into writing, if you totally lack literary talent you can forget about being a novelist. This is more of a prerequisite than a necessary quality. If you don’t have any fuel, even the best car won’t run.”
–from What I Talk About When I Talk About Running
“Writing is similar to trying to seduce a woman. A lot has to do with practice, but mostly it’s innate. Anyway, good luck.”
–from Murakami’s 2015 advice column
. . . unless you work really hard!
“Writers who are blessed with inborn talent can write easily, no matter what they do—or don’t do. Like water from a natural spring, the sentences just well up, and with little or no effort these writers can complete a work. Unfortunately, I don’t fall into that category. I have to pound away at a rock with a chisel and dig out a deep hole before I can locate the source of my creativity. Every time I begin a new novel, I have to dredge out another hole. But, as I’ve sustained this kind of life over many years, I’ve become quite efficient, both technically and physically, at opening those holes in the rock and locating new water veins. As soon as I notice one source drying up, I move on to another. If people who rely on a natural spring of talent suddenly find they’ve exhausted their source, they’re in trouble.”
“In other words, let’s face it: life is basically unfair. But, even in a situation that’s unfair, I think it’s possible to seek out a kind of fairness.”
–from Murakami’s 2008 essay “The Running Novelist,” tr. Philip Gabriel
Some talent is just innate. It’s the reason why you see so many dynasty professional athletes, where sons and daughters of their parents become equally, if not more successful. You also see this is siblings quite often as well. This example doesn’t always happen in music, because talent does not necessarily mean popularity, but when you’re talking about sports, talent is quantifiable through wins and losses.
However, many of us know those people, where they just pick up something new and they are effortlessly good at it. This is even true in music, where they might create their first loop and despite not having any experience in music, it sounds like something well beyond their abilities as a beginner. It’s these people, the Jimi Hendrix’s of the world, that go on to define their cultural niche for decades to come.
However, if you work really hard at something, you can be great, like Muramaki, who says that he is not an innately talented writer. He’s probably just being humble, however, I have seen in my own teaching where people come to me for coaching and the initial stuff they show me is pretty bad. Then they stick with it, take lessons to heart, and apply themselves. Then after a relatively short period of time, you start to see significant improvement. However, who knows, they could be innately talented to begin with, they just needed someone to give them confidence to harness their abilities.

 The first time I familiarized myself with this concept was when I used the iPhone grid to take pictures. I had read that a tip to take better pictures was to use that grid to “place” your content.