Tag Archive for: music production

Are Music Schools Worth The Investment?

Whether or not music schools are worth the money might spur a heated debate—schools worldwide might not like what I’m about to say, but I think that this topic needs to be addressed. What’s outlined in this post is based on my personal experience(s); I invite anyone who want to discuss this topic further, to contact me if necessary.

Music schools: an overview

Many people over the last few years have been asking me about my opinion regarding enrolling in music production schools. There are many production and engineering schools in the world, and a lot of them ask for a lot of money to attend. In Montreal, we have Musitechnic (where I have previously taught mastering and production) and Recording Arts. Most major cities around the world have at least one engineering school and if not, people can still study electro-acoustics at Universities. University takes at least 3 years to get a degree; most private schools will condense the material over 1 year. During that time, the physics of sound will be studied, mixing, music production in DAWs, recording, and sometimes mastering. While each of these subject usually take years to really master, the introduction to each can be very useful as you’ll learn the terms and logic of how these tasks work and what they are for.

If the teachers are good at explaining their topic(s) and have a solid background, there’s nothing quite like being in the presence of someone with a great deal of experience, not only for the valuable information they provide, but also, the interpersonal context. Having a good teacher will pay off if you ask questions and are curious. While I don’t teach at Musitechnic anymore, some of my past students are still in contact with me and ask me questions—I even hired some for internships. I’ve often been told by many students that they remembered more from hearing about their teacher’s experience(s) than the class content or material.

One issue with audio teachers I hear about a lot is that many times, teachers might be stuck in a specific era or on a precise genre, which might be difficult for a student to relate to; there might be a culture clash or a generation gap between themselves and the teacher.

For instance, if a school has teachers who are from the rock scene, many people who are interested in electronic music or hip hop will have a really hard time connecting with them. Similarly, sometimes the teachers who make electronic music can even be from a totally different sphere as well, and mentalities and approaches can clash.

The advantages of attending a school or program

There are, however, many beneficial outcomes from attending a music school:

  • you’ll get a solid foundation of the understanding of audio engineering, and get validation from experts.
  • you’ll end up getting a certificate that is recognized in the industry.
  • you’ll have access to resources, equipment and experienced teachers that you might not otherwise find.

The main issue I have with some music schools is how they sell “the dream”, in most cases. The reality of the music industry is really harsh. For instance, a school might tell students that when they graduate, they can open a studio or work for one. While after graduating you might have some skills and experience that you didn’t have before, nothing guarantees that people will come to you to have their music mixed. That said, getting your first client(s) will eventually bring in other clients and opportunities.

“What’s the best way to get a full time job in the music industry or to become an engineer?” I’m often asked, and I’m very careful about how I answer this question. I described my thoughts on finding full-time work in the music industry in a previous post, but I’ll share some points about this topic again here and how it relates to music schools:

  • Whatever anyone tells you or teaches you, even if you applied what they say to the finest level of detail, it’s likely that things still won’t work out the way you envision them. I know this sounds pessimistic, but the reality is that no path will provide the same results for anyone else in the music/audio world.
  • The industry is constantly changing and schools aren’t always following fast enough. If you want to make things work, you need to make sure that you can teach yourself new skills, and fast—being self-sufficient is critical to “make it” out there.
  • Doing things and learning alone is as difficult as going to school, but will be less expensive. The thing a school will provide is a foundation of knowledge that is—without question—valuable. For instance, the physics of sound won’t change in the future (unless one day we have some revolutionary finding that contradict the current model; this is not going to come in anytime soon).
  • Clients don’t always care where you’re from or what your background is, as long as they get results they like. Your reputation and portfolio might speak more for itself than saying you went to “School of X”. Where schools or your background can be a deal-breaker though, is if you apply to specific industries, such as video game companies, and maybe you already have some experience with the software they use—companies will see that as a bonus. But I know sound designers for some of those companies who’ve told me that your portfolio of work matters more. For instance, one friend told me that they really like when a candidate takes a video and then completely re-makes the audio and sound design for it; this is more important than even understanding specific software which can always be learned at a later time.
  • The most important thing is to make music, daily, and to record ideas, on a regular basis. Finishing songs that are quality (see my previous post about getting signed to labels) and having them exposed through releases with labels, by posting them on Youtube channels, self-releasing on Bandcamp, or filling up your profile on Soundcloud can all be critical to reaching potential clients. One of the main reasons I am able to work as an audio engineer and have my own clients is mostly due to the reputation as a musician I built a while ago. I often get emails of people who say they love my music and that was one of the main reasons they want their music to be worked by me specifically. Not many schools really teach the process of developing aesthetics (i.e. “your sound”) or the releasing process. While some do, both of those topics also change quickly, and you need to adapt. I’ve been feeling like every 6 months something changes significantly, but knowing some basics of how to release music certainly helps.

Would I tell someone not to attend a music school?

Certainly not. Some people do well in a school environment, and similarly, some people don’t do well at all on their own. So knowing where you fit most is certainly valuable in your own decision-making about schools. Perhaps a bit of both worlds would be beneficial.

Will a school get you a job in the audio world?

Absolutely not—this is a myth that I feel we need to address. It’s not okay to tell this to students or to market schools this way; it would be as absurd as saying that everyone who graduates from acting schools will find roles in movies and make a living from acting.

What are the alternatives to music schools?

If you don’t think music school is for you—because you don’t have the budget for it, or you’re concerned about the job market after, or even because you’re not someone who can handle class—there are still other options for you:

  • Take online classes. This is a no-brainer because there are a huge number of online classes, courses, and schools online, and you can even look for an international school. You can also work on classes during a time that fits into your schedule. This means you can invest some of your time off from work into it. Slate Digital has some nice online classes, as well as ADSR.
  • Become a YouTube fiend. YouTube has a lot of great content if you’re good at finding what you need. You can create a personal playlist of videos that address either a technique or a topic that is useful. There are also videos where you see people actually working, and they’re usually insightful.
  • Get a mentor. People like myself or others in the industry are usually happy to take students under their wing. While you can find most information online, one advantage of having a mentor is to speed up the search for precise information. How can you learn a precise technique for a problem if you don’t even know what it is? Well, someone with experience can teach you the vocabulary, teach you how to spot a specific sound, and teach you how to find information about it. “How do they make that sound?“, I sometimes hear, as some stuff feels magical to students until I explain that it’s a specific plugin. In my coaching group, we even have a pinned topic where we talk about certain sounds and how they’re made.

I hope this helps you make your own judgments about music schools!

SEE ALSO : On Going DAWless

“How do I get started with modular?”

Modular synths are fascinating, complex, and alluring machines, but to the uninitiated they can also be enigmatic and confusing. The vast range of available modules, the high price of entry, the obscure interfaces, and the images of gigantic, room-filling systems can make modular synthesis seem like a hobby mainly reserved for the independently wealthy PhD candidate. But the truth is that modular is more accessible now than it has ever been—in this post I’ll offer some of pieces of advice for those of you who are just getting started with modular synths.

Of course, there are unavoidable costs—it will probably never meet most people’s definition of cheap (although Behringer might be about to try and change that.) The lowest priced case and power supply combinations are still hundreds of dollars (the TipTop happy ending kit with power is around $175). Still, once this hurdle is passed, it’s in fact easy and beneficial to start small. Buying a couple of modules at a time, and getting to know them well before buying more, is a great strategy to take when starting out.

Let’s look at some relatively easy entries into modular in a variety of price ranges, looking to answer the Eurorack novice’s question, “How do I get started with modular?”

The semi-modular

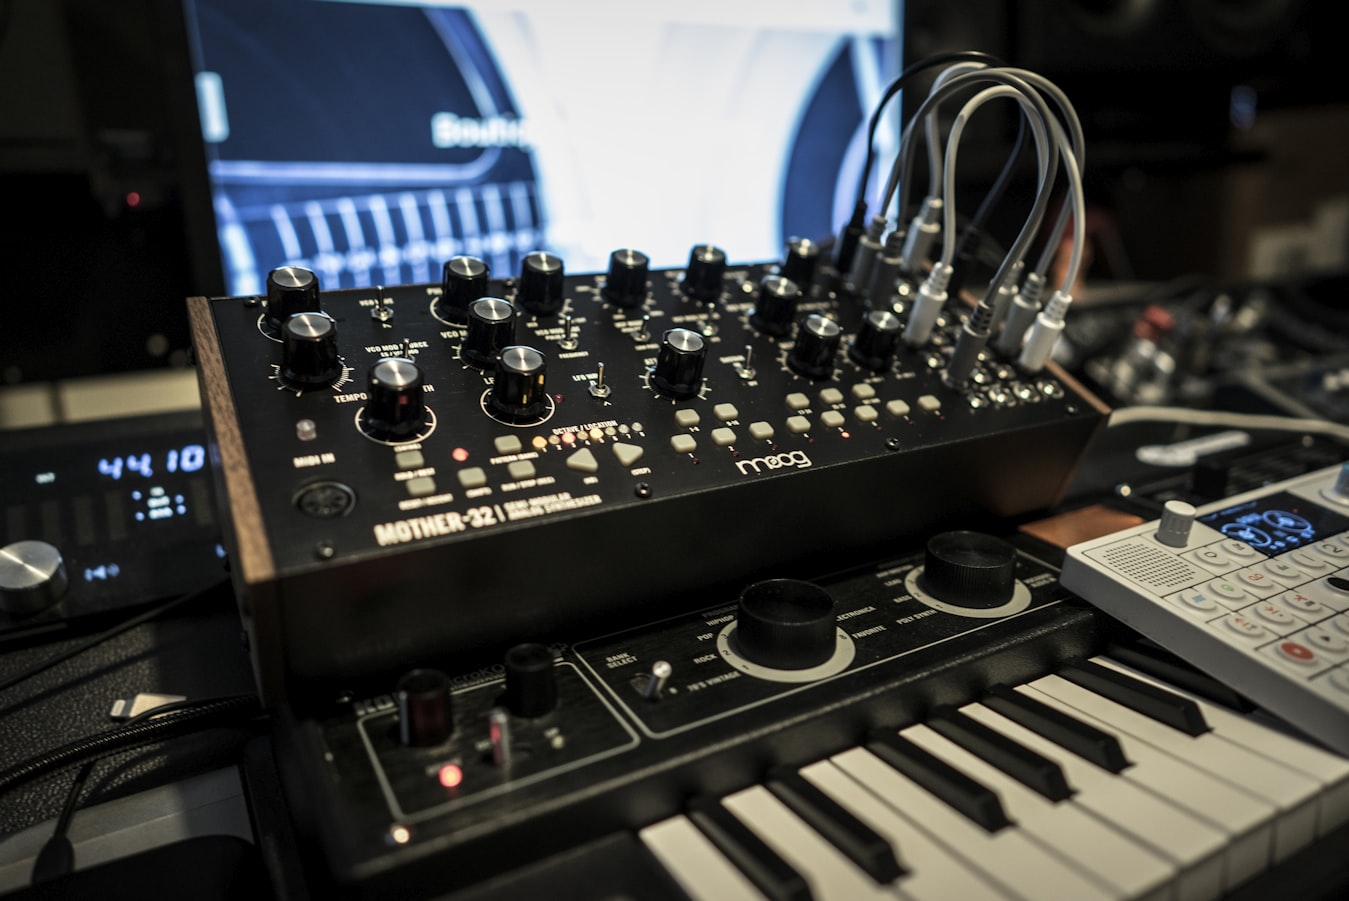
Semi-modular is a great way of getting some experience with patching. Standalone, semi-modular synths like the Moog Mother32, Moog Grandmother, MakeNoise 0-Coast, or the Behringer Neutron, give you a taste of the modular experience and are all highly capable synths. They are all fully compatible with Eurorack; essentially they are Eurorack format but with their own power supply and case. Which leads us to a possible disadvantage of this route: if/when you want to go deeper down the “rabbit hole” you still need to buy yourself a case and power supply for your modules. If you are committed to getting into Euro it will be more cost effective to get a case and power right away.

The micro-system

Full voice modules, like the Atlantis from Intellijel or Mutable Instruments’ Elements, function something like a desktop synth module, but in Eurorack. In other words, they combine all the oscillators, VCAs, envelopes and filters of a full mono-synth behind a Eurorack panel. Pair one of these with a Eurorack sequencer, or a MIDI sequencer and a MIDI to CV module like the Hexinverter Mutant Brain, and you have a full synth voice in Eurorack. Without any other modules to patch up it’s not the full modular experience yet – you have a synth voice that you can trigger with gates and CV from your sequencer or MIDI-CV module, but you do not have any modulators. Modulation is the heart of modular, so, tempting though it may be to stick one of these all-in-one modules in a tiny case and use it standalone, it is probably wise to leave some space for growth.

Another approach to build up a micro system is to go for a range of relatively cheap, bread and butter modules. Doepfer, the company that created the Eurorack format back in the 90s, are still a great choice for reliable, straight-forward modules at reasonable prices. Their active product line is vast and you can build a huge system with their products alone. Then there are the very small, low-priced modules from various companies such as Erica Synths, TipTop Audio, and 2HP (whose name refers to the size of all their modules—about as tiny as it’s possible to get). These are great value and can be highly useful but beware, they have tiny pots so too many of them too close together can get extremely awkward. While it might seem like a great cheap solution, a whole system made up of these tiny modules would be pretty annoying to use.

The ready-made, full system

On the other end of the spectrum in starting tiny with a micro system is splashing out on a full-size system. Why not bypass all that decision making, scrimping and saving for one module at a time, and just hit your bank account/credit card one devastating blow? The easiest way of doing this is to go for a single manufacturer’s system – a curated collection of modules by one company, which are sure to work well together. A the ultimate single manufacturer system is probably the stunning MakeNoise Black and Gold Shared System. This is a great option if you have the money and are totally sure of your commitment. But a makeNoise shared system is around $5.5k USD…so there’s that.

The modular drum machine

If you are a producer heavily focused heavily on electronic drums—which you probably are if you are reading this blog—you may want to build up a modular drum machine. Modular drums are capable of more extreme tonal changes and generally have a wider pitch and timbral range than a typical drum machine voice. They can also be triggered in a variety of unconventional ways, allowing for strange, unexpected rhythms. The good thing about drum modules when you are starting out is that they are, by definition, whole voices—they contain a sound source or two, an envelope and VCA, and perhaps a filter. You just feed them a trigger and they do their thing. There are now a huge number of drum modules available from many different manufacturers, analog and digital, covering a vast sonic territory, so you can mix and match to create something truly unique.

When getting started with modular synths, it’s useful to know that you can easily combine modular drums with external drum machines by using the same sequencer (e.g. sequencing your modular drums with an external drum machine) via a MIDI to CV module. This makes starting small simple—just add one drum module at a time. Of course, just as with any other approach in modular, modulation is key, so at least one step-modulation source, such as the Malekko Voltage Block (an 8 track, 16-stage CV sequencer), should be an early addition to your modular drum machine.

The other aspect of a modular drum machine, and one that really shines in Eurorack, is sequencing. Conventional, 16-step x0x style sequencing is of course easy in or out of the case, but you can quickly move far from a typical drum machine sound by using more idiosyncratic sequencing options. Methods of sequencing in modular is a whole other topic but take a look at digital modules that use binary logic gates for a taste of what can be done. For example, Noise Engineering’s range of digital trigger sequencing modules can create unique, ever-changing rhythms.

The DAW-integrated system

For many people, modular synths are totally separate from the DAW; indeed it is almost a point of principle for some modular users to “only” use their DAW, if at all, as a sort of tape recorder. But this is by no means the only way to approach things. If you are already fully committed to a DAW workflow—perhaps you already sequence standalone synths via MIDI from Ableton, for example—there are many options for fully integrating your modular synth with your PC. Sending gates, triggers and pitch CV is easy: the aforementioned MIDI to CV converter can achieve this via a MIDI interface connected to your computer. Expert Sleepers make a range of modules that can give you even closer integration, with smooth control voltages that a MIDI to CV module cannot send, due to the limitations of MIDI. Finally, if you use Ableton and have a soundcard with DC-coupled outputs (most MOTU soundcards have this feature) then you will very soon be able to use Abelton’s new suite of CV Tools in Max for Live to control your modular through your soundcard’s output jacks.

The obvious appeal of using the DAW to control your synths is that you immediately gain the equivalent of several modules-worth of functionality in terms of sequencing and modulation. The drawback is that you perhaps risk sacrificing some of the exploratory potential of modular in favour of greater control.

DIY

Going DIY would seem to be a great option, especially if you are short on cash. But beware, unless you actually enjoy soldering and are keen to learn a little bit about electronics, it might well end up being a lot more expensive than buying your modules ready-made. Remember, if you mess up your build the company is not liable to fix it for you. Basic synth DIY is totally doable and can be great fun….if it’s the kind of thing you like doing. But if you’re doing it only to save money you might find that:

a. It doesn’t save you all that much and,

b. Lots of your modules only kind of work and some don’t work at all!

SEE ALSO : Using Modular Can Change the Way You View Music Production

Getting feedback on your music

This is a more a personal, editorial blog post about music feedback which I’ve been wanting to write for a while now. All year – mainly through our community we are building on Facebook – people have been posting their tracks to receive feedback and validation about their work. It can be intimidating to share something in the group and to have people comment on it. I can relate, as I don’t really share music publicly unless it’s been signed, or if I feel I have something strong to share. Soon I’ll share some details with you about group coaching, which I’ve been testing over the last month and will help people to receive more feedback. That said, one of the things that strikes me most is that many people feel a bit lost when seeking feedback or validation about their music.

In art, the need for validation is huge, and given the state of music nowadays, we have very few places to receive valuable feedback. People try and try to make music and can get lost in it, sometimes losing sight of their main motivation that drew them to making music in the first place.

If someone asked me, “where do you get feedback?”, I wouldn’t really have an easy answer. But in general, I can describe where many people find constructive feedback about their music.

From established artists

PRO: Other artists are probably the most reliable source for good feedback. If the artist finds the time to listen and you like what he/she does, then the returned feedback is pretty solid. The great thing is that if an artist likes it, then your music could end up in a DJ set, podcast or his collection. Other artists usually have nothing to gain from you except a possible friendship if they like you and your music, so the chances that they’re true to their word are good.

CON: Getting an artist’s full attention. Giving too much credibility to an artist can distract you from your initial path.

Difficulty level: Hard. Artists are often in demand, contacted by random people who try to charm them to ask something in return

Online magazines

PRO: If you make a podcast and an online magazine or blog would like to publish it, it can indeed be great validation that you’re on the right path. If you get reviews for an EP/LP, it also exposes you to many people who visit the site which brings attention, with hopefully some good words.

CON: Some of the bigger magazine give reviews if you bought advertisement with them. Often I see people who write reviews who aren’t musicians themselves, and get blown away by very simplistic music, while brushing off music that might be more complex. Sadly, I feel many writers have lost the credibility they once had as a result of their interest in money.

Difficulty level: Extremely difficult, and potentially biased. If you buy advertisement to a site, they usually will give you attention. Some people even buy “space” on a site to make sure they get reviews.

Touring/Gigs

PRO: Touring is certainly the most validating experience if you play at the right places, in the right time slots, and see first-hand how people react to your music. It can be a very important insight into how to build your music in order to have better reactions on the dance floor. If you can play locally, you can also network with people which can help create a stronger following.

CON: The downfall is how much you have to put to make this happen, and how the work conditions when you tour can be harmful both mentally and physically. Getting local gigs is a bit less stressful and way less complicated.

Difficulty level: Medium or hard, depending of your networking skills.

Labels

PRO: For many, this seems to be the ultimate validation. Being signed by a label could mean that you’re officially part of the crew, that you. To see your name among artists you respect certainly brings some excitement and validation to your music.

CON: Is being part of the crew enough to validate your music? What if you made it there but your release is commercially a flop? Is releasing the validation or was the answer from the market the real response? These are all difficult questions.

Difficulty level: Very high. Many artists contact labels, and being noticed among the noise is difficult. Picking the right people is a complex process. Sometimes an artist fits on a label, but the technique doesn’t, or the direction of the proposed songs is not right. One of the most confusing thing is when a label decides to follow trends, which are ephemeral, or to release an artist because he/she is considered hot at the moment. That can compromise the credibility of the label and blur the validity that you initially got.

There were talks this year where people were saying that online vinyl shops giving multiple P&D to multiple, unknown artists, are slowly confusing and overflowing the market with music of debatable quality. Many people chase labels that sell because they know if they can get in the charts, they’ll get attention and bookings, certainly a good thing. But it doesn’t necessarily validate what you do. An amazing release in the hands of a label who doesn’t take the time to promote will not sell as well as it should.

But let’s face it, there are other ways to get validation about your music that are totally easy and might be just as productive as any of the classic ways:

  • Soundcloud: If you develop quality connections with people online, who you know comment on the music you love, they often provide you with meaningful comments. Personally, I have a tight circle of about 5 people I will send my music to right away to hear what they’ll say. I’m always more excited to hear from them than a potential label wanting to release me.
  • Local DJs: These are people who can test your music in context and show you what’s happening. You need to flex your social skills for this to work, but these people are extremely valuable.
  • Music fans: If you go out to events, you might meet some of those people who aren’t DJs but who know all the DJs and constantly post music on their Facebook page. These people are a gold mine for feedback. They won’t be technical but they’ll be telling you up front if they like your music or not. You always want them as supporters because they’ll be talking about you which is better than doing self-promotion.
  • Our Facebook group! I created a group of individuals who wish to improve their skills. You can join if you want 🙂

I hope this helps!

 SEE ALSO :  Is sampling wrong? 

The “sous-chef” experience

I’ve been reading a lot about music arranging lately, mostly to see how the big players in the music industry approach it. It’s not that I love how things are made in that scene, but more because I want to see what I can take in and transpose to what I do. There are major differences to what the underground music producer will do in an arrangement.

  • Majors work with a team. You can’t make it on that level without a full team looking into making sure that each step is taken care of. This implies song writing, project management, recording, editing, arrangements, and mixing. Nothing will be done half-way.
  • They want the best in every sphere. To make great things, you need the best. Therefore, they will rent the best studios, hire the best musicians, and make sure that every player involved has a strong list of credentials.
  • Nothing is made quickly. Sometimes things go fast but they won’t take things in an easy way.

(Photo by frankie cordoba on Unsplash)

The average release on Beatport is a one-man band, but more than often not if equipped properly, will still get some attention. The main difference is the song’s longevity. Most underground songs won’t have a long life, and might not get many plays and if it sounds like a lot of music out there (eg. it’s a tendency that people will imitate the top 10 to be part of it), chances are that in 1-2 years, it will be forgotten.

Where I think we can learn from the majors is about team work. The main issue with this is, most semi-pro musicians or aspiring ones have to put some life priorities first. We started a community project with my Facebook group that is called Cosmic Relay, where we would work as a team to make songs. We did a first EP that made it to the top 3 on Beatport (Minimal) without trying to copy anyone. The potential is there indeed, but on the second batch of songs, we struggled to rally everyone to make things move with a good flow.

I’ve been experimenting a second approach, which is inspired by how restaurants work. I’d be the “chef” and I’d be working with one or multiple “sous-chefs.” One of my strengths, available as a service through my Track Finalization product, is to make arrangements and finish music. Finding the elements to start often takes me ages to create, mostly because I work primary with randomly generated music (ex. from little jams, tool/demo exploration or simply using randomization on plugins). While this generates a lot of original content, it also requires me to go through a lot of recording to find the little gems in there.

Working with a “sous-chef” is most probably the best thing for my workflow. I send them on a quest to gather material based on my suggestions and then I’ll compose with what I have. Facing some limitations bring a flow of high creativity in me. I usually find ways to find how to use the elements to create a timeline and then something that gets me excited. Usually the direction of the project is decided by the people I work with. We agree on a reference and decide where to go with it.

I’m not sure if you have watched Chef’s Table on Netflix, but for me it’s been a source of inspiration. I see parallels between the chefs starting a restaurant and musicians opening their studio.

One thing all music producers all have in mind is to remain playful, open and to reinvent themselves.

So back to our project: if we continue to take inspiration from the majors, asking for help for the parts where you feel either slow or less solid, is a great way to complement another artist. Collaborations are the best way to do things you could never do alone, every time, for the best.

“Yeah but I want to learn how to do everything by myself!” I hear you say. Then be ready to be a jack of all trade, which is a master of nothing. That’s not a bad thing, but then you might never shine at what you’re supposed to be great at, simply because you’re spreading your precious time on different tasks that others could do better. The thing is, you’ll get better at everything if you also work with other people who are better than you at what they do.

I’m a good example of that. It took me a long time to get better at mixing and I’m still learning. Same for sound design. But talking with other people was more fruitful than spending time on Youtube. Using and buying quality samples have also been incredibly useful in the process. As well as getting quality tutorials.

For best collaboration tools, here’s my favorites:

  • Splice for getting samples and sharing projects.
  • Native Instruments Sounds.com for more samples.
  • ADSR for presets and tutorials. A fast way to have your basis and kick start quickly any project.
  • Dropbox for sharing anything and everything.
  • Reaktor’s community for getting new patches ideas.
  • Our Facebook community to meet new people in the same mentality as me. We have a label that we then release the music on.

SEE ALSO :  Tips on how to pick your EQs and use them (Pt. I) 

My Electronic Music Production Methodology: The Mothership (Part II)

I don’t know if you’re a fan of sci-fi movies, but I am. One thing I really like from those types of movies are alien invasions, where the aliens are dropping from the sky after jumping from a huge space ship; where all the bad guys are assembled and then dispatched. In music making, I apply a similar concept to my own music production methods and overall methodology.  Ever since I’ve passed this idea down to people I coach, I see them do really cool things using the concept of the “mothership“. They adapt this method to their own way of making music, and when they show it to me, I learn a thing or two on how to upgrade my music production methods.

This post about the mothership concepts, and I will share an empty Ableton LIve set you can reuse for your own work. I’ll also cover a few features in Ableton that can help fasten up your idea making.

The Mothership: Where Do I start?

First, know your music. Whatever genres you listen to, get to know what it has and needs. If you read this blog regularly, you know that I always insist on knowing and using references. Well, the mothership method also starts with using references. There are a few essential questions you need to ask yourself when you listen to your references:
  • What are the predominant sounds? For instance, in techno, the kick, hats, and snare are pretty much always there and for most of the song’s duration. There are percussion and effects often but they’re not the main players.
  • What is the melody composed of? Is the melody only one sound (ex. synth) or 2-3 different sounds talking to each other?
  • Is there more to it? Sometimes we can get a bit lost in a reference track as there seem to have a lot going on, perhaps little sounds in the background or swirling swooshes. Those are what I call distractions. If you want to truly analyze a song, make a 2 bar loop right in the middle part or when the song is at it’s busiest, then start counting each sounds and make sense of what you hear.

Once your song has been analyzed, you’re ready to build a template.

Building an empty mothership

If you feel like seeing what an “empty mothership” Ableton Live template could look like, you can download one here:

[download id=”34555″]

It might not meet your needs out-of-the-box, but it’s a great starter nonetheless.

This empty template was created by ROOM323 who I’ve been coaching for almost 2 years. His starting template is really great – perhaps even better than mine – so I’ll explain why I think it can be really useful.

  • Each sound has its own channel.
  • There are just enough channels to cover everything and limiting yourself to them makes you stay focused.
  • The background and effects channels are a good reminder. Sometimes we forget that one aspect of the song has been overused, especially for details like a background. It’s also a reminder not to overdo it.
  • Storing your loops gives you an outside view of all the potential you have.
  • There’s nothing better to help make decisions with regards to your different songs.
  • It can be turned into a live performance set!

How to use THE TEMPLATE

The very first part of using this template is to start by collecting “main ingredients” (see part one of this series). This can be done by scavenging Youtube, jamming a new demo VST synth or hanging out with friends while recording them play randomly with instruments. Anything can be potentially good, it’s how you use it that will make the difference.

“It’s not the note you play that’s the wrong note – it’s the note you play afterwards that makes it right or wrong” – Miles Davis

  1. Put each different idea in the appropriate channel of the Mothership.
  2. You’ll have perhaps 5 strong ideas. Now you can fill the channels that are missing content. If you have a nice guitar melody, then you need percussion, kick, etc.
  3. For each idea, try to have different variations. Perhaps your first loop was good but if you rework some elements, maybe you’ll find another option that is pretty cool too. Those variations can also be different scenes of the first loop.
  4. Jam away!

That’s about it!

When I work with ROOM323, I will have 20 different ideas from him, then I can select the best 5. From there, I’ll pick a row and drop it in the arrangement section to start building a song. In terms of productivity, this method is way more effective than canning one idea in a project that is then turned into a song. One important thing to have in the back of your mind is, if during your song, you run out of ideas, then you can just jump back into your original 20 loops to pick something complementary.

One amazing thing about Ableton 10 is that you can drop a song/sample from it’s browser and drop it in your song. It will import your idea as you left it. This means that you can build your Mothership today by dropping in all your unfinished loops!


SEE ALSO :

My Music Production Methodology Pt. III: Depth and spatial shaping tips

My Electronic Music Production Methodology (Pt. I)

I’ had been thinking about recently how I should consolidate the many values, observations and principles I share regularly on this blog into a summary of music production methods and methodology. I regularly give feedback in our Facebook group and I find that I’m often repeating myself with regards to certain details and points that seem like basics. Not long ago, I wrote a post with a checklist to see if everything had been covered in order to know if your song is done, but what about a todo list to start? And what are the big points you should consider beforehand in order to avoid getting lost?

Let me describe my own mindset before I get to work on music in the early stages; it helps me greatly and I think I could also give you a boost in productivity.

The intention

Have you ever had sessions that were magical or others where you felt you did the same things, went horrible where you started to doubting what you’re doing? Making music seems like it should be as straight forward as playing a sport but it can’t be predicted or controlled, which can be frustrating. I’ve started noting down a common denominator in all my good sessions: they all had been started with a precise intention. What I mean by an intention is that beforehand – even before opening the session to work with – I’d spend some time developing a precise idea of what I wanted to do in that session. It could be simple sound design, mixing, arranging, or working on a client’s session.

I’d sum it by saying to myself “today, by the end of the day, I should have done X.” The X is a sort of a goal I can quantify easily, such as finishing the polishing of a track.

I also start sessions with something I do well and love doing; this important habit puts me in a good mood, helps my brain focus, and preparesme for bigger challenges.

The mood board

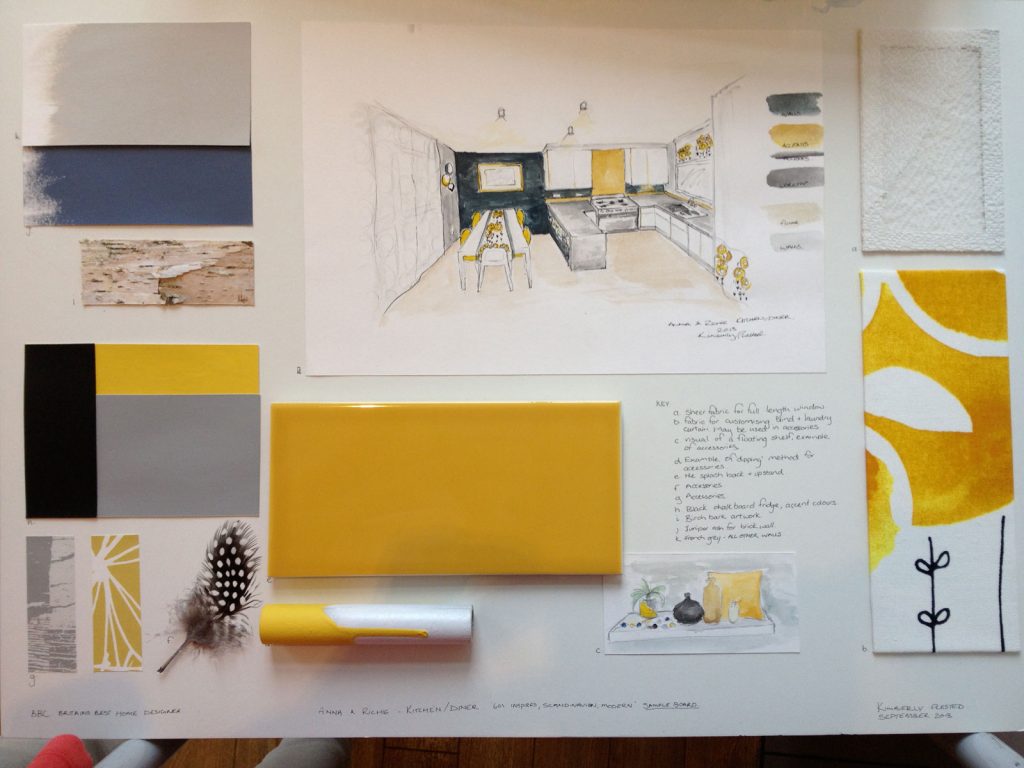
The term “mood board” is often used in visual design. It’s basically a pin board with all kind of images: the mood, aesthetics, concepts. Sometimes it can be a texture or drawing, but it can be also a few pictures; it becomes a reference for all the members of the team.

A example of a graphic mood board (image courtesy of https://www.sophierobinson.co.uk)

It’s basically the same in audio. I have a huge folder with music I like for use as references. I have also playlists on Youtube of each reference per client. I have yet another one on Soundcloud for ideas, inspiration, and arrangements. The audio quality of Soundcloud being not so great makes me use it more for ideas than anything mix/mastering related. Sometimes it’s songs, sometimes it’s just simple atmospheres or a weird tune just for its reverb (which I can use for convolution). There are new, amazing songs I see in my feed everyday and I really want to tag the ones I see. I honestly even have a mood board on Instagram/Pinterest. Some images help me generate sound ideas too. Yeah, I’m weird like that.

The main ingredient

In risotto for example, rice is the main ingredient but this dish can be altered in many different ways; audio works in the same way.

This main ingredient is the core of your next project. I often compare making music to making food; I find that relying on a first important ingredient helps to develop a theme for a song. The more you work on something, the more you’ll want to add. Remember that songs are split in sections and my rule is to have either one major change or one sound added per section. Songs have, in general, 3-4 sections. Some only have 2!

So, this means that your main ingredient could – in theory – have major changes 2-3 times maximum in a song  to remain understandable. Of course, this is my personal rule. You might have totally other views and that’s alright. The main ingredient will also have brothers and sisters. I usually form a family of 3 sounds per song. The main ingredients will have 1 brother and 1 sister. The brother will be a similar to the main ingredient as a way to complete it. For example, a higher pitched note. The sister sound will be in opposition to the main ingredient. For example, if the main ingredient has a fast attack, the sister would have a slow attack.

Setting up these ideas really helps me see what I need quickly. But knowing this method doesn’t help find the actual sounds though. Sounds come to me in many ways: sampling something you love, using jams you did on some machine that you recorded, recycling older ideas, browsing Youtube’s infinite possibilities, going to a local store and buy the weirdest record you can find, learning a new way to design sound from a tutorial you watched, etc. The idea is to make material to manipulate.

FACT: When I hit a wall, I usually do a remix for someone I know, for fun. Remixing is easy and fun. You try to juggle the elements and keep some of them true to the original to make the remix recognizable in a way. In remixes, you’re given the main ingredient already, and then it’s up to creativity to do the rest.

The foundation of the house

I invite you to view your song as a dish, but now let’s also picture it as a house. To build one, you need a solid foundation. Solid is not about making it loud or big. It’s about being clear. In musical terms, we refer to the foundation as its fundamental note, it’s lowest part. Therefore, I find that setting a few notes in the bass/sub will give ideas, support for the melody to come in the mids. But if it’s muddy in the lows, the whole song will suffer.

TIP: Try to keep it to only 1-2 elements under 80hz.

A hook

Your song will be memorable for others if they can actually sing it back to someone who has never heard it. Ask a friend to see if that’s possible. If not, your song would be categorized as “intentional music” (in the same vein as percussive African music) where you can’t sing it. In techno, the whole movement of Romanian music is partly built around a combination of hook-songs vs no-hook-song. What makes it addictive is that you feel you can sing it back but not, and then when mixed, the interaction of 2 songs makes it reveal something you didn’t expect.

Do you need a hook? No. But if you never use hooks in your music, try to make one. Or if you only do music with hooks, try to make one that feels… empty. it’s a pretty difficult challenge to go out of your comfort zone but it can also make you discover things you didn’t know you could do.

David Lynch said:”Ideas are like fish. If you want to catch little fish, you can stay in the shallow water. But if you want to catch the big fish, you’ve got to go deeper.”

That’s all it for the first part on music production methods and methodology – I will provide more insights next week.


SEE ALSO :

My Electronic Music Production Methodology: The Mothership (Part II)

Important Music Production Principles

As a label manager or as a teacher who regularly gives feedback (join our facebook group if you’re interested to participate!), I’ve realized I don’t listen to music like the average person; I listen for certain music production principles. There are a number of things that will get my attention that most people won’t really notice; I’m listen for a number of principles that make – according to my tastes – music that feels full, mature and deep. Many labels are after music that will sell, but I’m more interested in music that innovates, which to me comes from the design work involved in the song.

Why innovation first? I prefer treading new ground than releasing something vanilla. It might not pay, but the delayed gratification is more powerful and I can attract creative minds, which are my favorite kind of people.

I was reading about visual design and I was pretty interested in how it’s similar to audio production. I’ve compiled some basic music production principles that applies to both the audio and visual spheres.

Balance

Balance can be achieved in a variety of ways: from the stereo field being occupied, to the mid/side balance, or the balance between low end vs high end. I like to hear how balance has been designed and exaggerated – the emphasis of a zone that moves towards another. I want to feel the artist is playing with balance, or shows that he can propose balance shift during the whole timeline of his/her song. Balance is to me, the umami of audio, and I want to experience something that feels full.

TIP: In the final stage of arranging, try to check each zone (left/right, mid/side, lows, mids, highs) to see how they relate to each other.

Contrast

This one is a bit tricky. How do you apply contrast in audio? It can be in how you select your sounds for instance. Perhaps having a number of sounds that have very sharp attack compared to others that are soft. Maybe a contrast in volume, compression, harmonics or dull vs very detailed. As you bring in a number of sounds or melodies, think of how each of them can be different. This is useful as it can broaden up your palette of sounds or have them evolve into something else. One of my favorite contrasts is between textured sounds vs some that are smooth.Another type of contrast that I love to hear is a distinction between bold and subtle on certain elements.

TIP: Try to import two samples at a time that are very different. Ex. 2 claps, one bright and the other fat, then go from one to another to create contrast.

Emphasis

Which element that should grab your attention first? This is, in design, the focal point of your artwork and in audio, putting one sound forward will have the listener engage with it. This is usually in the mid frequencies, right in front of you. It’s rare that your key element will be panned to the right and if so, it will be really confusing to get something there through the entire song. A good way to create a focal point will be to decide what will be in front and what’s in the back.

TIP: Use one main element in mono and EQ the mids up to push it front forward. Group all sounds to be put in the back where you slightly remove mids in mid/side mode.

Movement

This one is all over this blog and if you haven’t consulted some of the past articles on how to get more movement in your tracks, I invite you to check some out. Movement is one of the most important parts of music arrangements. Movement is life, nothing less. When music is static, it feels dead, dull, redundant, synthetic in a bad way, and terribly alienating. You need to have your sound move in the space, in the stereo field as well as up and down – there are so many ways to achieve movement.

TIP: EQ, auto-pan, compression, filters are your best friends for movement.

Pattern

Ideas and hooks always are dependent on a precise pattern. Next time you listen to your favorite song, try to determine the pattern of the song. Sometimes it’s simple, sometimes it’s multiple patterns that are layered. Now, the pattern is more than just the percussion; it’s the order of elements that are also reappearing throughout the song. In techno, there’s a micro pattern (eg. within one bar) that is part of a much bigger pattern. Decoding it is a bit like reading morse code. But one of the key points of patterns, as explained by Miles Davis, is understanding the importance of silence because that’s what creates them.

TIP: When creating a pattern, try adding random additional ideas by using Ableton’s MIDI effect, “Random.” Having a developing pattern can do wonders to the timeline of a very simple song.

Rhythm

This is the perfect follow-up from the pattern principle as they go hand-in-hand but are slightly different. I like to see the rhythm as everything that amplifies the flow of the pattern you created. Groove templates in Ableton are particularly tied to rhythm as well as swing. But importantly, one thing to understand is the transition from section to section, as well as what’s regular vs irregular. You can have a very simple, almost boring pattern but with a great rhythm, you can make it very engaging for the listener. However, this doesn’t work the other way around; a poor rhythm will turn a great pattern to garbage.

TIP: Try to DJ your tracks at different stages of production. You can stretch your idea/concept to 5-6 min and see how it feels, mixed as a DJ. Of course, mix it with something you love the rhythm of and see how yours fits in.

Unity

This is the final touch to a song; “making sure all elements feel like they’re working together.”  Sometimes I hear music and I feel there are a few sounds that don’t fit in at all. Perhaps this has happened to you and you’re not sure exactly what it is. Here’s a quick list of things to consider while developing a new idea:

  • Make sure all melodies are in the same scale or in compatible keys.
  • Use the tuner to make sure the most important elements are in key.
  • Always have some sounds that are in the “call/answer” relation with some other.
  • Certain sounds should either be working together or complementing one another (eg. played at same time or shuffling).
  • Use a global swing/groove for main sounds.
  • Stick to just 1-2 reverbs for creating a common space.

Final principle: Make your work understandable, long lasting, and detailed

Here’s a personal motto that I apply to the analysis of my own work:

  1. “Is this song understandable?” If I ask a person to sing it, can he/she relate to one element?
  2. Is this song based on a trend or will it age well?” I like to analyze songs that I still love after 20 years and try to see what I still love about them. I then try to apply concept with my current knowledge. It can be a concept or a technique too.
  3. “Did I cover all details?” The last round of arrangements I do will be to cautiously pass through my song, one bar at a time to see if I am aware of all details, such as volume, tails, attacks, position, etc. If I don’t do that, the song isn’t done.

I hope this helps you to perceive your music differently and create your music more efficiently!

Basic Song Arrangements Tips

Given the quantity of hours of mixing I do regularly, I work on lot of projects from a wide variety of clients. I also have to do a lot of “cleaning up” before I get to work on the actual mixing of a song. I wanted to share with you basic song arrangement tips that you can do which will speed up song construction and help make it sound better in the end.

Cleaning a project for clarity

“Cleaning” is something many people overlook, but it will help you better understand what’s happening in a song. I strongly encourage people to work on multiple projects at once with my non-linear production technique; a clean project will help you understand where you left off on your last session.

Here are some tips for a cleaner, clearer project:

  • Name your channels/samples something simple. For example, rename that loop “rolling_AD252” to “percussion”. Keep things simple and clear as well as have your own vocabulary.
  • Color each channel based on content. For instance, red for kick, brown for bass, blue for melody, etc. On Live v10, you can then apply that color to the clips.
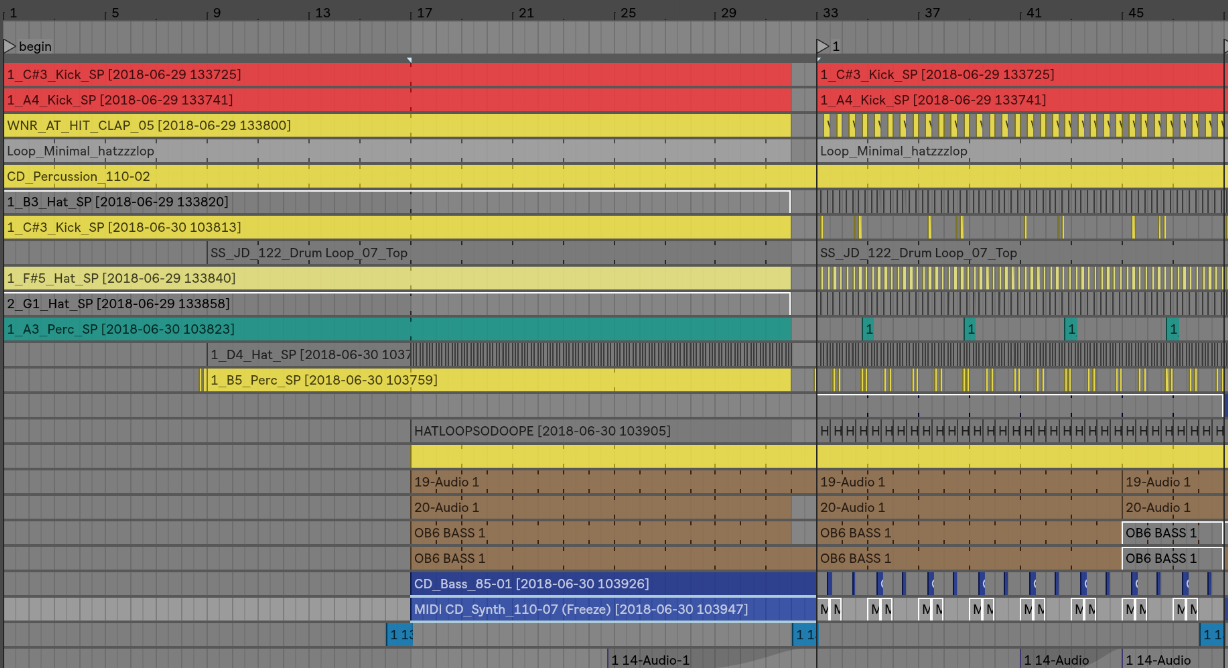
  • Create a comprehensive timeline in your arrangement. This is where 90% fail! The first sounds in your song should be moved way up to the front and top, and as sounds come in, they should be dropped in below. Since the arranger moves from left to right, you will sounds appear in order of appearance, just like how they make it for movies.
  • Drop markers to see the key points. Markers on the timeline help you see how things are repeating in a logical matter as well as for you to see where to drop in your transitions.
  • Consolidate blocks of sounds, change color if there are changes. Consolidate all the little blocks so you can duplicate them easily and see your arrangements more clearly.
  • Arrangements aren’t mixing. Don’t add all your effects and compression yet, focus on the timeline of things, then you can easily group and do your mixing if everything has been labeled and colored properly.

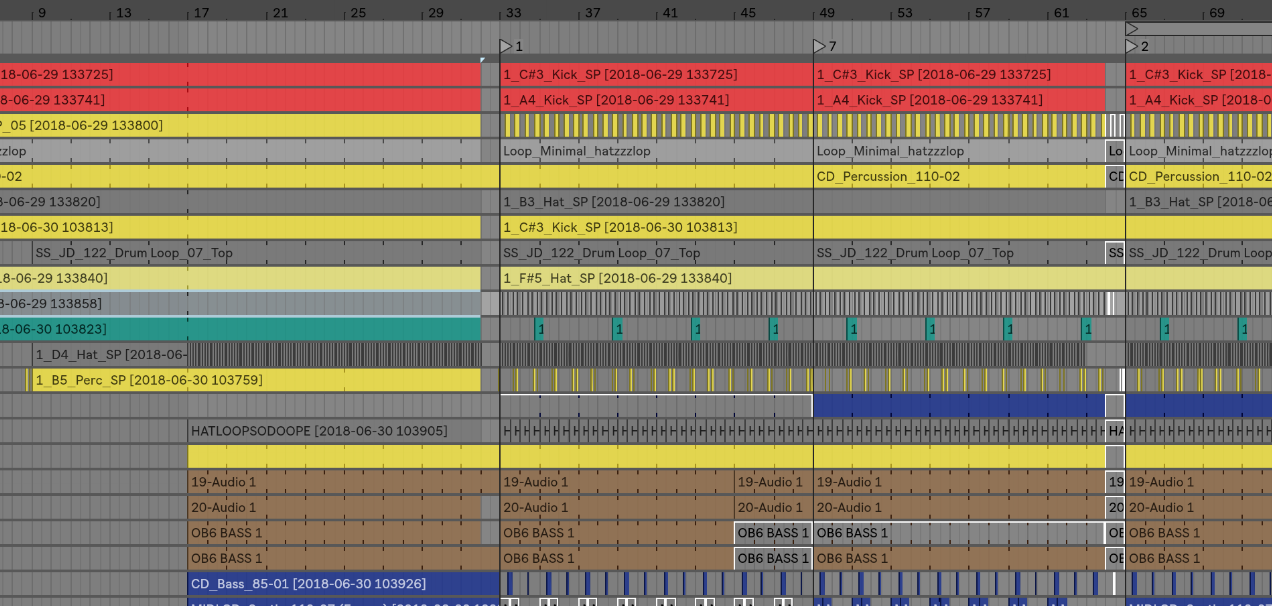
Before consolidation

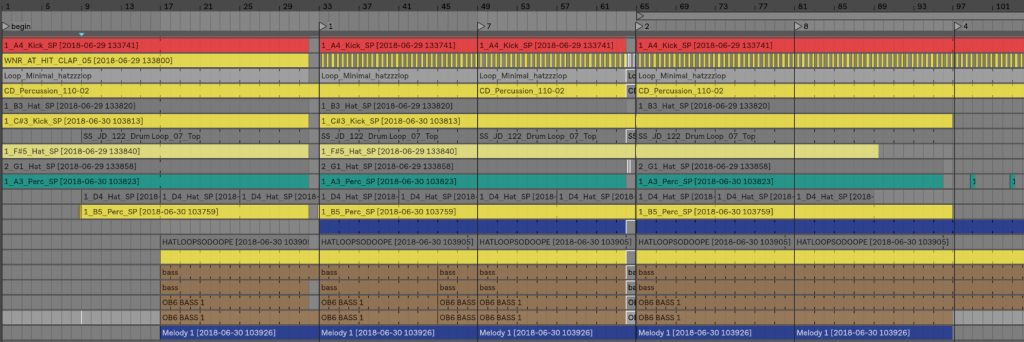
Clips consolidated

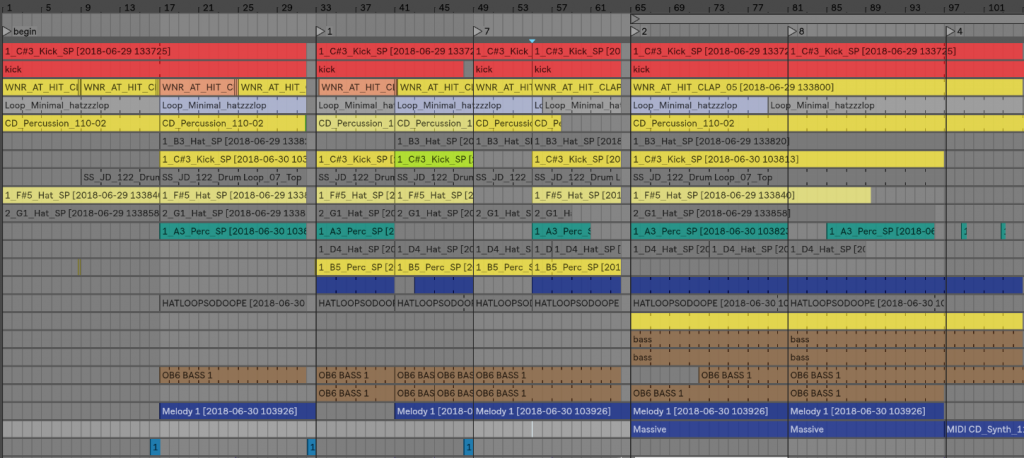
And duplicated

Think Balance

When you make a song, you have to think of a few key points to keep people interested:

  • Keep things moving to avoid redundancy.
  • Have logical development.
  • Bring in some surprises.
  • Have solid transitions.

All this can be seen visually if your project is clean and clear. Here’s how:

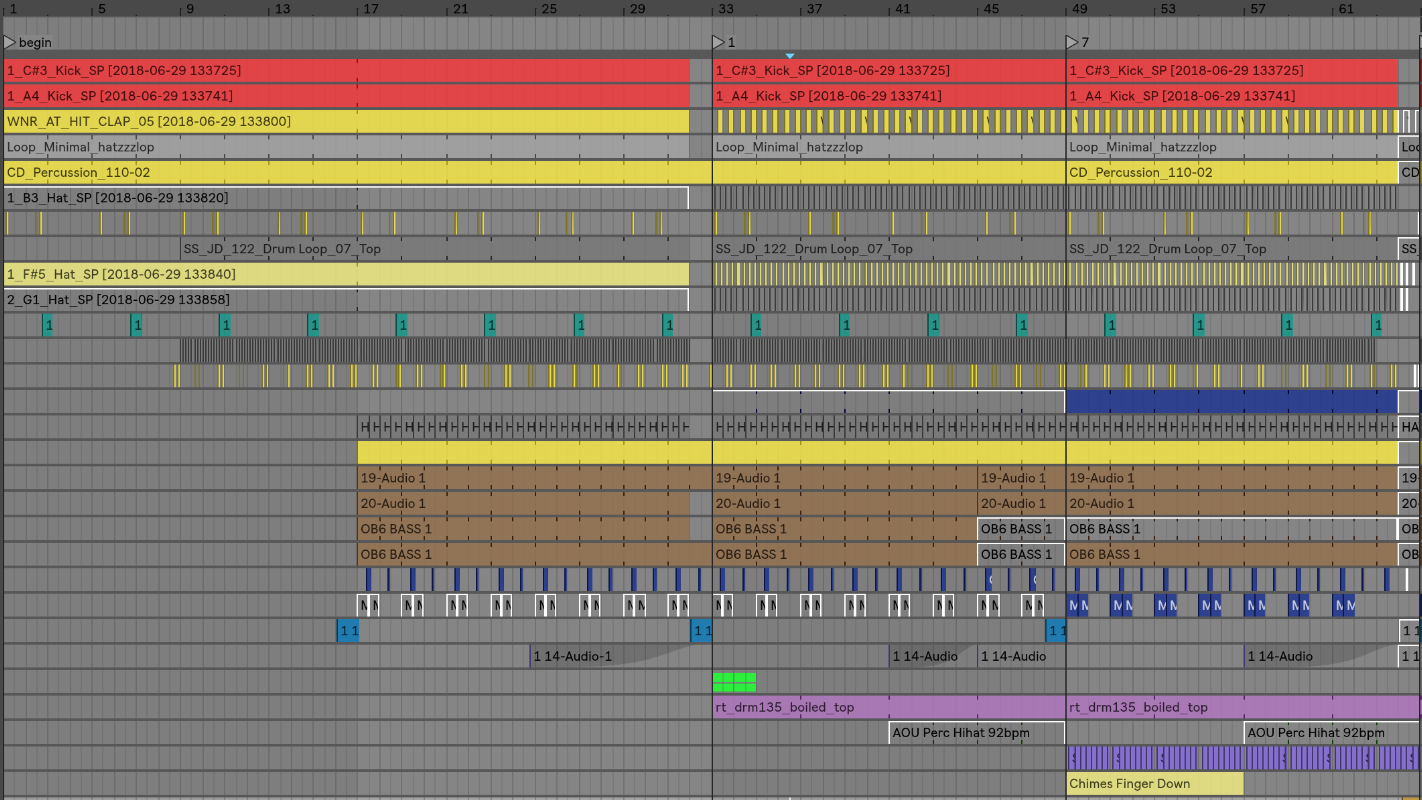
The image above is a good clean start. You can see these blocks are pretty straight-forward and repetitive. Usually when I hear a song like that, I will automatically visualize the blocks coming in and out; I call that type of arrangement “blocky.” There’s not much happening, nothing is too exciting, and the balancing of “blocky” songs is extremely rigid, dull.

However, having a “blocky” song can easily be fixed.

  • A sound can be appreciated agan if you “reset” it. You can “reset” a sound by turning it off, removing it, then bringing it back at a key point. This is a good way for the listener to appreciate different combinations of sounds all together. If you leave all your clips playing all the time, you can’t appreciate if X plays with Y alone. This is why I find that a song with 3 hats and or 3 percussion tracks gives you a really broad range of combinations, but you’ll need to be creative to have them all explored in a song. That can be done by occasionally muting certain sounds.
  • Transitions, transitions, transitions. Did I say this enough? You can make nice transitions with en effect, a silence, a flam (rolling, repeating sounds), a swap of sound(s), a volume automation, etc. Explore!
  • Automation, fade-ins. If your sounds all come in at once, try having some fade-ins from time to time.
  • Create variations. If the sounds were programmed in a specific way in a section, have them varied in the following section.
  • Varied patterns length. If you have multiple patterns that are one bar long, try having some that are 2 bars long, others 4, some half a bar. The richness of the combinations where sounds shuffle over time will be exciting to listen to.
  • Don’t drop all of your musical assets right at the start. Try to keep new sounds appearing per sections.

This last image shows what a project like with some holes added, which will add a lot more dynamism and surprise to your song. Take your time! You can trust the listener by letting things go and let things evolve. If you’re not into ever-evolving songs and more into stripped-down, tracky arrangements, its pretty much the same thing: take your time to get things come in and use automation.

I hope this helps!