Bouncing stems and mix

Recently I’ve been weighing the benefits of focusing on just one part of my production process exclusively, or, working on all the steps of a production simultaneously – arranging, mixing, pre-mastering, etc.. Very often producers ask me to explain a perfect workflow recipe and the truth is, there really isn’t a one size fits all answer.

But in theory, there are 2 main approaches I’ve been seeing in production to make a song.

  1. Classic way. Which involves taking one phase at a time but with the option to roll back to go fix something.
  2. Modern way. You go from one phase to the other in no particular order, as your needs change. You’ll mix as your arrange, change sounds of the percussion to match a melody, add saturation for aesthetics, etc.

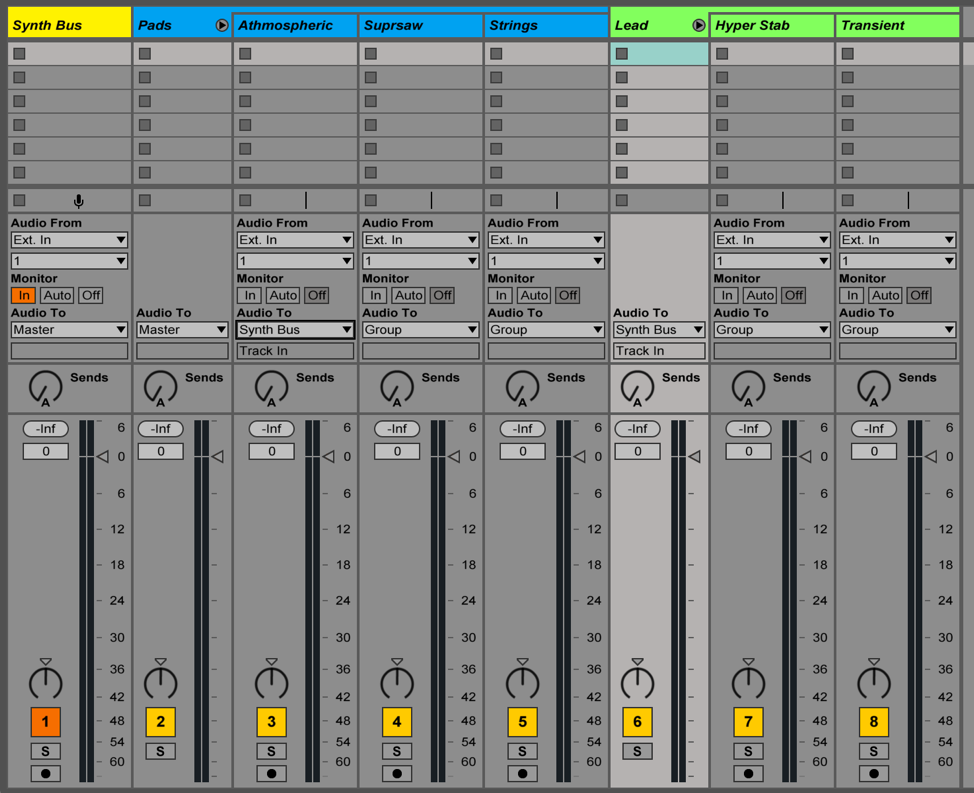
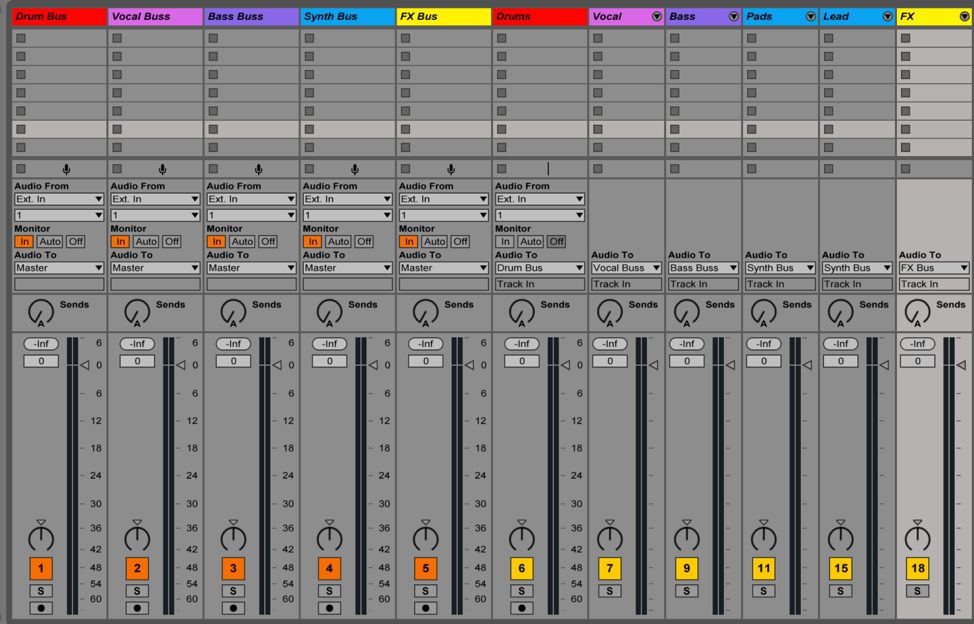
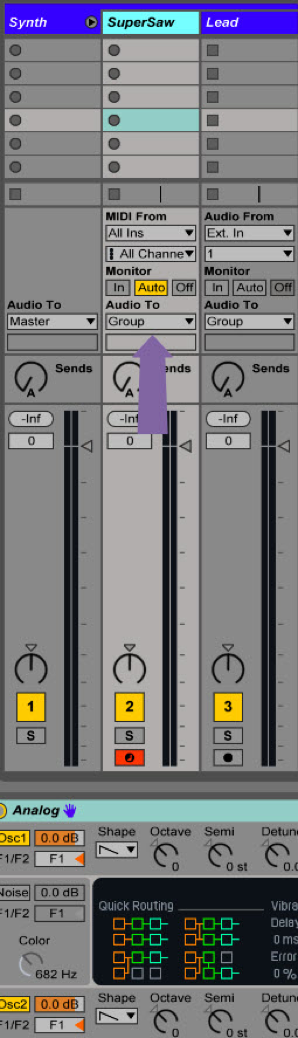
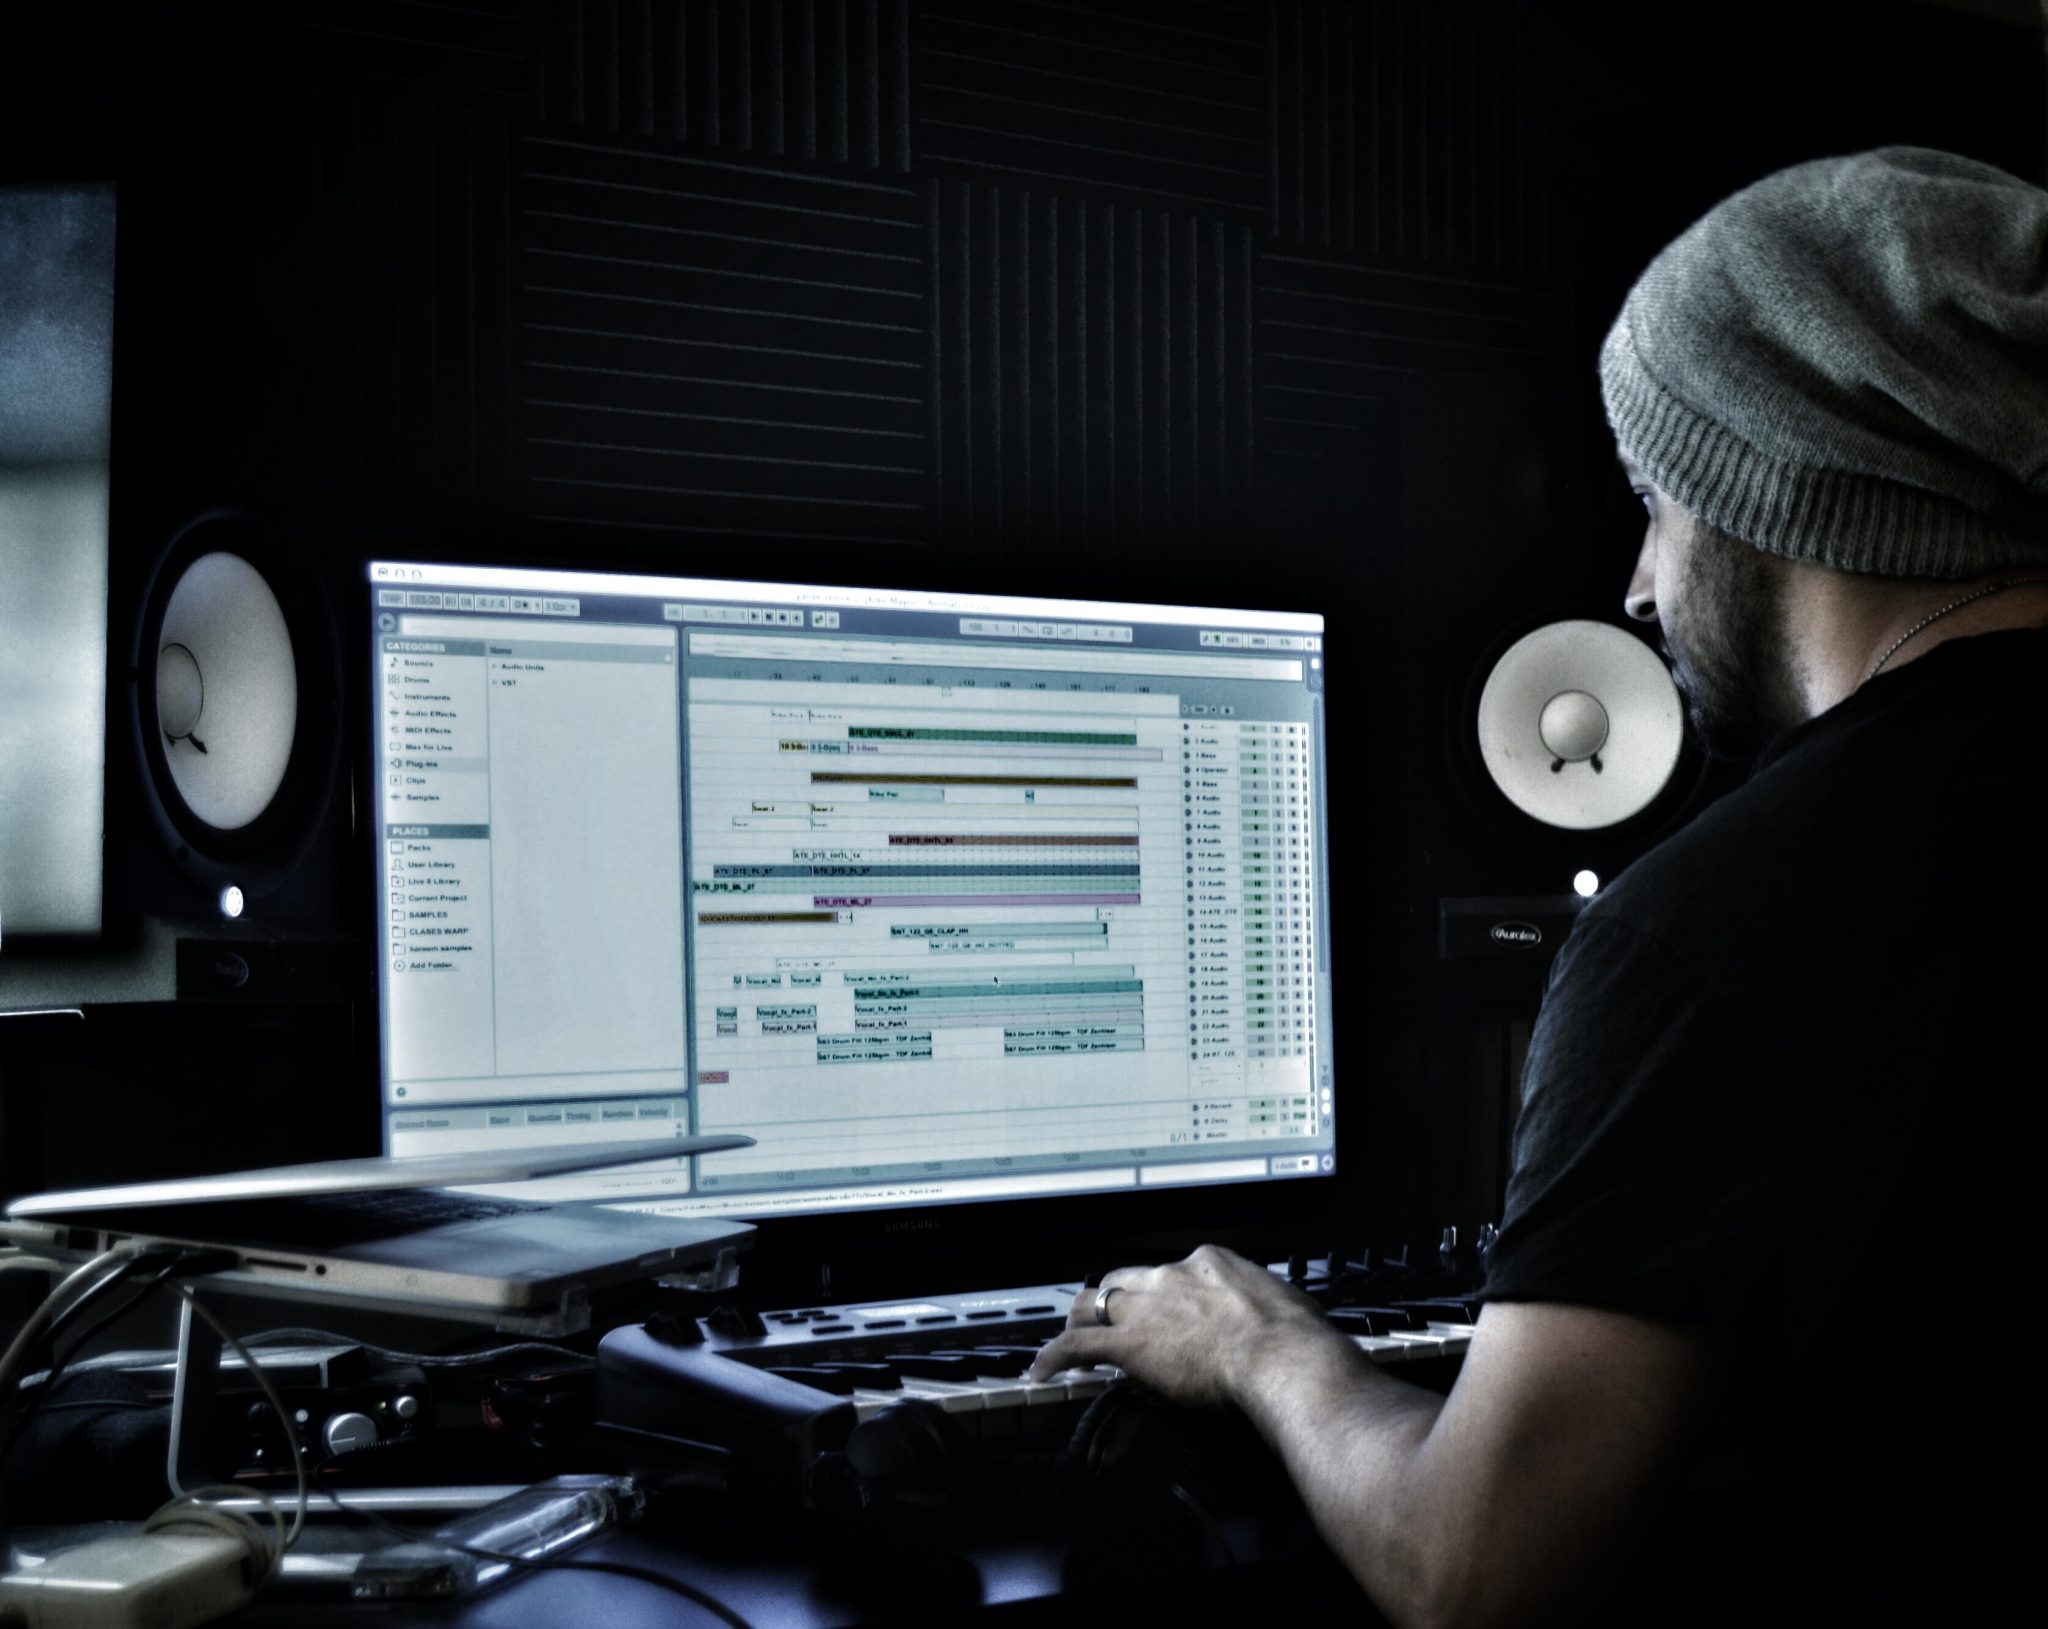
One of Ableton’s feature that I find killer is the option to export all channels as separate stems. It really is great for so many reasons but also allows your to really divide the production from the mixdown, which you could do in another DAW.

There are many reasons why you’d like to do your mixdown into another DAW. One of the reason is, you’re basically blending, what I call, software grains. Think of the various apps on your smartphone that offer various filters for your images, where you can go from one to another, taking advantage of each strength. I would say it’s the same for DAWs.

  • Workflow. Each DAW has its own workflow, appearance, feel. Sometimes, just a change of platform is enough to, psychologically, feel your track in a different way. There are countless researches that have been done in between DAW, to which has the best sound, but in terms of summing, if you take a file with nothing on it and bounce it, they will all provide the exact same file. Where there will be a difference is on automation, interface and that alone can make you behave differently in a mix situation. There’s also all the macros and gizmos they all offer too.
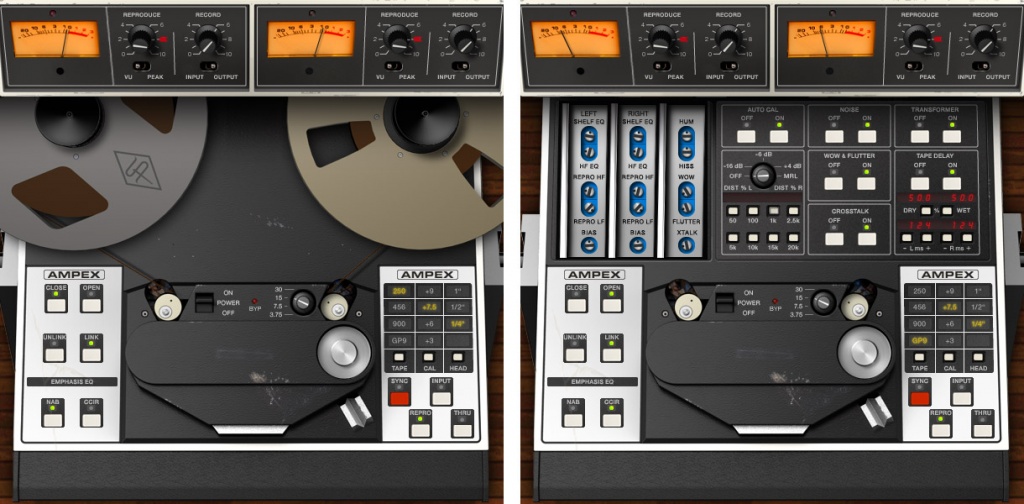
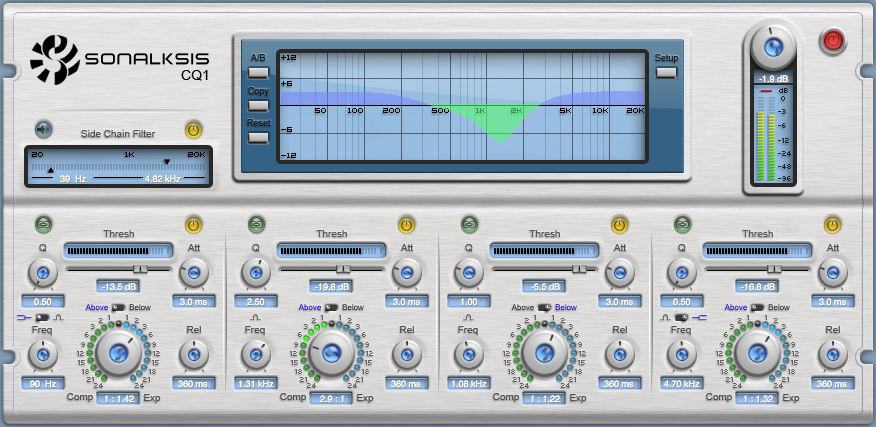
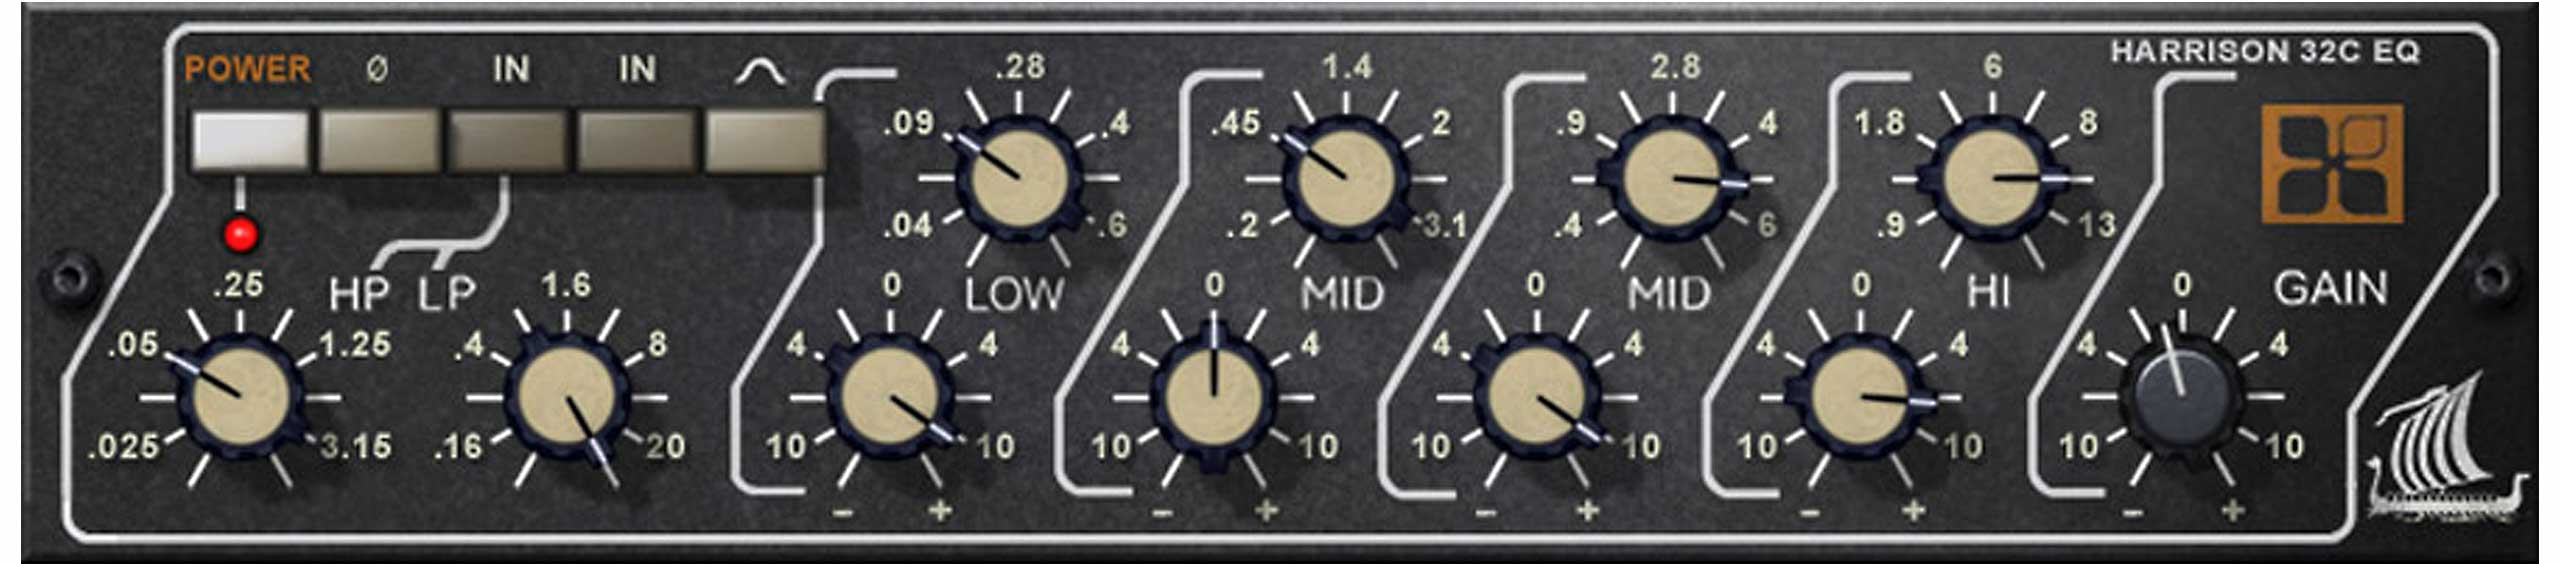
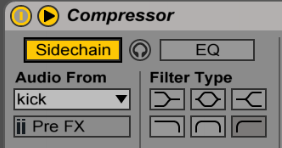
  • Native plugins. Again, this might be a game changer. This of an any DAW, they will offer different plugins doing different things. Now, just for compression and EQ, it becomes a serious business. Mostly because there’s a big difference between what you see and hear, plus no one really does things the same way.

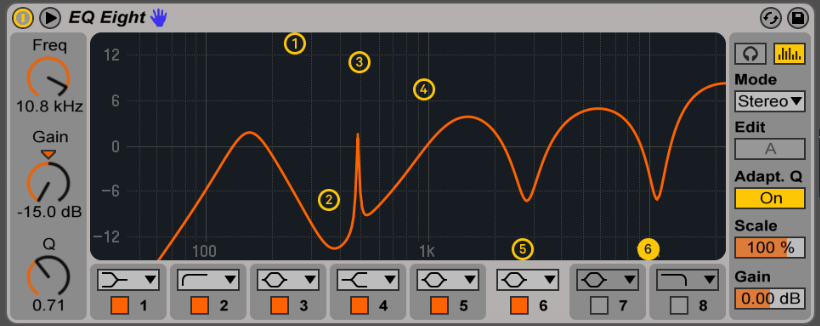
That last point is crucial here. You can take the same compressor concept (ex. FET compression), but it will sound different from one company to another. There are no real universal standards on how to approach compression or EQing. An EQ can show you a curve but the filter in the back might slightly be different to give a color, for instance.

So, when it comes to Ableton, I now export all channels as stems to do the mixdown. No more mixing as a arrange. I put a wall between the 2 phases. Some of the reasons are:

  • It liberates CPU usage. No surprises here. When you deal with a heavy load of VST’s and plugins it can often be a lot to manage. The act of bouncing out and mixing stems will force you to focus on only mix related plugins such as EQ and compression. No more delays, chorus and reverb adjustments. At this stage, you’ll focus on the volume levels alone.
  • It put’s an end to the endless adjustments you can make to every sound. You’ll have the option of correcting that little hihat detail that’s been bothering after hearing your track 100 times, but honestly, someone who has just heard your song for the first time will interpret that sound as part of the track, not as a mistake. It’s good to put an end to endless changes and adjustments and move on to finishing your production. Professionals keep their eye on the prize and get things done.
  • The audio summing seems to reveal imperfections. I’m not sure what’s happening here but sometimes, when you bounce the stems, things are just slightly different. I can’t pinpoint why and in theory, it’s not supposed to be but sometimes, it does sound slightly different. In fact, once you bounce it, that’s when you know exactly how it will be so it’s interesting to bounce all channels apart.
  • Ability to use other DAWs. As described earlier, this is the ultimate way to move from one platform to another. You’ll be to leverage the strength of each DAW.
    Build live sets or NI Stems. Having stems on hand can be useful to create live sets. Native Instruments offers a technology for creating a stems release to be played in Traktor, which is really cool, and super in demand by many of the world’s top dj’s.
  • Backup and remixing. Having stems is the ultimate way to have a real backup of your music. In 10 years time no one can predict what technology will be available, but having stems will prove useful as a way to be used with any new technology.

All an all, try it and see for yourself. Bouncing stems can only bring advantages to your workflow and I’d love to hear about it.

SEE ALSO : Use a main project for organizing yourself 

Mix & Mastering Preparation Tips

As a mastering engineer one question I get asked all the time is – “how can I get the best pre-master mix out of my tracks?”. It’s an important question for sure, and this post will outline some of the actions producers can make right now to make your tracks sound way better than before. I can promise by following the mix & mastering preparation tips in this article you’ll hear a huge difference towards the final version of your projects.

My clients want big and full sounding tracks, and I love when my customers flip out after hearing the project they’ve worked hard on come back to them sounding every bit as big as the productions they are inspired by. If you ask the best engineers around the world they’ll tell you that working on music with a great quality mix is the key to turning a solid tune into a monster sounding track. But how do we get there first?

My clients come to me to correct and fix the flaws of their mixes, which isn’t always simple and straightforward. Working on properly mixed tracks with plenty of headroom (at least -6db) will make my job much easier and allow me to bring out the very best in your track.

It’s common for producers not to have the right tools or experience when tackling many of the problems that take away from a good mix, and this is where I step in to help. Let’s make clear a few things you can do in prepping your tracks to sound their best from the get go.

  • Avoid extreme EQ’ing. The greater adjustments you apply to a sound, the higher the likelihood of inducing unwanted resonances, and phasing issues. While in sound design, heavy processing can sometimes bring interesting results, it is often much more productive to pair an EQ with a compressor to get the same result. First, use your EQ to cut shelves from your audio source, then use compression to make what you want to hear, louder. TIP: Try using a maximum of 4 points on your EQ.
  • Remove unwanted frequencies. This is mainly about removing unnecessary frequencies from your sound, rather than cranking up the parts you want louder. If your sound isn’t a kick drum or something else in the lower range, apply a high pass filter or EQ and cut everything below 100hz. If your sound is a kick or bass, try cutting everything under 20-30Hz. As for pads, melodies, vocals, I’d suggest doing cuts in the 100-250Hz region as there will always resonances there. If you use reverb, make sure to remove or cut anything under 300Hz as it can easily get congested there, which will take out some of the precision and power of your song.
    In the end using your eq is a process of clearing away space to allow other sounds to be heard more clearly. Less is more.
  • Be careful with cheap plugins. While you can do a lot with free or cheap plugins, sometimes, this might compromise the quality of your work. Most DAW’s will have native plugins such as reverbs, compressors, eq’s etc.. however I recommend investing $30-$50 on a handful of plugins that more than often sound much better than the native plugins your DAW provides. This applies to compression, EQ, reverbs, chorus, delays, etc. I’ll often get effects on Plugin Boutique or Plugin Alliance.
  • Side chain your kick and bass channel. These frequencies will likely overlap to some degree, which will leave your track sounding muddy, and reduce the impact, clarity, and volume of both sounds. Use sidechain compression with your bass and kick to allow both sounds to breathe and peacefully cohabit in your mix.
  • Less is more. Busy mixes, once compressed can sound horribly busy if not EQed properly. Play safe, use less. You might be surprised that on huge sound system, simple elements can sound much more powerful than a giant wall of noise.

These next 3 important points will always make a tremendous difference in the quality of your mix.

• Do not apply compression or limiting on the master (bus). Please leave the compression to me. This might sound like a good idea but your track will likely suffer for it. Mastering is my job, and I need your track to come to me as transparent as possible. If you add compression on the master channel, you’ll likely create distortions and the end result won’t be nearly as tight.
• Give me -6dBfs of headroom. This is super important. Ideally, you should aim to have each channel at -6dB, not just turn the master channel down to -6. This reduction in volume per channel creates the right amount of space for me work with and is essential in getting your track to sound full, and deep.
• 24 or 32bits / 44khZ. This is the requirement for the best results.
• Careful with hiss. Hissing is a background noise that can happen with analog gear or some fun plugins. Once compressed, it might be loud and difficult to mix in, so be careful of the level you use.

In general, the best mixes I get are the once where everything is balanced in terms of frequencies. Here’s a easy way to get that happen:

  • Lower down the volume of your monitoring. You can’t achieve good mixing at high volume. You’ll see right away what’s too loud if you use it that way.
  •  Lower the volume of each channels if they’re too close to 0dB. One bad habit I often see is people pushing all their channels to 0dB. Not only this take off the dynamic range, but it also gets hard to see what’s at the right level. The loudest channel in your mix should be at -6dB, the others below. Why? Because it gives you room (6dB exactly!) to push louder to what requires attention.
  • Find the busiest moment in your track and listen to it looping. Now, use one channel at a time to lower your channels completely and mix each sound up until you hear it properly. The mix out/mix in technique is a good way to pinpoint if something was too loud in the mix. Sometimes, a sound doesn’t need to be that loud and because we overheard the track, we feel everything should be loud.
  • Group channels or use busses. Group your four main frequencies: low, mids, hi-mids, highs. You can then play with volumes of each zones and adjust them so they’re balanced. You may use again the mix in/mix out technique and EQ for subtle details.


I want to hear your feedback on anything talked about in this post. As always let me know if you have any suggestions or tips you’ve come across in prepping your tracks for great mixes. Share this post or leave a comment below and tell me what projects you’re working on right now.


 SEE ALSO : Dynamic Sound Layering and Design 

Conversations with Clients: Kike Mayor

In Conversations with Clients, we bring you an honest and unfiltered look at Pheek’s services, straight from the mouths of those who know — and want you to know too! For this third piece in our series, I spoke with Kike Mayor, a Peruvian techno producer based in New York. 

◊      ◊      ◊

Why don’t you tell me a bit about yourself and your experience as a producer?

Well I started DJing back in the year 2000. I started collecting my first records at the end of the 90s, it was during my last years in high school. And then right after, I started playing records, and playing local parties in my hometown in Peru. Shortly after that I found myself playing at these big parties, and I was the warm-up DJ for every single act that came out of the country. Then I started making music around the year 2005, and from then I just kept doing it and made a lifestyle out of it.

You’ve been producing for a long time now then, just over 10 years.

Yes, 10 to 12 years. My first record came out in 2007, so 10 years in the market anyway.

And throughout this time, have you mostly mixed your own music? What’s your experience with sound engineering in particular?

It’s not much. I’ve pretty much been doing my own mixdowns based on my ear training, and it took me a while to realize how important [the mixdown] is. Last year I found Pheek, and he explained to me how a mixdown can really make a difference on the final product. It’s just amazing. And it’s not that he… like, he does nothing to a track that is already produced, he just, how to say it… he puts every single part of a track in its own space. Do you know what I mean? And from that, the tracks sound clean. And like, I never had any complaints about it [before], but I just feel that he improves the final product. Pheek is an amazing sound engineer. He’s my sound engineer!

Until now then, you’ve basically just been doing your best on your own?

Yeah, I was trying to do my best, but I think that having sound engineer knowledge is very important, you know? And I don’t have that. I was always making music and loving my tracks. I don’t think there was ever a problem. But I also think it’s a matter of my own practice as an artist, as a producer, that I always want my stuff to sound better and better and better.

So what inspired you to seek his help, did you just discover his services through his Facebook page?

So I got signed to a vinyl release with a label from Detroit.

Detroit Vinyl Room?

Yes, Detroit Vinyl Room. The owner got in touch with me and said that Pheek was going to take care of the mastering and mixdown.

Isaac Prieto you mean [another client of Pheek’s]?

Yeah, Isaac, yeah [haha]. And so it was really good for me, because – I’m going to be honest – I was trying to get in touch with Pheek before that. I started seeing him offering all these services, but I was always wondering, I mean, would that be alright, would that be good? I didn’t know. Because there’s also the fact that then you have to spend money, you know what I mean? When it comes to spending money on your music, it always has to be a really well thought-out decision. And then Isaac offered to do this for me, and I was like okay, I want to try it for free for the first time, it doesn’t hurt.

Then he introduced us and I sent the project to Pheek, and I loved the final result. I have the test pressing of the record here. It sounds amazing. So from then on, we started talking and talking and talking, and I’m really happy that we started working together, and now we’re friends.

You sound very satisfied with having spent the money! So what was the difference exactly?

The difference was that everything sounded in its place. Like when I see the spectrum of the track, I feel that the spectrum has layers, you know? There are some sounds that go in the back, and some sounds that come in the front, and in the middle. So the tracks stop sounding flat. I don’t know if that’s something for advanced ears, but I got to a point in my life when I realized that that’s what I want. I really found that with Pheek, and I’m very very happy about it. I love making music so much, and I love my music so much, and I want to spend the money to do that. It’s a great service.

Just to hear how my track sounds after Pheek does the mixdown is inspiration for me. I love how every time I send him projects now, he takes less time every time. And that means to me that the previous mixdown I made is improving. It’s just some specific things that maybe a regular ear wouldn’t feel, but I feel it, and sometimes it bothers me.

Would you say then that having Pheek do your mixdowns is helping you develop your own ear and skills at mixing too?

Exactly. 100 percent. I think that Pheek's mixdown services changed how techno producer Kike Mayor views musicas an artist you have to have the inspiration of working with somebody that is a big name – and as I told Pheek, I’ve been following his music way, way before I knew him. Something that I was always highlighting was that thing I told you about with the layers in the music — I was like, how does this guy make his music sound like this?

So when you get the mixdown back, is the track finished, or do you work on it more?

I listen to it, and I pretty much just copy/paste the link and send it to the label. I trust it 100 percent. It sounds awesome. There’s no difference when I mix my tracks with tracks from other artists, with the volume or anything – and I definitely mix my music with music that is awesome, amaaazing – and when I’m playing live, I feel no difference, which is great. That makes me really happy.

How beneficial was it to have a second set of ears on your music? Because usually, when you mix your own music, you’re listening to your own track a million times, right?

Oh, well, I would say there’s a difference with having someone else, and then having Pheek, you know? Just the fact that I respected him so much from before. I mean him being the one now that listens to my music… It’s great, man.

Have you taken anything from the experience that has impacted your production in a more lasting way?

Umm… well basically, the music that I’m making now… I mean I just listen to it and I really love it. I find myself very, very focused right now on producing music that will be, like, timeless.

So it’s really inspired more confidence in your own abilities.

Yeah, exactly, yeah, 100 percent. Because, I mean, it’s been 10 years that I’ve been producing. I started producing progressive house, and then I produced tribal house, and then I produced tech house, and then I produced deep house. And now it’s all about the evolution. I feel like it’s different for every artist, but for me it really took me a while to get to the point where I am now.

Do you know why it took you so long to find someone to do your mixdowns?

Well, I think it depended on my environment, you know? When I was in South America, everything was different. Music was different, the crowds were different, my needs as an artist were way different. Since I moved to New York everything changed, and I started trying to develop a new sound like 3 years ago, in 2013. I’ve been constantly trying to improve and improve since then, and I have changed too. I’m producing music now that is way different from the music I was producing back in 2013, like quality-wise. And now with Pheek, everything is going great.

I’m assuming you have a lot of other friends who produce music too?

Yeah, yeah.

And do they usually do their own mixing too?

Yeah, I guess it’s normal for people that… maybe they don’t want to, maybe they don’t trust. They might think that a sound engineer that does a mixdown for them, if it’s not in person, in the studio, that maybe they would change the song, that they’d regret it. For me it was really easy to trust, because it’s Pheek. 100 percent. I’m planning a trip in February to Montreal, so I want to get down to the studio.

And before Isaac had spoken to you about Pheek’s services, did you have some of these same fears?

Yeah, with my own music, you know… like, I would never give my music or a project to anybody. But I knew Pheek, I’d heard all of his music, and I knew who I was dealing with.

I am very, very happy with his services man.

That shines through!

Awesome [haha]. And also I like the fact that Pheek is helping me. He is always pushing me, and giving me advice.

So you get more than just his mixdown services you mean.

Yeah, I would say that he’s my friend. He really supports me a lot. A lot. Like he always tells me that he loves to work on my projects because they’re fun, and he loves the music I make, which means a lot to me. I’m always like, “Aw, dude, stop!”

– Check out Kike Mayor on Soundcloud.


A Day in the Life of a Music Producer

I’m a music producer, and I know many others. I’d call myself an audio producer more broadly, because I also run a label and do sound engineering. My main focus is on electronic music as you probably know already. I wish I could give you a simple outline of the daily routine of a music producer, but the truth is that there is no typical day.

First, inspiration isn’t something you can just summon on command. It has to come by itself. You can tell yourself you need to be in the studio at 9am to start working on a track, but sometimes you’ll get there and find that your brain just isn’t ready to make music. Some days aren’t for creative output. That’s why after 5 years of trying to make music every day, I burnt out (2007). I learned that it’s better to devote your time to other things on those creative down days, because the space between sessions is essential for creative rejuvenation.

There are also days when it works. But before I dive in to those, I need to clarify a few myths about music production:

Myth 1: You start a new song from the beginning and keep working on it until it’s done.

Myth 2: You only work on one song at a time.

Myth 3: Every song should be finished.

Myth 4:  You can work on music for hours. (You can, but you’ll be unproductive.)

You see, music production is a kind of dynamic chaos that evolves, regresses, progresses, and dies — or not — everyday. (I’ve written about these myths a lot before, especially herehere, and here)

So with all that being said, within the life cycle of a track, you’ll go through:

  • Ear workout. Listen to music of any genre and let ideas come. Your ears will be freshest in the morning, but they also need to be calibrated to how the music should sound. This can last from 1 to 3 hours.
  • Research and development. Which DAW to use? What gear to explore? Which synth will fit? Do I have what’s needed, or do I need to try out a demo or buy something new? This is basically the moment where you try to slot your initial idea into the production routine. This phase is ongoing, but I rarely spend more than 1h. There will be a number of sites I visit daily, with my favourites being:
    • Resident Advisor. To get industry news in general and listen to music. I also like to check out the music reviews to get an idea of what’s trending.
    • Attack Magazine. Because it has nice technical articles.
    • KVRAudio. To get the latest news about plugins.
    • My Soundcloud feed. Because I want to see what the people I follow have been into lately.
  • Sound design/recording. This is where you collect all the sounds needed to start your track. It’s very time-consuming.
  • Production. This will take the largest chunk of your time. That’s unavoidable, but you’ll want to space the production sessions out by a day. If you spend too much time working on a track at once, your judgment will blur and you’ll lose sight of the idea you began with. If you come back to your track with fresh ears, you’ll be able to stay focused on the core idea and to assess your work with a clearer perspective.
  • Mixing. This phase is time-consuming too, and you might want to ask another sound engineer to do this for you as a second pair of ears can really help.

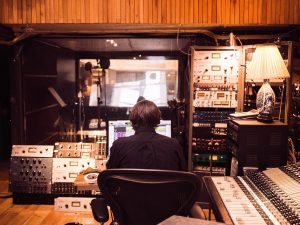
So overall, a full day’s work at the studio involves only about 2-3 hours of actual music production. A lot of my time will be spent on tweaking, searching, checking references, checking emails, and taking many breaks that might appear as procrastination.

Why such little time? Mostly because I want to be at the top of my game, and I know that my peak attention is condensed into short spurts. Of course, sometimes I will spend a good 5 hours on a track because there’s a lot of cleaning up and tweaking to do, but it’s mostly micro-editing.

In my case, I arrive at the studio at 9am and leave around 5pm. Lunch is usually 1–2 hours.

I love to have the people I coach over at the studio, and sometimes friends will visit too. The time I spend with others in studio is extremely valuable, because I’m nourished by the ideas we exchange and the music they share.

Being able to do this full time is a privilege and I embrace every single day with full dedication. It is possible to do it but it demands a lot of discipline too.

SEE ALSO : Useful Music Producer Skills For All

2016: Studio Trends and My Clients

It’s been a crazy first year for the audio services I founded in November 2015. Things really got started with the website in January, and it fired up right away. I thought this would be a good time to look back at 2016, and to share some of the year’s highlights: of the plugins I used the most, the projects I worked on, and the producers I had the great pleasure to work with.

Where to start?

Let’s begin with some numbers. With online sales alone, I completed over 300 projects by early December, though the number for all sales combined is closer to 350 projects for the entire year. This includes sound design, mixing, mastering, and training services, both online and in person. This was indeed my biggest year since 2004.

Add to that my online coaching service that reached 450 people in 6 months. It’s been a bit overwhelming to be sure, but being able to help so many people fuels me as well.

Overall, the breakdown of services offered by my studio in 2016 looks like this:

Mastering: 43%

Mixdown: 24%

Arrangements: 15%

Coaching: 15%

Other: 3%

And in terms of musical styles, it broke down like this:

Tech house/house: 24%

Techno: 33%

Deep/dub techno: 14%

Hard techno: 4%

Experimental/Ambient/Chill out/IDM: 15%

Pop: 3%

Hip hop: 7%

The most frequent requests were:

  • Rounded lows.
  • Warm bass.
  • Punchy.

I’m really happy that people have generally stopped asking for the music to be “LOUD,” as this was a common request years back. In 10 years, I’ve seen that people’s tastes have slowly evolved, and that they’re more and more into the warmer sound that analog provides.

Plugins

In terms of plugins, these are some of the ones I used the most this year. In general, I try to create a different chain of compressors and EQ depending on the label or client, to create a unique aesthetic. One thing a lot of people don’t realize is that the combination of various effects adds grain to the sound. It’s like combining ingredients when you cook: you can try 2 different brands of a same spice, and the results will differ subtly.

Universal Audio Ampex ATR-102 Mastering Tape Recorder Plug-In

This is certainly a very creative tool, as well as a nice mixing plugin. It adds saturation and will beef up flimsy parts. Anything that goes through it seems to come out in perfect shape.


Sonalksys CQ1

This is certainly the best multiband tool out there — and trust me, I’ve tried them all. You will need multiband for mixing, but you can get very interesting results if you use drastic measures for sound design. This one never fails.


Harrison 32C

This is definitely an underestimated player in the EQ world, as I rarely hear people talk about it. This year was when I started using it almost every day though. It has this little thing that makes lows so warm.


Bx_Opto

A simple compressor, but it works like a charm. Brainworx never fails to create quality products that use simple and intuitive controls. A huge help on percussions.


Space Strip

A fun little tool for sound design, it creates really cool spaces, as the name suggests. Throw it on the master and watch it craft lovely atmospheres out of so little.


Reason 9

The DAW of the year without a doubt. If you’re one of those people that has been overlooking Reason, run now to get yourself the trial and be ready to have your jaw drop in awe. Rewired with Ableton, it is the most powerful tool to get over any creative block. It also does crazy (I mean it) sound design.


Adaptiverb

This reverb didn’t get the attention it deserved. If you’re not familiar with Zynaptiq, they really make state-of-the-art products. These guys are machines. Adaptiverb is hard to explain, so I’ll leave the descriptions to them, but suffice to say that it is not your typical reverb. It’s certainly a nice add-on to your plugin collection, as it can form creamy textures out of simple pads.

People


One of the things that really got me motivated this year was having clients who were interested in pursuing a long-term association with me. They’d come to me for all of their mixing needs so that they could focus their energies on recording new ideas. Some wanted their studio sessions arranged around songs. It’s great to have multiple contracts with someone, because you start by working with a reference artist, until eventually that shifts and the producer starts referencing themself.

It would be impossible to list all the clients I had in 2016 whose work I loved, but here are a few of the highlights that come to mind:

Pachyderme

From Argentina, Franco worked with my buddies at 31337 Records, producing a superb palette of ambient sounds, intricately organized into a beautiful microcosm.


Kike Mayor

Kike has been one of my most loyal clients this year, as we worked together to define his sound as something “fun and sexy,” as we both liked to call it. Kike’s style is hypnotic and catchy, and he always comes to me with projects I love.


Debbie Doe

Debbie had a breakthrough this year, as she managed to pull her very first project together and nail down a growing number of important gigs. This Lebanese-Montreal artist is not afraid of reaching into her Arabic influences to craft some exotic moods.


Ghini-B

Another very serious producer from Italy/France who booked me regularly to handle mixes and mastering for his music. He’s a nerd collector with a massive modular set-up, and he prefers focusing on designing quirky house instead of spending time on his computer.


Andrey Djackonda

From Moldova, Djackonda was a nice discovery for me this year. The guy makes really organic techno with dub influences. It’s been a headnodder for my mastering sessions. You know you have some groovy music when you start spending time shaping the track into these groove monsters.


Stereo_IMG

From Montreal, Stereo_IMG is a serious sound designer who builds weird devices to extract found sounds that are both beautiful and intriguing. Working with him in the studio turned some of his tunes into Audion-sounding gems.


Wiklow

A programmer and kind soul, Wiklow came to me for mentoring, and we spent the next 2 months discussing music philosophy and the mysteries of human behaviour. This fantastic trip of anything-but-music-related talks led him to create a beautiful EP that would make Jan Jelinek blush.


Ruslan

Ruslan runs a label in New York named Minim, and he has been one of the most supportive people for me this year. We worked together closely, talking almost daily, and it was wonderful to see him at MUTEK to dance to Barac’s set.


Dom Varela

A young producer from Laval who I’ve seen grow slowly, finally releasing his first track this year. It’s been a pleasure to coach him and work closely with him on his development.


Bmind

This was my most demanding mixdown this year, but man did it turn out well. Bmind is an artist I adore. His free-jazz perspective makes his music feel like a spiritual journey through an LSD trip. Nothing easy, but never flaky.


Mod303

Not to forget also 2 other clients who were super busy with me, Isaac and Luis.

These guys make albums in a matter of months, and each time, it’s spot on. Not only are they dedicated, but there’s a real depth to every song they make.

There are so many others I could mention, and I have to apologize if you’re disappointed that your name isn’t featured here. But the truth is that working with ALL of my clients has been amazing! 2016 has been an incredible year, and 2017 will be too, without a doubt.


Reverb Tips to Boost Your Creativity

This isn’t just another article explaining what reverb is and what it does. If you dig a bit, you’ll find all the technical facts and information you need out there already. So instead, I’ll focus here on the little tips and tricks I use daily that you can try right away. And I’ll invite you to reflect on what reverb can do for you and your music.

Why?

Because reverb’s primary role is to add depth to a song.

I’m talking in the technical sense, but also in the way its 3D-like effect can give your song a soul. No kiddin’. Have you ever watched a movie where one of the characters is lost in thought or reliving a moment? Very often, the voice will be drowned in reverb to evoke an internal feeling, something deep and subconscious.

There could be a correlation between the reverb effect and the womb, perhaps, where it emulates the way a fetus hears the world, as if under water. Whatever the reason, the sound of reverb in our culture pretty much always conveys something hidden or profound, and using it in your music can change things dramatically.

Pros. Adds mysticism, warmth, and smoothness to percussion and melodies. Reverb can round out transients and stretch the release of sounds, which can also add dimension and that wet feeling you hear sometimes in songs.

Cons. Some people prefer a dry aesthetic in their music, which can also work very well. If the music is played in a warehouse or other large venue, adding reverb could make it sound more imprecise or confusing, perhaps removing a certain punch. This is why reverb should be used with care if you’re interested in producing dance-friendly music.

There are different types of reverbs, and each one has different uses. Here are some explorative avenues for you to try. They’re suggestions to get you started, but you could end up taking them in a completely different direction. I always encourage people to test out a few things, and most especially, to try whatever is contraindicated or not advised. This is the best way to figure out for yourself why it’s not recommended, but you might also find that you can pull something out of it.

My favourite tips are:

  • Convolution exploration. Convolution plugins extract the reverb from a song so you can apply the resulting image to other sounds. In theory, a good image is a white noise spread in a room, so that its impulse can be analyzed. You don’t have to respect this though. You can basically drop any short or long sample to see how the plugin will analyze its impulse. You can extract a sound from an old pop song, movies, your iPhone, or anything else you can think of. You can even drop a pad with no reverb and see what it does. Sometimes it gives you weird results. Same if you use a percussive loop, since it has a rhythmic impulse.
  • Panning reverb. Using multiple send channels or busses, you can combine multiple reverbs to create your own personal desired space. Pan one to the right and another to the left. Adjust the pre-delay and decay, and maybe change one to a hall and the other to a plate. See what happens.
  • Reverb EQing. Abbey Road made this popular with their trademark sound, which added an EQ before a reverb. Generations later, reverb plugins now often come with their own integrated EQ. One tip to increase precision is to cut off anything coming in the reverb for percussion and pads as it tames any edgy or problematic frequencies.
  • Adding subtle automation. A reverb that constantly moves will feel alive. You can use automation on the decay and pre-delay. These two usually add a lot of space. They will give the weird impression of being in a room that’s shrinking or expanding, as if you’re moving around it with the walls getting closer and further away. Used well, it can be very psychedelic.
  • Astronaut in spaceMultiband reverb. If you know how to split your signal’s in-frequency ranges, you could use a deeper reverb for your mids and a longer one for the highs. That can also be done with send channels, again where one filters out highs and the other filters out mids. This one is particularly effective with percussions, and it can add a really nice shimmering effect to them.
  • Resampling reverbs for convolution. Send a clap in your reverb experiment and resample it. That sample can then be dropped in the convolution. This will usually reshape the sound, giving you more freedom than managing multiple reverb plugins at once (unless you have a good controller).
  • Gates and envelopes. These are a lot of fun on a reverb, as they can create weird reactions. Imagine a strong impulse that drops abruptly, or one that shapes in a off-rhythmic. They can add a nice texture to pads.
  • Infinite reverbs. There are a few reverbs that have this feature. If so, you can send any sound you like through them and it can become a pad or smooth synth. If you resample it yourself, it can be dropped into a sampler where you can play notes from it.
  • Reverb + Chorus = killer combo. Just try it, no questions.

As a gift, I made these two convolution images for you to use in your music. Should work very well in dub techno as well.

I hope this helps. Please share any ideas or tips you come up with!


SEE ALSO : Intuition for decisions in music production

Spending Long Hours in the Studio

Every now and then I’ll see people boasting in some online producers’ forum about how they spent 5 to 8 hours in the studio working on a song. The same thing sometimes goes for when I’m with fellow Ableton users, who will claim they have spent 3 days on a song. It’s a common perception that the longer you work on a song, the better it must be. Yet from my own experience and reflections, I believe it’s actually the opposite.

crazy in studioIf you’re unconvinced, consider this: how does the producer’s experience level impact on studio time? Might it differ depending on the music genre? Does it change if gear is involved? You see, the amount of time you spend in studio can depend on many factors, and these are just a few of them.

Just think of the long list of artists who wrote their hits in very little time, from “Hotel California” to tunes from Jamie Jones, Seth Troxler or Samim. The minimal movement in contemporary music is another important example of this. By “minimal” music, I’m not referring to minimal techno but to music by the likes of Philip Glass or Steve Reich. The common denominator among these many artists and genres is the understanding that songs are built around one core idea, which is then fully supported throughout. That central concept or component is what people will hum or sing to their friends. It’s what people remember.

So that’s the ideal. But here are where the problems start:

  • You’re not focused on the idea itself. It should speak for itself, you don’t need 4 different layers to do it.
  • You’re distracted by non-essential supportive elements. Because unless you’re a producer, no one really cares if your kick is analog or not.
  • Your ears are tired. Ears get tired after a while and it will become impossible to mix properly. Give them a rest.
  • Your brain is tired. If you’ve played your tune over and over again, you’ve almost certainly lost the plot. To regain a firm grip on your initial idea, you need to take a break and refresh your perspective.
  • You’re forgetting the track’s lifespan. If your track is short, the idea is played for only a moment, and that will be enough. It’s not worth weeks of your time.

spending too long working on a track can ruin even the best ideasThe crucial thing to remember is that the longer you expose yourself to the track you’re working on, the more you’ll lose your sense of what you’re making. You see, humans have evolved with an amazing skill called adaptability, which has helped our species to survive over hundreds of thousands of years, often in the face of impossible odds. This innate trait has an impact on us in the studio. For example, if you listen to something that you mildly like for a long time, you will eventually learn to either love or hate it — and then either want to alter it (to expand its longevity) or delete it completely (because you get fed up). Either way, even if your initial idea is awesome, being overexposed to it might completely ruin it.

So how to solve this?

There are many things you can do, but the main thing I recommend is to simply limit your time in studio. (Though of course, if you’re in the studio jamming away and having fun, it can still be cool to go for long hours.) Here are some other things I suggest:

  • Try my Non Linear Production Technique. To sum it up, don’t work on one project for a long time. Try to work on multiple at once — say 10 at a time — and then rotate between them, spending up to an hour max on each.
  • Swap computer for gear and vice versa. Move from one to another to get a flow.
  • Give yourself some moments of silence to relax your ears.
  • Learn to spot the distractions vs. the essential parts. Do you need to buy a new synth to finish a track? Probably not. Learn to ask yourself these questions: is there something I have already that would do the trick? Is this new idea that popped into my head worthwhile, or is it a distraction? Is there a utility to it, is am I getting carried away?

One of the most important things is to reserve a moment in your calendar for music production. Prioritize it, and learn to respect that moment and not move it. Some professional musicians dedicate one day a week to production and use a routine that is super important to the creative process.

SEE ALSO : When Do You Know A Track Is Finished?

Getting Lost in the Sea of Tracks

Searching for music these days has become a real skill. I was in a few music stores recently browsing for new tracks for an upcoming DJ gig, and I realized just how counter-intuitive the experience had become — not only because music stores are, in general, a huge mess, but also because the noise factor was so high that I just couldn’t find what I was looking for. By “noise factor,” I’m referring to the ratio of songs I found that were irrelevant to my search.

sea of tracks, music production, crowd, vacationsWe can attribute part of this to the accessibility of music softwares today, which helped democratize electronic music by bringing production within reach for so many people. Part of it can also be blamed on the fact that launching a label has become so simple that basically anyone with the resources can start one. It might seem ironic for a music production blog to point this out, but this is the reality. I’m pretty sure that if you’re reading this, you’re someone who is dedicated to your art and is looking to really make something happen.

But how do you find your way through this wall of noise?

Consumers have more difficulty than ever finding the music they like. Scroll back in time and you’ll understand that the invention of records was to answer a simple need: to be able to play something again. Once that need was met, a lot of the innovations were centred on making the music sound better. robot, missing hubRadio appeared later as a way of broadcasting over distances. Then, at the same time as music was becoming easier to make, the internet came along to dramatically expand its accessibility and reach, leading to an overall decrease in the quality of what’s available. The sea of music out there today is the result of this over-proliferation caused by these technological advances all converging at the same time. For the consumer faced with thousands of new songs daily, it can be very disorienting. One’s community of peers therefore become an important reference.

Artists have difficulty finding appropriate labels to release their music. If you’ve overcome the technical challenges and are now hunting for a label, you might feel overwhelmed. Like I explained in a previous post, you’ll have to spend a considerable amount of time in music shops and online just trying to pinpoint which labels are a good fit for your sound. But with so little time and so many choices, finding what you’re looking for can be a huge challenge.

What seems to be missing is a hub between both parties.

So what’s the solution?

headphones, music, selectiveStop searching elsewhere, rely on your network. I have a few people who I follow attentively on Spotify or Soundcloud. These guys seem to either have a great radar or amazing connections, because they’re always finding gems. I’ve been told that a great way to keep up to date is to follow as many artists as you can, and then cut out those who are idle too long or change styles abruptly. I also ask my friends who are DJs or label owners to share their recent discoveries with me every now and then, and I do the same. Very efficient.

Find influencers. Influencers are individuals who seem to be at the intersection of multiple networks, who are followed by many people and will make waves with their track picks in charts or podcasts. Each genre has its own influencers, of course. Perhaps check a site like Resident Advisor to get an idea of who they think is trending currently.

SEE ALSO : The New Face Of Albums 

Buses vs Groups in Ableton Live

The word “bus” may sound foreign to many beginner- and intermediate-level music producers who were not raised during the good old days of analog mixing on consoles. But rest assured, readers: the term “bus,” in this case, does not refer to a 33,000-pound vehicle, but to an audio channel that allows a multitude of audio signals to pass through it.

Buses are used to apply general processing to the mixed signal, so as to achieve a more cohesive effect over a particular range of instruments. This may sound daunting, but allow me to provide an example to clarify. If you have several drum channels (kick, snare, hats, toms, etc.) playing in the DAW that you are using, it would be wise to send and route them to a drum bus, onto which you could then apply some warmth or glue with mix bus compression.

There are several DAWs, including Bitwig and Ableton Live, that allow you to “group” tracks together. Other DAWs prefer to emulate traditional mixing consoles by routing the desired channels through a bus. Note that neither method is better than the other: they are exactly the same. Nevertheless, Ableton aficionados may want to begin using buses more often, given that their use simply opens up more possibilities in terms of mixing the music created.

How so? There are certain techniques that just aren’t available to you when you’re “grouping tracks,” such as sending a parallel compression return track to a group, or applying effects to two groups at once by grouping them together (groupception). But by using buses, you’ll be able to route any audio signal to any channel you wish.

So with all this being said, here are some pointers for creating your first buses.


Basic I/O Routing


  1. Open the Audio Routing section by clicking on the I/O button right below the master fader in the lower right corner (CTRL+I).
  2. Create an audio track (CTRL+T) for your bus. In my case (see screenshot below), I called it “Drum Bus,” because I am sending all of my drum tracks through it.
  3. Depending on how you organize your drums (I’m using a MIDI drum rack followed by several loop-based elements, like percussion, rides, etc.). Route them to the drum bus by:
    1. Selecting/highlighting all of your tracks.
    2. In the Audio To section, select “Drum Bus.”
  4. Set your initial channel as Drum Bus and set Monitor to
  5. You should now hear all of your tracks going through the drum bus.
    1. Try muting some of them to hear the difference.
    2. Apply a compressor to the drum bus to glue things together.
  6. Note that you can also route return tracks through your drum bus. I’m applying New York Style Parallel Compression by sending my drum channels through a channel with heavy compression, then sending its output through my drum bus to give it more power.


Buses vs groups in Ableton: my drum bus, which I send all of my drum tracks/channels through
If you have groups of elements that share similar sonic features and would like to EQ or compress them all together, then you can create a bus and send them through it:

Create a bus in Ableton to EQ or compress a group of elements all together

When I’m mixing, I’ll even go as far as creating individual buses for every group of tracks towards the end. This helps me get the levels right and apply broader strokes for every category of sound (bass, drums, etc.)

When I'm mixing, I'll even create individual buses for every group of tracks


To conclude, I’d just like to emphasize that there isUse groups in Ableton to organize your channels when you're writing music, composing, or doing sound design absolutely nothing wrong with using groups when mixing. It’s simply that they should be used more often to organize your channels while you’re writing music, composing, doing sound design, etc. to work faster and more efficiently.

Remember, you can always group channels together by pressing CTRL+G or CMD+G on Mac! The audio channel will be automatically routed through the group fader and will function exactly the same way as a bus does.


 SEE ALSO :  Reverb Tips to Boost Your Creativity


Learn Mixing At MUTEK’s Panel Workshop

Learn more about the workshop here!

I’ve been asked by MUTEK to present a workshop on how to prepare tracks for mastering. This means, in technical terms, how to get the most out of your mixdown session. For many people, the whole music production process seems like a crazy, disorganized back-and-forth of constant tweaking, with the help of a lot of coffee. But if you look at the most common modus operandi, the stages actually go like this:

  1. Sound design/recording. This is where you either create new sounds or select the existing ones that you’ll be using in your next song.
  2. Production. Once you have all the sounds, you try to decide your hook. This stage involves deciding the structure and working on the arrangements.
  3. Mixing. Once your song is canned, you mix the component parts so you get the best sound possible.
  4. Pre-mastering. Shining and polishing. Adjusting so it sounds best, everywhere.
  5. Mastering. Preparing the master copy for duplication.

Get tips for making a great mixdown at Pheek's MUTEK workshopApplying a methodology to your music production can provide many benefits. Many artists embrace the chaos of going back and forth between the stages, or working without a plan. This is fine if you think it’s the best way for you to remain creative. But if you want the best out of your sound quality, it might be a good idea to adopt a more ordered approach.

Why?

One of the most important reasons is that if you juggle between these stages, you will lose focus. The mixdown will be done best if you have everything set up first. If you have to keep changing elements around as you go, you’ll be forced to reconsider EQ and volume levels also to make sure that everything fits. Think of it as building with Lego blocks: if you move one brick in the middle of a wall that’s already built, you’ll need to readjust a lot of things around it to compensate.

So while there’s no hard rule on the order of the stages, and one can hop between them to fix certain problems, there is another major issue to consider. If you spent countless hours on arrangements, your ears might be bored to death when it’s time to mix it, and you’ll lose what really matters. This is why mixing is increasingly seen as a stage you might want to leave to someone else — not because you can’t do it, but because you want a fresh perspective.

If you decide to do it yourself though, you want your song’s idea to be sewn up so that only the sound needs tweaking. And ideally, once you have everything set, you might want to take a few days off and then attack the mixing.

For the MUTEK panel, I’ll be sharing some great tips on:

  • How to approach production generally.
  • How to work with a reference.
  • How to do great mixdowns.

I will be using some of the participants’ projects as an example.

You can register here.


Conversations with Clients: Isaac Prieto

Isaac Prieto is a Detroit-based DJ and producer and the co-founder of vinyl label Detroit Vinyl Room. He was also a client of Pheek’s, who helped Isaac with song finalizationmixdown and mastering. I spoke with Isaac to gain some insights into his journey as a DJ and producer and his experience working with Pheek.

Note: this interview has been edited for length and readability.

Shawn: To start off, why don’t you tell me a little bit about your relationship with electronic music, how and when you got into it.

Isaac: Well it was basically when I moved to Detroit, with the first time I went to the Movement Festival, in 2012. I remember the experience, and not understanding why I had never heard this kind of music before, because I immediately fell in love with it. After the festival I sought out events in the city that played this type of music.

So you didn’t have any education or formal training in music, right? You just got into it as a fan?

Yeah, I was just a fan of the sound. I would always be using Shazam to find the tracks I liked, and I started listening to so many sets on Soundcloud and just building a music library like that. As my library grew, I got the urge to edit a lot of the tracks (slow them down/filter) to fit my style more, and that was my initial motivation. To make a set with my library, that I would enjoy.

So did you pretty much teach yourself how to DJ then?

Yeah, I started out with just one turntable and a Pioneer Traktor mixer. My friend told me to just watch a bunch of tutorials on YouTube, so that’s what I did. Something that helped me develop too was to try and find a set I really enjoyed [and] which I could find the tracks for, and try to replicate it.

Okay, so let’s talk a bit about your production work. In your Resident Advisor bio, it says you’ll be releasing music this summer on the Detroit Vinyl Room label that you co-founded. Can you tell me more about this project?

Yeah, so a few months ago a new venue opened up [in downtown Detroit], 1315 Broadway. I was asked by a friend of mine, Ali Unifier, to help put together the lineup for some events. To me the sets that always influenced me the most were vinyl-only sets, so we called it Detroit Vinyl Room. The parties went well, but after starting the podcast series I eventually decided to take a break from hosting events to focus on building up the label. I had some tracks I had been working on for some time, and that’s when I reached out to Pheek to help with the mixdown and mastering.

Isaac Prieto talks about co-founding Detroit Vinyl Room

So it was a series of parties and podcasts that then became a label, is that right?

Yeah, correct.

And was it easy to start up a label?

Oh god no, it’s a lot more work than I had anticipated to be honest, but I’m glad I’m doing it. For a while, I had been contemplating whether I wanted to build a package of tracks to send out to labels, but decided against that. I made my main goal in releasing music to make something I would personally enjoy to have, and in turn it made the production process a lot more enjoyable. I showed the tracks to a few of my friends, and they liked it and wanted to be involved in the release. So on this first release, I’ll be providing 2 original tracks with remixes from MGUN as well as Moreon & Baffa.

And you say you needed help with the mixdown and mastering. Tell me more about this. Had you tried to learn how to do it yourself?

Yeah, I had looked into how that process works, but it was beyond the scope of what I could dedicate time to at this point. It really is a job for a sound engineer.

And aside from questions of sound engineering, how did you find the transition from DJing to production? Did you face challenges at first, either technical or in terms of the creative process?

It was a little more frustrating because production took more time to get the hang of. I started off with just getting to know Ableton with a MIDI controller and making loops that I liked, and then moved gradually to aquiring more analog gear. But that took time and money. Before asking Pheek for help, it had been over a year of working on stuff on my own until finally I had 3 or 4 tracks that I was pretty happy with. With one in particular I felt like, “Okay, this track for sure I want on vinyl,” and with the others I felt I had really good ideas, but they just didn’t flow the way I wanted them to, you know? And so I went and asked him for help, and he made them sound a lot better and gave me ideas about how to change them up.

Yeah, he helped with song finalization too, no?

Yeah, so in his tutorials, he talks about these ideas and sub-ideas. And for one of these tracks, I had it down, but it was just the transition points between these ideas that I was having difficulties with. And so I sent him the project, and he changed it up a lot. He sent me a few versions and I would tell him, “Okay, more of this, less of that.” He sent me a few versions, and then afterwards he sent me the different parts of the finalized version that I liked the most. And from there I could easily tell, “Okay, these are the changes that I liked or didn’t like,” which allowed me to make the the final arrangements for the track into something different that fit my own style better. But I wouldn’t have been able to reach that last version had he not changed some other aspects first himself.

Detroit-based DJ and producer Isaac Prieto came to Pheek for help with song finalization, mixing and mastering

Right, so he sort of unblocked you, you could say?

Yeah, he took this block out. Like he would say, “Okay, that transition is really nice right there, but I want it to be more this way.” And now that the song is finished, it’s something that I felt was definitely, was organically, all my idea. He’s just been working with music for so long that these things come so easy to him. So the more we work together, the easier the process gets I guess.

So what brought you to Pheek originally though?

I had been a fan of his music, and so I just followed him on Facebook, and I saw that he posted stuff about production. I found that pretty helpful. I have an agent here in Detroit, my friend Maggie, from Auxetic, and I was telling her about the idea of the label and what I wanted to do, and how I saw what Pheek had been posting on Facebook. And she’s like, “Oh actually, he’s a good friend of mine, he’s a great person, you should totally get in contact with him.” So she made that connection. I mean I already had a bunch of his records, and I like the sound that he makes, so I thought he would be good as someone who can understand what I wanted to do with my sounds.

So it sounds like it’s been a very fruitful creative collaboration for you.

Yeah, yeah. I had chances where I could have put stuff out earlier, and some digital releases and stuff, but nothing really got me that excited about doing that. And it wasn’t until I thought, “Okay, now this is something I’d want to have as mine.” And even if it sells out or it doesn’t sell out or whatever, I’m just gonna print out a few copies on vinyl, and I think it’ll fall into the right hands.

And do you think that the collaboration has brought something to your own production more durably?

Yeah, definitely. I saw how he was able to change what I had, and it gives me new ideas as to how I can do that for future productions. He also posts a lot of good ideas [on his Facebook page and blog] that I wouldn’t have thought of, like “Do a loop a day.” Or, even just how he’s honest. Like when I first sent him the songs, one of them, it just wasn’t ready. And he said, “You can make it sound better.” So before I sent them back, it was a few more weeks of changing it up, before I thought, “Okay, I’ve reached a point where I think this is the most I can do with this track, and I think, with your help, it can be better.”

Follow Isaac Prieto and Detroit Vinyl Room on Soundcloud.

A Great Sound Engineer Will Give Your Song Its True Sound

In this blog post, I will explain how important it is, for the sake of your music as well as for the mastering process, to have a good mixdown. I also want to make the point that working with a trusted sound engineer who knows how to master can be a game-changer.

The Importance Of A Good Mixdown

No matter who your sound engineer is and how skilled he or she is or what equipment they use, there will never be a great-sounding master without a killer mixdown. A good audio engineer should understand your needs as well as your song. An engineer with experience can do that, but choosing the right one is important.

What is a great mixdown?

  • It has a perfect balance of sounds. None are battling to get heard.
  • Each part shines and feels right.
  • The stereo image gives your song a big impression.
  • The song breathes, it doesn’t sound harsh.

There are a few challenges you might face in completing your song.

Perhaps this is familiar?

  • The bass sounds muddy.
  • The main melody seems overshadowed by other sounds.
  • The song lacks overall punch.
  • Your track’s percussion sounds shy.

Sometimes, doing the mixdown yourself won’t give your project the treatment it deserves. If you spent countless hours creating it, you know that it has to sound right. Many producers, even experienced ones, know that a second pair of ears will do it justice. It’s no surprise that most of the best producers give their projects to a trusted mixing engineer.

There are some other challenges too:

  • Your studio is technically challenged (eg., lacks acoustic treatment, no sub, not EQed, etc).
  • You simply lack experience.
  • You’ve heard your song too many times and can’t make decisions.

Again, those are the kind of problems that many people have.

It’s important to choose a sound engineer who has a great understanding of the musical genre you’re producing. This will ensure your sound is in tune with what’s on the market.

Why me?

I’ve been doing mixdowns for myself and others since 2002. The number of songs I’ve done is hard to calculate, but the one thing that matters is that my clients are always satisfied. With almost 20 albums released under my Pheek moniker, I understand the challenges and know when compression should be done, and how.

My main task is to understand what you want to do so I can help you define your own personal sound.

In future articles, I will explain some of my tricks on how to get your music sounding proper.

But if you need an audio engineer like me, don’t hesitate to book me now!