How to maintain consistency in the quality of your productions

The most consistent musicians have reached a comfortable flow and they finish tracks that they’re satisfied with fairly quickly. But how do they ensure that each of their tracks are maintaining the same level of quality as their first well-received works, as they complete more and more of them?

Making a lot of songs/tracks and actually finishing them is, to me, one of the most essential purposes of making music. Stalling on a particular idea or song builds up doubts, and eventually you’ll grow to hate it. If you finish up a track quickly—as opposed to more slowly—you capture an idea you liked at a precise moment in time and make the most out of it, then move on to the next idea.

FACT: you will always learn something new when you finish a song that you can apply to the next one.

The faster you become at completing tracks, the more you become articulate in your self-expression; if you dig a really good idea, you’ll know what to do pretty quickly to make the best out of it.

Many well-known and consistent artists make multiple songs (yes, songs!) in one day. Marc Houle, Ricardo Villalobos, and Prince to name a few, have expressed that they like to sit, jam, record, edit a bit, and then move on. Ricardo’s long songs are actually long sessions that haven’t been edited. “It’s more important to simply record something each time you hit the studio rather than make a perfect song“, I’ve heard him say.

How do you maintain consistency in your work when you’re creating a ton of tracks?

My personal mentality that I like to have is to not get too attached to the music I make, nor about its potential or future. With this mentality in mind, you can embrace imperfection, have more relaxed sessions, and have more fun. But yes, there are also some technical points you can keep in mind to avoid letting your work slowly degrade in terms of quality while trying to maintain a regular quantity of completing tracks:

  • Stay away from trends or gimmicks. Trends can be hard to spot when they’re first evolving, but usually there are signs. When many people use the same samples over and over, which can often define a style, you know that’s a road probably too often taken—in going there yourself, you might get lost in the sea of similar sounding songs. To me, production trends are about some samples, effects, and arrangements that become a norm. I’ll always remember a long time ago when I was into hard techno, I was at the record store listening to a pile of 30 records and every record had the exact same structure to the point where you could predict when the kick muted, the hats came in, and so on. Sounding like existing trends is not a good way to stand out as a memorable, original musician; timeless music is often “odd” when it’s first released, but something catchy about it makes it work.
  • Use scales. You don’t always have to be using an established scale when writing, but it will help your music age a bit better. Off-scale or highly dissonant music not only sounds a bit weird or off-putting to the average listener, but by working with established tonal scales people can reference your music decades later. When I think of high-quality music, the musicality in terms of scales is always top notch. If it’s purely experimental and still high-quality, it’s usually based on a concept that makes it relevant.
  • Cross validate with references. I can never stress this enough—your references, loaded in a playlist alongside your music, should feel right.
  • Have a friend as quality filter. A reliable friend is one that will tell you when things aren’t working. I personally like to have 5 people to send my music to in order to get reliable feedback. Sometimes I feel more excited sending them my music than submitting it to a label. You should have 5 responsive people that want to listen to your stuff; proper feedback is a great feeling when done right.
  • Keep your renderings/bounces at -6dB, 24bits. This is in case you want to release them in the future, but also because music with headroom is universally more well-received. Back when the trend was to have very loud mixes, your music was irrecoverable later on if you lost the original mix. Loudness has also aged terribly since this trend went out-of-style.
  • Use quality samples and quality tools. What makes a great mix is the use of great samples. Working with a harsh sample means you have to use more effort to make it sound better, but the end results could still bad, or even worse.
  • Simplicity ages best. Humans tend to remember simpler ideas. Complex intentions and complicated, draining music isn’t always the best in the long-run. I’m not saying “don’t do it” if you’re into it, but maybe to tone things down a bit if you’re interested in the longevity of your work. I’m in love with this quote by Da Vinci: “simplicity is the ultimate sophistication.”
  • Make sure your mixing is high-quality, and use quality effects. If you can make sure your song is properly mixed, it will certainly age much more gracefully. Otherwise, you might regret some decisions you made in your mix as it ages. Cheap effects and presets don’t age very well because others might also use them heavily. Further down the road, your originality might feel lacking as a result, and plus nothing ages worse than a gimmicky sounding effect (ex. think of cheesy effects used on audio in the 80s.)

The effects of your work habits on maintaining consistent quality in your work

There are things you can do to make sure all your tracks end up with a level of quality you are happy with and will continue to be happy with as they age. I believe that working on multiple tracks at once is a great way to maintain perspective on your quality levels. Personally, I also like to export half-completed tracks and listen to them later, or import them into the next track I’m working on to give myself better perspective(s). Sometimes, I encourage clients to bring in all the tracks they’ve made in the last few months so we can toggle between them easily and make comparisons—this task might reveal a lot to you regarding the patterns and trends you use the most.

Are Music Schools Worth The Investment?

Whether or not music schools are worth the money might spur a heated debate—schools worldwide might not like what I’m about to say, but I think that this topic needs to be addressed. What’s outlined in this post is based on my personal experience(s); I invite anyone who want to discuss this topic further, to contact me if necessary.

Music schools: an overview

Many people over the last few years have been asking me about my opinion regarding enrolling in music production schools. There are many production and engineering schools in the world, and a lot of them ask for a lot of money to attend. In Montreal, we have Musitechnic (where I have previously taught mastering and production) and Recording Arts. Most major cities around the world have at least one engineering school and if not, people can still study electro-acoustics at Universities. University takes at least 3 years to get a degree; most private schools will condense the material over 1 year. During that time, the physics of sound will be studied, mixing, music production in DAWs, recording, and sometimes mastering. While each of these subject usually take years to really master, the introduction to each can be very useful as you’ll learn the terms and logic of how these tasks work and what they are for.

If the teachers are good at explaining their topic(s) and have a solid background, there’s nothing quite like being in the presence of someone with a great deal of experience, not only for the valuable information they provide, but also, the interpersonal context. Having a good teacher will pay off if you ask questions and are curious. While I don’t teach at Musitechnic anymore, some of my past students are still in contact with me and ask me questions—I even hired some for internships. I’ve often been told by many students that they remembered more from hearing about their teacher’s experience(s) than the class content or material.

One issue with audio teachers I hear about a lot is that many times, teachers might be stuck in a specific era or on a precise genre, which might be difficult for a student to relate to; there might be a culture clash or a generation gap between themselves and the teacher.

For instance, if a school has teachers who are from the rock scene, many people who are interested in electronic music or hip hop will have a really hard time connecting with them. Similarly, sometimes the teachers who make electronic music can even be from a totally different sphere as well, and mentalities and approaches can clash.

The advantages of attending a school or program

There are, however, many beneficial outcomes from attending a music school:

  • you’ll get a solid foundation of the understanding of audio engineering, and get validation from experts.
  • you’ll end up getting a certificate that is recognized in the industry.
  • you’ll have access to resources, equipment and experienced teachers that you might not otherwise find.

The main issue I have with some music schools is how they sell “the dream”, in most cases. The reality of the music industry is really harsh. For instance, a school might tell students that when they graduate, they can open a studio or work for one. While after graduating you might have some skills and experience that you didn’t have before, nothing guarantees that people will come to you to have their music mixed. That said, getting your first client(s) will eventually bring in other clients and opportunities.

“What’s the best way to get a full time job in the music industry or to become an engineer?” I’m often asked, and I’m very careful about how I answer this question. I described my thoughts on finding full-time work in the music industry in a previous post, but I’ll share some points about this topic again here and how it relates to music schools:

  • Whatever anyone tells you or teaches you, even if you applied what they say to the finest level of detail, it’s likely that things still won’t work out the way you envision them. I know this sounds pessimistic, but the reality is that no path will provide the same results for anyone else in the music/audio world.
  • The industry is constantly changing and schools aren’t always following fast enough. If you want to make things work, you need to make sure that you can teach yourself new skills, and fast—being self-sufficient is critical to “make it” out there.
  • Doing things and learning alone is as difficult as going to school, but will be less expensive. The thing a school will provide is a foundation of knowledge that is—without question—valuable. For instance, the physics of sound won’t change in the future (unless one day we have some revolutionary finding that contradict the current model; this is not going to come in anytime soon).
  • Clients don’t always care where you’re from or what your background is, as long as they get results they like. Your reputation and portfolio might speak more for itself than saying you went to “School of X”. Where schools or your background can be a deal-breaker though, is if you apply to specific industries, such as video game companies, and maybe you already have some experience with the software they use—companies will see that as a bonus. But I know sound designers for some of those companies who’ve told me that your portfolio of work matters more. For instance, one friend told me that they really like when a candidate takes a video and then completely re-makes the audio and sound design for it; this is more important than even understanding specific software which can always be learned at a later time.
  • The most important thing is to make music, daily, and to record ideas, on a regular basis. Finishing songs that are quality (see my previous post about getting signed to labels) and having them exposed through releases with labels, by posting them on Youtube channels, self-releasing on Bandcamp, or filling up your profile on Soundcloud can all be critical to reaching potential clients. One of the main reasons I am able to work as an audio engineer and have my own clients is mostly due to the reputation as a musician I built a while ago. I often get emails of people who say they love my music and that was one of the main reasons they want their music to be worked by me specifically. Not many schools really teach the process of developing aesthetics (i.e. “your sound”) or the releasing process. While some do, both of those topics also change quickly, and you need to adapt. I’ve been feeling like every 6 months something changes significantly, but knowing some basics of how to release music certainly helps.

Would I tell someone not to attend a music school?

Certainly not. Some people do well in a school environment, and similarly, some people don’t do well at all on their own. So knowing where you fit most is certainly valuable in your own decision-making about schools. Perhaps a bit of both worlds would be beneficial.

Will a school get you a job in the audio world?

Absolutely not—this is a myth that I feel we need to address. It’s not okay to tell this to students or to market schools this way; it would be as absurd as saying that everyone who graduates from acting schools will find roles in movies and make a living from acting.

What are the alternatives to music schools?

If you don’t think music school is for you—because you don’t have the budget for it, or you’re concerned about the job market after, or even because you’re not someone who can handle class—there are still other options for you:

  • Take online classes. This is a no-brainer because there are a huge number of online classes, courses, and schools online, and you can even look for an international school. You can also work on classes during a time that fits into your schedule. This means you can invest some of your time off from work into it. Slate Digital has some nice online classes, as well as ADSR.
  • Become a YouTube fiend. YouTube has a lot of great content if you’re good at finding what you need. You can create a personal playlist of videos that address either a technique or a topic that is useful. There are also videos where you see people actually working, and they’re usually insightful.
  • Get a mentor. People like myself or others in the industry are usually happy to take students under their wing. While you can find most information online, one advantage of having a mentor is to speed up the search for precise information. How can you learn a precise technique for a problem if you don’t even know what it is? Well, someone with experience can teach you the vocabulary, teach you how to spot a specific sound, and teach you how to find information about it. “How do they make that sound?“, I sometimes hear, as some stuff feels magical to students until I explain that it’s a specific plugin. In my coaching group, we even have a pinned topic where we talk about certain sounds and how they’re made.

I hope this helps you make your own judgments about music schools!

SEE ALSO : On Going DAWless

Tips to add movement and life to your songs

One of the most popular topics in music production is with regards to making music feel “alive” by creating movement in music. While I already covered this topic in a past article, I’ll focus today on tools you can use and some techniques you can also apply to create movement.

First, let’s classify movement into categories:

  • Modulation (slow, fast)
  • Automation (micro, macro)
  • Chaos
  • Saturation

One of the thing that makes modular synths very popular is the possibility of controlling and modulating many parameters the way you want, but the other aspect that makes it exciting is the analog aspect. You’ve probably seen and heard multiple debates about the analog vs digital thing and perhaps, what’s funny is, many feel they know what this is about but yet, can’t really figure it out.

Take, for example, something we all know well: a clock that shows time.

An analog clock is one with needles that are moved by an internal mechanism, making them move smoothly in harmony while time goes by. There’s a very, very preciseness to it where you can see the tiny moment between seconds.

The digital or numeric clock jumps from second to second, minute to minute, with the numbers increasing: there are no smooth, slowly incrementing needle that moves between numbers; they just jump.

Sound is pretty much the same in a way. Once it’s digitized, the computer analyzes the information using sample and bit rates for precision. The flow isn’t the same, but you need a really precise system and ear to spot the difference. Some people do but it’s very rare. This is why, in theory, there’s a difference between digital files and vinyl records.

One eye opener for me was that when I was shopping for modulars at the local store, I was talking with the store’s specialist who was passionate about sound. “The one thing I don’t like about samples is, the sound is frozen and dead”, he said. With modular synths, because there’s often an analog component, the sound, on a microscopic level, is never the same twice.

This is why using samples and playing with digital tools on your DAW, needs a bit of magic to bring it all to life.

Modulation

By modulation, we’re referring to tools that move parameters for you, based on how you have configured them. The two main modulators you can use are:

  • LFOs: As in Low Frequency Oscillators. These will emit a frequency in a given shape (ex. sine, triangular, square, etc.), and a certain speed. They can be synced to your song’s tempo or not. LFOs are often included in synths but you can also find once instances in the Max for live patches.
  • Envelopes: Envelopes react to incoming signal and then will be shaped in how you want. Compressors, as we discussed recently, kinda work with an envelop principle.

There are multiple aspects of a sound you can modulate. While there are numerous tools out there to help you with that, it’s good to know that there are a few things you can do within your DAW. The main things you can modulate are:

  • Amplitude (gain, volume): Leaving the level of a sound to the same position for a whole track is very static. While there’s nothing wrong with that, it’s means that the sound is lacking dynamics.
  • Stereo position (panning): Sounds can move from left to right if you automate the panning or use a autopanner.
  • Distance (far, close): This is a great thing to automate. You can make sounds go further away by high passing, filtering to higher frequencies. Combined with the volume, it really push the sound away.
  • Depth (reverb): Adding reverb is a great way to add space and if you modulate, it makes things very alive.
  • Sound’s length (ADSR, gating): If you listen to drummers, they’ll hit their percussion so that the length constantly changes. This can be done by modulating a sampler’s ADSR envelope.
  • Filtering: A filter’s frequency and resonance changing position as the song changes offers a very ear pleasing effect.

Some effects that are modulating tools you already know are chorus, flanger, autopan, phaser, and reverb. They all play with the panning and also depth. Adding more than 2-3 instances in a song can cause issues so this is why it’s good to approach each channels individually.

My suggestion: Have one LFO and one envelope on every channel and map them to something: EQ, filter, panning, gain, etc.

Some amazing modulators that offer really good all in one options that you might really enjoy (as I do for quick fix on a boring stem):

QuatroMod

LFO Tool by XFER Records

ShaperBox by Cableguys – My go to to really bring sound to life.

Movement by Output  – This one is stellar and really can make things feel messy if pushed too far but the potential is bonkers. You instantly turn anything into a living texture that is never boring.

AUtomation

Automation is what you draw in your DAW that allows you to make a quick-moving or long-evolving effect. You might already know this but you’d be surprised to know that it is too often, under used. How can you know this though?

I have my own set of rules and here are some:

  • Each channel must at least have one long, evolving movement. I’m allergic to straight lines and will sometimes slightly shift points to have them have smallest slant. My go: amplitude, EQ or filters.
  • In a drop down list of each potential parameters, I want to have at least 3 things moving.
  • Each channels, must have at least 3 quick, unique, fast change.
  • Include at least 3-5 recorded live tweaks. I like to take a midi controller and map certain parameters and then play with the knobs, faders. I record the movements and then I can edit them wherever I want in the song. This human touch really makes something special.

While working with automation, one thing I love is to use Max for live patches that create variations, record them as automation and then edit them. It’s like having an assistant. There are great options to chose from but my favorites would be:

Chaos

By “chaos” I mean using random generators. They would fit under the umbrella of modulators but I like to put them in their own world. There are multiple uses of generators. You can take any LFO and switch them to a signal that is random to make sure there’s always a variable that changes. This is particularly useful with amplitude, filtering. It really adds life. You can also use the random module in the MIDI tools to add some life. Same with the use of humanizer on a midi channel. Both will make sure the notes are changing a little, all the time.

Saturation

If we think of the earlier example of how analog gear is constantly moving, using a saturator is a good way to bend perception. We previously discussed saturators in an earlier post but we didn’t talk of a super useful tool named Channel strip which often has an analog feel included. It remains transparent but it does something to the signal that is moving it away from a sterile digital feel.

My favorite channel strips would be:

The Virtual Mix rack by Slate Digital. Raw power.

McDSP Analog channel

Slam Pro


SEE ALSO : Getting feedback on your music

The EQ and compression combo (Pt. 3)

After going into details with regards to EQ and compression, in this post I’ll cover some practical tips on how they work well together. I’ll try to also clarify why many engineers will tell you that all you need is these two tools to accomplish most of the work in mixing and mastering.

Here are a couple terms and ideas that have to do with this topic:

  1. There are no rules for how to use EQs or compressors. You’ll read many different views online, and some people will affirm loud and clear that their point of view is right, but after 20 years of trial and error, I still feel that I’ve accomplished a lot of great things when I knew less than now. Relying on your ears is really important. Some of the most innovative trends involve people who have no idea what they’re doing else than following their gut feeling.
  2. Substractive correction. It involves only cutting the junk out.
  3. Coloring correctives. This usually means that you’ll boost frequencies. Sometimes, cutting might necessary.

To start with, I’d point out that in mastering or mixing, one of the most common chain would look like this:

[Corrective EQ]  –  [Compression]  –  [Color EQ]

There’s precise logic behind this. Basically, you want to take the rogue frequencies out first, compress and readjust the good ones with the compression, and finally adjust the tone or highlight details with a coloring EQ. My personal preference for better results would be that whenever I cut, I do it with a pretty narrow Q (resonance) on the EQ. A great starting point is to start with 2 or 3 and then adjust. Don’t hesitate to use visual reference of the FFT that is often included in the EQ’s display, especially if this technique is new to you. Then, I’d cut about 3dB at first, up to 5. You see how this changes your sound by bypassing the EQ and comparing.

When it then comes to compression, there are a few different things you could do here. For instance, if you go with an aggressive setup, then you’ll beef up what you have “open” by cutting away the bad frequencies. I’d suggest starting with a more exaggerated approach to see what will pop as annoying. It might not be possible to hear what’s wrong if you don’t push the sound to its limit.

Once you see and hear issues more clearly, you can cut again, then you roll the compression into parallel mode to have some of the incoming dry signal mixed with the compression.

If you haven’t explored the side-chain frequencies, this is an option where you can decide that your compressor won’t apply anything starting at the target (ex, anything under 100hz). With this, you might want to filter only a part of your song with the EQ and then compress to accentuate the part you want to put to front.

The last process in the chain is the color EQ. You can take any EQ you like but ideally, I’d go for either an analog emulation or a shelving EQ. Those will provide a nice enhancement to complement what the compressor has been doing. For coloring, you can explore. One way to approach it is to completely exaggerate one band to see how it sounds, and then roll down. This is not only very interesting for sound design, but also for mixing more subtly annoying details. It can help build body for a sound that feels week too.

Examples of where to start – EQ and Compression

A pad that that lacks body and roundness. In this case, it’s most likely that a resonance is poking through too loudly and that good frequencies are hidden behind it. You could start by checking if there is one peak on the spectrum and with your corrective EQ, with a not so wide Q (ex. 1.5 to 3), try to bring that peak down pretty severely with a cut of 5-6dB. Get the threshold of your compressor to meet the highest peak and then adjust the output to be the same as the input. With the shelving EQ, bring the mids up but 2-3dB.

A kick that lacks bottom. This might be related to the mids of the kick that are too loud. You could lower them by 4-5dB, then compress with a ratio of 8:1. The shelving EQ should then bring the lows under 100hz up by 4db. If that doesn’t do, cheat by using the corrective EQ to notch up a bell curve at 50hz.

Percussion that are harsh. This is usually because one frequency is resonating around 4 to 8khz. It’s hard to say but try to cut by 8dB and scan around to see if there’s at any point, something more comfortable. Bypass to double check and then adjust your cut so that you can make the resonance almost there. Compress with a fast attack to control the transient and glue them. The shelving EQ could be used to lift the highs.

EQ suggestion: The TDR SlickEQ GE will do a great job for correcting.

Compression: The new SphereComp is super lovely and affordable. I tested it in sound design and it does really nice gluing.

Shelving EQ: I tried the demo of EVE-AT1 and I think you’d like it just like I did. The price is incredibly good for what it offers!

SEE ALSO : Saturation Tips and Hacks

Tips for compression: The Multi-band compressor (Pt. 2)

Continuing with more compression tips, I’d like to discuss of my all time favorite tool for anything and everything: the multi-band compressor. For many, this beast is a bit of a difficult tool to tame, but I’d like to break it down for you so you can include it in any of your routine and needs. In order to continue, I hope you’ve first read the first post about compression, and also the two posts about how to use EQs.

Compression guidelines

Common Use-Cases for Compression

Controlling harshness. Using a compressor, you can set the attack to be fast and the release to also be pretty fast. This makes the whole action of the compressor fast, controlling any aggressive sounds and taming them. If the attack is too fast however, it can distort, so you need to juggle with the settings to find your sweet spot.

To add punch. This is the opposite of harshness. You’ll want the attack to be slow and the release to be fast. The compressor won’t jump on the transient immediately but will instead create some snappiness. The ratio should be around 5:1 or even higher to achieve this effect in most situations.

To add thickness. Using your compressor in parallel mode, you can set it to about 50% wet/dry, then compress with a medium attack and a medium-fast release. I’d make sure the ratio is as high as possible too. If your compressor doesn’t have a parallel option, then you can use the compressor in a AUX/Send bus.

To glue together a mix. Very similar to thickness and punch, you’ll want to add this to multiple channels and busses at once. Again, parallel compression, slow attack, high ratio. That should do it. Experiment with exaggerated effects and then tone it down.

To sum it up, a fast attack makes the compressor react quickly, which means it is there to control something. A slow attack is to enhance the beginning of the sound. The ratio is how much of that effect you want in action, and the release is for how long.

Multiband action

The multi-band compressor works exactly as the use-cases explained above, but with a multi-band compressor, we can set a range of frequencies to be affected. Therefore, you can set thickness in the mids, control the high-mids for harshness, and enhance the high’s transients with a single compressor, but with different settings for each section.

The multi-band compressor has an additional feature: the use of crossovers that set points for where each section starts and ends. A crossover is simply a frequency you set. For instance, Ableton’s 3-band multi band will have 2 of crossover frequencies. You set the lower crossover which will set where the low end ends in the mids (ex. 200hz) and the other crossover will be where the mids end and the highs start (ex. 6khz).

My perspective on multi-band compressors is that I use them like a shelving EQ where I control each section’s aesthetics in a different way. You can then shape the tone of a sound or mix, or extract minute details. Ideal for finishing touches, multi-band compression can also be used to bring forward parts of your sounds in the most effective way.

Now, here are some situations where the effects of multi-band compression can be useful:

  • Wimpy percussion: If your percussion needs presence, thickness and power, set your crossovers so you can control what’s happening between 200hz and 800, then up to 3khz. Beef up the first section with slow attack and high ratio and aim to add punch up there (refer to the notes above regarding how to do this).
  • Pale pad: Again, say a weak pad needs presence, beefiness between 250 and 600 hz. I’d also compress between 4 and 8khz to add some shimmering, which is like adding thickness. You could even lower your section to hit all the way down to 90hz to get some analog feel.
  • Crazy swirl: Sometimes transitional effects are great but can be not appropriate for your song. I like to control the highs over 7khz in a way were they don’t hit aggressively but will have the mids over 1khz enter smoothly. This is a way to control the harshness and presence; often very useful to create wobble, rubbery movement.
  • Dull mix: A dull mix usually needs brightness which can be created by stimulating the highs and mid highs. This can be a combination of adding thickness or stimulating the transients. I’d say try sharp sections around 4khz to 8, then another one until 11khz and even compress above that with a 3rd section to create what we call pixie dust.
  • Stellar reverb: A multi band with a reverb is pack of fun for me! I like to beef up the mids above 300hz and also create thickness between 2khz to 6. You can then control the levels to decide on the tone of the space you’re creating for your song.
  • Deep kick design: Compress a section under 50hz and then another until 120, plus a last one that goes all the way to 500hz. I can guarantee you that if you have the lower sub purring, then you can also add a bit of punch around the mids to have a super deep, but punchy kick.

When it comes to my favorite multi-band compressors, here are some of them:

Neutron 2 (Izotope)

General tool for mixing that makes pretty much the best all around assistant to deal with numerous problems. Transient shaper, exciters, gate, compressors and all of them are in multi-band mode. You can’t get better than that.

Drawmer 1973 (Softubes)

The Drawmer compressor is amazing for creating ambient so imagine if you can set it in multi band mode, then you get awe dropping moments.

Fabfilter Pro-MB (Fabfilter)

Elegant, precise and transparent would be the best way to describe this one. Really useful for the finishing touch of your mixdown.


SEE ALSO : The EQ and compression combo (Pt. 3)

Tips and recommendations for compression (Pt. 1)

After two important posts on EQs, it’s time to start discussing how to use compression, as these two work so well hand-in-hand, and I’ll offer my own recommendations on some of the best compression VST plugins. Your own selection of VSTs should always start with a few of these two categories:

For EQs:

  1. One Parametric EQ for surgical needs.
  2. One Shelving EQ for toning.
  3. One analog based EQ for coloring.

For compression, there are also several choices and it’s easy to get lost, so one of the things I find important to start with is to explain the different families of compressors (more suitable to relate them to as models).

FET

This type of compressor is one of the most popular out there. It’s known for its aggression and for its use of adding tons of punch to sounds, mixes, with a lot of attitude. The FET compressor, which means Field Effect Transistor, appeared later in the history of compressors, when they switched the tubes for to a model that helped make sounds warmer and richer; it became an instant favorite in studios. The 1176 is one compressor that became one of the most popular models in studios.

Use: Amazing punch on percussion and add life on textures, pads.

Recommended plugins:

FET Compressor (Softube)

FETpressor (PSP)

Black Limiting 76 (IkMultimedia)

Opto

This type is pretty much the opposite of the FET (although there are people who will argue about this). The Opto model is smooth and super warm. Not idea for percussion but I do use it in parallel (see techniques below), which can give beef to a kick, for instance. The way this model works is very interesting. It’s basically a lamp that reacts to the incoming sound and will light up depending of the incoming signal. I’m not the best at explaining this, but that pretty much sums it up,  and this makes the Opto compressor not the most aggressive, as it offers smoothness.

Use: Ideal for pads, synths, textures and I would recommend you experiment it with percussion, but in parallel mode.

Notable suggestions for VST:

Bx_Opto (Brainworx)

Opto compressor (IKMultimedia)

Renaissance Compressor by Waves also offers an Opto mode.

VariMu

VariMu is like the prince of compressors because it has finesse and elegance. Manley popularized the VariMu with their famous version of it. It is a cousin of the Opto in the way it works, and is also very smooth. Often used in mastering, it works like a charm to handle punch problems or to keep coherence in a mix that needs general glue to it. It’s not the best to create punch and this is why, but when used in pair with another compressor, it can really create beautiful results.

Use: On your mix or on a group. It will glue it all together in the most luscious way.

Suggestions of plugins:

The Manley Compressor from UAD

MJUC by Klanghelm

DynaMU by IKMultimedia

VCA

This type of compressor is also very popular just like the FET. I’d say that most generic compressors are often based on that model. Since it’s based on voltage control, this compressor is a surgical type of tool. It is really effective to produce snappiness to percussion but it can also be used to control harsh transients.

Use: Smack those kicks with it and control the transients of hats with another setting.

My favorites:

TDR Kotelnikov

U-He Presswerk

API 2500 (There are a few imitations from UAD and Waves, so check it out)

Techniques

You may have the best plugins but if you don’t know how to use them, you’ll miss the full potential of these amazing tools. I’d say that if you don’t, please know that a large number of producers out there, even experienced ones, struggle to fully understand them. So while you will find so many tutorials out there, I’d like to explain you my simple vision.

But first, let me explain what compression does. It takes the incoming sound and monitors the loudest peak and checks if it is louder than a certain point: the threshold. If that’s the case, it will push down the signal above the threshold, down. I like to picture it as when you sit in a bath, where the water rise as you sit in it. The way a compressor “pushes down” the audio will be controlled by the attack (how fast it reacts), release (for how long) and ratio (how much).

I’d like to compare a compressor to an oven and the incoming music as the dough. The compressor doesn’t work like, let’s say a reverb where if you put it on a sound, you’ll automatically hear what’s being altered. How compressor VSTs work are really, to me, like a oven. You need to bring in the sound, cook it, then push it out.

So, use these parameters when dealing with compression:

  1. Incoming signal. You’ll need to raise the volume of the incoming signal to make sure it meets or is above the threshold. If the signal is too low, it won’t be processed.
  2. Threshold. Lower it down if needed. You’ll see that most compressors have a “GR” for gain reduction meter. This will start to pump as the signal meets the threshold. If nothing happens, lower down the threshold and or boost the incoming signal.
  3. Attack/release. A fast attack will make the pumping start react quickly while a slow one will be less aggressive. You can then adjust the release to control for how long the pumping will last.
  4. Ratio. This is how much will be pushed down. For instance, a 2:1 ratio means that for 2dB over the threshold, it will be turned down by 1dB over the threshold. Eg. 8:1 is a more aggressive result.
  5. Make-up gain/Output. Your output signal will be turned down in the process so you can use the make-up gain to adjust the processed signal to match or be louder than the incoming signal.

So yeah, it sounds weird on paper, but compression is about lowering the volume to make things louder.

Regarding my analogy with the bread, you need to make sure it bakes (gets compressed) before pushing it out.

Now, the techniques you can use compression for:

  1. Limiting. This is the most known use of a compressor. It is a way of making sure the sound never goes above a certain level. Ideal on a master bus to avoid clipping. You can use it to a certain extent on busses to maximize the volume. But make sure it’s not too much as it can then distort in mastering.
  2. Side-chain, ducking. Popular in electronic music, this makes the compression work based on an incoming signal. I’ll get back to this in a future post.
  3. Parallel compression. To do this, you need to put the compression in an AUX/Send bus and then send whatever needs compression to it. This ensure the original signal is mixed with the compressed one, adding power, loudness, precision.
  4. Serial compression. To be used with care, but has very powerful results. This is about putting two (or more) compressors back to back. One can be in parallel (thanks to a wet/dry) and the second one, not. This makes sounds really powerful, punchy, fat. Ideal on sounds that are wimpy and pale.

That’s it for the basics of compression! I’ll discuss the art of sound design using compression and EQs next.


SEE ALSO : Tips for compression: The Multi-band compressor (Pt. 2)

The best EQ plugins and various EQ’ing tips (Pt. II)

In my previous post regarding the best EQ plugins, I covered some of my favorite EQs and some of their uses. After receiving many compliments about that post, I’ve decided to continue with a part two. In the following post, I’ll share a few tricks with you that you can easily do yourself when facing certain mixing situations, and I’ll also briefly outline compression.

Filters

In case you didn’t already know, EQs are filters; really complex mathematics which each developer has coded in more or less slightly different formulas. This explains why some EQs are really expensive: because of the time invested in perfecting the curves. Many people don’t realize it, but EQs do sound different from one another and you can tell once you have a high quality sound system.

“Most people don’t have a high quality system, so what’s the point…”, you say.

Well, if you use high quality tools, in the end, your regular sounds will be “upgraded” in quality too, which will eventually make a difference where ever you play them.

The number one tip for a better mix is to use filters; this alone can make dramatic improvements.

For instance, your kicks might sound muddy if you don’t remove the garbage frequencies that are below the fundamental note of it. If this sounds complicated, let me explain it in the most simple terms:

  1. Use your EQ and the first point on the left should be switched to filter, then low cut.
  2. The slope should be put to 24db/octave.
  3. Then roll it to 20hz to start with and then go up frequencies until you hear your kick losing power. If that happens, you’re now filtering too high and you have to roll back a bit.
  4. My general rule is to cut kicks at 20hz by default.

Now that tip was for kicks alone, but you should apply this idea to basically everything in your mix. However, besides the kick, I wouldn’t use a slope of 24db/octave on anything else unless there are big issues. It’s up to you to experiment but if you want to test something interesting, try 18 or 12 for cutting other sounds and you’ll see that this leaves less of a digital feel, giving your sounds clarity and warmth.

I’d also cut the highs where they’re not needed, but not too much either.

Percussion, melodies, and high pitched sounds such as hi-hats would benefit from a 6db/octave, high cut filter; this smooths things in a lovely way.

Some of my favorite filters for this kind of use are:

EVE-AT1 from Kuassa

SliceEQ by Kilohertz

PSP MasterQ2: Smooth!

Sharp cuts

Surgical, sharp and static cuts are very useful for a ringing resonance. Many people ask how to spot it these and how to know if it’s really something to cut or if the it’s something to do with the acoustic of the room. There’s no real way to know but to often cross validate with reference tracks.

So often, I get clients sending me a project in Ableton and I see really odd cuts. Is that bad?

Yes and no.

First off, if you use Ableton’s native EQ, switch it immediately to oversampling mode for better quality.

Second, cutting might change something in your environment but you’ll also permanently cut frequencies that might not be needed to change, which could also potentially induce phasing issues (i.e. during the entire length of the song).

*Note – do not use too many EQs in one chain because that will definitely cause phasing!

So, how do you spot one rogue frequency?

Sometimes I just use a spectrum meter to get hints if I can’t pinpoint where it is. Try to always use a spectrum meter on your master to have an overall indication of your mix. If you see some sounds that start to poke above 0dB, this *might* be a problem; not always, but it could. What you want to look for is one thin spike coming up out loud about +3-6dB. This might really be an issue.

My instinct would be to try to lower the volume of the sound itself if that’s possible. Sometimes it’s not and that’s when you use an EQ.

  1. Isolate the sound in the appropriate channel.
  2. Drop your EQ of choice (see below for suggestions).
  3. Pick an EQ point, set it to the frequency you spotted, then adjust the Q to 3-4. Cut 4dB to start with, but more if needed.
  4. On the EQ, there should be a output gain. If you have cut that frequency away, it might be great to just increase the gain by about the half of what you have cut away. Ideally I like to compress but we’ll get into that later.

TIP: Avoid sharp cuts in the low end. That can cause issues such as phasing, muddiness. If you really have to, make sure to use a mono-utility after.

I revealed some of my favorite EQ plugins in the first post in this series, but I’ll add some more:

Cambridge EQ by Universal Audio: Works amazing on synths and melodies.

AE600 by McDSP.

Voxengo CurveEQ: Solid on percussive content.

Valley cuts, boosts, and shelving

Many readings on the subject of EQ’ing only will recommend that if you need to boost, go moderate and try to have a very low Q to have an open curve. However, there are really no rules on what you should or shouldn’t do. Explore, fail, and be audacious, because sometimes great things come out of it.

My only red flag would be on those really complicated, several points EQ curves you can do in Fabfilter ProQ2. This sometimes induce weird resonances when you’ll bounce, which is no good for mastering unless you are OK with annoying people’s ears.

Also, think differently. If you’re going to use 3-5 points that are all boosting, then why not start by turning up the gain on your EQ’s output and cut down whatever you don’t want.

But if you boost, I like to have a Q below 1. It gives really interesting results!

  • For instance, try to boost 2-3db at 500hz to instantly give presence and body to a song.
  • Try it at 8khz to add a lush, bright presence to metallic percussion.
  • Boost at 1khz on your snare to make them pop out of your mix.

Experiment like this. At first it will appear subtle but with practice, great results will come.

My favorites of the moment:

Sie-Q by SoundToys for really doing beautiful shelving.

MEqualizer by MeldaProduction.


SEE ALSO :

Tips and recommendations for compression (Pt. 1)

Tips on how to pick your EQs and use them (Pt. I)

People often ask me about my opinions on what the best audio plugins are, and there are no doubts that investing in quality EQs and compressors is one of the most important things you can do for both sound design or mixing. You can do pretty amazing things just with EQ and compression, but of course you need to understand your tools to make the best of them. In this post I propose some exercises and tips, as well as covering the main tools I have gathered through the last years and my thoughts on the best EQ plugins.

Types of Equalizers

There are many types of EQs and I believe some are more important than others. It took me a while to understand how to fully use them all and how to select the right one for specific situations. This subject is actually so vast and complex, I could make a series of multiple posts and I wouldn’t get through it. I’ll try to avoid being too technical and will explain them in simple terms so anyone can understand.

The way I approach EQs are based on different actions:

  • Corrective. Sometimes a sound will have part of it that will feel aggressive and annoying. I will do corrective by spotting where where it looks like it’s an issue and then cut. Corrective cuts are usually not too narrow (Ex. Q of 3)
  • Surgical. A resonance in a sound makes your ears hurt and that will need a very narrow cut. (Q of 6-8+).
  • Tonal adjustments. An EQ can be used to make tonal changes such as deciding if you want your track more beefy or more light by either boosting lows or highs.
  • Coloring. Some EQs aren’t transparent and will have a musical touch to the changes it makes. This will add some personality.
  • Valley cuts. The opposite of surgical, where the Q will be make the curve really wide. It makes very subtle changes, somewhat tonal, a bit colored and sometimes a bit corrective. Try it at different points on a sound and see it change without being able to really know what’s happening.

TIP: The human ear will hear a noticeable difference if you cut 3-4dB minimum. If you cut 6dB, it will be quite obvious.

The main types of EQ plugin categories are:

  • Graphic/Fixed Frequencies. Influenced by older models and the first EQ, the frequencies you’d have access to are fixed and won’t be changed. In many of those models, the frequencies are based per octaves but certain companies will have their own way of deciding which ones are used.
  • Parametric. One EQ that is very popular is the Q2 by Fabfilter which allows you to drop a point anywhere and then be able to shape how narrow you want to cut or boost.
  • Shelving/Band. This is a part of the spectrum that will be affected. For example, on DJ mixers, the 3-4 EQ buttons are basically shelves of frequencies that are altered.
  • Dynamic. This one is advanced. You can “order” a point of your EQ to react depending of certain conditions. For example, if you have a recording of a drum, you can order the highs to lower down by 3-4dB if the cymbals hit too loud. Very practical!

TIP: If you love the sound of analog, you might want to dig in Universal Audio’s suite that does emulation of classic pieces of gear. The fidelity of replication is absolutely mind boggling!

Now let’s make some associations regarding which EQ does what:

  • Surgical and valley cuts are mostly done with parametric EQs. This type of EQ will allow you to precisely identify the rogue frequencies and then cut or boost, in the way you want.
  • Corrective EQ can also be done with parametric but with graphical ones too. Sometimes a correction needs precision but sometimes, it can just be a way to realign the curve of the sound which a graphical EQ can do easily.
  • Tonal adjustments. This is done with shelving and band EQ.
  • Coloring. This is basically fixed frequencies, but if you look for analog emulation or EQs that provide a type of saturation, then you’ll also get some coloring and personality.

My favorite EQ plugins

Here are my thoughts on the best EQ plugins  that are precious tools to have in your arsenal. I’ve also included low budget EQs alternatives that are similar.

1. Fabfilter ProQ2 (Surgical, Valley cuts, Corrective, Tonal)

This plugin seems to have found it’s way in many producer’s tool kit mostly because it can pretty much do it all. From complex curves, mastering touch-ups to shelving tones and copying the frequency of a sound to apply it to another… the ways you can use this beast are so numerous that you’ll have to watch a bunch of tutorials to get all the hidden things it can do.

Budget Alternative: TDR Nova GE by Tokyo Dawn

2. Electra by Kush Audio (Shelving EQ, analog replica)

Not so known by the masses but this EQ is an absolute wonder to have on hand. I use it in every single mixes I do and the results are always amazing. A bit of a learning curve to understand as the GUI is a bit weird but even if you’re not sure of what you’re doing, it shapes the sound in a way that makes it pop out and warms it too.

Budget Alternative: RetroQ by PSP

3. BX_Hybrid V2 by Brainworx (Corrective, shelving)

I don’t think there’s any plugin that can do what this can do in terms of results. Not as versatile as the ProQ2 but where this one stands out is for how buttery it cuts in the sound, smoothing things out. When I have people studying mixing with me, I would always require them to buy this one as the very first EQ to have and use.

Budget Alternative: Voxengo Prime EQ

4. Passive EQ by Native Instruments (Shelving, correction, color)

This emulation of the famous Manley Massive-Passive EQ is a bomb EQ. I love to place it on a bus of all my melodic content and then smoothly shape it into something that magically turns organic and warm. It requires a bit of exploration but when you get your hands around it, you’ll always want to use it. I find it quite powerful for sound design as a way to warm up the lows.

5. F6 Floating band dynamic EQ by Waves.

I’m not a big fan of Waves as well as their aggressive tactics for selling but this plugin is a really useful one to have. As described above, with a dynamic EQ, you can tame some frequencies that are randomly happening. The problem with a static EQ is, you’ll be cutting permanently a frequency so if what you’re trying to cut isn’t always there, you might cut something that doesn’t need adjustment. This is why you can have more control with a dynamic EQ. This one is also really easy to use if you’re familiar with the concept and the fact that you can use it in MS makes it really versatile. Not as easy and fancy looking as Fabfilter’s but it does more, in other ways. Wait for the price to fall but you might get it fro either 29$ to 49$ if you’re patient enough.

In the next post, I will go more in detail with my favorite plugins and will also explain certain ways, in details, for how to get the most of them.


SEE ALSO :

The best EQ plugins and various EQ’ing tips (Pt. II) 

My Music Production Methodology Pt. III: Depth and spatial shaping tips

This post about music production methods is an important one. In the group I work with on Facebook, I give feedback to people and I’d say that while for many, the part they strugg le with the most is to nail down a proper mixdown, and for the majority there are issues with the stereo field. I have a bunch of tricks that can help turn a 2D pattern into a 3D realm to get lost in. Let’s start by discussing a few things regarding making music 2D, and then how you can slowly shape it.

One thing that is essential for music to sound clear, loud, and powerful in a club is to have the majority of your sounds “in mono”, or in engineering terms, to have your mids solid. This is why many people will tell that doing a mono test on your mix to see if everything is heard is a good way to know. Why? Because if the sounds are moved randomly around, they might phase with others, which will end up cancelling out once in mono.

While this might sound like voodoo magic if you make music as a hobby, you can drop a tool into your DAW to make the signal mono so you can check. (hint: in Ableton Live, it is the Utility effect that will let you do that)

Ableton’s Utility tool

This is why you want your low end (under 100hz) to be in mono; to make sure there are no conflicts and that it will be sounding fat and strong. Again, in Ableton Live 10, you can activate the “Mono bass” option on the Utility tool.

Why I’m saying this is clear and simple: depth is a fun thing to have on your music but if you go too crazy with it, it might end up being a problem. So, first and foremost, when you program your patterns and music, try starting in mono. Make sure everything is heard and clear.

Once you have created the arrangements and are pretty much done but before you get to mixing, start spreading your sounds around to occupy the space in front of you. You don’t want to have everything in the middle, it will feel narrow and lifeless. There are multiple ways to get this done and it goes a bit beyond than simple panning which might be a bit boring. (Note: many mixes I get have everything in mono!)

Tips to give your mix more space

Mid/Side is a great way to use space in a mix, but is often misunderstood.

Here are a few tips to give you mix space and life, and if you google this topic, you’ll find multiple others too:

  • If the sound/sample is in mono: Try doubling it by duplicating the channel a few times, then pan and experiment. In pop, soul, R&B, the producers often do that and have up to 4 duplicates, spread around and or pitched to different tones to give sounds textures. You can use a VST Doubler to do the same but there’s something exciting about doing it manually. Keep in mind, a clap is actually 4 layers and so on for your percussion. Try to create something wild.
  • Panning around your sounds can do but it will feel bland if you don’t couple it with a quality reverb. Even at very low levels, a reverb will create space around the panned sound. This is why I group percussion into families (ex. all organic, all metals, all wood, etc) then have a reverb per family, not per sound.
  • Use stereo effects: These will be super useful to help things around and for instance an auto-pan will help give life and movement. These include: chorus, delay, phase, flanger and wideners (of course). These should be applied to a sound, not a family. Only one of these effects per song to avoid issues.
  • Quality reverbs: as described above, a quality reverb is a game changer. Stock plugins are never as good as a whole team that work on making something special. For instance, all the plugins from Valhalla are now recognized as some of the best in the industry and for a reason, they sound just as good as some hardware units. Tip Top who make modular synths has licensed their reverb for their z-Dsp 2. If you can, always go for convolution reverb for your music and use only one, in a AUX/Send. So if you really a 3D sounding song, keep in mind that a reverb will do 80% of the job. The rest is about lowering the volume of certain sounds to give the impression they’re further away. Also, filtering out the low can give that impression. Mixed with a quality reverb, you will have a lovely space.
  • MID/Side: This is one of the most misunderstood aspects of mixing because it’s hard to really understand it. Keep it simple, this term refers to how your space is shaped as what you have in front of you is the mid and the sides are located where are the speakers/monitors are. If you misuse the sides too much, it will make your music phase (you’ll hear it in the mono-check). But it’s really interesting to play with the Mid/Side (Aka MS) of your groups to open them, a bit.

Last tip: Low end should always be in mono and I usually make sure that some part of the melody is also, while it can partly be spread around. The main hihat and percussion should also be strong in the mid but then you can have support sound of the same family be spread around to give room.

 SEE ALSO :   The “sous-chef” experience 

The rule of thirds in arrangements and mixing

One of my favorite aspects of music making is to use proportional ratios regularly. While this seems perhaps counter-productive when compared with the artistic side of producing music, I use it to eliminate a bunch of technical roadblocks that emerge in the process of decision making. Because making decisions can sometimes end up in roadblocks, you can use this technique as a general rule that you always refer to whenever you have to.

Let me explain how this rule of thirds can give you wings.

The first time I familiarized myself with this concept was when I used the iPhone grid to take pictures. I had read that a tip to take better pictures was to use that grid to “place” your content. To compose your photos according to the rule of thirds, you must imagine your photo divided into nine equal parts using two vertical lines and two horizontal lines. For example, the square in the middle should have the subject of your picture, so it’s perfectly centered, it is also recommended to have something like a detail where the lines cross.

When I practiced this, I immediately saw a parallel with musical arrangements. For instance, any song will have three distinct sections when it comes to the story line (intro, main section, outro). Where each section meets, there must be a pivot, an element of transition. When I work, I always start by dividing the song into equal thirds, then, I’ll divide again so I have nine sections total. Starting with arrangements, they have equal parts, but this will then change as I dive in details of arrangements; some of the “lines” of the grid will be moved around.

TIP: Use markers in Ableton and give names to each section.

What you want in arrangements, is a good balance between expected and unexpected elements.

Using the rule of thirds helps achieve this balance: while you center the main idea of your song right in the middle of your timeline, you can have an overview of where the listener will sort of expect something to happen. Then you can play with that. Either you give the listener something where they expect it, or move it slightly to create a surprise.

The rule of thirds can also help in a few other aspect of your work:

  • Tonal balance: We covered this topic recently and this means splitting your song’s frequency range in three areas (low, mid, high). You can use a shelving EQ to help you with this or you could re-route your sounds into three busses that are per-band. This will allow you to control the tone using the mixer of your DAW. In this case, by simply splitting in 3 bands, you minimize the work of deciding which tone to take.
  • Sound design: We’ve discussed sound design before but I’d like to pinpoint how you can apply the rule here. For instance, think of how a kick is made. There will be the mid punch of the kick, supported by a bit (or a lot) of sub, then a transient on top. Most of my percussion are layered with three sounds. One will occupy most of the space, another will add add body, and the last one will be adding transients or texture. I also find that shuffling with three sounds often makes it difficult to get bored of a sound. The rule of thirds – where you have sound variations – pretty much always works for me. The question to ask is, is there a balance or is there a dominant?
  • Mixing: When I do a mixdown, I always have multiple categories for my sounds. Part of this is that – since I really don’t want all my sounds to be front forward – I’ll have some that are intentionally low, others in the middle, and the loudest one are the ones that are meant to be right in front of me. It’s very soothing for the ear to have these three areas of sound levels because it help creates dynamic range and creates an acoustic feeling of tangible spacing; putting some sounds in the back will give support to the ones who need to be heard. Just like sound design, if you always keep in mind that you’re layering in thirds, this can give your mixes a lot of depth.
  • 1, 2, PUNCH!  This is a technique that I’ve learned in my theater classes, consisting of creating expectations to then mess with the expectations. Basically, you want to introduce a fun sound, and in the pattern introduce it again later, but at the exact same place, then the listener will expect it to come a third time. This is where you can surprise them by either not playing the sound or by bringing something different. Simple, but very effective.
  • AUX/Sends. This might sound a bit much, but I limit myself to not use more than 3 aux/sends. I find that an overflow of effects will make your song messy and unnecessary busy. One of my starting templates has only three sends by default: reverb, delay, compression (or another sound modulation effect such as chorus).
  • Stereo spectrum. I like to see the placement of my sounds in a grid of 3 x 3 zones. It will go as: right, middle, left then, low middle and high. Some of the main sounds will have to be right in the middle (ex. clap, melody), some in the low-middle (ex, bass) and then some elements that are decorative, around. A healthy mix is sort of shaped like a tree: middle low should be strong with bass/kick, then middle left-right and middle-middle are strong too, then some content in the middle-high, with a little presence in the high left-right. You want to be very careful with the zones of low left or right as this could create phasing issues. You want your low end to be in mono, therefore, centered.

There are other examples, but these are the main ones that come to me!

How to get the right tonal balance for a mix

One of the biggest challenge of finishing a song is to properly adjust the tonal balance. There’s no doubt this part of track-making is puzzling; many people – even experienced producers – are still going to have some issues with tonal balance some days. There are tools and methods to correct tonal balance, but it’s always a challenge; I feel that it’s important to share some tips on how you can make adjusting tonal balance easier.

What is tonal balance?

I’ll keep this as simple as possible: tonal balance, from my perspective, is dividing your song into three frequency sections and figuring out how to adjust them. For instance, in certain genres, you want the tone to be totally balanced, while for dance oriented, electronic music, you’d want the lower end louder in the mix. While this sounds extremely simple to achieve, in reality, it can be a nightmare.

The biggest issue with tonal balance is that if your tone is wrong, your work when played in a specific context (ex. in a club) will sound completely off compared to similar songs of the same genre.

Common problems with tonal balance include:

Lower end anemic: The song will feel weak, energy less and hollow.

Lower end too loud: The song will feel muddy and lacking in body.

Mids lacking: The song will feel empty, no punch or body, far off.

Mids too loud: The song becomes unnecessarily aggressive and obnoxious.

Highs lacking: The song lacks definition and precision in the sounds.

Highs too loud: The song is fatiguing and harsh.

Using the right tools for tonal balance adjustments

Monitoring is of course, crucial to adjusting the tonal balance of a song. I’d say 75% of the time I get a file for mastering and the tonal balance is completely off, mostly because of the artist’s listening environment. While we don’t all have the budget or space to have a fully treated studio, there are some things you can still do:

  1. Cross-validating. With my speakers, I’ll always check a mix periodically with headphones as I work. I like to have a different perspective and I find that the sound I have between the two often reveals a perspective I missed.
  2. Mixing at a low volume. You’d be surprised at how you’ll automatically hear what’s wrong. Reduce by half the volume level you’re working with and listen to how the kick comes through, then the melody compared to it, then the high end, etc. Cross-validate with a reference track.
  3. Using a subwoofer. Many people will tell you that you don’t need a sub to do a good mix but it certainly helps to have an idea of what’s happening down there. Many of us will have issues with the neighbors so I suggest to only use sparingly just to check your mix. A good alternative is getting a Subpac.

There are also tools you can use in your productions to help you. I use many but here are some of my favorites:

Reference

This plugin is a life-saver, no doubt. You load in your reference track, adjust the volume to match and then you can swap between your mix and the reference. There are even some dynamic graphics to show you what part of your mix is too loud or lacking in comparison to the reference track.

If the track is already mastered, you won’t be able to rely on the compression meter but the levels will be used the same way. For 60$, this is certainly an essential to have in anyone’s collection.

Shelving/Band EQ

When I first started to make music, I really didn’t like shelving EQs as I felt they weren’t useful, but once I started looking into them, I have to say that it almost became one of those obsessions one can have for a plugin. There are many of them, so I’ll name a few and then explain how to get the best out of them.

  • Tonelux (Softubes): One of the most recognized and acclaimed tools out there. It gets things done, quickly. Often on sale too.
  • Solid EQ (Native Instruments): I love this one because you have some precision on what you do and it is a good mix between being a musical EQ and a transparent one.
  • Maag Audio EQ4: This one is great for highs. It’s one of the most used in the industry in mastering to get the proper “air” sound, right.
  • Hammer DSP (Kush Audio): Crazy musical, warm and outstanding all the time. Often something to just play with on the master bus to see all the different moods one song can have.
  • Sie-Q (Sound Toys): A bit like Hammer. Musical, and slightly magical in how it handles the mids.
  • ValvEQ (Kazrog): A good alternative to the expensive Bax EQ by Dangerous. It’s handling your tone in MS mode as well.

Using the right techniques in tonal balance

If the EQ, cross validation and other tools don’t seem to work for you, I’d recommend a very simple technique to help you nail down the tone.

Basically, we’ll limit it our tone balance to three sections but you can pull it to four or five if you want, but the lower the number, the easier it gets later on. Knowing this, I’d encourage you using Ableton Live 10 for the use of the groups in groups feature. You can make alternative groups where you push all the channels using lower end in one group, then mids, finishing with highs.

If you have only three groups or busses, you really limit your options to these 3 faders to control. The less you have in front of you, the more focused you’ll be.

The way I usually do it, I’ll start with the main, loudest channel and put it as the loudest one, then mix the 2 others accordingly. Pretty often I feel like knowing the level of the low end first will greatly help settle the rest.

Free Ableton Live Mixing Template

(Update May 2023: When we moved to the new site, the template was lost. It was obsolete anyway as I’ve learned so much since that I can do better. I did a new one, but it’s more basic. In my opinion, it also does a better job. You can still gather ideas from this post and I will make another one but the basic is at the end of this post. The information below is for the old template, but the one to download is the new version. Sorry for the confusion. I will fix this soon.)

I’ve put together a free Ableton template after receiving feedback that it was very helpful for many people I’ve worked with. The template available on this page is aimed specifically at mixing. I’ve noticed that many aspects of mixing are often misunderstood; I’ve assembled a starting template that has bundled together many useful tools to deal with basic things – this free Ableton template will be useful for those involved in music making!

This template includes:

  • 6 Groups: Kick, Bass/low end, Percussions, Hihats, Atmosphere, Melodic.
  • 3 Busses: Low end (Where kick + bass are routed), Percussion, Melodic.
  • 1 MIXBUS: Where the busses are routed and is actually your pre-master channel.
  • 1 Reference channel: Where you drop the your reference track.
  • Multiple Sends as enhancers.
  • Macro tools on each groups and busses to help you tackle tone and potential issues.

This template looks very close to what pro engineers use like the one Andrew Scheps did for Puremix, but I found Andrew’s template wasn’t really as suitable for electronic music. I’m sure he would disagree but underground music isn’t really handled like commercial music is.


Is this template for producing or just mixing?

You could use this template to start producing with if you feel comfortable with it, but I’d encourage you to export stems from a project and then use this template to mix. Yes, it’s a bit more work, but it will also make free up your CPU and make your project ready for a new phase of production. It’s fun also to put an end to tweaking details and then focus on the mix alone.


How do I use this template?

There are many ways you could potentially use a template like this but I’d like to explain a few things to get you started quickly. First off, grouping your sounds is always a good start. I like to to think of it this way:

  • Kick group: This group is made to hold the different layers of your kick(s); the best way to make full range kick is to have up to 3 layers, but that will be handled by the group’s macro tool that uses compression and saturation. I created another little macro tool to help beef up your kick with a sub generator and a transient enhancer. I included some sounds from my collection for you and feel free to add more. If you balance everything properly, you’ll have beautiful, warm and punchy kicks.
  • Bass/Low end: This group is essentially the same thing as kicks, but to be used as the bass. Include the multiple layers of your bass (sub/mids), and I’d encourage you to also include anything that is below 200hz such as toms, synth, pads. The macro on that group will help balance it out.
  • Percussions: Anything percussive from bongos, claps, snares or percussive synthetic sounds. This group can get busy so don’t be afraid to add multiple new channels in the group itself.
  • Hihats: Hats or anything that is regular in your group and an important part of your groove could be put in this area. In my case, I sometimes include snares. Please note that there’s no right away to use the Percussion & Hihats group and experimenting might get you some interesting results.
  • Melodic groups: These two work hand in hand. One is for anything in the background and the other is for the melodic elements to be forward. The way the macros work, they will help you position properly the sounds and make the best of them. Try playing with the various knobs to see how they influence the groups.

Please note – I’m applying high pass on these groups and feel free to change the steep which can influence the sound in some good ways, sometimes.

The three busses are quite interesting to work with once you get the levels of your groups finished. For instance, you want to find the best relationship between bass and kick that are routed together. Once they are balanced, the bus allows you to control both the bass and kick at once; this can help you more easily decide on the tone of your track by moving the bus up and down.

I’ve also included a reference channel to remind you to use a track that can be used as a mood and reference board. Reference tracks are great to help you to take inspiration from parts of other tracks you like and would potentially like to use in your mix.

The various sends are simple tools to just beef up or open up your sound. Sends are really for finishing touches to your mix and they’re meant to be used as gently as they can be; subtlety can also make things intense.

Thanks to everyone who provided feedback for the development of this free Ableton template; I am glad I can continue to help everyone enjoy making music!

Click to download this free Ableton template: (New version 2023)

Pheek’s template 2.0 for Ableton Live 11.3+

Intuition for decisions in music production

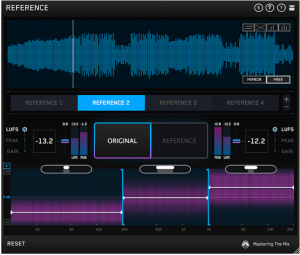
In a sense, musical intuition is what defines someone who can bring a bit of creative magic into something, in comparison to someone who sticks to truly technical application of software. I’ve often had the chance to watch experienced producers make music, either while I was visiting one’s studio or on the spur of the moment of a jam. For instance, we once had the infamous Narod Niki experience at Montreal’s MUTEK in the early 2000’s where Zip, Villalobos, Dan Bell, Akufen, Cabanne, Dandy Jack, Monolake (even Cassy sang for some minutes) all synced their laptop and gear to improvise a show for us. Our local festival gave us many opportunities to watch, what I would call, masters in what they do, play in front of a crowd to present how to create and perform. The live act itself, when done properly, should sort of represent what the artist is doing in his or her studio, but in a way that can bring the crowd on a journey.

When I state a live set done properly, I refer to something that is partly prepared, partly improvised: a set that relies partly on musical intuition. Musical intuition is the happy combo that allows for “happy accidents” and creates a sense of risk-taking. There are a lot of pre-recorded performances that I don’t get the point of. What interests me here, is the topic of musical intuition. Ever since I started teaching, this one question is often brought up:

How does one teach musical intuition, or intuition at all?

There are 3 points about intuition that we need to discuss first. Intuition can be:

  1. immediate apprehension or cognition without reasoning or inferring.
  2.  knowledge or conviction gained only by intuition.
  3. the power or faculty of gaining direct knowledge or cognition without evident rational thought and inference.

What I refer to by using the word intuition is a bit different from those three points. For me, intuition in music is how someone does something that seems to be random, but is actually done in a very effective way. Partly unpredictable, partly guided by experience, but entirely guided by a personal vision to arrive at a specific result. This is musical intuition.

A notable example would be an artist, during a live show, dropping some sounds or a musical idea that was unexpected but works with what’s happening at the current moment completely. Another example could be a musician proposing a random idea and having that incomprehensible idea make total sense after 2-3 minutes or development.

Can musical intuition be learned or developed in music making?

I firmly believe it can be. Some ways to get there would imply:

  • Listening to a lot of music genres, be diverse in the selection. The best way to get new ideas for one song and bring a wind of freshness into something is to translate an idea from somewhere else. The number of ideas I get from free jazz or Indian music are too large to count, but I find a lot of depth into these genres; they have been around for so long that they have developed so much maturity. Try to dig into realms that seem obscure or spend time listening to folkloric music as a starting point.
  • Knowing your tools. This one is overwhelming as there’s always something to learn. I often say to people, what you need to know about your DAW should be just enough to make blocks and build tracks. The rest of it, you learn as you go. But the main part is that you should be at ease with the DAW, and using it should be second nature to you. Moving blocks around, copying & pasting, and arranging basics must be something you can do fast so you never lose your flow. It’s when you start looking for how to do something very simple when you struggle too much and lose your initial idea. Imagine you couldn’t explain to a friend how to get to the nearest grocery store because there are too many details to explain; it would be confusing for him and you.
  • Be attentive to your routines and things you don’t like. We get caught up in what has previously worked, and will tend to repeat it ad nauseum. While part of what attracts people to our music sometimes one specific sound, if we become a slave to ourselves and to people’s expectations, we will fail to grow as artists. Musical intuition progresses with your personal dedication to grow and stepping outside your comfort zone. The easier it gets for you to explore, the more easily you can express yourself. The sense of becoming fluent in music-making will allow you to become more spontaneous and able to come up with new ideas.
  • Nurture technical curiosity. Spend tons of time reading about music, but also, non-music related topics. I have had so many ideas come to me by reading sci-fi novels, watching dancers, reading about architecture, drawing with my son, running in the woods, etc. Your brain needs to do other things other than spending time in the studio. You can only learn to a certain extent in there, you open yourself up to new ideas by doing other things.
  • Rehearse alone and with others. If you can jam on your own to get comfortable in your art, that is one important thing. But when you can then play with a friend, it becomes very interesting as the dialog forces you to interact/propose/listen/adjust. This will improve your communicative music skills by a few notches.
  • Play for friends. I used to do intimate, living room concerts where I would play for 3-4 friends, sitting on the floor, sipping tea, drawing, dancing, chatting but mostly, listening carefully. Those moments are where I’ve learned the most and this is often overlooked as people think playing in front of a lot of people is where the fun is at; it can be, but it’s not the only option. The advantage of playing for a handful of guests is about getting intimate and instant feedback, which can be a very rich experience.

Experiment with these ideas and you should slowly develop your musical intuition. Let me know if you have questions or join my mentoring service to explore your music more deeply.


SEE ALSO : What Is A Mature Sounding Track? 

Pointers To Define Your Sound

The majority of artists I work with during mastering and finishing your tracks, talk about their desire to define their own sound. It’s important to them because as a music lover many times you’ll hear a just a few seconds of a song and think that’s got to be _____ band, or producer. To achieve this ‘signature style’ there will usually be a particular production style or a sound palate one will use in a way entirely his or her own that is instantly recognizable.
Case in point – there is much talk and celebration of Burial’s album “Untrue” which is now considered to be one of the most influential albums of the last decade.

Why is this album so celebrated?
For starters, the ghostly atmospheres, foley recordings and sound effects of London at night, conjure an atmosphere of a dark, eerie space. The heavy, downtempo vibe of the music is an invitation for listeners to go to their own dark places and reflect on that. Even the titles of his tracks, “loner”, “U Hurt Me”, tap into a feeling of emotional damage, which many people can really connect with. In short, the heavy sound and persona behind the record are instantly Burial.

Taking note of the various elements artists can use to create a sound all their own, let’s analyze some of the fundamentals of what will be influencing your sound.

  • Tonality: this is hugely important as most artists will generally embrace a ‘vibe’ or ‘mood’ in their music such as happy, upbeat, or angry, melancholy. Do you often work in a similar scale or key? Are your melodies basic and straight forward, or do you write complex chord progressions?
  • Genre: picking a genre to work in is perhaps one of the most obvious choices in creating ‘your’ sound, and defining your identity as an artist. Are you embracing an existing one or will you try to fit between two? This can be a hit or miss and to do something original is taking a risk but the reward can be massive.
  • Samples: Are you using samples? Synthesis? Modular? The Orb for example, loved to use samples from specific movies (the 80’s like Flash) and Boards of Canada were famous for recording their synth parts to old tapes and resampling that back into the session. Consider the possibilities of your sound source.
  • Rhythms: Are you more 4 to the floor? Breakbeat influenced? Jazz? Hip-hop? Latin rooted? Take note of where you’re most comfortable and what is your go-to groove.
  • Technicalities: This is where I can help you most and have been helping clients with on their way to creating ‘their sound’.
  • Mistake. Are you going for something slightly sloppy or very tight and quantized? Try to see what mistakes can bring to your music and if something wrong can develop something interesting. Don’t be afraid to try something you might never do as a starting point to your next track. 

The tools and effects you use can also have a major impact on your sound. I’ve covered this before but it’s important to refresh your mind when considering your choice of effects.

Reverb, Delay. You might pick one plugin to work with all the time for consistency. Reverb – maybe you always go for a plate or perhaps you prefer to use huge spaces and long tails. Are you going to use dub delays or short ones to go for a Haas effect?

Compression. Do you want your sound to be compressed or not? This is something think about. Find a compressor that can be your swiss army knife for all occasions, and stick to using that.

The process of defining your sound is much like a designer developing the branding elements for a client.

While not essential but certainly helpful, a designer will tell you which set of colours, fonts, images, and direction to use within all your work.

What I usually do with my clients to create more of a signature sound is take a collection of references and sounds they connect with and then work on a way to replicate similar sounds and ideas. The pad from here, the percussion and swing from there, kicks made this way, hats always that way… and so on. You cherry pick all your preferred sounds from different sources (eg. why not go for a style that is entirely alien to you like afrobeat if you’re into techno?) and make a collection. I can find which synth is excellent at creating that sound, and while playing with it, you’ll often discover so many new sounds you are drawn to that sound original, fresh, and inspiring.

The truth is that trying to define your sound will not come overnight. It’s a process that will be different for everyone, and you truly cannot speed through this and feel right about it because there is no fast track to originality.

That being said, in all honesty, working with someone who has the production and musical experience to guide you in the areas that best represent you is huge and can be a game changer in defining your sound.

As always let me know if you have any suggestions or questions about this post and leave a comment below and tell me what projects you are working on right now.

JP


SEE ALSO : Beats and Melodies

What Izotope’s Ozone Series Doesn’t Consider

It was a great surprise to see the release of Izotope’s new Ozone and Neutron update last week. Since I use both products, often I immediately got started looking for whats new.

There will undoubtedly be a ton of new tutorial and youtube review videos posted of these tools, but I want to approach this post around how I use these plugins, and also mention a larger problem I find all too common within the production of software, and an issue I feel Izotope’s Ozone series doesn’t consider.

But firstly, let’s talk about where Izotope really succeeded.

The sound. I can’t put my finger exactly on it, but to my ears, there is a noticeable improvement of the sound quality in Ozone 8. Perhaps it’s an oversampling issue or something with the filters, but the sound is tighter, bright, and more precise over earlier versions.
The workflow – Ozone 8 comes with several new features that provide a faster way for me to achieve the sound I want. The maximizer now includes a loudness target and the reference addition to comparing the versions via the tonal balance control.

Tonal Balance. A fascinating tool that allows you to visualize the frequency levels of your track, and will enable you to match to eq targets from a specific genre of music. Having visual feedback of where your tonal balance per frequency is, and easy access to eq those levels is a great and fast way to achieve a professional sound. I did some testing earlier today and found the target system pretty accurate, but in the end, I found the target ranges slightly off for the lows and highs (see below in my low points).

Visual Mixer. This is the bomb within Neutron 2, and for that feature alone I’d buy the entire package. The visual mixer allows you to place and position your tracks visually across the spectrum, (volume, pan, and width). It’s a beautiful process, and the edit window looks super sci fi and modern. If you work with multiple channels and often have mono tracks this is simply a killer addition. One of the things that blew my mind was that you can actually automate the panning, which opens the doors to many exciting and beautiful options in sound design.

Improved Mix assistant. I really like the mix assistant by the way. I’ve heard many people mock the process, or are jaded to the idea  that it’s impossible for AI to do a man’s job but honestly if the assistant can pull up all the tools I need and set the table for me to tweak fast, you won’t hear me complain.

Communication between plugins. This feature is really cool. You may adjust EQ from one window on another incoming channel, which is reflected in other instances of the plugin. This is super useful when you want to tame the relation between kick and bass as you want to be EQing side by side, both channels. It works and looks seamlessly.

In the end, I’m really loving the update from Izotope and will be using many of the new and improved features. I also want to take a minute to point out a criticism I have with Izotope.

Generalization of customers – It’s unfortunate that I find many large, corporate companies narrow down potential customers into three simple types – pop, edm, and hiphop. I see how that makes marketing more manageable, but what about producers like me who are creating and working on underground and experimental music? I say this because many of the new tools shipped with Ozone and Neutron are built with presets as starting points to mix and master only three types of music. I my opinion, this is quite limiting, and the fact that you can only refer to 3 types of tonal shapes is, to me, a complete fail. It reminds me of LANDR giving only 3 types of loudness range. It’s disappointing because I feel like this software expects you to be either this or that, which is clear from the design of the genre-specific presets – as if there are no other types of musician in the world??

What Izotope’s Ozone series doesn’t consider is people like me, and many friends and colleagues of mine, who make our living from creating music, and don’t fit into the standard pop, edm, or hiphop category.

CPU hungry. I have a newish MacBook, fully geared up for performance, and while running several instances of Ozone my entire screen began flickering and making strange glitches. Izotope support claimed it was likely my CPU over-loading, however, I was only using 5 Neutron and 1 Ozone 8 instance, plus visual mixer. If my custom built computer is hit hard with CPU usage imagine how will the average Joe deal with such demands on the processor.

This goes along with the new mastering plugin by Eventide, Elevate that is so power hungry that it’s barely usable. Funny enough, a few days after Ozone 8 came on the market, Eventide droped the price of its plugin by 50%…

Still, in my opinion, the updated Ozone suite is a serious tool to consider having. It really delivers impressive quality sound. As always, I want to hear about what you think about these tools and feel free to leave a comment below and share your opinion.

Cheers,

JP


Background vs forefront to create dimension

Nearly every week I have a similar conversation with my clients. In good faith, and to save both my clients and myself time I’m writing this post to help answer the questions many producers keep wondering. The question of background vs. forefront to create dimension.

My clients often send me projects with a lot of sounds going on, which if you know me and my label well enough is something I’m a big fan of. That being said, there is a way to work with a song made up of lot’s of sounds without things becoming a bit too much.

During the production of your song, how many times have you listened to it all the way through? Twenty, thirty times? More? As songwriters, we need to consider the listening perspective of our audience, who will likely never hear all the nuances and details that we do. Perhaps if they’re big fans, they’ll listen to our track ten times. With that number of listens, the impression you get from a very busy song is very similar to looking at a very busy picture – You’ll discover different ideas on each view, but the whole image will be taken for what it is. What will sound like a mistake to you will likely be perceived otherwise by the casual listener.

When we use many different sounds together in an arrangement, it can be impossible to hear them all equally. As producers, we care for the work we’ve put into our sound design and often make the mistake (myself included) of trying to give every sound (big and small) the same amount of emphasis in hopes that nothing will be missed.

Even during active listening, both simple and complex music will often have subtle details we may not hear at first.

The important thing to understand is this – many sounds working together shape and create an experience. Some sounds only work when combined with others to form a unique layer, much stronger than the sum of it’s parts.

Sound design is a complex science that often takes years to understand fully. For many producers that ‘a-ha’ moment comes with the understanding that many sounds aren’t massive all by themselves, but rather a combination of several sounds carefully layered together.

For example, a punchy kick may have three layers (low, mids, hi-mids for transient shaping). A warm and full sounding pad may have harmonics created from a layer of richer oscillation in the hi-mids (using a square oscillator). This is the technical part of it but for someone not interested in sound design and is purely a listener, he/she will experience these sounds in an entirely different language, but he will get it though.

TRY: When listening to music, force yourself to identify layers in sounds.

With the concern that some sounds will not be heard equally at rest, we can start looking into how to create details with dimension and subtlety.
These details are as important as each of the featured sounds as they are needed to support the main element(s) of the song itself. Let’s see how to approach this:

  1. Decide what the core or backbone of your song is. If someone has to sing your song to someone else or attempt to explain what the song is about, what would that person say? In other words, the most memorable part of your song is the main idea. If you remove that, the song is not really there since most of the sounds are there to support that main idea.
  2. In the percussion sounds, identify what are the main elements that support the groove and the main idea. Usually, there’s the kick, a snare/clap, and a hat. Some tracks have multiple claps or additional  percussions here and there, but it’s important to decide what the main percussion sounds are.
  3. The other sounds will be EQed to create dimension. Only the use of EQ combined with volume changes will be enough here.

TRY: Next time you listen to a song, try to give attention to anything that is mixed low in the mix.


How to apply the distancing technique, on a very simple level, is to apply a low-pass filter/EQ on the sound. The more your filter up, the thinner the sound will feel and also the more pushed away it will sound. There’s no right or wrong here, but you’ll need to adjust the volume to your own taste and feel. I would suggest compressing your sounds to bring them together somewhat.

This is a regular cut that usually removes a lot of muddiness.


This cut would move sounds to a bit behind any of the featured sounds.


This place sounds far off


For subtle positioning.


The other trick would be to use reverb but that one is something to use with great care. Depending on your reverb unit, this technique can introduce muddiness which the previous trick won’t do. Like always experiment and find what you like in the process. You can also combine the EQ trick with the reverb use for better feel.

Let me know how it goes!


 SEE ALSO :  Dynamic Sound Layering and Design    

Templates As Seeds

As a producer, you’re likely trying to balance several tasks all at once while working on your music. If you’re spending time to look through four or five reverbs in search of the perfect sound, setting up buses and groups to pre-mix your tracks while you arrange it, or just feeling frozen looking at a blank project screen and finding it hard to get going, it’s no wonder you aren’t as productive as you’d like to be.

Good news, this post is all about setting yourself up to win before you begin. Begin to see your templates as seeds. 

Many DAWs can be setup to load a template as an initial starting point. Reason will propose a pre-made environment, and Studio One will propose if you’d like to setup a project for mixing to speed up your getting started time. Ableton Live doesn’t have that feature by default, but you can easily change that to open a custom startup project.

Even though most DAWs have this helpful feature, that wasn’t enough for me. But it felt like I could do better.

In one way this is a follow-up post to the previous Bonsai Technique that I shared a few weeks back. It was super popular, and many people sent in comments about how it really helped them develop tracks from little ideas. Now, I’d like to follow up with this idea as I realized that many people are missing out on the fun of using a template to get their projects started. Also, there are a few things we can add in that will also be valuable for your next productions. Let’s have a look at the techniques to get rolling fast.

I’m going to suggest something simple in essence, but it’s very effective to get new projects sounding great right from step one.

Start your next project using the last song used. I heard about this technique from Matthew Herbert’s manifesto, and it got me inspired. Herbert would pick up the mixing board where he left things off from the last session. Why is this a good idea?
Starting from the last mix would provide a faster workflow but also, the random EQs, compression, effects, would be set to something he would never have set up beforehand. I thought this concept was brilliant and began doing this myself. Very often I would start with the last project loaded but would make the next song right after the end of the previous one. The same configuration and settings for the kick, percussion etc… were the same, which often led me into directions I didn’t expect at all. This is a big advantage. 

Consider keeping the effects on each channel as is, but drop your new clips into existing channels at random. In some situations, I also would copy the arrangement of one song and paste it into another song’s arrangement view. Very strange results would come up, often leading to unexpected yet very usable sound design results. I often have one “mother” project which will be a safe place for me to develop and grow these ideas. Then I will copy some loops into another project’s arrangement view, and sometimes move the clips between channels to see which one fits the best. I even did the exercise of dropping a full arrangement into another project keeping it as intact as possible. From there I wouldn’t even listen to it before bouncing it out. I’d then listen to it weeks later and get blown away. I made a handful of tracks from my album Intra or White Raven this way.
Next, challenge yourself to keep your bus routing and groups intact. It’s great to have pre-made sends channels or busses that you can re-use quickly. Of course, an easy way would be to be to assemble a macro of the chain of effects you’ve used, but I like the idea of opening a template and have no idea what effects would be awaiting me. I will sometimes swap my most used effects with others I newly acquired or some I’ve forgotten about. It’s often nice to dig up older, legacy plugins that can bring up a particular grain to your sound.

Clear your finished project from the clips and save it as a template.

One exercise you can start applying today would be:

  1. Create a folder for your templates.
  2. Each time you finish a song, you do a “save as…” to that folder. You’ll then clean it from the clips in the Arranger view. I will often leave what I call ‘leftover’ sounds that weren’t used in the project. I’ll set these clips in the session view in a channel named “Leftovers.” Doing this allows you to re-purpose those sounds, which may be a perfect fit in your new project.
  3. Midi clips could be left there as well because it is usually interesting to have on hand some midi material you can quickly throw new sounds onto and see what it gets that sounds like.

Now, an extra tip, which is to make a template for the design of an EP/LP. As you know, it’s always great to have a common feel for an entire release, and one of the things I would recommend would be in the way you apply your effects.

  • Reverb. Either you pick a reverb from one specific company (ex. Altiverb) and use some presets to get started, or you try to remain in the same family of space such as Plates.
  • Delays. Using the same plugin but changing the delay speed.
  • Saturation. Try to pick one type and stick to it. I recommend applying this through a send channel where you have more control over how each sound is colored.
  • Compression/EQ. Some apply a distinct color and are more or less transparent. It can be a good idea to keep the same type of combination through your channels.

As always I want to hear your feedback on anything mentioned in this post. Feel free to share this post or leave a comment below and tell me how these creative, and time-saving techniques are working for you. 


SEE ALSO :  Pointers To Define Your Sound