Tag Archive for: creative process

Do You Love Your Track? Or Are You Just Overly Committed?

  • The creative process involves a lot of fantasizing. You fantasize about the reaction you’ll get from crowds, and the reaction you’ll get from promoters. You fantasize about the reaction you’ll get from their creative peers, and the reaction you’ll get from your friends. Perhaps the person you have a crush on will like it. Perhaps you’ll get it signed to the label of your dreams, and it will break your career as a musician. This often creates a deep level of love for your track. 

However, the caveat is that many people feel this adoration in that euphoric phase of composition, where you’ve discovered an amazing loop or a basic structure of a song that enraptures you. 

This is that moment when you pull the hammer back on the metaphorical pinball machine and bounce your idea into the summit of the board, where it starts bouncing off the bells, whistles, and fixed, flashing bumpers, sending it careening into a space of infinite possibilities. 

Then after a while, it slows down, and you begin to see that the ball is falling deeper and deeper towards your flippers and that if you don’t hit it just right, you may destroy your track forever.

This is that moment of self-reflection and doubt that most creatives have. It’s in this period that you might think that you messed the whole track up by adding a part that doesn’t elicit the same joy as before, almost like chasing the high the first time you took a drug. 

The problem is that you’ve committed so much time to this track that you may be convinced that it’s still incredible, and become stubborn about any suggestions. 

Or it could go the other way, where you’ve committed so much time to this track that you feel like you need to do something with it, but you don’t love it like you used to. There are solutions to both conflicts, resulting from the same emotion – love for your track.


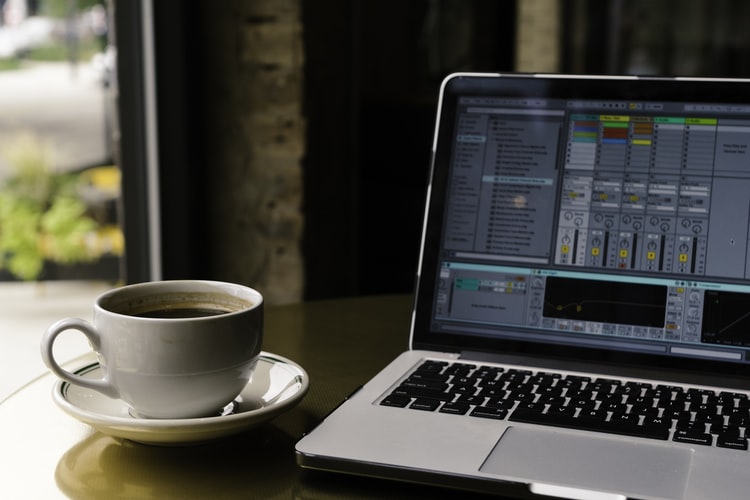
A photo of Ableton next to a cup of coffee.


A solution to loving your track too much

This is a hard one because people often get stubborn about their art. They love it so much that they can’t absorb any feedback or rejection from their peers about it. Often that’s because their love for it is built on the cognitive heuristic of commitment, rather than them actually believing it’s an incredible track. 

Therefore, often this fallacy is built on eggshells and critique may seem like a personal attack, and therefore the creator protects it from opinion and rejection, lest they be rejected too. This sometimes leads to people not putting their track out at all, always “waiting for the right moment.”

The way to get over this fear? Truly don’t give a shit what other people say. Most great artists didn’t. We always hear stories about the albums that critics lambasted or art that sat obscurely for decades before being dusted off and appreciated. Or there is the opposite, where their art’s controversy was appealing to some, and appalling to others, creating a maelstrom of press. 

This is what happened to John Cage and Karlheinz Stockhausen, who made some of the most challenging music in modern history, where to this day most people don’t understand it. But they are both considered important in the canon of music. 

They knew their music was threatening, but they probably didn’t care, because they thought it was important, and thus put it out there. 

If people want their music to get out there, especially if they still hold onto the original fantasy of other people listening to it, then they need to put it out there for critique. Whether that’s your friends or a marketing campaign that goes out to media contacts and DJs, you’re going to feel rejection, even if it really is brilliant. That’s because music is subjective. 


A photo of Deadmau5, who understands that his love for his tracks can often be misguided.

Credit: Wikipedia

A solution to not knowing if you still love your track

If you got to the point where you can put the song out, but are still having doubts about it, keep in mind that you really have no idea how it will sound to others. Remember, when you first started the track, there were elements about it that sent your brain bouncing off the proverbial pinball machine. Therefore, there is a good chance that other people will love it too. 

Deadmau5, love him, or hate him, knows how to finish tracks, and has released some of the most seminal modern rave anthems. With his hit, Strobe, he was having this conflict. He liked it enough to finish it, but not enough to be confident with it. 

Since his label hadn’t seen anything in a while, he decided to send it over to them, suggesting that it could be a B-side to a record; another piece of content to whet the appetite of his fans. Then, to his surprise, it blew up in 2009, right at the advent of the EDM explosion, helping to propel his career into the stratosphere. 

If you listen to Strobe, you might be able to see why he wasn’t confident in it. It’s at least two minutes longer than any other song on the album, clocking in at 10:33, and it takes a few minutes before the kick drum comes in. It’s not necessarily a radio anthem. 

But believe it or not, people like challenging music, because it gets them thinking.

A less mainstream example of this is from one of my clients who had a song that they sent me that I thought was pretty good, but they were having doubts about. I was like “Look, how about I send it to some labels and see what happens.” 

So I sent it out to some labels, and it didn’t just get signed, it got picked up by a bunch of different places. They were having doubts, and their doubts were squashed when it became as successful as anything else they’d released.

You also don’t know who tracks are going to resonate with. While they might not vibe with your primary (often fantasized) audience, they could resonate with an entirely new audience. 

A good example of this is a client of mine who sent me over some ambient tracks they made, which was surprising based on his previous work. What was also surprising is that they had all these Indian-sounding names. 

Well, it turns out those Indian names were actually holy words in a religious sect, and when people searched for those on Google in regards to the sect, their songs would come up. With this, their music, in a way, became holy music and ended up performing better than any of the other, more branded tracks that we worked on together.


A Note On Expectations

As I get older, I realize that the desire to be understood, or liked by others is a trap for the creative process. The real joy should come from if a song is technically solid, or if you changed your style to something that you’ve never done before. These are both something to be proud of as they show an improvement in your abilities as an artist.

I like to think of each track as journaling, and it’s a capturing of an idea, rather than trying to make something that will please thousands of people. The most frustrated artists are the ones who have high expectations for their music and where it goes, the least frustrated are the opposite. 

A note on collaboration

As many of you know, I do track finalization. Whether you do it through me, or another session musician, I think what I’m about to say rings true for both. Basically, I only like to work with people who have a realistic expectation of their art or don’t view me as some sort of savant. Just like they have high expectations for the track, they might also have too high of expectations for the session work, especially if they have both. Because whether people realize it or not, they might have subconscious ideas of how their track should go without consciously knowing how it should go. 

Then when I or anyone else goes in and makes edits, these sorts of clients expect it to sound like something completely different. Also, if they’ve heard a track a couple hundred times, any alterations to it are going to be glaringly noticeable, and might not jive with the congruency you have programmed in their head. Therefore, if you have these sorts of expectations, it’s best to forgo them, as they diminish the creative potential of a track. Remember, it took something like 27 people to write “I Feel Love” by Donna Summer. Did they all agree? Did it diminish the value and impact of the track?

The best people to work with are ones who are about a 6 or 7 out of 10 on their love for their track. These people tend to keep an open mind.


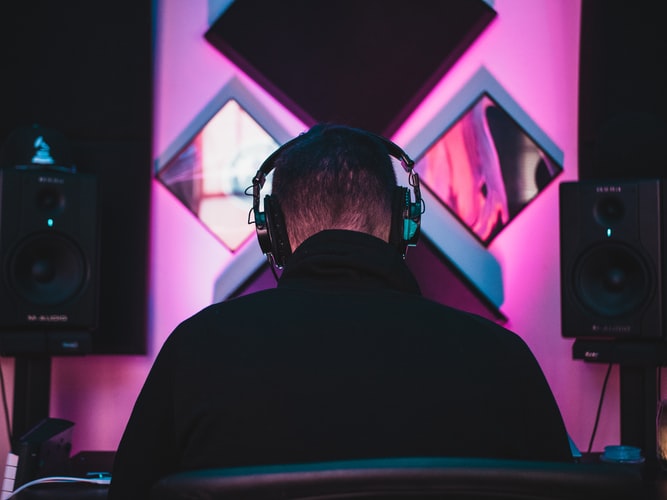
A photo of someone listening to a track. Don't listen to your track too much or else you might love your track artificially.


Electronic Music Coaching Lessons

There is this attitude in electronic music that if you share your secrets and techniques that somehow an essence of it will get lost, and some of the magic will dissipate. Additionally, people may take that advice, utilize it, and somehow outgrow and surpass the teacher. And nobody wants to feel like they dug their own grave. This philosophy about electronic music coaching took me some time to overcome, and I’m glad I did. 

Instead of the relationship between teacher and student becoming parasitic, instead I have found it to be purely symbiotic. Sure, some students have surpassed me in many aspects, but I find that they are reciprocal about their newfound knowledge. Now I have many people who are happy to help me with aspects of music making that I don’t enjoy doing as much as they do.

A photo of George Martin coaching the Beatles.

George Martin helping The Beatles. He would have been excellent at electronic music coaching.

Success Takes A Team

As I’ve harped on in previous posts, it makes sense to delegate some of the tasks of your music making, as this is what happens in every other genre of music, yet, for some reason, seems to be stigmatized in electronic music. Think about it, The Beatles had George Martin, Miles Davis had Herbie Hancock. Michael Jackson had Quincy Jones (as did Frank Sinatra). It doesn’t make you less of a musician to be the teacher and embolden your students; it empowers you and propels you to greatness.

That’s why, around Spring of 2016, I announced on my Facebook page that I’d do free electronic music coaching to anyone who would come to me. Back then, it was just a pure invitation to share my knowledge to people and using Mailchimp’s newsletter technology, I was hoping I could send emails to people and guide them in exercises. 

Initial Experiments In Electronic Music Coaching And The Lessons Learned

My initial attempt kinda failed pretty quickly as my lack of understanding of the email technology drove some of the participants mad and I had more damage control to do than coaching. So I closed that option and decided to open an electronic music collective / Facebook group with a precise goal – to provide a safe space for anyone who was unsure about their music before posting it publicly or sending it to a label. Of course, any question would be welcomed and we would have a hive mind to answer questions from various people.

As I’m approaching 5 years of free electronic music coaching, I’ve learned a lot from this. From giving feedback and to seeing mentees grow into solid musicians, these are the scenarios I saw play out.

Common scenarios In Electronic Music Coaching

Pretty much everyone who came to me to get some help had one thing that was blocking them from something. A minority would come to perfect their skills and some would come to have guidance in different situations but in the most part, people come to me because they’re blocked. In our electronic music collective, the more specific questions are usually searching for a specific effect used to replicate a sound or getting feedback on a song. These are quickly answered by the community that share a few ideas and hints. Often, it might not be exactly what the person needs but it often guides them down a path that may lead them to something more proactive.

However when doing one-on-one electronic music coaching, I often am presented with the same problems:

  • People who are experiencing a major writer’s block and are feeling helpless.
  • Aspiring artists that have worked really hard and are feeling stuck, not seeing improvements.
  • People who have the loopy syndrome, having countless loops but not being able to finish songs.
  • People who have deep love for what they create and are stubborn about any criticism, or conversely, they have intense hate towards what they create, and beat themselves up over it.

How Evolution Impacts Knowledge

If you look in hindsight at what happened in the world of electronic music production in the last 20 years, the software world paired with the internet has made it much simpler. 20 years ago, we were limited to a few resources and we’d always be in stasis waiting for our answers to come (if they ever did). We are now living in a world where we are constantly having our attention pulled in multiple directions, with each direction espousing that “this is the true way,” when there is rarely a “true way” for anything, especially in art.

It’s these conflicting statements that seeds a ton of doubt, or unnecessary confidence in their practitioners. This doubt, or this overconfidence that my one on one sessions seek to remedy. 

There is nothing wrong with being confident in your work, but overconfidence creates barriers to learning, and conflicts with progress. Sometimes I wonder why these people want electronic music coaching at all, but the fact that they get it, shows they at least have a conscious understanding of its importance, even if their subconscious confidence conflicts with it. 

Conversely, the doubt that many musicians have creates a similar problem. They may be in coaching to become more confident, but their lack of confidence results in that sort of barking little dog syndrome, where any bit of critique damages their already delicate creative ego, even if they consciously know it’s necessary. This can be likened to something like physical therapy; it’s going to hurt to walk again if you broke both your legs, and you’re going to hate it, but you know it’s necessary.

Successful Students

After coaching for over 15 years total, I had noticed that some people did better than others. At the beginning, I was working with a plan, and would teach all the people the same things but I quickly adapted that because it was not working well. Some were learning fast and would provide some interesting challenges or questions while others had some of the same questions but were always struggling on basic issues.

I understood one thing which is, you can’t really teach electronic music theory and music production training from a rigid approach because what makes it successful is to understand someone globally and then, as a team, find strategies to build a routine and work habits. More importantly, I tried to help the person find its own way of learning through the internet jungle.

Here are common points that people who succeeded had:

  • They had a clear direction: People that I see with a clear intention and direction, such as “wanting to sound like X”, are the easiest to guide. If you have a target and goal, you can always try to push what you do and technically study how it is done with music you have on hand.  With my help, we can reverse engineer some songs and try different things. Once that target is mostly reached, what’s interesting is how it leads them elsewhere. The fact that they know how something is done allows them to discover other artists or songs that are itching their curiosity. But working with targets, is always a clear indication of improvement.
  • They showed consistency: Anyone who works on a regular basis, over a constant time, has shown great improvement. More than people who started really strong but couldn’t keep up the pace. Working hard isn’t always smart. It’s more about knowing what you can do and try to consistently learn something new, practice it and then putting it into context of a song.
  • They asked a lot of questions: Often creative success and inquisitivity go hand in hand. Asking for advice and technical guidance is a must if you wish to go far. You can do everything yourself but you’re not giving yourself the chance to grow adequately. Even if someone thinks otherwise than you, there’s some part of his view that can be useful.
  • They stayed humble and always wanted to learn. If you come with the idea that you’ll learn something everyday, you won’t be stagnant in whatever you do and will always be looking forward.
  • They were not afraid of rejection and criticism. Because each song is an experiment in itself and anyone’s point of view is arbitrary.

electronic music coaching photo

Struggling points

These are individuals who have been facing a number of problems in the learning and while have learned a lot and improved much, they unfortunately haven’t rolled out as much as they wished. These are what commonly hinder them.

  • The student focuses on the success of a specific song.
  • They work in a linear fashion and won’t change.
  • Insisting on doing everything themselves.
  • The musician is often convinced they know more than they do.
  • Their expectations are set really high.
  • The belief that hard work brings success is deeply ingrained in them.
  • They see music in a hierarchical way.


What I’ve Learned In Electronic Music Coaching

The Latin proverb docendo discimus translates to “by teaching, we learn.” These are some of the lessons I’ve learned by teaching others.

Free isn’t always a good thing

If you give something for free, it doesn’t always have value. Free advice is cheap advice. Unless people pay for it, there is less of a chance that they will anchor said advice. Not saying that giving free advice is bad; that’s what these blog posts and the group flourishes on. It’s just that they can be easily dismissed. However, if you paid for advice, there is a greater chance that you implement it.

Consistency is key to development

Think of it like training for a sport. If you are training for a marathon, and decide to take a month off, you’re going to have to spend time ramping back up to that level. Additionally, the longer you put something off, the more chance you have to disregard it.  

Not be afraid of making mistakes

The comic strip artist Scott Adams has a really poignant quote about mistakes in the creative journey. He says, “Creativity is allowing yourself to make mistakes. Art is knowing which ones to keep.” I find this statement to be very true. Many of my favorite parts of my works have come unintentionally, or are a result of seriously messing something up. 

Bob Ross would have been great at electronic music coaching.

Being part of the community

No man is an island. Civilization was built by teams, and communities, not individuals. Teaching has allowed me to be part of a vibrant community, and for that I am extremely grateful. It has taught me at least as much, and provided me as many resources, as I have provided others.

Other Benefits of Electronic Music Coaching

Since my music is pretty esoteric, I learned over decades of performing that the people who attended my shows were cut from a similar cloth. They were musicians, and sound designers, eager to absorb some of the essence of the performance in order to translate it into their own creations. 

This gave me the realization that in order to grow and keep my fan base engaged, I had to give the people what they wanted. Therefore, electronic coaching became not only empowering creatively, it became a solid marketing channel. 

If you’re interested in becoming part of our community and getting some free coaching, join our electronic music collective, Pheek’s Coaching Corner. We also have a bunch of tutorials on YouTube as well. If you want more personalized coaching, I offer that as well.

How To Communicate With Audio Engineer

how to communicate with audio engineer photoOne thing that I love doing is to work with unestablished artists. It’s why I have Pheek’s Coaching Corner, and it’s why I price my services at a reasonable price. Working with new artists is fulfilling as I often find artist’s earliest work to be their most creative, and raw. It’s in these musicians that you find stuff that can be truly seen as original, having the vestiges of being an entirely new genre. It’s this sweet spot that exists before they start to become either derivative of their own work, or pivot to fill more socially acceptable shoes. However, unestablished generally means inexperienced in the rest of the music industry. There are certain things that both artists and engineers should understand while working together, simplified by good communication. If you are able to put things in a language the engineer understands, your experience will be much smoother. In this guide, I will provide tips, tricks, and methods to make this process as seamless as possible. Therefore, here’s how to communicate with audio engineer.

First, it’s necessary to lay out what a mixing and mastering audio engineer does and does not do.


What An Audio Engineer Can Do

1. Their Job Is To Facilitate And Mediate

People come to someone like me to either get guidance, or have access to a set of tools that they would otherwise not invest in. At my disposal are a bunch of plugins, and hardware that are specific to making sure things sound great, and translate well across as many mediums as possible. Additionally, I have access to creative tools that artists may not even know exist, yet could be applicable to their sound.

Additionally, artists come to me to get advice on where to go with their sound. Do they need additional elements to fulfill its intended purpose? Are they having writer’s block, or their skills limit them in what they want to do next? It’s my job to find resources that will help them reach their goals. These resources are something that I will touch on later in this article.

2. Their Job Is To Understand The Genre They Are Working With

how to communicate with audio engineerNot all genres are the same, and they require different equipment. If you were to record a cowboy outlaw record, it’s probably not the best idea to go to a micro house producer. However, I have had rock bands come to me because they wanted their album to sound electronic in nature, despite it being a rock album.
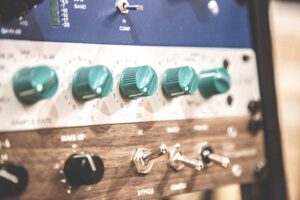
If you were to come to me as a micro-house producer, I’ve been in this genre for a while, and have a lot of resources. Therefore, it’s easy for me to tap these, and find things like reference tracks, or communicate with other artists who have tricks to help your track get to the next level.

Additionally, this genre understanding allows me to reverse engineer aspects of the music, and apply it to your track. Having a problem with simulating a certain textural effect that you heard in a micro-house track? Chances are I know how we can get pretty close to that with the resources, and experience I have.

Additionally, we understand how to reign in things like low-end if you are creating a song that you expect to be spun in a club. Remember, you’re competing with common frequencies of another song, like the kick, or the hi-hat. It’s good to know how to moderate these things for a club environment, and that’s where engineers come in.

3. Audio Engineers Understand The Technical Aspects Of A Release

Do you know how many LUFS the loudness of a track bounced out of the limiter needs to be to normalize correctly on Spotify? How about SoundCloud, or Beatport? Each platform has different loudness variations in their codec, and often if your tracks aren’t uploaded with these standards in mind, then there can be translation issues. This is where audio engineers come in. We understand this boring, uncreative stuff, and how to achieve it in the mix and master, so you can concentrate on being creative. Then again, if you want to learn, we can also play the role of instructor.

4. We Help Accent The Best Parts

Let’s say that you have a killer bridge. We can recognize this, and help bring that out in the mix, or even add elements that will help it transition better into the next part of the song.


What An Audio Engineer Cannot Do

1. An Audio Engineer Cannot Please Everyone

Perception is reality, and some people have different perceptions on what things are supposed to be. Especially when dealing with their art. With audio, producers often get married to their sounds, thinking that they should be specifically in this spot in the mix, when, in reality, it probably won’t translate the way you want it to. This may come from hearing said sound over and over again in whatever room, or on whatever medium they were listening to while they were making it. However, in a well treated room, with calibrated equipment, or conversely, in a club with a good, or poor sound system, it may not translate exactly how you anticipate. Some people are more judicious about this, and accept the reality. However, some you just can’t please. So is the way of the artist.
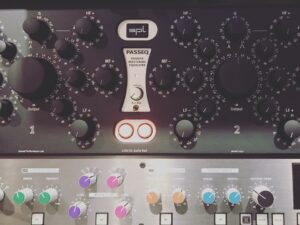
Therefore, I take the approach that it’s best to do the least amount of damage possible to a track, while still allowing the frequencies to properly breathe, and translate to whatever medium the artist imagines it being listened to on.

This is why it’s important to know how to communicate with audio engineer, so we can both come to a mutual understanding through the techniques I will discuss in a bit.

2. Audio Engineers Can Never Say What Does And Does Not Sound Good, Artistically

Kind of expanding on the idea of doing as little damage to a track as possible, it needs to be noted that like all other art, music, and sound is subjective. Sure, there are best practices to get something to translate, and upload to platforms properly, but as far as the timbre, and aesthetics of a sound are concerned, that’s so subjective. There is a reason why techno fans can’t agree on all techno being good, despite it being the same genre. Where everything else is the same, it’s the sonic grade that ultimately defines a song.

Extremely, there is a reason why some prefer the frantic shouts and pounding SH101 basslines of Nitzer Ebb to the soft musings of John Prine. As a matter of fact, they might detest John Prine, and John Prine fans might detest Nitzer Ebb. Does this mean one is better than the other? No, because our realities are subjective.

It’s my job to help you get to the sound that you truly desire, using references to other tracks, or having clear, simple communication.

However, it needs to be noted that we know what sounds good, technically. Like, for instance, if you’re making pop music, or if people are casually listening to your music (alternative or pop), they like mids, because mids translate the best on common speaker systems, and headphones. Chances are that if you submit your track to a blog, it’s not going to be listened to out of a soundsystem – it may be listened to out of a phone, laying in bed, which are mid intensive.

3. Provide Critique Without Having A Solution

Talent is subjective. So is if something sounds good. Therefore, if an engineer gives feedback, or says that something could be better, it’s their professional duty to have a way to fix it. That’s what we are hired for. However, if you aren’t looking for that sort of feedback, it’s good to have that role clearly defined beforehand.


Tips On How To Communicate With Audio Engineer

1. Keep Things Simple

how to communicate with audio engineerEngineers get that artists have a lot of things to say about their work, and may use poetic language in order to communicate it. And this prose sometimes leads to elaboration. However, there is a saying in sales, called K.I.S.S, which stands for Keep It Simple, Stupid. This is because people understand things if they are simplified. No need to get technical, or elaborate. Just say what you mean. A good way of easily communicating is to provide examples of things that already exist. Let’s be real, nothing is new under the sun, so if we can pinpoint where that idea is coming from, then maybe it can be recreated, with a flourish that makes it your own.

No need to write out a full page of diction. Instead, just Keep It Simple, Stupid. Also, don’t use vague words like, “I want it to sound tight.” That doesn’t mean anything, and is subjective. Which brings me to my next point…

2. Provide References

Expanding on what I said earlier, we are all borrowing ideas. Even if your track borrows many different ideas, and creates something new, if you think hard, you can find tracks that provide the feeling you are going for, which can give clues to the frequencies, and mastering qualities you want to match.

The references also don’t have to be sonic, instead they can be cultural. Let’s say that you imagine your song being played in an after-hours spot. This means that the song will likely be played in a place with little treatment, or in a long, narrow venue that isn’t typically used for music. This requires specific mixing, and pre-mastering to properly express its full potential.

Also, there are moments where something is created that doesn’t exist. There is no way for me to know how to create something if there is no reference to it, so don’t ask for that, since it’s impossible to know without endless tweaking.

3. Contact Us Before You Buy

This is true especially if you have doubts. You wouldn’t hire someone without vetting them normally, so why should this be any different? If you have a song that you think might fit my aesthetic, but not quite, then let me have a listen to it, and I will let you know if I think it’s worth working on. Believe me, I don’t want to work on projects that are unnecessarily difficult, just like you don’t.

You’d be surprised at what projects I have worked on. For instance, even though I make “underground” music, I worked on an EDM project, because the producer liked that I didn’t sound EDM. 

4. Know Some Basic Terms

As producers, many have at least some basic knowledge of the audio engineering spectrum. Most know what equalizers, and compressors are, as well as reverb or delay. They also know what mono and stereo means. However, there may be more specific things that they don’t know – like for instance the difference between a transparent and colored master. A transparent one is where you have a mix you’re happy with, but you want everything to be properly balanced. A colored one is where you aren’t totally satisfied with the mix, and want some more textures, and other elements, such as compression, and saturation added to bring out new elements. In other words, you don’t mind things being changed.

Other common terms used in studios to describe frequencies are:

Muddy: Too much bass.

Boxy: Too many mids.

Tinny: Upper mids or lower highs need reduction.

Bright: Similar to tinny.

Airy: The high register frequencies. The ones that can break glass.

Warm: Reducing high end, or boosting the lower mids to give it a toasty feeling.

5. Don’t Micromanage

Do you hate being micromanaged at work? Well, so does everyone. By micromanaging, you’re distracting away from the work that could be getting done on your project by pointing out things that the engineer recognizes, but hasn’t got to, or may not even be necessary once another process is done. We’re professionals; let us be professional.


Conclusion:

All said, if you learn how to communicate with audio engineer properly, you are making yourself better at what you do, because you are furthering your education by understanding the terms. Also, you’re making yourself easier to work with, and at professional levels, easy to work with can get you far.

This skillset will also help with other artistic undertakings, such as remote music collaboration, or doing collaborative DAW projects, or even online collaborative DAW ones.

Hopefully this proved to be a valuable guide to helping artists with how to communicate with audio engineers. Like in most things in life, solid communication, means a solid experience.


The Inspiration Cycle

Most people enjoy discussing music technically in terms of production as we all wonder where to start and how to handle ideas in order to make a song. I also follow many magazines and articles which cover how the brain perceives creativity, where it starts, and how to invoke it and keep it alive. However, even if you know the techniques to make music, remaining inspired to make music can become a challenge.  I struggle with musical inspiration as well, but also have a few tips if you’ve been struck with writer’s block that I find always work.

How is your inspiration cycle working?

This video about using flow is tightly linked to the experience of inspiration. Let’s dive deeper.

Through reading and my own personal experience, I’ve noticed that inspiration comes and goes through a number of phases, in a cycle:

  1. The stimulation and satisfaction of the mind.
  2. Conceptualization.
  3. Struggle.
  4. Release and creativity.
  5. Project completion.
  6. Transmission, validation.
  7. Celebration.

In the above video, the discussion is around flow, which is an important state of mind for a high level of creativity that can be reached by athletes and musicians during a performance. You can also access this level of creativity by making music, in your studio. But before a studio session, you need an idea and concept to make music around. Let’s examine the phases of the musical inspiration cycle I outlined above:

The stimulation and satisfaction of the mind

To sum up this phase, think about falling in love with something. For the writer, it’s a book or a scene description. The photographer gets excited about a landscape; the gardener, about the perfect trees; and the musician, sounds or a song. This can stimulation can occur anywhere at any time; in your car for example, or in many cases, during a “celebration” of some kind. The cycle becomes evident here, because the last phase is the celebration of completing your work, but this phase can also restart the cycle and restart the first phase of stimulation.

For example, many people feel that they want to become a DJ after a special night in a club. This is an example of musical stimulation kicking off the cycle of inspiration. People also like to celebrate art, in search of some sort of new stimulation for the mind; to be inspired to create.

Describing his creative process, Mozart observed, “Those ideas that please me I retain in memory, and am accustomed, as I have been told, to hum them to myself. If I continue in this way,” he writes, “it soon occurs to me how I may turn this or that morsel to account so as to make a good dish of it… All this fires my soul” (Harding, ).

The mind will feel satisfied by certain things that will inspire it to bring different elements all together, into a collection that will lead to the creation of a concept.

Tip: Before investing and diving into production, try to make a personal collection of music that moves you. It could be a secret playlist on Youtube, Spotify or Soundcloud, for instance. The richer your collection, the more you are investing into potential sources of inspiration.

Conceptualization

Understanding your concept is key here; it’s about putting to words what you have in mind. The main writer’s block-inducing trap in electronic music is facing the limitless options of where you could go in a creative sense. Ideas and concepts help to box you in, and to create your sounds into a palette that matches your idea. For instance, knowing you want to make “banging techno” already provides you with a direction as to what you’ll be doing. The challenge in this particular case would be educating yourself and understanding how complex sounds are recorded as well as other technical details. Conceptualization leads to the next phase which is the struggle; an unavoidable part of the creative process necessary when trying to apply your concept.

I’ve always found there to be two main things that will help with conceptualization:

  • Finding real life equivalent to what your vision is, such as finding songs that contain your idea or a part of it.
  • Finding resources to help you understand what your idea actually is.

The more clear your initial idea or concept, the best you can explain it. From there you can find someone who has the experience or tools to help you get your there if necessary.

Tip: Using voice memos to record something you hear or to leave yourself notes is a very useful practice. If you can invest in a microphone to try to reproduce sounds with your mouth or found objects; this technique can lead to very interesting results.

Struggle

The struggle is the phase in which many people feel like they want to stop making music altogether and even sell all the gear they have in extreme cases. Perhaps you’ve been through this struggle before – it can manifest in many ways – but the best approach to handle a struggle effectively is to moderate what you like doing, by reducing the length of time or efforts you’re inputting into developing your concept.

For example, instead of being in the studio for four hours, how about going for just one? How about you go for a walk when you have negative ideas coming to you? There’s no rush in making music.

I’ve seen so many artists struggle through this phase by falling victim to substance abuse which is by far the most risky way to deal with writer’s block. If you need an external substance to make you creative, you’ll quickly become dependent on it.

Tip: My drug is jogging.

Release and creativity

This phase can be when the “aha!” moment hits you full effect; all the technical details fall into place and you can express yourself entirely. I’ve had this moment with two albums I made, Tones Of Void and White Raven. However in previous albums, I’ve worked and worked to eventually find a pace that just made me feel unstoppable. I would finish songs in a day, which would normally take me months. Find a recipe, a patch, a series of effects that give you wings to turn anything in the sound you’re looking for.
For me, the “aha” moment is easy to hear on Tones Of Void. I had found the right series of effects that I loved and I was digging in my library, then could easily turn 1-2 sounds into a full song. I would record it live, do minor edits and felt entirely satisfied with whatever I had. I’ve also seen people using modular synths to make self-generative patches where songs are just written on their own and it’s really beautiful to see.

Tip: This phase isn’t linear and comes in moments. Find ways to save your tools and understand what uplifts your work.

Project completion

Finishing projects is something many people struggle with. The real question is when is it really done? Recently, I made a list of items to check to give yourself an answer but you can also give yourself certain criteria. I like the idea that something is never actually totally done, and that is part of the charm of it. Knowing the next project will be better is a way to let go of anything that has been revisited too often.

Once you can save your file and are happy with it, do a backup and call it done, this phase is simply done; it’s something you don’t want to drag on.

Transmission, validation & Celebration

You know when you love your song so much you want to share it with the entire world? That’s what the celebration phase I mentioned earlier is about. We want validation for our work, but there’s a part of ourselves that also wants to pass on our ideas to others. This creates the desire to have “the celebration” and to provide musical inspiration to others.

There are some people, however, who fear sharing their music. It’s no secret that most musicians seek validation from their community and music is a way to do it. What stops some people from sharing their work with others is the fear of being criticized. However, transmission and validation are necessary to move on to “the celebration”, which is the end of a cycle, but also the beginning of another.

I’d love to hear your stories about your inspiration. Please share!


SEE ALSO :   Where to Get Fresh New Ideas for Tracks 

Music production techniques: Non-Linear Production

It’s been a while since I promised a post about one of a number of music production techniques I use: non linear music production. The very first album I did using this technique and really sticking to rules of it was Intra; and then I recently went deep in to produce multiple EPs in the same vein of non linear production, which were made between end of December 2017 until March 2018. While Intra was an album of 23 songs made over nine months, my last experiment produced 19 tracks over 3 months. I think I’m getting better at it, mostly because it’s becoming clearer in my mind.

Out of the 19 recent tracks, I kept 8 for this album – which you can hear above – I named Returning Home; a statement about home being a state of mind and not necessary a physical place. I’ve been making techno/dance music since 1998, and after diving into more electronic soundscapes, experiments, and ambient music, it just felt good to return to my roots. A funny thing also – I tried working with some other labels to find it a new spot as I wanted to keep my label Archipel for more down-tempo stuff, but I kept getting refusals or complicated compromises. I’m too stubborn to change things and since this album was made based on a very solid concept, I didn’t want to go back and change what felt good.

But back to the non linear production technique. I’ll cover how the process went, from the beginning of where I started from scratch until the end.

I know some people who are like, “but I don’t need a technique as I just do music.” Sure, that is not for you then. But this technique can bring benefit if you’re looking to expand your production. It surely contributed to make me more prolific through time.

Non-linear music production – A concept

This concept (which has been around for decades according to some research I did), encourages the producer to explore working on multiple songs at once, in a non-linear way.

This means that:

  1. You aren’t working on a song’s beginning first to bring it to its end, before starting a new one.
  2. Each track is approached individually for its needs but you also work globally. Keep in mind that what you did in the previous track should differ on the next.
  3. The technique is about repeating the same phases/rounds until you get a solid core. Then there’s the finalization to get ready for mixing.

It’s called “non-linear” because you constantly circle up in a series of rounds, on multiple tracks, all at once.

Note: A non-written rule also implies that working on a track should be done in short periods such as 20-30 min at a time on a song, then stop, save and move on. Why? Because it keeps you fresh.

For many people I explained this to at first, it felt unsettling and confusing. There’s some kind of embedded belief in people that when you go make music, you should find your idea, absolutely stick to it, and build it into a song; beginning at start and bringing it to an end. I usually see people’s projects having a few blocks right at the beginning of the track and then they get lost.

The number one thing I hear all the time: “I can make a great loop but don’t know what next.”

I’ve written a post in the past about this. However the non-linear technique is really aimed at making the loop issue something of the past, because it’s all about transforming small ideas into bigger concepts.

But where does it start? How do you begin?

Before diving into producing, let me explain the rounds of the non-linear music production technique, as this is what it’s all about:

  1. Content creation, generating ideas.
  2. Filtering ideas into a concept.
  3. Building a core loop.
  4. Template structure.
  5. Arrangements.

When you decide to create your project, the first thing you should do is decide on your project type. Is it an EP (3-4 songs) or LP (5-10 tracks)? Perhaps you just want to make a bunch of tracks; I personally believe that we should never make just one track at a time. If you have no precise project, invent one, such as “I’ll make 5 tracks for fun and want them to be mainly techno.” Once this has been decided, you’re ready for content creation. I usually spend a considerable amount of time in content creation and idea generation.

You can also start from unfinished tracks that you want to apply the idea to. The idea is to work on multiple projects in parallel. I usually it works best if you have at least five on the go, but there’s no limit of course. To newcomers, start small though to see if working this way works for you. The technique is about to bring your track from a simple idea to a finalized but unmixed, song. The mixing is not part of this. I find the mix down works better if you don’t do early, it but perhaps it can. Don’t hesitate to build a reference folder where you put songs that inspire you.

Content creation, generating ideas

From all the years of listening to music, running labels, doing mastering and DJing, I’ve come up with a theory: a solid song is – in general – a single, solid idea, supported with two others. The main idea can be a loop, a motif or even a sound. I remember Hans Zimmer describing a motif by saying it has to have an emotional impact on you, that it reappears in your mind later on. He was saying that the Batman motif he did was a simple two notes, but very powerful. You’ll play them and you’ll automatically think of Batman. The two other ideas are necessary because a song usually needs a development and a “surprise.” That said, in this production technique, you need to create fresh ideas. Lots of them.

I made a very long post about how to come up with new ideas but I’ll sum how I did mine:

  • Recycling older ideas: I have countless samples that I’ve used or never touched. I like to process them into new sounds.
  • Recording radio or other spaces with a microphone: When I’m in a creative mood, I’ll spend a lot of time recording sounds around me from that period of my life. I’ll leave the recorder somewhere for an hour to see what comes up.
  • Try demos: I love getting demos and try to see what I can come up with it by sampling them. Some have limited time or others are in days. It forces you to resample the hell out of the work and get something. Sometimes I end up buying it of course.
  • Pure sound design: Layering sounds from different takes is a great way to generate rich sounds. I do this a lot but its time consuming.
  • Jamming with the sounds: When I have plenty, I’ll generally put the sounds in a sampler and jam them with a midi controller or PUSH. I’ll record everything I do into a project.

A project that has many ideas will be recorded with the date of the day for the jam. It might turn out that I have a few hours of material which means there’s hypothetically 3-4 ideas in there.

The definition of done (DoD) of this phase is when you have a project with 3-4 ideas ready to go. I usually do one session per track needed for the project.

Filtering ideas into a concept

This phase is one that you need to do outside of jamming. Why? Because when you jam, you’re in your creative state (right brain) and have tons of ideas but your judgement is off. You can’t be a judge then. You need to feel free and explore without boundaries. This second phase is about going into a more analytical side where you will be curating your crop.

  1. Go through all recordings you’ve made and loop part of it. The question is, can you listen to a loop and feel inspired? If yes, you have something to hold on to.
  2. Use different size loops like 1, 2, 4 bars. Compile different ideas.
  3. Use the session view to make scenes of loops you like.
  4. Try to see if certain loops, once layered, make unexpected motifs.
  5. (optional) Add a kick & hihat to give you an idea of the groove and adjust the timing of the loop.

The definition of done (DoD) of this phase is when you have a few scenes in your session view that feel solid.

*Note that you may go back to create more ideas (Round 1) to complement what you have. You may also create a pool for all ideas of all sessions and then make ideas from that. No rules here, only possibilities.

Building a core loop

At this point, you should have X number of projects (based on your project definition you decided on at the beginning, i.e. EP, LP, whatever), each with material that has been organized into 2-3 ideas. Now comes the moment to put it all together.

The loop you’ll build here is the middle part of your song so it should have all the bells and whistles.

  1. Add a foundation. The fundamental part of your song is the low end and the bass. From the main idea, add a bass that either supports or responds to the idea. Adjust it so it’s in key.
  2. Add percussion. Complementary to the bass, you may add kick, percussion, or anything complementary of what will create the groove. I usually start right away to decide what groove template I’ll use on this core part.
  3. Add melodic touches if needed. Decide how long your melody will be and how it progresses (if it does).
  4. Create a background and space if desired. This is usually the reverb and textures. However, this can also come later on.

The definition of done (DoD) of this phase is that you have a main loop that you can place in the arrangement window, right in the heart of your song (which means you need to know roughly how long it has to be). A good loop is one that is centered around your motif where if you solo that part, it would be what someone would talk about to describe your song.

In the process of working through the core loop, you might need to go back to create more content or you may import some from other sessions.

Template structure

Now that you have the core part of the song, it’s easier to build out the remaining structure. In the arrangement view, create three sections: a beginning, middle and end. You will now lay out your structure to have an idea of what you can do with your core idea.

  1. Copy the elements from beginning to end  that will be present the whole time through the track.
  2. Work backwards by deconstructing the timeline of what comes in first and so, until you get to the middle part.
  3. Do the same process until the end. You may repeat some elements.

The definition of done (DoD) of this phase requires that you have a temporary structure from beginning to end. It might take you a while, I encourage you to do sprints of 30 minutes at a time. The problem with working too long on this phase is that you lose perspective regarding the strength of your song. I usually want some sort of structure to come out of this phase, but I may go back and forth with the other phases until I am happy with it.

Arrangements

This is the final phase. You might need to come back to it as everyone has different needs that will arise in this process. Arranging – in simple terms – is creating the story-line of your song, but also between songs for your project! How do your tracks relate to each other? I have songs that have brothers and sisters, while some are from a completely different family.

After working on the arrangement of song, the last thing I do is export what I’ve done so far. When I switch to another track, I import the last session in the arrangement to see what I did and compare. I adjust the arrangements so all my tracks don’t have the same structure; beginning, breaks, and punches. I adjust them so they can be fun for DJs to mix too.

Arranging is a massive topic that I will detail in a future post and is involved in most music production techniques – but this explanation is a full conceptualization of how I work. Hopefully it helps you somehow too!


SEE ALSO :   Non-Linear Music Production 

The 2-minute Soundcloud preview method

The 2-minute Soundcloud preview method, as I call it, is about creating tracks previews that are 2 minutes long. Why that length?

If you look at most track previews labels and artists are sharing online, they’re about 2 minutes in length. This unofficial standard got popular during the early days of Soundcloud when a little problem was discovered involving people being able to download full tracks from the website; not the full resolution file, but the streaming version, which is very low quality. Many tracks leaked this way and it’s crazy to think some people used those versions to play in podcasts or even in clubs!

So then, why post 2-minute tracks?

Many labels look for artists by browsing their Soundcloud page and it doesn’t look good if the page is empty. As a result, some artists started creating “fake” songs, as 2-minute tracks, often with artwork created by an online app. The crazy outcome of this behaviour was that some people/labels started asking artists to release some of those two-minute tracks, which forced the artists to finish them.

The pros of uploading 2-minute mini-tracks is that if someone connects with you about one, you’ll know what’s working best from all the tracks you have online. This particularly useful if you have a large number of sketches and wonder which ones have the most potential. The cons of this approach, if done poorly, is that it can really backfire at you, and make you look (very) unprofessional.

That said, if your goal is to get some traction online, this method can really be effective. Some people also need motivation and direction to get things done so this approach might be good for you if you’re one of those artists. Here are some tips on how to approach this effectively, to get most out of it:

Use tracks that are in progress to avoid getting caught with unexpected requests. The more advanced you are in the arrangements, the better. You can actually use a complex 2-minute base as a way to find the final ideas of your track. Uploading a very simple loop is not a good idea as it might sound completely empty.

Make sure it is mixed properly. This might be the most difficult part of it, but make sure the mixdown is solid. Use some compression and have a limiter on the master to glue it together.

Make sure the main idea of the track is exposed in the preview. What I mean here is, be sure that if someone listens to your preview, they will have an idea of what the song is about. If you need a better idea, go to decks.de and listen to previews of records to see what I mean.

Have something strong to say. Make sure your loop is exciting, has something special in it and has a memorable element that might make people want to hear more. This is the most critical aspect of your 2-minute track.

Try to have very different song ideas from one to another. If you have too many previews that all sound exactly the same, it’s sort of like having a colour palette with a multitude of beige variations; have different colors but keep an aesthetic that is in tune with your style.

Make sure the mixdown is solid, then normalize. If you don’t use a limiter, export it normalized, this will create a louder version.

Limit the total number of tracks on your Soundcloud page. Try to pick a number between 10 and 15 then never have more. Why? Because you don’t want to be that artist that has zillions of unsigned tracks either. Remove older ones and remove ones that have no comments or likes. This is not good for momentum (see my previous post).

Indicate if the track is unsigned. Let people know the track isn’t signed or mastered; this helps clarify to people who listen to it.

So then, when do you finally finish one of these 2-minute tracks? You should decide to finish it when it generates some sort of buzz. If you get a DJ asking for a copy of a track for a podcast, this can be as important as if a label would like to sign it. If someone interested in your track, don’t sleep on it; let me know of your results!


SEE ALSOIntuition for decisions in music production   

Playing Electronic Music Live – How to Prepare Your Live Set (Part 3)

After the first two parts on this series of posts about playing electronic music live, we arrive at our final topic: clip arrangements, song organization and sound preparation.

Clip Preparation

I hope you did your homework from part two where I asked you to take your arrangements and turn them into an Ableton Live session. If you’ve done this, you’ll see that this task is pretty demanding and can be confusing, because you might feel your song(s) aren’t the same anymore, or perhaps they don’t make any sense. But trust me, even if you feel like you have failed in arranging your sessions, it will start to make more sense as we continue. What really matters is that you now have material loaded into the session view.

What if my track is so simple that I have only a few clips in the session view?

That’s not a problem, the idea is to have something. Part of the beauty of a live set is that once you have all your tracks in the session, you’ll shape them into a longer set. A live set isn’t like a DJ set, where you focus on transitions and track selections; it’s way more flexible and involves constant shaping to create a bigger picture.

1st To Do: Import all Your tracks into one big project

For the sake of this exercise, please start by creating a blank new live set that you’ll name “My Live Set” where you’ll have 12 channels to start with.

Next we will import all songs into that project. There are two ways to do this and it’s up to you to decide what is the best for you. I personally like to open a track, grab all clips in the session, copy (cmd+c), then open your “My Live Set” project and paste. You can also copy through the browser and should you be more comfortable using that method, do it that way.

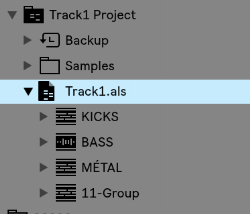
One of the great new features of Ableton 10 is that groups now appear in the browser; which could be a good way to organize your work to re-import later on.

You should also consider copying audio leftovers over from each track. These unused pieces are more precious than you think, in a live context. A leftover is anything in your track that was created but didn’t make the final cut. It could be a variation, some weird FX, vocals, whatever – basically, anything will do. The idea behind leftovers is to create material for your live version to make it differ from the original song; it will add an edge.

Once you have all your tracks imported, you have a better idea of your whole session.

“How many tracks do I need for a 1h set?”

The answer here is hard to figure out until you’ve rehearse and determine your natural flow. After years of playing and recording my sets, I’ve figure that each of my tracks average a rough 6 to 8 minutes in a live context. This also includes the transitions (i.e two songs overlapping for 1-2  minutes, to make things smooth enough like a DJ would).

The total time of the tracks is not necessarily important to figure out. If you’re creative, you might even play the tracks in a random order.

2nd To Do: Name and color all clips appropriately

People often overlook this part but trust me, the better the organization, the less stress you’ll have in a live context. Never believe yourself when your mind says “oh I’ll remember what this clip is.” This is why names are important, but also, the clip color. All kicks should be the same color, basses and so on. My personal coding colors have been:

Kicks: red (grabs my attention)

Low end, bass: brown

Percussions: yellow

Claps/snare: Orange

Hihats: grey

Melodic elements: Blue, in various tons as some are different.

One thing about colors that helps is if you’re playing a track while in transition to another one, you can see the color of the other clip that you can’t see on screen.

Please note that I don’t necessarily recommend putting all of the same sounds in the same channels. You might want to mix, for instance, hihats of track A with the ones of track B. If both track’s hihats are in the same channel, you won’t be able to mix them and one will play after the other (only one clip can be played in a channel at a time).

Scene organization

Organizing your scenes is time-consuming, and it will also be what you’ll be reworking the most. It will also get your songs to have more of a live feel. For this section, I’ll use an example of one of my latest live sets to explain what I did, and why.

This song starts at the second row (scene).

Channel headers: As you can see, header colors aren’t important to me so much but there is a section all in white. This is because I use two MIDI controllers for controlling the volumes and the second section is for the second controller. This is also why they’re numbered so I know which slider they refer to on the actual controller.

3rd To Do: Map your channels to the appropriate elements of your controllers

Think of how you want to control your set on a base level, which is the channels in most cases. This is the most important part to pin down, because as you prepare your set, you’ll need to control volume sliders. Map your channels to the appropriate elements of your controllers. If your controller has buttons, I’d also map them to the mute buttons. Mutes are very important.

Buffer rows: As you can see, alternating rows before and after each busy row have scene of empty clips. You can also see that they have the “stop” square in them. I create “buffer rows” for two reasons: the buffers help know where the song starts and begins, but they also serve as a quick way to toggle a clip to stop playing if necessary.

4th To Do: Add 1-3 buffer rows between each song

The first scene/row of each track: The first row, to me, is the most important one. Over years of playing, I’ve settled on a super minimalist version of my live set where I play mostly loopy music with variations which really enforced the importance of the first row of the set.

The first row has various various roles:

  • It is the introduction of your song: It will be used in the transition from the previous track.
  • It is the core idea of your song: All sounds that are playing from beginning to end of your song should be placed here and remove everything below. In my case, the kick will be the same from beginning to end. The length of the kick will be 4 bars long and include variations. Some people like to add multiple clips underneath as variations to trigger, so that is always another option, but think that whatever remains the same throughout should be there.
  • Tension relief: If you noodle around, create an improvised breakdown or start removing sounds. You can use the right side play to then trigger all sounds at once to come back to the song’s full intensity and main idea. This point is very important if you think you’ll be exploring and improvising as you’ll need an anchor.

5th To Do: Make a solid core

Supplementary/following scenes: There are multiple ways to use the scenes that follow your initial introduction. To “play it safe” you could simply have each scene play as the track evolves. The good thing about this approach is that by having all scenes on hand, you can deconstruct the timeline of your song by playing them in different orders. My favourite way of doing this is to have variations of a scene, such as one line with hihats, one with none, one with two playing and a clap, etc, same for melodies. This way I can play variations but I can also trigger one entire line and have a “ready-to-go” new take. If you look at my live set screenshot above, you’ll also see that under one sample “Tommydrum”, I have the same clip three times using variations in timing or tweaks in the versions. I can toggle between them as I need them.

Last To Do: Plan your follow-up lines/scenes and decide what you use.

In the next post, we’ll discuss rehearsing, sound calibration and advanced clip settings!

Intuition for decisions in music production

In a sense, musical intuition is what defines someone who can bring a bit of creative magic into something, in comparison to someone who sticks to truly technical application of software. I’ve often had the chance to watch experienced producers make music, either while I was visiting one’s studio or on the spur of the moment of a jam. For instance, we once had the infamous Narod Niki experience at Montreal’s MUTEK in the early 2000’s where Zip, Villalobos, Dan Bell, Akufen, Cabanne, Dandy Jack, Monolake (even Cassy sang for some minutes) all synced their laptop and gear to improvise a show for us. Our local festival gave us many opportunities to watch, what I would call, masters in what they do, play in front of a crowd to present how to create and perform. The live act itself, when done properly, should sort of represent what the artist is doing in his or her studio, but in a way that can bring the crowd on a journey.

When I state a live set done properly, I refer to something that is partly prepared, partly improvised: a set that relies partly on musical intuition. Musical intuition is the happy combo that allows for “happy accidents” and creates a sense of risk-taking. There are a lot of pre-recorded performances that I don’t get the point of. What interests me here, is the topic of musical intuition. Ever since I started teaching, this one question is often brought up:

How does one teach musical intuition, or intuition at all?

There are 3 points about intuition that we need to discuss first. Intuition can be:

  1. immediate apprehension or cognition without reasoning or inferring.
  2.  knowledge or conviction gained only by intuition.
  3. the power or faculty of gaining direct knowledge or cognition without evident rational thought and inference.

What I refer to by using the word intuition is a bit different from those three points. For me, intuition in music is how someone does something that seems to be random, but is actually done in a very effective way. Partly unpredictable, partly guided by experience, but entirely guided by a personal vision to arrive at a specific result. This is musical intuition.

A notable example would be an artist, during a live show, dropping some sounds or a musical idea that was unexpected but works with what’s happening at the current moment completely. Another example could be a musician proposing a random idea and having that incomprehensible idea make total sense after 2-3 minutes or development.

Can musical intuition be learned or developed in music making?

I firmly believe it can be. Some ways to get there would imply:

  • Listening to a lot of music genres, be diverse in the selection. The best way to get new ideas for one song and bring a wind of freshness into something is to translate an idea from somewhere else. The number of ideas I get from free jazz or Indian music are too large to count, but I find a lot of depth into these genres; they have been around for so long that they have developed so much maturity. Try to dig into realms that seem obscure or spend time listening to folkloric music as a starting point.
  • Knowing your tools. This one is overwhelming as there’s always something to learn. I often say to people, what you need to know about your DAW should be just enough to make blocks and build tracks. The rest of it, you learn as you go. But the main part is that you should be at ease with the DAW, and using it should be second nature to you. Moving blocks around, copying & pasting, and arranging basics must be something you can do fast so you never lose your flow. It’s when you start looking for how to do something very simple when you struggle too much and lose your initial idea. Imagine you couldn’t explain to a friend how to get to the nearest grocery store because there are too many details to explain; it would be confusing for him and you.
  • Be attentive to your routines and things you don’t like. We get caught up in what has previously worked, and will tend to repeat it ad nauseum. While part of what attracts people to our music sometimes one specific sound, if we become a slave to ourselves and to people’s expectations, we will fail to grow as artists. Musical intuition progresses with your personal dedication to grow and stepping outside your comfort zone. The easier it gets for you to explore, the more easily you can express yourself. The sense of becoming fluent in music-making will allow you to become more spontaneous and able to come up with new ideas.
  • Nurture technical curiosity. Spend tons of time reading about music, but also, non-music related topics. I have had so many ideas come to me by reading sci-fi novels, watching dancers, reading about architecture, drawing with my son, running in the woods, etc. Your brain needs to do other things other than spending time in the studio. You can only learn to a certain extent in there, you open yourself up to new ideas by doing other things.
  • Rehearse alone and with others. If you can jam on your own to get comfortable in your art, that is one important thing. But when you can then play with a friend, it becomes very interesting as the dialog forces you to interact/propose/listen/adjust. This will improve your communicative music skills by a few notches.
  • Play for friends. I used to do intimate, living room concerts where I would play for 3-4 friends, sitting on the floor, sipping tea, drawing, dancing, chatting but mostly, listening carefully. Those moments are where I’ve learned the most and this is often overlooked as people think playing in front of a lot of people is where the fun is at; it can be, but it’s not the only option. The advantage of playing for a handful of guests is about getting intimate and instant feedback, which can be a very rich experience.

Experiment with these ideas and you should slowly develop your musical intuition. Let me know if you have questions or join my mentoring service to explore your music more deeply.


SEE ALSO : What Is A Mature Sounding Track? 

Music Making Is Problem Solving

Every once and a while the excitement to launch into a session fully inspired, fully motivated, literally can’t-get-into-it-soon-enough hits me, and it’s amazing. Seriously, in my experience there really isn’t anything that gets me pumped like that because when you know your idea is that good, and everything seems to come together perfectly, you know it’s going to be big. It’s different this time. So, you get started, loading the drum kit, mapping out the midi, tweaking the saturation.. soooo gooood….. then, your Facebook beeps, the insurance guy calls, your plugin freezes, and before you know it you’ve completely lost the groove, and the dream is over before it started. Music making requires endless problem-solving. 

Why is inspiration so quick to fade out? Why are there so many obstacles in the way? Does sitting down to make music always have to be this difficult? If you can relate to the experience I painted above you have tasted the sourness of the scapegoat in music.

There will always be a need to solve problems and cut through obstacles, both unexpected and predictable. Yet for better or worse, they come part and parcel with making music. Questions and distractions… Instead of fighting them, we need to minimize their effect on us, and as much as possible reduce the chance of distractions from happening altogether.

Looking back at nearly 100% of any consultations and coaching I do with people, I find there are four main ‘problem’ areas which seem to rotate and steal our attention. While there will always be some form of distraction, if we work to minimize these four main problems we’ll be in much better shape to stay on track during our next session.

We’re talking about a creative solutions to common solving problems.

Problem one: How and where do you get inspiration? I believe that there is a special energy that comes to us when she knows we’re committed to her. When I say her, I mean the work. Professional runners say that the hardest part about running a marathon is simply getting the motivation to put on their shoes, and leave the house. Boom. Just show up and get started – load up your daw, and start making noise, you’ll soon get excited and find something cool to work towards. One of the most important and simple approaches to music production, which I always recommend, is simply making music when you feel great. I’ve read several articles about the importance of rituals – where you design and carry out a pattern that makes you happy inside and out, and within that zone, your mind will enter a very positive space, which is super important when we demand creativity and imagination.

Problem Two: How can I know enough about music production to be a one-man band?
It’s impossible to know everything, and you don’t need to. What you really want to know are the ins and outs of your daw, and instruments you use. If you’ve been buying all the latest synths and each one of them is different, it’s going to take quite some time to know them all 100%, whereas if you are using one or two instruments, read the manuals and learn everything you can about JUST those two synths – you’ll be much quicker to make and achieve the sounds you want by knowing less (less instruments to learn), and focusing more (mastering the ones you use).

Less is more. I watched a video interview of one producer who’s had several track placements with Kendrick Lamar ~ the dude is 18, and records everything into Garage Band on his iPhone. He has a guitar and a phone. That’s it, and he’s making huge strides with his work, even with the most basic equipment.

Find a way to get engaged. Ask yourself what part of music production makes you forget about time, food, and everything else? This is a space where you’re in the zone, fully committed, and nothing else matters. Embrace this process and be aware of when this happens, you may not reach this level of focus and results during other steps along the way. For some, this state will only come to them when Dj’ing, and for others, it will come while locked in a mixdown, etc.. know where you’ll find your flow.

Problem Three: How can I commit to a direction in my music?
While there is no straight answer for this, I’ll simplify things to the belief that – you have multiple options, and don’t have to commit to only one. Record both ideas, and use the ‘save-as’ feature, allowing you to save a second version of the song to work on, and later decide which direction you’ll be happy with.

And lastly Problem Four: What will the afterlife of my song be?

No one can see into the future, so it’s impossible to know. I don’t believe it’s a productive use of your time to dream about what could be one day… without finishing your song, it will stay living on you hard drive forever, which is not what you want. What is important right now is to focus on the important things here:
Making music, Finishing projects, promoting your work, networking with other producers.

(for tips on how to promote yourself as an artist in a way that is personal to you, check this post

To wrap things up, problem-solving can be as complicated or as simple as you want it to be. While a study suggested that in front of anxiety, one of the best things to do is to take a 2 day break, although I’d encourage you to take a week off to start with.

Photo by Oskar Wimmerman on Unsplash

In an excellent psychology related article I read that when one is faced with a challenge, it’s critical to understand exactly what you’re being tested with – that is, you need to know what is the real problem. To know and understand what the problem is you must be able to explain to someone else with clarity, with a clear description. Understand the problem, and understand the options available to you. I read that negotiators who talk to terrorists holding hostages will eliminate many options down to only two in an effort to achieve a quick, yet satisfying resolution. Reduce your options to get moving quickly. Making a decision in haste can also have a negative effect, so don’t feel the need to always make a decision right away – give your self time away from the problem, and trust your brain’s ability to understand that in the background, beneath the surface, at some point a creative solution will emerge, often when least expected.

In the end, to win more, to score more, to get through to the finish line more often, you need to be as creative in finding solutions to problems as you are in every other area of your productions. Set a up a system where you minimize the chance for distractions to happen.

(quick tip– every mac has an app called Automator, where you can assign a chain of commands for whatever you wish to do. Check this video to setup a quick way to close all programs, turn off wifi, launch Live, and kick-start your session fast.


Cheers Guys JP


  SEE ALSOChecklist to see if my song is finished 

How to filter your best ideas

I’m always looking for ways to improve upon what I do, and how I can better serve my clients. I’m not taking any breaks on becoming better and better every day. I read a lot and especially enjoy reading words from entrepreneurs to learn from, and help build upon the success of others. When I come across an article that brings up an ‘a-ha’ moment, I want to share it. One of these moments came from one article I read about how to turn a great idea into a business. Across many different fields, music, tech, etc.. one pattern in runs true throughout all of them – sometimes the best ideas come to you in ways you can’t always predict.

Another thing which is true, to generate ideas you start by brainstorming.

In the musical world, I would translate this as jamming. With nowhere particular direction in mind, you begin by tweaking and trying everything. Make sounds, press buttons, turn knobs, listen to the effect of this and that, try new techniques for the first time. In a past article, I’d invited you to use Youtube to find out something new or use a new synth demo and record the outcome.

Jamming freely. It’s known that Prince would spend time in his studio every day making a ton of noise simply to try new things, try new jams, and record these experiments which resulted in a vault of music no one would hear, except him. I’d encourage you to do add this to your daily routine, either very early in the morning or at the end of the afternoon.

Going back to the article that ignited my ‘a-ha- moment, the process of idea generation should involve the following two steps:

  1. Creative session.
  2. Analytical period.

The article states that the brain has a very difficult time creating and analyzing at the same time. In the moment of creation and discovery, our brains use a lot of energy to focus on active listening. In this messy and uncontrolled environment, our brains are set in one direction, we’re in the zone. The missing piece of the puzzle for me was reading that our brains have a very difficult time when asked to create and analyze at the same time. It won’t work both ways.

This is why it’s recommended to separate the two tasks, create freely one day, then analyze the material on the next. This would also explain why we often listen to what we did from our first session and find it mostly garbage. The key word here is – mostly.

It would also confirm my theory that spending too much time in the studio is counter-productive because without a change of perspective you don’t have enough distance objectively evaluate your efforts.

Over time I’ve nearly burnt myself out explaining this process to others who struggle with the process. I’ve also learned it’s sometimes best to let those learn by themselves, at their own pace. This confirms the idea that the creative process is very much a personal one, and that no two people will learn or develop at the same rate.

Session 1: Jam, have fun, explore, fail, win, repeat.
Session 2: review everything that was recorded and isolate the potential ideas that stand out, and are more usable.
Session 3: Go through isolated ideas. Work around one.
Alternate.

In other words, try to alternate between creative flow and analysis, self-criticism and more technical work.

Your brain can only do one at a time and more so, why go analytical when you are creative and why be creative when it is time to be self-critical. The main thing you’ll refer to as your analytical part is to listen to what feels good to you.

Build. Learn. Repeat. Build. Learn. Repeat.

As a child, going out to restaurants with my parents would normally involve using pencils and paper to draw pictures and doddle while we waited for our food. (this was waaaayy before smartphones became commonplace) For me, a blank piece of paper is a license to get messy. Everything is possible, and I always found it easy to get started. Our favorite game was one where one would draw a weird, unrecognizable doddle, and pass the paper on to the other.

The second player would have the challenging task of turning that mess of lines, shapes, and circles into something recognizable like a car, or a bird, or anything that required a bit of time and imagination. Until this day I’ve always thought this exercise was one of the most creative tasks I ever did.

So, here’s another way to approach this: take something totally random, even something you truly don’t want to work with whatsoever and try to make something usable out of it. Make a loop, make a playable sound, take something terrible and push yourself to find something in it that you can do something with. I did a full EP once, a while back where I’d force myself to work with sounds and recordings that made no sense whatsoever. It turns out it’s a good exercise but also very useful as you don’t depend on only good material to be effective with what you have.

SEE ALSO :  The Modular Trap   

Creating Timeless Music

Recently my Facebook page was flooded in a fantastic way. This thread became overwhelmed with comments I was happy to read because it reminded me of how much music can drive and affect our emotions. We’re talking about timeless music.

I asked my FB followers to name some music that hadn’t left their DJ bag for years. These were the records that passed the test of time, and truly stood out as ‘timeless’ music. Which brings up the question, what is it about some music that makes it sound timeless? In many cases, music that has content touching on deeper themes can be easier to connect with since right away it feels more personal. Music can have a way of suggesting and expressing emotions which words sometimes cannot, which is why music is often such a powerful medium of expression.

A friend of mine mentioned that music with a particular sound or mood would seem to have a personality of its own, which is a similar comment my friend Vera told me about the records she always carries with her – that certain records were like friends or companions to her. Some records work better with others and some work really well in a very specific context. Some people talked about keeping certain records to close out their sets, and others perfect for a sunrise.

In a past article, I covered how to develop many ideas quickly, but also explained the lottery of finding a good one. This can be quite a complicated topic and in some ways impossible to pin down as a science. Despite the fact that so many popular songs can, and have been written very quickly, there is still no exact science to writing great music. That being said, it’s worth spending a minute to look at a few common denominator between these examples.

Let’s explore some theories you can put in place so that hopefully, you may one day create timeless music of your own.

First, some will say achieving a state of grace, which in psychology, is often labeled as being in a state of flow. Many artists have, and can touch that feeling yet sadly will often rely on substances to reach it again, which is in many cases counter-productive. What exactly is flow?


In positive psychology, flow, also known as the zone, is the mental state of operation in which a person performing an activity is fully immersed in a feeling of energized focus, full involvement, and enjoyment in the process of the activity. In essence, flow can be characterized by a complete absorption in what one does and loses a sense of space and time.

You could also see this state of ‘flow’ as an activity where time flies by so quickly, and you are so absorbed by what you do that you can feel it is being made by nearly itself, in the most natural way. I would say that this is not something essential, but usually, as you make music and have experienced this state you’ll agree that some of your best music will be written during this time.

Another way you can approach writing music that sounds more timeless is to be aware of current trends in music, and understand what really defines what’s popular. There is no shortage of studies that have looked look at chord progressions common throughout different eras, and identified a winning formula. The use of the right chord progression mixed with innovative techniques of an era will make a musical and well-written song truly stand out. David Bowie is one artist who always had the flair to find and collaborate with upcoming, creative people to push the edge creatively.

 Get it done, and get a lot of it done.
Being productive helps if you avoid censoring yourself, and not to overthink the process. In other words, if you made 50 tracks over a span of time and 5 of those were truly excellent, will always be more prolific than spending years having only made five great tracks.

Below you’ll find some tracks that made it to the suggestions people did and what made the tracks timeless would be categorized to a few main points.

Melodies: More than often, a haunting melody or something very catchy will make you remember a track.

Innovation: Using some new technology or personalizing a technique. Sometimes what you can do is take a way used in another genre and apply it to what you do.

Arrangements: There’s no secret here to say humans love surprises and arrangements are the art of playing with expectations, unexpected moments, gratifying cues and misleading ideas. The balance of these elements, the ratio of events in your track, spread in the right perspective, will make your timeline, timeless.

Mood and emotions: When you hear an accordion playing in a restaurant in Paris, even though the song is probably 100 years old, you’ll automatically connect to the mood, the emotion and understand why that musicality belongs to the streets of Paris. You know that will still be played in 100 years too. It fits. Using triggers as these in some ways can really help your music to connect with a context.

To finish my point of view, I’ll share some of the tracks people suggested that got attention and I’ll try to explain why the track can be seen as timeless.

This track by Maurizio (Moritz Von Oswald) was when I felt I really clicked to the more minimal movement back around 1996. It was one of the first low key track that was completely hypnotizing and that could be played at pretty much any moment, mixed with anything (almost) and up until now, it has been copied, influenced the whole dub techno movement. It’s for sure, a well-known classic by any DJ that’s been digging for a while. Excellent to drop in any set, it’s one of those tracks that you can’t go wrong with. Would this record have the same appeal if it was released today? It’s still strong!

Timeless for: Innovation, use of pads, groove and endless feel.

Isolé got really big through the release of his track “Beau Mot Plage” which, when released, automatically went in most of DJs bag, listening to techno, house, etc… It’s just a beautiful, well-produced record that brings a smile when played. There’s no doubt it will be a classic for the next 20 years as well.

Timeless factor: Melodies and arrangements.

We were lucky enough to first see Ric play this during his live set at MUTEK in 2002. He had it sketched out and played it at the festival. It’s one of those records that, when played, often get people to ask what song is this. Mainly because there’s a super catchy bass at first then the guitar drops and it automatically creates an atmosphere where things feel suspended. The nostalgic, yet profound feel, and tone of it makes you want to listen to it on repeat. There’s no doubt the guitar use is what makes this track memorable.

I’m flattered this track came as a suggestion to have in the bag. When Hubble and I made this track, we weren’t expecting it to get the attention it got (it was on sale on Discogs for 150 euros at one point before the repress). Soon we saw videos of DJs playing it and gave us goosebumps. It seems that this track is one that you can drop in any set, mixed with other songs or by itself and it locks you in. I’m biased because I was involved in its creation but I get the attraction by DJs to play it.

Laurent Garnier is the man behind this track, and even though it’s from 1993 is still playable right now. It’s romantic to think back then, we were making music of the future yet this one really made it there. This acid bass and melody are making things work so well in many situations, and there’s no doubt it’s a classic now, raising hands when dropped. I believe it has made a good job at grabbing a snapshot of what was rave music of the early 90’s.

Very beautifully made, catchy melody and overall, this is the kind of song that can seduce pretty much anyone. You’ll feel Paris and you’ll feel love. It’s certainly not something you can play anytime you’d like in your set but I can imagine someone playing this to end an event and would have exactly the right effect.

SEE ALSO : The Art of Keeping People on Their Toes 

Templates As Seeds

As a producer, you’re likely trying to balance several tasks all at once while working on your music. If you’re spending time to look through four or five reverbs in search of the perfect sound, setting up buses and groups to pre-mix your tracks while you arrange it, or just feeling frozen looking at a blank project screen and finding it hard to get going, it’s no wonder you aren’t as productive as you’d like to be.

Good news, this post is all about setting yourself up to win before you begin. Begin to see your templates as seeds. 

Many DAWs can be setup to load a template as an initial starting point. Reason will propose a pre-made environment, and Studio One will propose if you’d like to setup a project for mixing to speed up your getting started time. Ableton Live doesn’t have that feature by default, but you can easily change that to open a custom startup project.

Even though most DAWs have this helpful feature, that wasn’t enough for me. But it felt like I could do better.

In one way this is a follow-up post to the previous Bonsai Technique that I shared a few weeks back. It was super popular, and many people sent in comments about how it really helped them develop tracks from little ideas. Now, I’d like to follow up with this idea as I realized that many people are missing out on the fun of using a template to get their projects started. Also, there are a few things we can add in that will also be valuable for your next productions. Let’s have a look at the techniques to get rolling fast.

I’m going to suggest something simple in essence, but it’s very effective to get new projects sounding great right from step one.

Start your next project using the last song used. I heard about this technique from Matthew Herbert’s manifesto, and it got me inspired. Herbert would pick up the mixing board where he left things off from the last session. Why is this a good idea?
Starting from the last mix would provide a faster workflow but also, the random EQs, compression, effects, would be set to something he would never have set up beforehand. I thought this concept was brilliant and began doing this myself. Very often I would start with the last project loaded but would make the next song right after the end of the previous one. The same configuration and settings for the kick, percussion etc… were the same, which often led me into directions I didn’t expect at all. This is a big advantage. 

Consider keeping the effects on each channel as is, but drop your new clips into existing channels at random. In some situations, I also would copy the arrangement of one song and paste it into another song’s arrangement view. Very strange results would come up, often leading to unexpected yet very usable sound design results. I often have one “mother” project which will be a safe place for me to develop and grow these ideas. Then I will copy some loops into another project’s arrangement view, and sometimes move the clips between channels to see which one fits the best. I even did the exercise of dropping a full arrangement into another project keeping it as intact as possible. From there I wouldn’t even listen to it before bouncing it out. I’d then listen to it weeks later and get blown away. I made a handful of tracks from my album Intra or White Raven this way.
Next, challenge yourself to keep your bus routing and groups intact. It’s great to have pre-made sends channels or busses that you can re-use quickly. Of course, an easy way would be to be to assemble a macro of the chain of effects you’ve used, but I like the idea of opening a template and have no idea what effects would be awaiting me. I will sometimes swap my most used effects with others I newly acquired or some I’ve forgotten about. It’s often nice to dig up older, legacy plugins that can bring up a particular grain to your sound.

Clear your finished project from the clips and save it as a template.

One exercise you can start applying today would be:

  1. Create a folder for your templates.
  2. Each time you finish a song, you do a “save as…” to that folder. You’ll then clean it from the clips in the Arranger view. I will often leave what I call ‘leftover’ sounds that weren’t used in the project. I’ll set these clips in the session view in a channel named “Leftovers.” Doing this allows you to re-purpose those sounds, which may be a perfect fit in your new project.
  3. Midi clips could be left there as well because it is usually interesting to have on hand some midi material you can quickly throw new sounds onto and see what it gets that sounds like.

Now, an extra tip, which is to make a template for the design of an EP/LP. As you know, it’s always great to have a common feel for an entire release, and one of the things I would recommend would be in the way you apply your effects.

  • Reverb. Either you pick a reverb from one specific company (ex. Altiverb) and use some presets to get started, or you try to remain in the same family of space such as Plates.
  • Delays. Using the same plugin but changing the delay speed.
  • Saturation. Try to pick one type and stick to it. I recommend applying this through a send channel where you have more control over how each sound is colored.
  • Compression/EQ. Some apply a distinct color and are more or less transparent. It can be a good idea to keep the same type of combination through your channels.

As always I want to hear your feedback on anything mentioned in this post. Feel free to share this post or leave a comment below and tell me how these creative, and time-saving techniques are working for you. 


SEE ALSO :  Pointers To Define Your Sound

Bouncing stems and mix

Recently I’ve been weighing the benefits of focusing on just one part of my production process exclusively, or, working on all the steps of a production simultaneously – arranging, mixing, pre-mastering, etc.. Very often producers ask me to explain a perfect workflow recipe and the truth is, there really isn’t a one size fits all answer.

But in theory, there are 2 main approaches I’ve been seeing in production to make a song.

  1. Classic way. Which involves taking one phase at a time but with the option to roll back to go fix something.
  2. Modern way. You go from one phase to the other in no particular order, as your needs change. You’ll mix as your arrange, change sounds of the percussion to match a melody, add saturation for aesthetics, etc.

One of Ableton’s feature that I find killer is the option to export all channels as separate stems. It really is great for so many reasons but also allows your to really divide the production from the mixdown, which you could do in another DAW.

There are many reasons why you’d like to do your mixdown into another DAW. One of the reason is, you’re basically blending, what I call, software grains. Think of the various apps on your smartphone that offer various filters for your images, where you can go from one to another, taking advantage of each strength. I would say it’s the same for DAWs.

  • Workflow. Each DAW has its own workflow, appearance, feel. Sometimes, just a change of platform is enough to, psychologically, feel your track in a different way. There are countless researches that have been done in between DAW, to which has the best sound, but in terms of summing, if you take a file with nothing on it and bounce it, they will all provide the exact same file. Where there will be a difference is on automation, interface and that alone can make you behave differently in a mix situation. There’s also all the macros and gizmos they all offer too.
  • Native plugins. Again, this might be a game changer. This of an any DAW, they will offer different plugins doing different things. Now, just for compression and EQ, it becomes a serious business. Mostly because there’s a big difference between what you see and hear, plus no one really does things the same way.

That last point is crucial here. You can take the same compressor concept (ex. FET compression), but it will sound different from one company to another. There are no real universal standards on how to approach compression or EQing. An EQ can show you a curve but the filter in the back might slightly be different to give a color, for instance.

So, when it comes to Ableton, I now export all channels as stems to do the mixdown. No more mixing as a arrange. I put a wall between the 2 phases. Some of the reasons are:

  • It liberates CPU usage. No surprises here. When you deal with a heavy load of VST’s and plugins it can often be a lot to manage. The act of bouncing out and mixing stems will force you to focus on only mix related plugins such as EQ and compression. No more delays, chorus and reverb adjustments. At this stage, you’ll focus on the volume levels alone.
  • It put’s an end to the endless adjustments you can make to every sound. You’ll have the option of correcting that little hihat detail that’s been bothering after hearing your track 100 times, but honestly, someone who has just heard your song for the first time will interpret that sound as part of the track, not as a mistake. It’s good to put an end to endless changes and adjustments and move on to finishing your production. Professionals keep their eye on the prize and get things done.
  • The audio summing seems to reveal imperfections. I’m not sure what’s happening here but sometimes, when you bounce the stems, things are just slightly different. I can’t pinpoint why and in theory, it’s not supposed to be but sometimes, it does sound slightly different. In fact, once you bounce it, that’s when you know exactly how it will be so it’s interesting to bounce all channels apart.
  • Ability to use other DAWs. As described earlier, this is the ultimate way to move from one platform to another. You’ll be to leverage the strength of each DAW.
    Build live sets or NI Stems. Having stems on hand can be useful to create live sets. Native Instruments offers a technology for creating a stems release to be played in Traktor, which is really cool, and super in demand by many of the world’s top dj’s.
  • Backup and remixing. Having stems is the ultimate way to have a real backup of your music. In 10 years time no one can predict what technology will be available, but having stems will prove useful as a way to be used with any new technology.

All an all, try it and see for yourself. Bouncing stems can only bring advantages to your workflow and I’d love to hear about it.

SEE ALSO : Use a main project for organizing yourself 

How To Quickly Audition New Plugins

Plugins – it seems every week there is a wave of new and exciting plugins released to producers. It’s true that using the right tools can make producing music more enjoyable, and help you make better sounding music. This post is very technical, but by the end of this you’ll know how to quickly audition new plugins and find the best way to use them.

With each new tool comes a learning process, and some plugins are more straightforward than others. As an audio engineer I often assume that music producers of all experiences know exactly how to use their tools, but during a recent coaching session I realized that this is not always the case.

For many music producers, finding a new plugin is a trip, a quest for the next great tool.

This post is very technical, but by the end of this you’ll know how to quickly audition new plugins and find the best way to use them.

What are some of the problems with learning something new?

  • Lack of patience: We all have busy lives and when you finally have the time to sit to make music, you often don’t want to dedicate time learning the science of sound, you just want to rock out and have fun.
  • Preset limitation syndrome: Some plugins aren’t very well laid out, and their knobs might have been labeled in counter-intuitive way. In that case, I’ve seen people only using presets to get their way through.
  • Lack of knowledge: I’ve seen people getting lost while learning how compression works, what the attack vs release means, and often listening to bad advice from the internet.

There are a many ways to audition your new tools, but what’s the best way to find out how a plugin really works?

brainworx, eqThrough years of exploring plugins, I’ve found the best way to learn what a plugin can do for you is to use it in test environment before using on a serious project.
1. Create an Ableton Lab Project. I’ve said this many times before but it’s really helpful to create and use a dummy project where you conduct all your experiments. When it comes to exploring new plugins, synth or techniques you’ve learned from a video. This will a testing ground where things can safely go wrong, and it also can be the nursery for your next great ideas.
2. Import specific ‘dummy’ sounds. You’ll need to equip yourself with specific types of different sounds to see what your new acquisition can do for you.

My selection will include these sounds/loops:
1. 2 bar percussive loop. I’m talking about something fairly busy like kick-clap-hihats.
2. 2 bar hi hat loop. This is an important one. Hi hats are very sharp which often makes it easy to hear the new effect.
3. 1 bar bass loop. A simple low bass with maybe 2 notes. Simple.
4. 1 to 4 bar Pads loop. This is to have something with a long sustain to easily hear what happens with a specific effect on something long.
5. Give full attention to specific details. This is where you need to be really attentive and undisturbed, especially when you first try this technique.

The use of headphones can be very helpful too. What I’ll listen for is this:

  1. Texture change. This is the first thing I listen for. Some plugins, by their simple presence turned on will change the sound somehow. With your eyes closed listen to how the sound changes simply by turning the plugin on and off.
  2. The length of effect. Is it short or long?
  3. Volume change. Is it altering the loudness of the sounds?
  4. Movement. Is it producing movement somehow?
  5. Dynamics. Do the sounds appear to be more flat or popping out? This means the dynamics might have been affected.
  6. Record the experiment’s results.
  7. Always use a limiter on the master to avoid your ears bleeding after something goes crazy.

Lastly, once you’ve got your testing ground project ready, I’ll now describe my own audition/exploration technique. This is quite easy to apply and will forever be useful. If you can map your knobs/faders to a controller this will be a real advantage. Ableton’s Push is also great for this.

  1. Play one of the loops to be tested.
  2. Chose a knob to start with, dial this knob at its minimum. Make a mental sonic image of your sound.
  3. Put the knob at it’s maxed level (the completely opposite of where it was). Did something happen? What was the noticeable change?
  4. Gradually bring it to the middle, where it’s exactly sitting in the 50%
  5. Repeat this with all knobs but explore leaving some at 50%, others at 25% and see what happens. Sometimes you need a combination of 2-3 knobs adjusted to really see something happening.
  6. Once you’ve found something interesting, change the loop to see how it behaves on something else.
  7. Try randomizing the knobs with Max4Live’s randomizer. This can also bring fun results.

As I said at the beginning there is no shortage of new tools available to producers, yet finding the right plugins for you will be a process of trial and experimentation. The process of learning something new and auditioning your plugins can be really fun and will hopefully make you a better producer.

SEE ALSO :  Plugin Review: Circle 2 VSTi 

Two birds one stone. Separating ideas.

I’m really excited to share a killer new exercise with you that I know will help you become really creative and productive. I’m using this exercise in my own productions and it’s a little like the Bonsai Method I wrote about in my last post. The key focus of this exercise is to duplicate your output in different ways with big benefits. Let’s call it Two birds one stone, and trust me, the takeaway from this exercise is huge.

This technique will improve your productivity in the studio, aid you in finishing more music, train your ears to produce better music, and creating tracks DJ’s will find easier to play and mix. 

When people ask me to listen to their tracks and provide feedback, most of the time I feel there is enough material in one track to make two entirely different songs.Why do I feel this way? DJ’s often prefer to mix tracks that are often stripped back, and have less sounds going on. They do so in order to blend one track with a complimentary one to make something new, and create an original mix. For your tracks to please the DJ consider producing songs that are less busy, and have less sounds going on. Doing this will give the sounds you do have more room to breathe, flex, and develop dynamically. These tracks that follow this production style allow the DJ to creatively mix and eq their tracks in very creative ways.

The objective in this exercise is to take whatever song you have and find a way to separate the elements in order to make 2 different songs out of the original idea.

When producing music, think of your track as a tool, and less of a song to be played on it’s own from start to finish. To some degree, let it be incomplete, and be created as part of an equation that will sum up to something out of your control. As a creator of music, it might be difficult to conceive but I believe that letting tracks be something someone else can mould and play with will attract the right person who can do the most with that track.
Related: How to create tracky music blog post.

Another interesting element in spreading your ideas across two tracks is that in doing so you’ll create a sister, or b-side for the initial track (hence the two birds one stone reference). When you are playing these tracks live you’ll know and hear they’re meant to work together well, hand in hand.

Now let’s get to business and see how to do so.

ideas, ableton, productivity, how to


  1. Select a track that you want to use for this exercise. It could be a track that you feel a little lost on, or some long forgotten project that was never finished.
  2. session view, arrangements, ableton

    Session view in Ableton

    Bring all your sounds to the session view. (This will make it easier to see what’s going on).

  3. Mute all percussions that are not related to the main idea of the song. Although, sometimes a conga or snare could be part of the hook, if so try to mute it and see how much of the main idea is affected.
  4. Organize your sounds in 2 groups. There’s no good or bad way to select the sounds, but by splitting the group you’ll see some sounds are complementary to the other. Sometimes, certain sounds are calling, and some are answering to the other, and for those, you want to separate in two different groups.
  5. Activate the crossfader option so you can see/hear the A/B.

    ableton crossfade

    Make sure the “x” is in yellow to activate the crossfader

  6. Assign your sounds to either A or B on the crossfader. Don’t assign any of the percussions on the crossfader.
  7. Do a “Save as…” to create a sibling to this project.


After you’ve gone through the previous steps you should be able to play with the crossfader and hear how well the sounds blend together. Hearing things in the middle of the crossfader will give you an idea of what a DJ will hear if he/she merges both ideas.

Let’s go back to your new project. Since you already have the percussion from the original track, you can use the sprouting technique to create complementary beats. Once you have main idea, you may then mute or delete the original percussions and you’ll have your second track’s main idea.
In both cases you’ll need to play with compression and perhaps add a bit more material to get your track moving along. But now, the great thing is, you have created two totally new tracks from one that might have been sleeping in your HD. It’s a killer two track combo ready to go. Win-win.

I hope this post will get you into the habit of creating tracks that avoid the busyness that often robs  a track from reaching it’s fullest potential. It’s natural to come to a point where your track has too many ideas going on and will begin to lack direction, which is the perfect time to use this technique.

The two birds one stone technique will improve your productivity in the studio, aid you in finishing more music, train your ears to produce better music, and creating tracks DJ’s will find easier to play and mix. 

As always let me know if you have any suggestions or questions about this post and leave a comment below and tell me what projects you’ve been working on.

JP

SEE ALSO : Pheek Talk 3: Productivity Tips 

Bonsai Method

Are you having a hard time writing music? Are you confused what DAW to begin using, what plugins to download, what samples to get started with? Never before have producers had so many questions to answer, and to be honest, if you are struggling to make music with such a wealth of options and tools at your fingertips you might be simply overwhelmed by all the options.
This frustration also carries over into production itself. So many possibilities can be done from what you have that even making music can be frustrating. Given that, it’s no surprise that many producers fall into making music that sounds very similar to others because the process of making music is easier to do what other producers have already done. What gear others use, what techniques people use, (we can thank Youtube for exposing all the secrets) and all too often we try to replicate one’s success instead of focusing on the act of our own personal creation.

With so many tools anything is possible.

It’s predictable that faced with so many options you’ll struggle to pick one, and later worry that your choice may not have been the right one, you waste time endlessly worrying about other directions your song could have taken. Not productive right?
I once read an article that explained how negotiators work in difficult situations, where multiple options are available to them.

They will try to sum all all it up to 2 final choices.

That advice really stayed with me whenever I work on a project and will clear out my options until I can chose simply between A and B.

Throughout my posts I have been providing ideas and answering questions to help make your time more productive, and now I’d like to do propose an exercise I know has helped me greatly, I call it the Bonsai Method.

In a past post, I talked about the Rule of 10, where working on multiple projects at once might be one of the most productive way to approach creation. While feeling slow, it later fuels down to a huge batch finished almost all at once. The Bonsai Method was used for latest album where I ended up making 25 songs over 6 months, and in a matter of a few days, that all the tracks took their final form.

What is the Bonsai Method?

It’s inspired by how the Japanese make bonsais trees. Growing something with great attention under strict limitations. This evolves through 3 phases:

• Sprouting. Generating a new idea for a song is one of the most difficult parts of making music. Once you have your idea, you set off in one direction. Finding that idea can be the hardest part mostly because at the moment of making it, you may become so absorbed in it that you become biased if it’s cheezy or genius material. You’ll know with distance or you’ll grow the idea in something that would be more suitable.
• Taming/pruning. This part is when you have material on hand and that you want to give it a direction.
• Growth to final product. This would include the final arrangements before mixing. This method of creation is based on finding ideas uniquely.

In the past, I suggested ideas for new ways to create content. What makes a song memorable on my opinion is the power of one strong idea that is showcased and developed over time. Your song will suffer if you use a lot of individual sounds because nothing may stand out on it’s own, and your track will sound too busy, and lack a clear focus. The minimalist way of making music (or cooking) is to take one idea and really put it forward by using an effect with the mix down in mind, to make it shine.

Sprouting is about finding that gem. My biggest take on finding new ideas is complicated to explain, and there are so many ways to come up with ideas on your own. One quick way to sprout new ideas is quite simple.
1. Take a track you like.
2. Loop it’s last 1/3 (outro).
3. Throw ideas on top of what could be the best complementary track to mix over it. This could mean you can add a chord hit, some percussion, a simple bassline, etc.

Basically, you’re building the intro of your track that would be mixed by a DJ, over the track you selected. Once you listen to both of them and notice that have something there, mute the reference track and listen to what you have put together.
It’s possible that this process may seem underwhelmingly simple or plain weird, by itself. We’ll work on that on the second phase but remember that this is the beginning of something which will grow into a future track. Patience my friend.

Taming and pruning. This one, just like described in the post Rule of 10, is about coming back to what you have created over several days, and work on it little by little. You’ll need to focus on the content, the idea, not necessarily over the percussions, mixing, kick, etc. All those will come by themselves once you nail down what this track is about.

  • Don’t discard anything, keep everything.
  • Resample and record the little takes you do. Instead of putting blocks in the arranger, play a melody in a loop and record yourself tweaking it.
  • All these new takes are the pruning of the original idea.

Things you can do to alter and modify your sound:

  • Change the pitch.
  • Stretch it, warp it.
  • Change the groove. Change the sequence, rhythmic feel of it.
  • Add effects: compression, EQ, saturation, filter, are the main ones to look for.

Growth to the final arrangement.
Ableton, arrangements, live, techno, cleanIn a past article I’ve explained how to turn a loop into a song but for this method I’d like to take a special approach that might surprise you. It’s based on one simple rule – once your have your idea down: you may only make 1 correction per time you open the project.
This is important, you’ll come back on multiple occasions and adjust little details in your last touches. Just like the Bonsai Method, you have to come back, adjust one little detail, save, and close the project.
You’ll spend only a few minutes on your song at one time to keep your impression of the track as if you listened to it for the first time.
You’ll be more efficient if you come to your project with the idea that you can only make one single change and then save it until next time.
As you probably know, the main goal here is to make the first 1/3 of your track and then, the rest will be pretty much-duplicated ideas and add-ons.

As always I want to hear your feedback on anything mentioned in this post. Feel free to share this post or leave a comment below and tell me how the Bonsai Method is working for you. 


JP –

SEE ALSO : Two birds one stone. Separating ideas.

Finishing Your Projects

I want to tackle a huge, big-time topic of much discussion and effort among many music producers – finishing your projects. Like many of my friends, readers of this blog, and clients of mine, finishing your music is really important to you. Yet, we all have loads and loads of music with real firepower that will never get past the finish line.

As someone who has finished dozens of records, remixes, and projects of my own, I’m going to get right down to business of showing you how to finish all the projects you want to. Let’s do this.

Firstly, I need to get a few things out of the way.
1. From my perspective, I believe a song might never be done. Even if you’ve finished it, mixed it, released it, (which you defiantly need to do) and heard it played in mixes all over the world, to you that track might never really be complete.

2. It’s (almost) never going to be perfect. Do not let perfection kill all your efforts. The more you hear it, the more you’ll pay attention to that part you could have tweaked better, or that part in the arrangement you could have brought to a totally new level. Let’s face it, you need to remember that a listener will likely never hear that song as much as you have and will never notice the few imperfections that are loud and clear to you. It’s okay, let’s get it done the very best we can in the time we have.

3. Taste is subjective. What you feel is perfect, likely won’t be in the eye’s of someone else, and vice versa. Yet at some point, you have to put your foot down to what the song’s theme and structure is and embrace it by telling yourself “ok, this is my song and there won’t be compromises, I’m moving forward.”

4. Use your reference tracks. I keep coming back to using musical references in many of my posts because it’s your personal target for what sounds good, and what you want your production to sound similar to. The more you work with one, (comparing your sounds and levels to the reference track) the more you’ll understand how your track is progressing, or not.

The next part is going to be exciting, and scary.
After writing and developing all the right parts of your track at some point you’ll come to feel your project is ready to be canned down into it’s finished form. “What are the signs that a track needs to enter it’s finished form”?
• Your track has a beginning, a middle, and end.
• The imported reference track in your arrangement has about the same length and number of sounds as your track.
• The sections of your track are very clear and your transitions from one part to the next flow well, and feel right.
• All channels have a rough mixdown and an overall healthy balance. Now, we’re really good to go.

“If you want to make music the #1 thing you have to do is finish your productions. Open a project that is ready and follow these steps – we’re going to finish one right now.”

finish your music productions

Getting to this point is the goal ~ crossing the finish line, exporting your finished music.

Since the main sections of your track are already there, we’re going to starting at the beginning and listen closely to each part of your arrangement.
1. Loop 4-8 bars at a time – mainly rely on your ears and listen. You’ll quickly hear if something stands out and needs to be adjusted, or removed. After running through each section, continue doing this every 8 bars or so.
2. Give your ears a break. After 5-10 minutes of active listening stop the music for at least 20 seconds. Our ears get tired easily and right now we need to stay sharp to make the right corrections to our track.

We’re in the last phase of finishing your project now. Here’s how to make sure your track has all the right elements to be interesting and keep the listener’s attention.

• Notice how sounds come in and out. Some sounds come in abruptly, to cause a surprise, while others will come in slowly (fade-in). Alternating how sounds come in is a great way to keep interest.
• Percussion sequence. Is the way sounds are programmed making any sense or can be improved? A good way is to put one or multiple channels in solo and listen carefully… Are you making a coherent phrase?
• Transitions. Are the transitions between each section supporting the evolution of the main idea? Some transitions will be used to announce incoming sounds or the exit of others. Some transition can also be used to build or release tension. Be aware of the effect of both.
• Don’t overdo it. The biggest issue when working in micro-mode is the danger to over listen to your idea and changing too many things, nearly starting all over.

One more important thing – once you have about the song completely revised, I would greatly encourage you to take a macro, global view of the project. These are the points you want to look for:
Perspective 1/3. Zoom out of the window so you can see the song entirely in your arranger. You should be able to see clearly 3 distinct sections. If not, you might want to look into that. What defines each sections? They should have different intensities, and a number of sounds playing.
Why is this important? Your song is a story and it needs the right timing and elements our ears to come to expect. The most dramatic reason though is, each section should showcase a strong moment. Having 3 of them is a good formula to make a song interesting and memorable, but any more than that and you’ll likely take away the power the previous peaks.

Sequence of how sounds come in, out. Keep a logical and fluid transition of how sounds come in and out. Your percussion parts can come in a certain way, then you can repeat it later. Don’t showcase all your sounds all at once, or you’ll burn your idea out pretty quickly.
Repeating ideas. As seen in the lego post, if some sounds happen in a certain sequence, try to keep that until the end for coherence.

For any musician or producer, not finishing your projects can be really frustrating, but it happens to the best of us.

This post is all about sharing my own personal way of starting and completing projects so that you can confidently go into your next session with a game plan I know will keep you on track to get things done.

As always let me know if you have any suggestions or questions about this post and leave a comment below and tell me what projects you are excited to complete.

JP

SEE ALSO : Pointers To Define Your Sound